
The development of logos is considered to be the sphere of activity of professional artists-illustrators and design studios. However, there are cases when cheaper, faster and more efficient it turns out to create a logo on their own. In this article, consider how it can be done using a multifunctional graphic editor Photoshop CS6
Creating a logo in photoshop
Photoshop CS6 is ideal for creating logos thanks to the functions of free drawing and editing figures, as well as the possibility of adding finished raster images. The layered organization of graphics elements allows you to work with a large number of objects on canvas and quickly edit them.Note: If Photoshop is missing on your computer, set it according to the instructions that is given in this article.
After installing the program, you can proceed to the drawing of the logo.
Note: The procedure for creating a logo, shown below, is just one of the many possible examples. We just show what and how to do in Photoshop to solve the existing task, taking, or rather, creating as a basis the most simple drawing as a basis. And when we write - move the figure so, increase it or reduce it, set this color - this does not mean that you should act in the same way with your drawing. It all depends on preferences and / or requirements.
Step 1: Canvas Setting
Before making a logo, set the operating canvas parameters in the CS6 photoshop. Choose "File" — "Create" . In the window that opens, fill the fields. In the "Name" line invent our logo name. We define the canvas square shape with a side of 400 pixels (you can specify large or smaller values, it all depends on what sizes the image you should be). The resolution is better to set as above - 300 points / centimeter will be optimal. In line "Content background" Choose "White" . Click OK.

Stage 2: Free Form Drawing
- Call the panel of the layers and create a new layer.

Layer panel can be activated and hide a hot key F7..
- Choose tool "Feather" In the toolbar to the left of the working canvas.

Black free shape, after which you edit its nodal points using the "Angle" and "arrow" tools.

It should be noted that the drawing of free forms is not the simplest task for the beginner, however, mastering the pen tool, you will learn to be beautiful and quickly draw anything.
Read more: Pen tool in Photoshop - Theory and Practice

- By right-clicking on the resulting circuit, you need to select in the context menu "Run the fill of the contour".

Then you should choose the color for the fill.

Fill color can be assigned arbitrarily. Final colors can be selected in the layer parameter panel.
Stage 3: Copying Form
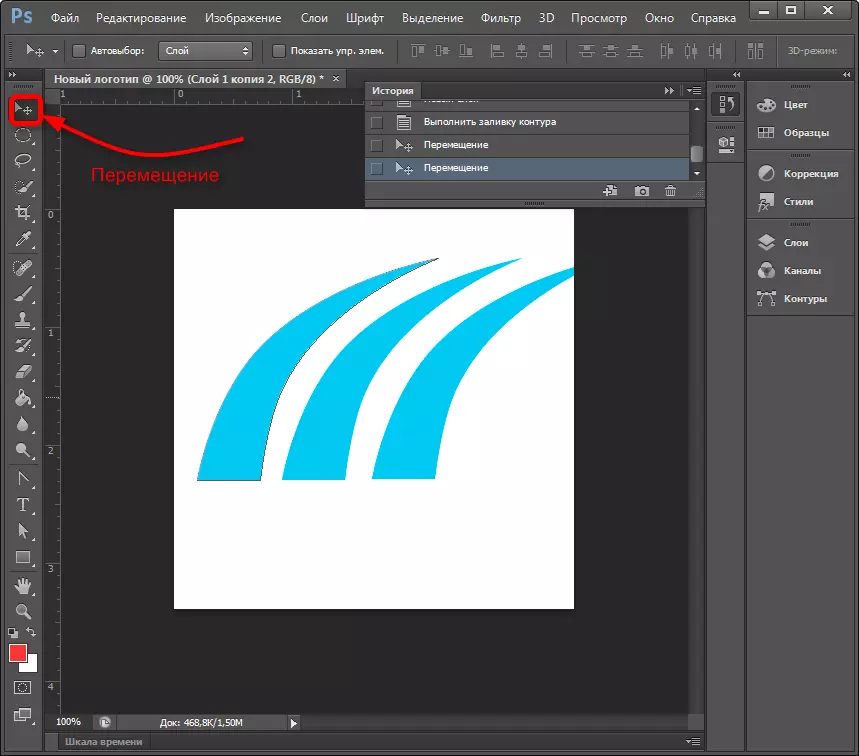
To quickly copy the layer with a bulk outline form, select it, press the toolbar "Movement" and, with a pinch key "ALT" , move the shape to the side. We repeat this step another time. Now we have three identical figures on three different layers that were created automatically. Drawn circuit can be deleted.
Stage 4: Scaling the elements on the layers
Having select the desired layer, select in the menu "Editing" — "Transformation" — "Scaling" . Hold down the SHIFT key, reducing the figure by moving the angular point of the frame. If you release shift, the figure can be scaled disproportionately. In the same way, we reduce another shape.
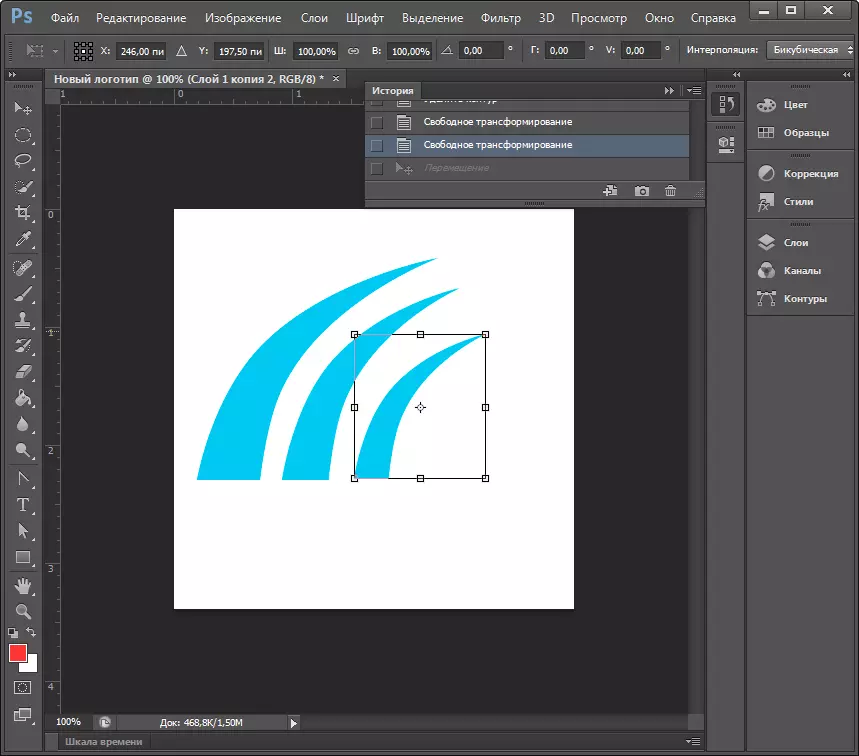
Note: Transformation can be activated by a keyboard key Ctrl + T.
On the eye or more accurately pick up the optimal shape of the figures, select the layers with them, click the right mouse button in the layers panel and combine all the allocated by us. After that, with the help of a known transformation tool, we increase the figures in proportionately canvas.
Stage 5: Fill Figure
Now you need to set the layer of individual fill. Click right-click on the layer and choose "Overlay parameters" . We go into the box "The overlay of the gradient" and choose the type of gradient that the figure is poured. In the "Style" field, we set the "radial", set the color of the extreme points of the gradient, tighten the scale. Changes are instantly displayed on the canvas. Experiment and stop at an acceptable option.

Stage 6: Adding Text
It's time to add your text to the logo. In the toolbar, choose the tool "Text" . We introduce the necessary words, after which we allocate them and experiment with the font, size and position on the canvas. To move the text, do not forget to activate the tool "Movement".
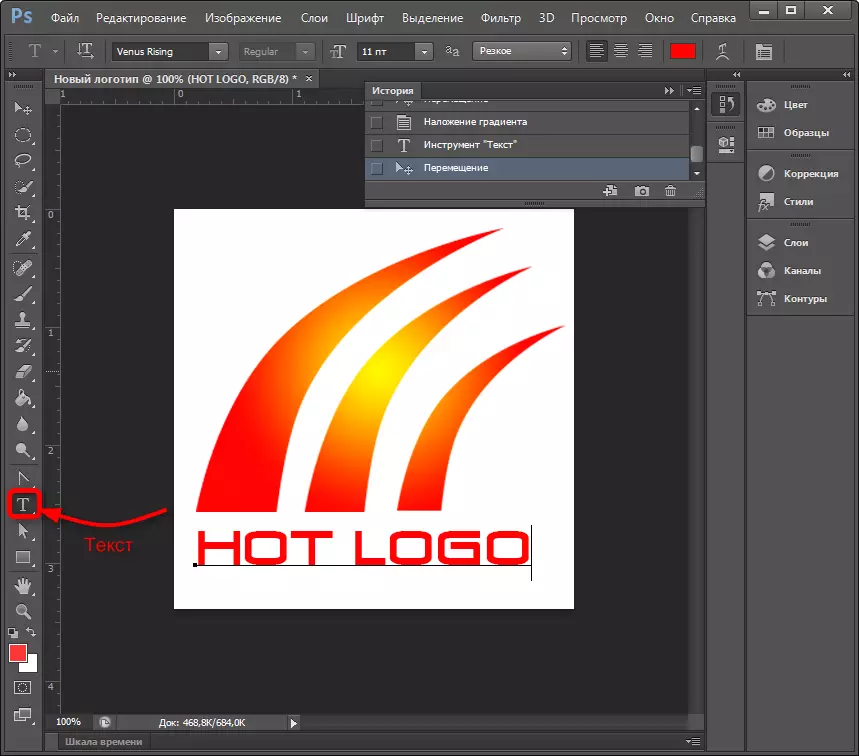
The layer panel automatically created a text layer. For it, you can set the same overlay parameters as for other layers.
So, our logo is ready! It remains to perform its exports in a suitable format. Photoshop allows you to save the image in a large number of extensions, among which the most popular PNG, JPEG, PDF, TIFF, TGA and others.
Conclusion
So we looked at one of the ways to create a logo. We used free drawing and layered work. In captured and familiarized with other functions of photoshop, after a while you can draw logos more beautiful and faster. How to know, maybe it will become your new business!
READ ALSO: Programs for creating logos