

Rounded corners in the photo look quite interesting and attractive. Most often, such images are used in compiling collages or creating presentations. Also pictures with rounded corners can be used as a miniature to posts on the site. There is a lot of use options, and the way (correct) get such a photo is only one. In this lesson we will show how to round the corners in Photoshop.
Rounding corners in Photoshop
To achieve the result, we use one of the "Figures" group tools, and then just delete everything too much.
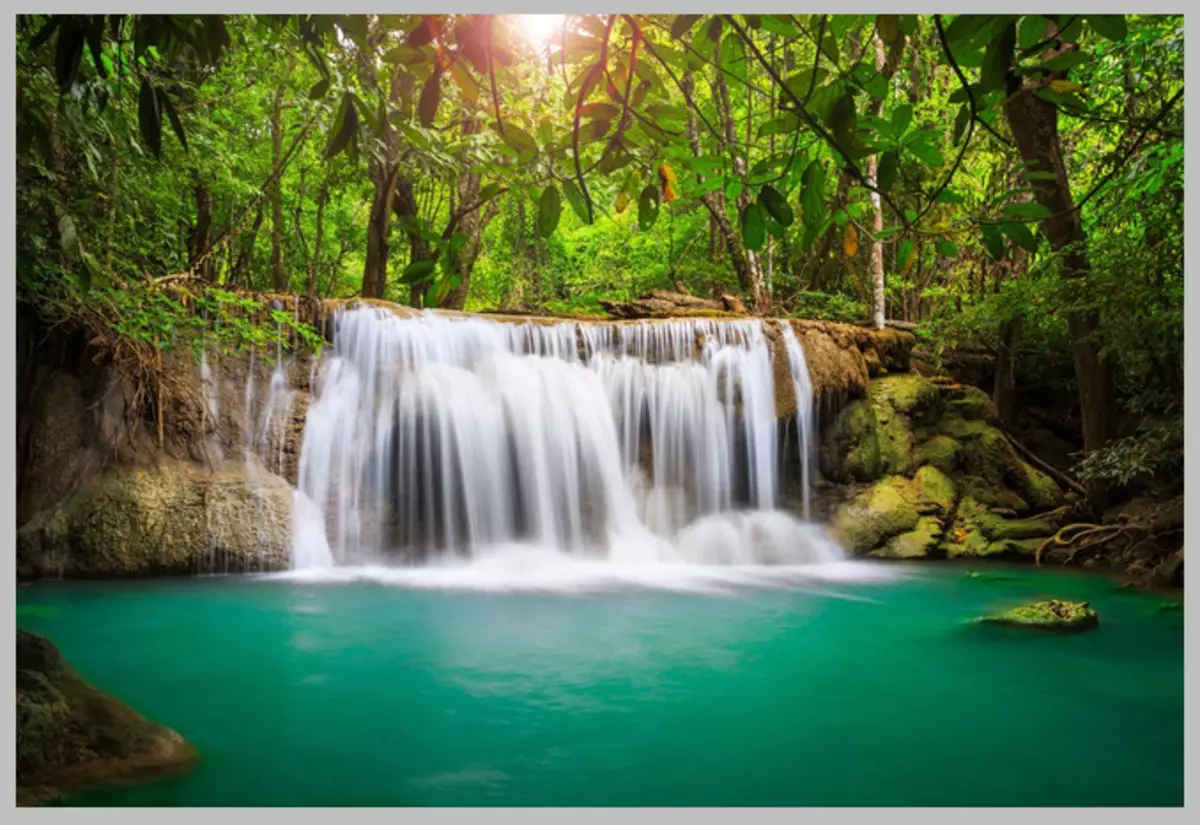
- Open a photo in Photoshop, which is going to edit.
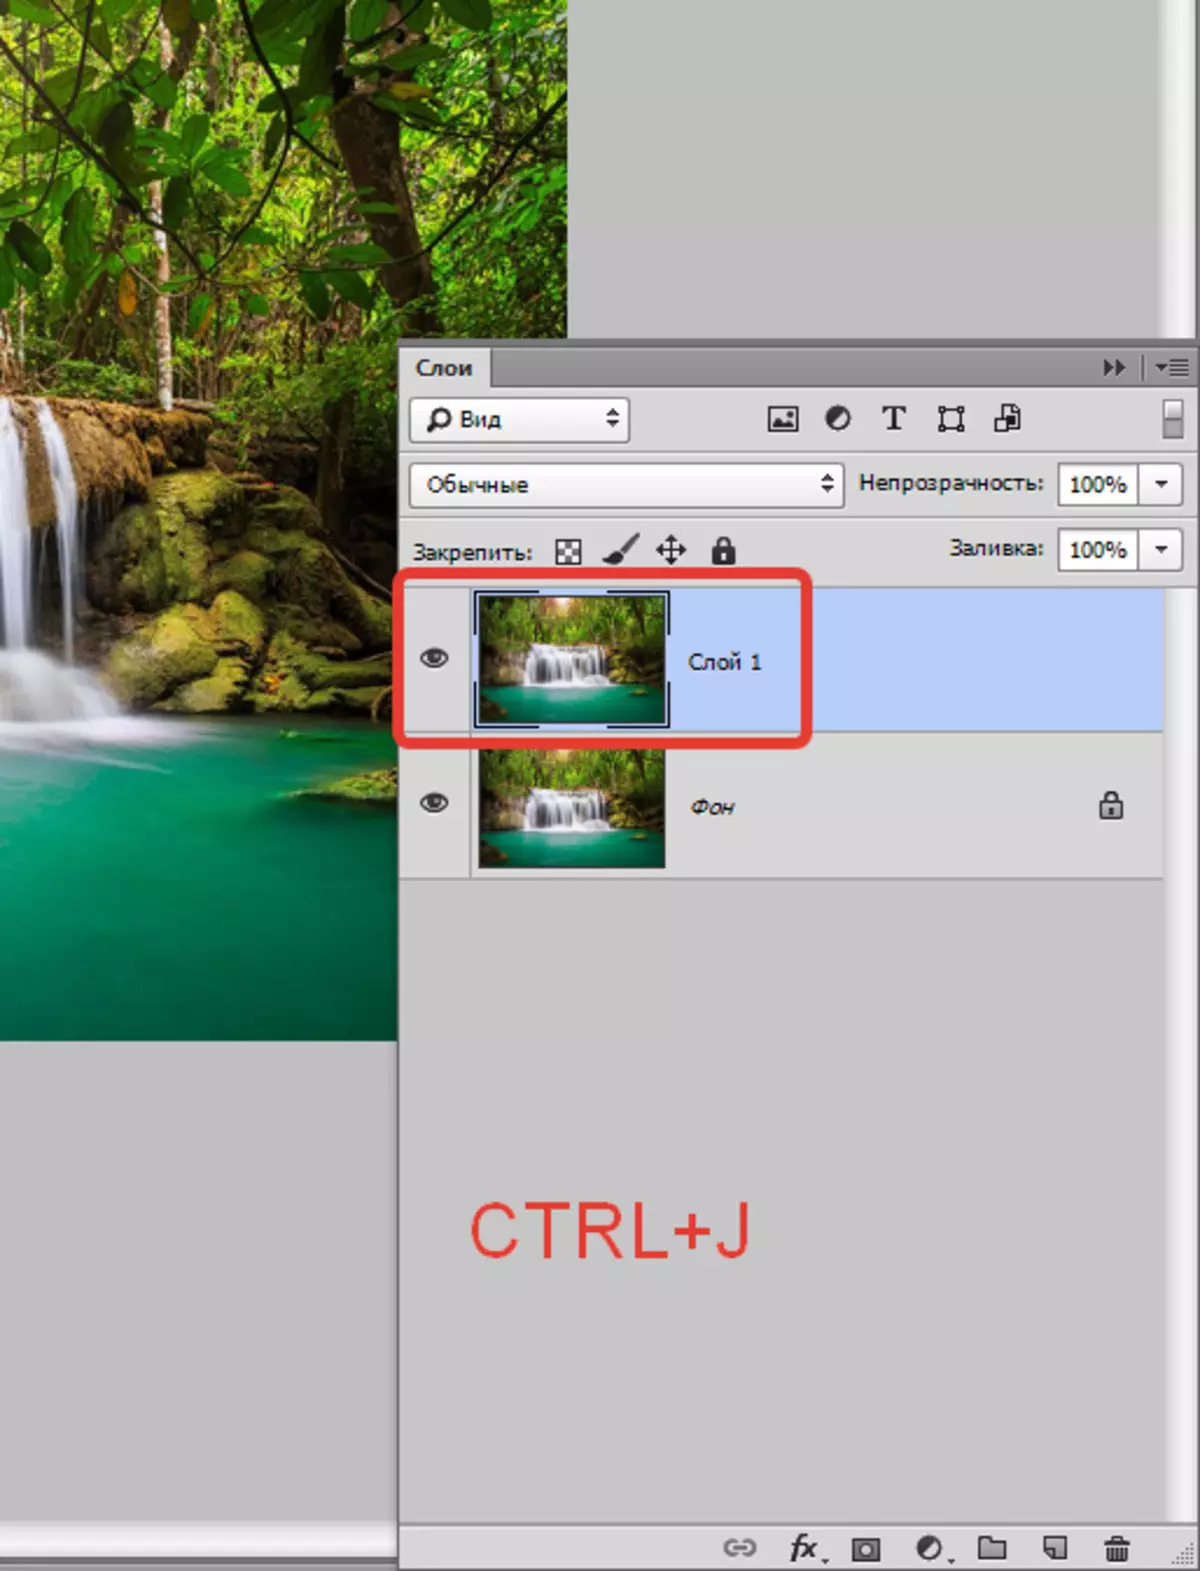
- Then create a copy of the layer with a waterfall called "Background" . To save time, use the hot keys Ctrl + J. . The copy is created in order to leave untouched the original image. If (suddenly) something will go wrong, you can remove unsuccessful layers and start again.
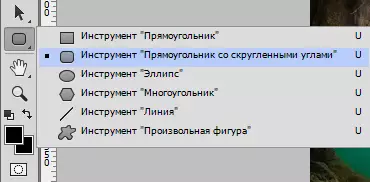
- Go ahead. And then we need a tool "Rectangle with rounded corners".
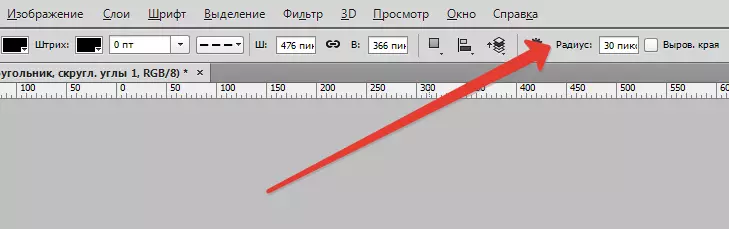
In this case, only one is interested in the settings - the radius of rounding. The value of this parameter depends on the size of the image and on the needs. We will set the value of 30 pixels, it will be better visible the result.
- Next, we draw a rectangle of any size on the canvas (we will scale it later).
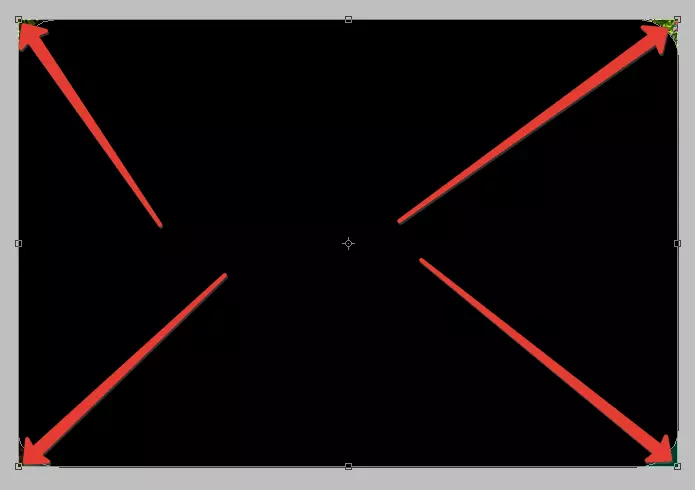
- Now you need to stretch the resulting figure on the entire canvas. Call a function "Free Transformation" Hot keys Ctrl + T. . A frame appears on the figure, with which you can move, rotate and change the size of the object.
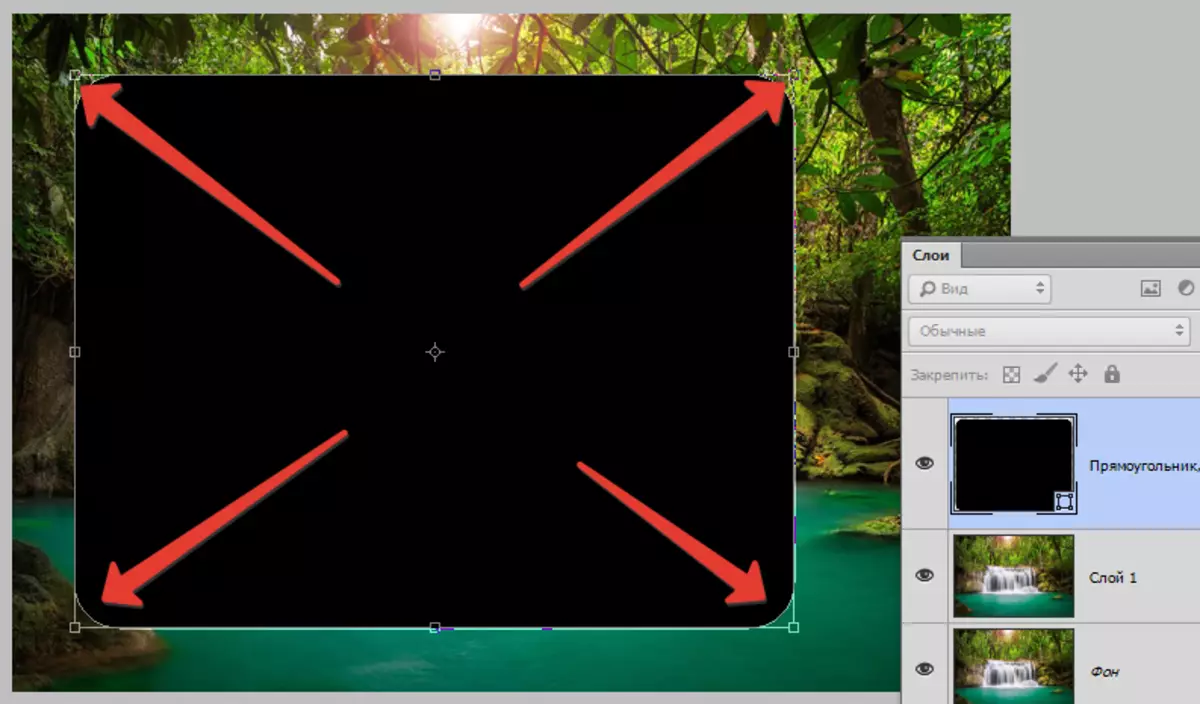
- We are interested in scaling. We stretch the figure with the help of markers indicated on the screenshot. After completing the scaling, click ENTER.
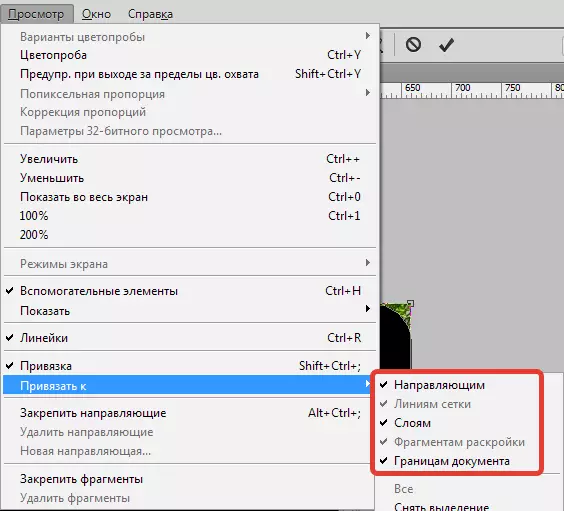
Advice: In order to make scaling as accurately as possible, that is, without going beyond the canvas, it is necessary to include the so-called "Binding" . Look a screenshot, it is indicated where this function is located. It causes objects to automatically "stick" to the auxiliary elements and the boundaries of the canvas.
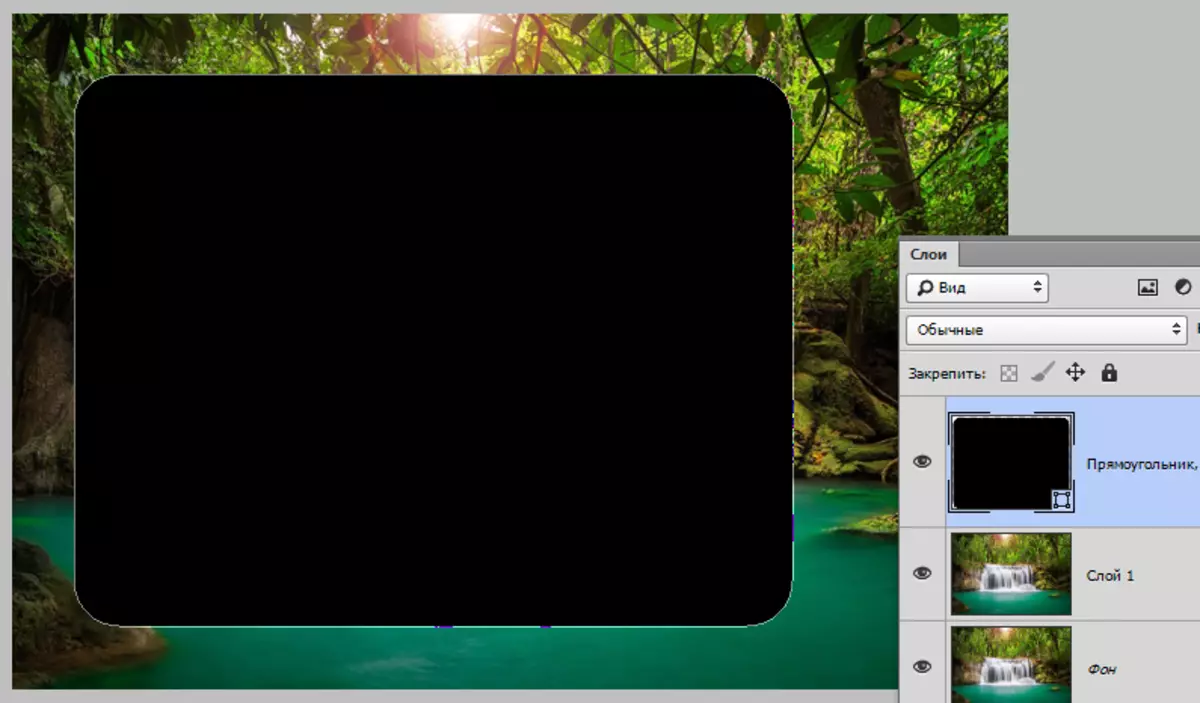
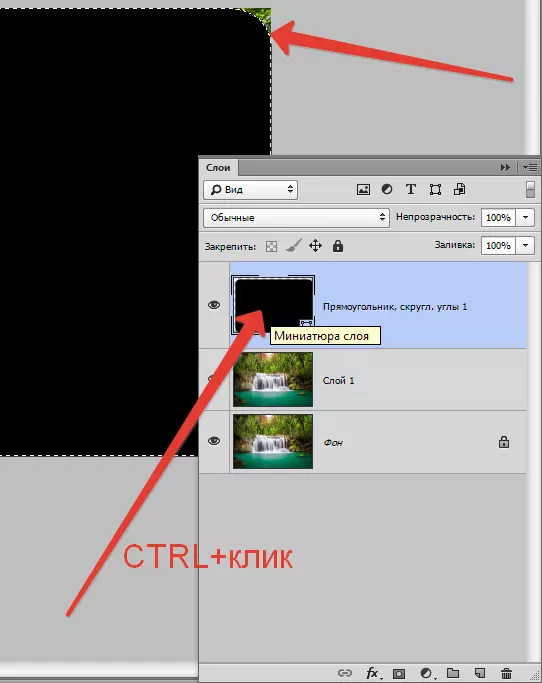
- Next, we need to highlight the resulting figure. To do this, clamp the key Ctrl And click on the miniature layer with a rectangle.
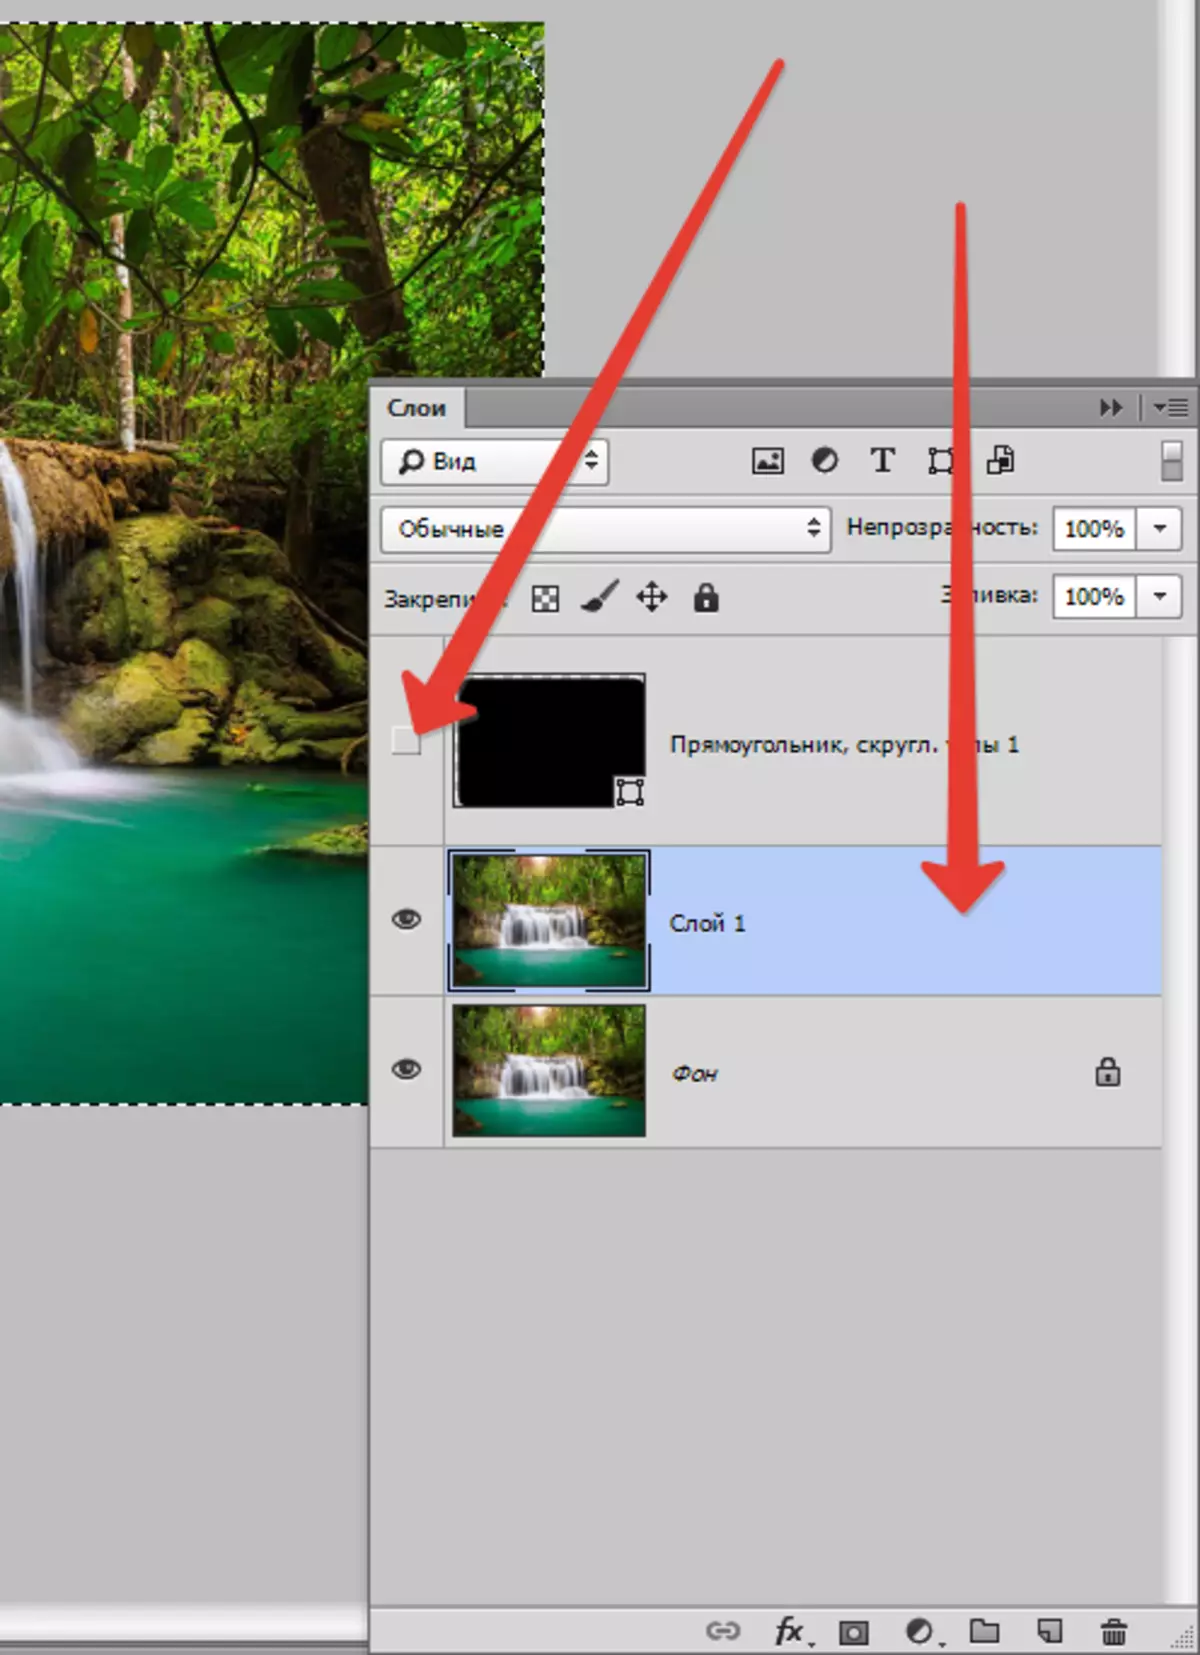
- As you can see, there is a selection around the figure. Now go to the layer-copy, and from the layer with the figure we remove visibility (see Screenshot).
- Now the layer with a waterfall is active and ready to edit. Editing consists in removing superfluous angles. We invert hot keys Ctrl + SHIFT + I . Now the selection remained only at the corners.
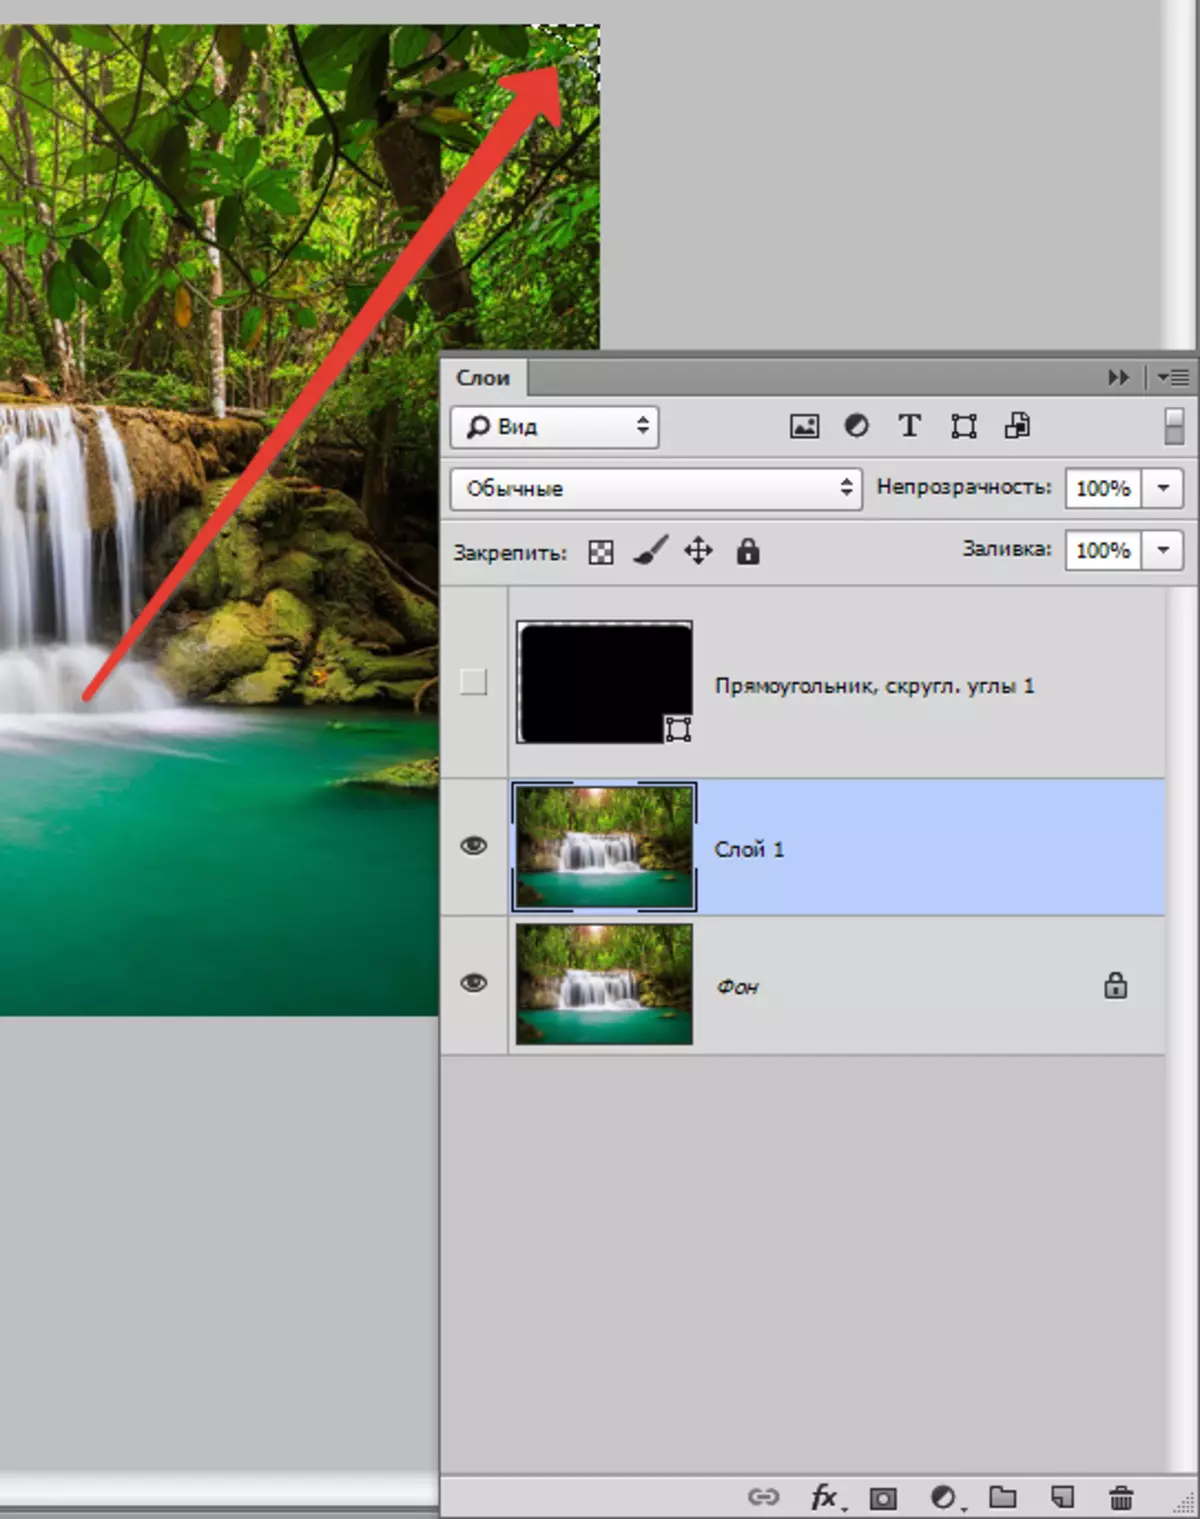
- Next, delete unnecessary, simply by pressing the key Del. . In order to see the result, it is necessary to remove visibility and from the layer with the background.
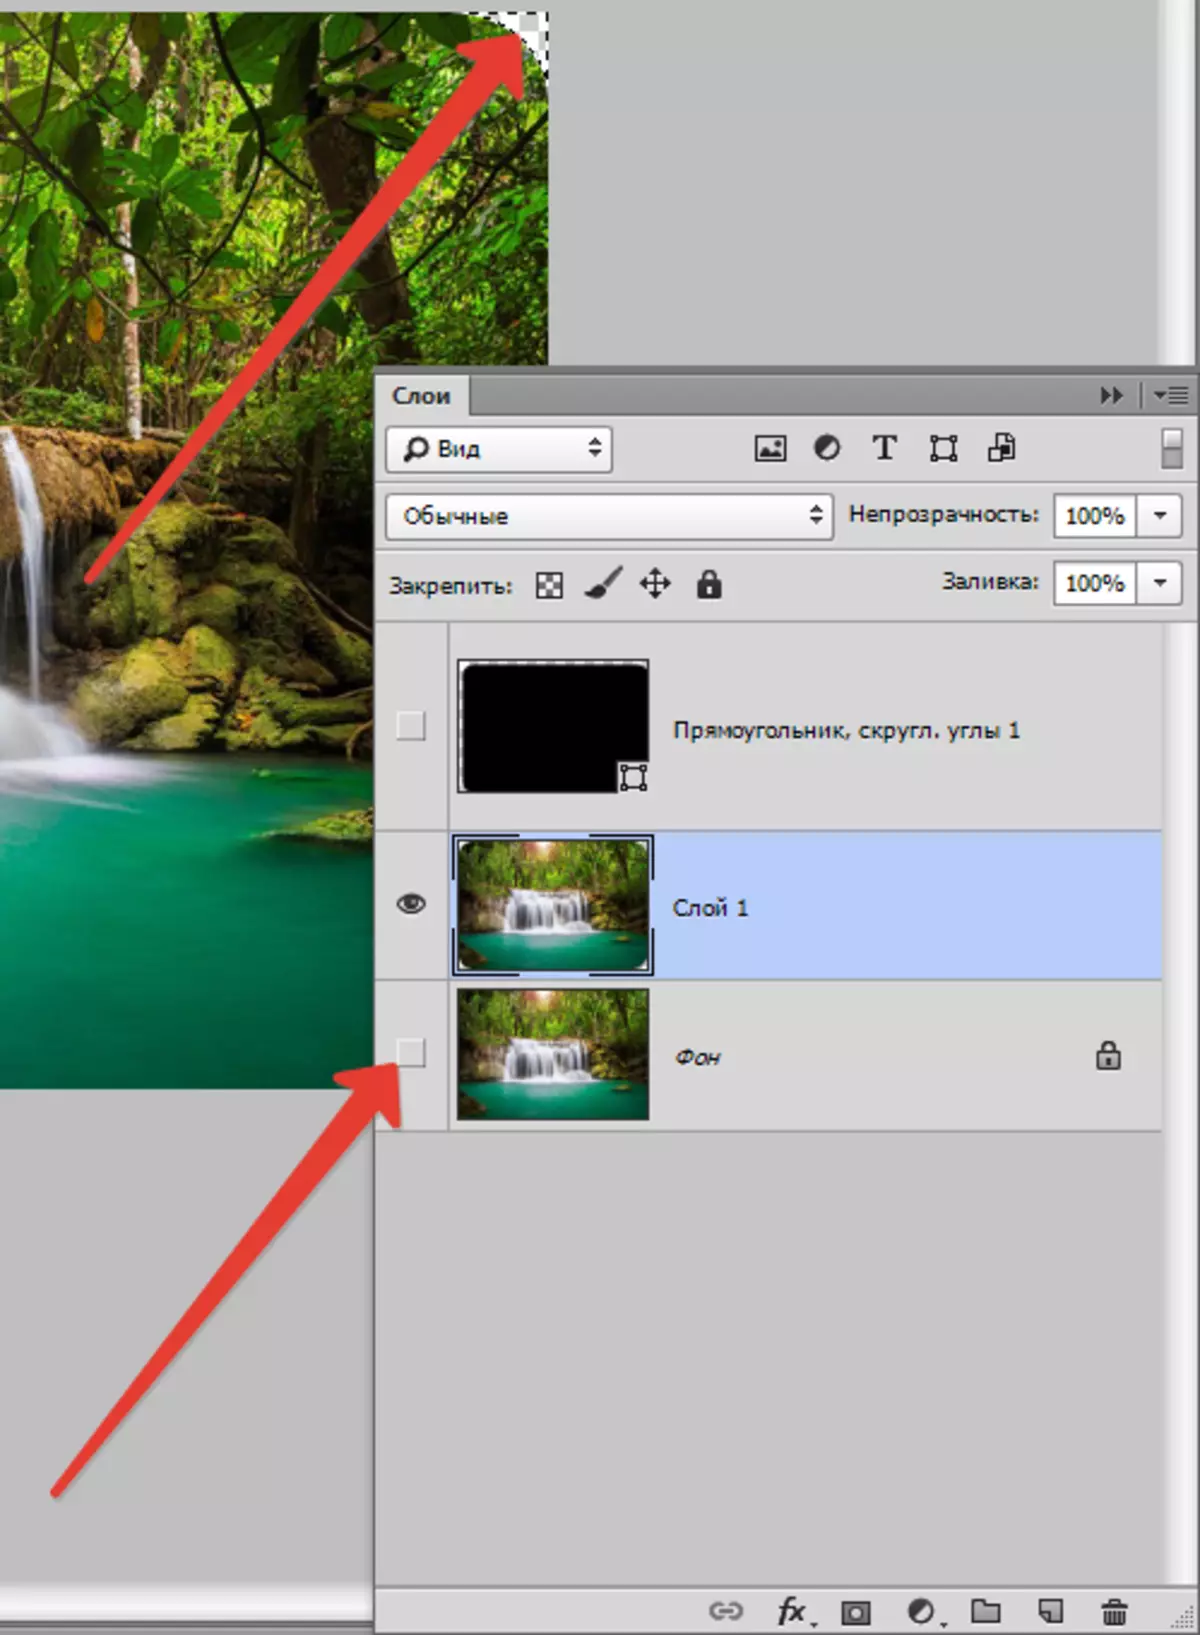
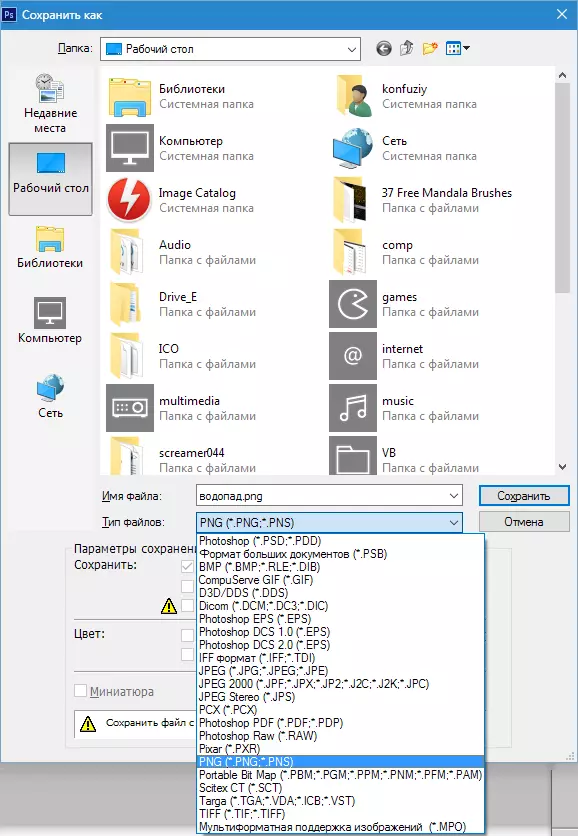
- We remove the unnecessary selection by hot keys Ctrl + D. We go to the "File - Save As" menu.
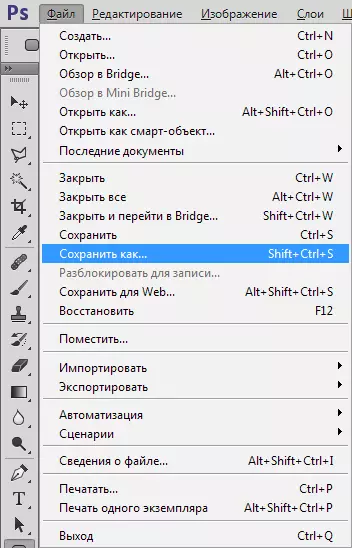
Keep the resulting image in format PNG. . Only in this format is the support of transparent pixels.
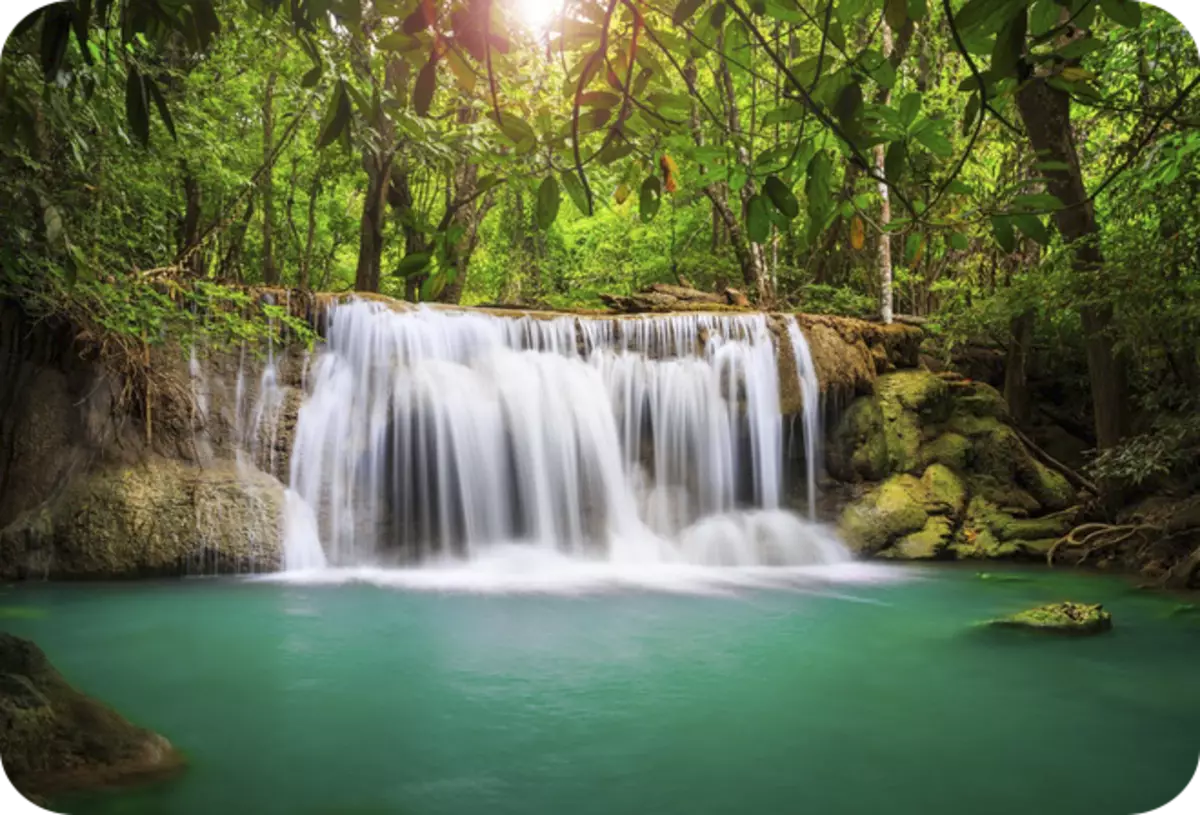
The result of our actions:
That's all the work on the rounding corners in Photoshop. Reception is very simple and efficient.