

The background is an image that serves as a substrate for a composition or having a different destination as an independent element. In this lesson, we will learn how to create a beautiful background in Photoshop.
Creating a background in Photoshop
Today we will look at two options for creating backgrounds. In the first case, it will be strips with gradient fill, and in the second fantasy on the free topic with the side effect.Option 1: Strips
- Create a new document required. To do this, go to the "File - Create" menu.

Expose dimensions and click OK.

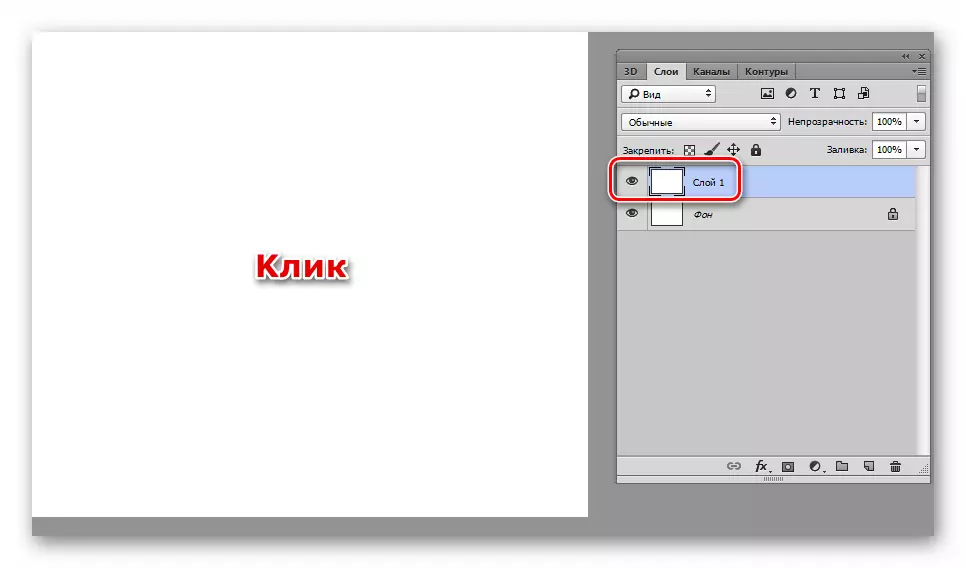
- Create a new layer in the palette.

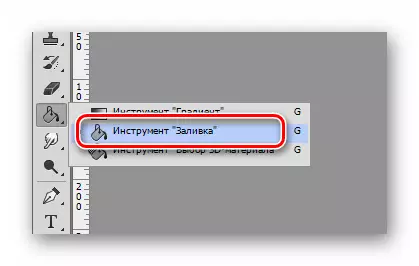
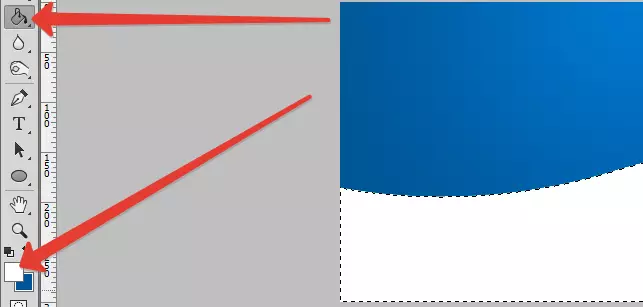
- Take the tool "Pouring".
Click on the canvas, pouring it with the primary color. The shade is not important. In our case, it is white.
- Next set up colors. The main need to choose gray, and the background is also gray, but somewhat darker.

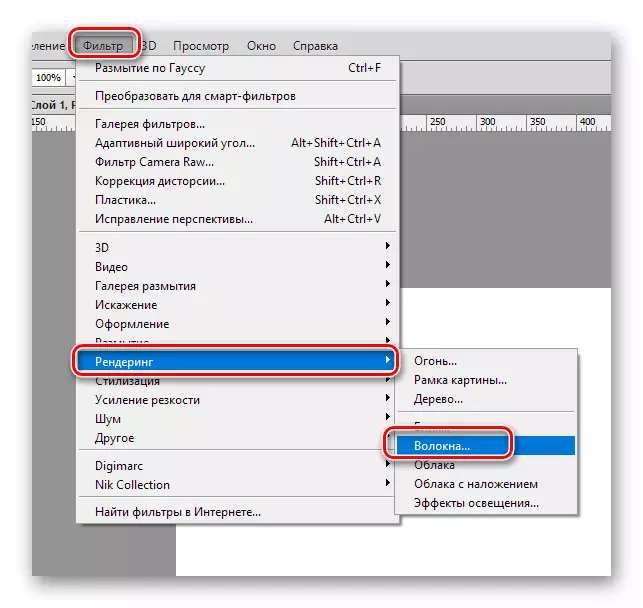
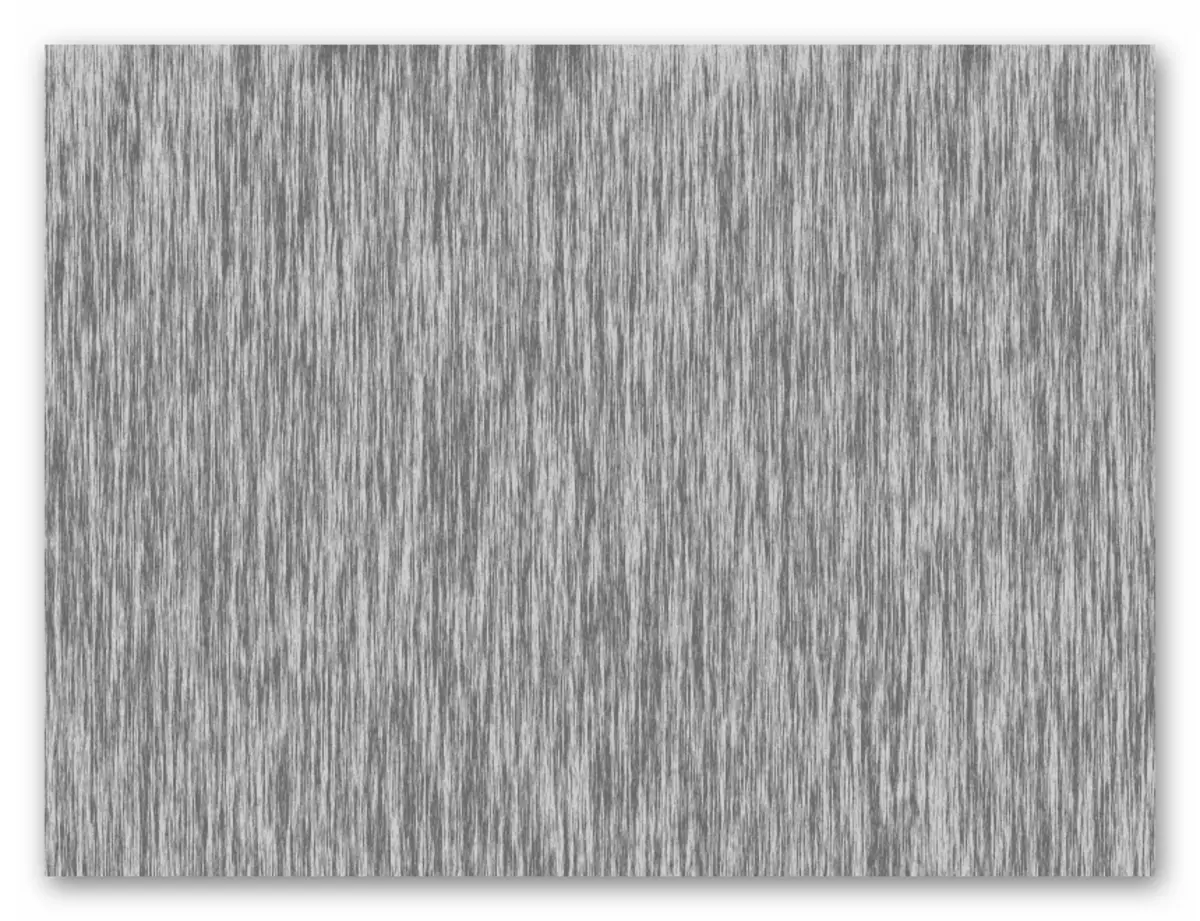
- We go to the menu "Filter - Rendering - Fiber".
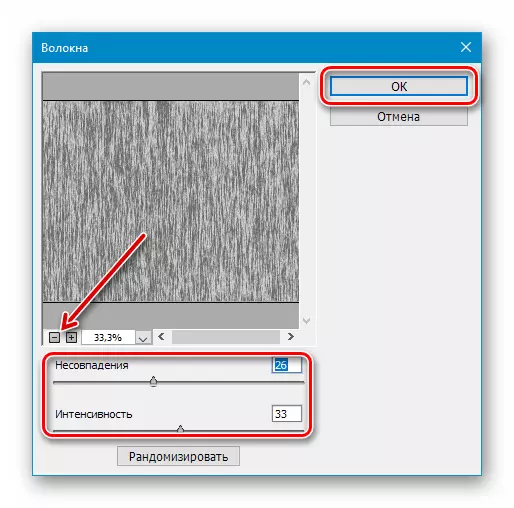
Customize the filter in such a way that there are no large dark spots in the image. Parameters change sliders. For a better review, you can reduce the scale.
Result:
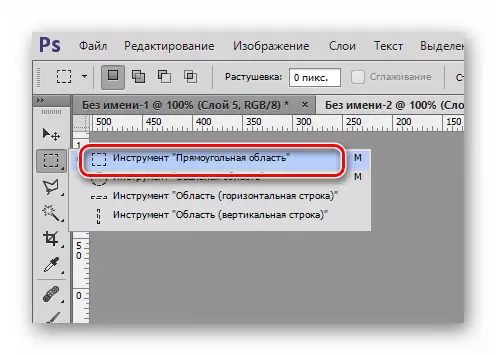
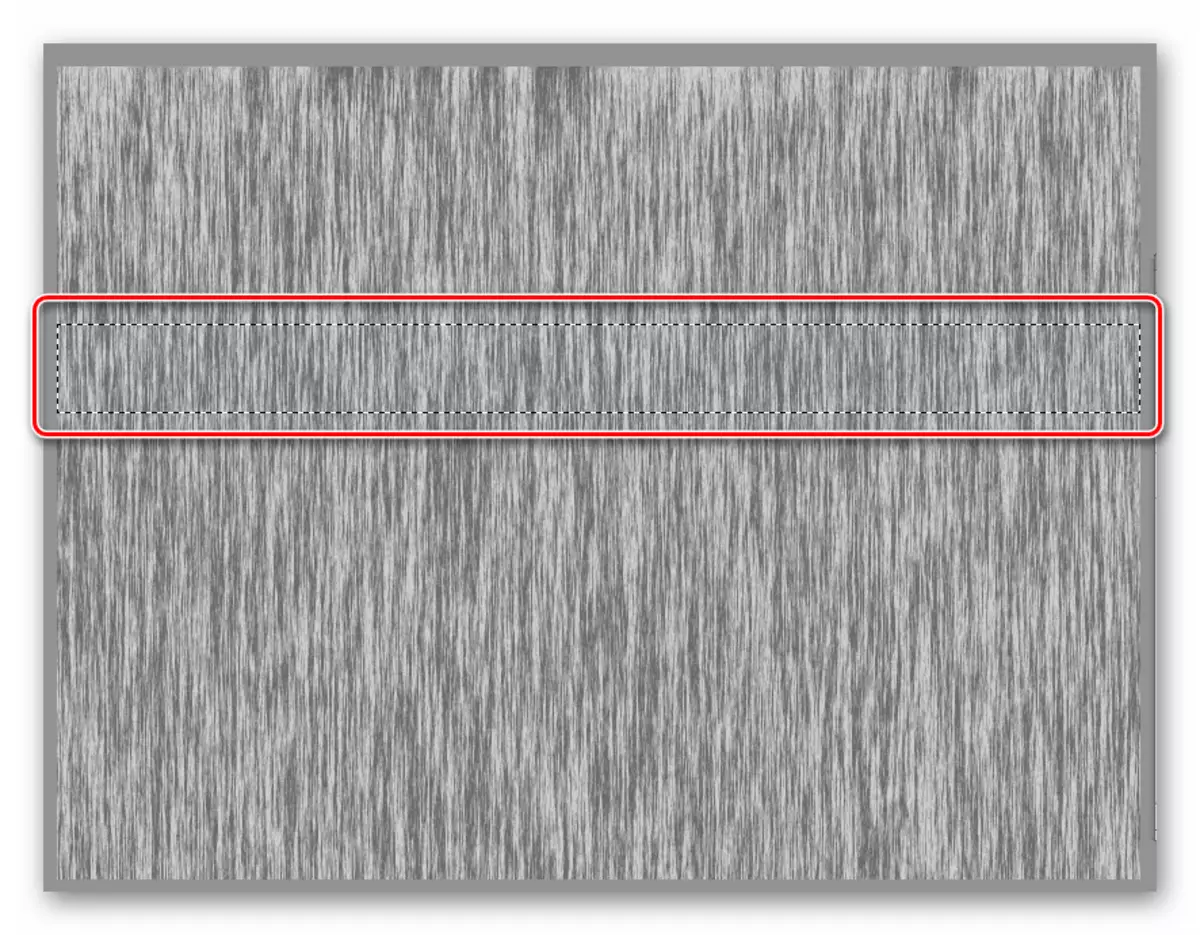
- Staying on a layer with "fibers", we take the "rectangular area" tool.
- We highlight the most homogeneous area across the entire width of the canvas.
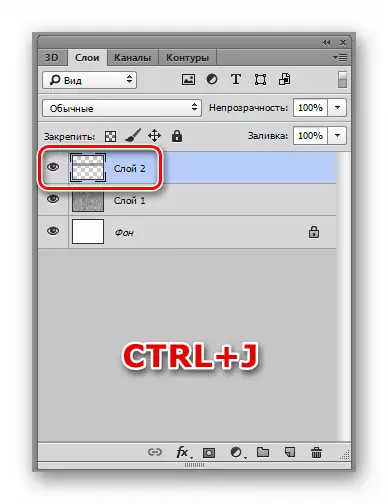
- Press the CTRL + J key combination by copying the selection to a new layer.
- Take the "Move" tool.

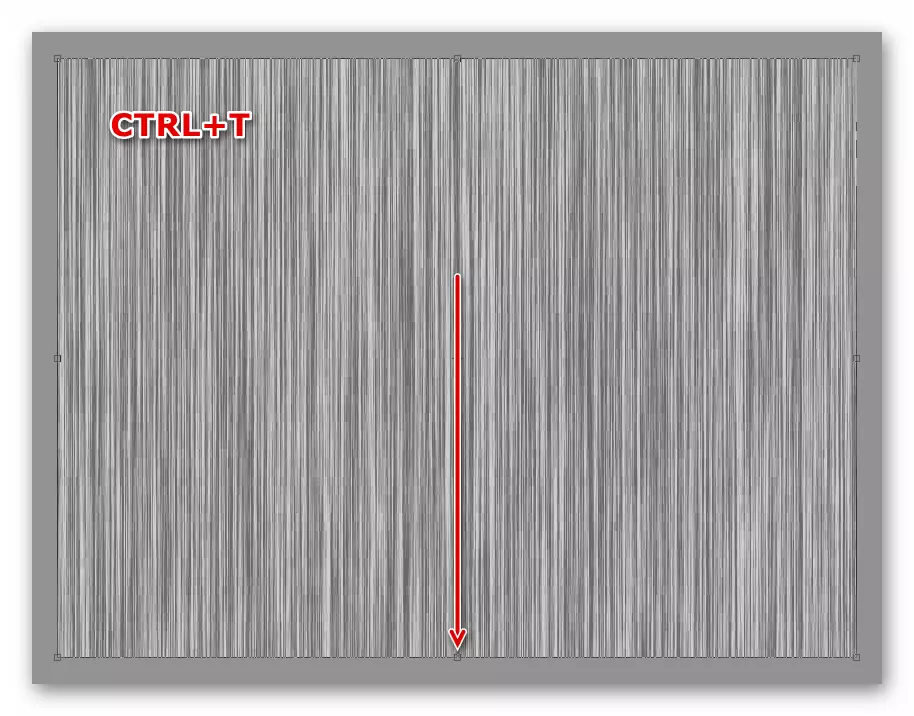
We remove visibility from the layer with the "fibers" and drag the copied area to the very top of the canvas.

- We call the "Free Transformation" function with the combination of Ctrl + T keys and stretch the strip down to the very end.
Option 2: bokeh
- Create a new document by pressing a combination Ctrl + N. . Pick the size of the image in your needs. Permission is set 72 pixels per inch . Such permission is suitable for publishing the Internet.

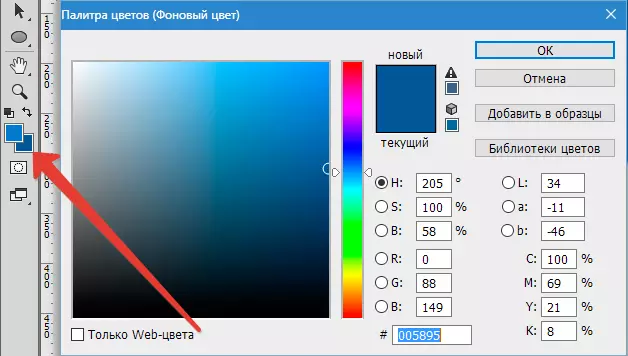
- We pour a new document with a radial gradient. Press key G. and choose "Radial gradient".

Colors choose to taste. The main must be a few lighter background.
- Then spend the gradient line on the image from top to bottom. This is what should happen:

- Next, create a new layer, choose the tool "Feather" (key P. ) and spend approximately such a curve:
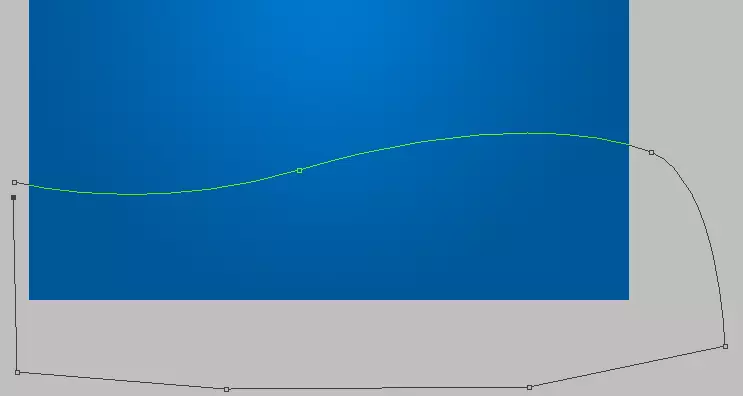
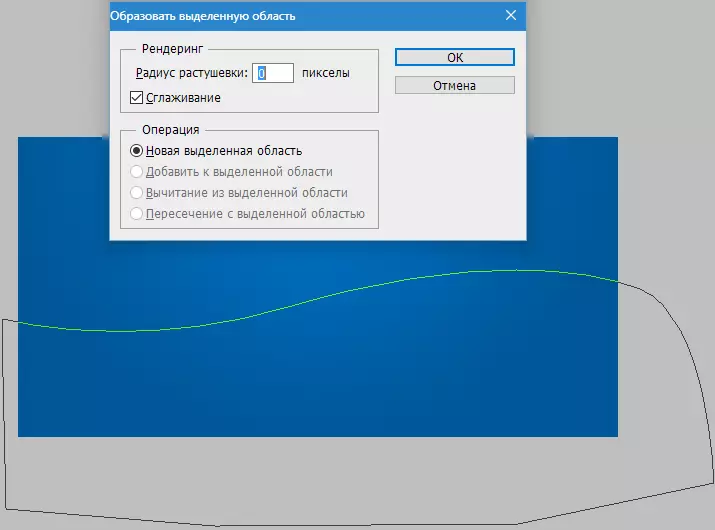
The curve must be closed to get the outline. Then create a selected area and poured it with white (on the new layer that we created). To do this, click inside the circuit with the right mouse button and select the item "form a selected area".

We put a gallery near the "smoothing", I exhibit 0 (zero) radius and click OK.
- We take the "Fill" tool and pour the selection with white.
Remove the selection of key combination Ctrl + D..
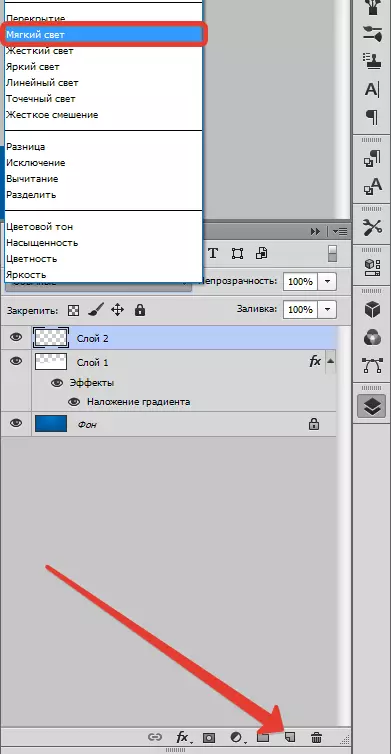
- Now double-click on the layer with just a flooded figure to open styles. In the imposition parameters, choose "Soft light" or "Multiplication" , impose a gradient.
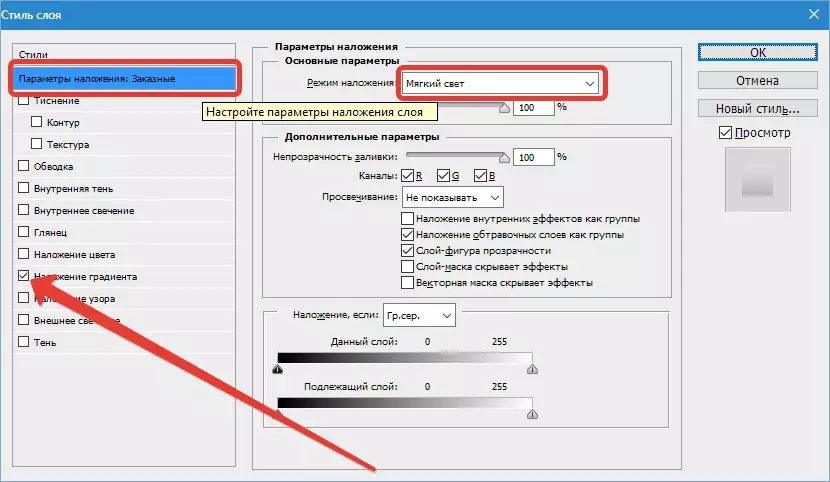
For gradient, choose mode "Soft light".

The result is approximately like this:

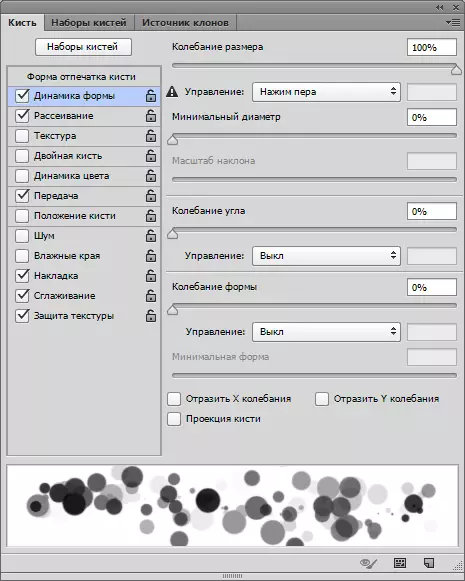
- Next, configure the usual round brush. Choose this tool in the panel and click F5. To access the settings.

Put all the daws, as in the screenshot, and go to the tab "Shape Dynamics" . Express size oscillation 100% and management "Press Pen".
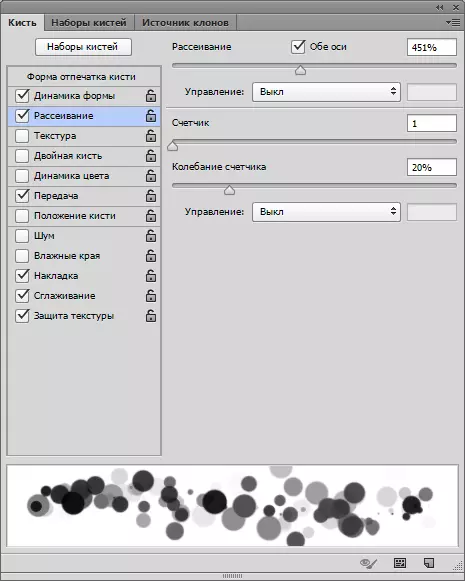
Then on the tab "Diffusion" We select the parameters to work out like on the screen.
On the tab "Broadcast" Also play yourself with the sliders to achieve the necessary effect.

- Create a new layer and set the overlay mode "Soft light".
On this new layer, we repose our brush.

- To achieve a more interesting effect, this layer can be blurred by applying the filter "Gaussian blur" , and on the new layer repeat the passage to the brush. The diameter can be changed.

Takes applied in this lesson will help you create excellent backgrounds for your work in Photoshop.
- Create a new document by pressing a combination Ctrl + N. . Pick the size of the image in your needs. Permission is set 72 pixels per inch . Such permission is suitable for publishing the Internet.