
Magic wand - One of the "smart" tools in the photoshop program. The principle of operation lies in the automatic selection of pixels of a certain tone or color on the image.
Tool "Magic Wand" in Photoshop
Often users who do not understand the possibilities and settings of the tool are disappointed in its work. This is due to the seeming impossibility of controlling the allocation of a certain tone or color. This lesson will be devoted to working with "Magic wand" . We will learn to determine the images to which the tool apply, as well as set it up.
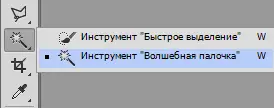
When using photoshop CS2 version or earlier "Magic wand" You can choose by simply click on its icon on the left pane. In the CS3 version, a new tool appears entitled "Fast allocation" . It is placed in the same section and the default panel is displayed precisely. If you use the photoshop version above the CS3, you must click on the icon "Fast allocation" and in the drop-down list find "Magic wand".
The principle of operation of the instrument
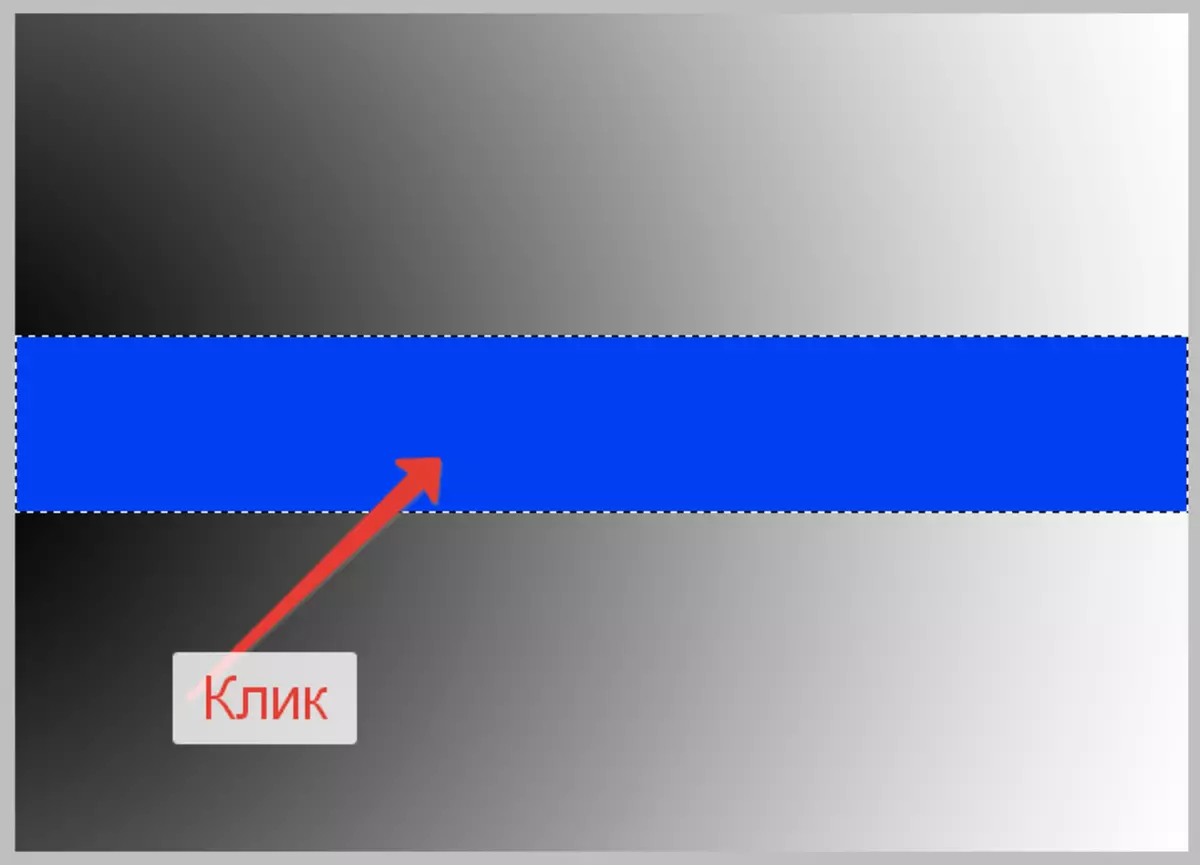
First, let's see the example "Magic wand" . Suppose you have such an image with a gradient background and a transverse one-photon line:

The tool loads into the selected area those pixels, which, according to photoshop, have the same tone (color). The program determines the digital values of the colors and highlights the corresponding site. If the plot is quite large and has a monophonic fill, in this case "Magic wand" Just indispensable.
For example, we need to highlight the blue plot on our image. All that is required is to press the left mouse button on any place of the blue strip. The program will automatically determine the value of the shade and load into the selected area of the pixels corresponding to this value.
Settings
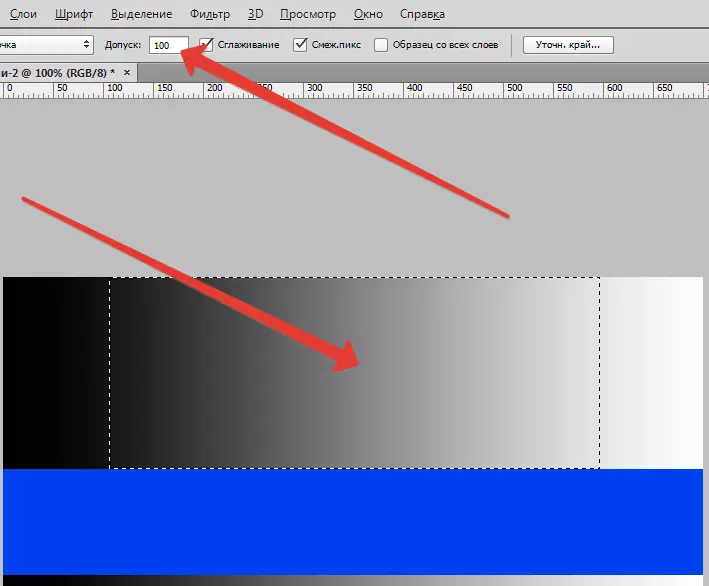
- "Admission". The previous action was simple enough, because the site had a monophonic fill, that is, there were no other shades of blue on the strip. What will happen if you apply the tool to the gradient on the background? Click on the gray area at the gradient.
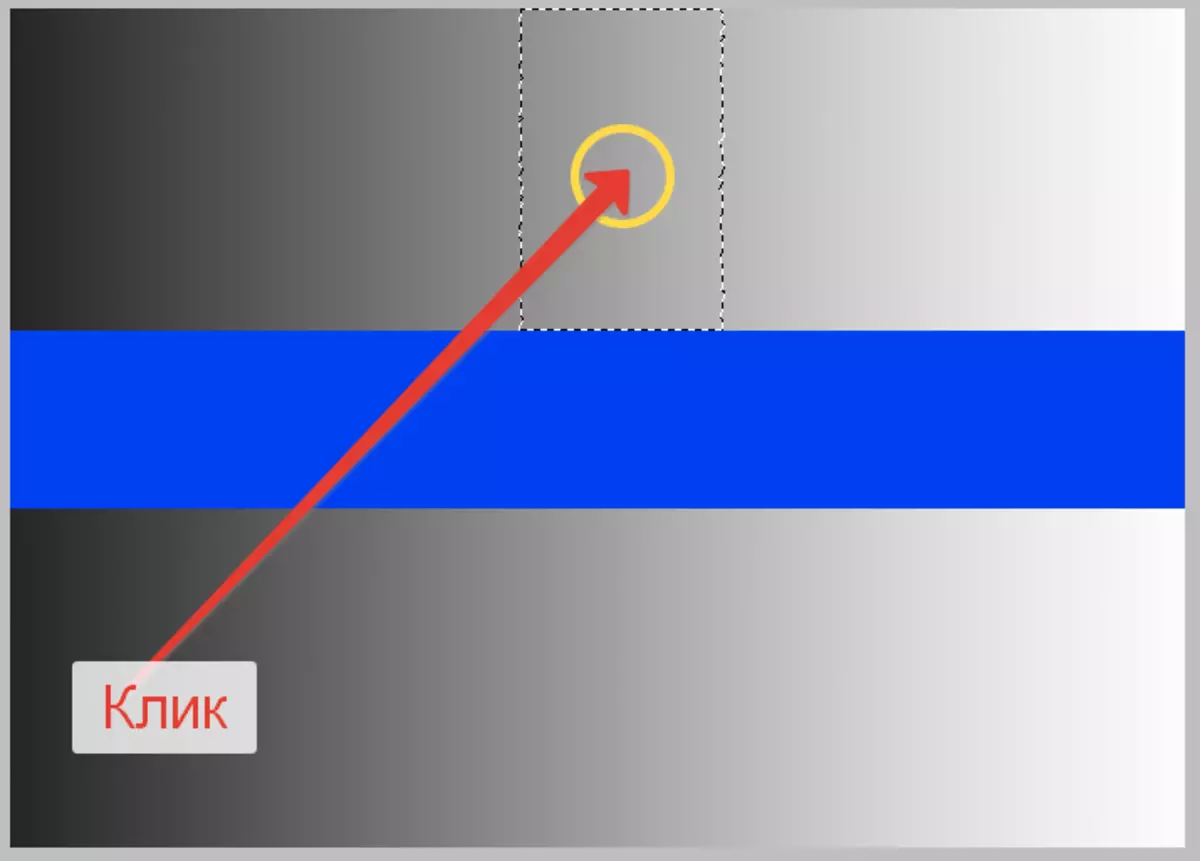
In this case, the program allocated the shades range approximate by the value to the gray color on the site where we clicked. This range is determined by the tool settings, in particular, "Admission" . Setting is on the top toolbar.

This parameter determines how many levels may differ sample (the point for which we clicked) from that shade, which will be loaded (allocated). In our case "Tolerance" installed on 20. This means that "Magic wand" Add to highlight 20 shades is darker and lighter than the sample. The gradient on our image includes 256 brightness levels between absolutely black and white. The tool allocated, in accordance with the settings, by 20 brightness levels in both directions.
Let's, for the sake of the experiment, try to increase the tolerance, say, up to 100, and apply again "Magic wand" To the gradient.
At "Tolerance" , enlarged five times (in comparison with the previous one), the tool allocated a portion five times more, since not 20 shades were added to the sample value, and 100 on each side of the brightness scale.
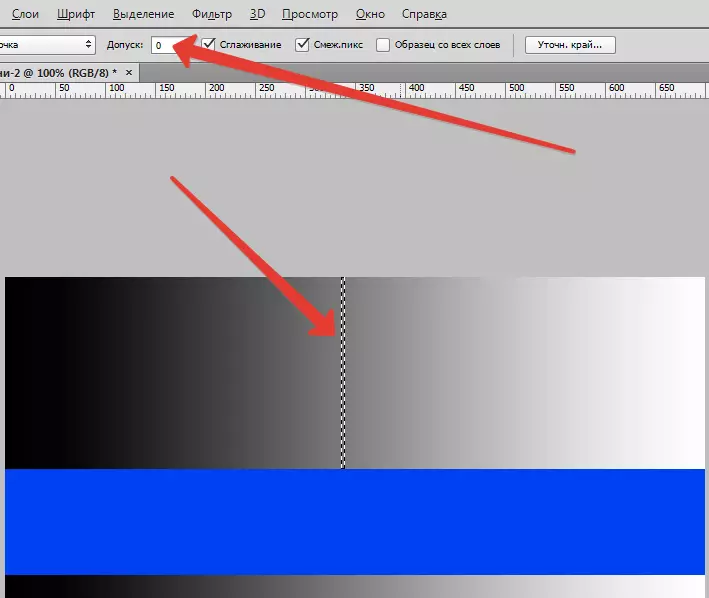
If you want to select only that shade that corresponds to the sample, the "tolerance" value is set to 0, which will give the program to the program not to add any other values of shades to the selection. With the value of "tolerance" 0 (zero), we only receive a thin selection line containing one only shade corresponding to the sample taken from the image.
Values "Tolerance" You can set in the range from 0 to 255. The higher the value is, the greater the area will be highlighted. The number 255, displayed in the field, will force the tool to allocate the entire image (tone).
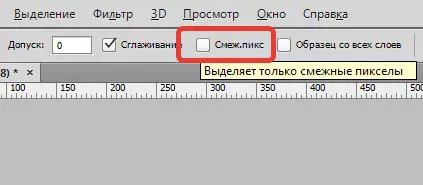
- "Related pixels." When considering settings "Tolerance" It was possible to notice a particular feature. When clicking on a gradient, the program highlighted the pixels only within the area of the gradient. The gradient on the plot under the strip was not included in the selection, although the shades on it are completely identical to the upper portion. For this answers one more tool setting "Magic wand" And it is called "Related pixels" . If a daw (default) is installed in front of the parameter, the program will allocate only those pixels that are defined "Admission" As suitable for the range of brightness and shade, but within the selected area. Other such pixels, even if certain, as suitable, but outside the selected area, will not fall into the loaded area. In our case, it happened. All suitable pixels at the bottom of the image were ignored.
Let's spend another experiment and remove the tank on the contrary "Related pixels".
Now click on the same (top) section of the gradient "Magic wand".

As we see, if "Related pixels" Disabled, all pixels in the image suitable for criteria "Tolerance" will be allocated even if they are separated from the sample (located on another section of the image).
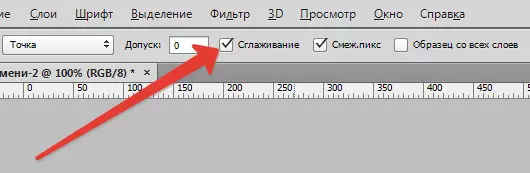
- Two previous settings - "Tolerance" and "Related pixels" - are the most important in the work of the instrument "Magic wand" . Nevertheless, there are others, even if not such important, but also the desired settings. When highlighting pixels, the tool makes it stepwise, using small rectangles, which affects the quality of the selection. Seamlords may appear, in commonerodies are called "Lestenka". If a plot is allocated with the correct geometric shape (quadrangle), then such a problem may not occur, but when the sections of the wrong shape of the "Lanenka" are inevitable. A little smoothed gear edges will help "Smoothing" . If the appropriate daw is installed, photoshop applies a small blur, which almost does not affect the final quality of the edges.
- Next setting is called "Sample from all layers" . By default, the "magic wand" takes a sample shade to highlight only from that layer, which is currently highlighted in the palette, that is, active. If you set the tank opposite this setting, the program will automatically take the sample from all layers in the document and will turn on to the selection, guided by the parameter "Tolerance".

Practice
Let's consider in practice the use of the tool "Magic wand".
We have a source image:
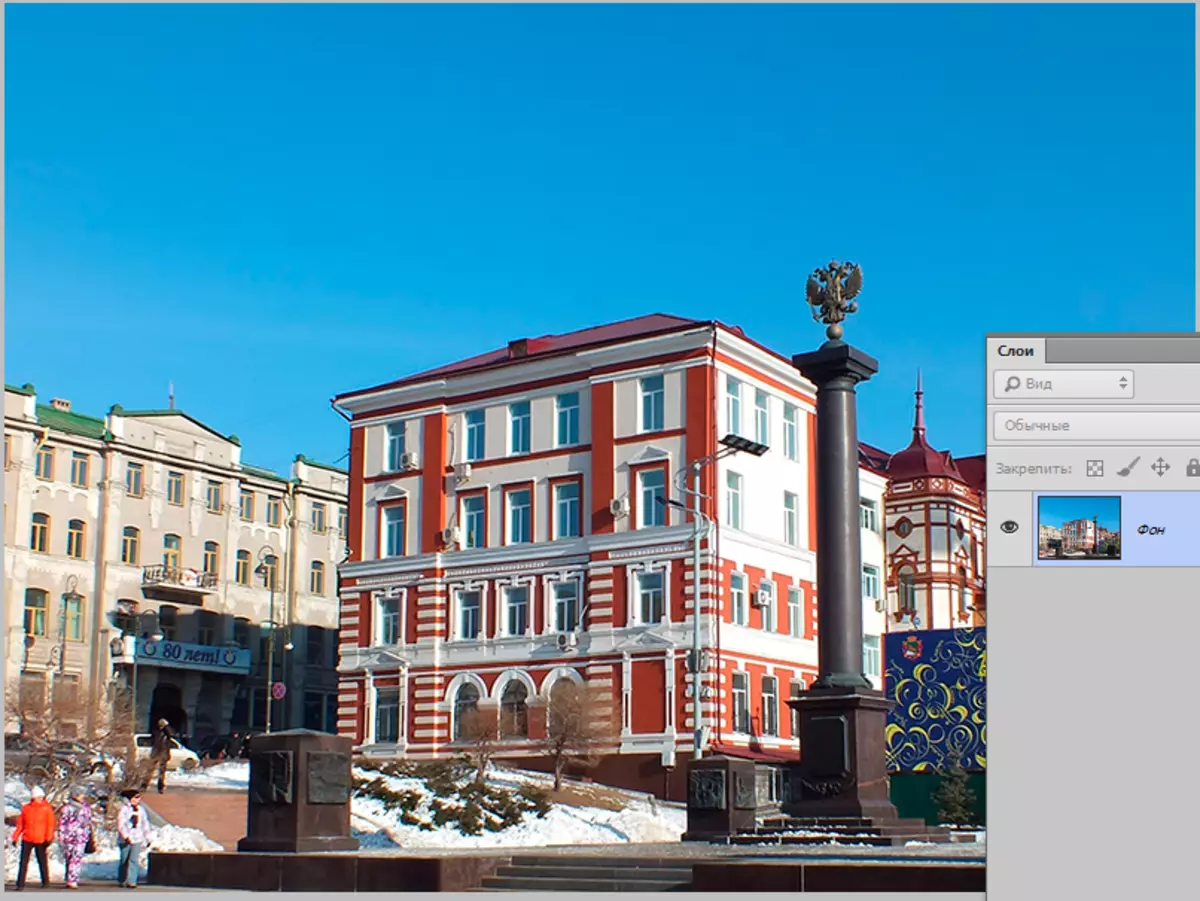
Now we will replace the sky on your own clouds.
We explain why we took exactly this photo. And because it is ideal for editing using "Magic wand" . The sky is almost the perfect gradient, and we, with help "Tolerance" , We can fully allocate it. Over time (acquired experience), you will understand which images you can apply tool.
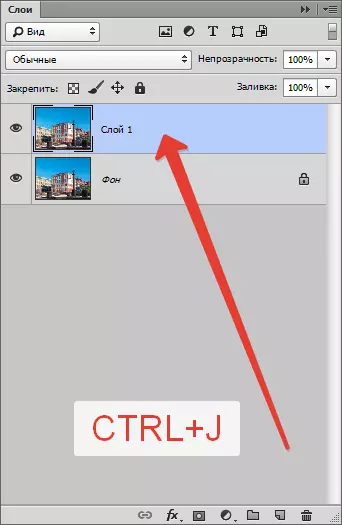
- Create a copy of the layer with the source key combination Ctrl + J..
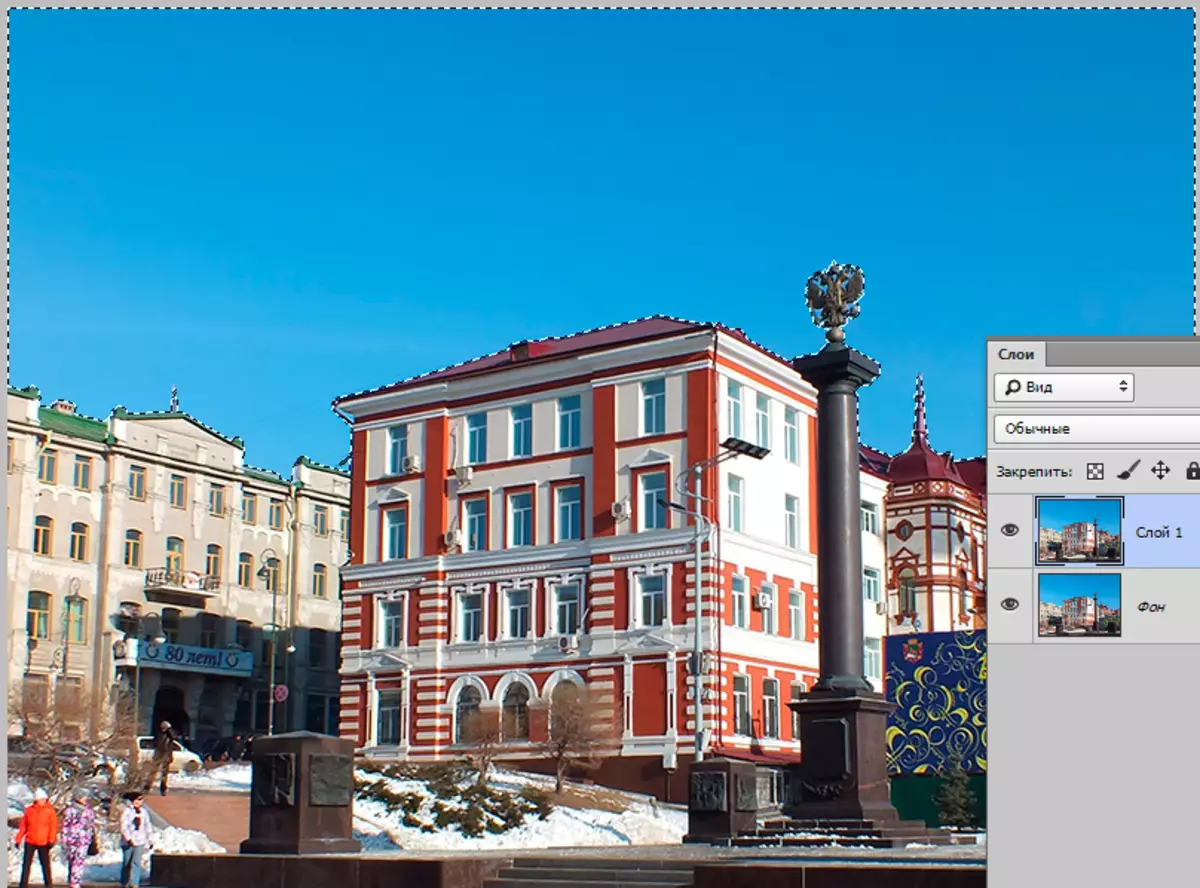
- Then take it "Magic wand" And configure as follows: "Tolerance" - 32, "Smoothing" and "Related pixels" included, "Sample from all layers" Disabled.

- Being on the layer with a copy, click at the top of the sky. We get this selection:

- As you can see, the sky is not completely outlined. What to do? "Magic wand" , like any "allocation" tool, has one hidden function. It can be called like "Add to selected area" . The function turns on when the key is swapped Shift. . So, clamping Shift. And click on the remaining non-selected section of the sky.
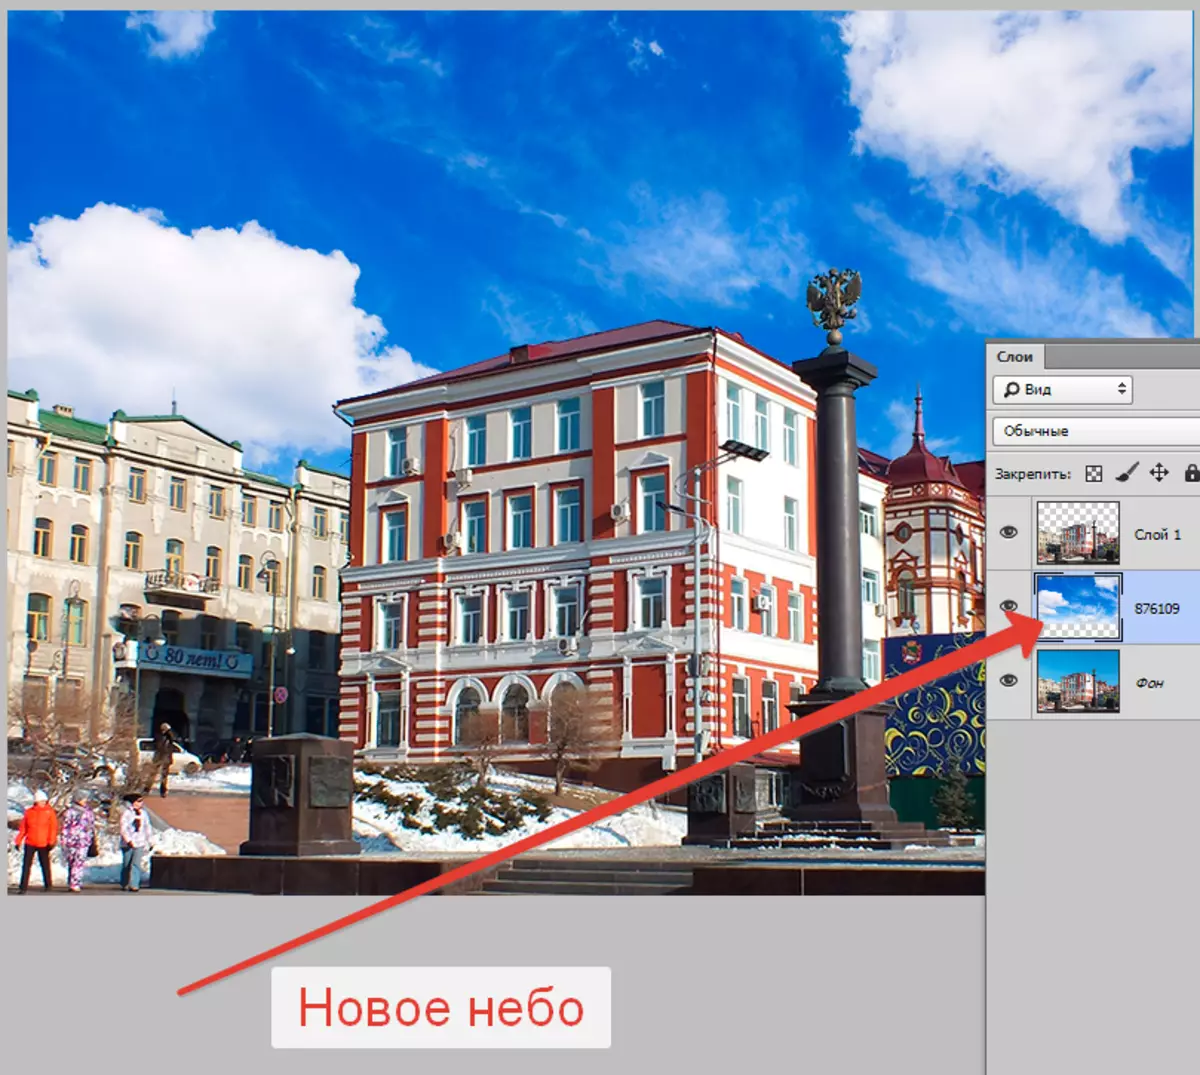
- We delete an unnecessary key Del. and remove the selection by a combination of keys Ctrl + D. . It remains only to find an image of a new sky and put between two layers in the palette.
On this study tool "Magic wand" can be considered finished. Analyze the image before using the tool, use the settings with the mind, and you will not fall into the ranks of those users who say the "terrible wand". They are amateurs and do not understand that all the photoshop tools are equally useful. You just need to know when to apply them. Good luck in your work with photoshop program!