

Creating cartoons is a rather complicated and painstaking process, which has now been much simplified thanks to computer technologies. There are many software that allows you to create an animation of different levels of complexity. Separate solutions are intended for beginner users, but many such software are focused on professional animation. As part of today's article, we would like to talk about three programs that allow you to realize the task.
Create animation on a computer
The choice of suitable software is one of the most important aspects during the beginning of its formation in the field of animation, because solutions are really very much, and each of them provides users with a completely different set of tools and functions. For example, MOHO is focused on creating a simple 2D cartoon, but Autodesk Maya allows you to create a three-dimensional character, organize a realistic scene and configure physics. Because of this, it is recommended to first get acquainted with the tools, and then choose the optimal one.Method 1: Toon Boom Harmony
Toon Boom Harmony is one of the most popular programs for sample animation. Its advantage is that it is simply mastered by novice users, and also provides a whole complex of additional modules, allowing to produce such projects. Today we will focus on this assembly and will analyze a simple example of creating a cartoon.
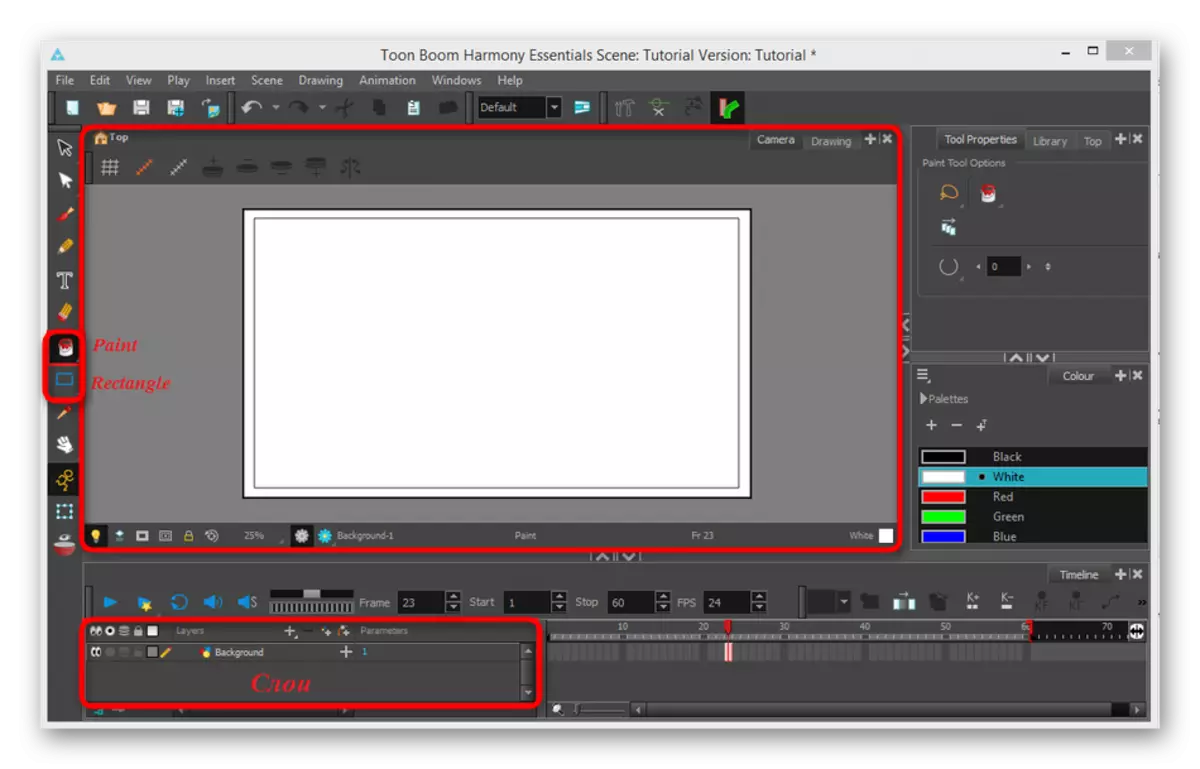
- Consider the process of creating frame animation. We run the program and the first thing we do to draw a cartoon, create a scene, where it will take place.
- After creating the scene, we automatically appear one layer. Let's call it "background" and create a background. The Rectangle tool is drawing a rectangle that goes a bit from the edges of the scene, and with the help of "paint" make a fill with white.
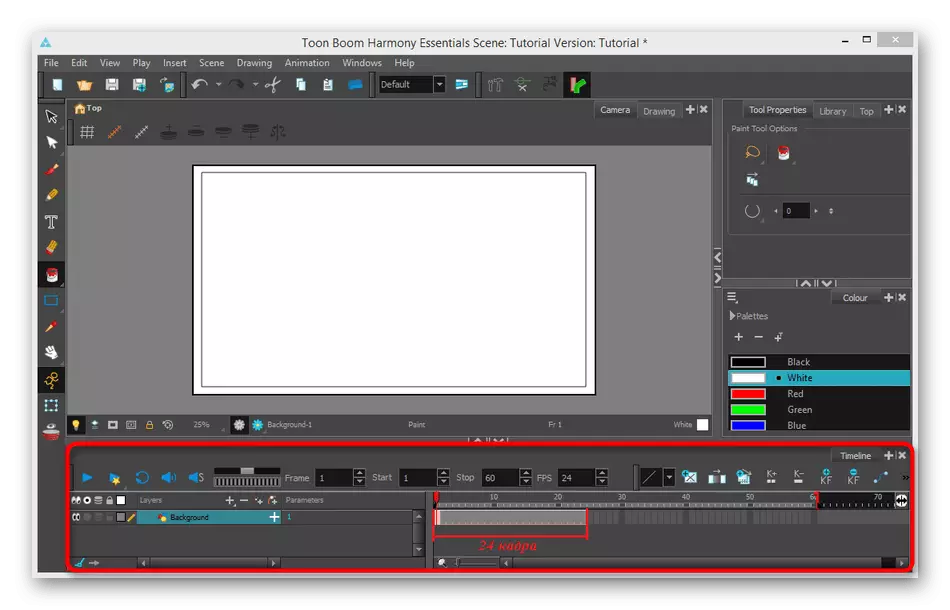
- Create a ball jump animation. To do this, we will need 24 frames. In the Timeline sector, we see that we have one frame with a background. It is necessary to stretch this frame for all 24 frames.
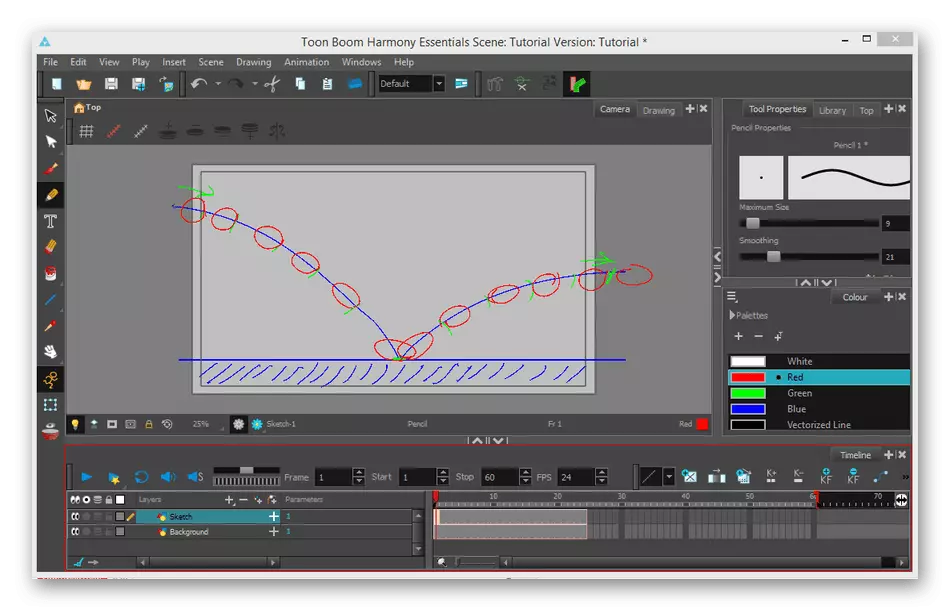
- Now let's create another layer and call it "Sketch". It is noted a trajectory of a ball jump and an approximate position of the ball for each frame. It is desirable to make all the marks to do different colors, as with such a sketch it is much easier to create cartoons. Just like the background, we stretch the sketch of 24 frames.
- Create a new layer "Ground" and draw the land with a brush or pencil. Again, we stretch the layer on 24 frames.
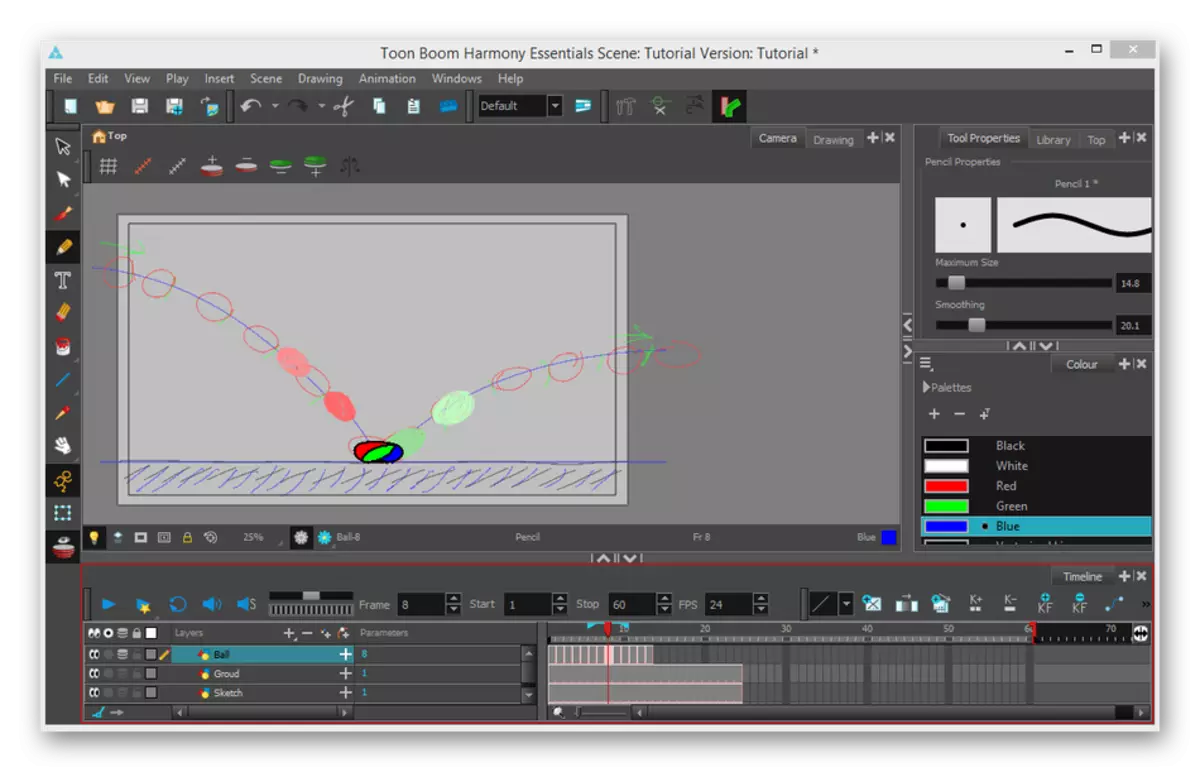
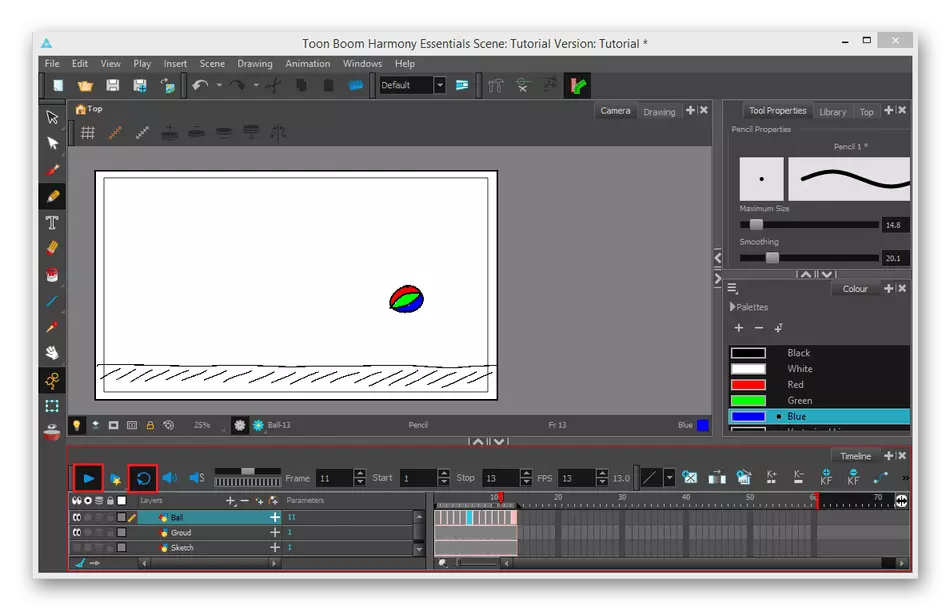
- Finally, proceed to drawing a ball. Create a "Ball" layer and highlight the first frame in which I draw a ball. Next, go to the second frame, and on the same layer we draw another ball. Thus, draw the position of the ball for each frame.
- Now you can remove the sketch layer and unnecessary frames, if any. It remains to run and check the created animation.

If you can not find a color palette, right to find the sector "Color" And expand the bookmark "Palettes".

During coloring drawing with a brush, the program is watching that there were no protrusions for the contour.
On this lesson is over. We showed you the simplest features of Toon Boom Harmony. Learn the program further, and over time your work will become much more interesting.
Method 2: MOHO
Moho (previously Anime Studio Pro) is one of the most popular programs that allow you to create a two-dimensional animation even to novice users. The toolkit here is implemented in such a way that professionals and beginners feel comfortable during the creative process. This provision applies for a fee, but the trial version will be enough to master all the functions and figure out how to make an animation in Moho.
We offer to familiarize yourself with a small instruction demonstrating the easiest animation method, on the example of one character from ready-made patterns. All actions look like this:
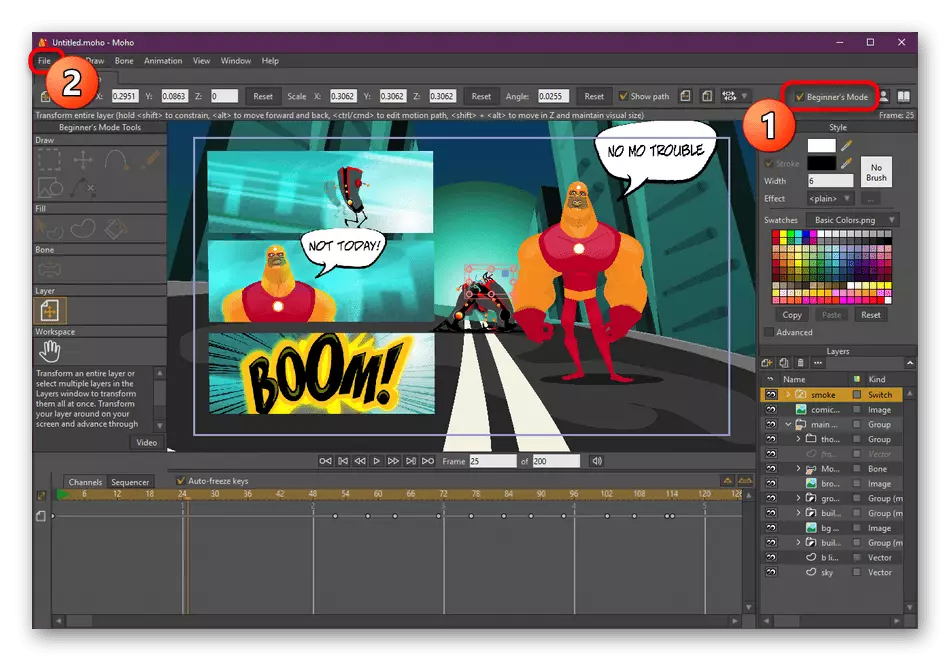
- After registering and installing MOHO, create a new project through the "File" menu, and also include a view for beginners to be easier to familiarize yourself with all those present.
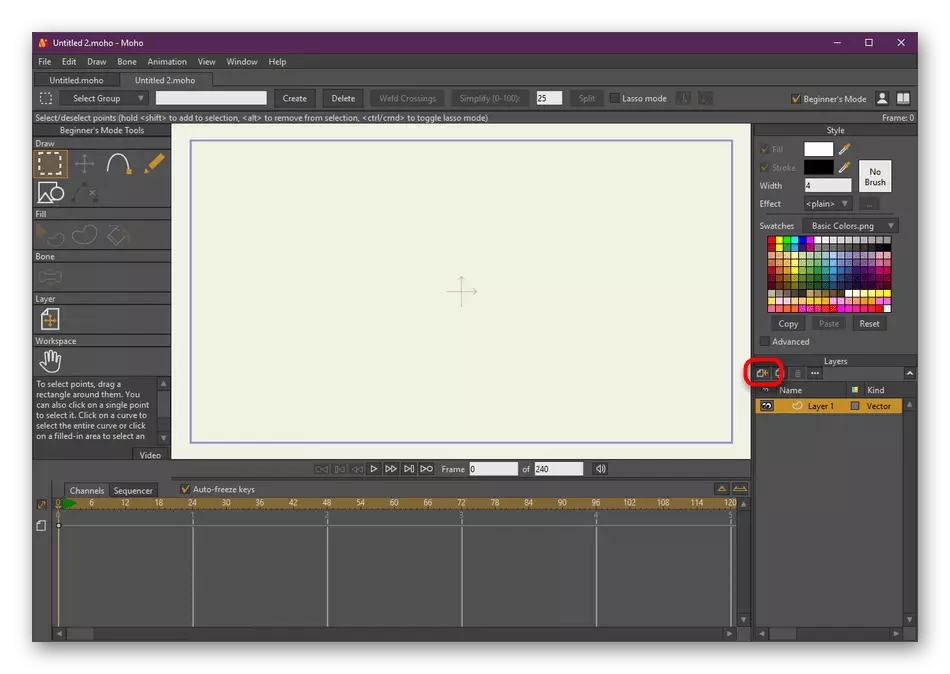
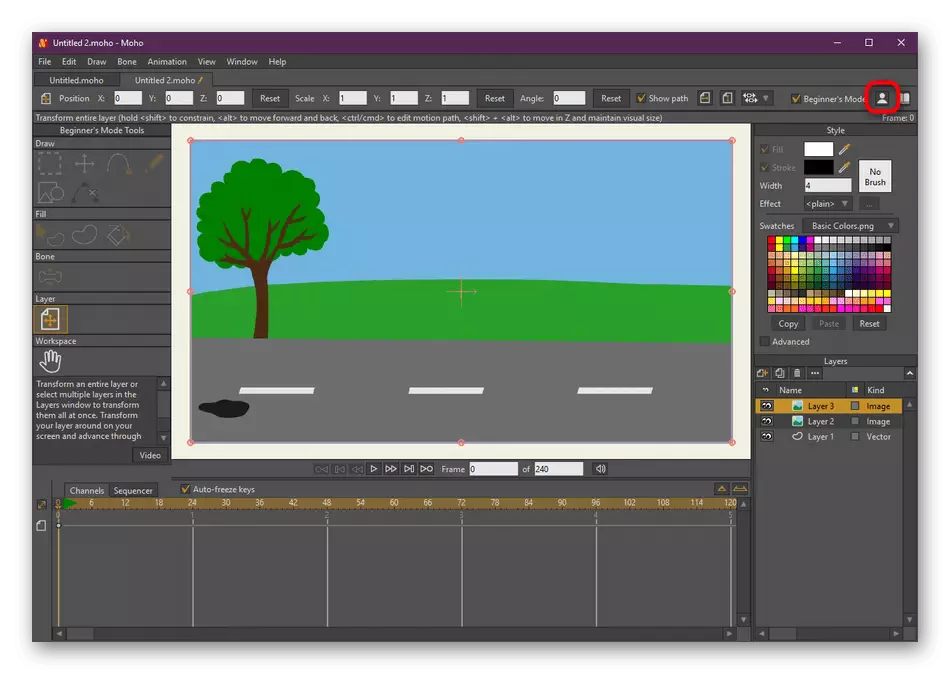
- On the panel to the right you see a separate button that is responsible for adding a layer. Through it, you can insert an image, music or any other object into the project. Let's add a simple background.
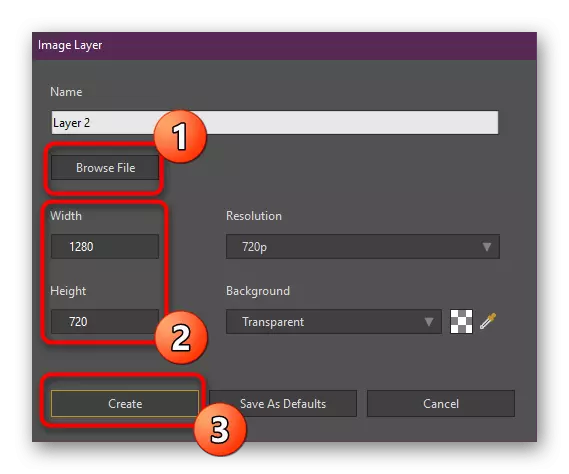
- When the "Image" layer is selected, an additional window will open, where you will first have to select the file, specify its sizes in pixels and click on the "Create" button. Moho supports all popular formats of pictures, and will also allow you to fit their expansion.
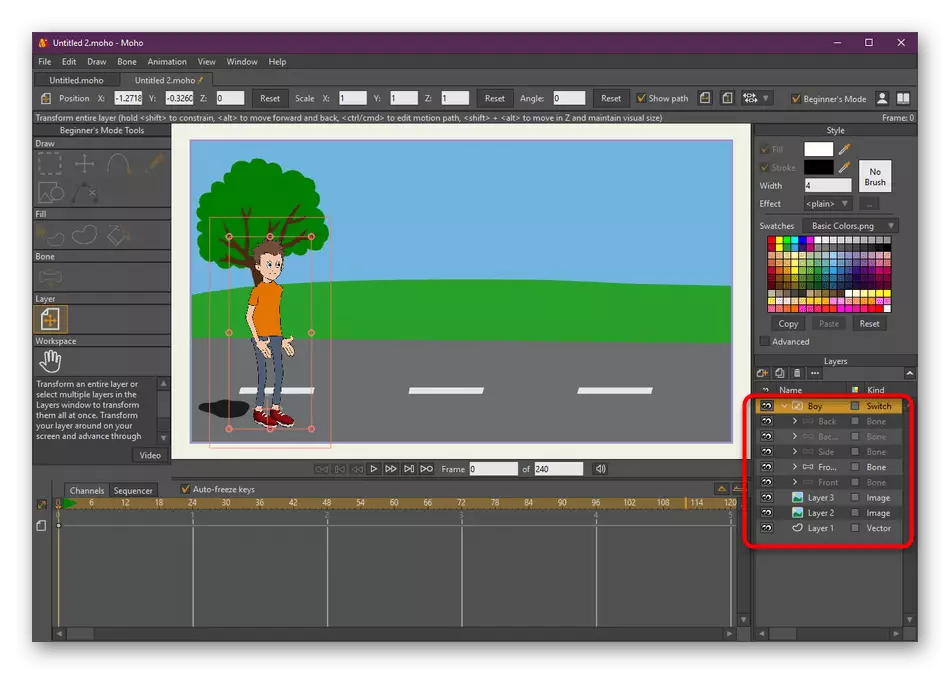
- After adding the background, you will see that it began to display as the lowest layer. Use the move tool to configure the size and location of the image.
- Click the man's icon button if you want to add a finished character from the library. Otherwise, you will have to create a figure independently, drawing every moving bone and assigning dependencies, which will leave a lot of time. We will not talk about it today, but we will only use the easiest example.
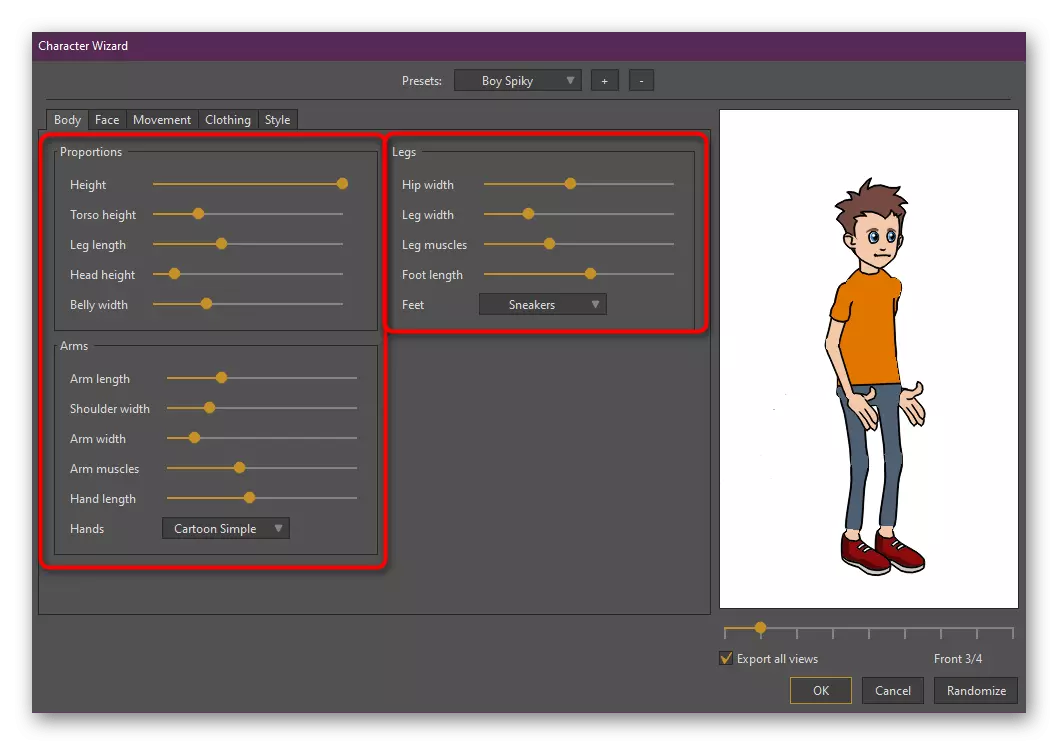
- In the Character Editor, you have a choice of settings of the proportions of his body, legs and arms by moving the corresponding sliders. All changes will be immediately displayed on the preview screen on the right.
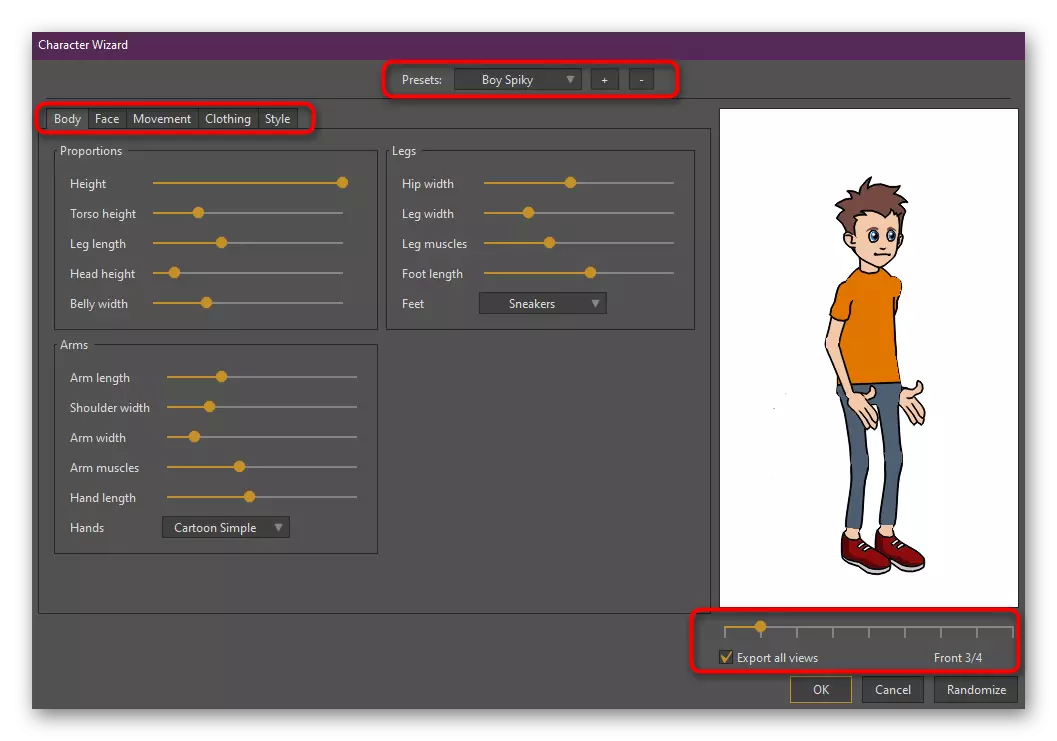
- In addition, you can choose another finished character, move on tabs with the configuration of the face, clothes and movements, and there is also another slider that allows you to view all kinds of character. Pay attention to the "Export All Views" button. If the will of it is a tick, then the character will be added to the project with the possibility of changing the type of display of it.
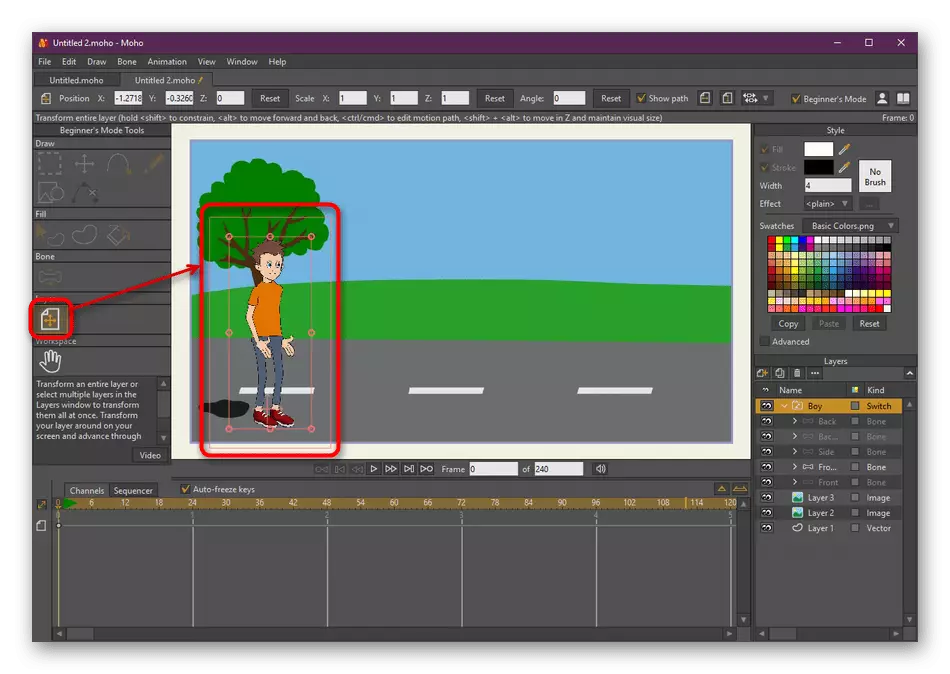
- At the end of adding a shape to the workspace, use a layer work tool to move it, resize or angle.
- Then look at the panel with layers. Each type of character is highlighted in a separate string. Activate one of the types to work with a character in a certain position. For example, in the screenshot below you see the view of 3/4.
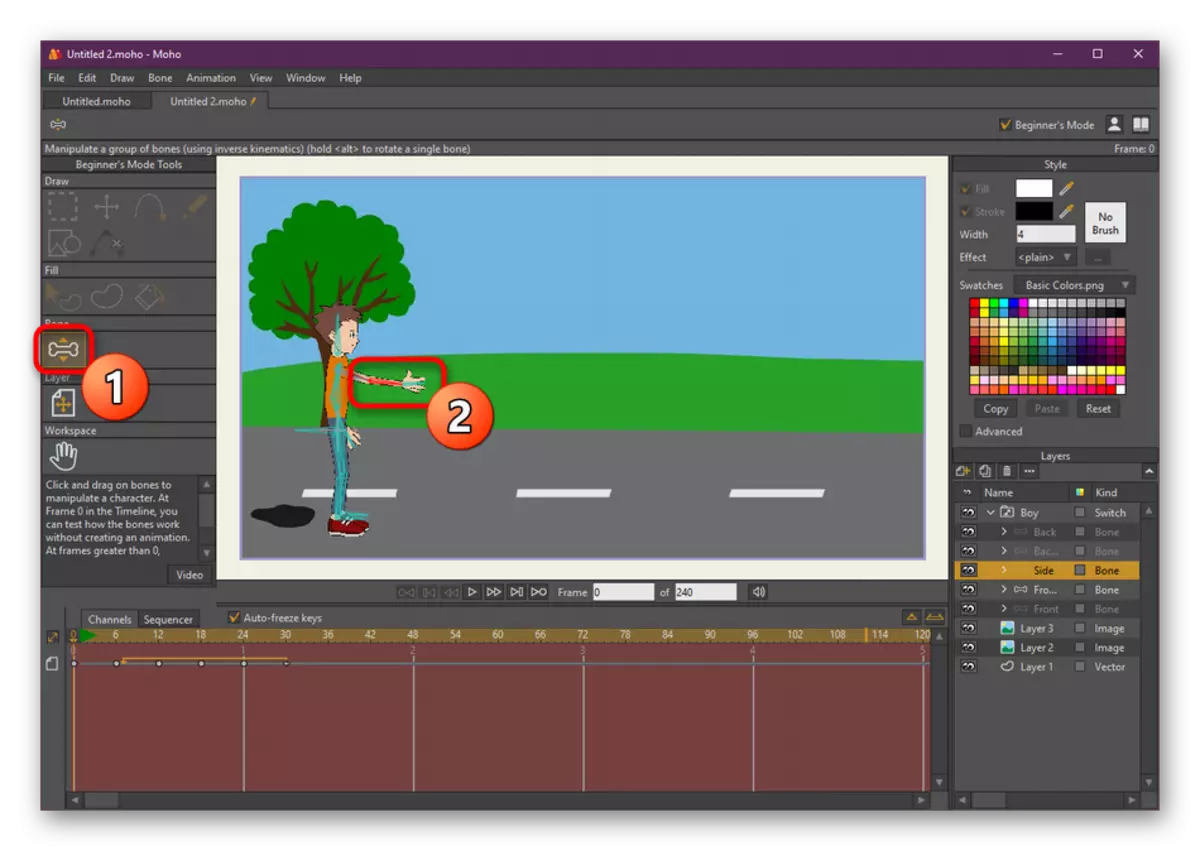
- After selecting a layer on the left panel, a tool will appear responsible for moving bones. It allows you to choose one of the added bones to move it. It is this that creates the effect of animation - you just highlight, for example, hand, move it to a certain position, then take the foot or neck, creating a walk or jump.
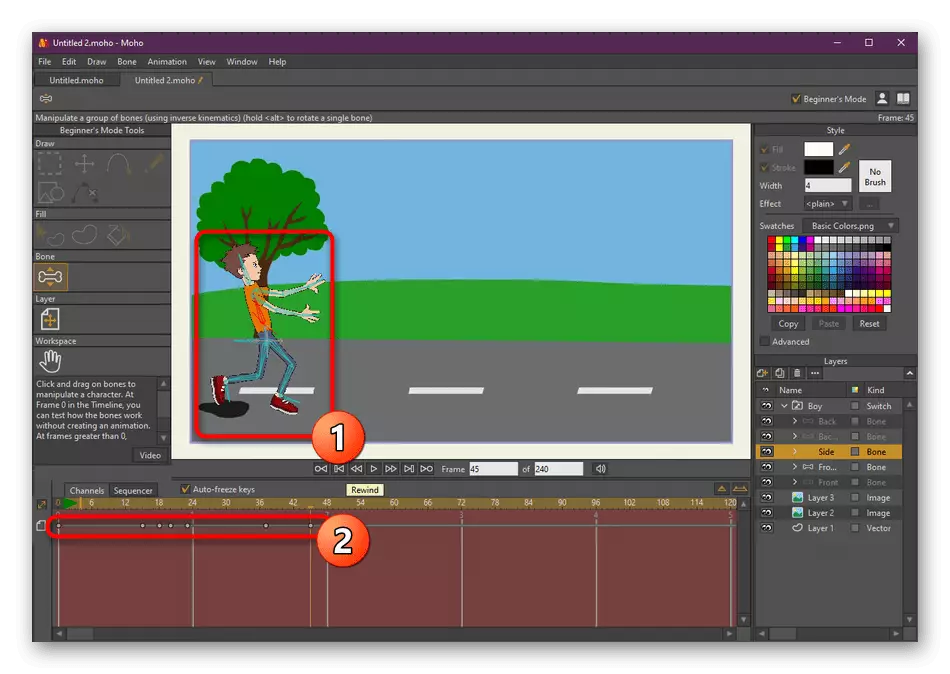
- All movements need to be fixed on timeline so that there is a beautiful animation when playing. Since the mode was turned on for beginners, at the bottom, several keys (animation points) are already spelled out, which together create the steps of the added figure. You can delete them to create your own project from scratch.
- Select a figure, move to a specific frame, for example, 15, then move the bones to the desired position, trying to repeat any movement. Then the key will be created (it will appear as a point). Move the slider further, for example, on the 24th frame, create new shape changes. Repeat such steps until the animation is completed.
- Upon completion of the animation of all shapes and items, go to the export of the project through the "File" menu.
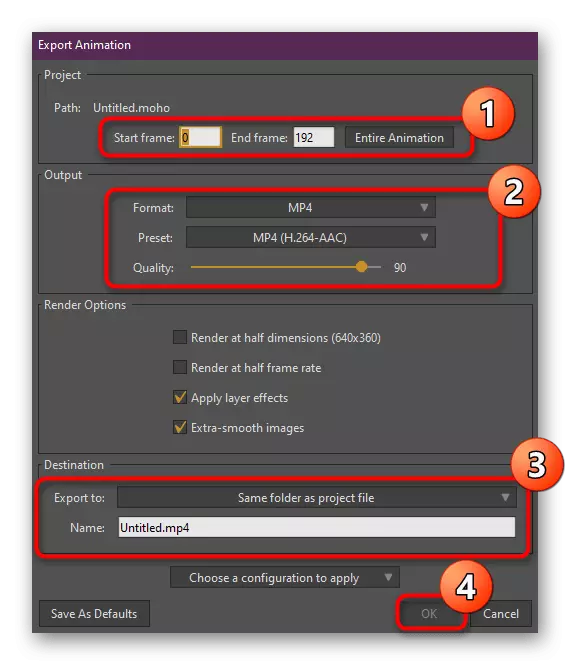
- Select the frames that will be captured, specify format and quality, set the name and folder for export, click on "OK". Please note that the demonstration version does not have the ability to save the finished project.


Above, we led an example of creating a simple animation in MOHO software. It is not necessary to perceive this guide as a full lesson that allows you to master the functionality of this software. We only wanted to demonstrate the general possibilities of the software so that you could understand whether it is worth considering it as a main tool for learning to professional or amateur animation. Of course, we did not mention a lot of useful features and moments, but a lot of time will leave for the analysis of all this, besides, everything has long been shown in text or video tutorials available for free on the Internet.
Method 3: Autodesk Maya
We set a way to Autodesk Maya at the last place, since the functionality of this application is focused on professional modeling and animation. Therefore, lovers and those who want to simply create their own cartoon, this provision will not fit - too much time and effort will need to understand how to work with projects here. However, we would like to tell about the basic principle of creating an animation for those who want to seriously engage in this case.
You should start with the fact that Autodesk Maya has a trial version for a period of thirty days. Before downloading, you create an account via email, where to bind the provision. During installation, add additional components will be asked, and they have a lot of space on the computer. Because of what we first recommend it in detail to study the work of these tools, and only then move to their installation. Now we will take MAYA's main working environment and demonstrate an example of animation:
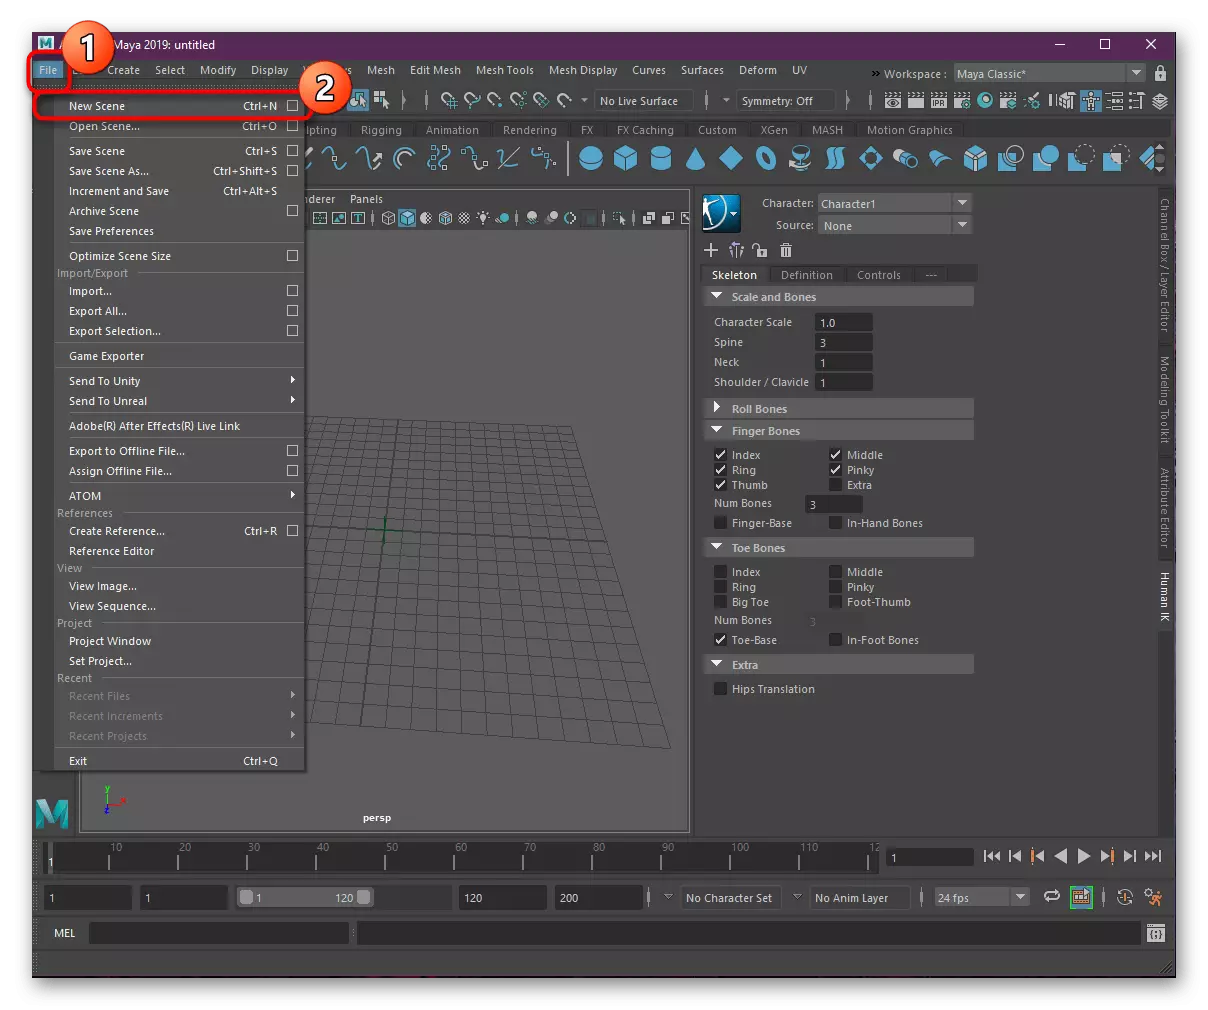
- After the first launch of the provision, respectively, you have to create a new scene through the "File" menu.
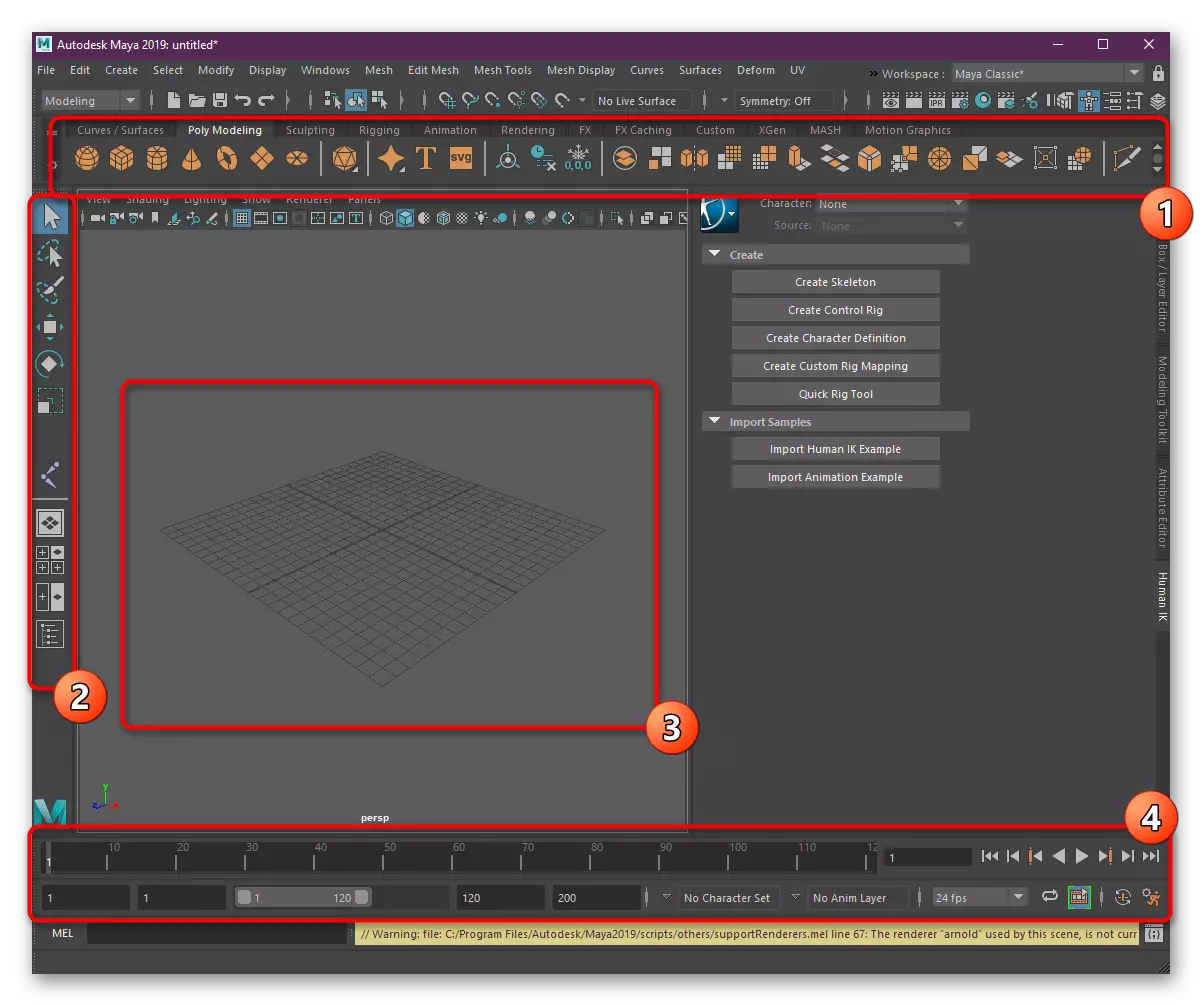
- Now let's walk through the main elements of space. At the top you see the panel with various tabs that are responsible for adding shapes, their editing, sculpting, rendering and animation. All this is useful during the creation of your scene. On the left displays the basic object management tools. In the middle there is a scene itself, on which all the basic actions occur. At the bottom there is a timeline with a storyboard, where the animation keys are noted.
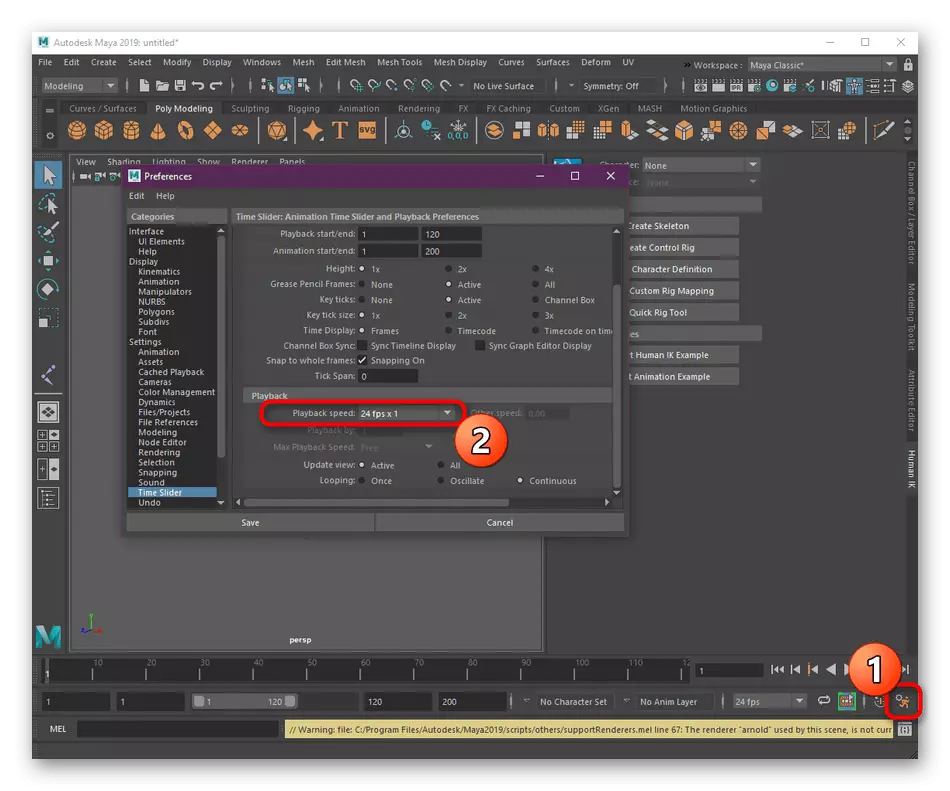
- Before you begin animation, we strongly recommend changing the standard setting. Click on the Specked button and specify "24 FPS X 1" for "Playback Speed". This action will be required to ensure the smoothness of the moving elements, since the default engine will give the maximum possible number of frames per second.
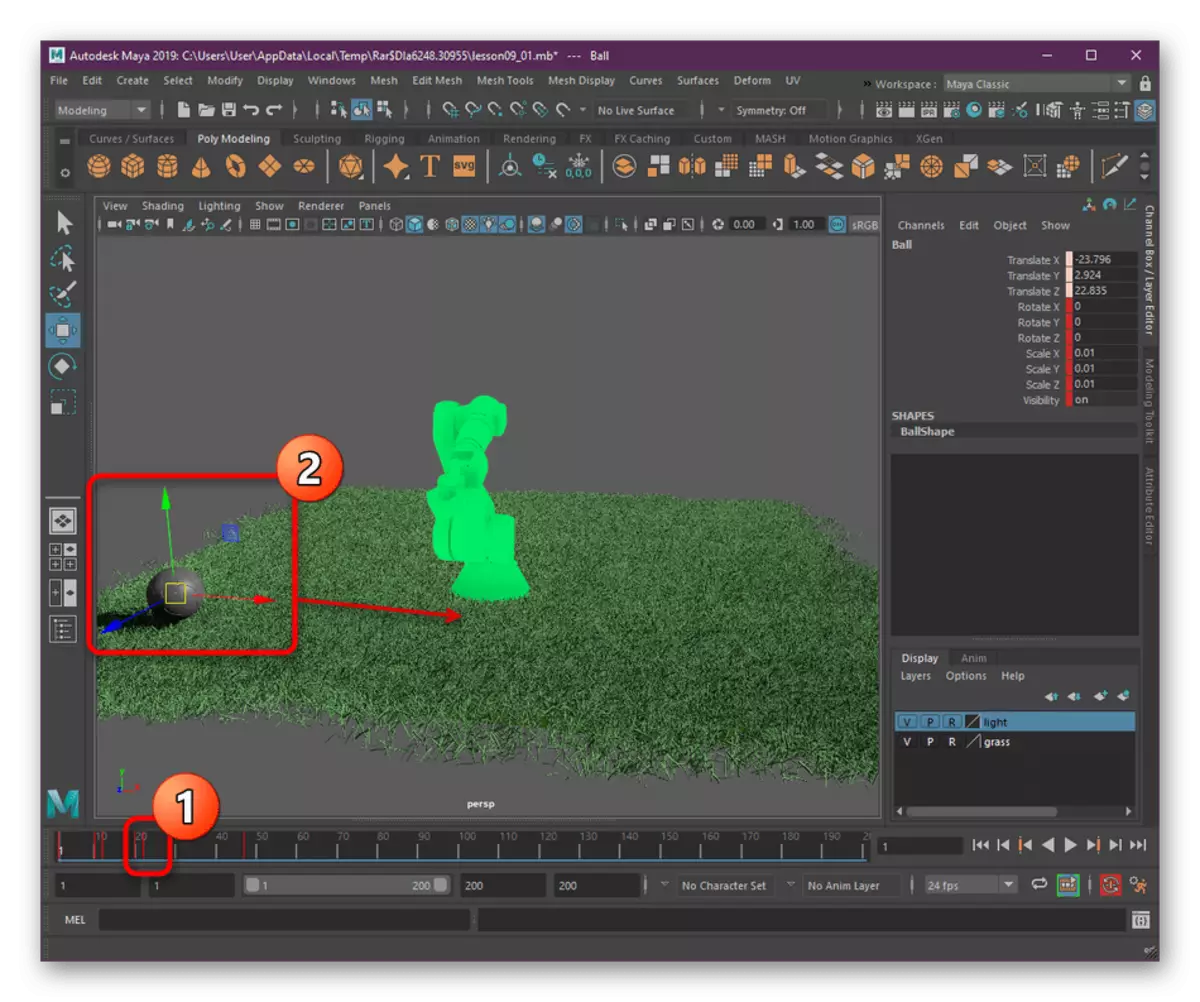
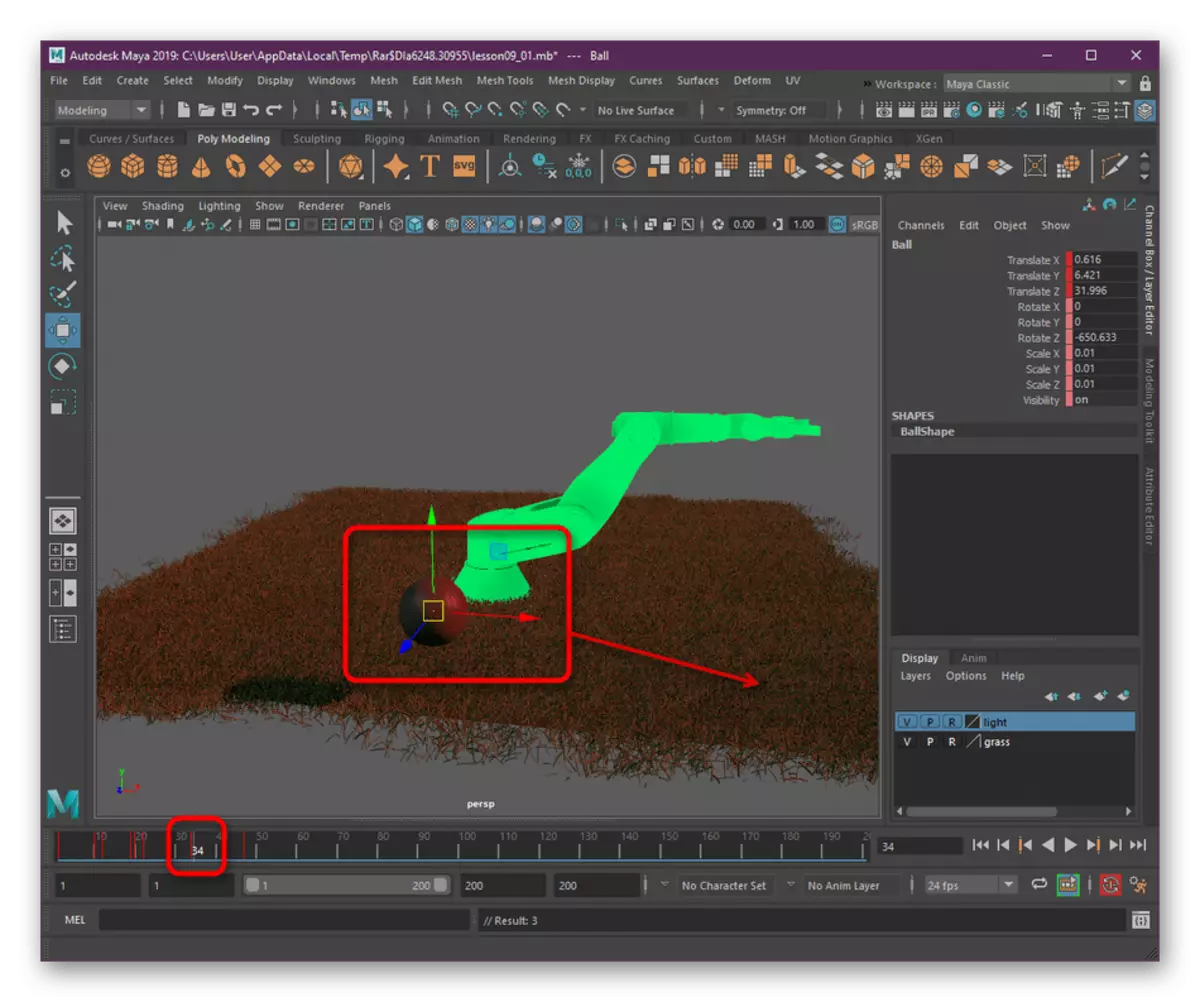
- Now we will not affect modeling and sculpting, since the subject of the article does not have this, and also study it better with the help of full-fledged professional courses, where they explain all the subtleties of such work. Therefore, let's immediately take an abstract scene and we will deal with simple animation of the movement of the ball. Put the runner to the initial frame, select the ball to the tool for moving and turn on the automatic keystroke function (after moving the position, the position will immediately be saved).
- Move the slider to a certain number of frames, and then drag the ball slightly by clicking on the necessary axis (x, y, z).
- Perform the same actions with all other elements until the entire scene is completed. In the case of the ball, you should not forget that it should rotate along its axis. This is done using the adjacent tool on the left pane.
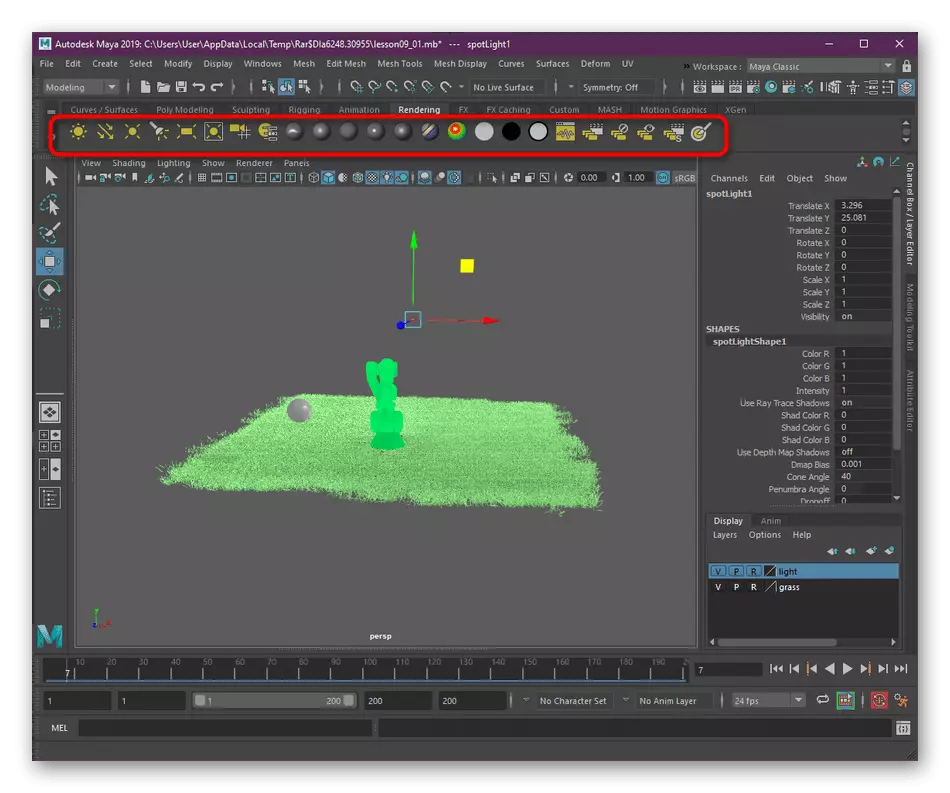
- Next, move to the "Rendering" tab and set the light by using a lamp or, for example, the sun. Consecration is configured in accordance with the scene itself. This is also stated in professional courses, since the fall of the shadows and the overall perception of the picture depends on the construction of light.
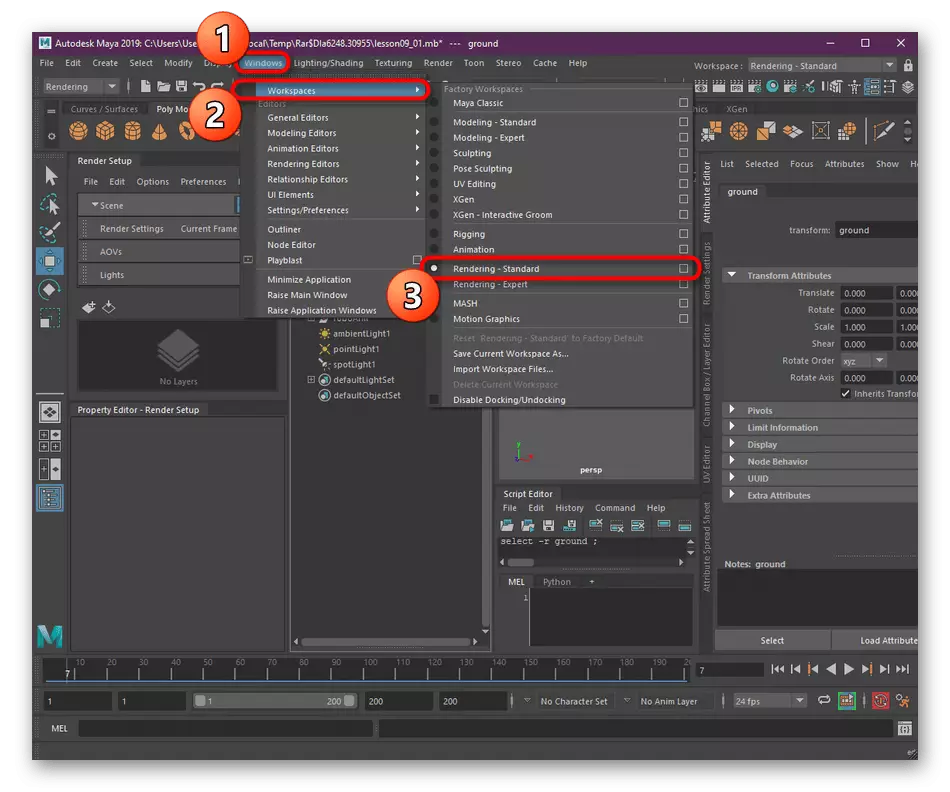
- Upon completion of the animation, expand "Windows", select the Workspaces section and go to the Render Window.
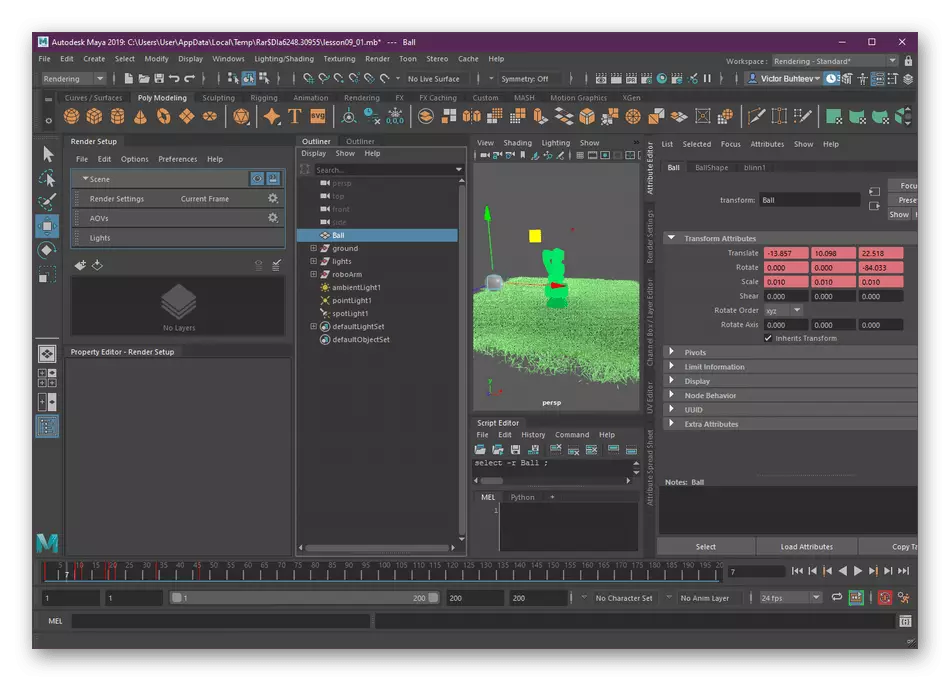
- In this work environment, the appearance of the scene is configured, textures, external environment are processed and final light settings are carried out. Each parameter here is selected individually for user requests and scene complexity.
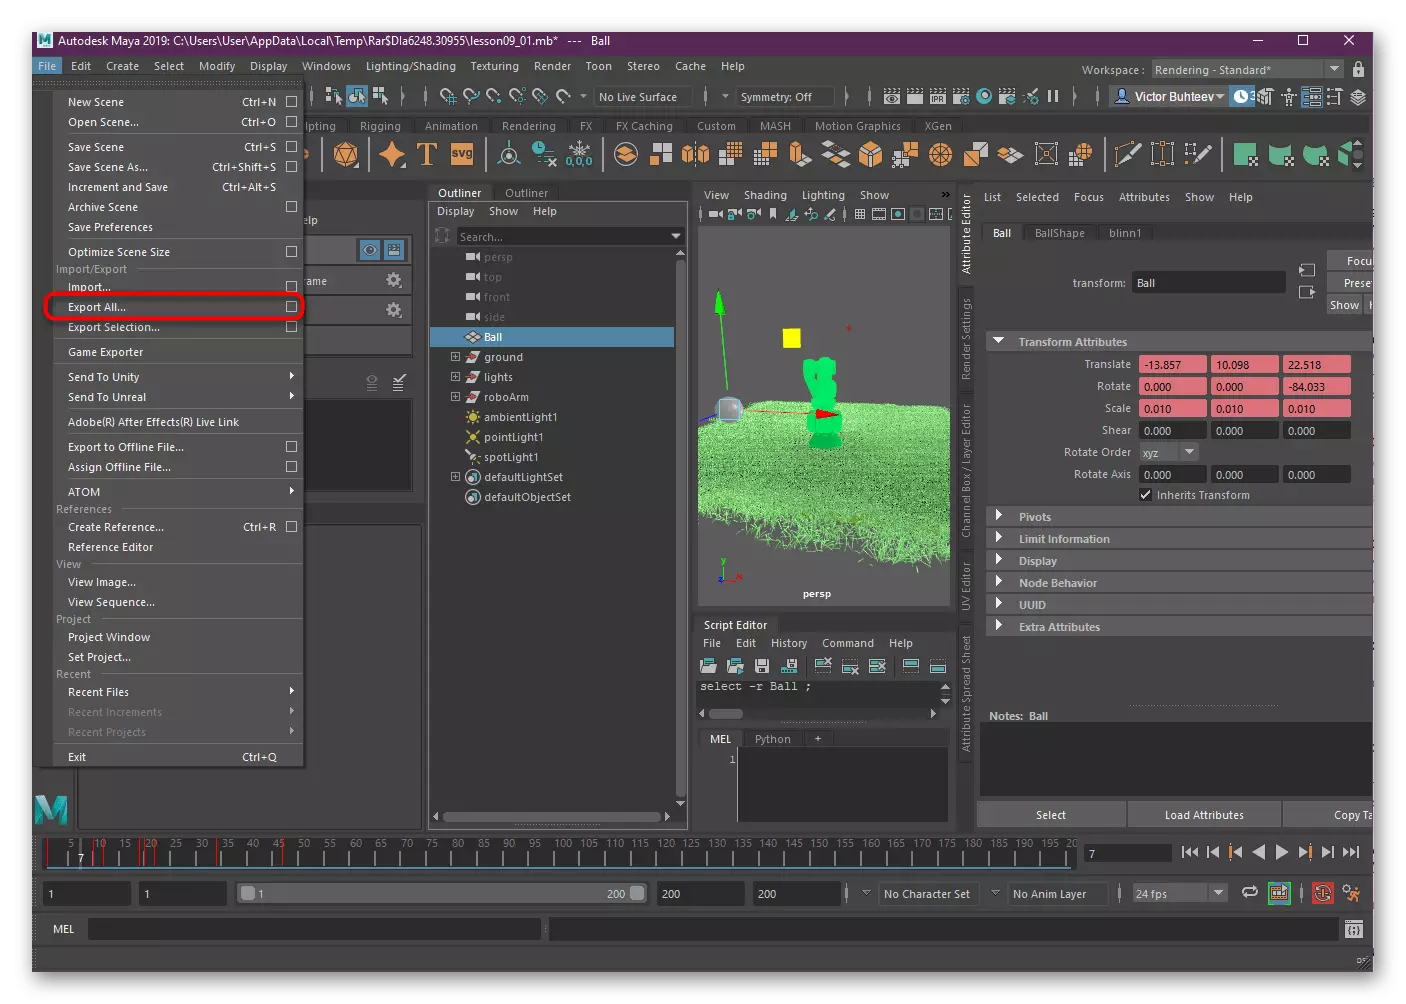
- How to finish the render, go to export mode through the "File" menu.
- Save the project in the right place and convenient format.


We will repeat that within the framework of today's material we only wanted to demonstrate the overall picture of the work of amateur and professional solutions for creating cartoons. Of course, many aspects were missed, since detailed familiarization with all the functions would take too much time, and not everyone needs it. In exchange, we suggest familiarizing yourself with the lessons from the software developers themselves, with the help of which you can pass the way to work with such complex tools. All the necessary information can be found in the materials on the following links.
Moho Animation Software Videos and Tutorials
Maya Tutorials.
Above you have been acquainted only with three available options that allow you to create cartoons of different difficulty levels. On the Internet, there are still many similar software that provides a different set of functions and tools. Another our author in a separate article created a list of the best representatives of such software. In addition, there are online services designed specifically for animation. With them, you can also read by clicking on the link below.
See also:
The best programs for creating cartoons
Create a cartoon online