

Saving video after processing in Adobe Premiere Pro is the final stage of the project. It depends on how much the video will turn out in the end and on which devices will be reproduced normally. The built-in functionality of said software allows you to maximize the rendering, so you will need to read each aspect in more detail to understand all the parameters and create perfect parameters for your work.
Keep video in Adobe Premiere Pro
As part of today's material, we will try to reveal the video rendering theme as much as possible, told about each present paragraph and the correctness of setting values. All information will be divided into steps and is considered on the example of the latest version of Adobe Premiere Pro, which came out in 2019. In previous builds, you can detect inaccuracies in the location of the buttons and the absence of some functions that are important enough. In view of this, we advise you to use a topical assembly.Step 1: Transition to export and installation of basic parameters
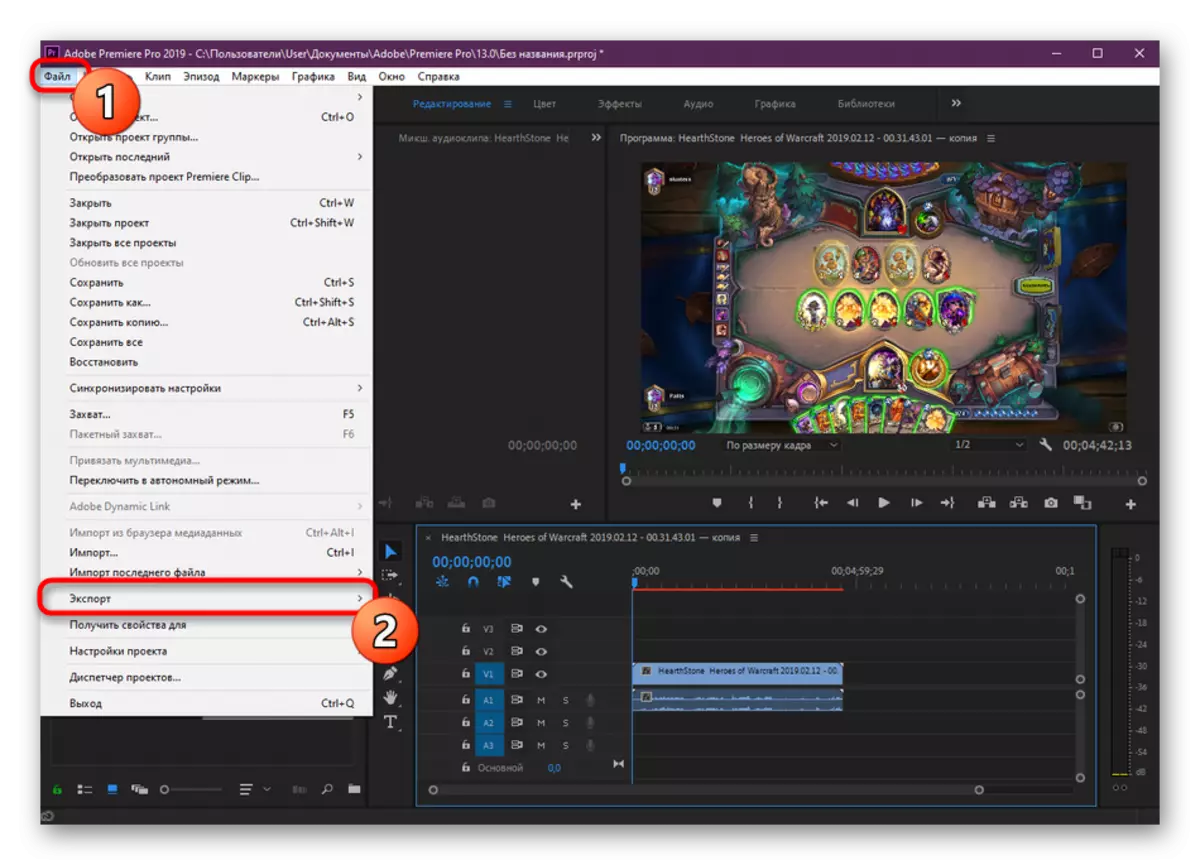
To begin with, you will need to move to a separate window that is responsible for setting up rendering. Before that, we strongly recommend ensuring that the project work has been successfully completed. If you have any questions about how to use any functions, we propose first to familiarize yourself with the other material on this topic, while moving on the reference below, and we proceed directly to the first storage step.
Read more: How to use Adobe Premiere Pro
- Through the File menu, go to Export item.
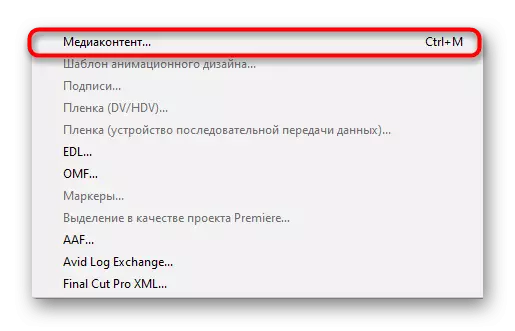
- In the menu discovert, select "MediaContate".
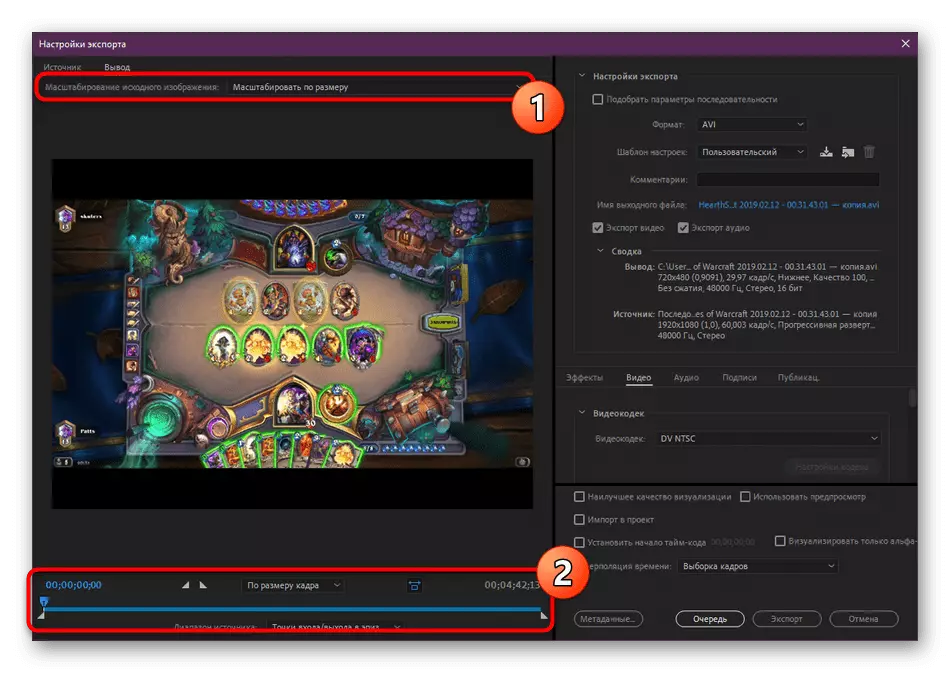
- First, it is better to set the appropriate scaling of the original image. Below you see a standard timeline. Through it, you can view the video entirely or include a certain fragment on repeat.
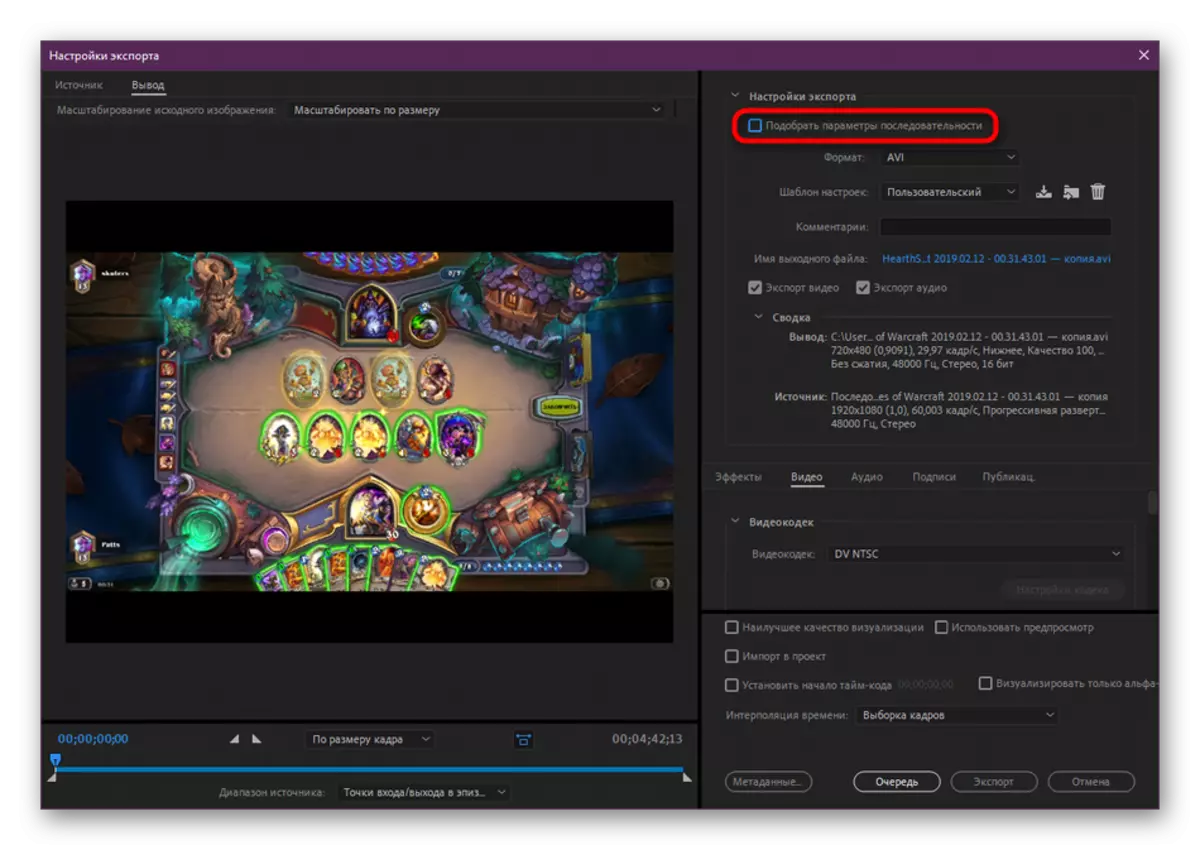
- In the case of the need for rendering with the same settings that have a source file or while maintaining sequences on a timeline, add a tick opposite "Possess the sequence parameters".
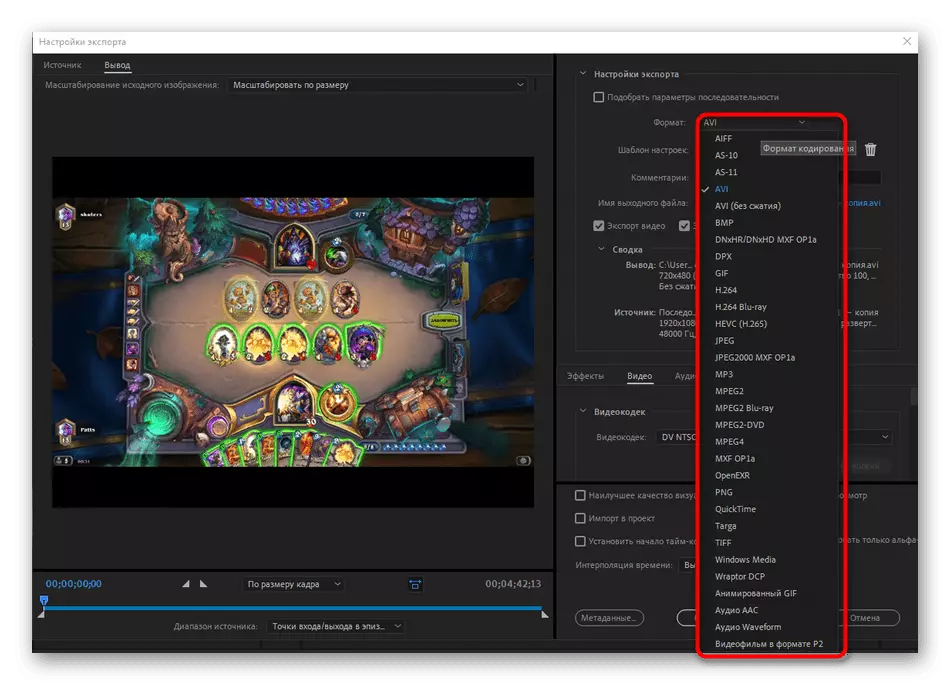
- Next, the final video format is selected from a huge list of containers. We will not stop at all options, because each user chooses suitable under its goals.
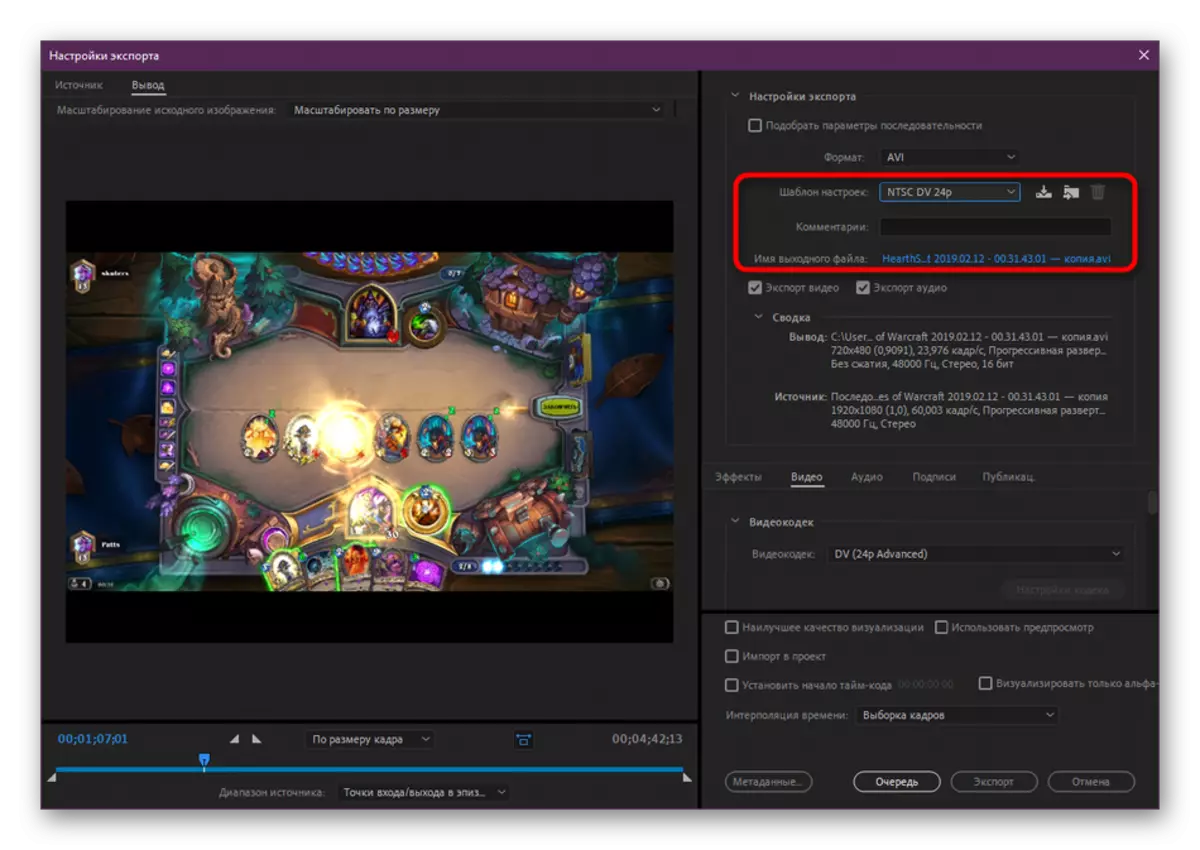
- There are several settings templates responsible for frame frequency and specific codecs. Use them if required.
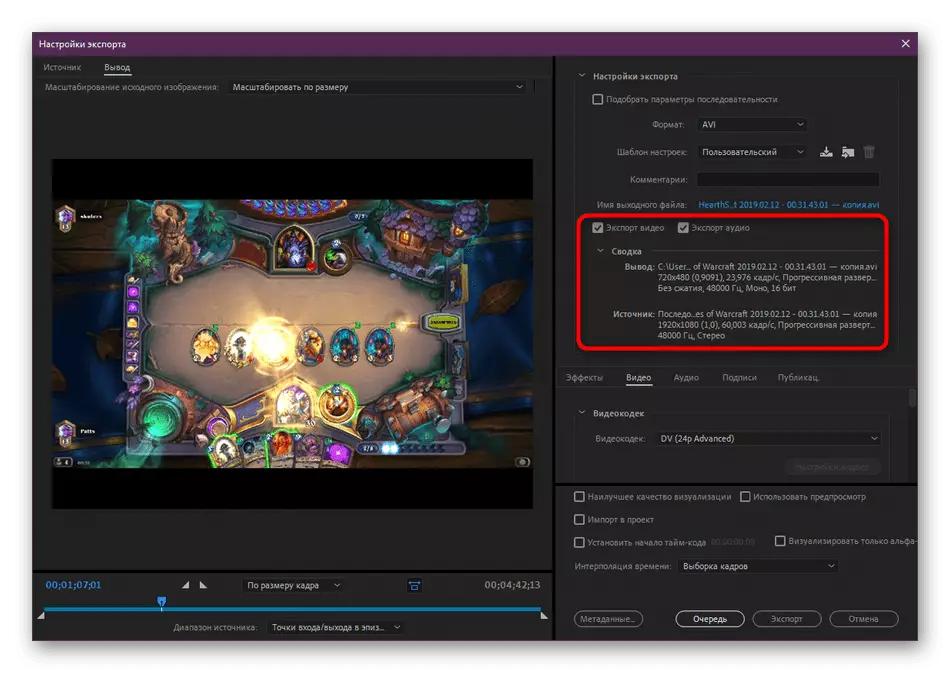
- At the end of the first stage, it remains only to mark the "Export video" and "Export audio" checkbox so that all this has been saved. Below you can monitor the main report on the project.
The basic rendering settings, of course, play a large role when saving a video, but it is still not all that will be needed to make the user. Additional parameters also play a very important role, they will be discussed.
Step 2: Effect Setup
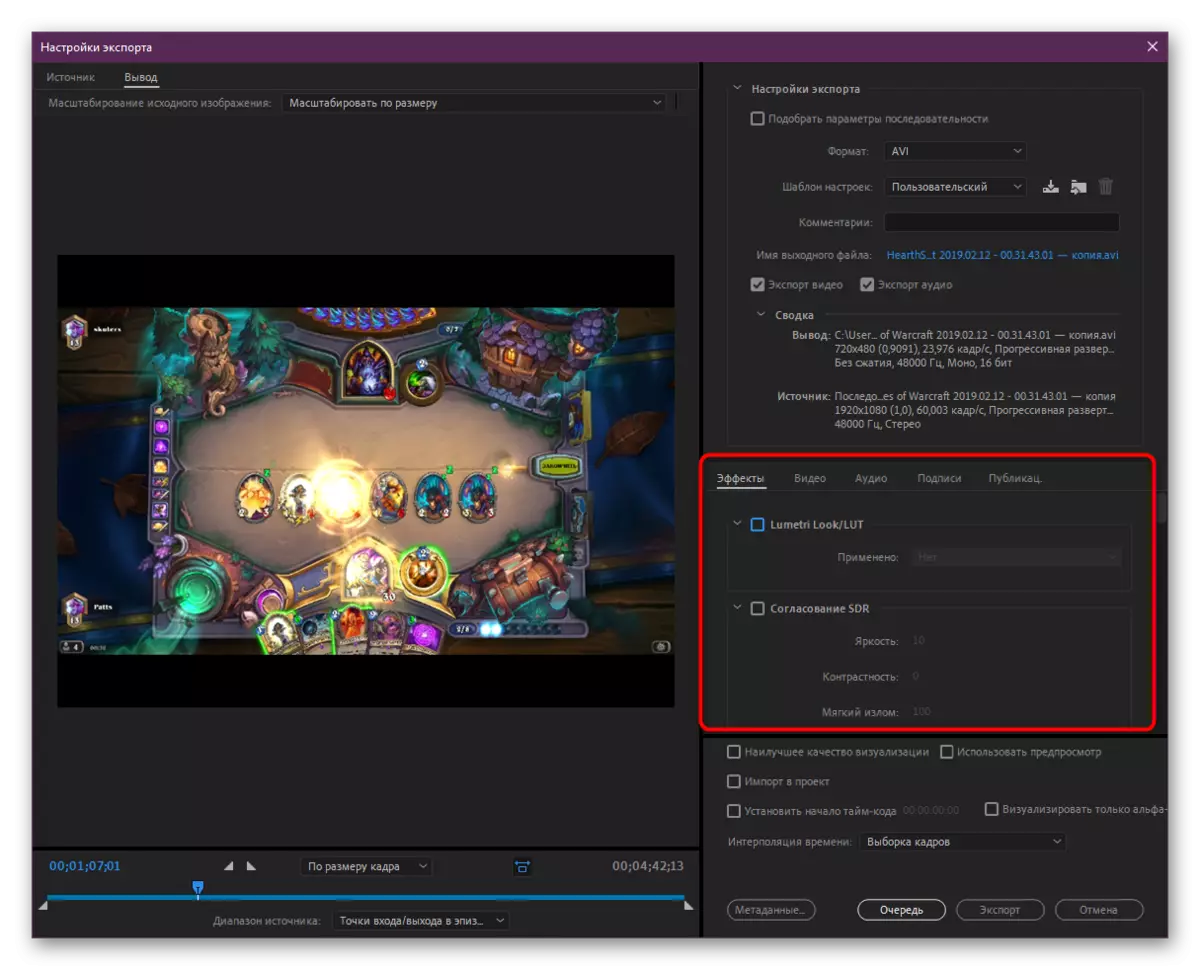
Sometimes during rendering there is no need to impose a picture, timer or other effects on your video. In this case, you will need to refer to the "Effects" tab, where everything is flexibly configured.
- At first it is proposed to include additional color correction effects designed specifically for this provision. By activating them, you can immediately see the result in the preview window.
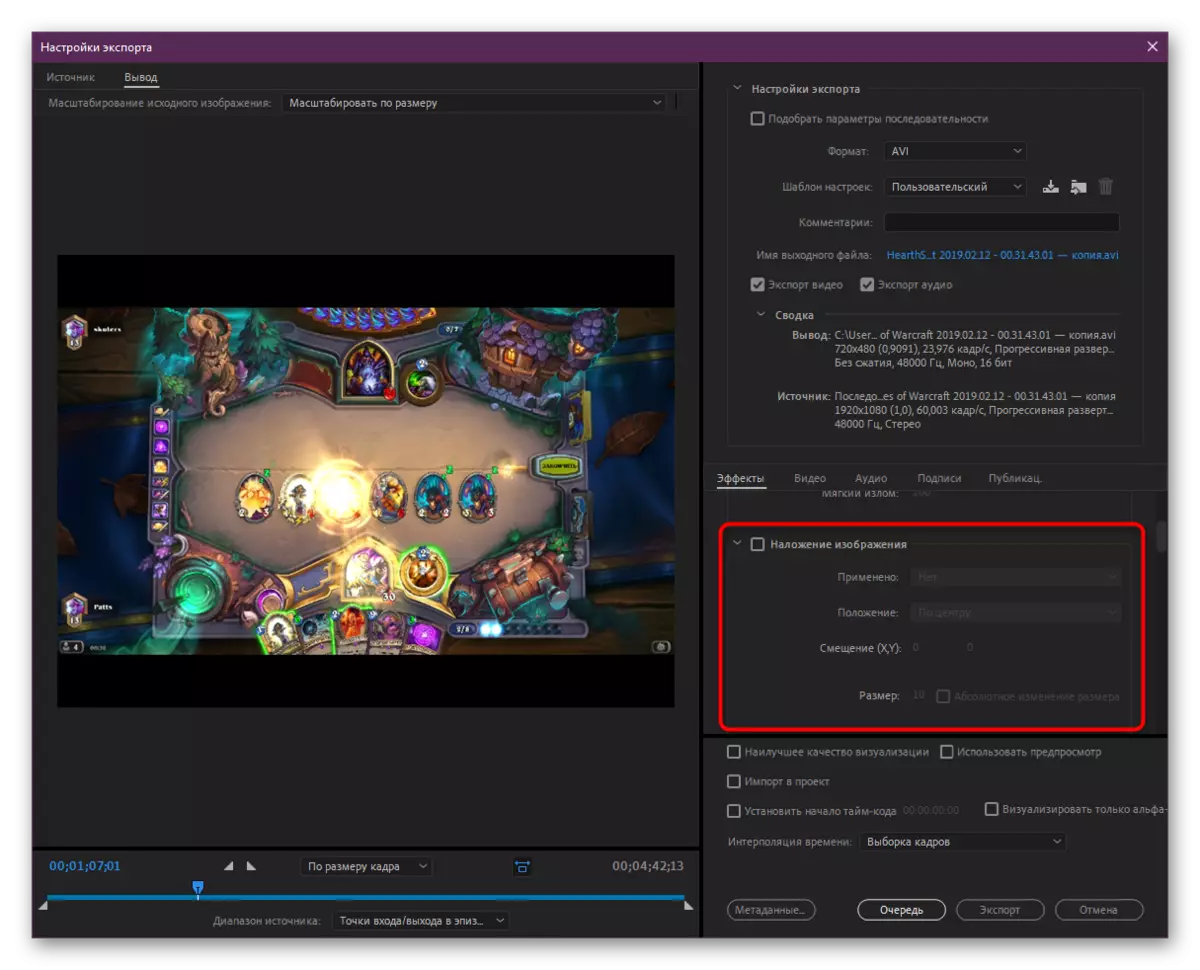
- Next comes the section "Writing an image". This allows you to add any picture on top of the roller and arrange it at a certain position. This will help added mixing and size tools.
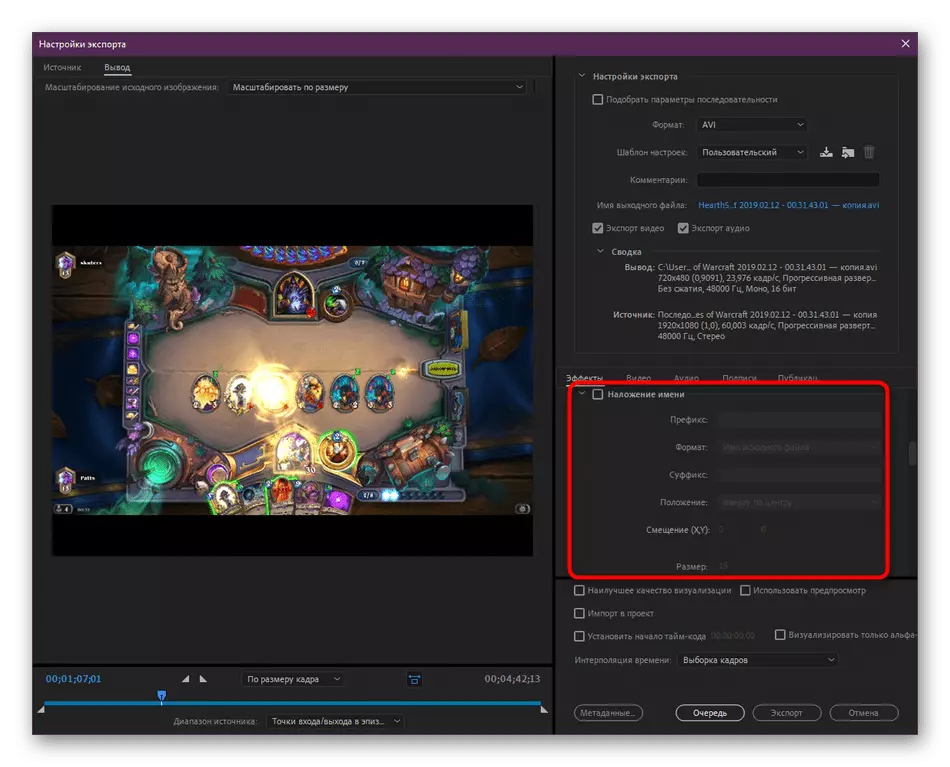
- Approximately the same applies to the name of the name. Here are built in several fields, allow you to write absolutely any text, and then put it in the frame. This inscription will be displayed throughout the duration of the roller.
- Time-code overlay will add a string that will show the total video duration from the moment of start. An important parameter here is the setting of opacity and a source of time that is configured individually.
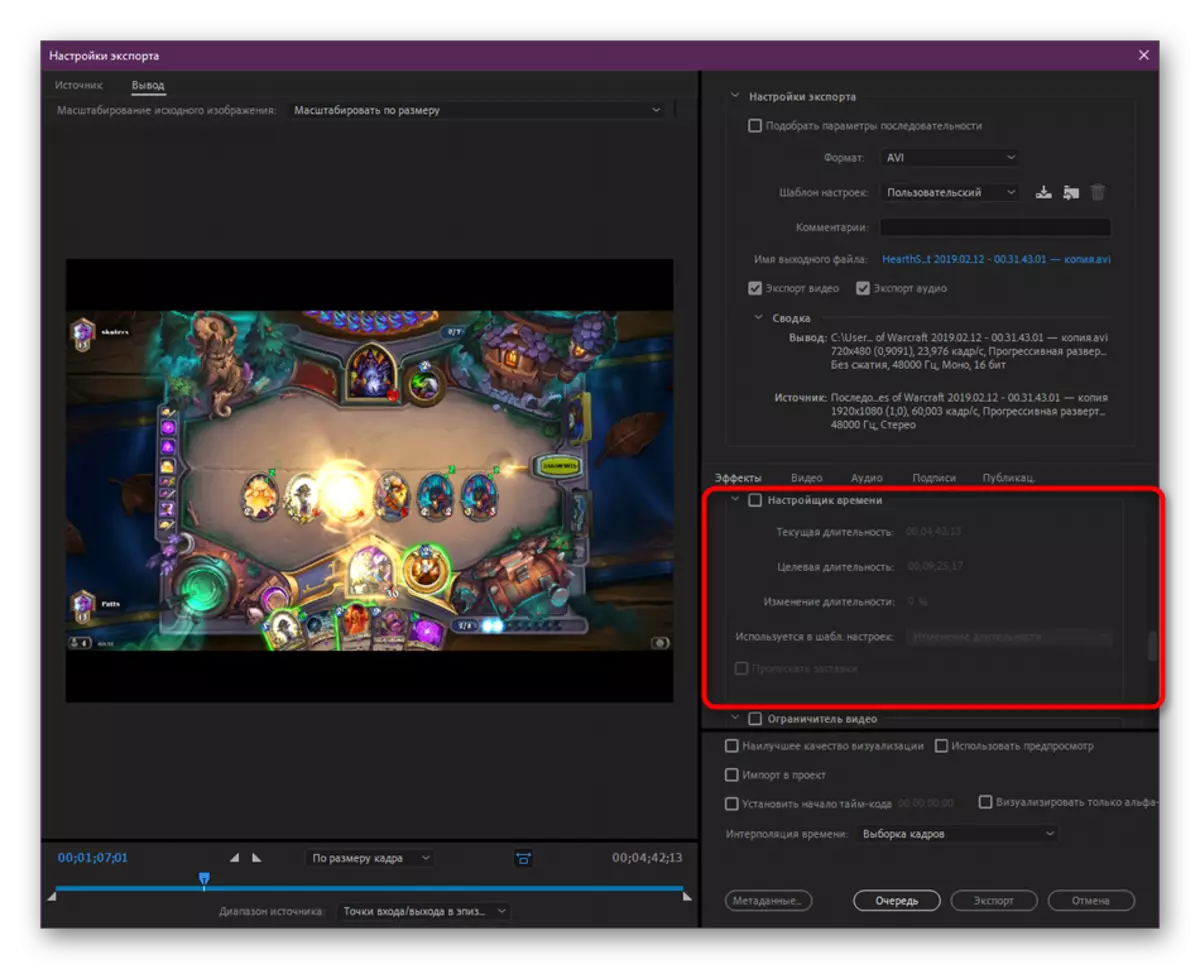
- Time setting will optimize the duration of the roller if you want to speed it up, slow down or remove screensavers.
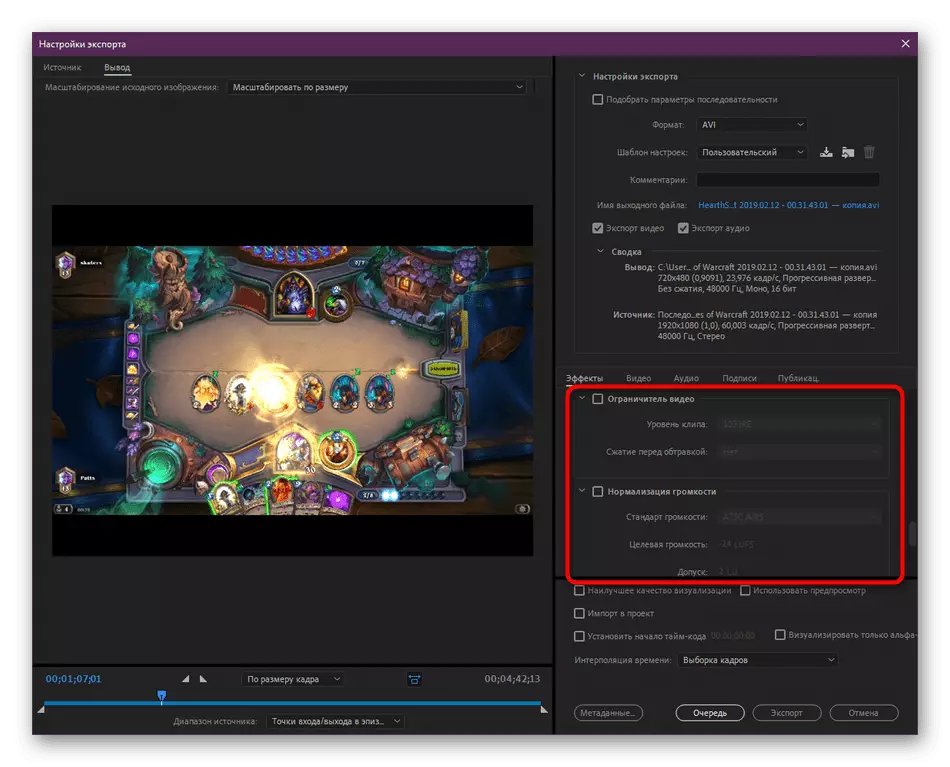
- The latter in the list of effects protrude video limiters and the normalization of the volume. The first parameter allows you to reduce the level and set compression, the second optimizes audio, changing the volume and playback standards.

Despite the fact that in the rendering window is available for use with many of the most diverse effects, most of them are still edited directly in the editor, so do not forget to do it before saving.
Step 3: Video Setup
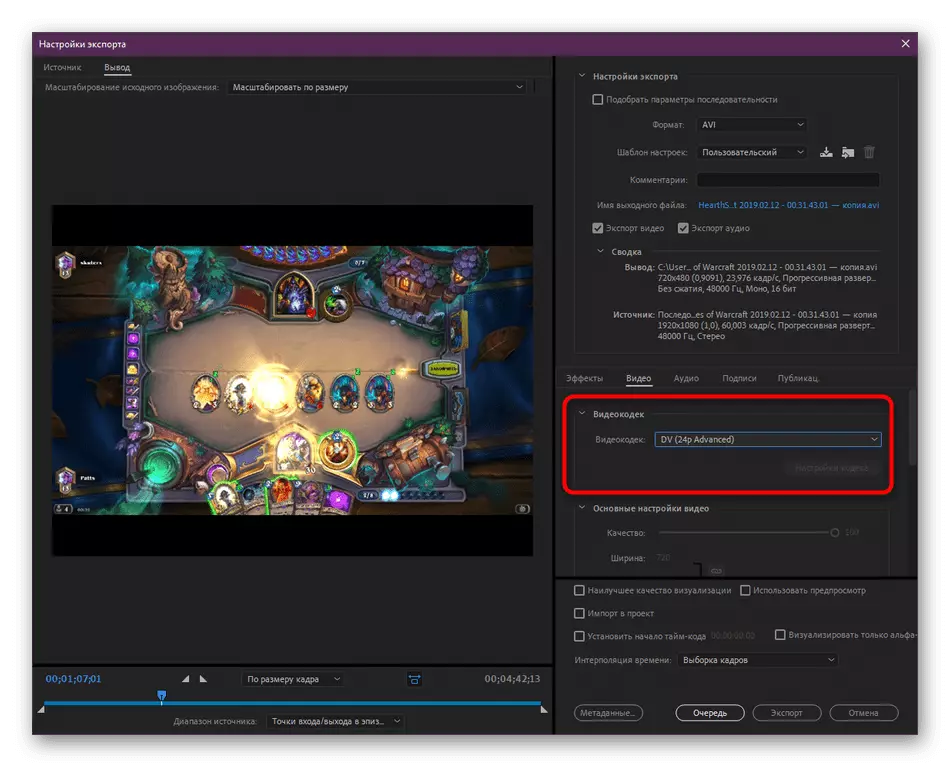
Now let's move on to the tab where the project image itself is configured. The parameters present here depend on what kind of conservation format and the template was selected in the first stage during the overall configuration. We will consider an example when using the AVI media processer.
- Move into the "Video" tab. Here, first of all, the video codec is selected. If you first encounter a similar choice, it is better to leave the default value.
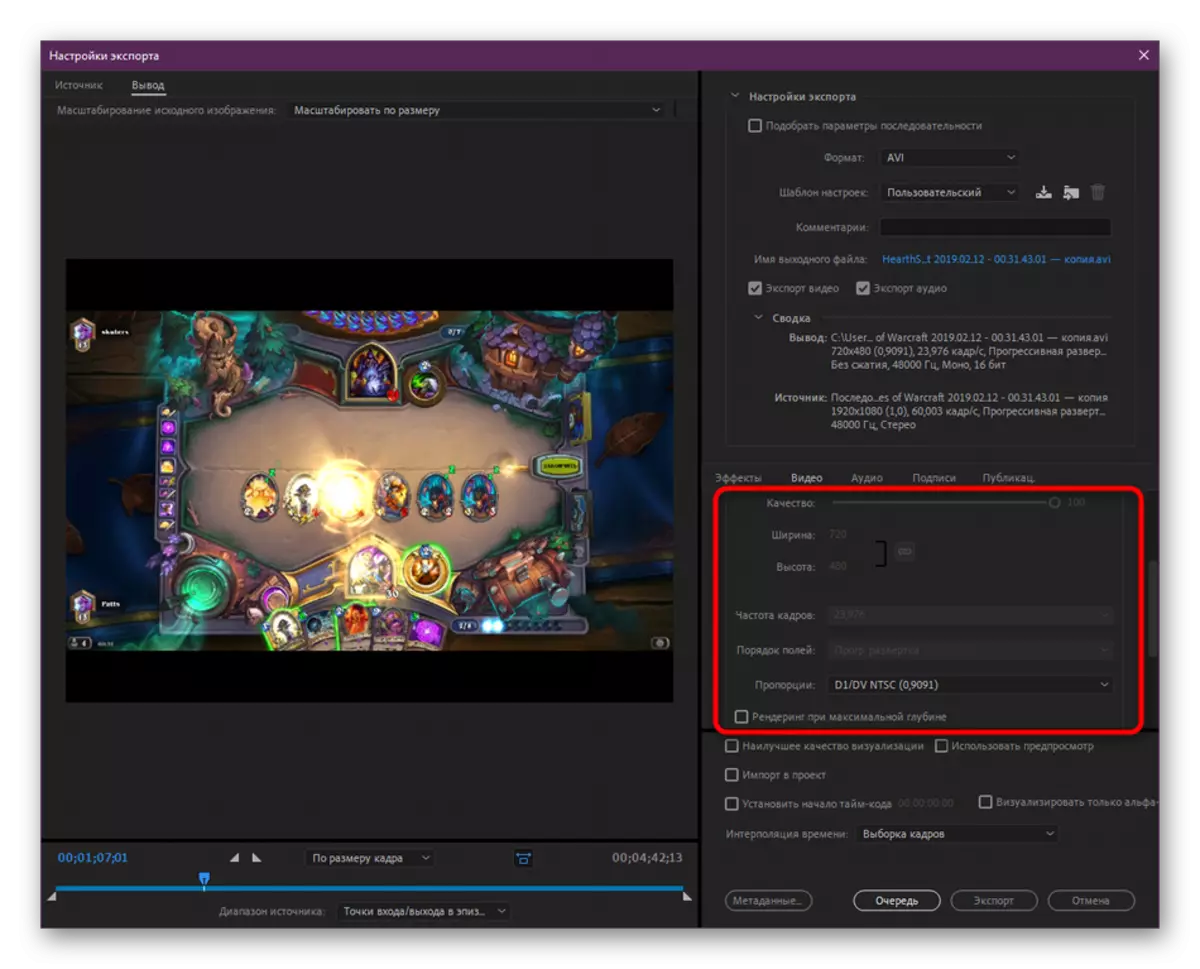
- Next are the basic settings, which depends on the picture quality spent on the render time and size of the destination file. Move the slider to reduce or increase the quality. Select the frame rate and specify the proportion. Activation of the Rendering function at maximum depth will help to make the final version of better, but it will take more time.
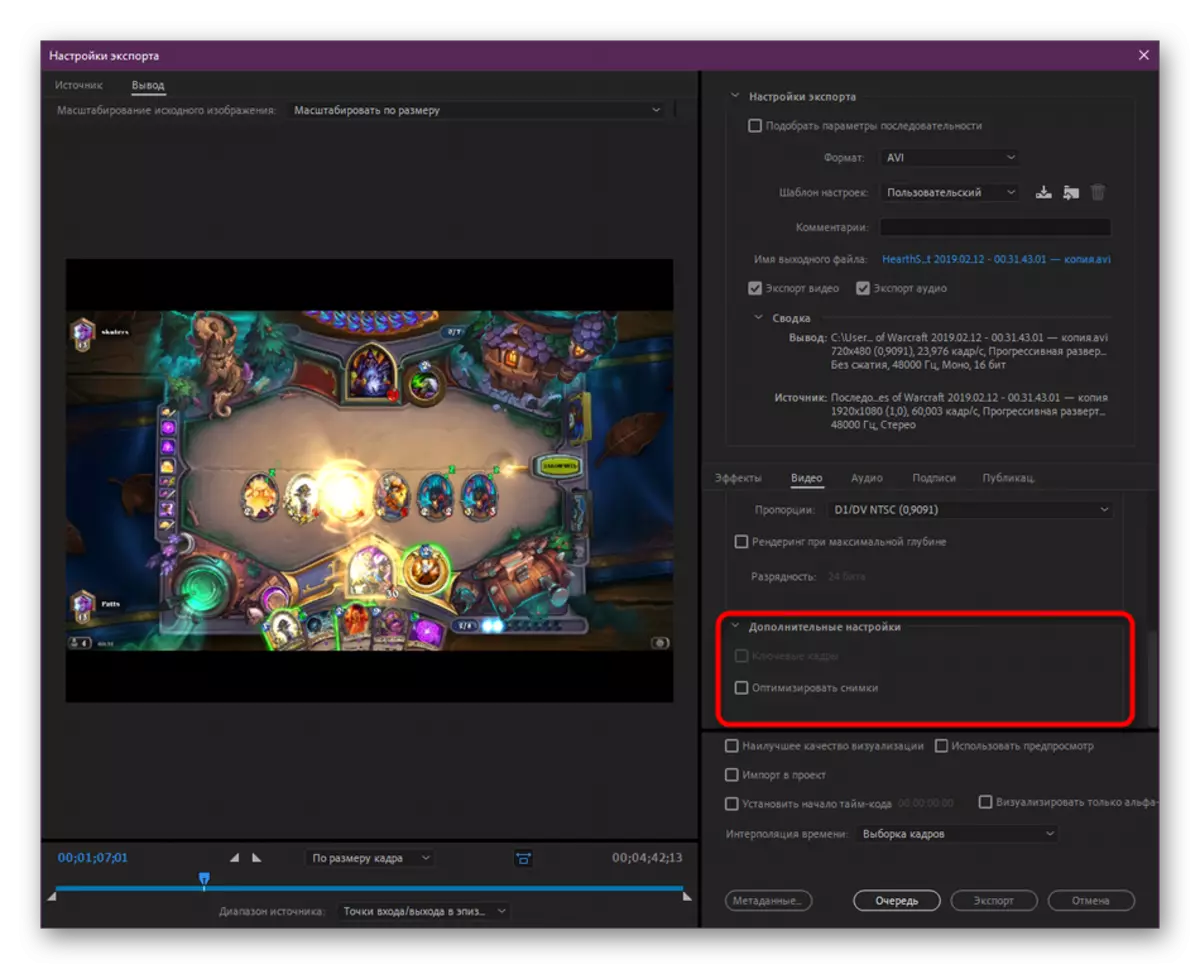
- In the "Advanced Settings" section you can activate key frames and optimize the added pictures.
This step is the most important in terms of the quality of the final video and its size, of course, after selecting the media processer (roller format). Therefore, pay a sufficient amount of attention, assessing the power of your computer, the amount of free space and material requirements.
Step 4: Sound Setup
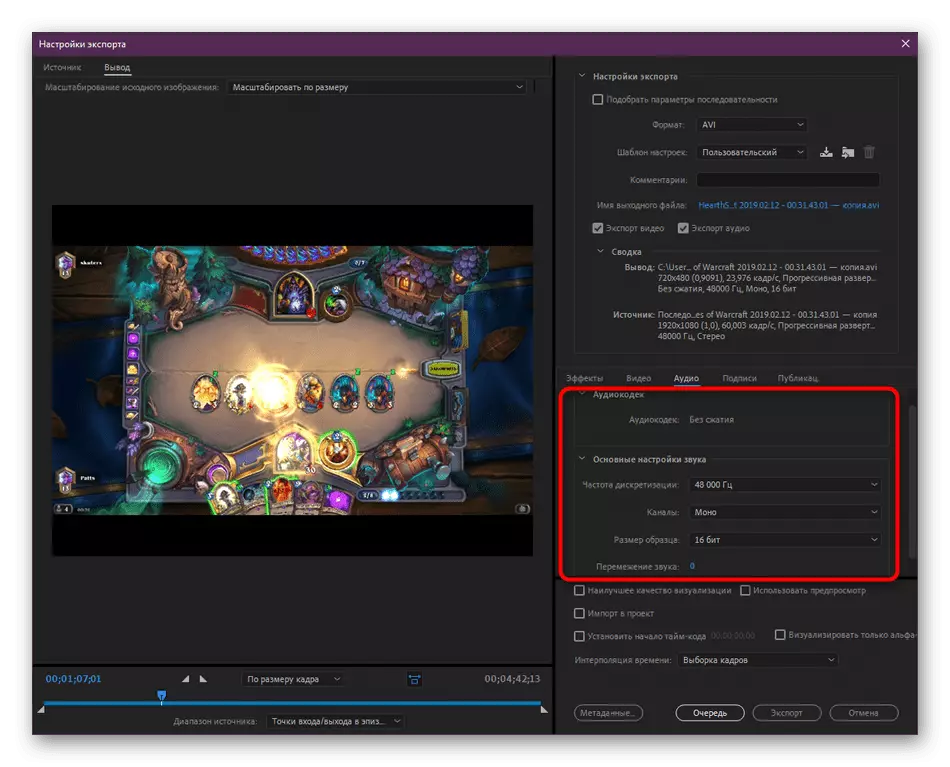
Most of the projects created in Adobe Premiere Pro have sound support, which causes the need to set up and this part of the roller. It is carried out approximately by the same principle as the video configuration, however, here there are features that we want to tell further. The first section is devoted to the choice of audio codec. From the settings there is only a different degree of compression. Next is the main configuration - the sampling frequency, channels (mono or stereo) and sample size. All values here are issued for the user's requirements. Unfortunately, no more settings are provided, so they will need to be set before the start of preservation.
Step 5: Finishing actions and rendering
It remains to implement only a few steps, after which it will be possible to start directly the process of material processing. You need to get acquainted with the following points:
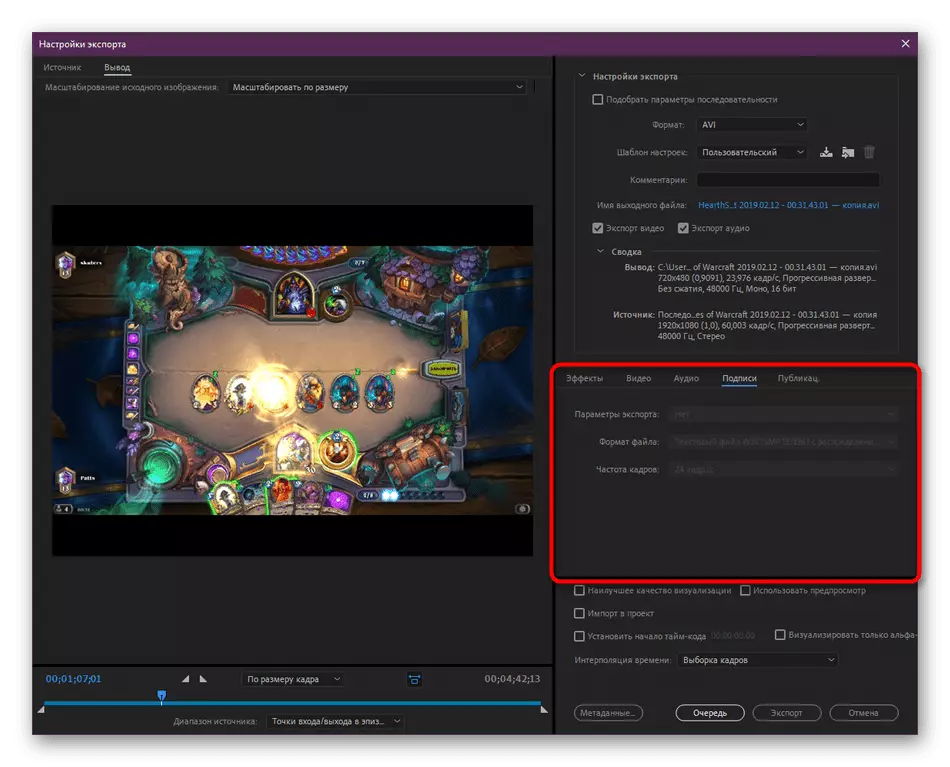
- In the "Signature" tab, you can set export parameters, attach information about frame frequency and file format. In the last tab of the "Publications", exports to social networks and video stations, where the basic information provided for by these web services is indicated.
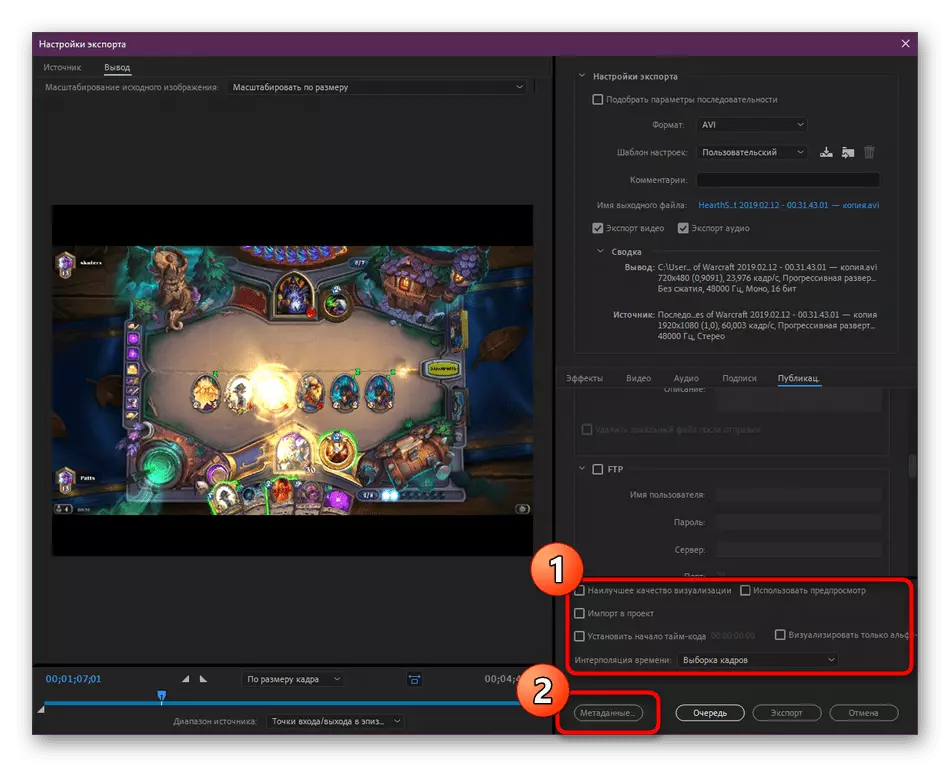
- Pay attention to the parameters under the tabs. Here you can include the highest quality of visualization, activate the preview during rendering, import this project to another, establish its beginning of the time code and activate the interpretation of the time. Next, we advise you to move to Metadata.
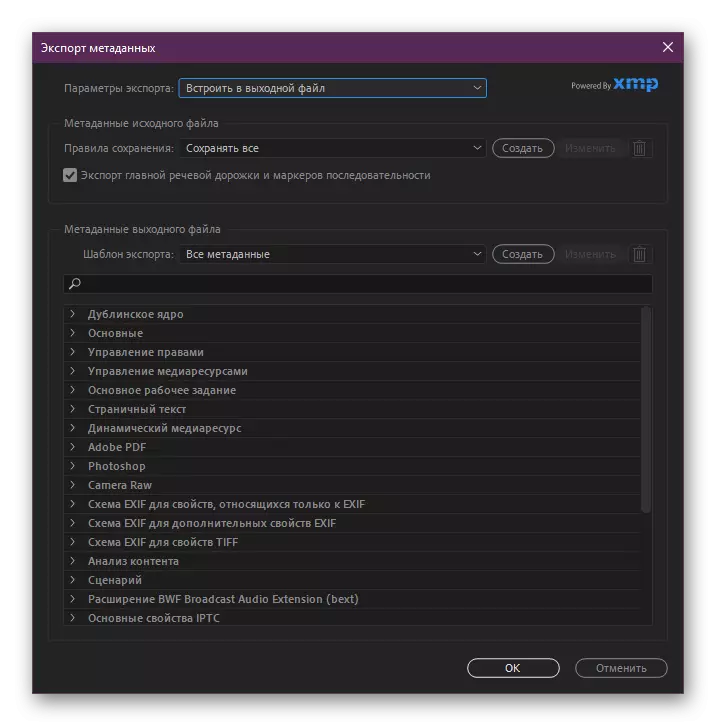
- The new window allows you to edit the information that will be saved in the final file. It usually provides useful information to various players and other system tools. However, sometimes it is required that certain information cannot find ordinary users, then they are removed from metadata.
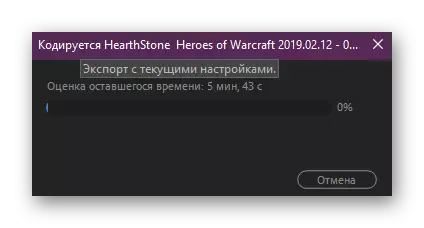
- Upon completion of the entire configuration, make sure that you do not forget to configure something, and then click on the Export button.
- Rendering will take some time that depends on the power of the computer, the quality and length of the roller. Progress will be displayed in a separate window.

By default, the Adobe Premiere Pro sets a rather high priority of system resources consumption, so during processing other applications can slow down a bit or not to work at all. Because of this, it is recommended to first complete work with all other programs, and then launch rendering.
Today we tried to familiarize you with all the main moments of conservation of the video in Adobe Premiere Pro. ATTENTION was focused on exporting a file, since saving in a standard program format is carried out by a banal pinch of the hot key Ctrl + S.