

Microsoft Word provides quite wide opportunities for formatting and designing text in documents. One of the options of the latter can be a frame, and it is about its creation we will tell today.
Creating a frame in Word
There is only one documented Microsoft developers. A method for adding a frame to Word document, however, if you give fantasy will, you can find a couple of alternative solutions that provide slightly more wide opportunities for design and configuration. Consider all of them in more detail.Method 1: Borders of pages
Let's start with the most simple and obvious method of creating a frame in Word by contacting this to the section setting the page boundaries.
- Go to the "Design tab" (In the latest Word versions, this tab is called "Designer") located on the control panel, and click on the "Page Borders" button located in the page of the page page.
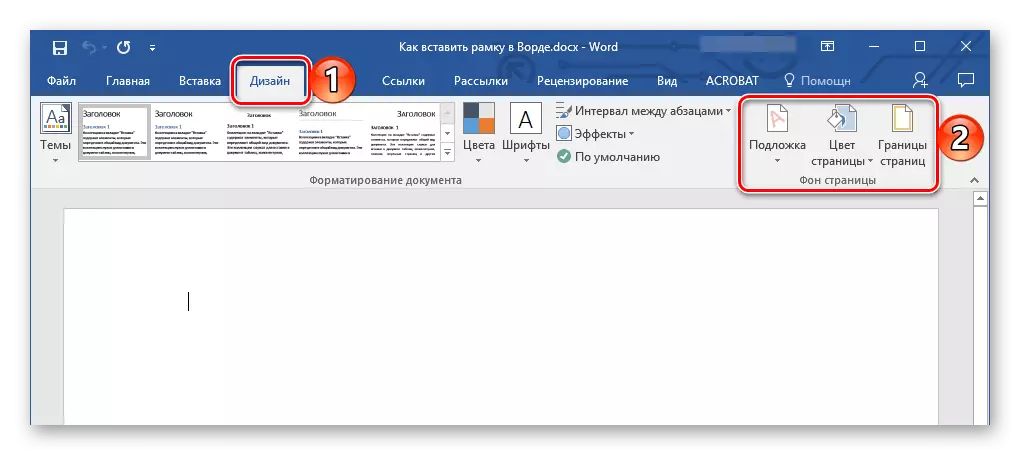
Note: To insert the frame to the Word 2007, go to the tab "Page layout" . In Microsoft Word 2003 item "Borders and Pouring" required to add a frame located in the tab "Format".
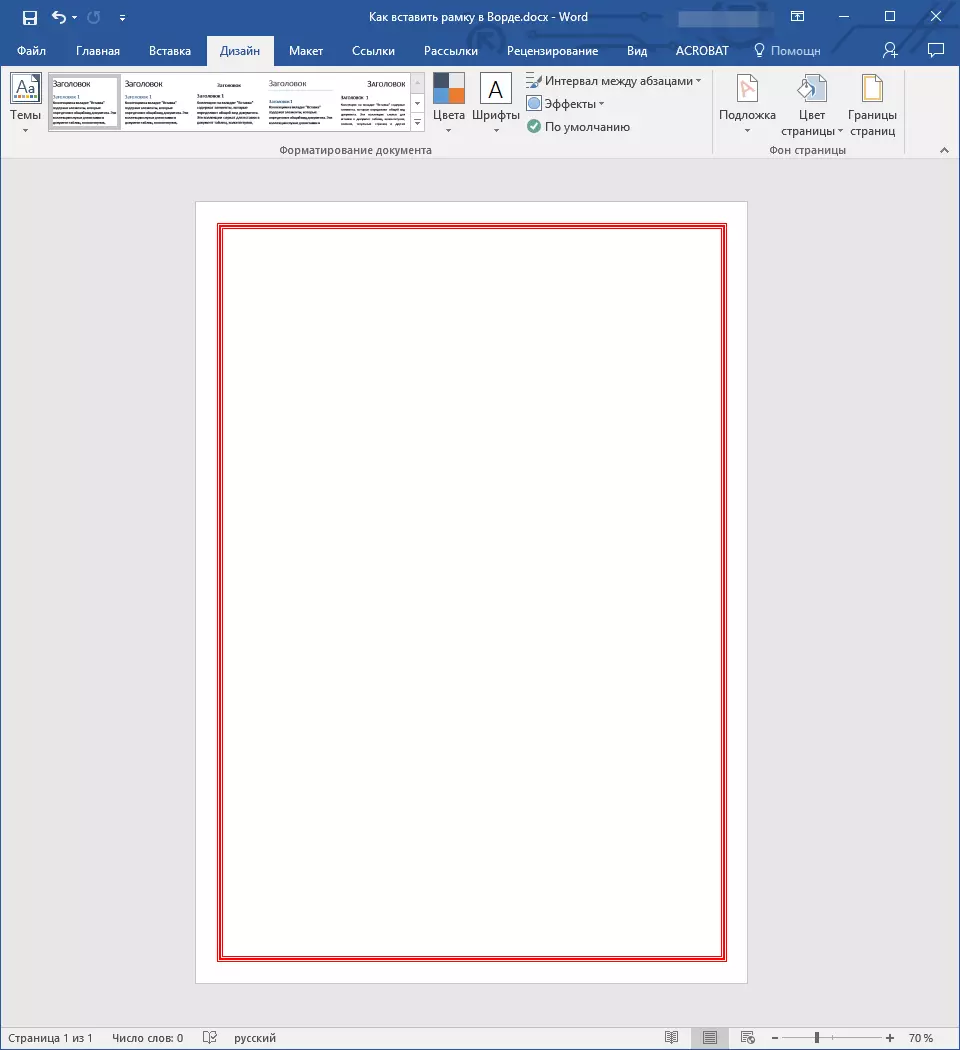
- A dialog box appears in front of you, where in the default tab of the "Page" tab, you need to select the "Frame" section.
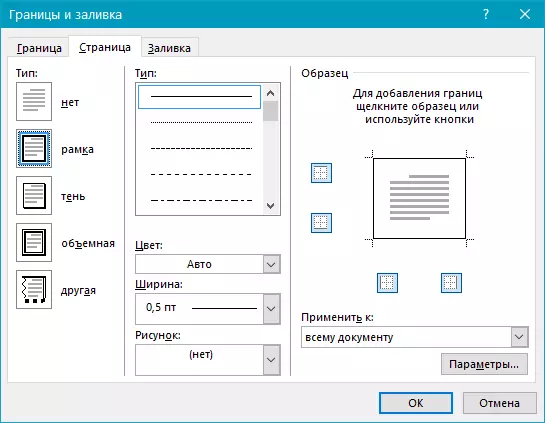
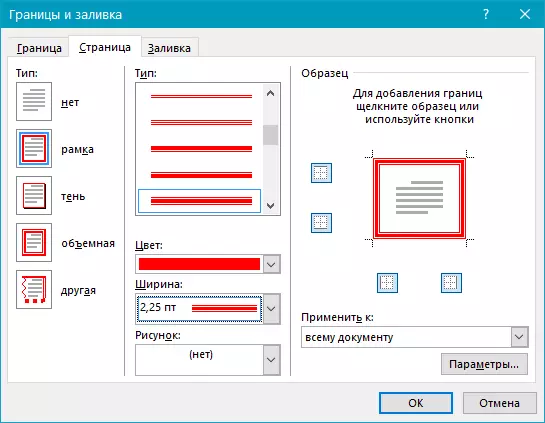
- On the right side of the window, you can select the type, width, frame color, as well as a picture (this parameter eliminates other add-in for frame, such as type and color).
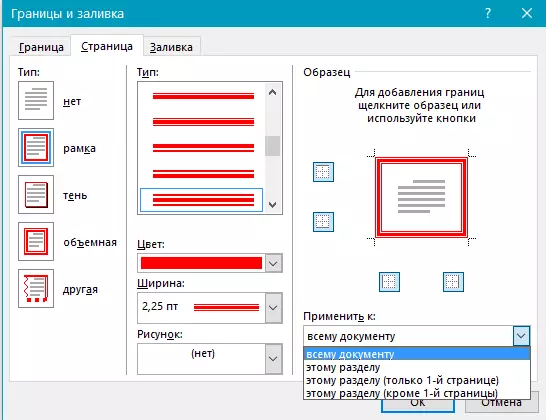
- In the "Apply to" section, you can specify whether the frame is needed in the entire document or only on a specific page.
- If necessary, you can also set the size of the fields on the sheet - for this you need to open the "Parameters" menu.
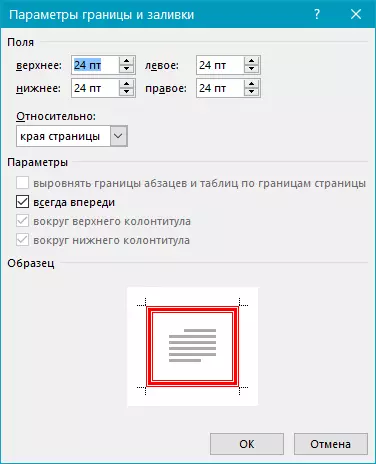
- Click "OK" to confirm, after which the frame will immediately appear on the sheet.
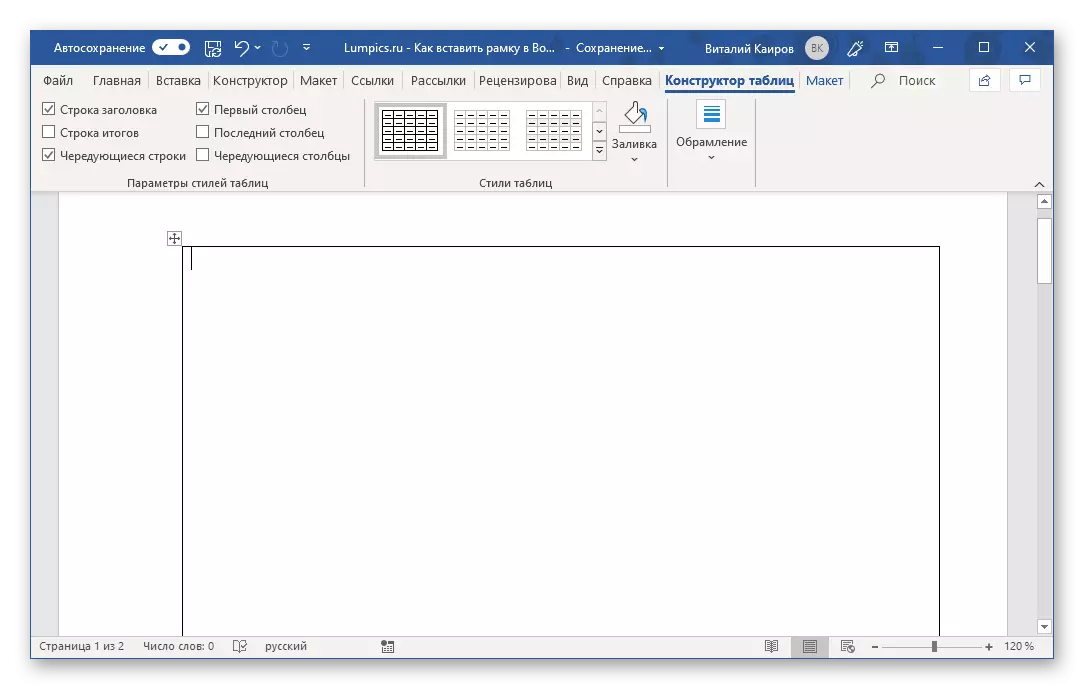
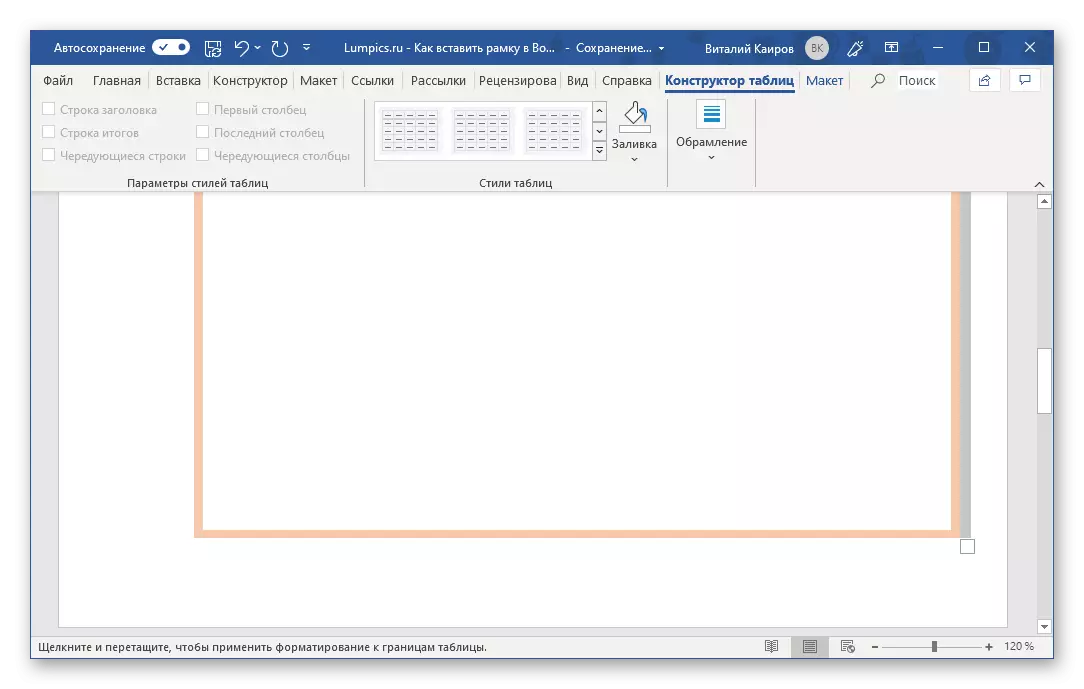
- Go to the "Insert" tab, expand the "Table" button drop-down menu and designate the size in one cell. Press the left mouse button (LKM) to add to the document page.
- Using the mouse, stretch the cell on the borders of the page. Make sure not to go beyond the fields.
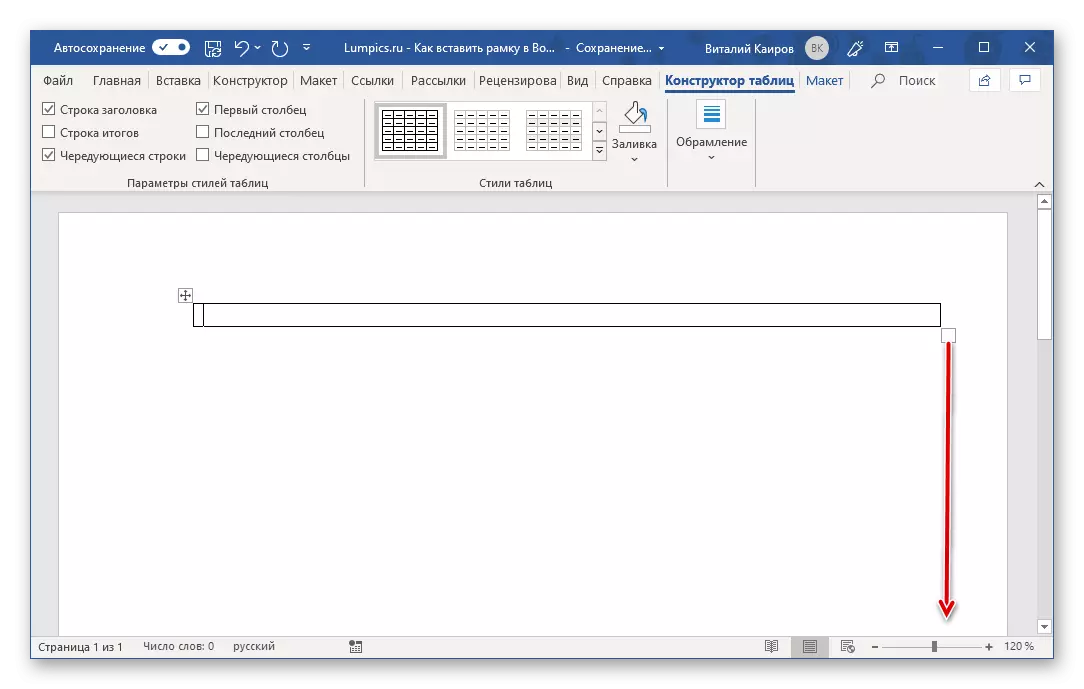
Note: With the "intersection" of the borders, they will be highlighted in green and displayed in the form of a thin strip.
- The base for the frame is, but you can hardly want to be content with a simple black rectangle.
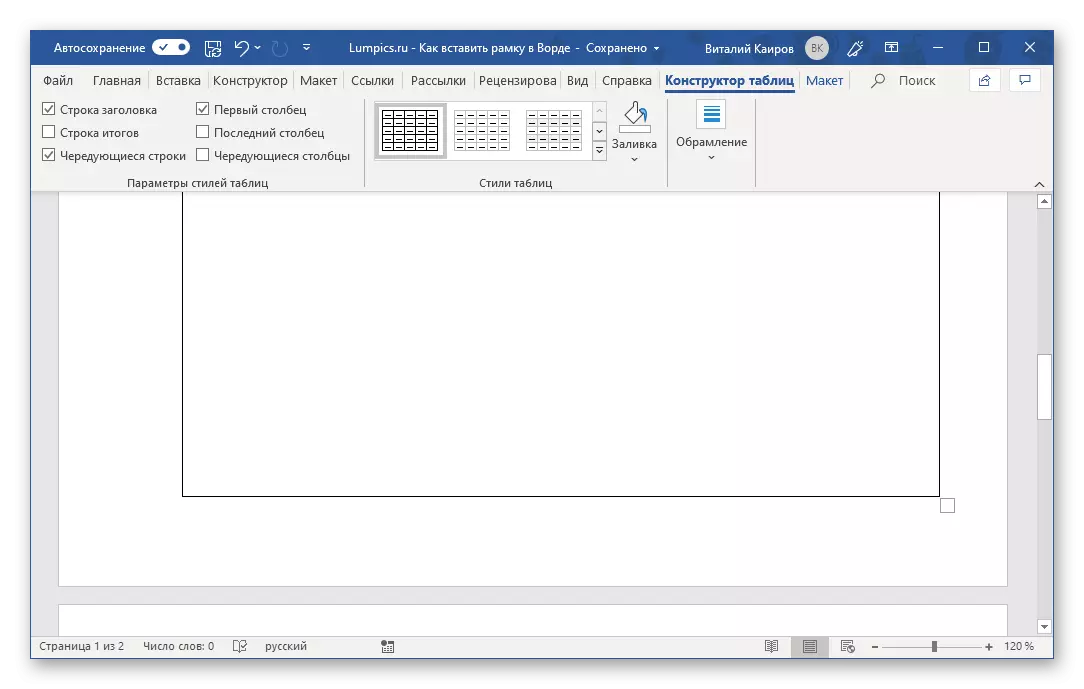
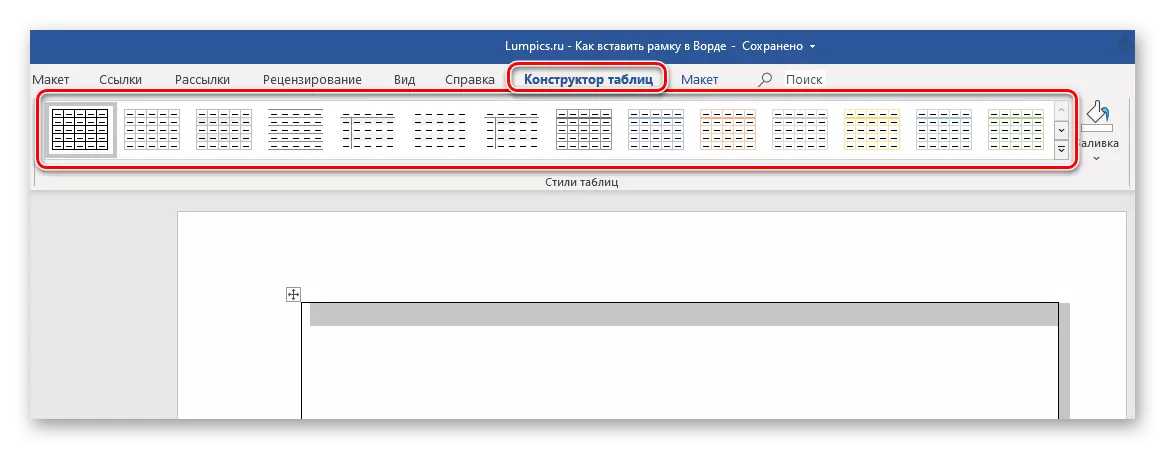
You can give the desired type of object in the tab "Table Designer" tab, which appears on the Word toolbar when the added element is selected.
- Styles of tables. In this group of tools, you can choose the appropriate design style and color gamut. To do this, simply apply one of the set templates available to the table.
- Framing. Here you can choose the style of the design of the borders, their type and thickness, color,
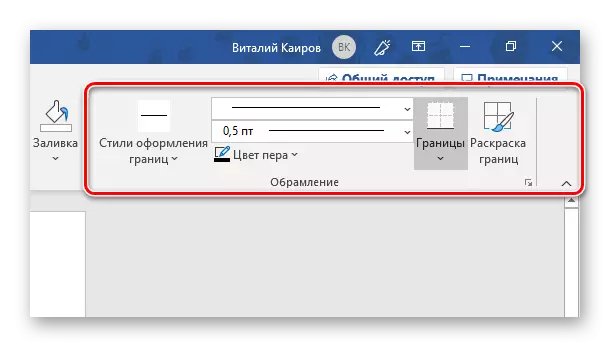
And also to color manually (to spend a virtual pen on the borders).
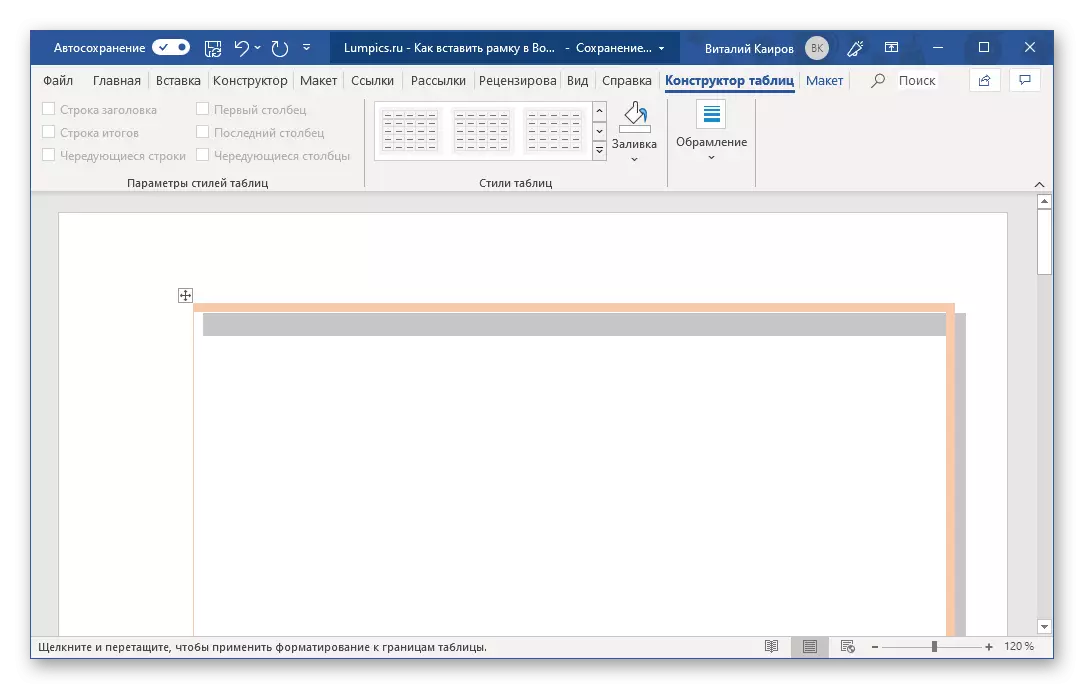
Thus, you can create both relatively simple and more original frame.
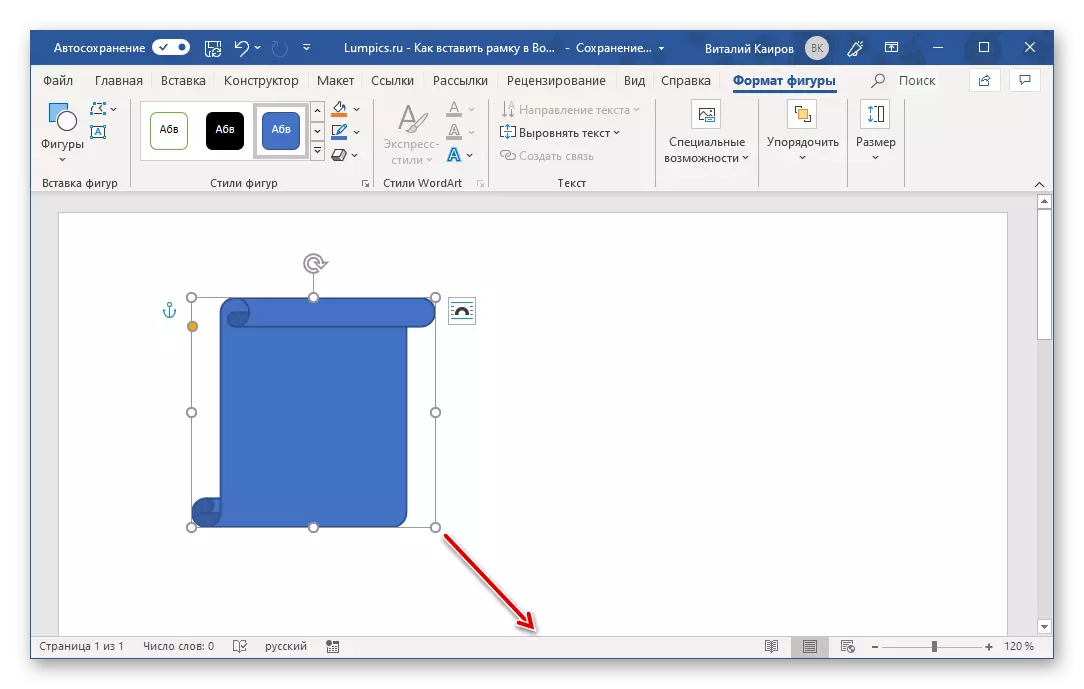
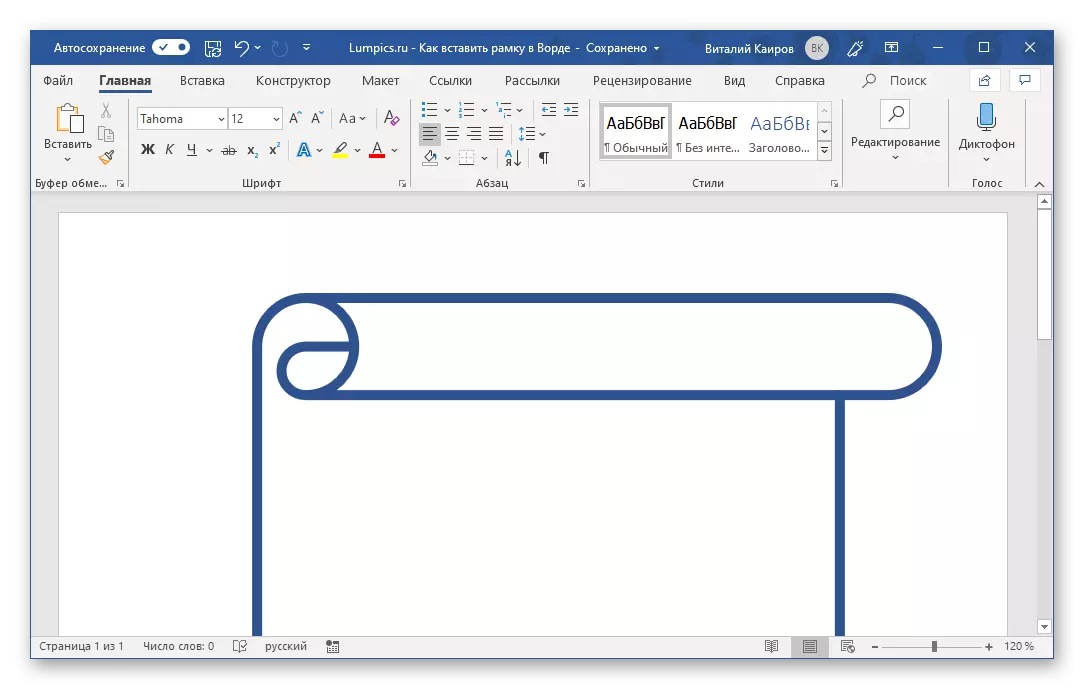
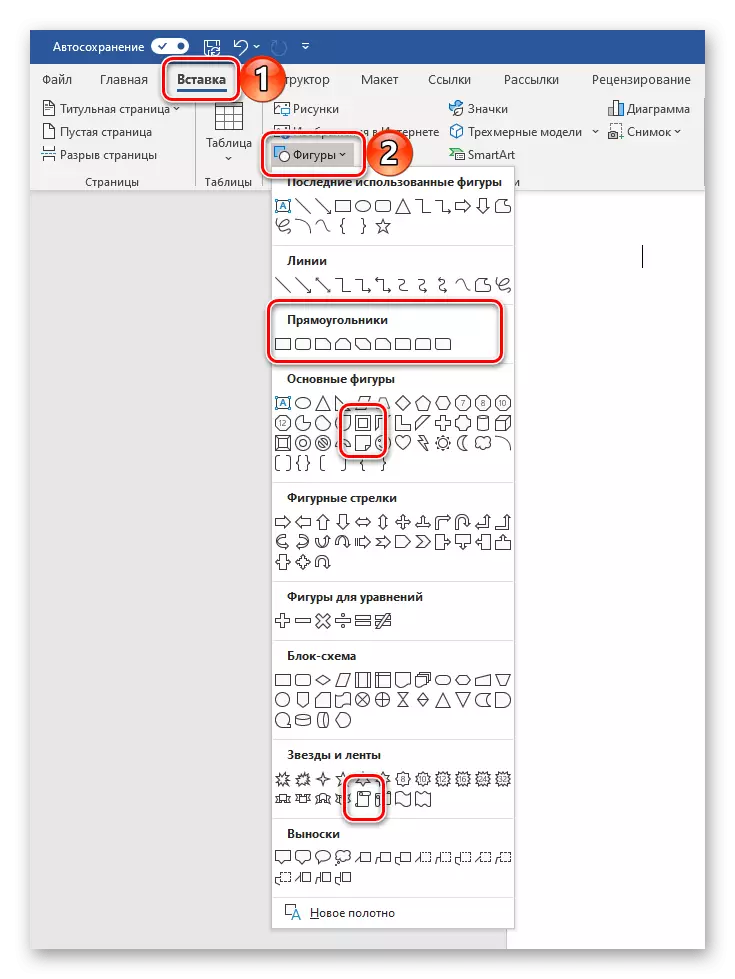
- Open the "Insert" tab, click on the "Figure" tab and select any desired element, to one degree or another resembling a rectangle. Highlight it by pressing LKM.
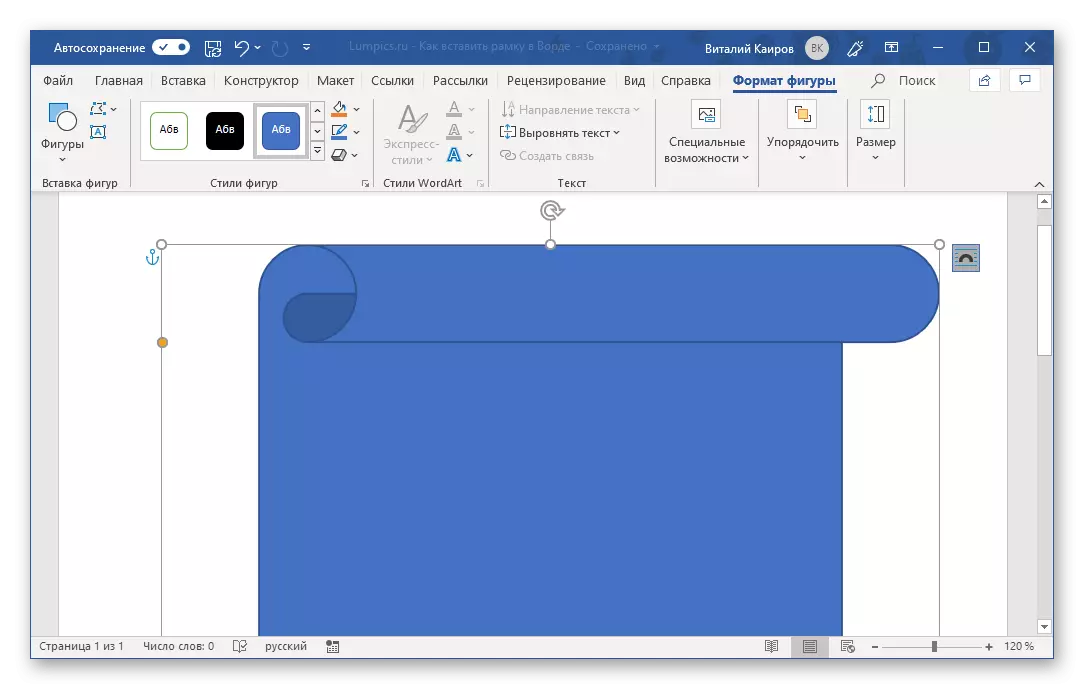
- Press the LKM in one of the upper corners of the page and pull into the opposite diagonally, thus creating a frame that will "restart" in the field, but not go beyond their limit.
Note: You can choose not only "empty" figures (contours), but also those to which the fill is applied, as in our example. In the future, it can be easily removed, leaving only the frame itself.
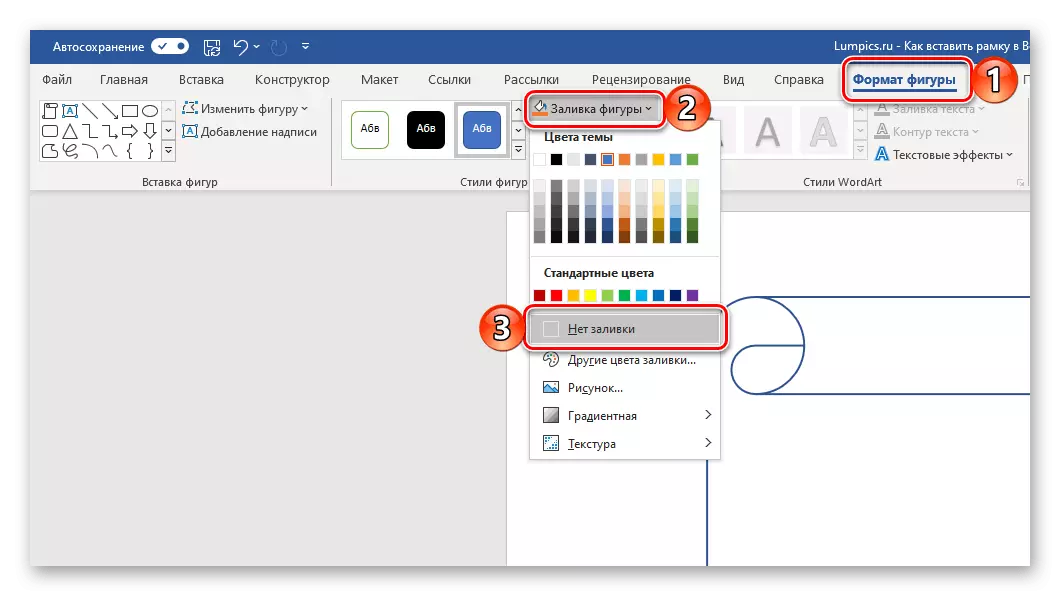
- Having adding the added object, go to the "Format Format" tab.
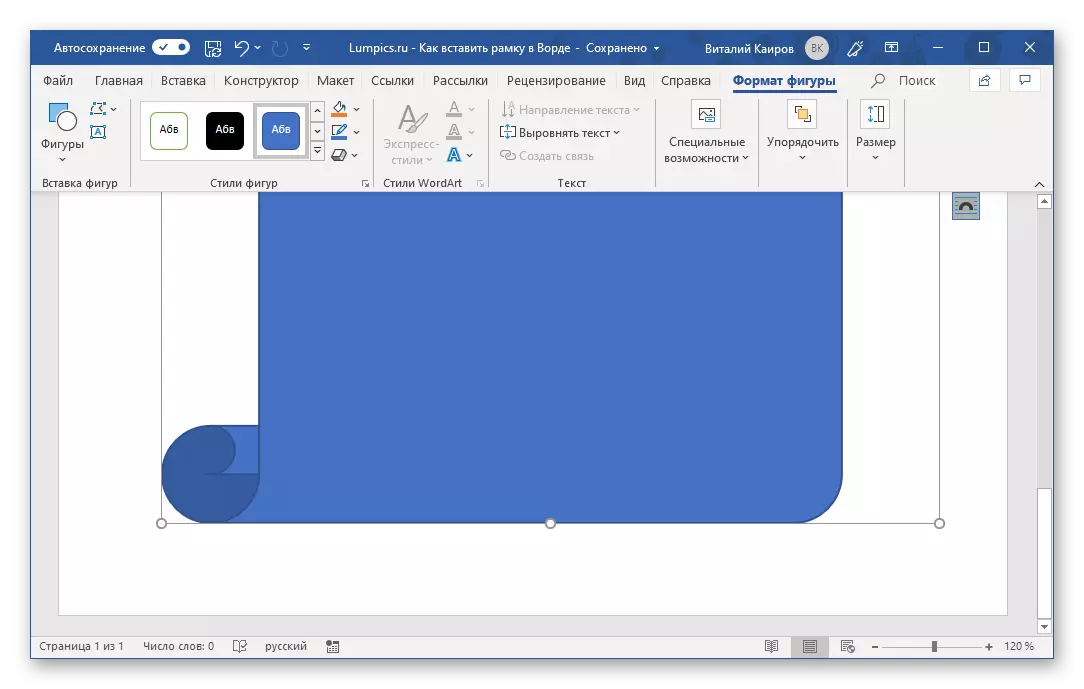
- In the "Styles of Figures" tool block, expand the menu of the Fill Fill and select "No Fill" or, if there is such a need, any preferred color.
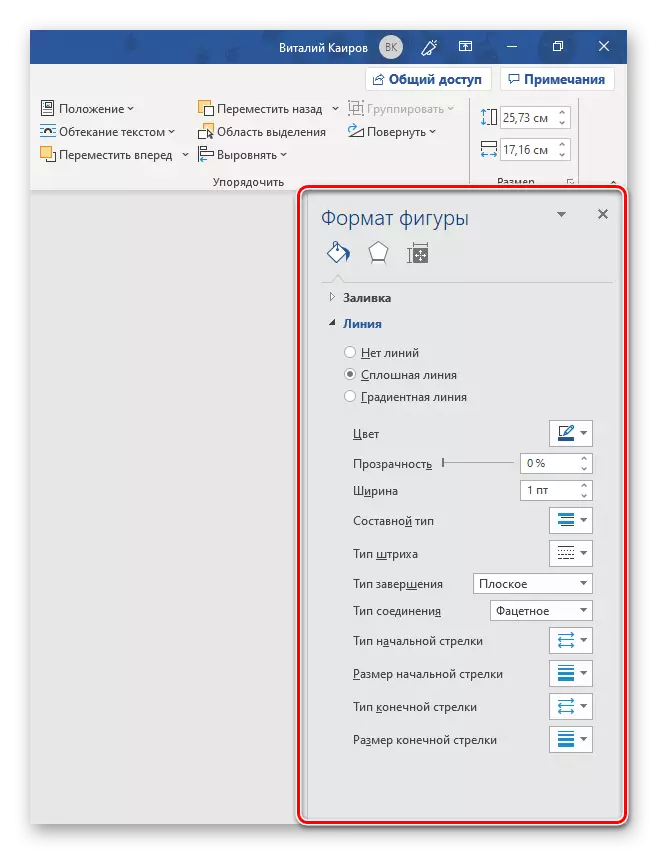
- Next, expand the menu of the section of the figure of the figure and determine its main parameters - the color and thickness of the line,
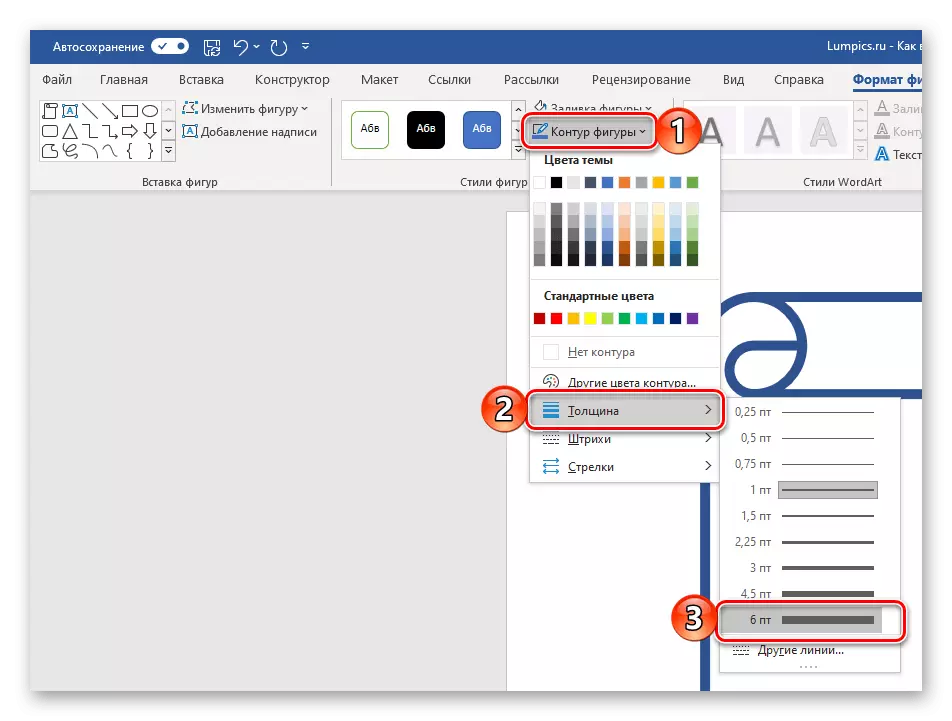
Its appearance ("Other lines" in the "Thickness" options provide more opportunities for configuration).
- Optionally, choose the appropriate effect, which will be applied to the figure (Item "Figure Effect"). Alternatively, you can add a shadow to it or apply the backlight.
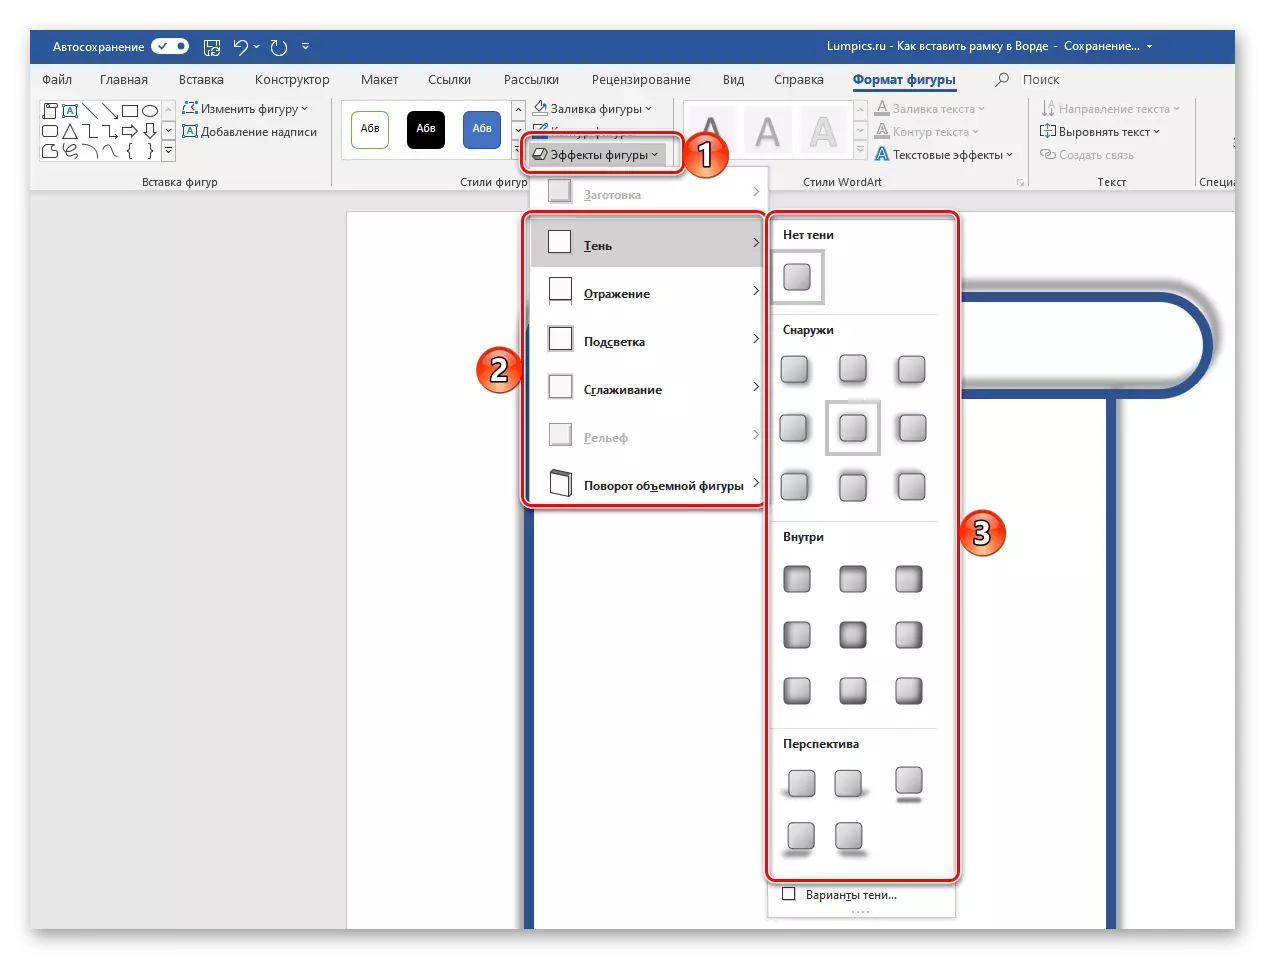
In this way, you can create a truly unique frame, giving the document the desired and recognizable design.
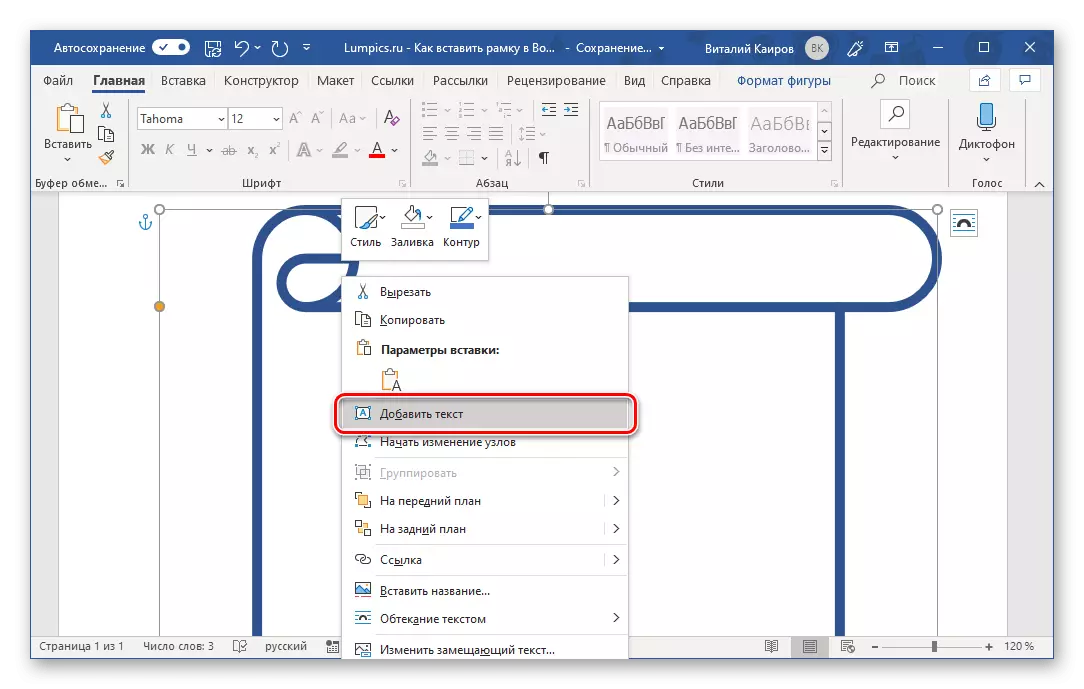
In order to start writing the text inside this figure, click on it right-click (PCM) and select "Add text" in the context menu. A similar result can be achieved by double pressing LKM.
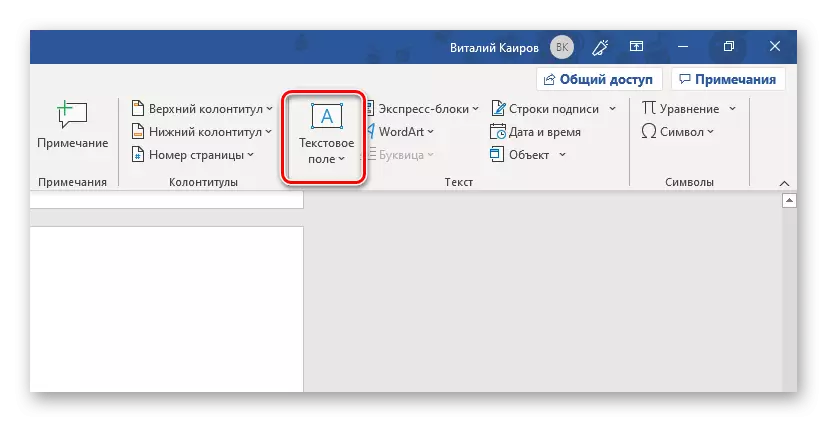
- Go to the "Insert" tab and click on the "Text Field" button.
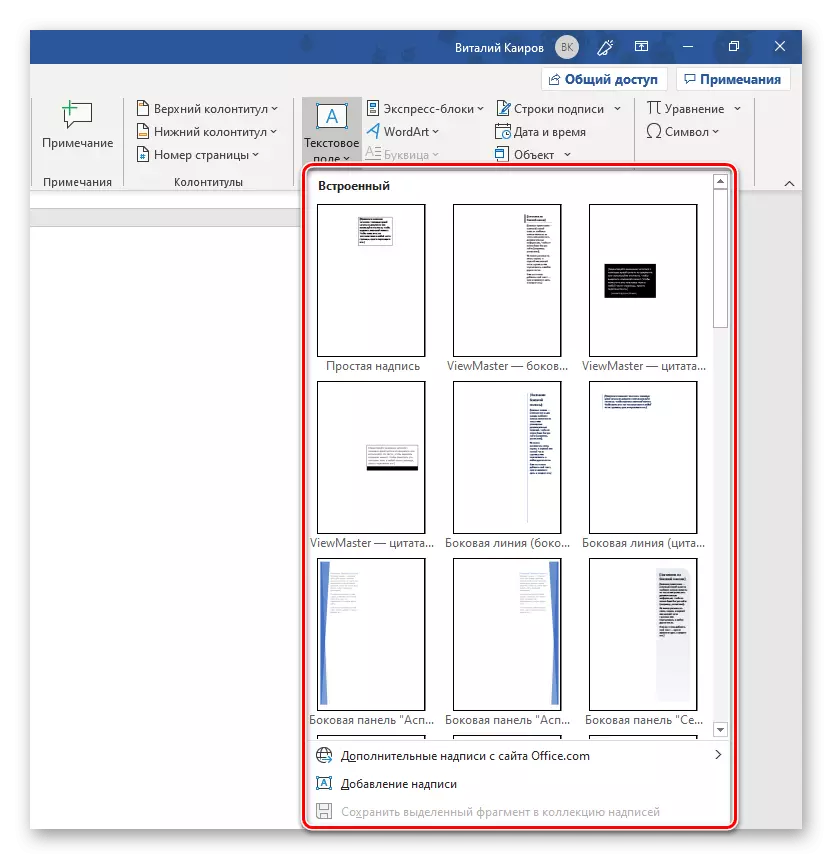
- From the drop-down list, select one of the templates presented in the built-in set, including both neutral frames and full-fledged graphic elements with their design styles.
- Enter (or insert) to the Added Record Added Text field,
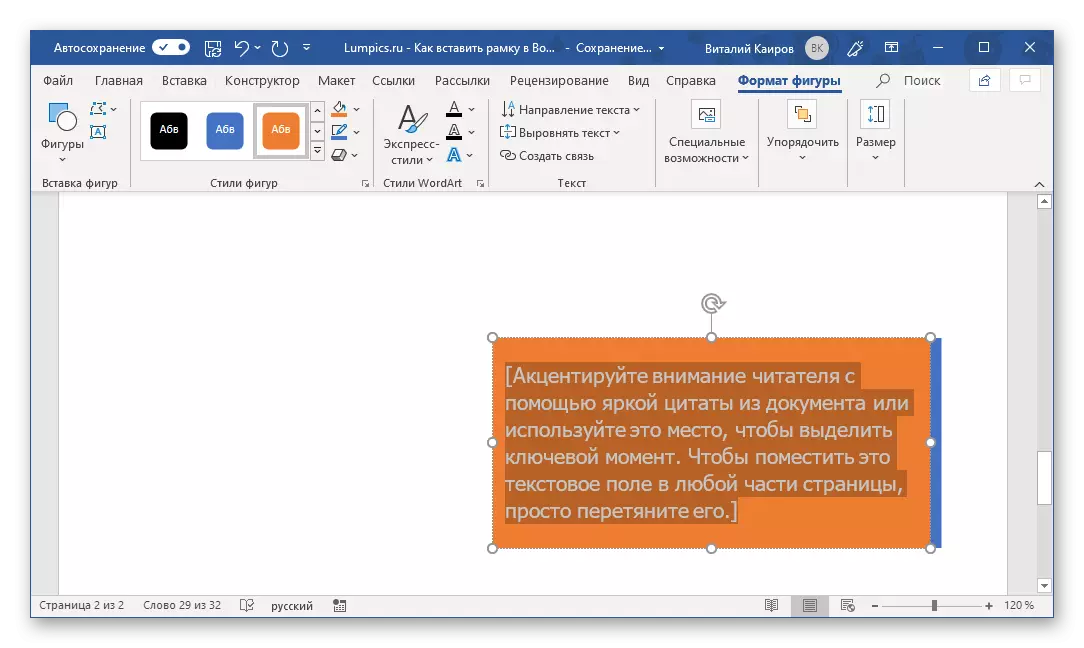
Pick under it the size of the frame, remove the fill (similar to this action with the figures).

If you need, move this object, however, it is done by dragging its individual boundaries and changes in size.
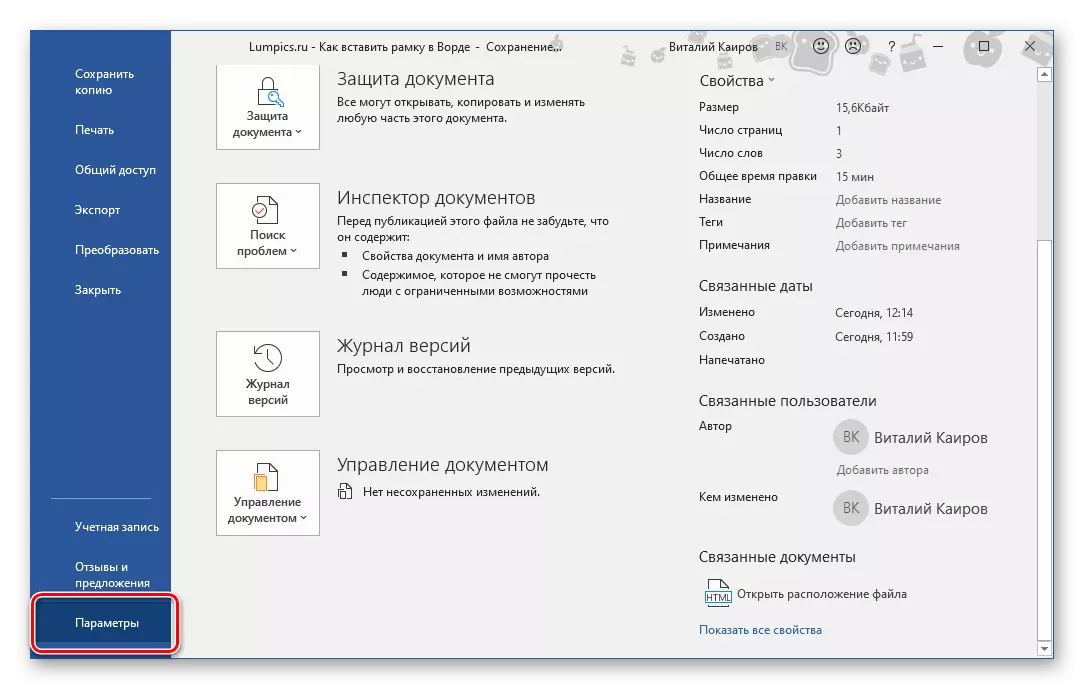
- Open the "File" menu and go to the "Parameters" section.
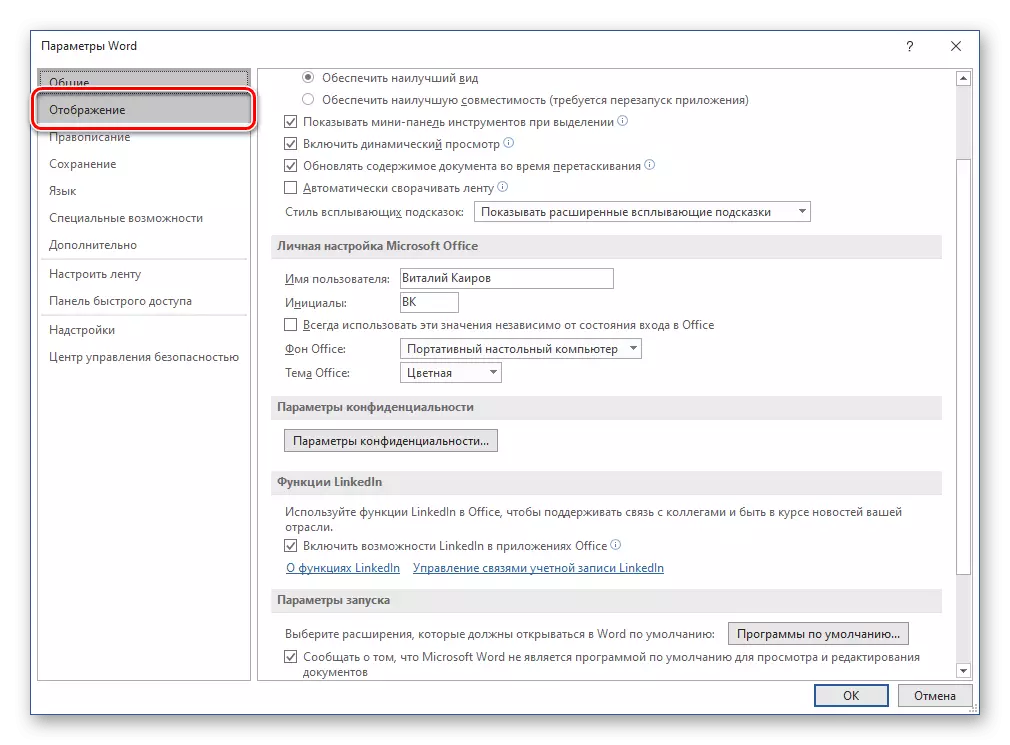
- On the sidebar, select the "Display" tab.
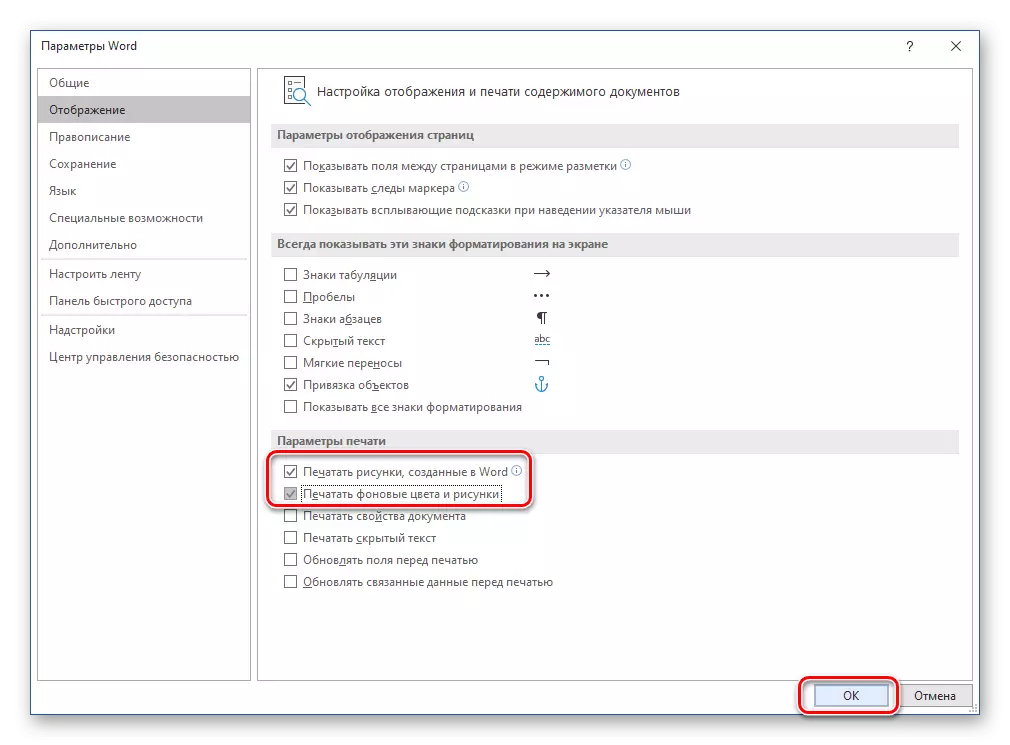
- In the "Print" block, install the checkboxes opposite the first two items - "Print Drawings created in Word" and "Print Background Colors and Pictures", and then click "OK" to confirm.

Most users will be enough features of the standard to add frames to Word, however there are other methods.
Method 2: Table
In Microsoft Word, you can create tables, fill in their data and decompose, applying various styles and layouts to them. Stretching only one cell on the borders of the page, we will get a simple frame that you can give the desired appearance.

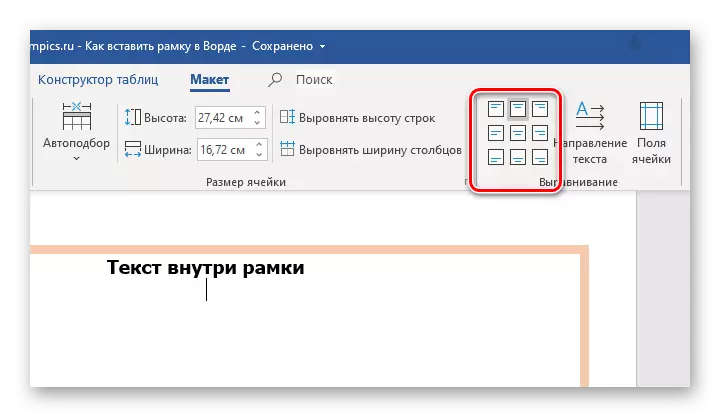
Note: The text inside such a frame-table is recorded and is executed in the same way as the usual text in the document, but additionally it can be aligned with respect to the borders of the table and / or its center. The necessary tools are located in the Additional tab. "Layout" located in the group "Working with tables".
See also: how to level the table in the Word
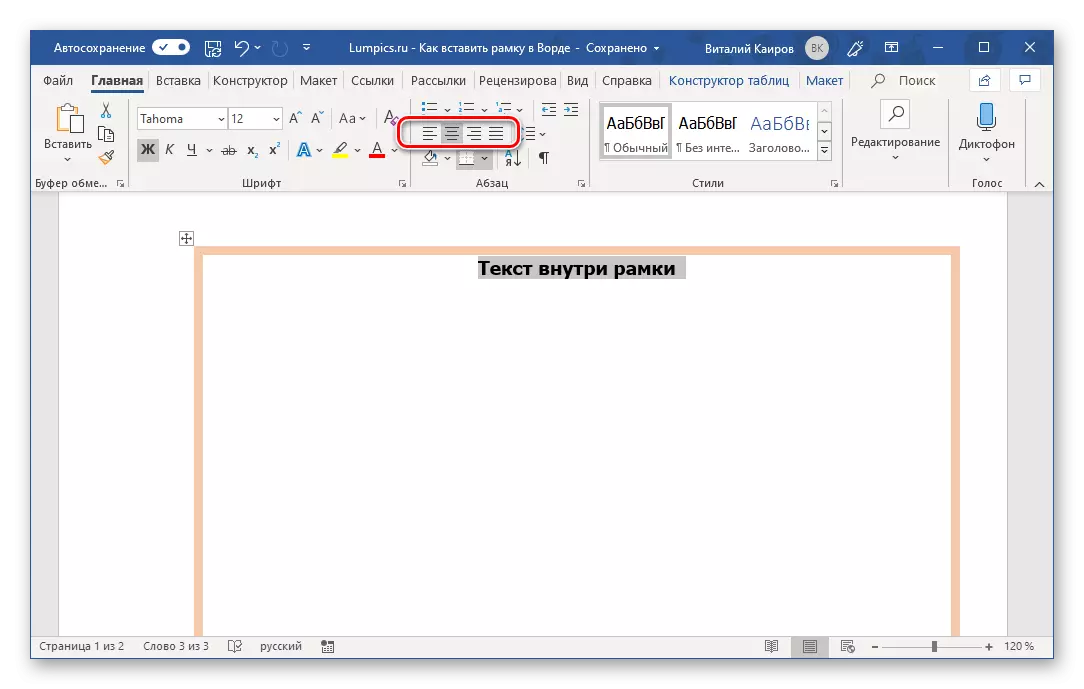
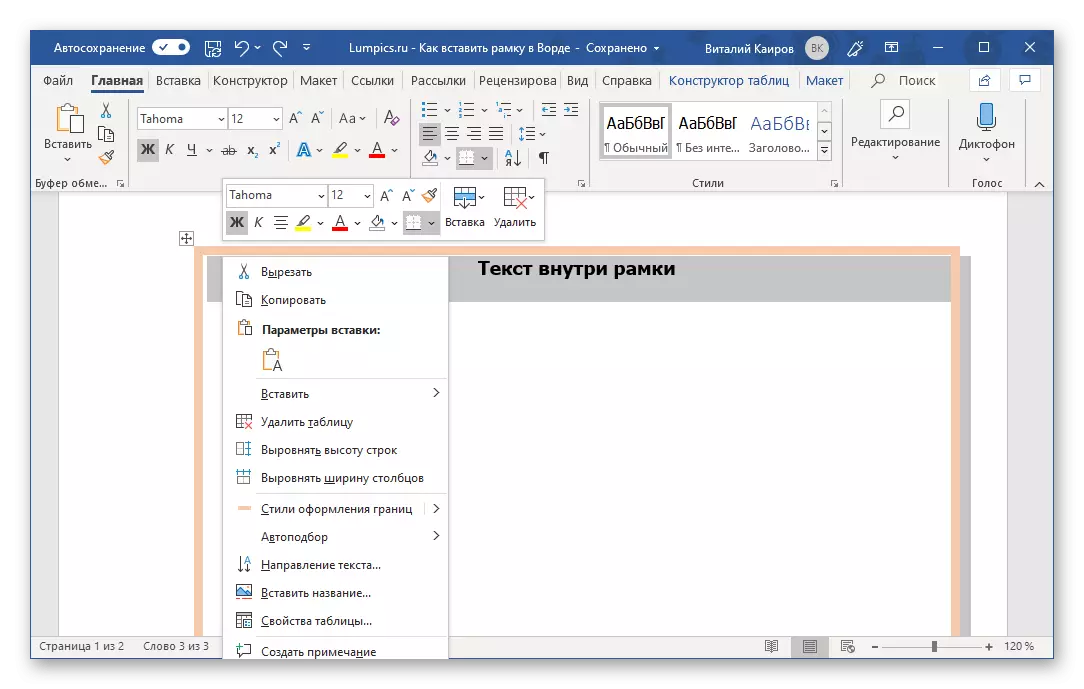
The main work with the text inside the frame is carried out in the "Home" tab, and additional actions are available in the context menu.
To learn more about how to work with tables in Word and give them the desired appearance, you can from the references below below. Applying quite a bit effort, you will definitely create a more original frame than those that are in the standard set of text editor and we have been considered in the previous method.
Read more:
Creating tables in Word
Formatting tables in the Word
Method 3: Figure
Similarly, a table with a size of one cell, to create a frame in Word, you can refer to the insertion section of the figures. In addition, their design provided by the program is much wider.
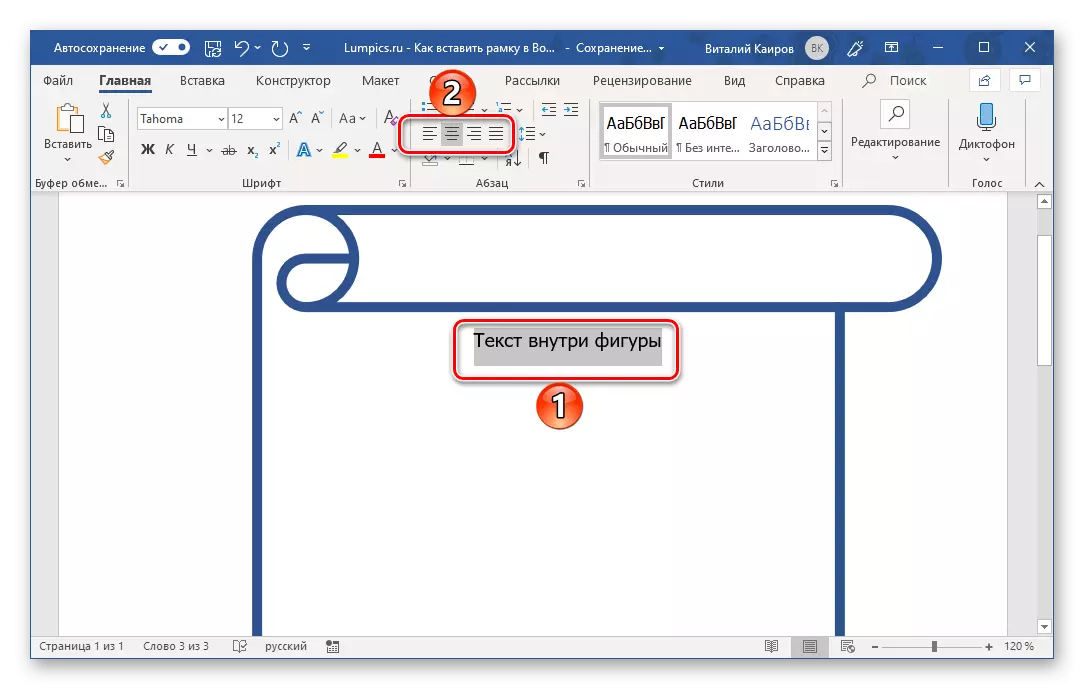
By default, it will be written from the center. To change this, in the "Format Format", in the Text toolbar, expand the Alignment menu and select the appropriate option. The optimal solution will be "at the top edge".
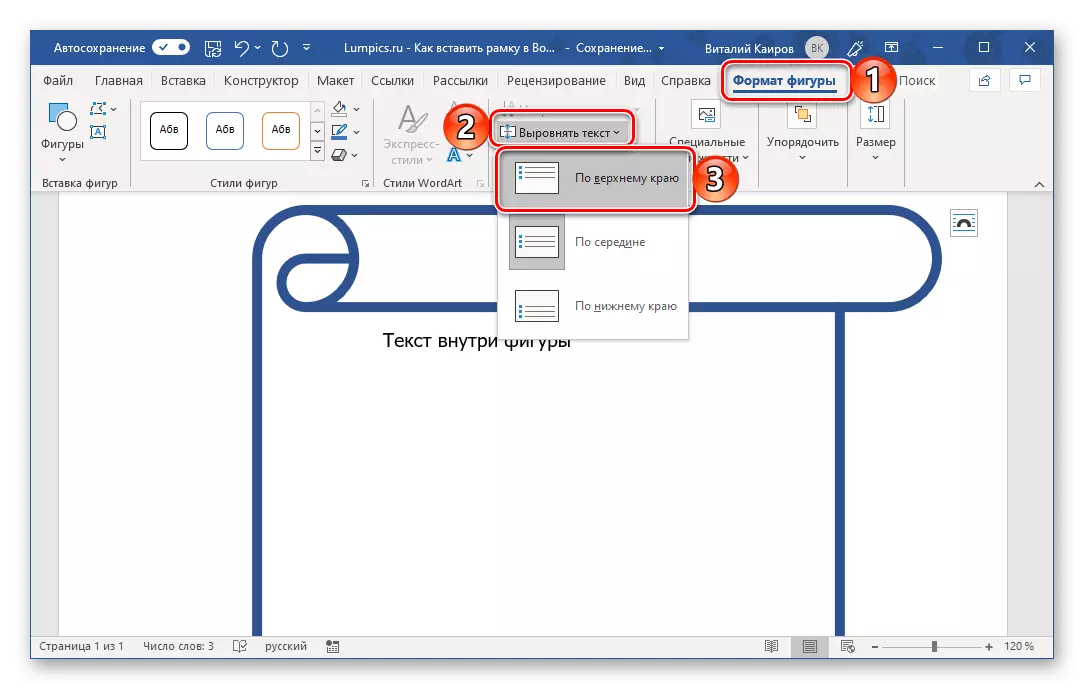
In the Home tab, you can specify the preferred level of horizontal leveling.
READ ALSO: text alignment in a Word Document
To learn more about inserting and changing figures in Word from a separate article on our website, which describes including the design of these elements.
Read more: Inserting figures in the Word
Method 4: Text Field
In the cases considered above, we created a frame around the perimeter of the Word document page, but sometimes it may be necessary to "climb" in it only a separate fragment of text. This can be done both using a table consisting of one cell and having a suitable size and using a text field, which also has its own characteristics.
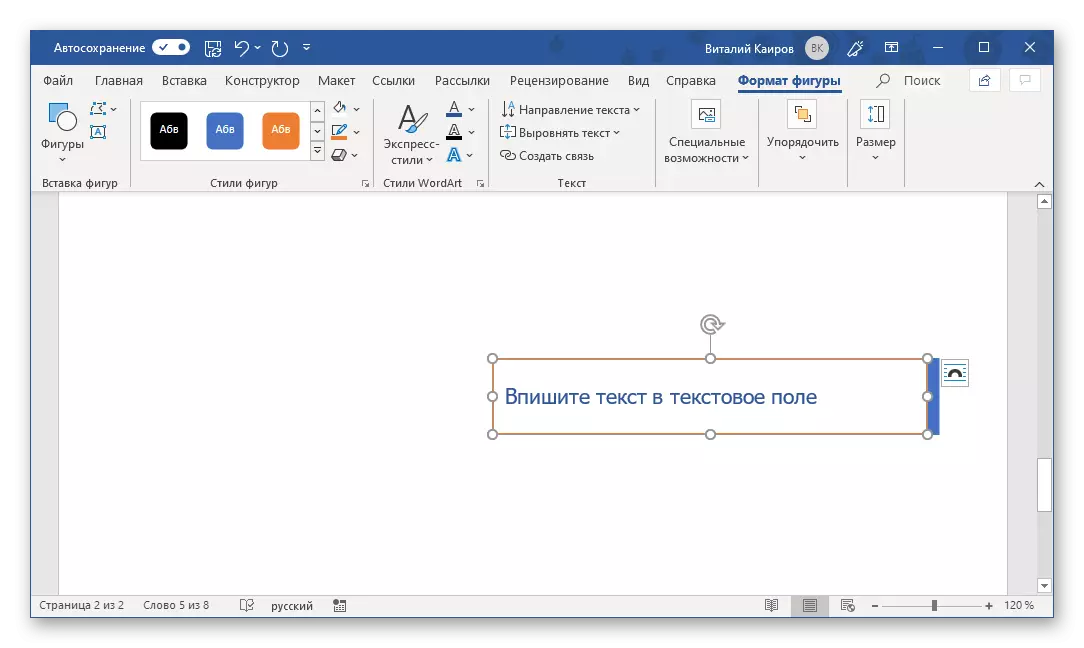
Inscriptions added to the document in this way can be rotated and turned over, as well as change them using the styles built into the Word.
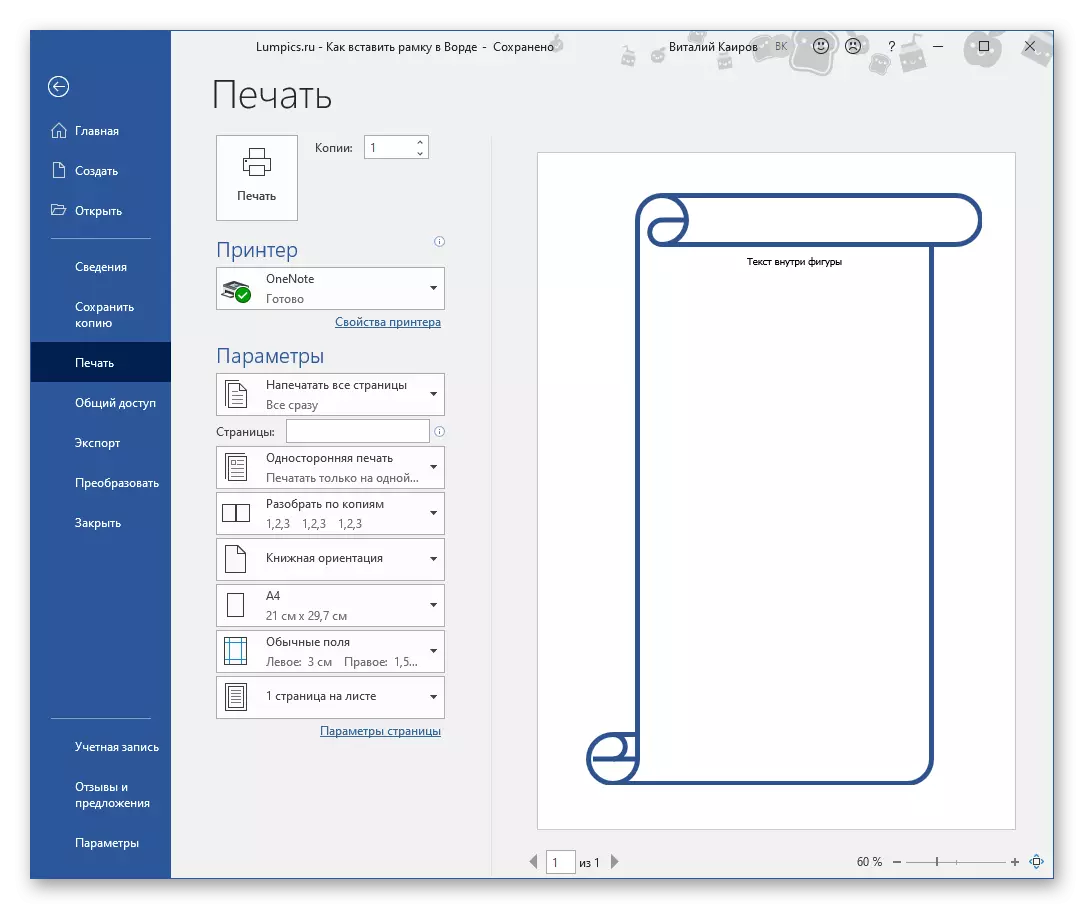
Print documents with frames
In cases where the document with the frame created in it is required to be printed on the printer, you can encounter the problem of its display, or rather, the absence of such. This is relevant primarily for figures and text fields, but is easily eliminable by visiting the text editor settings.
By the way, it is necessary to do if the document has independently created drawings or a page background has been changed.
See also:
How to draw in the Word
How to change the background in the Word
Print documents in Word
Conclusion
Now you know not only the standard way to create a frame in Microsoft Word document, but also to move away from template solutions and independently create something more original and attractive.