
Among the multitude of graphic editors, GIMP should be allocated, which is the only application, in its functionality, practically non-inferior paid counterparts, in particular, Adobe Photoshop. The possibilities of this program to create and edit images are really great. Let's figure it out how to work in it.
Work in Gimp.
Consider several common scenarios of the use of GIMP.Creating a new image
First of all, learn how to create a completely new image.
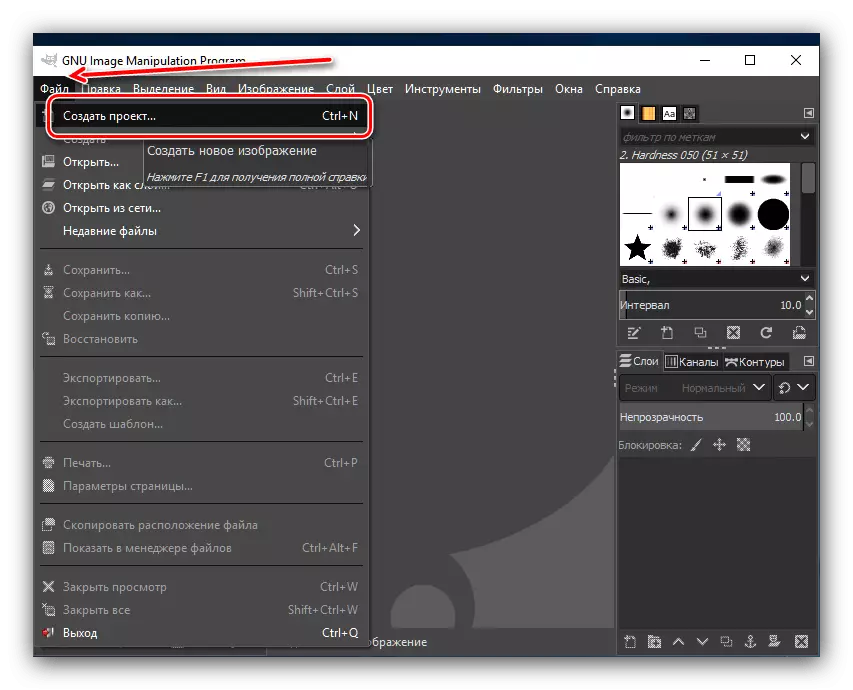
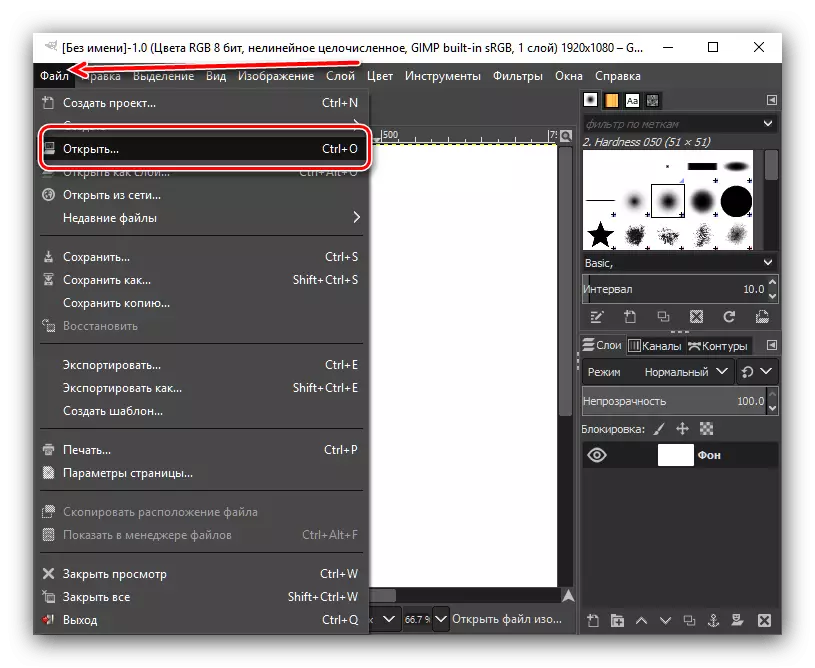
- Open the "File" section in the main menu and select the "Create" item in the list that opens.
- After that, we open the window in which we must make the initial parameters of the image being created. Here we can set the width and the height of the future pictures in pixels, inches, millimeters, or other units of measurement. Here you can use any of the available templates, which will significantly save time on creating an image.
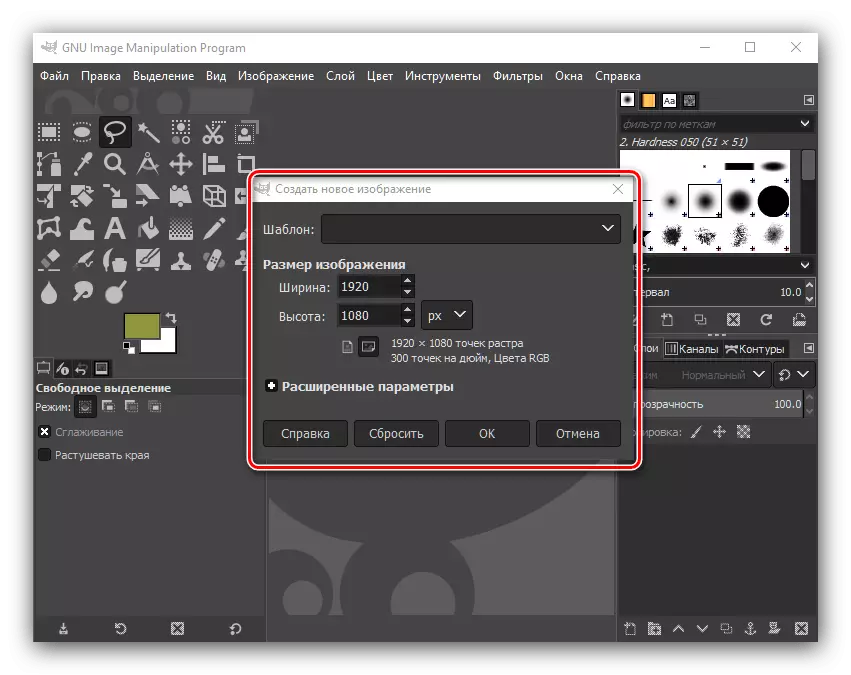
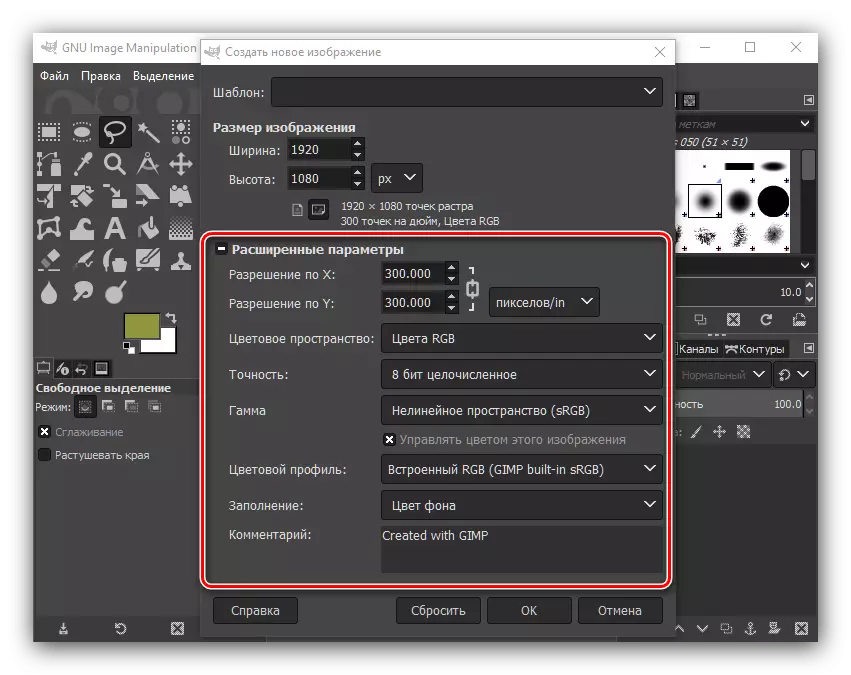
In addition, you can open extended parameters where the image resolution is indicated, color space, as well as background. If you want, for example, in order for the image to be a transparent background, select the "Transparent Lay" parameter in the "Filling" item. This section also you can also make text comments to the image. After you have completed all the necessary settings, click on the "OK" button.
- So, the preparation of the image is ready. Now you can further work to give it a complete species.
Creating and inserting an object circuit
Let's deal with how to cut the circuit of the object from one image and paste it into another background.
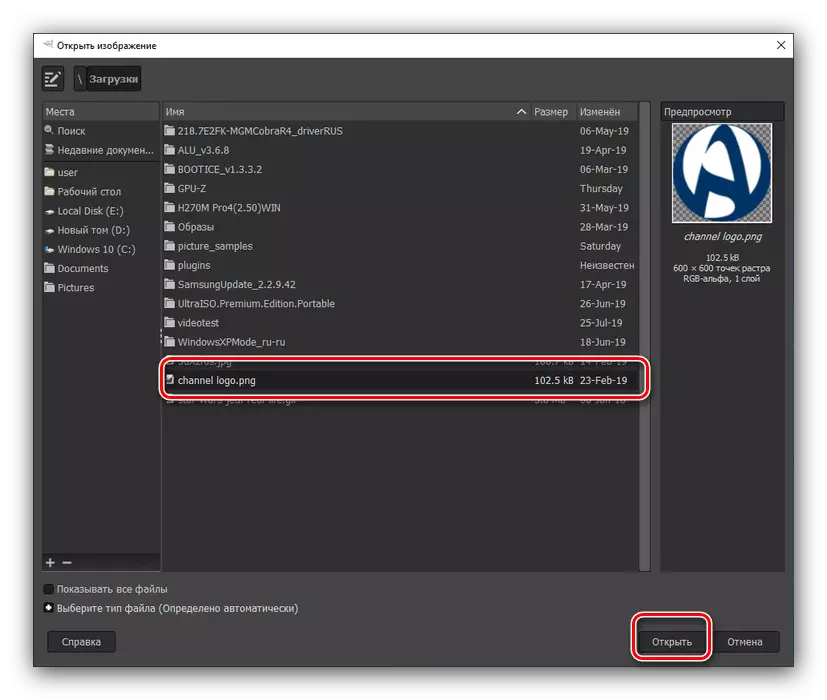
- Open the image you need, going to the "File" menu items.
- In the window that opens, select the desired graphic file.
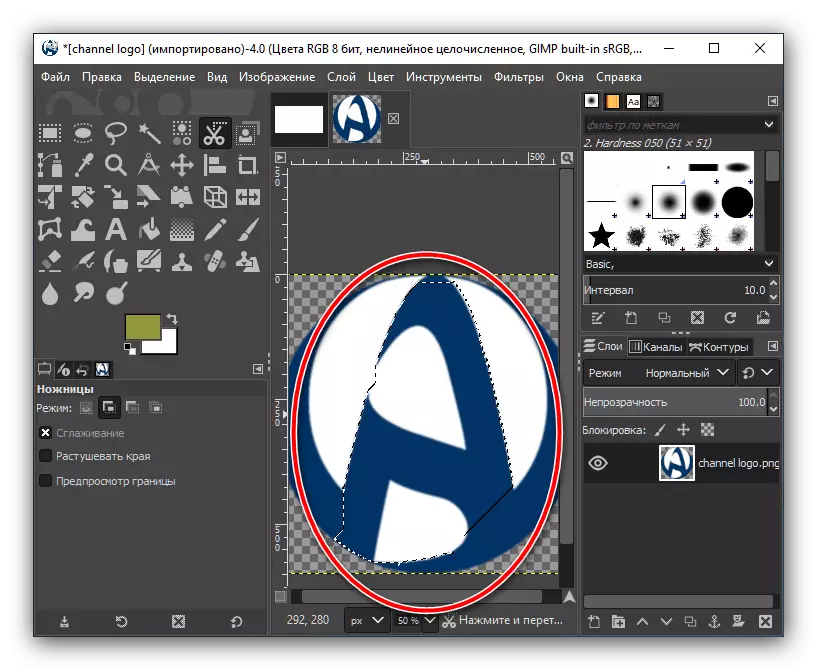
- After the image opened in the program, go to the left side of the window where various tools are located. We choose the "smart scissors" and "unite" them around the fragments that we wish to cut. The main condition is that the inquiry line is closed at the same point where it began. As soon as the object is circled, click on its inside.
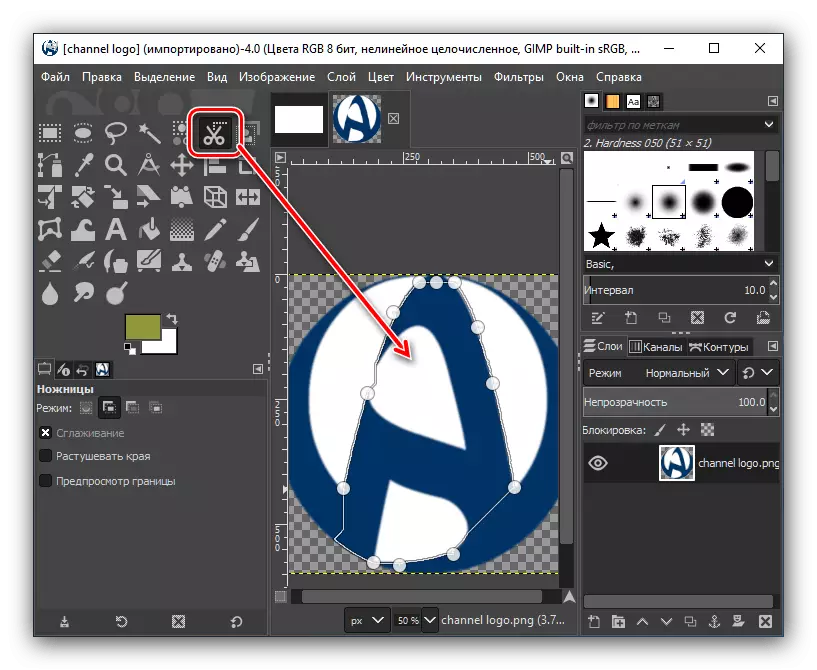
As you can see, the dotted line has frozen - it means the completion of the preparation of the object to cut out.
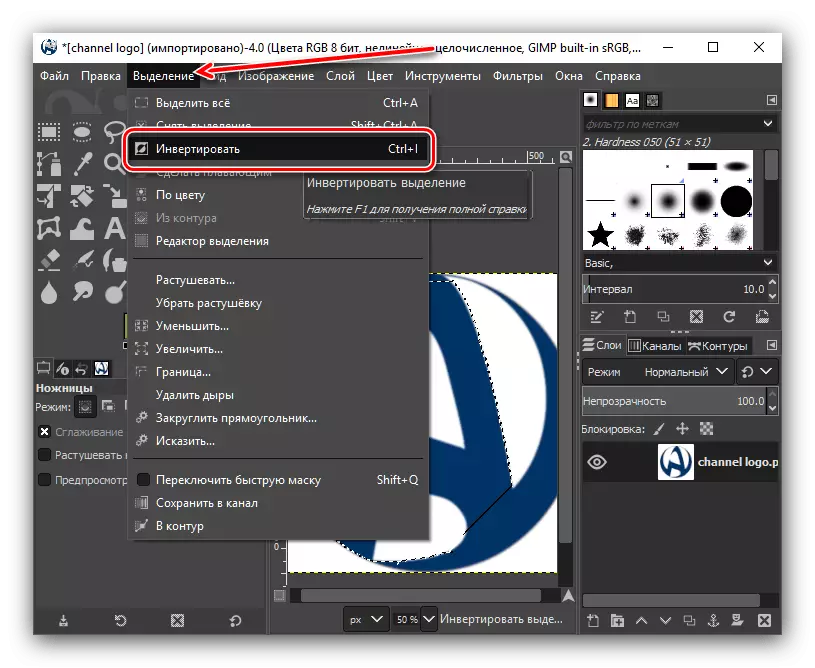
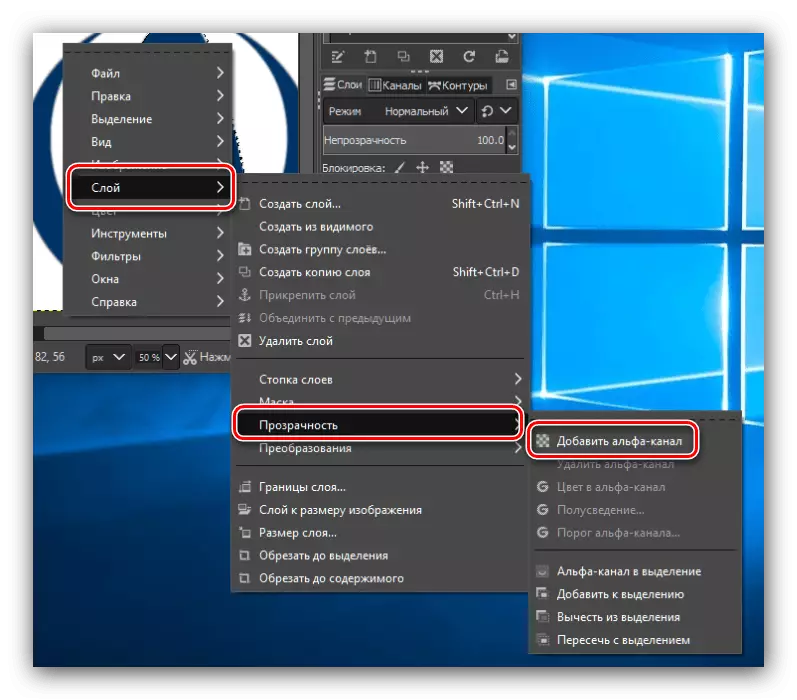
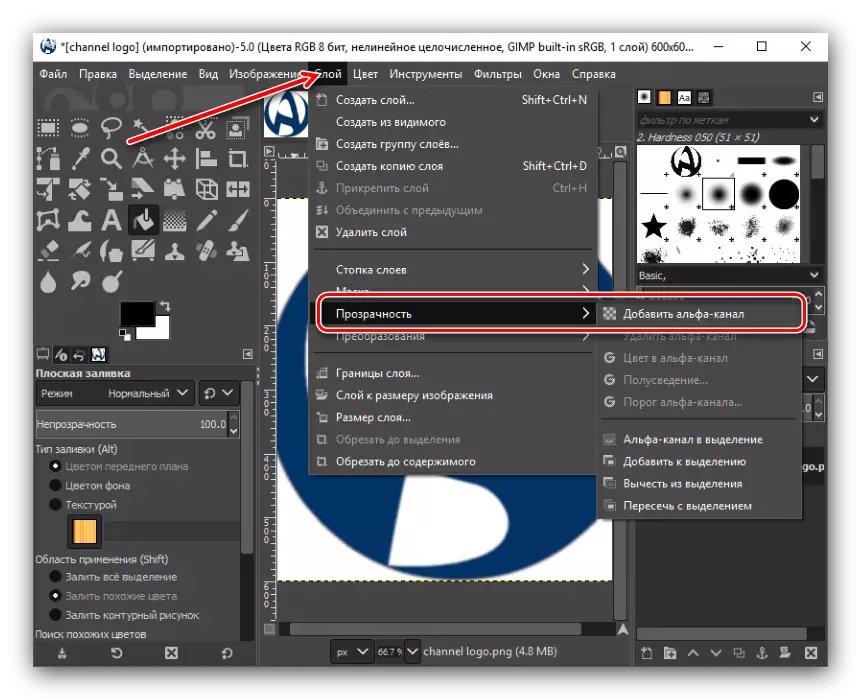
- In the next step, we need to open the alpha channel. To do this, click on the unused part of the image with the right mouse button and in the menu that opens sequentially go through the "Layer" items - "Transparency" - "Add Alpha Channel".
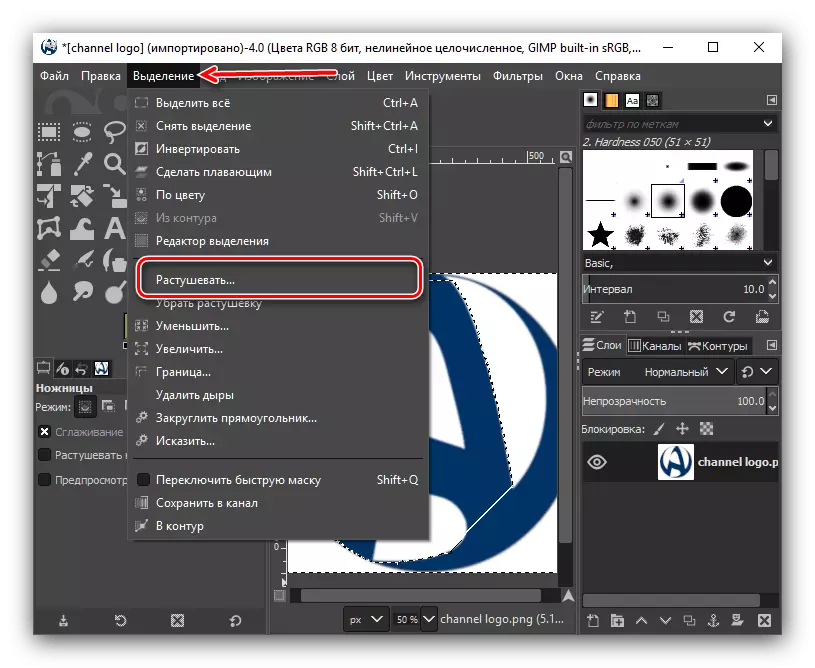
- After that, go to the main menu and select the "Allocation" section, and from the list of clicking on the "Invert".
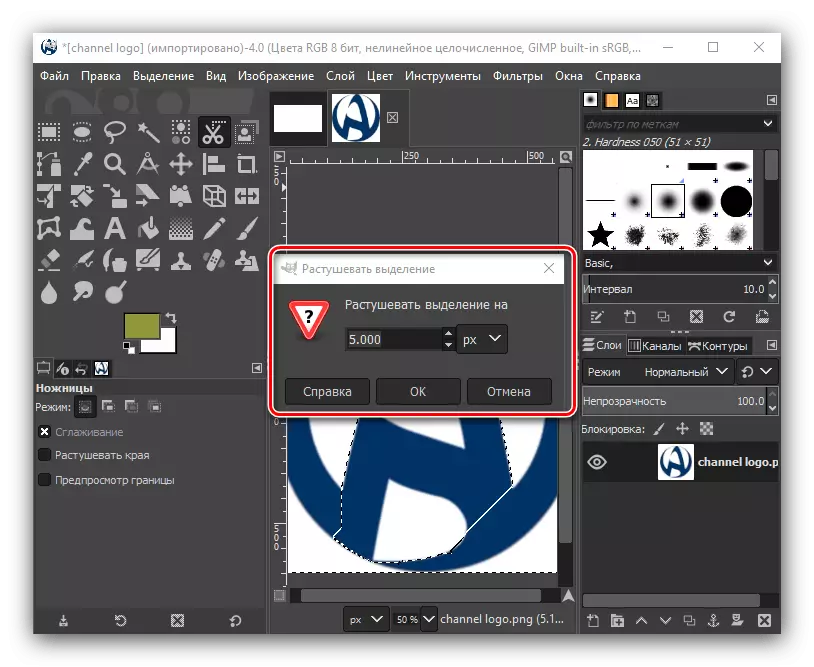
Again, go to the same menu item - "Allocation". But this time in the discontinuing list click on the inscription "growing ...".
- In the window that appears, we can change the number of pixels, but in this case it is not required. Therefore, press the "OK" button.
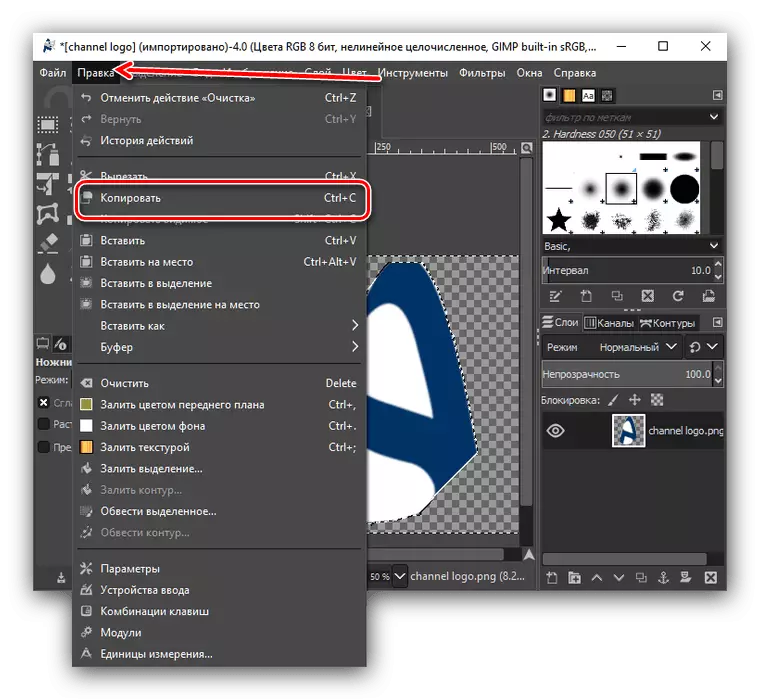
- Next, we go to the "Edit" menu item, and in the list that appears by clicking on "Clear" or simply press the DELETE button on the keyboard.
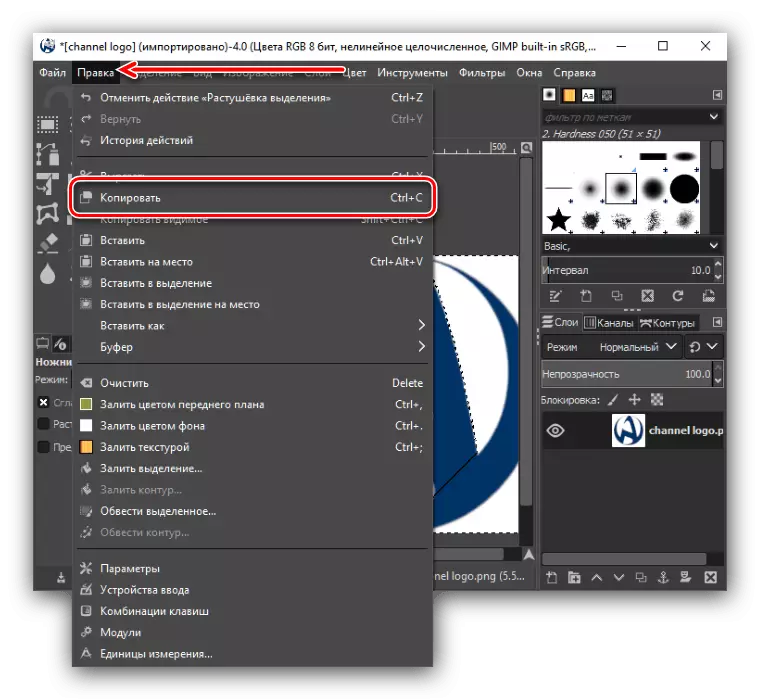
As you can see, the whole background, which surrounded the selected object, is deleted. Now go to the Edit menu section and select "Copy".
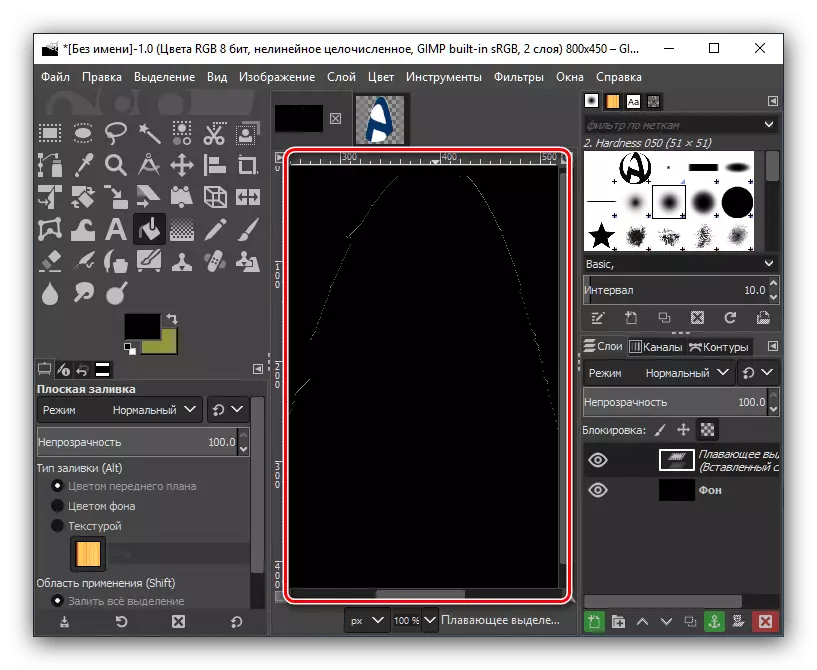
- Then create a new file, as described in the previous section, or open ready. Again, go to the "Edit" menu item and select "Insert" the inscription or simply click the Ctrl + V key combination.
- Thus, the circuit of the object is successfully copied.

Creating a transparent background
About how to make a transparent background with directly creating a graphic file, we briefly mentioned in the first part of the article. Now we will tell about how to replace it with a transparent at the finished image.
- After we opened the desired picture, go to the main menu in the "Layer" section. In the discontinuing list, sequentially click on the items "Transparency" and "Add Alpha Channel".
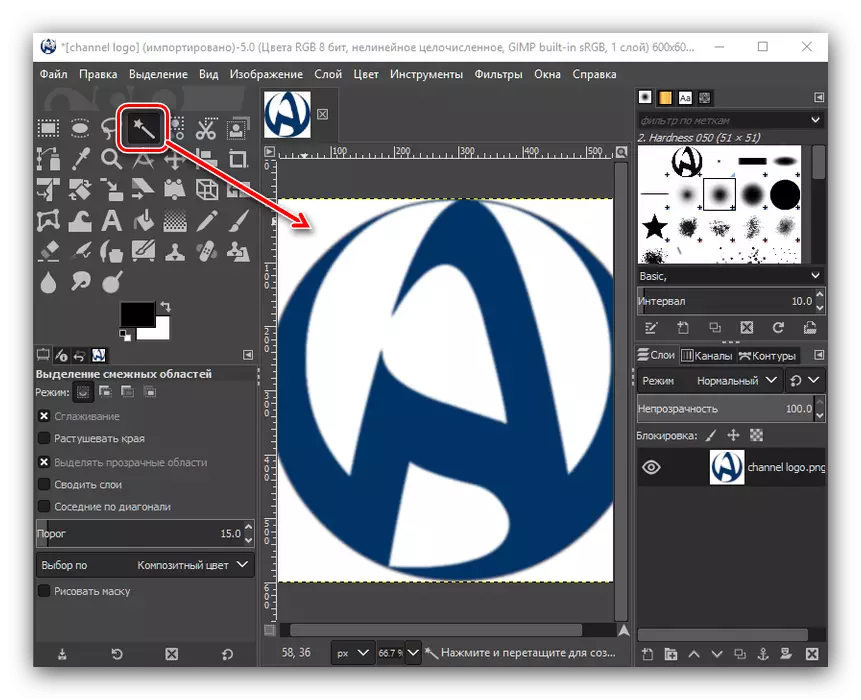
- Next, use the "Isolation of adjacent regions" tool (it is the "magic wand"). I click on the background to be made transparent, and click on the Delete button.
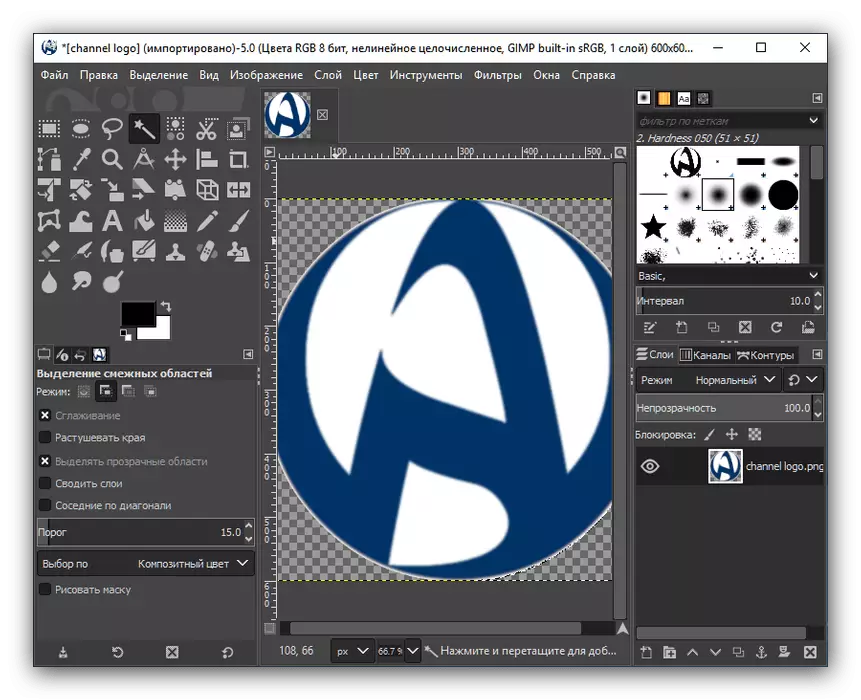
- As you can see, after that, the background became transparent. But it should be noted that to maintain the resulting image so that it does not lose its properties, it is necessary only in a format that supports transparency, for example, in PNG or GIF.
Read more: How to make a transparent background in gympe
Adding lettering
The process of creating an inscription in the image is also interested in many users.
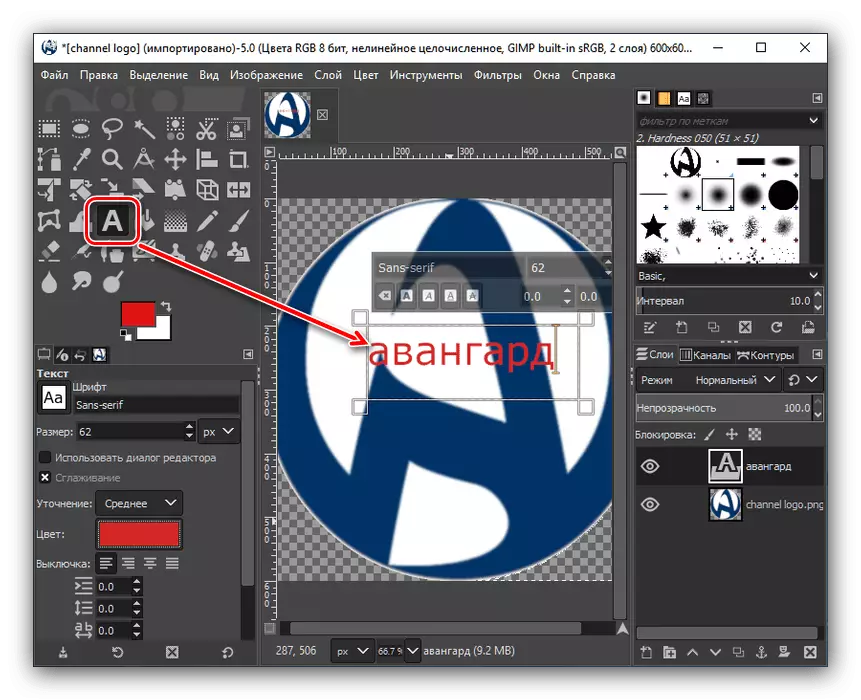
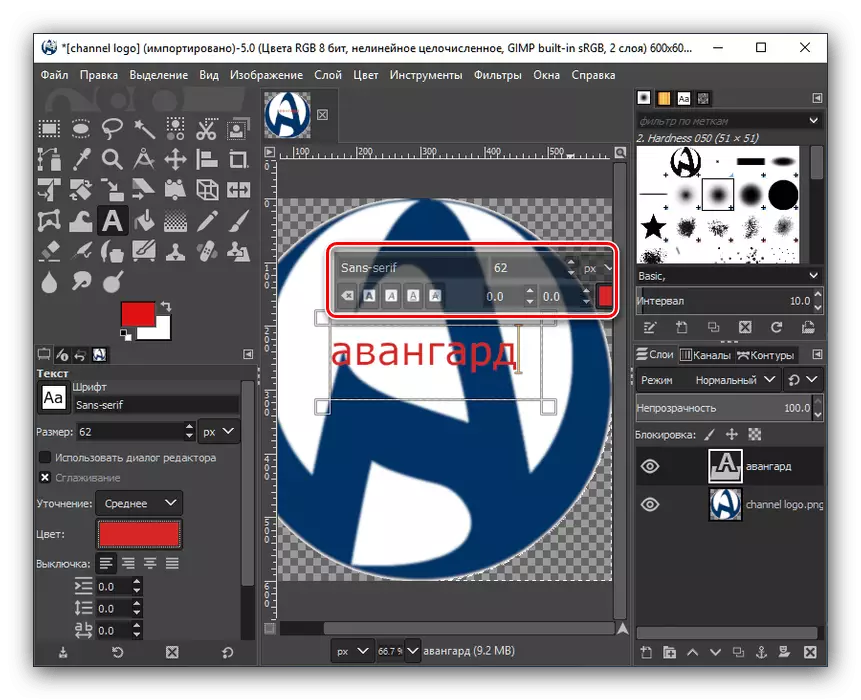
- First of all, you should create a text layer. This can be achieved by clicking on the left pane of the tool on the symbol made in the form of the letter A. . After that, click on that part of the image where we want to see the inscription, and score it from the keyboard.
- The size and type of font can be adjusted using a floating panel above the inscription or using the tool block located on the left side of the program.
Using drawing tools
The GIMP app has a very large number of drawing tools in its baggage.
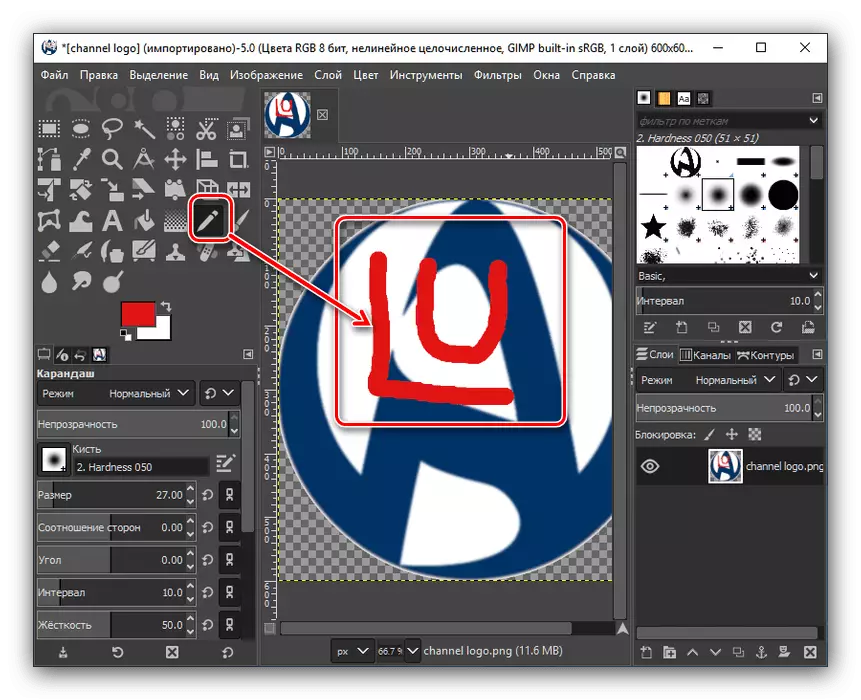
- The "Pencil" tool is designed to draw with sharp strokes.
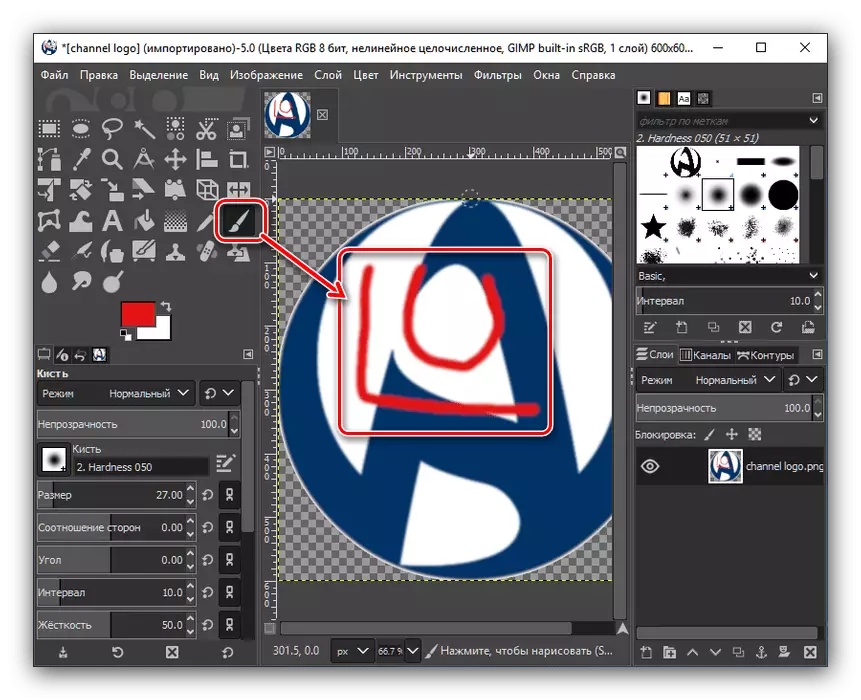
- "Brush" means, on the contrary, - for drawing with smooth strokes.
- Using the "Pouring" tool, you can pour entire areas of the image color.
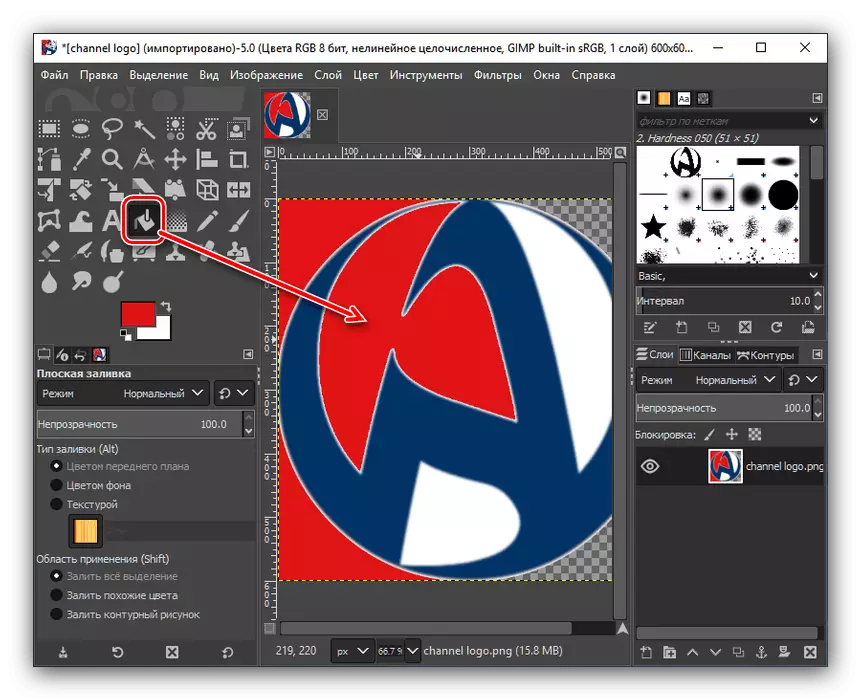
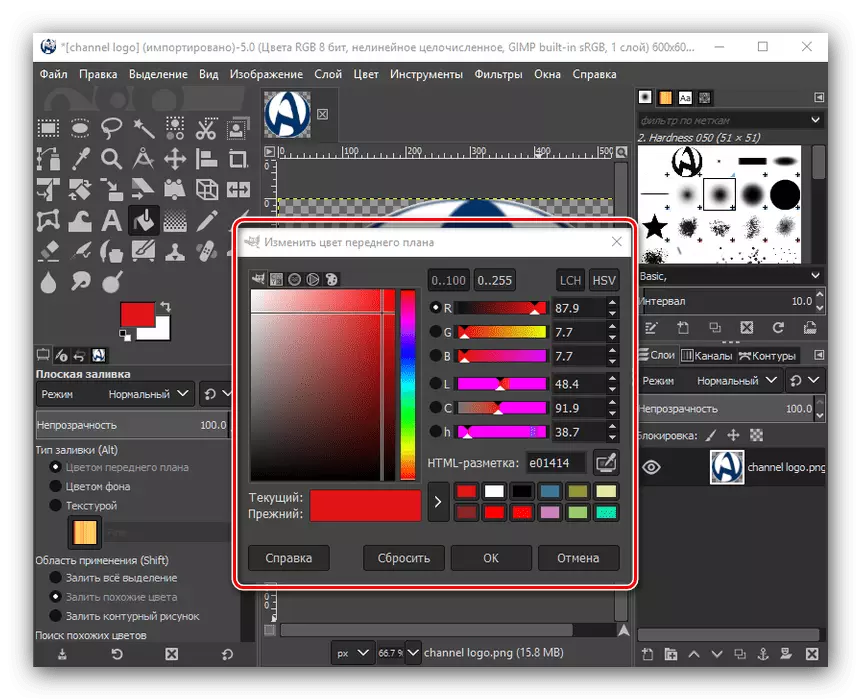
Color selection To use tools is made by pressing the appropriate button in the left pane. After that, a window with a palette appears.
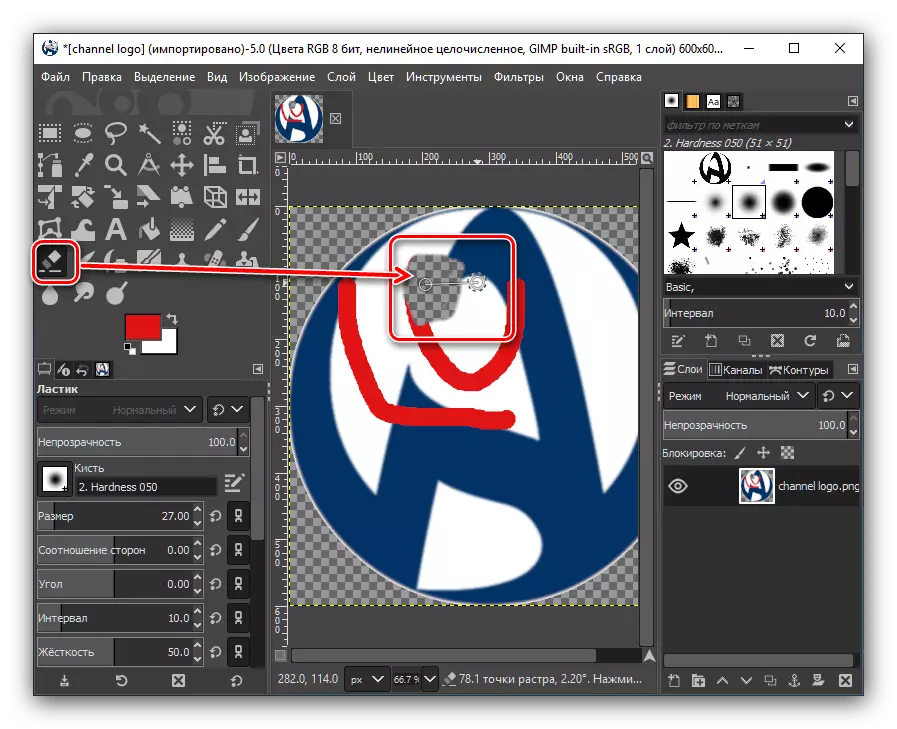
- To erase the image or part of it, the Eraser tool is used.
Saving an image
The GIMP program exists two options for saving images. The first one implies the preservation of the picture in the internal format. Thus, after the subsequent loading in the GIMP file will be ready for editing in the same phase, in which the work on it was interrupted before saving. The second option involves saving an image in formats available for viewing in third-party graphic editors (PNG, GIF, JPEG, etc.). But in this case, when you re-boot the picture in the GIMP edit layers will not work.
We summarize: The first option is suitable for graphic files, work on which is planned to continue in the future, and the second is for fully finished images.
- In order to save the image in an image available for editing, it is enough to go to the "File" Main menu section and select the "Save" item from the list.
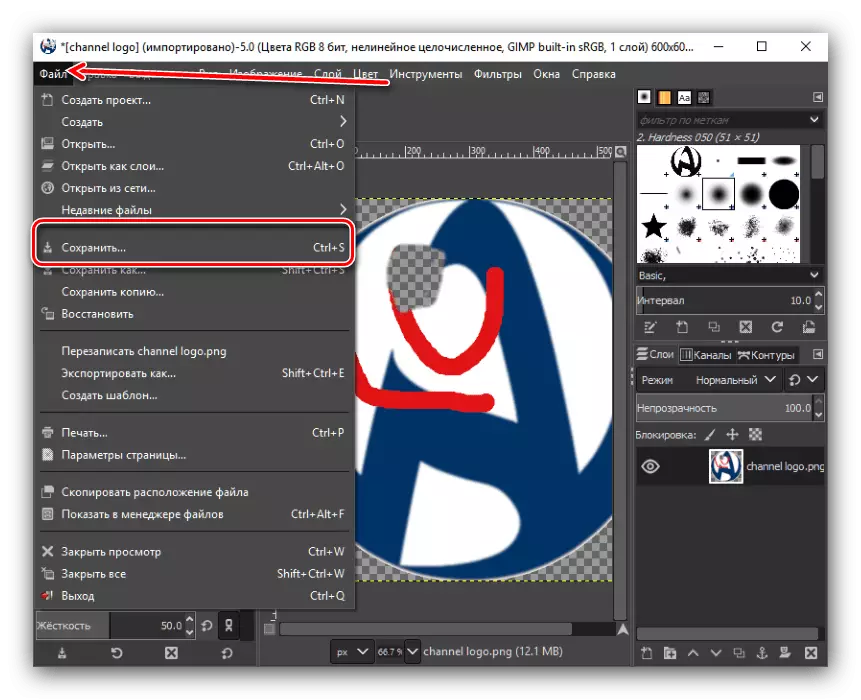
At the same time, a window appears, where we must specify the directory of preserving the workpiece, and also choose which format we want to save it. The XCF Save File Format is available, as well as archive BZIP and GZIP. After we have decided, click on the "Save" button.
- Saving an image in a format available for viewing in third-party programs is somewhat more complicated. To do this, it should be converted. Open the "File" section in the main menu and select "Export As ..." ("Export as ...").
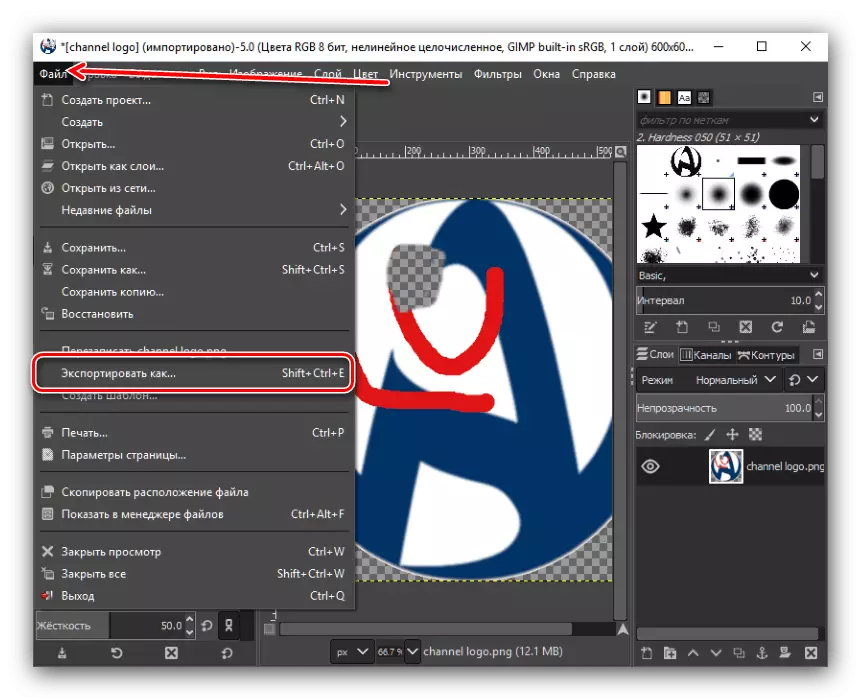
Before us opens a window in which you need to determine where the file will be stored, as well as select the format. The latter is quite available quite a lot, ranging from traditional PNG, GIF, JPEG, and ending with formats for specific programs, such as Photoshop. As soon as we have determined with the location of the image and its format, click on the "Export" button.
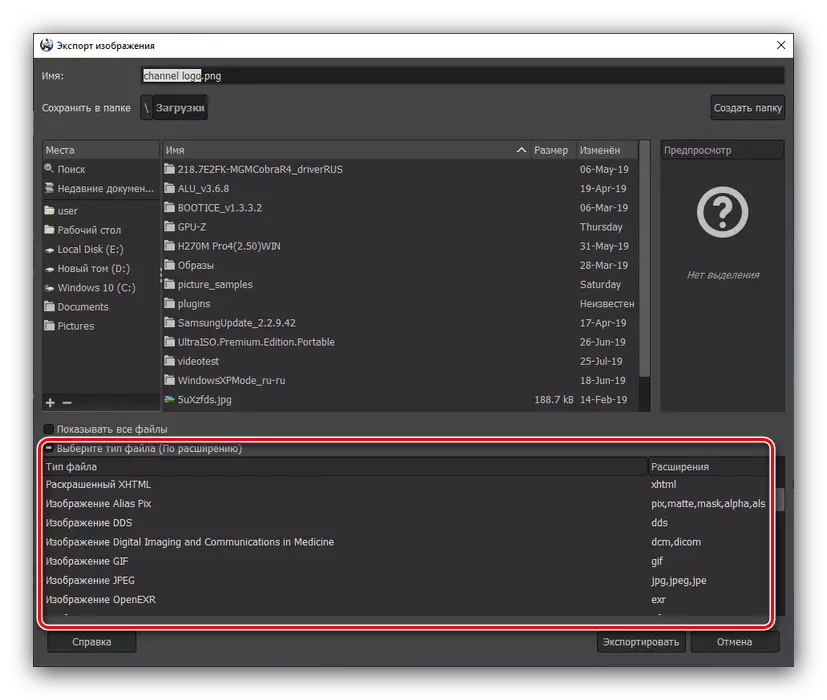
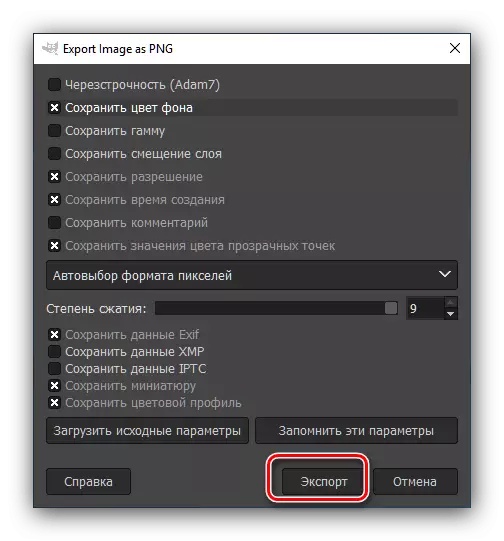
A window will appear with the export settings, in which indicators such as compression ratio, storing the background color and others. Advanced users, depending on the need, sometimes change these settings, but we simply click on the Export button, leaving the default settings.
- After that, the image will be saved in the format you need in a predetermined place.

As you can see, work in the GIMP application is quite complex and requires a certain initial training. At the same time, the processing of images in this text editor is still easier than in some similar solutions, for example, Adobe Photoshop, and its wide functionality simply amazes.