

AutoCAD is one of the most popular programs in the world for drawing and modeling in two-dimensional and 3D mode. Its feature is the presence of many useful tools and functions that are often used both beginner users and professionals. One of the collaborations of high-quality interaction with software is the correctness of its configuration under certain requirements. As part of this article, we want to affect the main points of the configuration of the software under consideration.
Configure AutoCAD program
The full autocad configuration can be divided into several different categories. We will try to tell us as in detail about each that even the most beginning users have no more questions on this topic. You can familiarize yourself with all the presented material or choose only some individual items that consider the most useful and necessary in your situation. We will start with the editing of the most important - appearance.Interface
The software interface always plays an important role during the execution of various operations. The location of windows, their number, size, color of the workspace, fonts - all this affects the convenience of work. Therefore, it is primarily recommended to set up this particular component. There will be no specific recommendations will not be shown, we will only demonstrate the location and configuration of the basic parameters, and you, based on your needs, select only the desired one.
Main settings
The main parameters include the color palette, size and display of certain elements, as well as the font used. All this is edited in one menu, the transition to which is carried out like this:
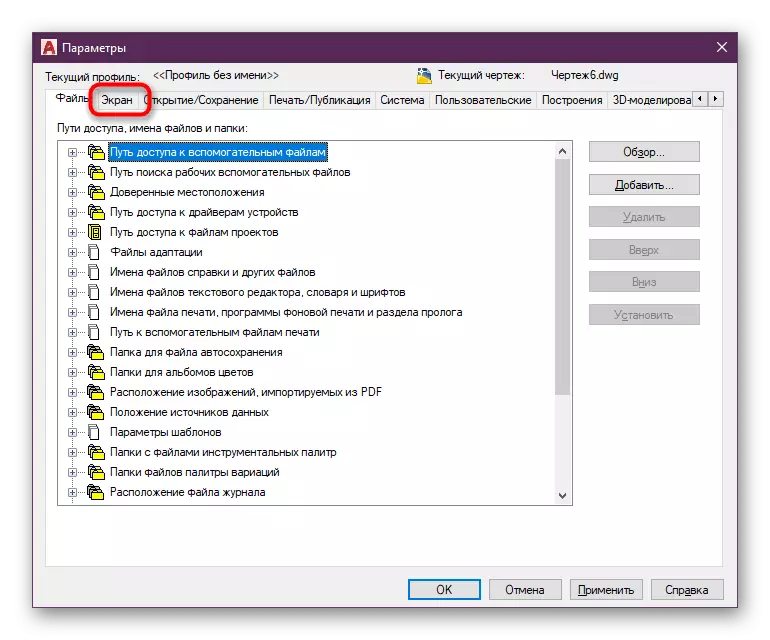
- Click on the empty place of the working space with the right mouse button and select "Parameters" in the context menu.
- In the window that opens, move to the "Screen" tab.
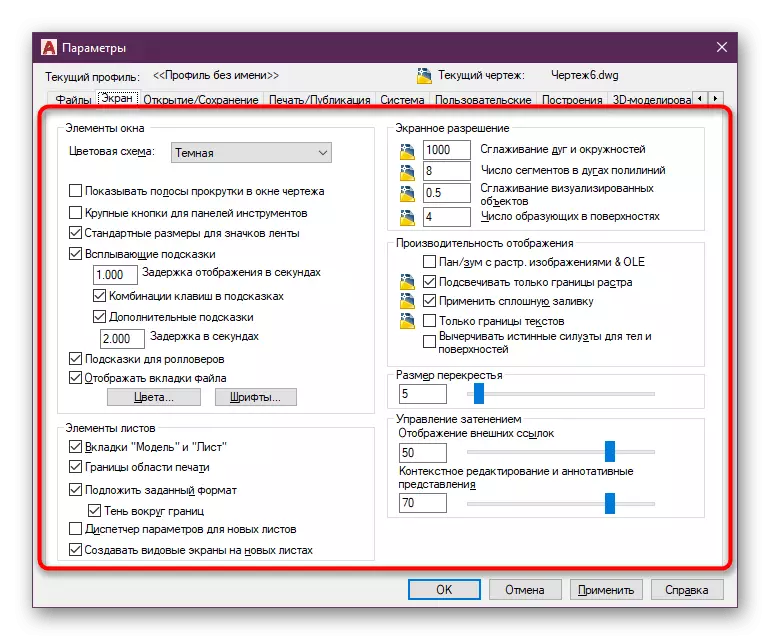
- Here, pay attention to the available items that can be noted by a check mark, as well as the variable values by moving the slider or manual change in numbers. In the "Window Elements" section, the color scheme varies if the default theme is not satisfied with the default.
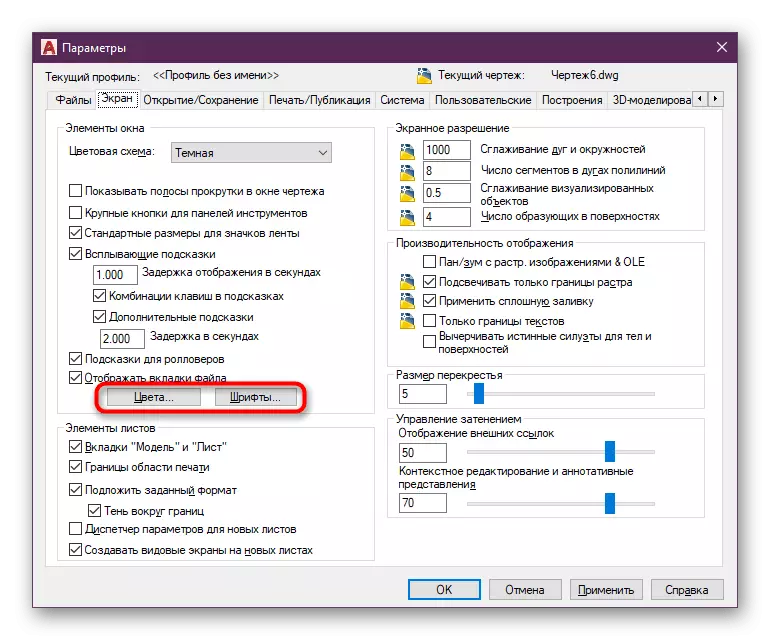
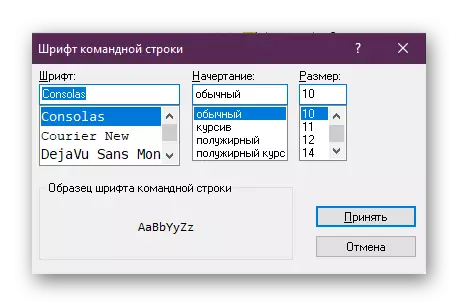
- Separately, I would like to mention the "Color" and "fonts" buttons. Click on the first to get into the section configuration.
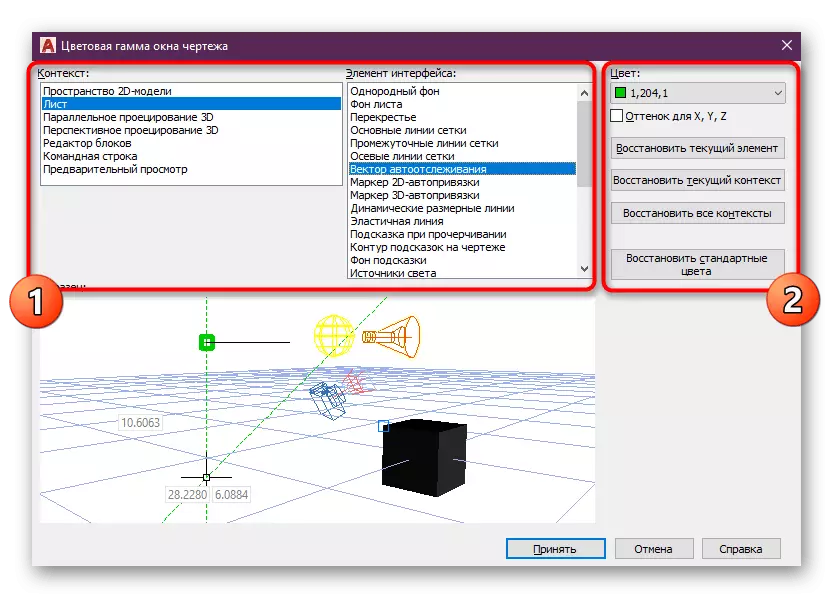
- In the window that opens, the color of each interface element is available in a different working environment. Here you already decide what shades want to see.
- The "Fonts" section still does not yet have such a large number of settings. Here are only edited by the inscriptions on the command line. However, it is quite possible that the developers in the future will correct this and add more configurable fonts.

Adding buttons to the shortcut panel
The shortcut panel is one of the main lines of AutoCAD. It is a separate line where the main software management elements are displayed (opening files, creating a new project, saving, sending to print and more). However, everything can not be done immediately on such a small panel, so the developers offer to select the required number of buttons displayed from the list.
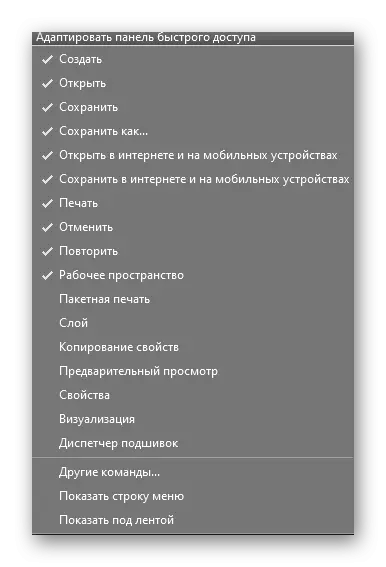
- On the upper panel, click on the arrow icon down.
- A context menu is displayed, where you can remove or check the check mark near the necessary items. Accordingly, if the checkbox is present, then the button will be displayed on the shortcut panel.
- After adding, pay attention to the highest line. Now there are all the necessary parameters.


Adding buttons to the status panel
The status string is always at the bottom of the work space, displays the basic information and allows you to quickly use certain tools. The number of all buttons is about the same as the quick access panel, therefore have to choose which of them will be displayed on the panel.
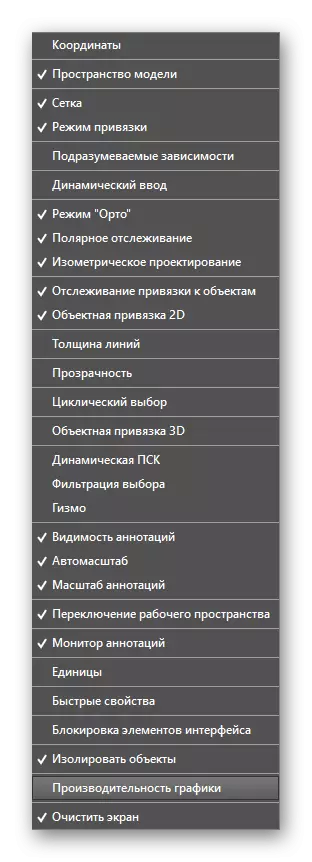
- Click on the icon in the form of three vertical lines, which is located in the lower right corner.
- In the same principle, as shown in the previous instruction, mark or remove the checkboxes from the displayed items in the context menu.
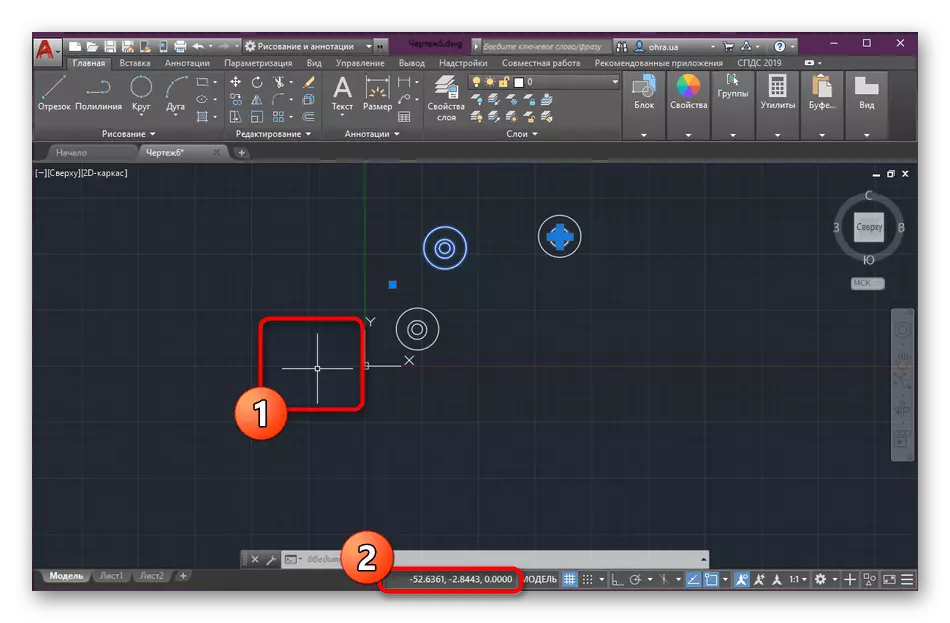
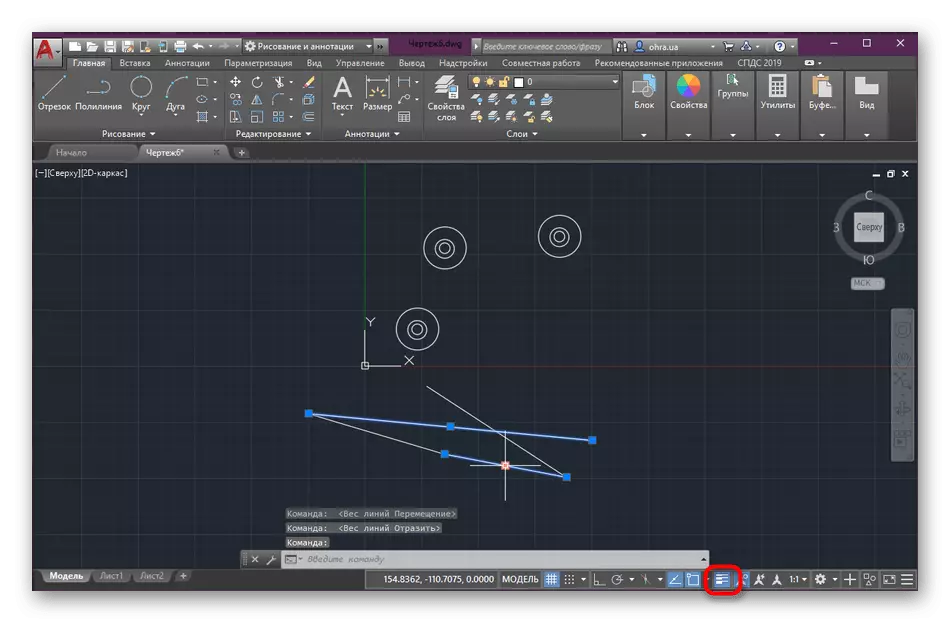
- Most situations, users need to add the coordinate mapping. After activating this function, when you move the cursor at the bottom on the line you will see the corresponding numbers, just indicate the coordinates.
- To a number of frequently used functions also includes the "weight lines". Do not forget to add this button if necessary.

On this we will finish the analysis of the basic parameters of the appearance. We will return to the windows and some other features, but these items deserve more attention, so read about them more in the same material further.
Return classic interface
Return to the classic AutoCAD interface is one of the items that should be accurately allocated to a separate paragraph. Many users who are used to working with old versions of this software, when downloading the latter, pay attention to a significantly highly modified appearance, which refers to the location of the buttons, the presence of certain panels and tools. Fortunately, developers allow you to return the old format that you can do this:
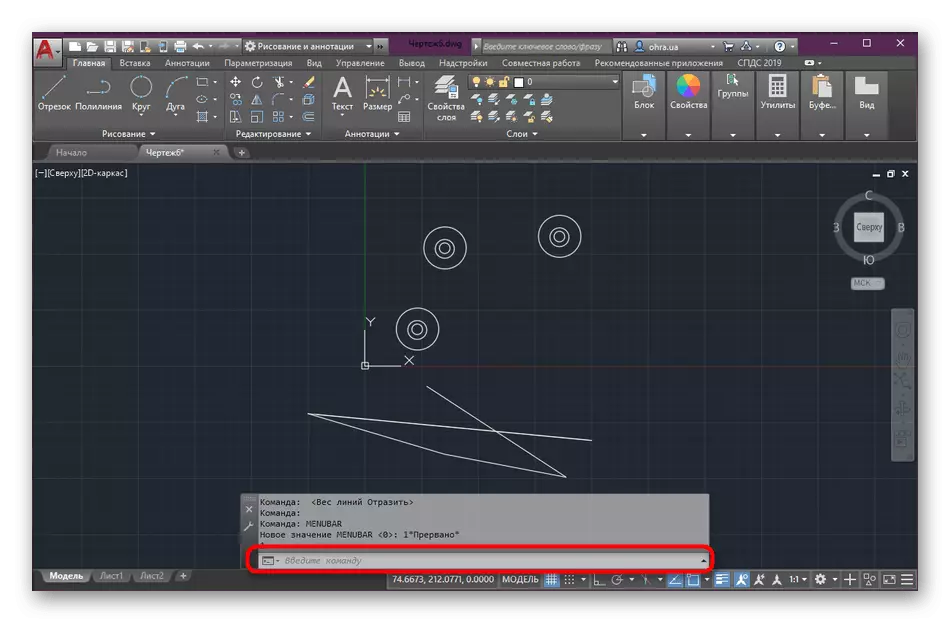
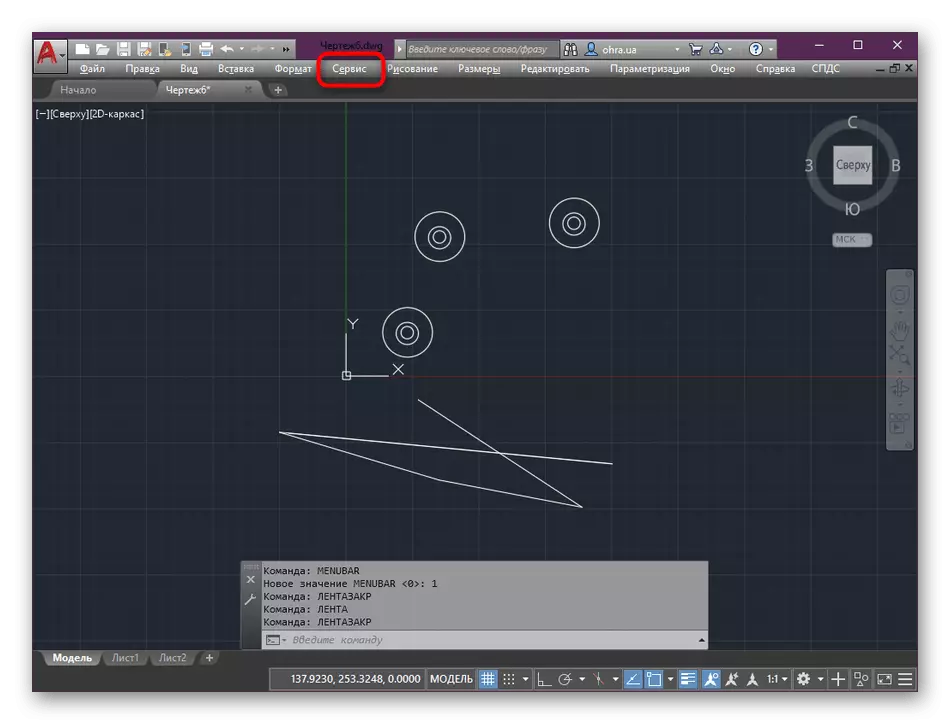
- Locate the work area at the bottom of the working area and click on it with LKM to activate.
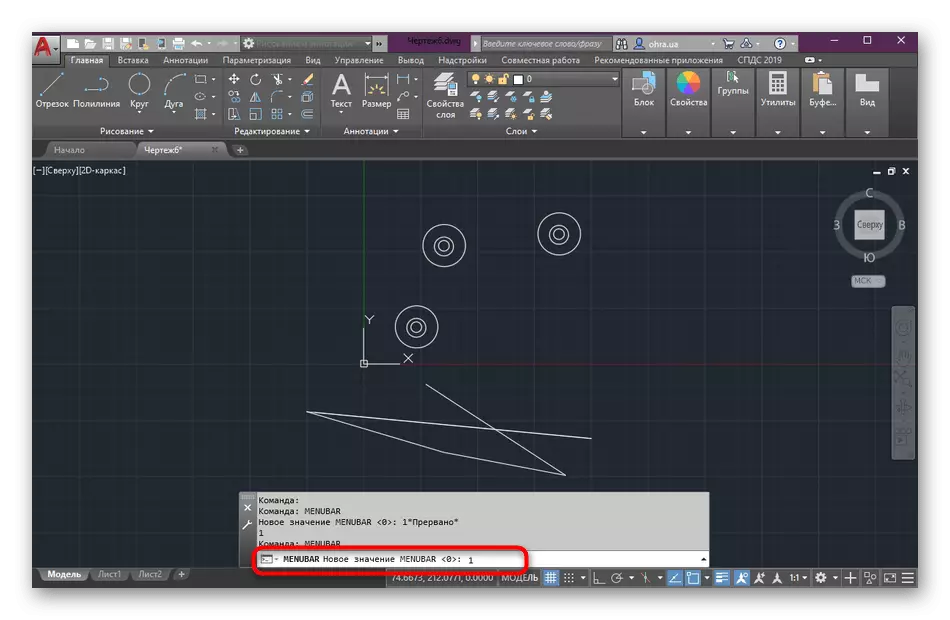
- Dial the Menubar command and set the value 1, speaking this number.
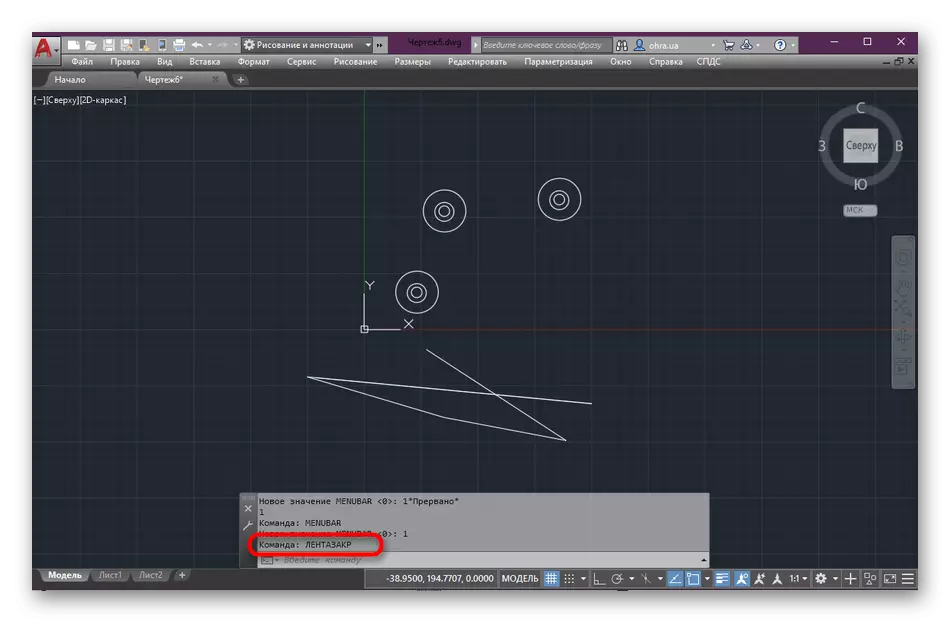
- Next will open an extra tape. If necessary, it closes by entering the Lentazakr.
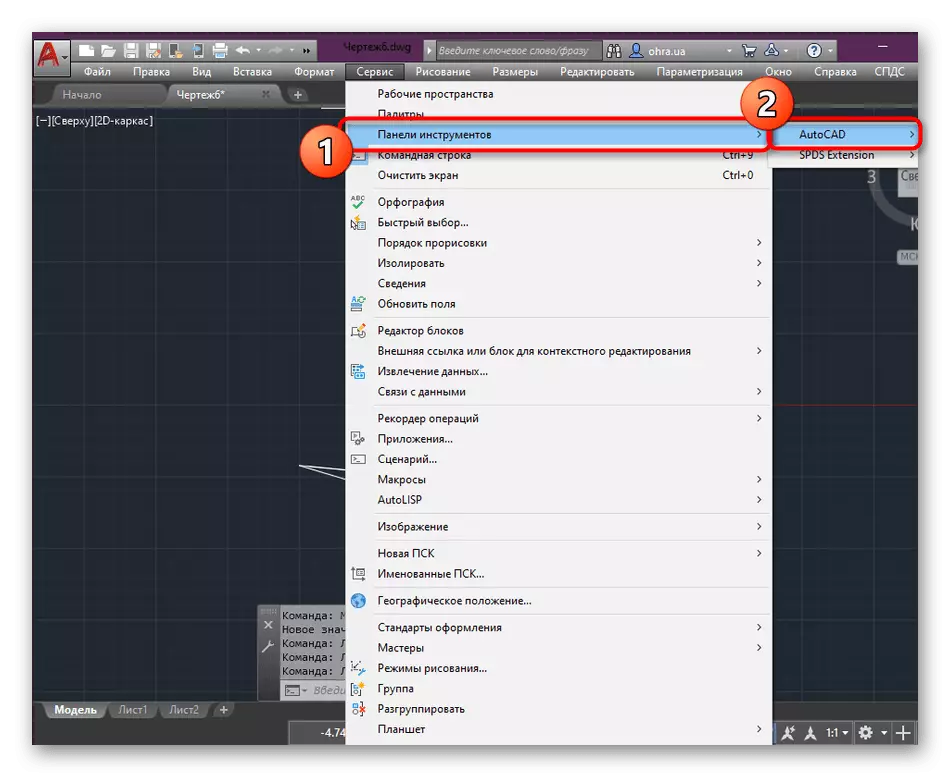
- Now on the panel that appears, click on the "Service".
- The context menu will open, where you make the cursor on the toolbar and select AutoCAD.
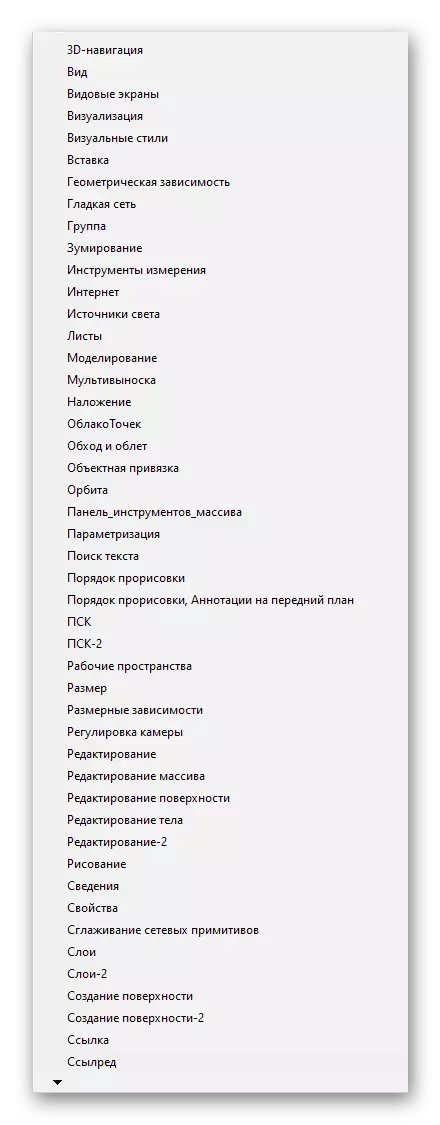
- You can mark all the necessary tools and buttons you want to see on the workspace. They will correspond to the form that was in past versions of the program.
After that, boldly proceed to work in autocadus with the usual classic interface. Use all the same actions that have been shown above so that when necessary, once again edit all the elements of the appearance.
Graphic settings
Now not all users have powerful computers that easily cope with the performance of even the most difficult tasks. Therefore, sometimes there is a need for improving the speed of software. This is done by lowering graphic settings that consume a significant number of system settings. AutoCAD also has several such points.
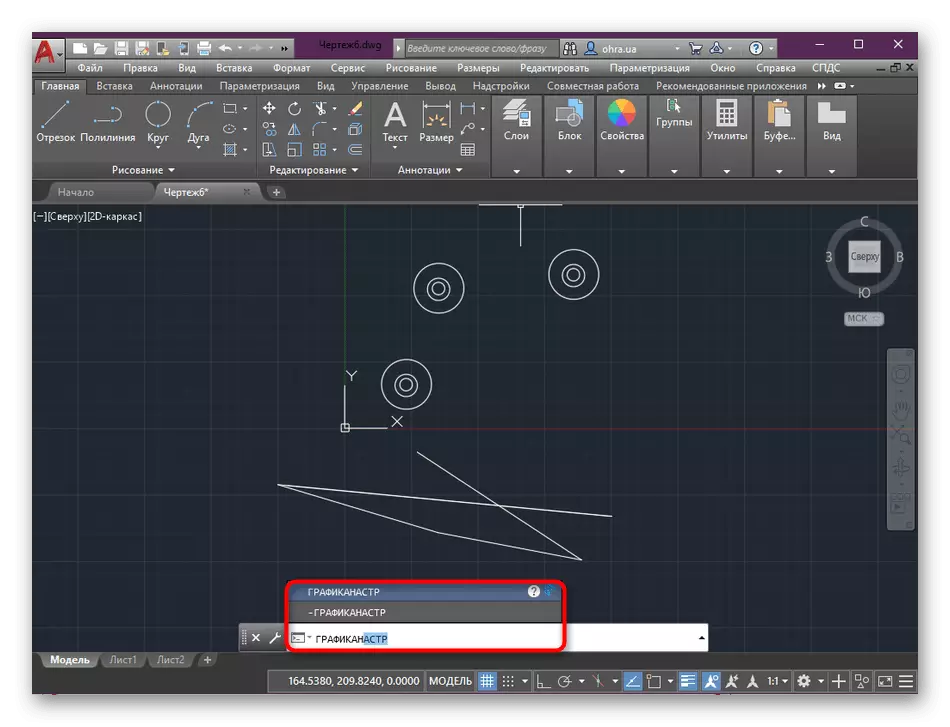
- Activate the Line command, hovering on it the mouse cursor, then register the playback and press the ENTER key.
- An additional window called "graphics performance" will open. Here you have to pay attention to the following:
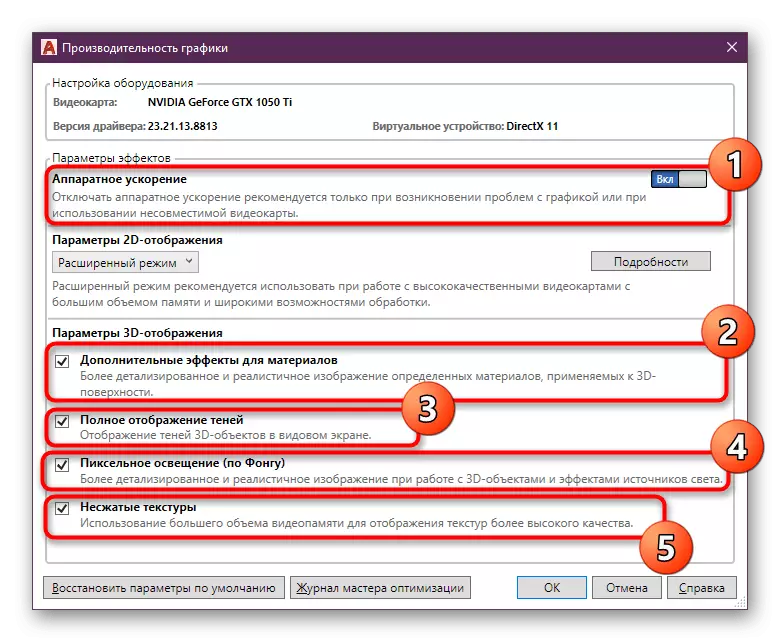
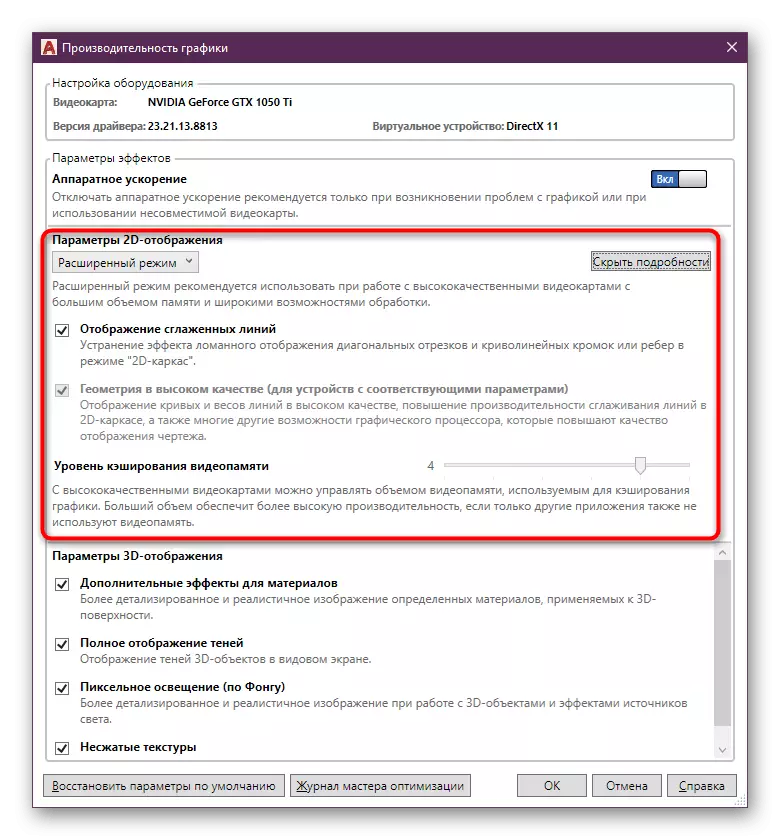
- Hardware acceleration. By default, this function is activated and is responsible for improving speeds thanks to the built-in graphic adapter technologies. If video card drivers are incompatible with this parameter, which will report notification when starting the software, turn off the hardware acceleration. It is also recommended to do this when various artifacts appear on the screen or hangs;
- Additional effects for materials. This item sufficiently affects the overall speed, since consumes a huge amount of video card resources. It is recommended to remove a tick with this setting in that situation if you work with textures and materials superimposed on 3D models using a weak PC. Then the image processing speed should increase;
- The complete display of shadows simply improves the appearance of 3D objects. There is no important component in this setting, so the owners of weak iron can safely turn off the shadows;
- Pixel lighting (according to me). Another parameter that is too much depends on the power of the video card. It allows you to get a more detailed and realistic image in the preview mode. Ultimately, the rendering is naturally not affecting, so the function can be disabled;
- Uncompressed texture. The last item of the menu under consideration. It allows you to use more video card memory to get textures in better quality. On the unproductive PC, you can turn off this feature, but the picture in the preview mode will be a little worse in quality.
- The following is proposed to deploy the "2D display parameters" string to enable the advanced mode. There are also available multiple settings for editing. Disconnect the display of the smoothed lines and increase the level of video memory caching to ensure maximum performance.
The above instruction will help not only in optimizing the software, but also prompts which settings you should pay attention to when you want to create a high-quality picture in the preview mode with the possessors of very powerful components.
Control of pop-up prompts
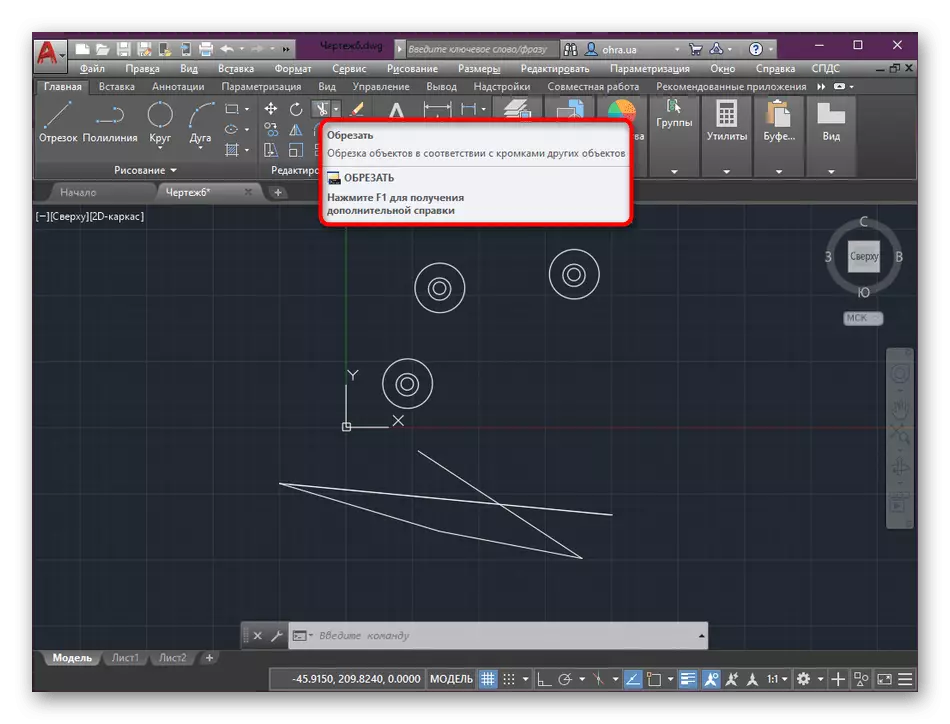
Pop-up tips, which are displayed when you hover over one of the tools will be very useful for newcomers, who are just starting their acquaintance with AutoCAD. A small sign interfers with general information about the active button, and also shows additional information, for example, the standard hot key to activate. Control of pop-up prompts is carried out like this:
- In the screenshot below you see an example of displaying the mentioned information. By default, the window appears after a second delay if you have a cursor on the or tool.
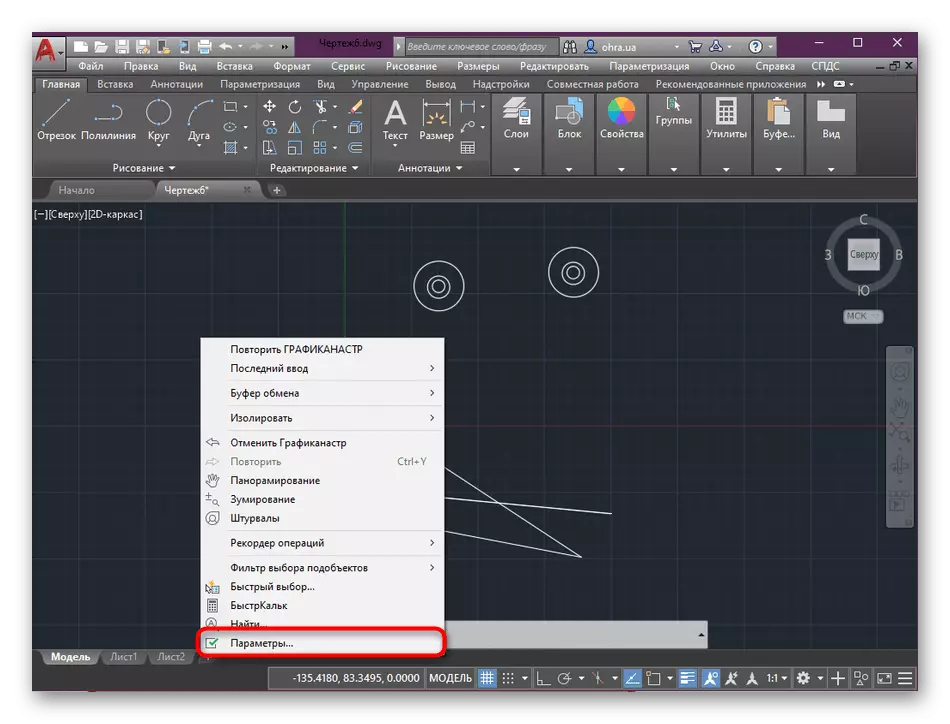
- Press PCM on the free part of the workspace and select the option "Parameters" to go to edit the function in question.
- In the "Screen" section you will see several items that are set specifically for the configuration of pop-up tips. You can completely disable them, set the display delay, install, whether hot keys will be displayed in the block, and configure additional information shown by a bit later of basic information.

As you can see, adjust the pop-up tips is quite easy. All items are selected by the user independently so that the use of this function is as comfortable as possible.
Opening and saving files
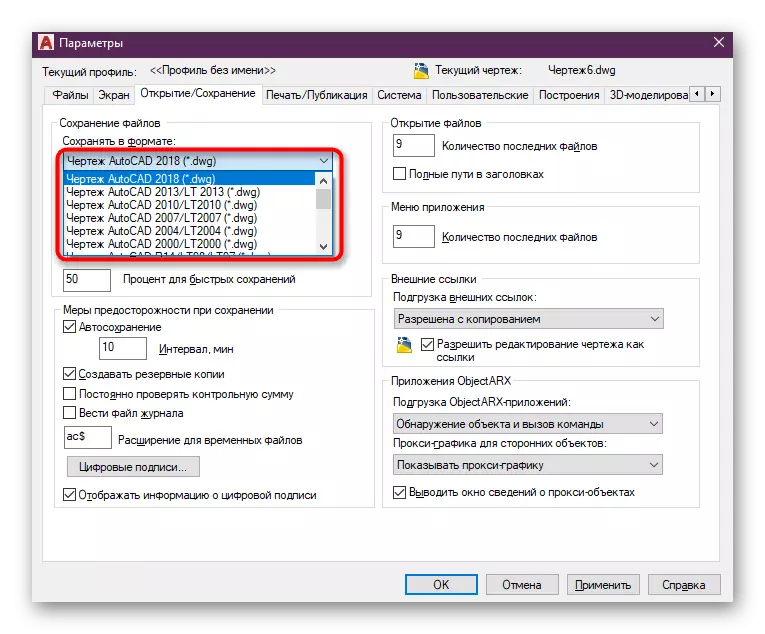
Each drawing or any other autocade project is stored in a separate file of a particular format. By default, the most relevant data type is always set. Now it is "AUTOCAD 2018 drawing (* .dwg)". However, the user at any time is available to change this configuration, which will simplify the interaction with older versions of this software.
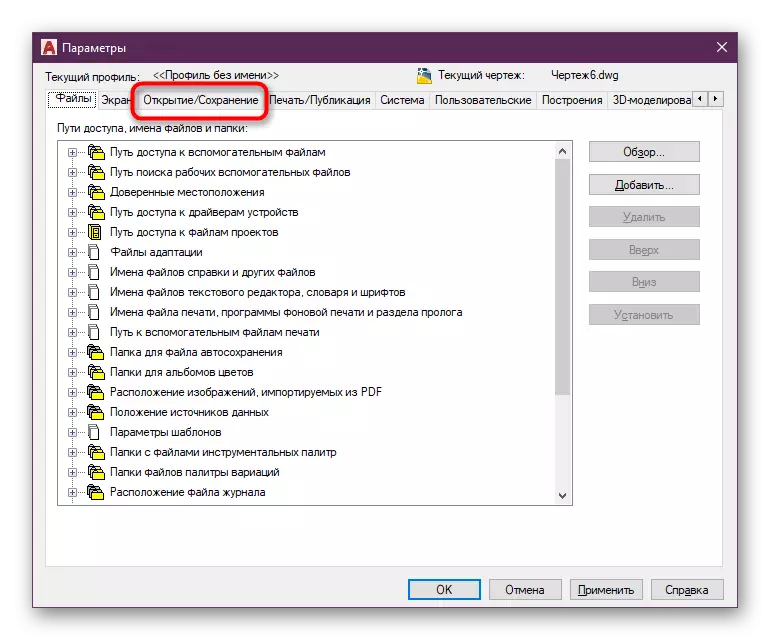
- Open the "Parameters" menu in the same way as we have already shown above. Move here to the Opening / Saving tab.
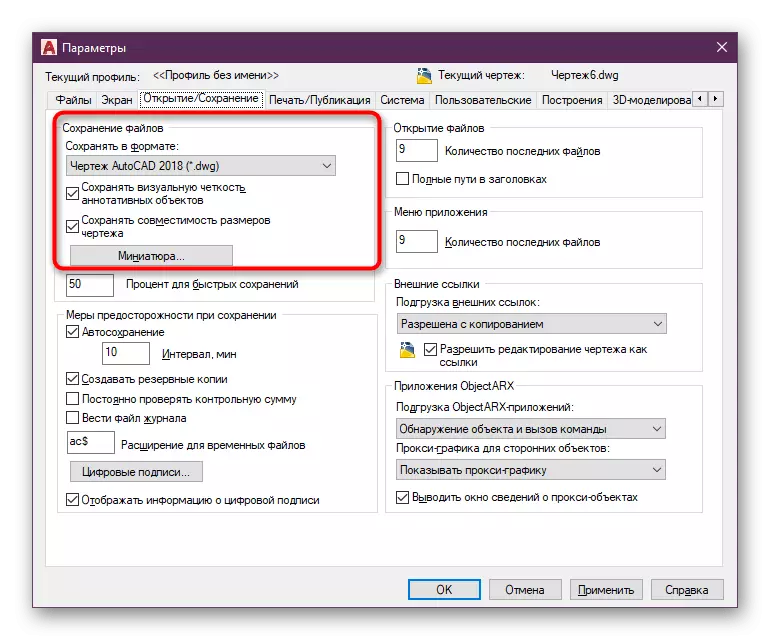
- We advise you to pay attention to the "Saving Files" section. There is a compatibility of ready-made projects with old software assemblies.
- In the pop-up menu, a variety of most diverse supported formats is available. Your decision will depend only on what optional software is used at home or at work. Everything else is edited exclusively individually. In most cases, they remain unchanged.
Command line
The console or command line is one of the most important elements of the software under consideration. Through it, users are quickly moving to a specific menu using commands, cause hidden settings and activate the tools. Init words much easier than to look for the desired item, opening several windows. Therefore, many professionals and lovers involve console. There are several small moments that should also be considered when the authokad is generally configured.
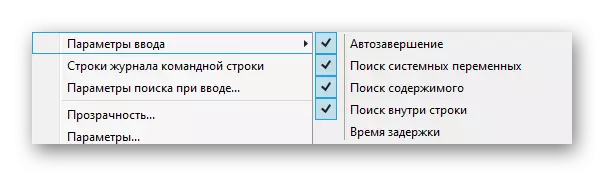
- Take a look at the bottom of the work environment. To the left of the command input field, click the key icon to open the parameters.
- In the pop-up menu, it is proposed to configure the configuration of the fitting, searching for content or inside the string, as well as specify the delay time. Using the strings below, you can move to the General Console log or open global parameters.
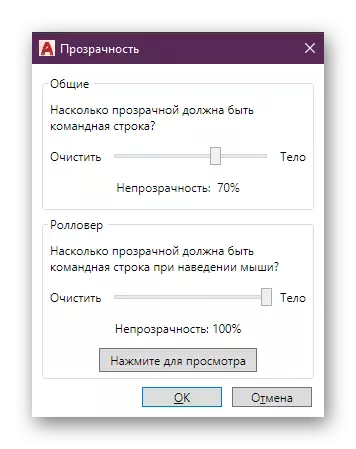
- Separately want to mention editing transparency. By moving the sliders edited percentage of this factor. Adjust it so that the interaction with the program you have been most convenient to use the console, and while it does not interfere with other activities.

The distribution of windows in the workspace
A little back to the topic and talk about the interface of the main window layout changes that default delivered in section "Home." Initially, you will not see on the sides of AutoCAD some additional panels, as implemented in most of the other similar solutions. Here you will need to customize the location and size of the necessary tools.
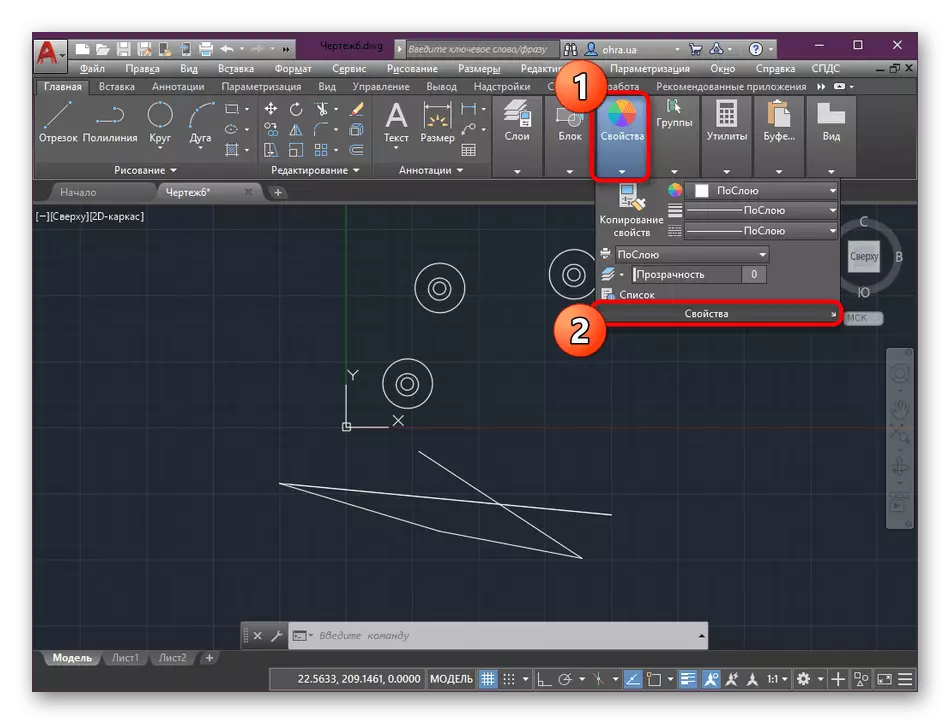
- Being in the tab "Home", open to any desired section and at the bottom right of its name, click on the arrow.
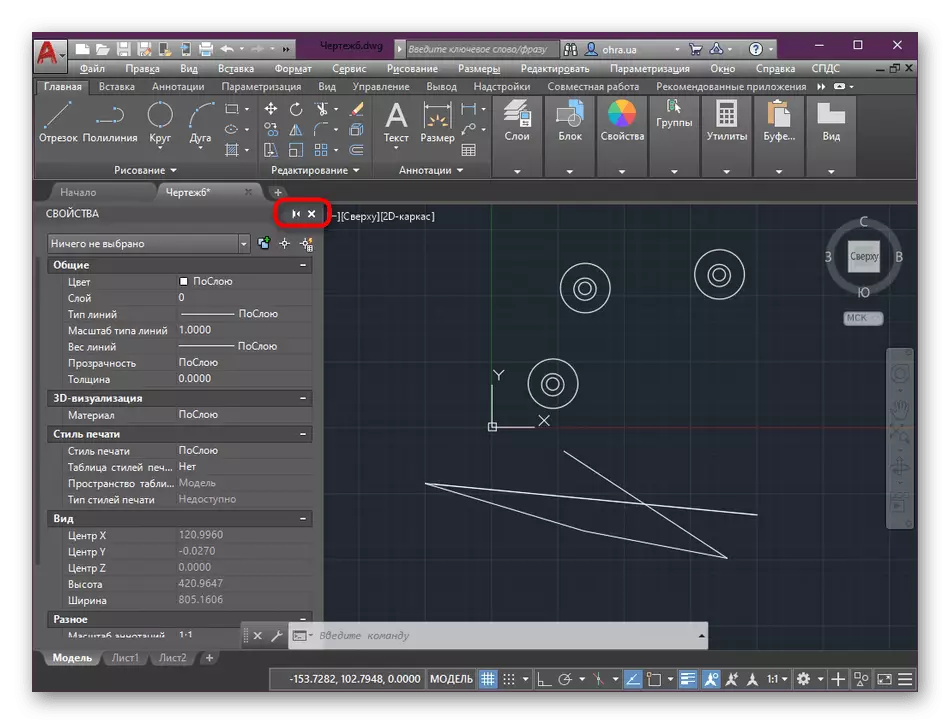
- The panel will be put into the left side of the screen. Now you can roll it up or hide the back.
- In minimized mode adds new options that allow you to edit the position and size of windows. That is to say you the location of the panels in absolutely anywhere and its flexible transformation.
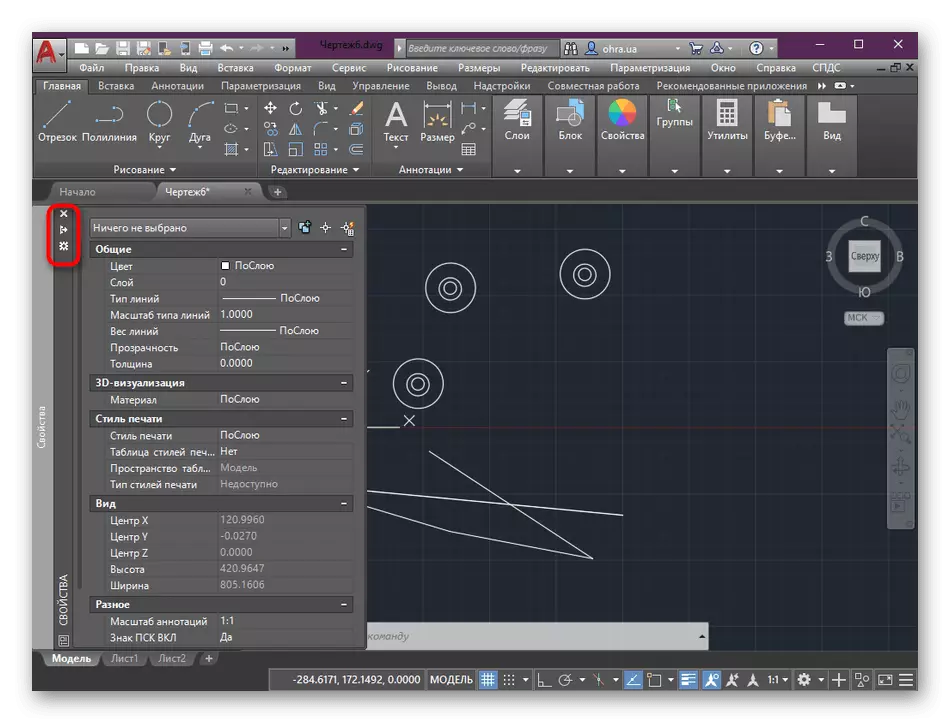
In the same way allowed to make any number of panels, placing them over the entire surface of the main window. This will help to make the interaction with the necessary tools as quick and comfortable as possible.
Custom keyboard shortcuts
Finally we want to touch upon another important topic - viewing and editing hotkeys. As is known, AutoCAD - program is packed with features and tools. Call them all through commands or pressing the buttons is not always convenient. Because many users of both amateurs and professionals prefer to use hotkeys. View basic combinations and their changes is as follows:
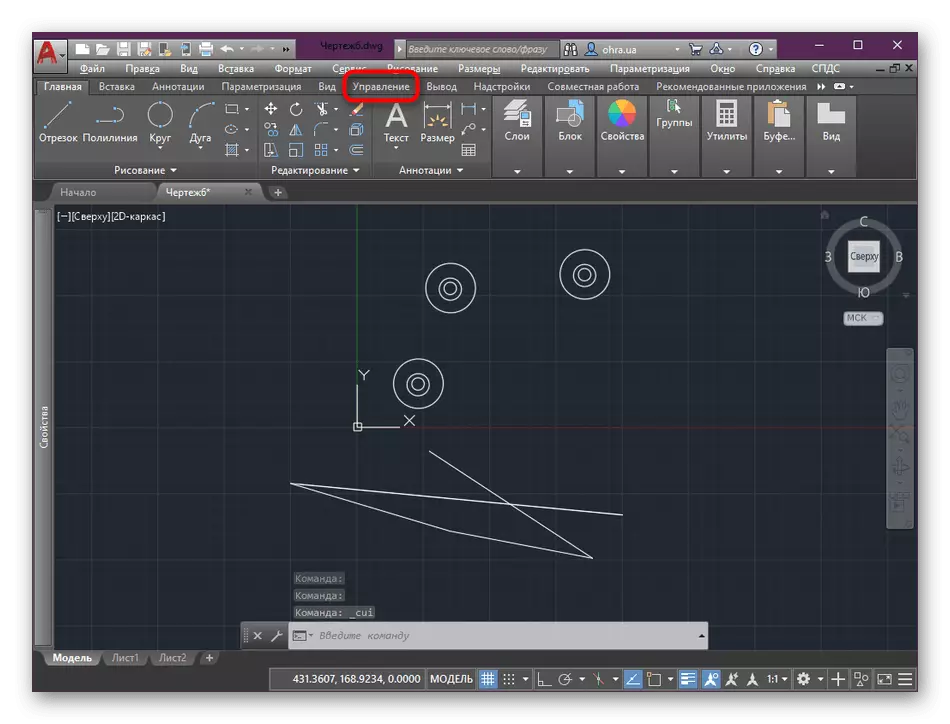
- Navigate to the tab "Manage".
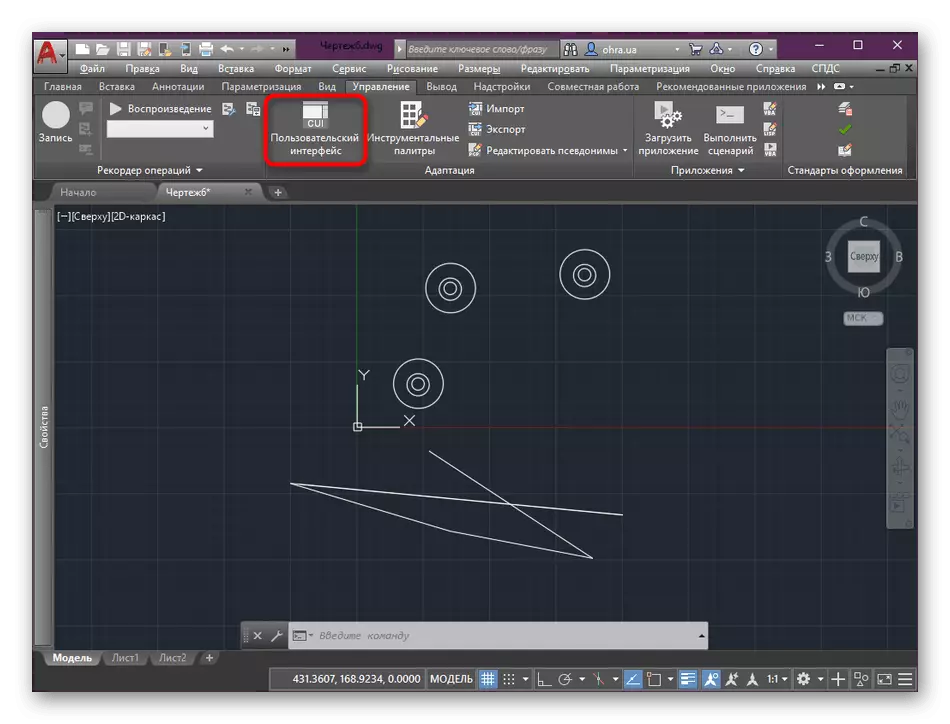
- Click on the "User Interface".
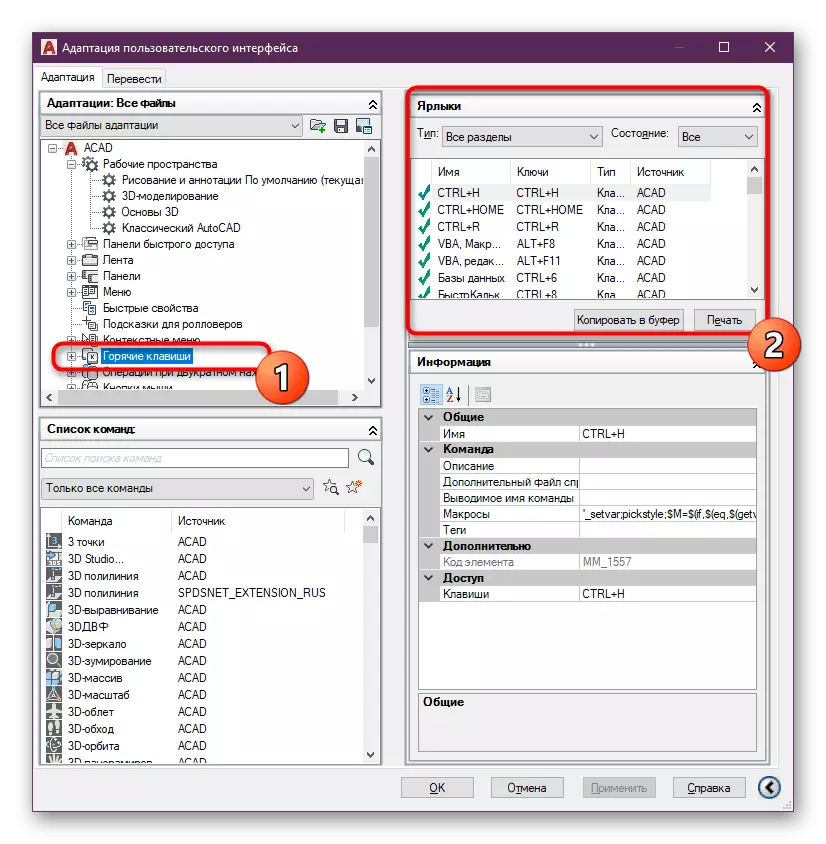
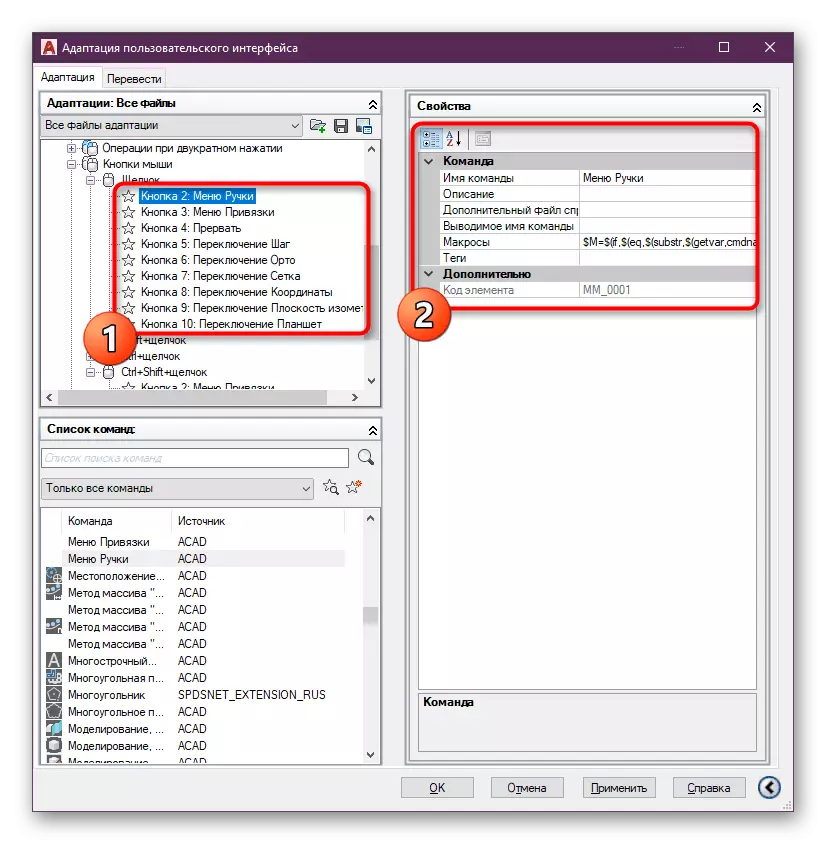
- This opens an additional menu entitled "User Interface Customization". Here, find the section "Hot keys" on the right and check out all the available combinations.
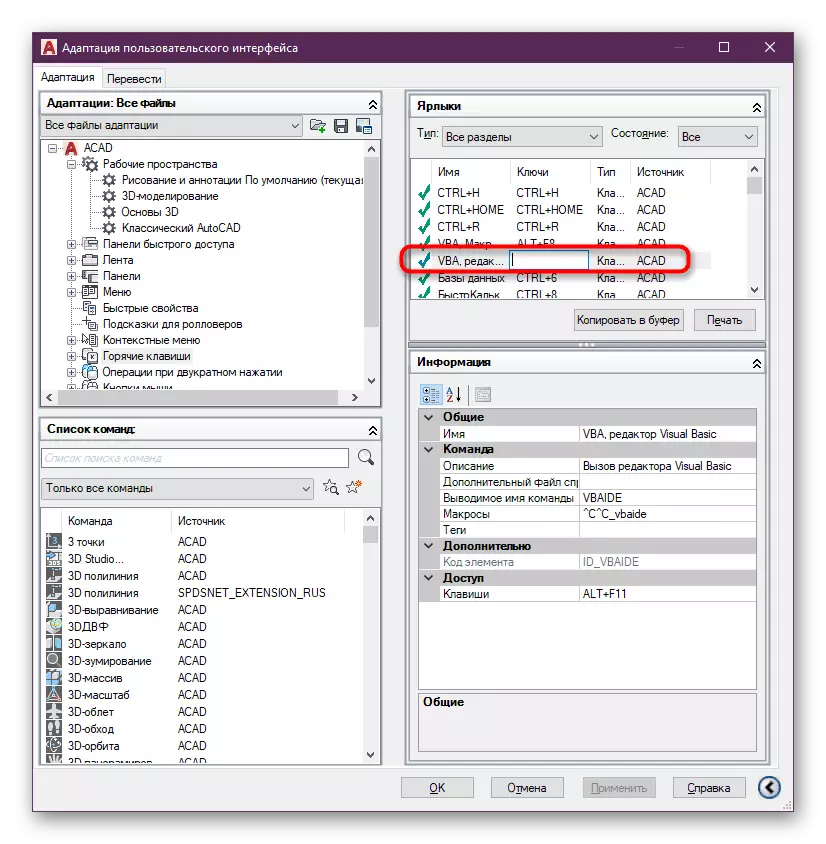
- Now you can edit them yourself, inscribing new keys. Only pre-advised to make sure that a given combination is not used for other teams.
- Approximately the same scheme configured the mouse buttons. Expand the corresponding block to see all existing values.
- Select one of them to change macros, add any description or completely change the value.

Expanded information on the topic of studying and setting up hot keys to AutoCAD read in another material by clicking on the link below.
Read more: Hot keys in AutoCAD
Above you have been familiar with the main moments of the overall autocadus configuration. As you can see, there are a large number of items and menu partitions. We tried to tell in detail about the most popular and often used, and everything else, simpler and individual, we suggest learning themselves by reading all the rows of the "Parameters" menu. After successful configuration, you can safely switch to the preparation of your drawings and edit them. To deal with the main focus of working with data will help our separate article further.
See also: How to use AutoCAD