

With the help of special software implementation of electronic drawings now it occupies not much time, and support tools allow you to make this operation much easier. The most famous representative of this software called AutoCAD, and it features such a huge number. One of them acts as a binding to specific points., Making it possible to produce drawing, starting from certain coordinates, lines, or points. In this article, we want to tell everyone about this tool.
We use binding in AutoCAD
In AutoCAD there is a large number of bindings that are disabled by default. The user chooses the type of compliance and sets it for themselves. The changes are global and do not depend on the active project, because the configuration is performed only once, and the settings will be saved forever. We offer in order to get acquainted with all aspects of interaction with bindings, starting with the activation.Inclusion type bindings
To get started you want to enable the types of bindings. There are a number of parameters that are used most often, it is from this we should proceed, but do not forget about personal preferences. Sometimes users are faced with the necessity of building an object with specific bindings. Therefore, we only show activation method comparison, and you choose the ones that need you.
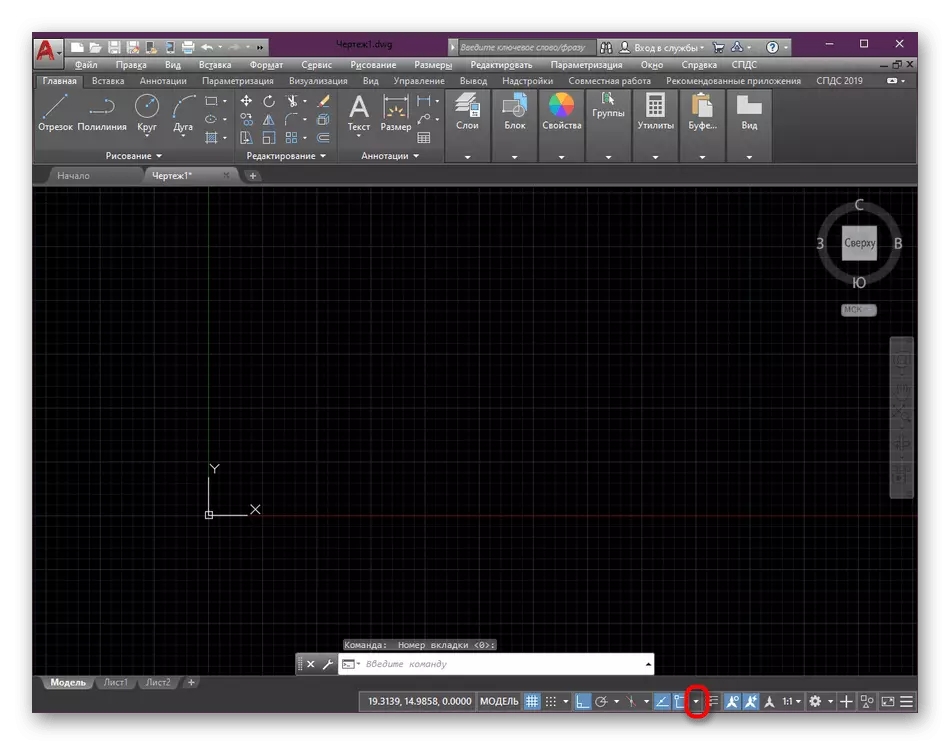
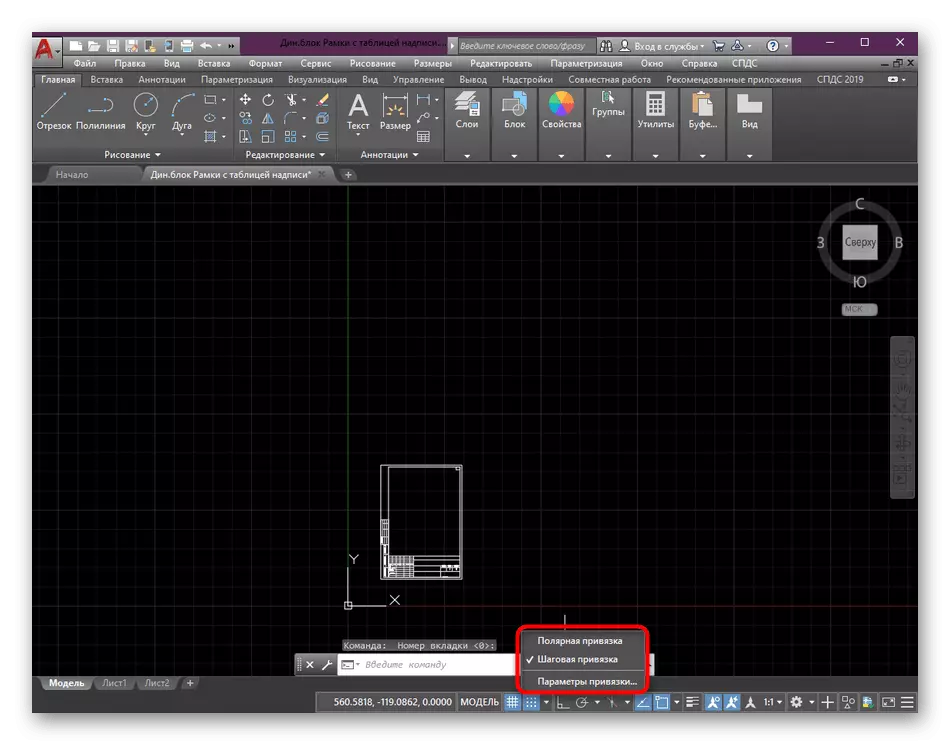
- Scroll down AutoCAD workspace, where the status bar look for the arrow marked in the screenshot below. Click on it to open all types of bindings.
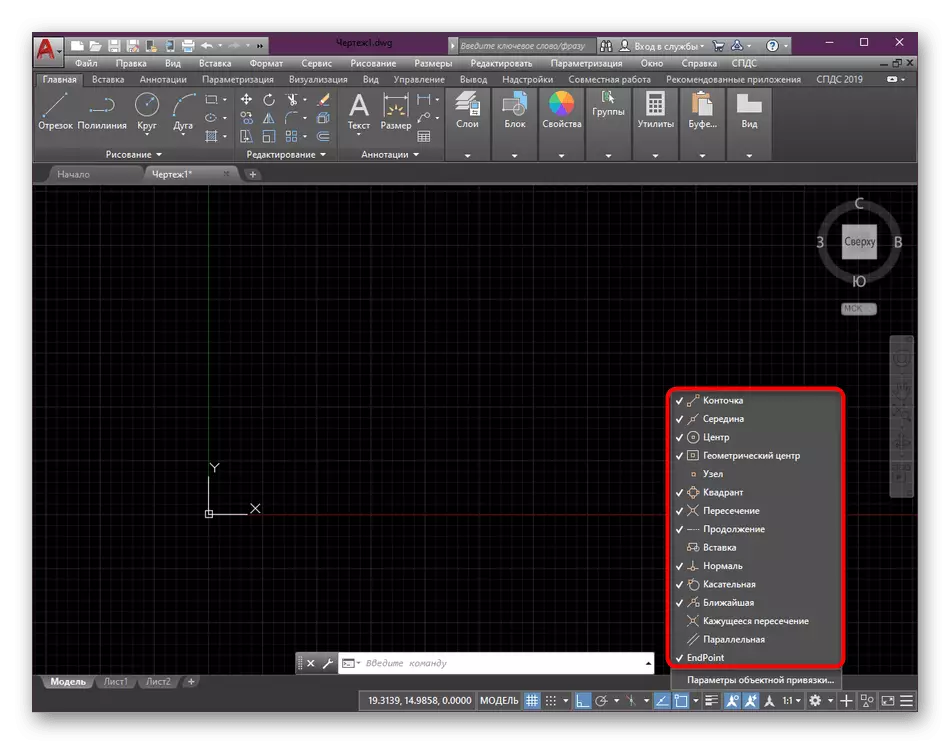
- Check the boxes that apply.
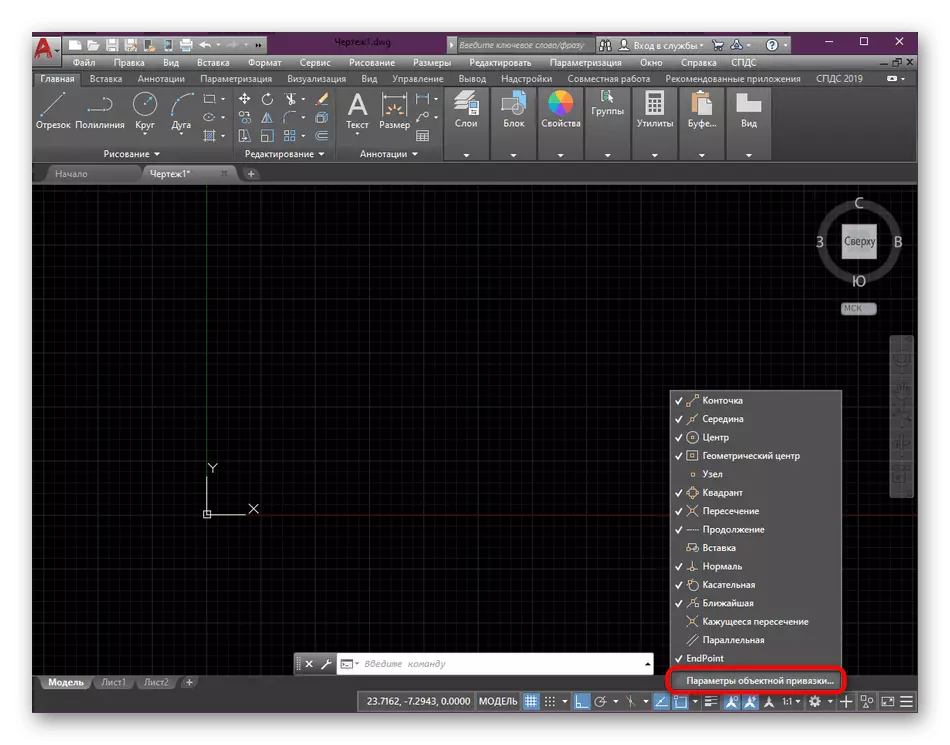
- If suddenly in the list was not an option, need to click on the "Object Snap Settings."
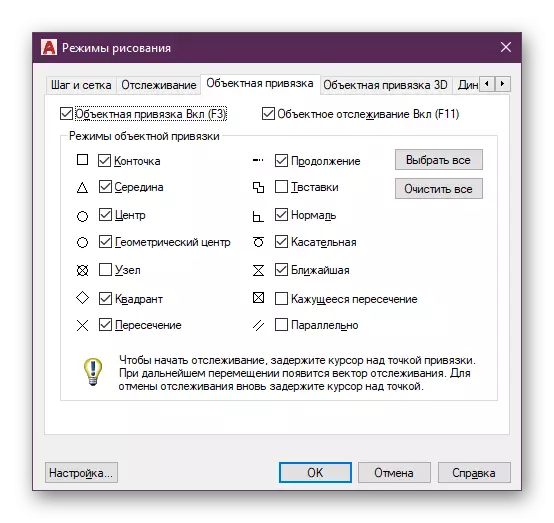
- Already in the window that opens, select the check box items.
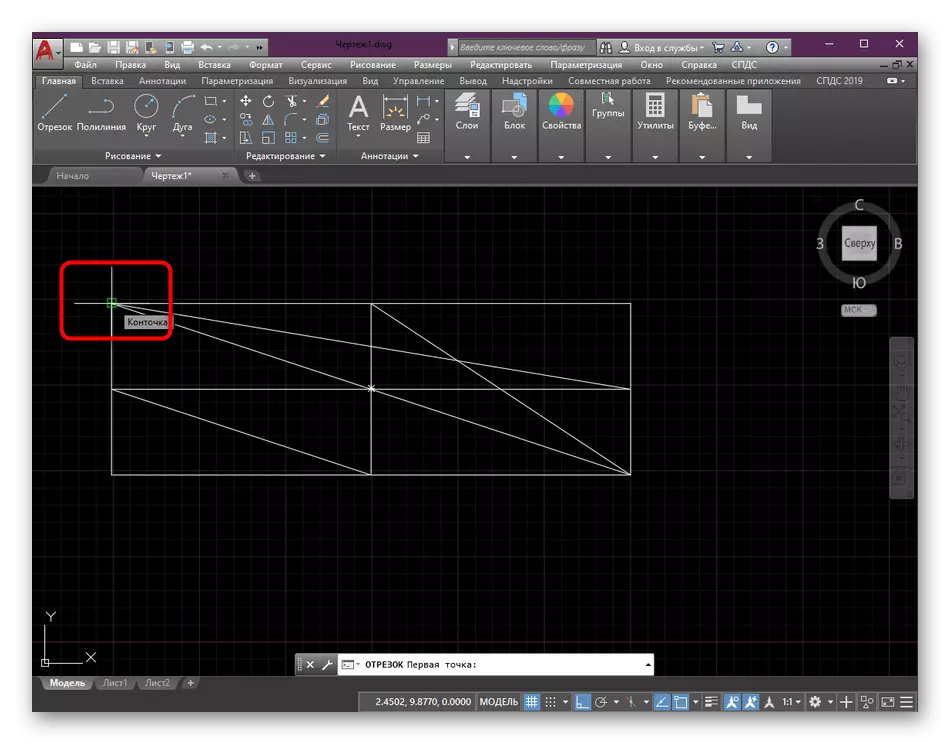
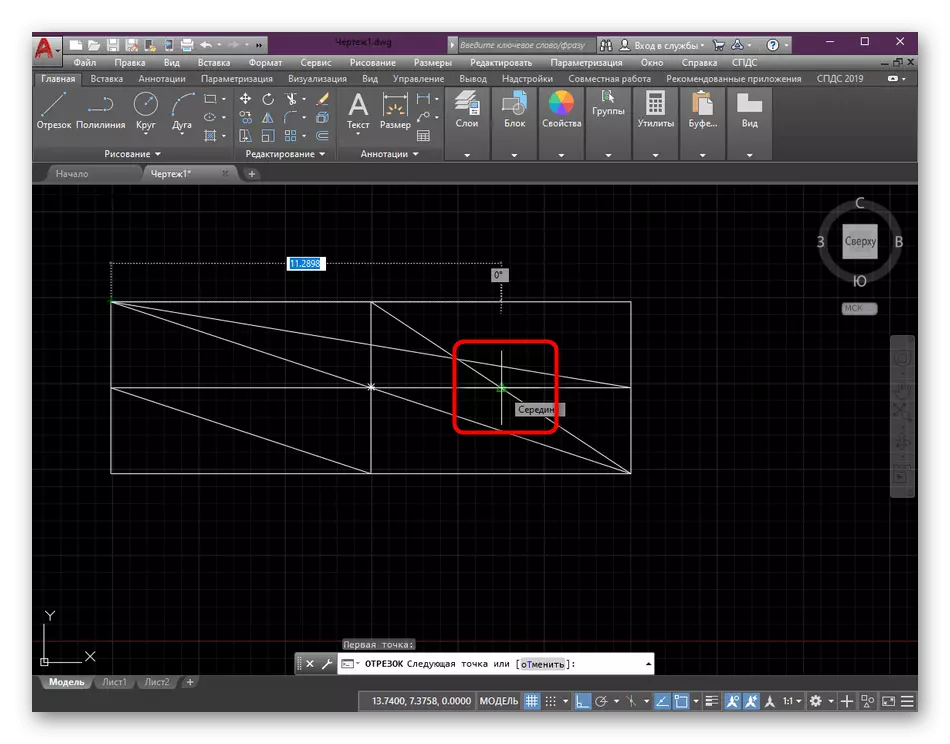
- Now you can create any entity or object. When you hover over any line will show a green figure, indicating the binding. When you create two lines are perfectly aligned points.
- With regard to this, and all subsequent points added to create primitives.
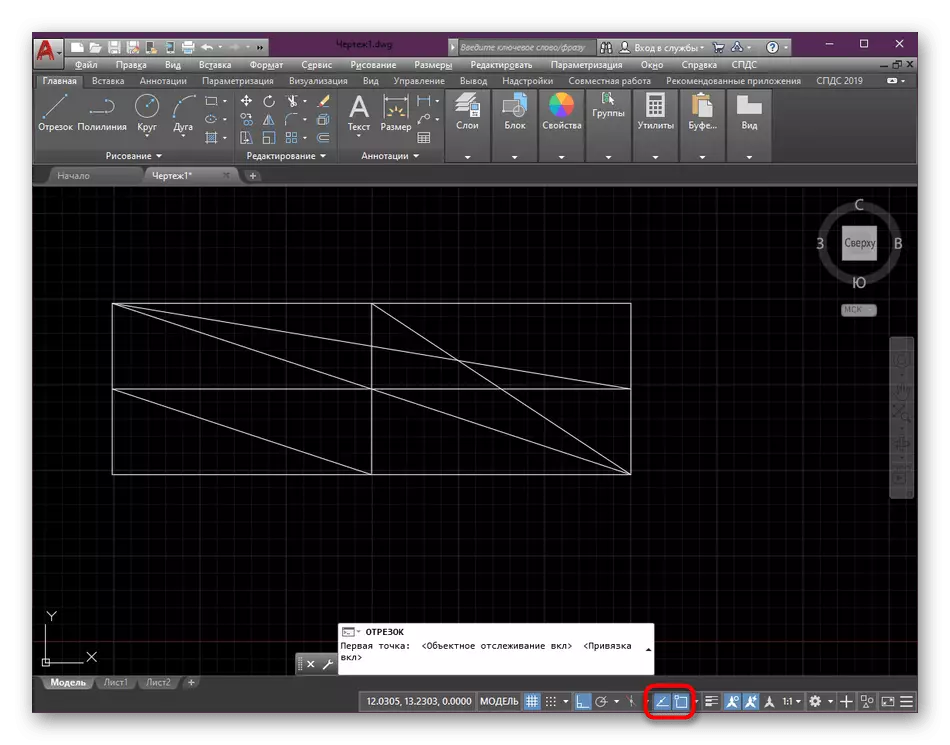
- It is required to make sure that the items that display binding options are turned on in the status bar.
Binding to the drawing grid
Of special note is a binding function for drawing grid. It has nothing to do with objects, but it allows you to draw certain segments or pieces, starting from marking millimeter mesh. By default, this feature is disabled, and activate and configure it as follows:
- At the bottom of the status bar, click on the button titled "Binding to the drawing grid." If it is marked in blue, it means the successful inclusion.
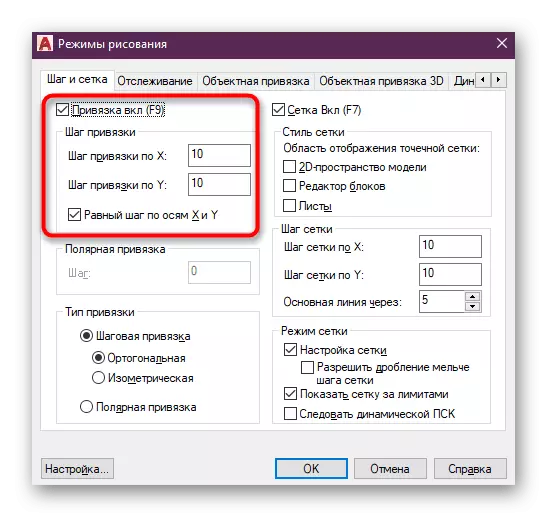
- Click the down arrow to the right of the button to open the advanced settings. There is selected one of the two types of binding. We recommend using the step mode, because it is much easier to polar.
- If you click on "parameter binding", you will be moved to a special section of the settings. There is carried out a step configuration and binding activates the function itself. By default, a single step is 10 millimeters on both axes, but nothing prevents you to edit the values to suit your needs.
With the main functions of binding, we have successfully dealt with. Now, let's focus on several global configuration parameters by which the optimization of this function takes place by itself.
binding settings
Unfortunately, that functionality is not considered software allows you to configure each type of binding. Exposed values will be applied completely to all modes. However, such an individual is not always necessary. With respect to general parameters, here we should note the following items:
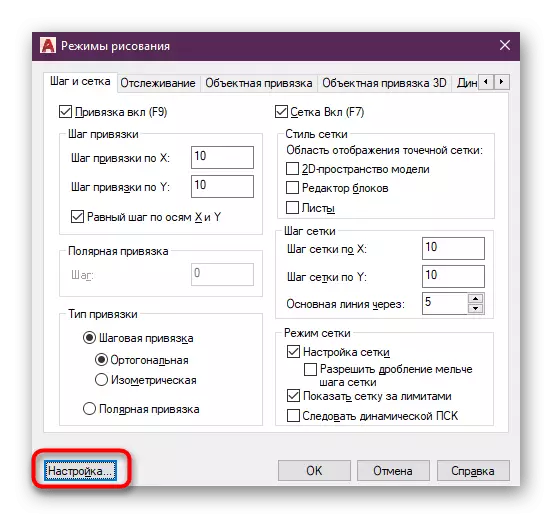
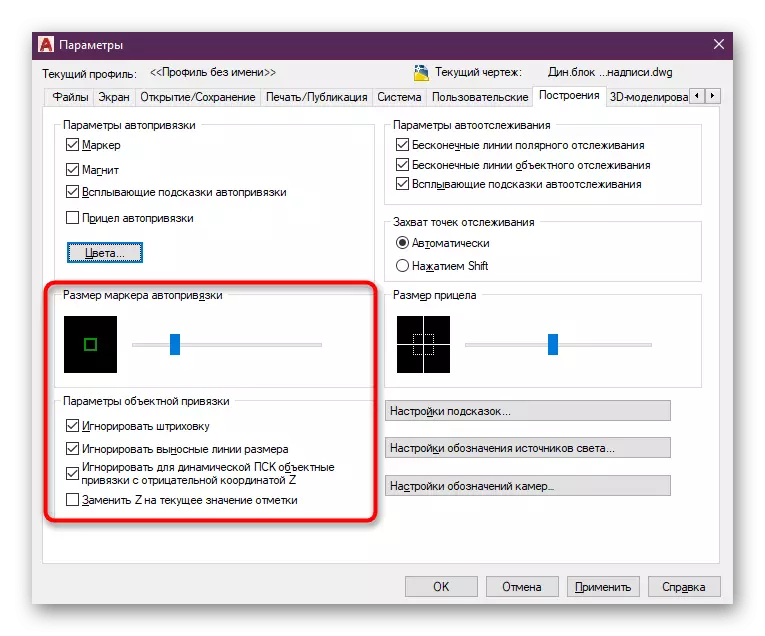
- Being in the "Drafting Settings", in which we have moved in the instructions above, click on the bottom left of the button "Settings".
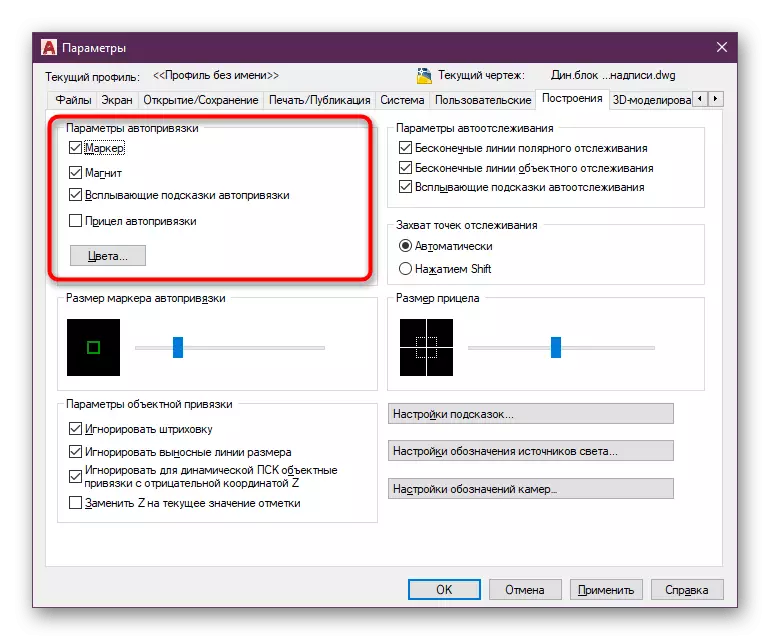
- Here you will be automatically moved to the tab "Building", where the search for "Options AutoSnap". By default, there are included a marker, a magnet and a pop-up tips, you can additionally activate the sight. Simply remove the tick or to present the items at its discretion.
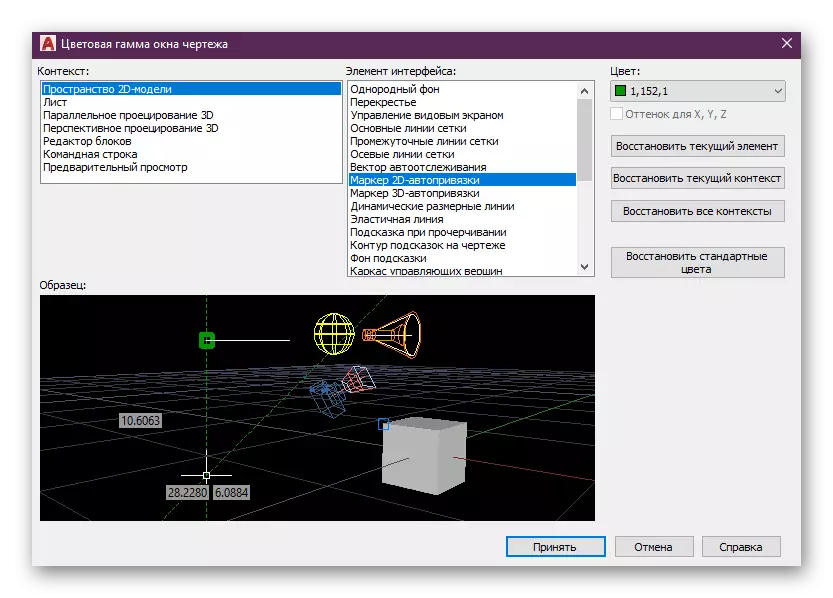
- If you press the "Colors", will jump into a separate menu to edit the color. Make sure that the "context" selected "2D-space model" and "interface element" - "Marker 2D-AutoSnap".
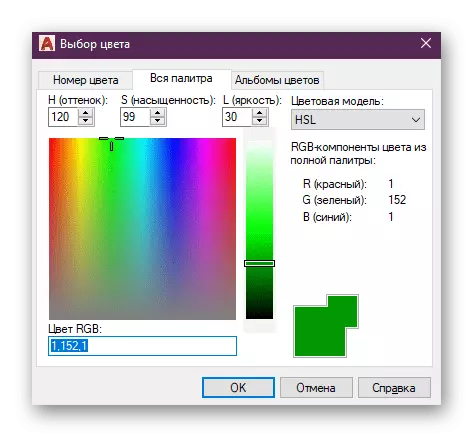
- Then expand the full list of colors on the palette and select the appropriate marker color.
- Upon completion, apply Changes and return to the global parameters where additional items are present regarding the size of the autographs marker, whose configuration should also be given a little time. Set the appropriate marker size, install hatching or remote lines.
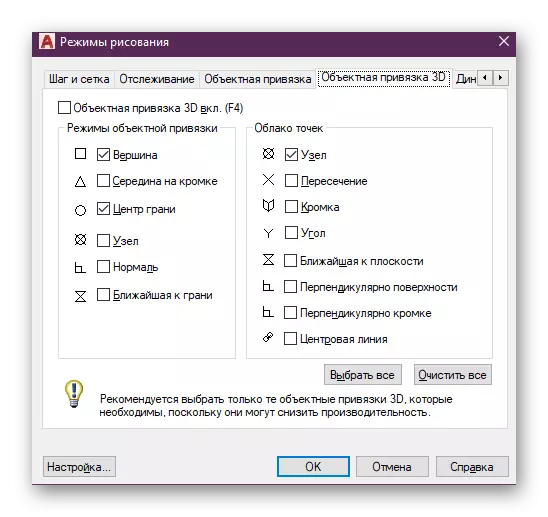
- Additionally, you can configure and bindings in 3D space. This is done in the same way as demonstrated above.
During the interaction with the global parameter window, you could notice that AutoCAD has a huge number of useful settings. We recommend familiarizing yourself with a separate material on this topic on our website, because it will help to quickly deal with all existing items, paying attention to the most significant and important points.
Read more: Setup AutoCAD Program
Approximately the same principle also built the other our articles, the main task of which is to train novice users with the main tools and the functions of AutoCAD. All detailed information on the lessons is in one premise material, go to which you can by pressing the following link.
Read more: Using AutoCAD Program
Above you have been familiar with the concept of bindings in the autocada. As you can see, they greatly simplify the procedure for building primitives and complex figures. You will only need to configure them for yourself and use as needed to carry out the most accurate structure of the elements in the drawing.