
Each monitor connected to the computer has certain specifications to which the frame update frequency is in second, that is, the hertes. Than this indicator is more, the smaller and more clear will be the image displayed on the screen. Therefore, gamers and professional cybersports are preferred to the equipment that can be issued 144 or even 240 Hz. However, sometimes users cannot find information on frame update frequency in the monitor description or manual. This question is solved very simply - you just need to download special software or use the standard tool of the operating system. Let's consider the implementation of the task in Windows 7.
We determine the hertes of the monitor in Windows 7
Now all the most popular and budgetary options are considered to be devices with 60 Hz, moreover, by default, this value is selected in the OS in cases where the user has not yet installed the drivers for its graphics adapter. Therefore, to obtain correct results and the ability to view all modes of the monitor, we recommend first to make sure that you installed on a computer component on your computer. If not, use the instructions below to solve this issue literally in several clicks.Read more: Installing video card drivers
Method 1: AIDA64
We have already talked about the fact that the information we need provide third-party funds and the standard OS toolkit. Let's start with the first version, breaking several software representatives to determine the components of the computer. The AIDA64 will be taken as an example - the most popular program that allows you to get all the required information about the PC as much as possible.
- Go to the above link, download and install the software in question on your computer.
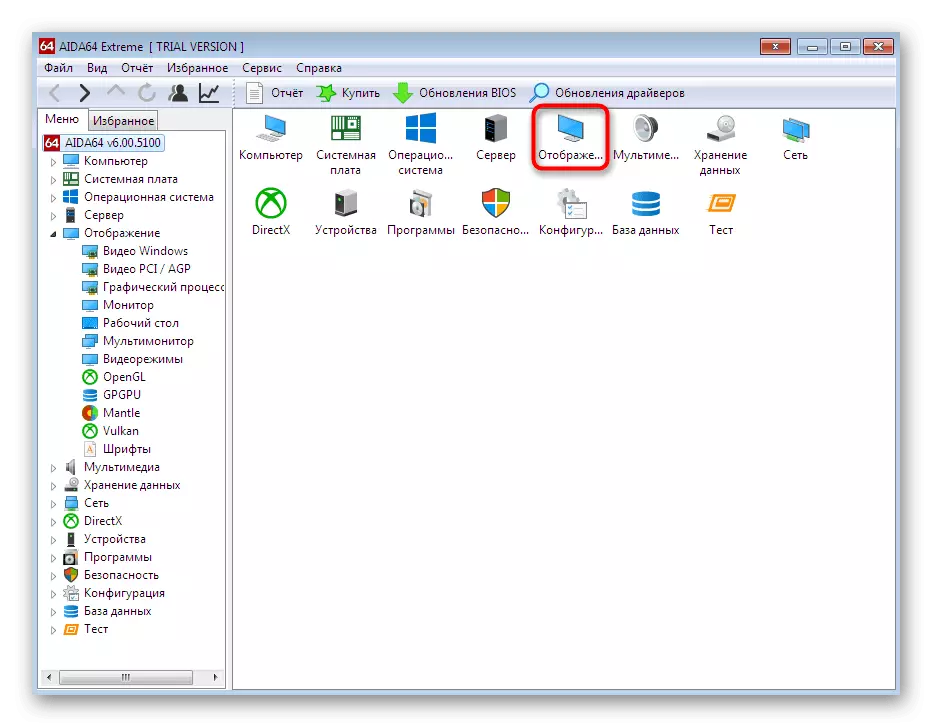
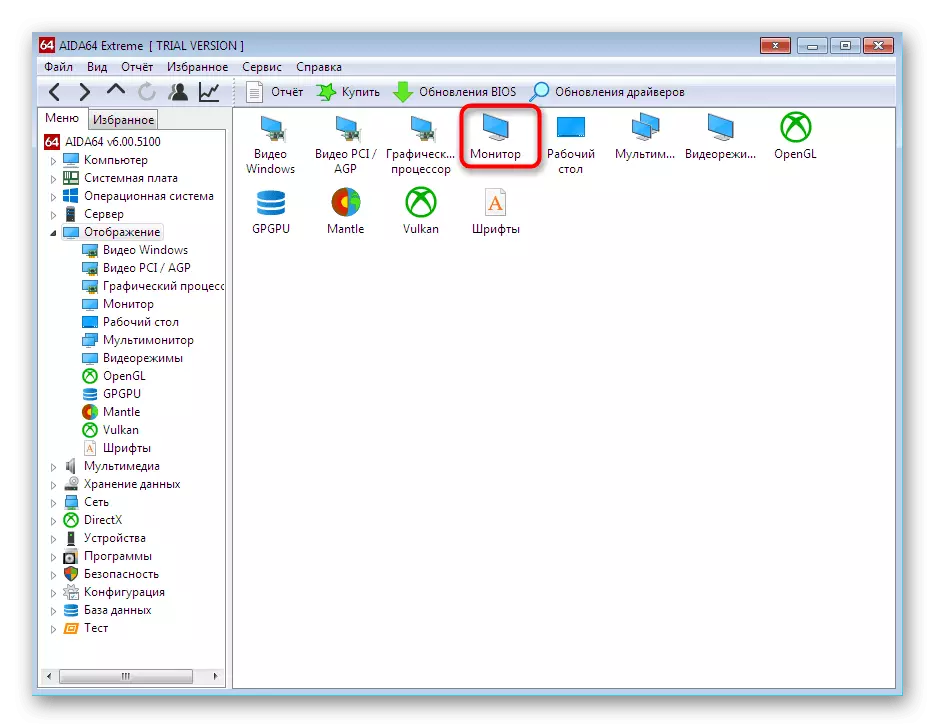
- After starting, being in the main menu, go to the "Display" section.
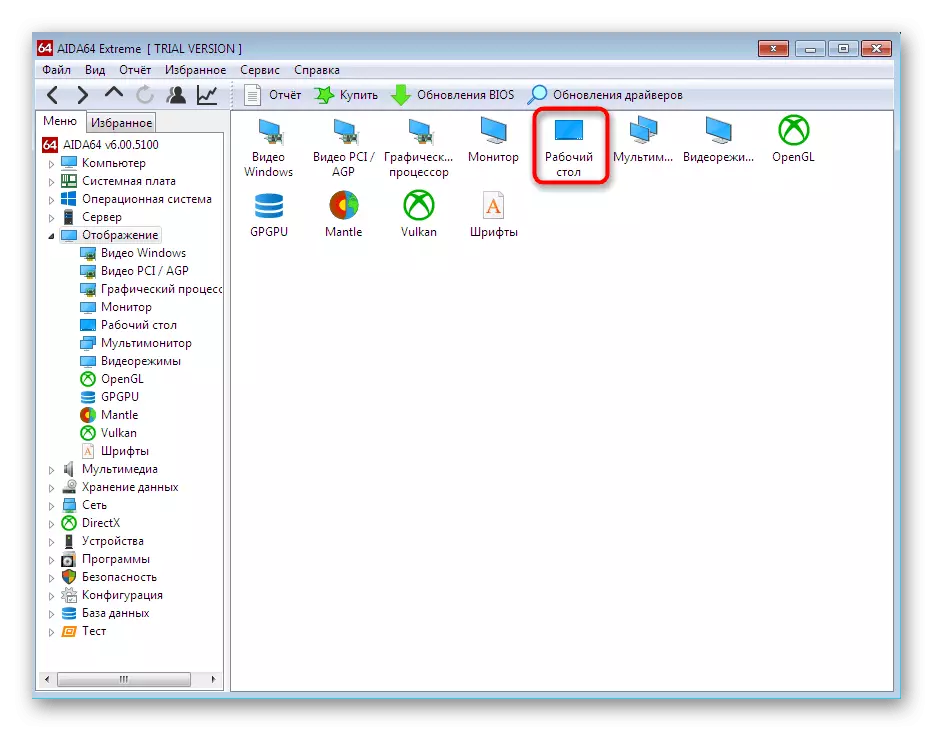
- In it, you can track the current hertes of the monitor by clicking on the "Desktop" option.
- The desired parameter is derived here in a separate line called "Regeneration frequency".
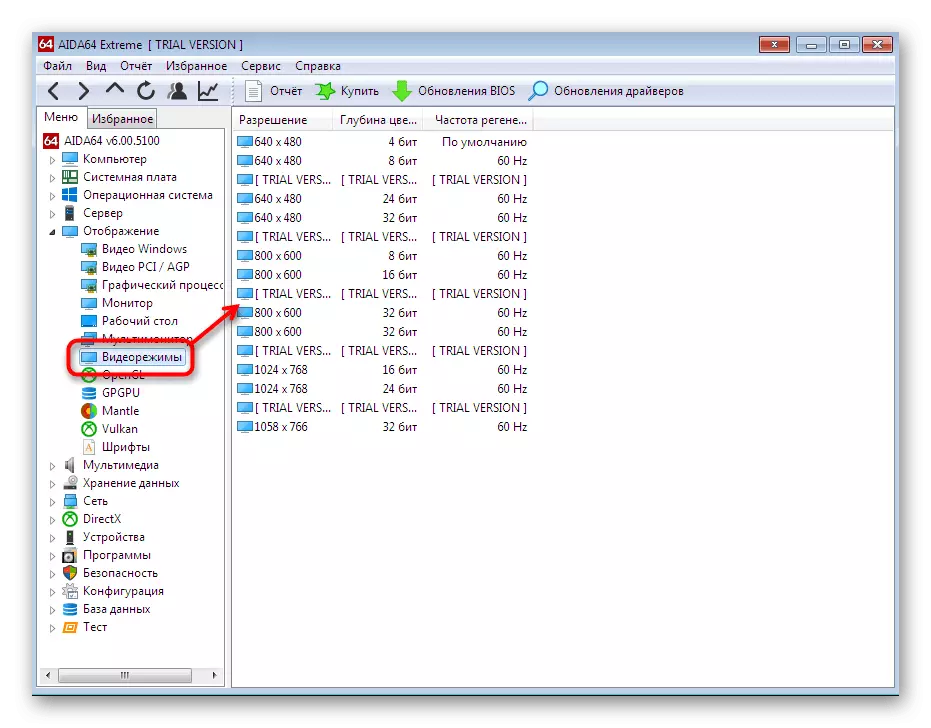
- Use the panel on the left, to move into the category of "Video Modes". Here you see all available display options work. If the connected device is advanced, the more likely you will get a few lines with different resolution and color depth gertsovkoy. This means that any of these options, you can choose to monitor settings via the "Control Panel".
- Operating range frame rate and other parameters of the monitor can be seen in a special section of the same name.

It should be noted that the AIDA64 software provides the user with many more useful data, which we have not mentioned, because they are not within the scope of today's material. Acquainted with all of them you can in another article on our website below.
Read more: Using the AIDA64 program
Method 2: Speccy
Speccy - is a totally free program that provides basic information on the operating state of the system connected to it peripheral and embedded components. In our case, it is also nice because the displays detailed information on the graphics adapter and monitor.
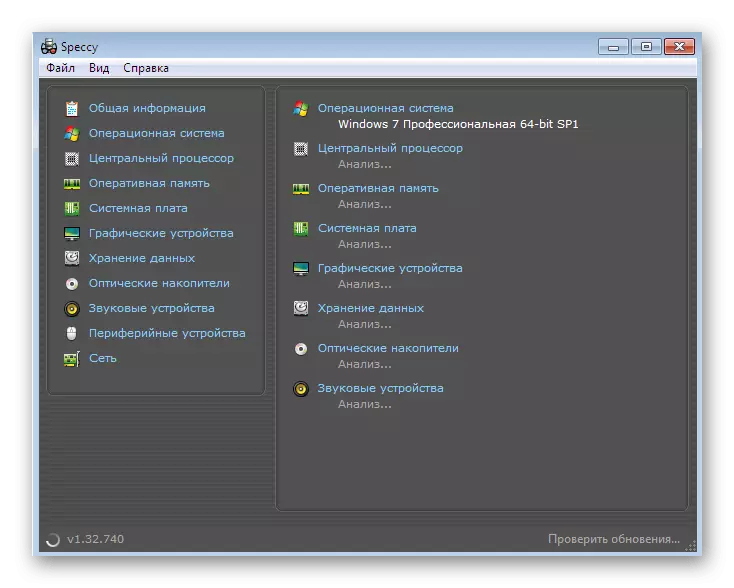
- Download and install Speccy familiar way. During the first run it will be performed analysis of OS, because need to wait some time for progruzki absolutely all rows.
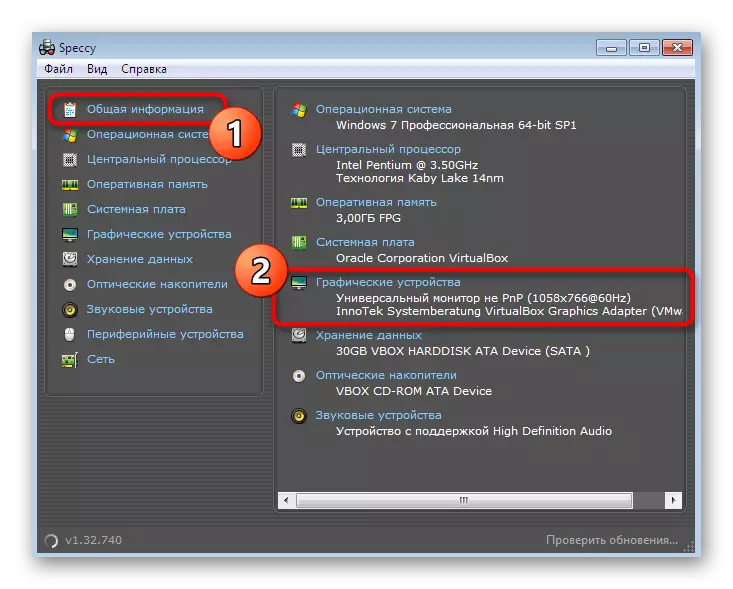
- First, you will be in the "General Information". It is already possible to see gertsovku monitor, drawing attention to paragraph "graphics device". the frame rate is shown immediately after the authorization.
- If there is a need to know, and other parameters, navigate to section "Operating System". In the column "Structure" contains additional lines on the graphics adapter.
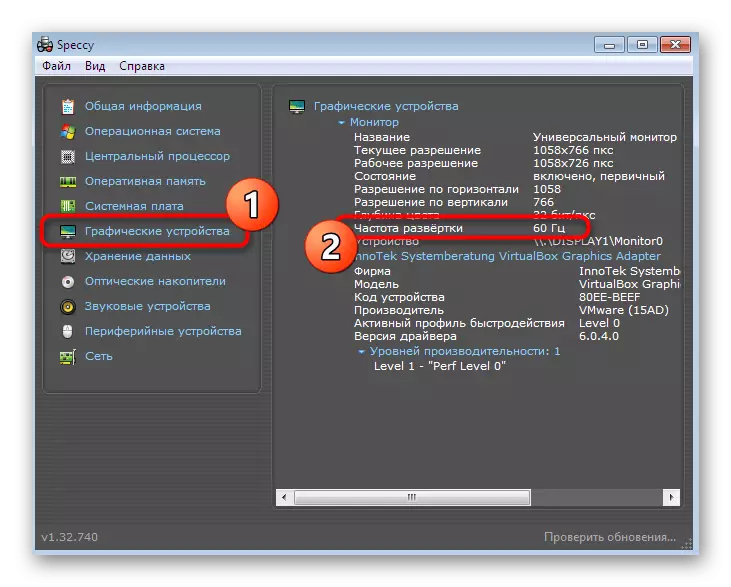
- Separately, data display and video card displayed in the menu "graphics device". Gertsovka is displayed in the line "Frequency Sweep".

Method 3: System Spec
The third and final third-party software in this article will perform System Spec. In this solution, there is no Russian interface language, and some rows that contain Cyrillic, is not really valid. However, it is free and does not require installation, because System Spec can be used to completely fulfill the purpose of the set today.
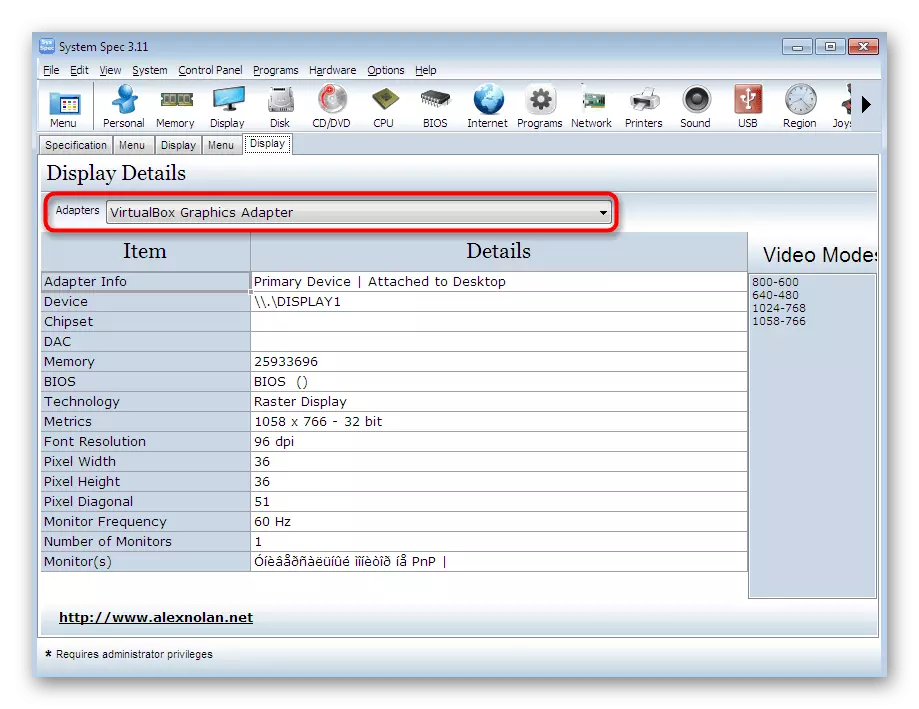
- Get an exe file from the official site and run it. Then, through the main panel, move to the "Display" section.
- Using the pop-up list, specify the desired adapter, the information you want to get.
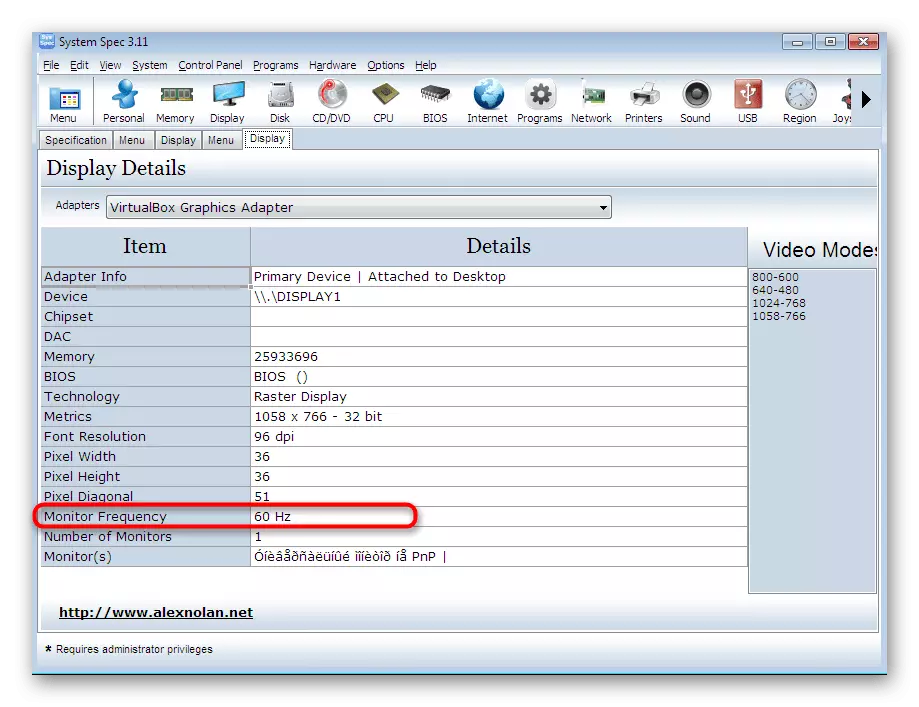
- Now you find the "Monitor Frequency" string. In the "Details" section and the Herrent will be shown.

Above we submitted to your attention three of a wide variety of solutions from third-party developers, allowing to track down the monitor to Windows 7. However, some users do not suit any of these tools. Therefore, in such cases, we recommend you to familiarize yourself with the rest of the representatives of such software by reading the separate material on this topic on our website by turning on the link below.
Read more: Programs for determining the iron of the computer
Method 4: System Menu "Screen"
Not everyone has a desire to search and download third-party software, especially since the embedded functionality of Windows 7 also offers several options for determining the necessary technical characteristics of the monitor. The first method is to watch the hertes in the "Screen Settings" menu, which looks like this:
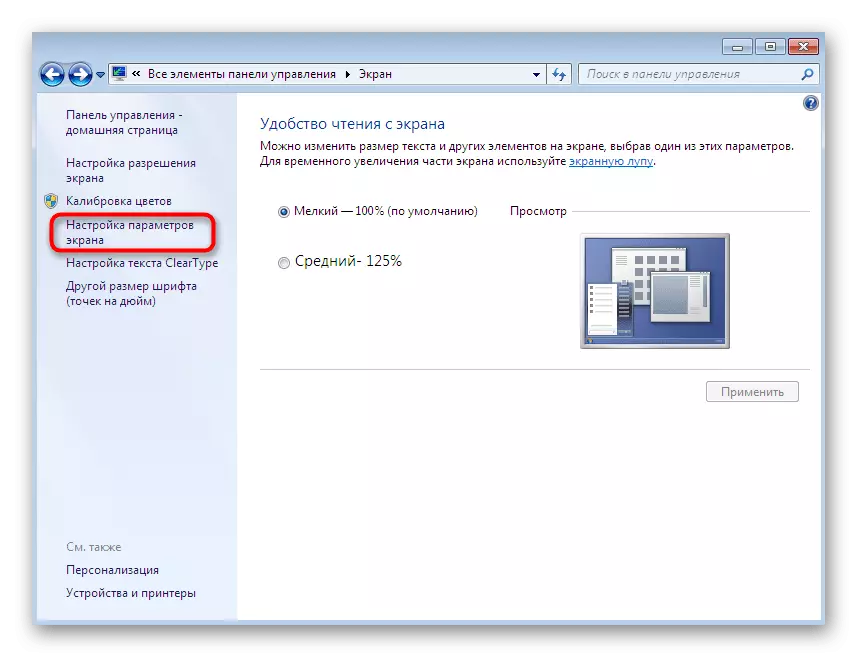
- Open the Start menu and go to the control panel.
- Here you will need to find a section called "Screen".
- Pay attention to the panel on the left. Watch out the inscription "Setting the screen parameters" and click on it with the left mouse button.
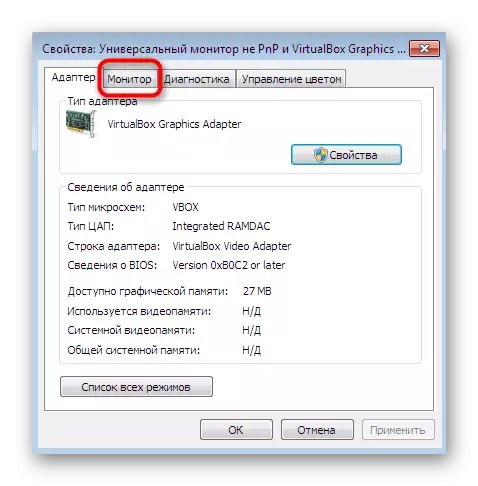
- Go to "Advanced Parameters".
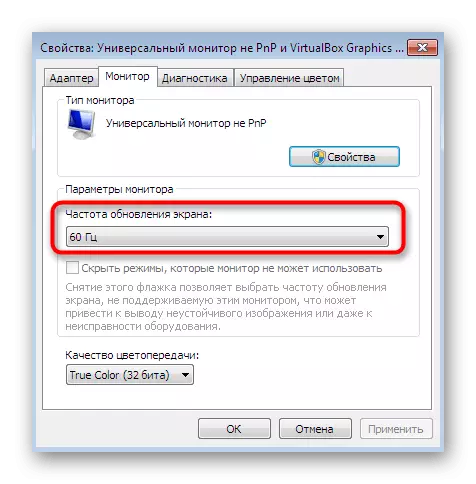
- In the monitor properties you are interested in the Monitor tab.
- Here, a separate item has "Screen Update Frequency". Expand the list to view all the available hertes and choose the desired one.
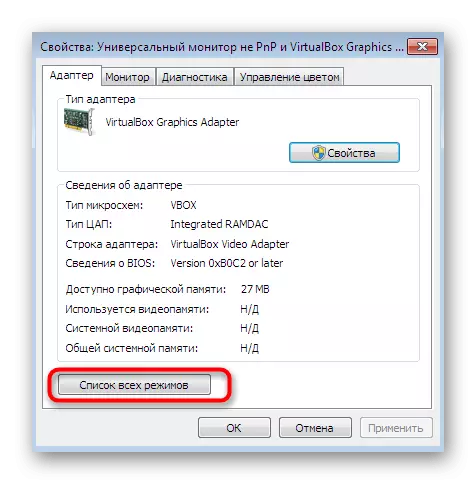
- Additionally, we recommend returning to the first tab and click on the list of all modes.
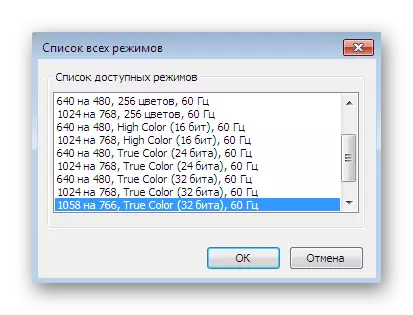
- A separate window will open, where video modes will be demonstrated. It can choose the resolution, quality of color reproduction and hertes.


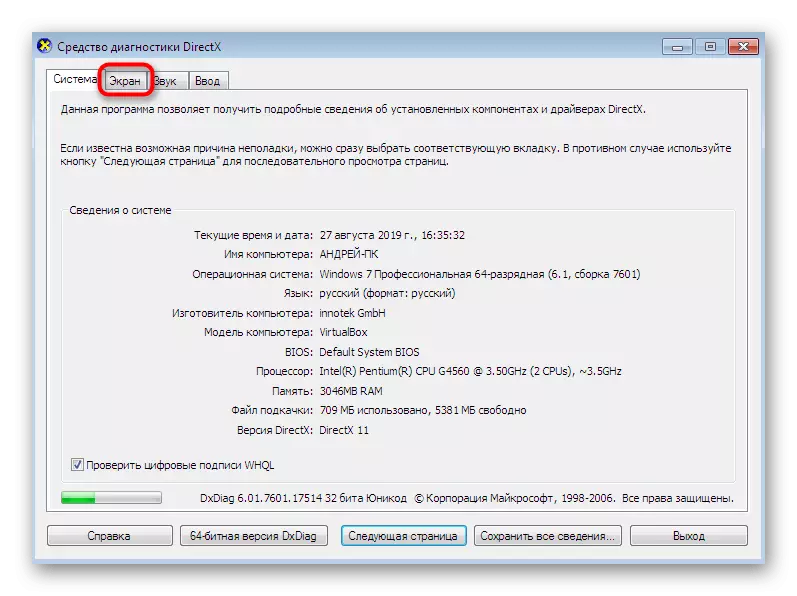
Method 5: DirectX diagnostic tool
By default, the diagnostic means is installed on the operating system along with the DirectX components. It is suitable for detailed information about the installed drivers, performs the search and error correction feature. In our case, this tool is useful for output to the frequency screen of the display frames.
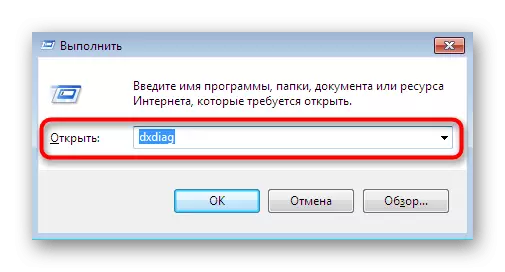
- Run the "Run" utility by pressing the Win + R key combination. In the input field, write dxdiag and click on ENTER.
- Confirm the launch of the diagnostic tool. After the new window appears, move to the "Screen" tab.
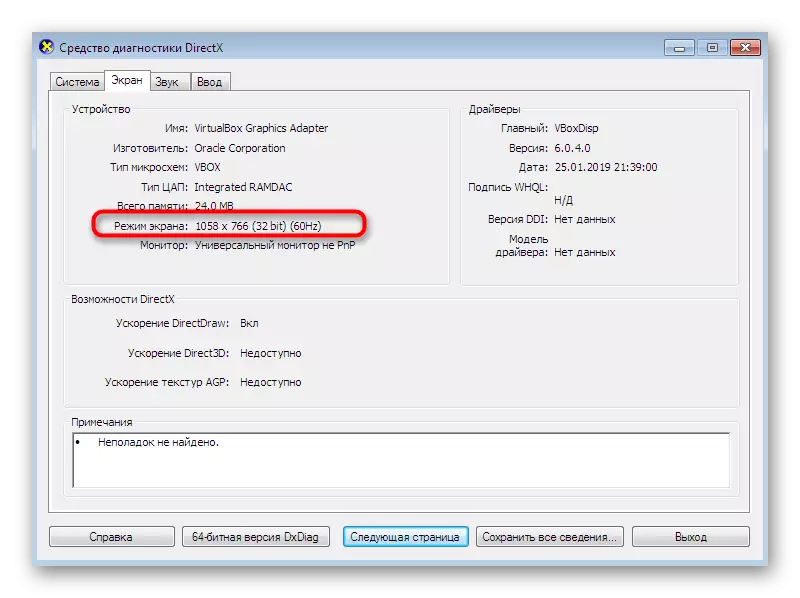
- Here, find the "Screen Mode" item. After resolution and depth, you will see the frequency of frames in Hz.
If you first encounter this tool diagnostics and want to study all its components in more detail, check out the special material on this topic by clicking on the link below. There you will find a guide dedicating users in ways to interact with this tool.
Read more: Windows System Utility for Diagnostics DirectX
Now you are familiar with the procedure for determining the administration of the monitor in Windows 7 and you can choose any convenient method by which the target will be carried out. These manuals will help even quickly find out the desired parameter. If suddenly it turned out that the display is capable of working with a large number of frames, it does not interfere with the improvement, using the standard menu of Windows settings.
Read more: Configuring a computer monitor screen in Windows 7