

Each computer user at least once came across the need to install drivers in the operating system. This operation is not always successful, because sometimes the software version is not suitable or additional difficulties appear. Among little common problems, there is such when an error with code 52 appears during installation, which indicates the absence of a digital signature of the driver propagating in the informat of the INF. Beginner users are most likely not even know about such a thing, therefore are confused. Today we want to tell about this problem in more detail and demonstrate the methods of its solution in Windows 7.
We solve the error with code 52 when installing the driver in Windows 7
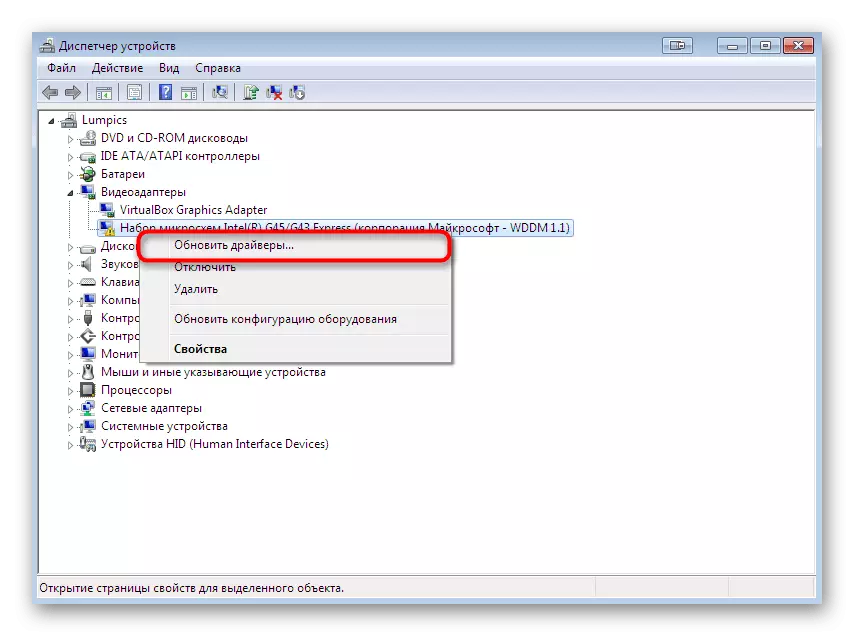
Certain files, which include drivers, have a digital signature. It is a guarantor of security and contains certain information. It indicates the creator of the program, time and date of signature, as well as changes after registration. Built-in Windows default protection refuses to install such drivers as they are not considered reliable. Bypass this prohibition is only in cases where you are confident in the safety of the actions performed and in the fact that after installation on the computer will not be infected with viruses, and the OS will continue its correct operation. Next, you can learn about several ways to eliminate this problem. Everyone will suit a specific series of users, so we recommend first to get acquainted with all of them, and then it is already optimal for yourself.Method 1: Search for an alternative installation option
The effectiveness of this method depends on what kind of driver is in your hands, for which device and what method it was obtained. It is not recommended to install files that were downloaded from dubious sites on request in the browser. In addition, it is worth paying attention to the official website of the equipment developer, if the software is on the disk or someone handed it to you on another removable carrier. Go to the link below to read all the available options for installing drivers. There you will find a more appropriate and secure solution, especially if you manage to find the official installer in the EXE format. Then after its launch, all actions will be automatically implemented.
Read more:
Installing drivers in the Windows operating system
Windows 7 Driver Update
Method 2: USB Filtering Registry Keys
If you want to install a driver for a device that connects to a computer via USB, then we advise you to study this method. It does not suit the rest of the users, because it is associated only with the said connection type. The fact is that sometimes the registry creates multiple keys responsible for USB filtering. It is they block the installation and the notification with code 52 is displayed on the screen. It is worth trying to delete these records and re-try to register the driver in the system, which is happening:
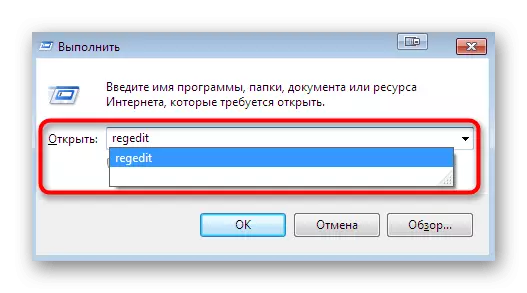
- Run the Utility "Run" by holding the standard combination of the Win + R keys. In the Enter Regedit field and press the ENTER key.
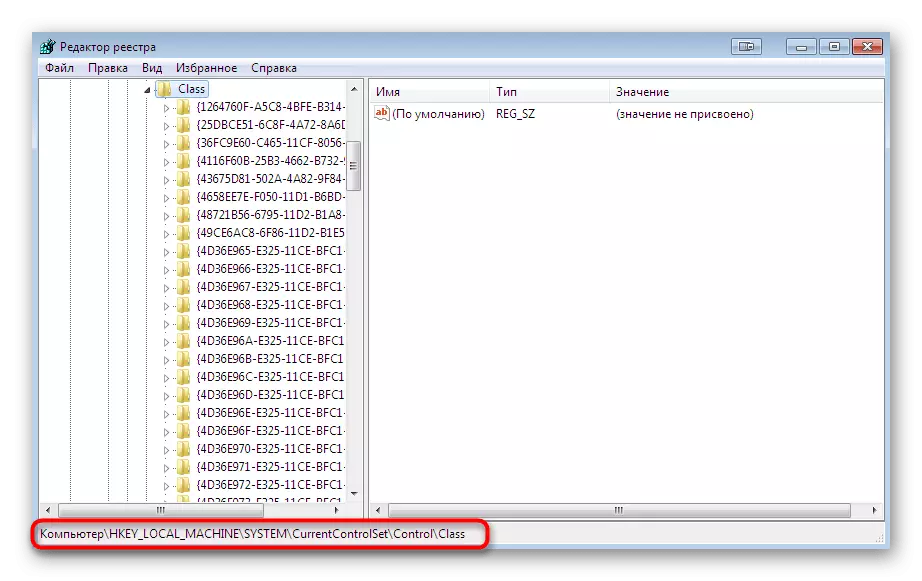
- Before you will open a familiar to many registry editor. It should go along the path HKEY_LOCAL_MACHINE \ SYSTEM \ CURRENTCONTROLSET \ CONTROL \ CLASS \.
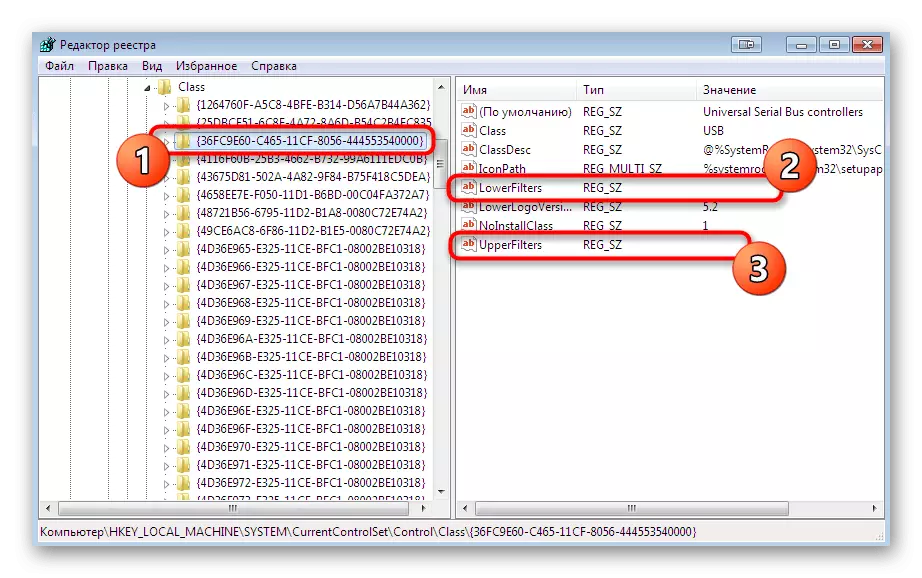
- There, find the standard directory "{36fC9E60-C456-11CF-8056-4445535540000}". If there are two parameters with the "LowerFilters" and "UpperFilters" names, you will need to remove them.
- Just click on the file right-click and in the context menu that appears, select the appropriate option.
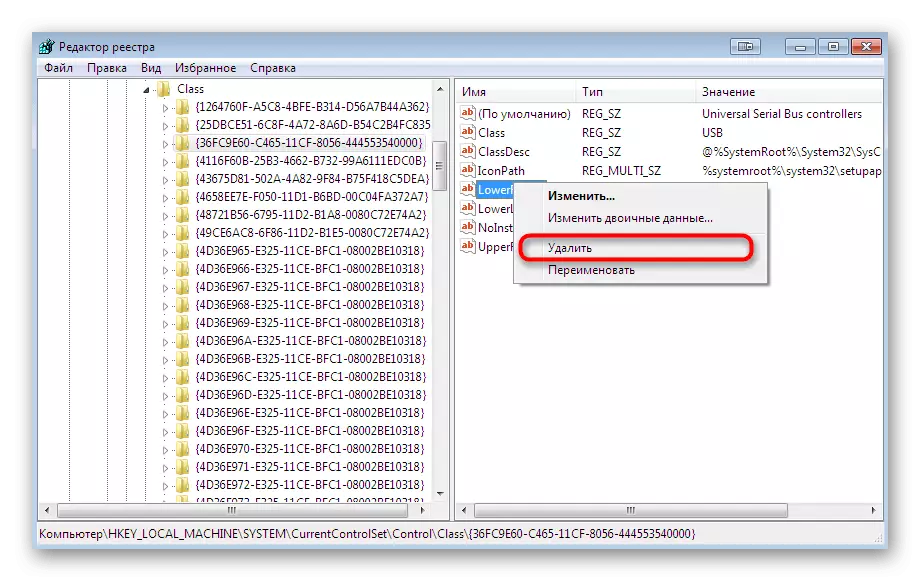
Upon completion of this instruction, it is mandatory to restart the computer, and only then you can go to a re-attempt to install an INF file convenient for you.
Method 3: Disable Digital Signature Check
This method is the most radical and is fully disconnected by the protective component, which prevents the installation of unverified software for components. There are several different embodiments of this procedure. After deactivating the option, you will be able to install absolutely any driver without any problems, but then do not forget to turn on the protection to turn on the PC to the PC, it is randomly a threat in the form of a virus. Detailed guides on this topic are looking for in a separate material on our website by clicking on the link below.
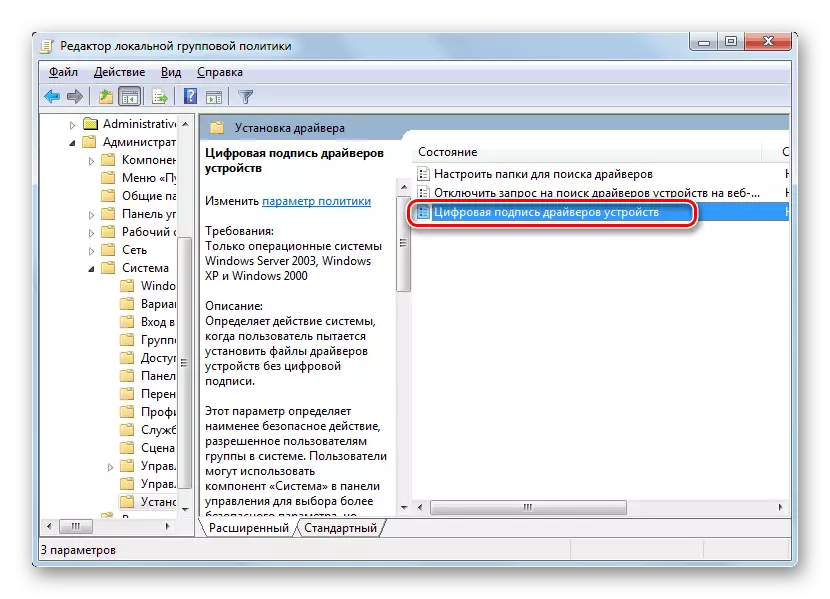
Read more: Disable verification of digital signatures of drivers in Windows 7
Method 4: Creating a Signature for Driver
We delivered this option to the last place, since it is extremely narrowly compound, difficult in execution and will only suit some users. Its essence is in its own file registration using Microsoft development tools. You can take both the driver and developed personally. However, if you need to install it only once, we advise you to get acquainted with a similar, but simpler instructions for importing a configuration by clicking on the reference below.
Read more: Import digital driver signature
Now we go to the creation of your own signature. It will always act on the driver, which will allow you to install it on the device of the local network, to transmit it to the Internet or distribute it to other methods. Conditionally divide the entire procedure to the steps not to confuse you.
Step 1: Preparatory work
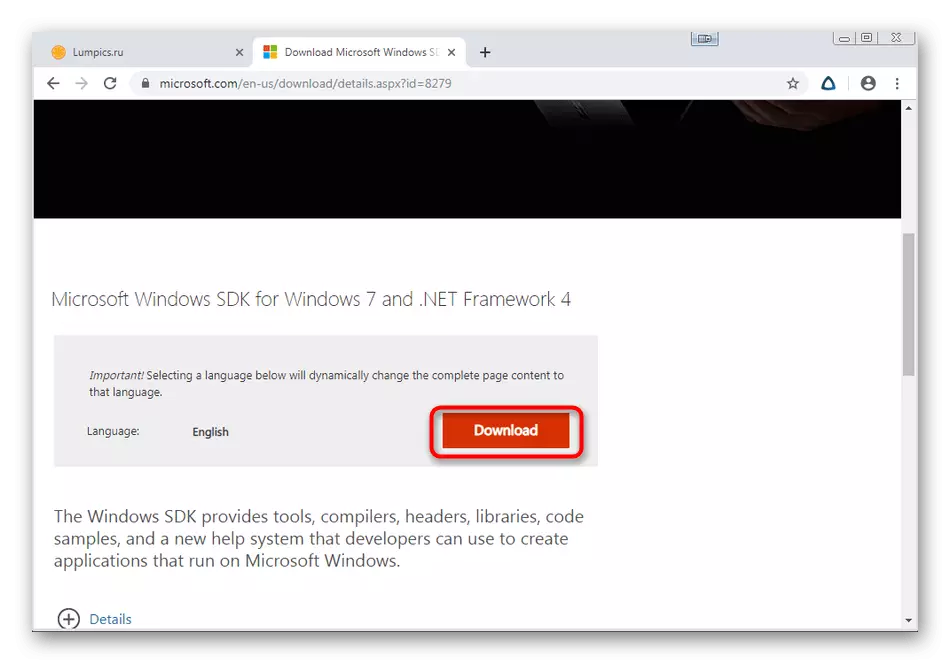
You should start with the preparatory work, since the default in Windows 7 there are no all necessary components. They are implemented in the form of additional utilities that will be involved in mandatory. They are distributed free of charge, and you can download them from the official Microsoft website, which looks like this:
Microsoft Windows SDK for Windows 7
- The first to download the developer is subject to the name of the SDK. It contains the most necessary and basic elements used in the development of programs and certain scenarios. Go to the above link, where click on "Download" to start downloading. Together with the package you will receive and .NET Framework 4 required for the correct run of software.
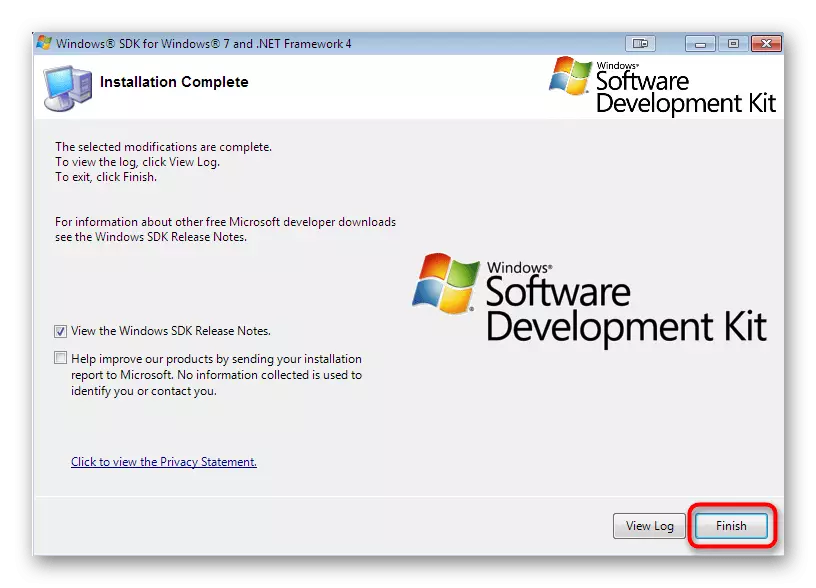
- After downloading the executable file, run it and follow the instructions. Installation must be performed in normal mode, leaving all the default settings.
- Upon completion, information about successfully performed actions will appear in the window, and you will only be left to "Finish".
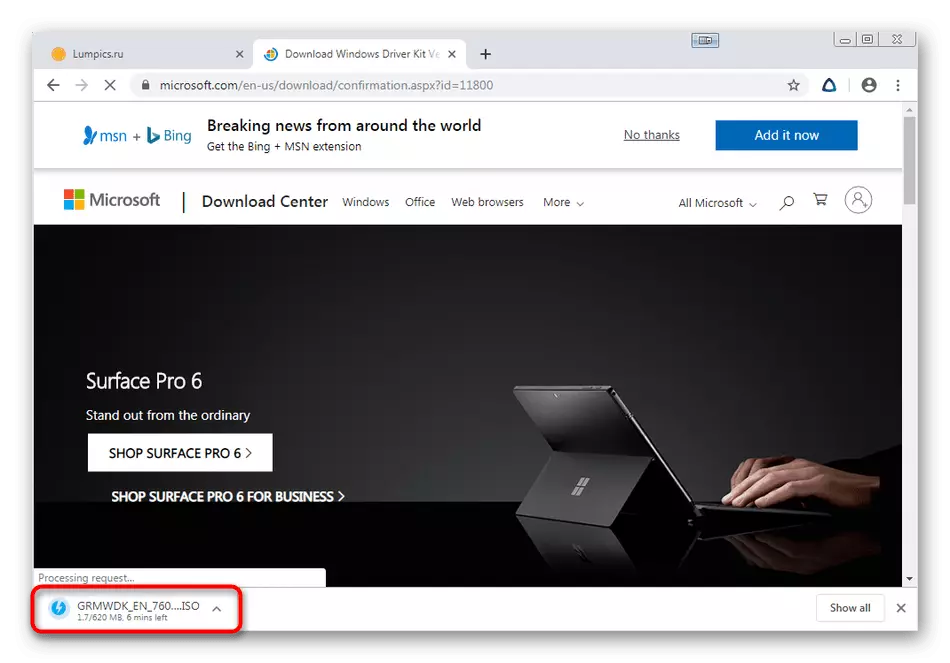
- Now use the reference below to download from the official site a set of tools for registering drivers version 7.1.0.
- It takes 620 megabytes and is distributed as an ISO image. That is, it will take a special software for mounting images. Read more about this below.
- After mounting the image, the autorun window should be displayed. In it, select "Run KitSetup.exe".
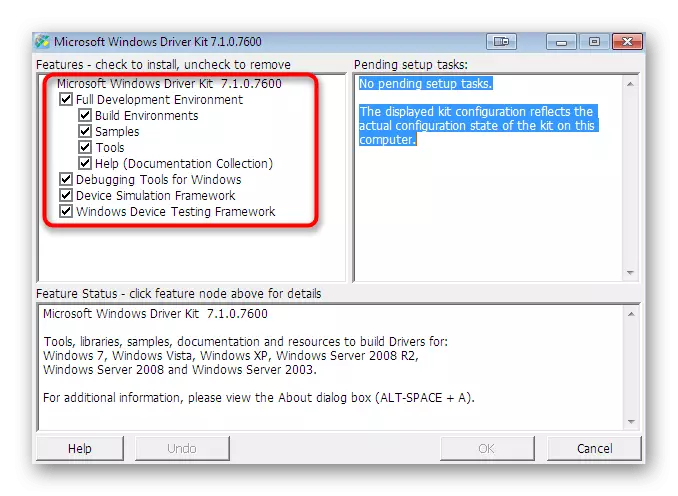
- In the welcome window, you see that this set is fully compatible with Windows 7. It does not need to press anything, just wait for the installation of the installation wizard.
- Tick all items to add each component to work with drivers, and then start the installation.
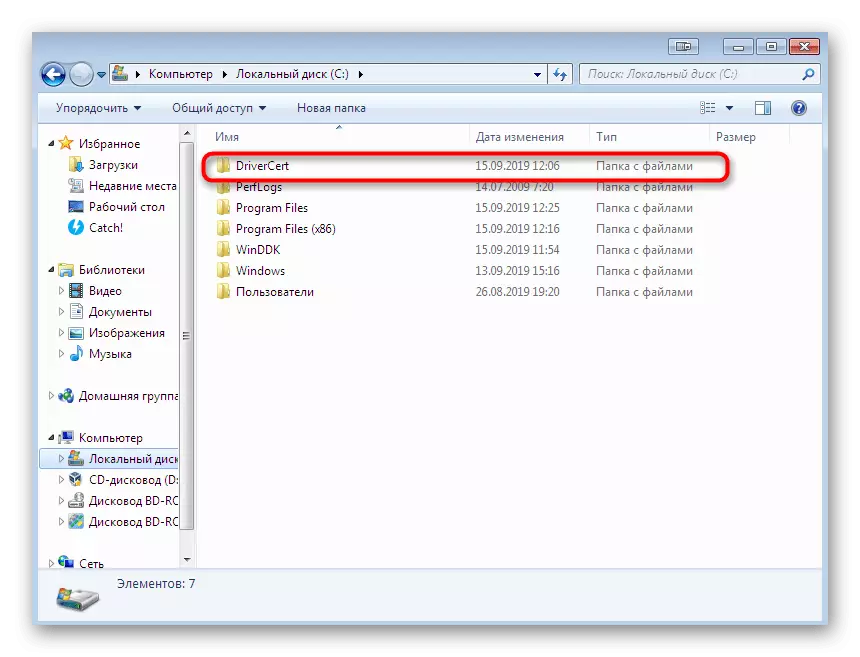
- Additionally, in the root directory of the system partition, create a folder with an arbitrary name in which all files associated with the driver will be stored. We will call it "DRIVERCERT".
- Specify the location of all installed components, remember or record the name of the folder with the version so that with further transitions and other actions in the console do not get an error.


Windows Driver Kit 7.1.0
Read more: How to mount the image in the Daemon Tools program


We strongly recommend using only those versions of additional components for developers who are based on the links above, since the support of important utilities has now been discontinued in new assemblies, which will not allow you to create a digital driver signature. Only after you have successfully installed all the elements and reboot the PC, go to the next step.
Step 2: Creating a Certificate and Key
This stage of creating a digital signature is to issue a certificate and assign a closed key. The first component (certificate) will contain information about the driver and will determine it as a proven, the second (private key) will create protection for unauthorized change of file. All this, as the subsequent steps, runs through the "Command Line" and looks like this:
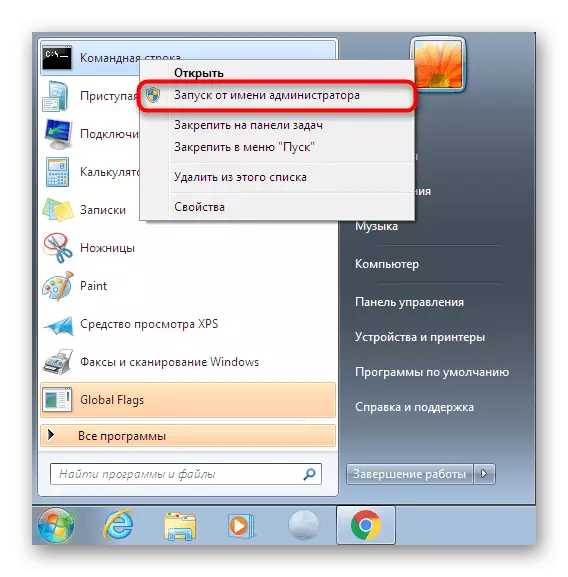
- Open "Start" and find a classic "Command Line" application there, then click on the PCM.
- In the context menu that appears, you should select the "Startup from the administrator" item.
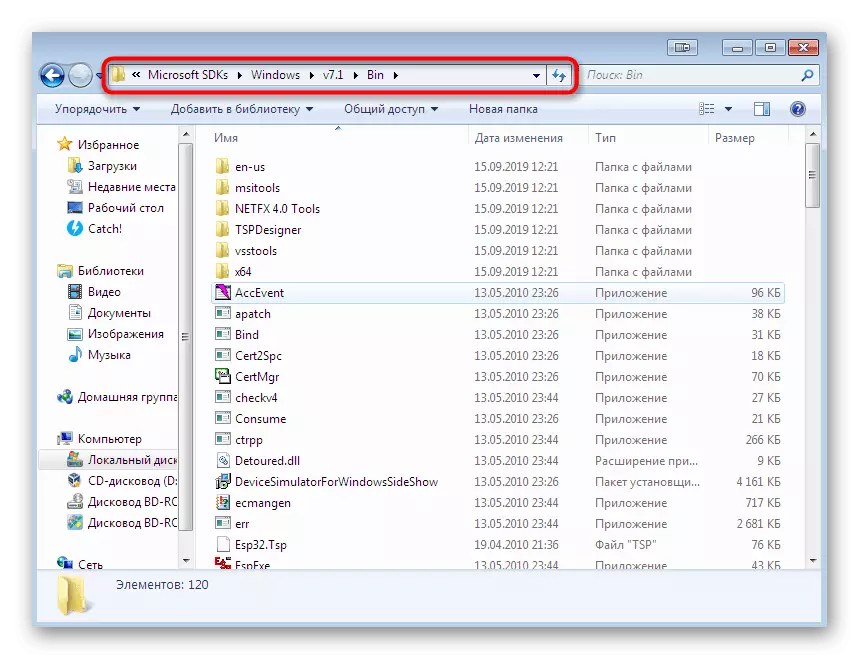
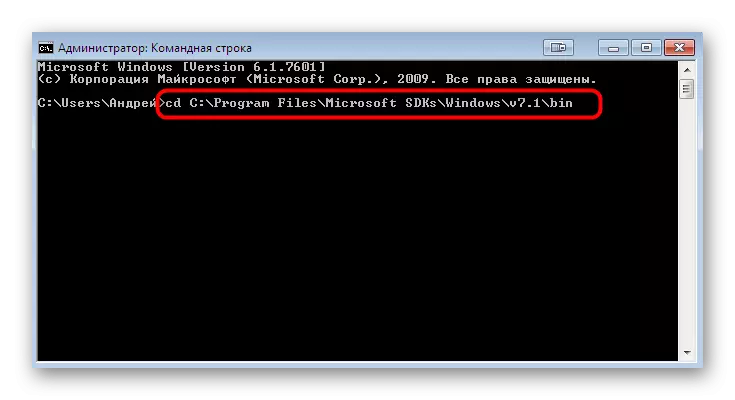
- Enter the CD C: \ Program Files command (x86) \ Microsoft SDKS \ Windows \ v7.1 \ Bin to move to the SDK storage folder. Its path may differ, which depends on the selected directory. We have already told about defining the path.
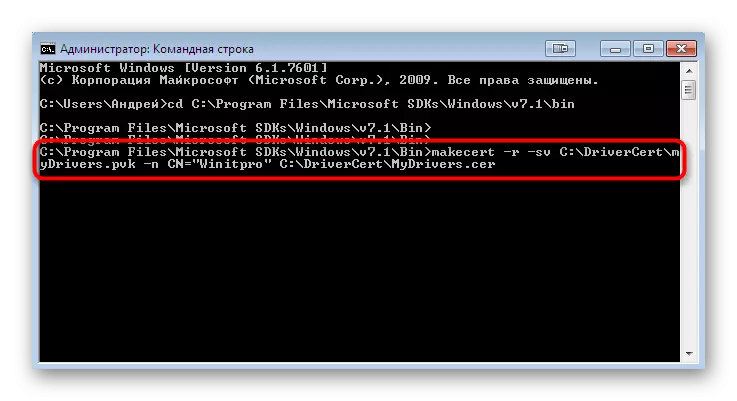
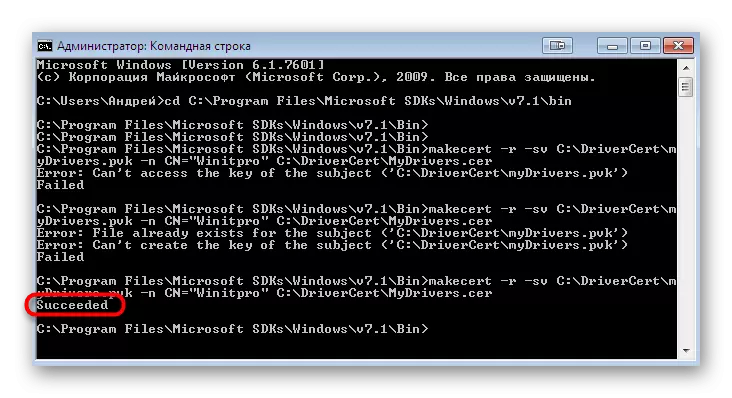
- Here we will use the oncoming utility to create a certificate and key. Run it with certain arguments, scoring the MAKECERT -R -SV C: \ DRIVERCERT \ MyDRIVERS.PVK -N CN = "NameCompany" C: \ Drivercert \ MyDrivers.cer, where NameCompany is the name of the company for which the certificate is issued. Instead, you can enter any value.
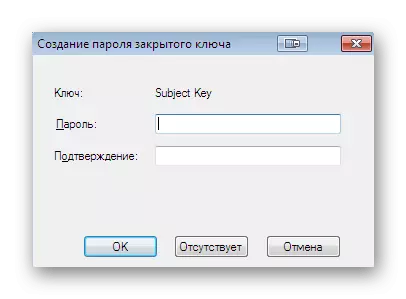
- A new window will appear on the screen to create a closed key password. Enter a reliable code to the appropriate field and confirm it, and then click on the "ENTER" button.
- Continuation of work will be available only after entering the already created password.
- By closing the window, you will see a notice that the operation has been completed successfully, which means that you can move to the following action.
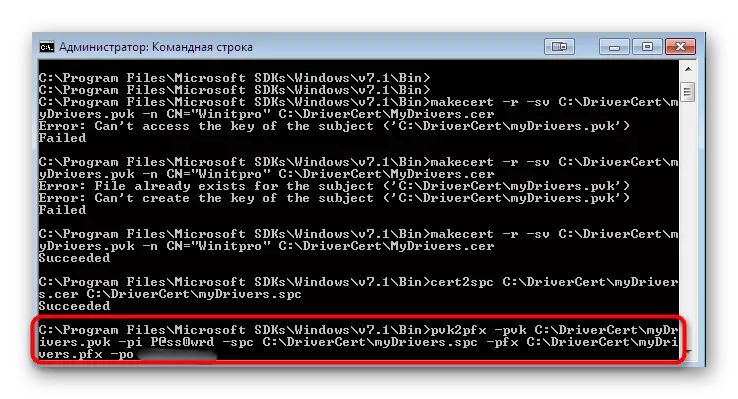
- Next you need to create a public key that will be available to software creators. To do this, use the CERT2SPC C: \ DRIVERCERT \ MYDRIVERS.CER C: \ DRIVERCERT \ MyDRIVERS.SPC command, confirming it by pressing the ENTER key.
- A successful process indicates a string that appears with the inscription "succeeded".
- It remains only to combine the two created keys to provide more comfortable interaction with files. This is done by the PVK2PFX -PVK C: \ DriverCert \ MyDRIVERS.PVK -PI P @ SS0WRD -SPC C: \ DRIVERCERT \ MYDRIVERS.SPC -PFX C: \ DRIVERCERT \ MyDRIVERS.PFX -PO PASSWORD, where Password has previously created password closed key


In most cases, this stage takes place correctly and without the appearance of any cantilever errors. However, if you still have encountered them, carefully study the content, usually it is indicated, what exactly is the problem. Additionally, the solution can be referred to as the official site of Microsoft if the notification is absolutely specific.
Step 3: Creating a configuration file of the driver package
This step is to create the necessary CAT format file, which will contain all the information about the recorded driver. This configuration object is also useful in cases where you need to manually change any settings for the provision. To begin with, transfer all drivers files to the previously created DRIVERCERT folder by placing them in a new directory with a name convenient for you. Then return to the console and follow these steps:
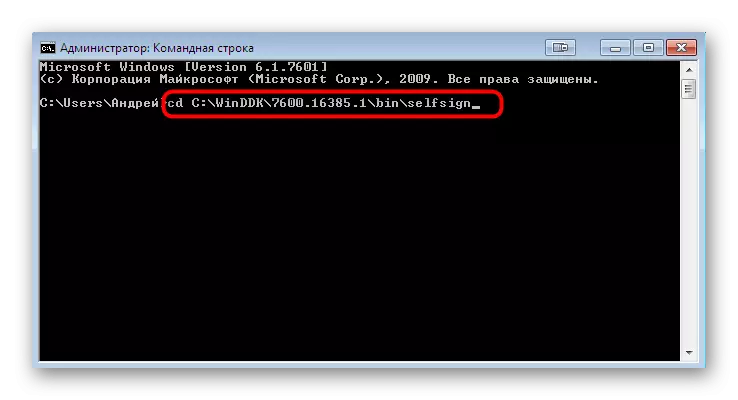
- Open the directory in which the utility needs now is stored, through the CD C command: \ winddk \ 7600.16385.1 \ bin \ selfsign.
- Make sure that the driver directory has two Inf and SYS format files. It is based on them and a CAT object will be created. Run the generation procedure by specifying inf2cat.exe / driver: "C: \ DriverCert \ Driver" / OS: 7_x64 / verbose, where Driver is the name of the folder with files by.
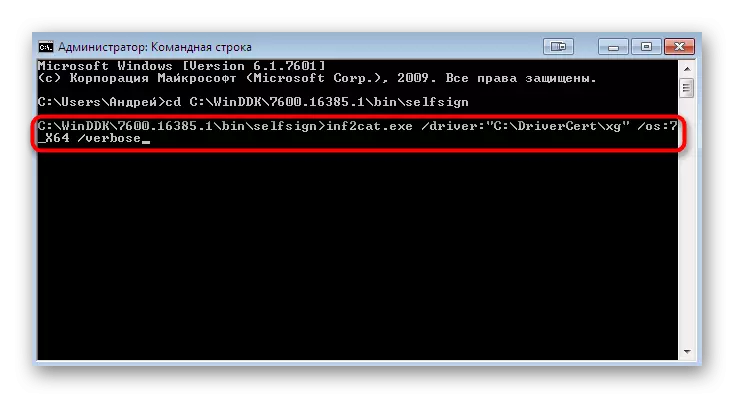
The execution of this operation may take a few minutes. During this, it is impossible to turn off the "command line" and it is not recommended to carry out other actions on the computer. The end of the creation of the configuration element will report "SignAbility Test Complete" and "Catalog Generation Complete" contained in the console report.
However, sometimes different errors occur. Most often an inscription "22.9.7.7: Driverver Set to IncorRect Date (Must Be Postdated to 4/21/2009 for Newest OS) in \ xxxxx.inf", which indicates an incorrect date of creation of the driver. In such cases, you need to go to the file to which the error is assigned, run it through the standard "Notepad" and change the "Driverver =" string by setting it the value of 05/01 / 2009.9.9.9.9. After that, go back to the console and repeat the recording process if the "G20gr.cat" file, which is in the root of the driver directory, has not been updated automatically.
Step 4: Installing the Signature for Driver
Now you have a created certificate, a package with a driver, filled with all the necessary optional objects, therefore it remains only to sign it before installing. This is done using the developer added previously by the console.
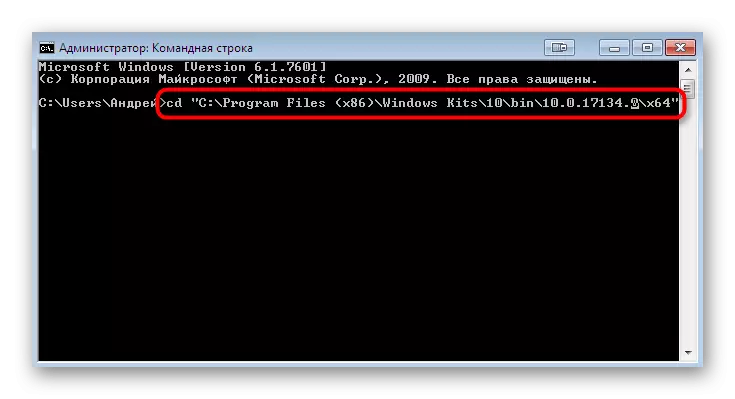
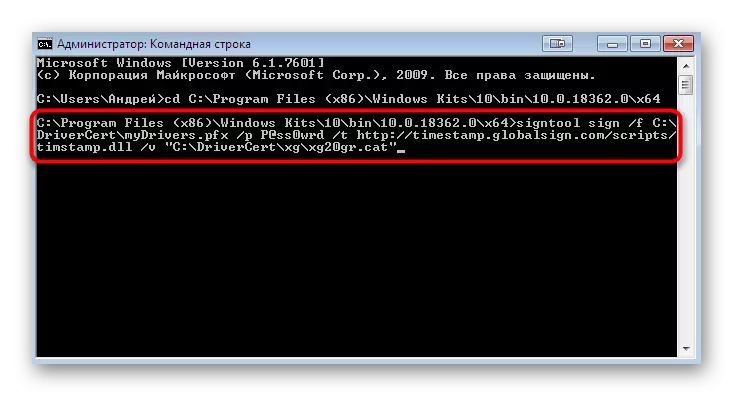
- Go along the path CD "C: \ Program Files (x86) \ Windows Kits \ 10 \ Bin \ 10.0.17134.0 \ x64", where all Windows Kits utilities are located.
- Enter the SIGNTOOL SIGN / F C: \ DriverCert \ MyDRIVERS.PFX / P password / t http://timestamp.globalsign.com/scripts/timstamp.dll / V "C: \ DriverCert \ xG \ xg20gr.cat", specifying Instead of password added earlier password. This action implies a time stamp set using the GlobalSign online service. If the operation has passed successfully, a string is displayed with the contents of SUCCESSFULLY SIGNED: C: \ DRIVERCERT \ XG \ XG20GR.CAT Number of Files SuccessFully Signed: 1.
- After that, enter the commands below in turn to install the certificate.
certmgr.exe -add c: \ driverscert \ mydrivers.cer -s -r localmachine root
Certmgr.exe -Add C: \ Drivercert \ MyDrivers.cer -S -R Localmachine TrustedPublisher

You will display a graphic menu where you simply follow the instructions. Then you will be notified that the certificate was applied, which means that you can move directly to the installation of the driver. Read more detailed information on this topic in a separate article on our site by clicking on the link below.
Read more: Manual installation of drivers in Windows 7
Now you are familiar with all the methods of solving an error with code 52, which appears when you try to install the driver in the INF format. As you can see, there are as many four ways available. Only you decide which one to use to solve the task. Above, we described all the advantages of each option, so there should be no problems with the choice of instructions, and the remaining actions are made literally into several clicks, not counting the method 4, because it is intended exclusively for advanced users.