

During any events on users' computers, the "Diagnostics Policy Service" is turned out. Because of this, it is not possible to start the built-in tool created to search and correct system errors. Next, we will look at how you can enable this service and what to do if it fails to activate in the usual way.
Enabling "Diagnostic Policy Service" in Windows 7
Most often, this service turns out to be turned off for two reasons: due to the inept attempt to optimize the user's operating system and poor-quality assembly. As a result of the first cause of users who decided to speed up the operation of the OS by disconnecting the services, they were turned off on ignorance. The second reason includes a variety of concentrated images of Windows 7, where their amateur authors often try to turn off everything in a row to make the system as easy as possible even for weak machines. In rare cases, since it practically does not depend on the work of the remaining components of Windows, its shutdown occurs itself. One way or another, it can be included without much difficulty even when problems occur.Method 1: "Services"
It is logical that if we have a problem element, it is necessary to manage it through the built-in tool.
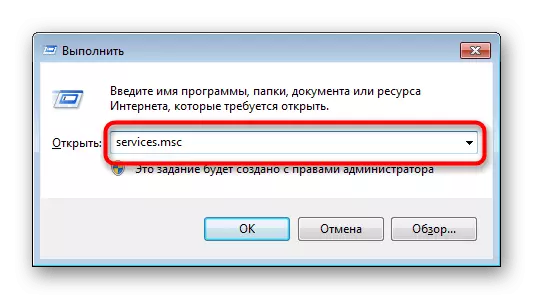
- The combination of the Win + R keys call the "Run" window, write there Services.msc and confirm the input.
- Locate the line "Diagnostic Policy Service" and click on it twice LX.
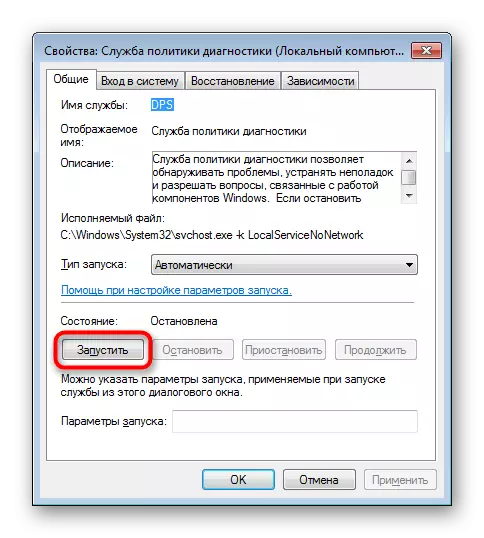
- If the startup type is "stopped", change it to "automatically" and click "Apply".
- After that, the Run button will be available. Click on her.
- There will be launch service.
- Now you can close the window.


Ideally, after this concomitant problems, it should not occur, and the search tool and solving problems should work correctly. If this is not the case - refer to the section of this article, where we tell how to troubleshoot.
Method 2: "System Configuration"
Another way to enable implies the use of the "System Configuration" tool. Here you can also manage services.
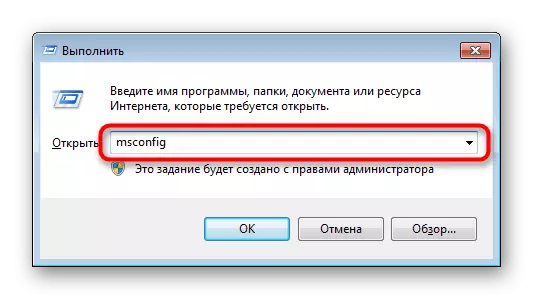
- Win + R keys, expand the "Run" window, write there msconfig and click "OK".
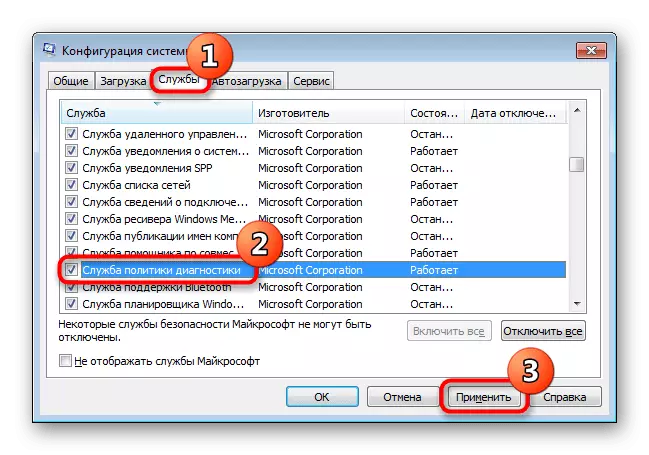
- Switch to the "Services" tab, where to find the "Diagnostic Policy Service", set a tick next to it and click "Apply".
It will be prompted to restart the PC or postpone this action for later. In general, it is not required to start this service to run this service, but when some problems appear, it is better to produce it. If this did not help, refer to the instructions below.

Troubleshooting when starting the "Diagnostic Policy Service"
Not always, you can run the necessary item from the first time, because of which you have to access additional recommendations. Most often, users face that they still receive a window with a malfunction, where including "Error 5: denied access". In addition, an access error may occur already when you try to enable the service through the methods presented above. We understand how to fix it.Option 1: Checking the status of other services
In addition to the "Diagnostic Policy Service" in "Services" or "Computer Configuration", you also need to check the status of other services that can indirectly influence the fault today. These include:
- "IPsec Policy Agent" - "Automatically";
- "Diagnostic service node" - "manually";
- "Node of the diagnostic system" - "manually".
If they wear the status "disabled", make them activate the same actions as shown in the method 1 or 2, given the type of startup that the list above is indicated opposite the service name. Finally, restart OS.
Option 2: Issuance of the "Diagnostic Policy Service" Rights
It is possible that the service does not want to be launched simply for the reason that she lacks right. In this situation you need to increase priority for its work.
- Go to the "Diagnostic Policy Service" properties in the service application as it was shown in the method 1.
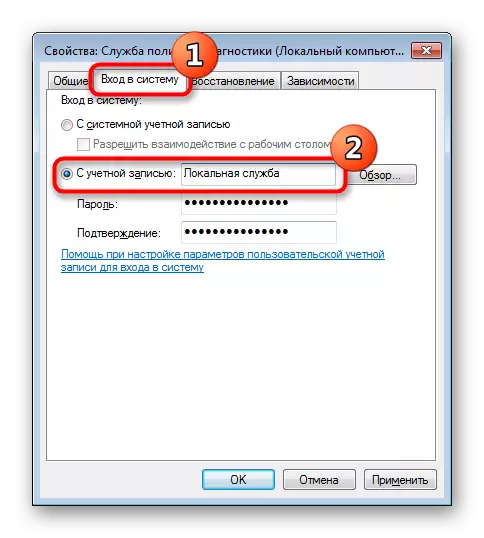
- Switch to the "Login to System" tab and check which entry type is selected. The option "With an account" should be marked. Now you need to specify which one, so the right to write the "Local Service". It should turn out how to screenshot below.
- Now in the "Password" and "confirmation" of the point and leave these lines empty. At the same time, if on the account, through which you have now logged, you have a password, enter it twice in these fields. Apply the changes to "OK".

Restart the computer. By the way, someone helps this method and without entering the password from the account. You can also try it.
Option 3: Adding Network Services to the Security Group
The meaning of the instruction is to add network services to the Administrators group. Thanks to this, you can get rid of errors that refuse access.
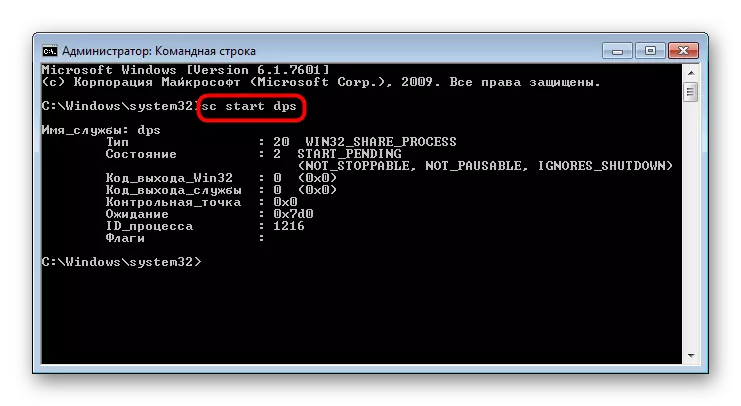
- Open the "Command Line", be sure to name the administrator.
- At first, if the service was not running again, you can write SC Start DPS and press ENTER.
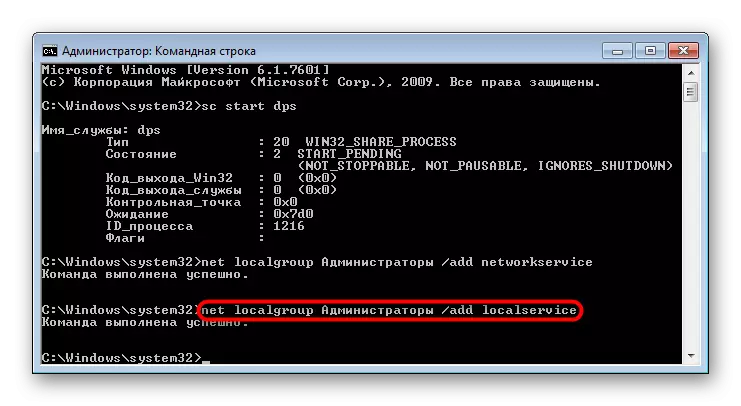
- After that, enter the Net Localgroup command / Add NetworkService command, confirming the ENTER key.
- Latest Enter Net Localgroup Administrators / Add LocalService - All operations must be successful.
If you run in the "Command line" not on behalf of the administrator, you will receive another "error 5".


After restarting the PC, try again to perform the action that previously gave you the error "Run Policy Service".
Option 4: Network Service rights to create entries in the registry
When previous options have not been successful or you get another error, for example, that service failed to run, take advantage of the recommendations. Thanks to them, you can resolve the Network Service account to make recordings in the registry, since now it seems that it does not have authority.
- The Win + R keys and the Regedit command, open the registry editor.
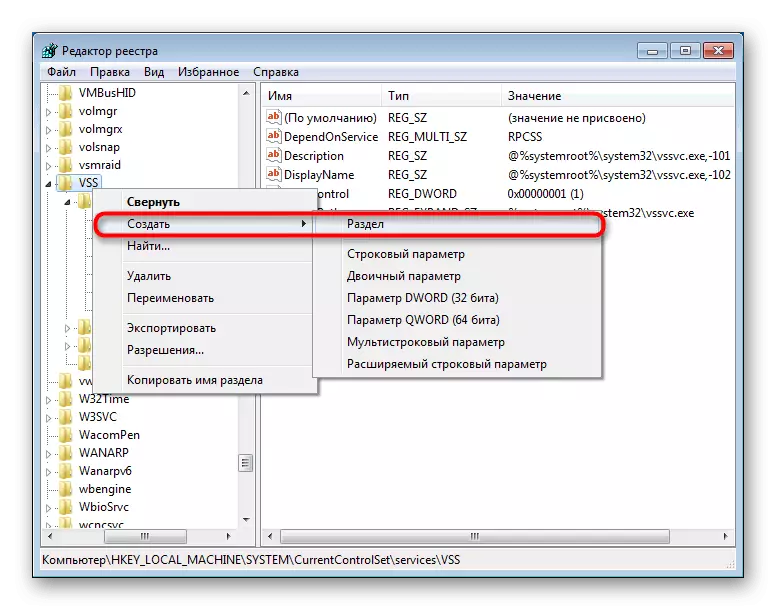
- Go along the path HKEY_LOCAL_MACHINE \ SYSTEM \ CURRENTCONLSET \ SERVICES \ VSS, where you will see the "DIAG" folder.
- Click on "DIAG" PCM and select "Permissions".
- In the window that opens, find the "Group or Services" block, select the Network Service account there and in the Allow Combination column, check the box in front of the "Full Access" item. Close the window to OK.

In rare cases, when the specified folder is missing, create it yourself by clicking the right button on "VSS" and selecting "Create"> "Section". Name it "DIAG" and continue the execution of further actions.


Restart the computer and check if the error occurs.
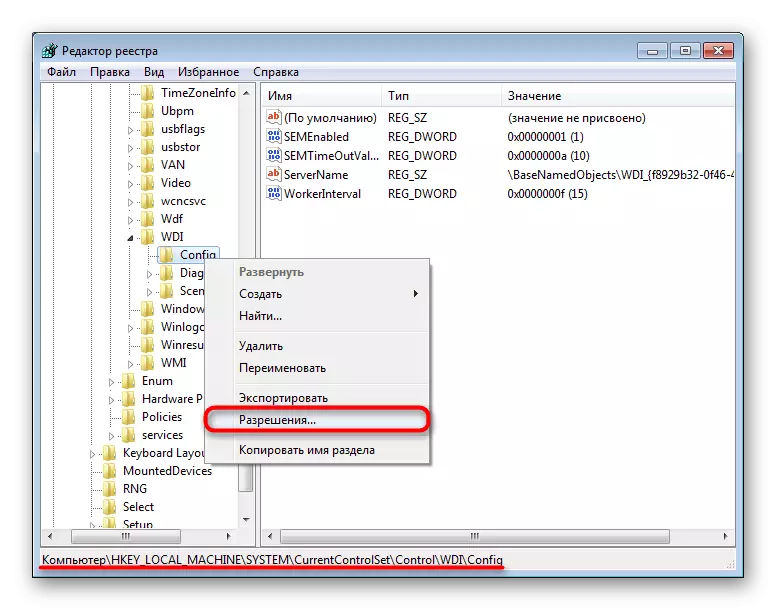
- If when you try to change the resolution, you received a refusal, go to another registry feed - HKEY_LOCAL_MACHINE \ SYSTEM \ CURRENTCONTROLSET \ CONTROL \ WDI - and highlight the mouse click on the CONFIG folder. Click on it PCM and go to "Permissions".
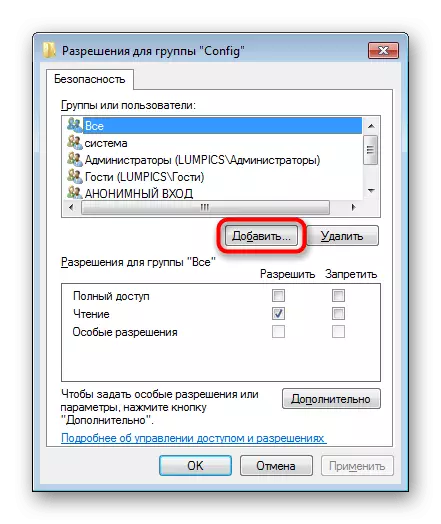
- Click on "Add".
- Enter the name "NT Service \ DPS", and then click OK.
- Recording "DPS" will appear in the list. Highlight it with the mouse click and activate the "Full Access" parameter in the Allow Column.
- Click "OK" and again go to manipulations with the "DIAG" folder.


In the end you will need to restart the computer.
Option 5: Adding network access rights through properties
This option half repeats option 3, but we carried it separately, because according to the reviews of some users help manipulations made through the OS shell, and not through the "command line".
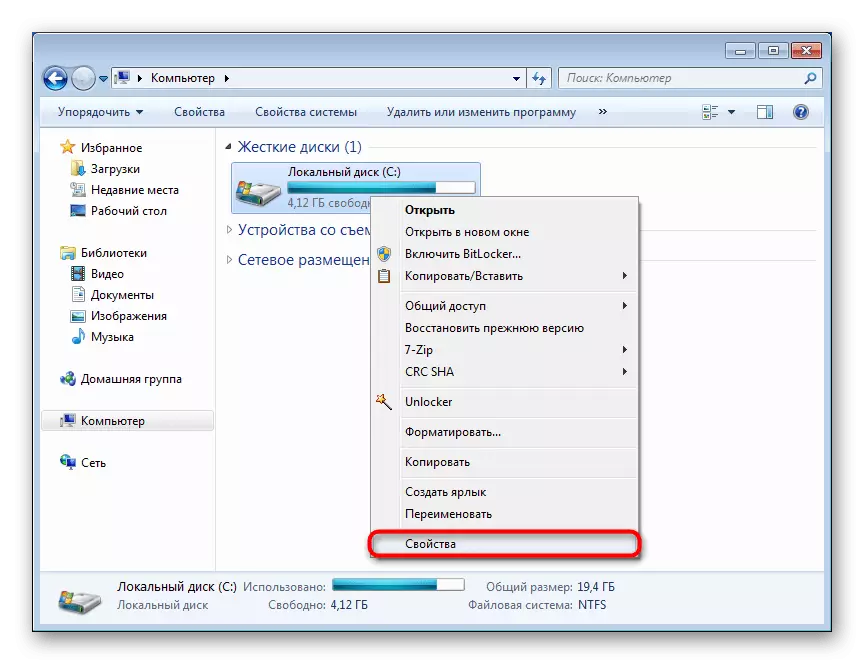
- Open "My Computer", right-click on the "LAN (C :)" and select "Properties".
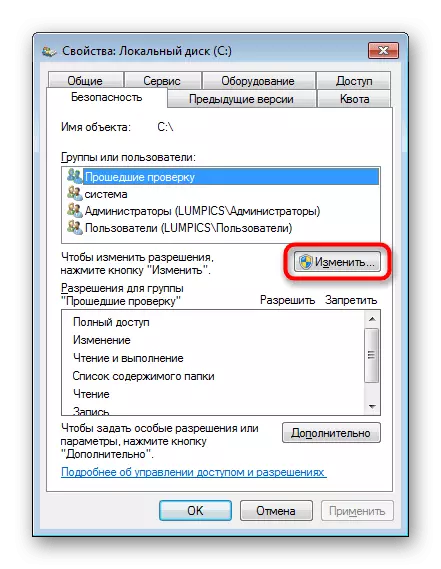
- Switch to the Safety tab.
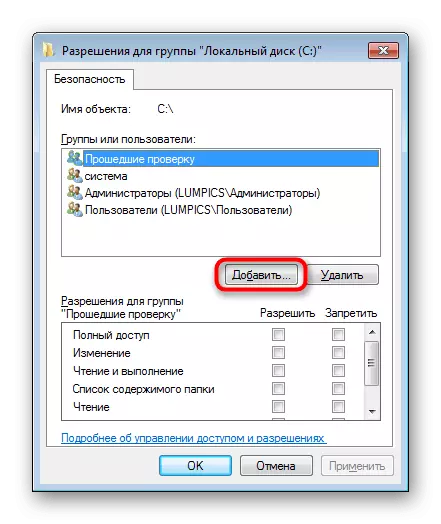
- Under the "Group or Users" block, click "Edit".
- In the new window, select "Add".
- Another window will open, where at the bottom, click on "Advanced".
- The window will appear again. Here, click "Search".
- From the list of names, find "Local Service", highlight it with the mouse click and click "OK".
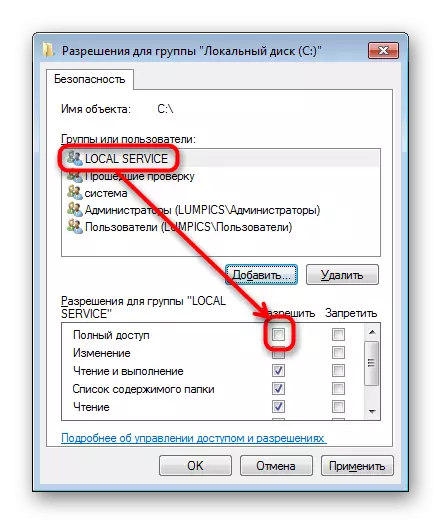
- You will see that Local Service has been added to the list. You can close the window on OK.
- The name appeared in the group or users. Additionally, you can resolve it "full access", but it is not necessary, because it usually a mistake is corrected without it.
- Check if the error has been eliminated. If not, add "Network Service" in the same way as "Local Service".


Perform Windows Reboot.
Option 6: Reset IP and DNS Settings
This method does not help this method because it will be effective only with the problem at the same time with all network services. However, still it is worth mentioning it.
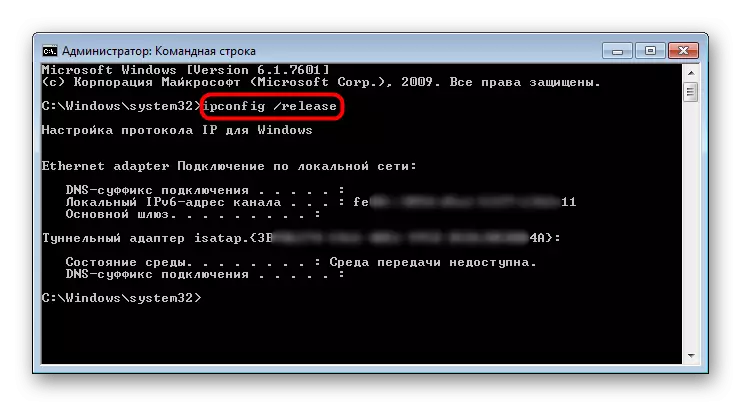
- Run the "Command Line" on behalf of the administrator.
- Write the ipconfig / relase command to reset the IP from the DHCP server and press ENTER.
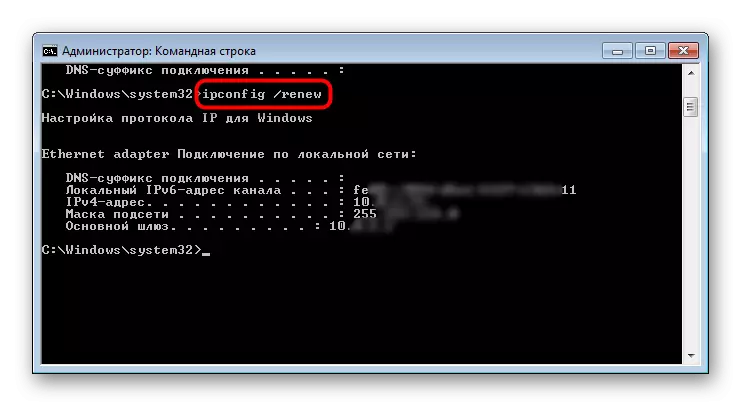
- Following it, enter IPConfig / Renew to get a new IP from DHCP and confirm the input. At this stage, a connection to the network will disappear for a few seconds.
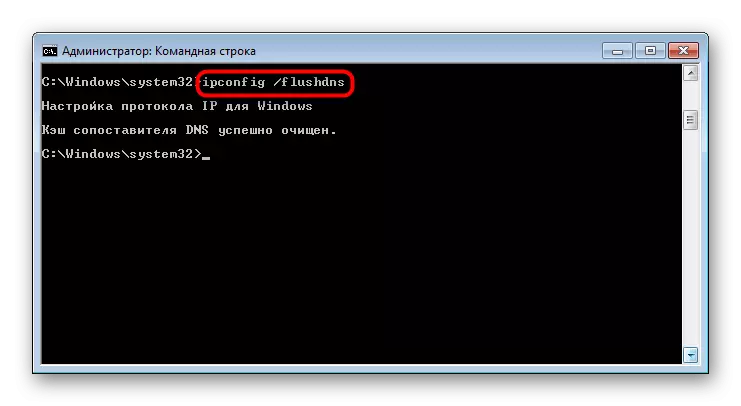
- Next, reset the DNS cache with the IPConfig / Flushdns command.
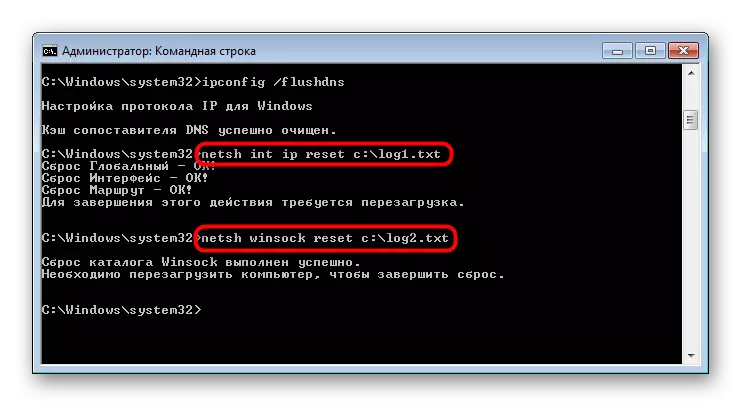
- After that, reset the TCP / IP protocol settings with the creation of a log file in the system directory: Netsh int IP Reset C: \ log1.txt. Do the same for the WinSock: Netsh WinSock Reset C: \ log2.txt.
At the end of all manipulations, reboot the "seven". Then the created logs can be removed.
Option 7: System Restore
Pretty little percentage that none of the disassembled recommendations helped. Nevertheless, this chance always exists, and therefore it is necessary to remember the possibility of kickbacking the system to a state when problems in the operation of the OS have not yet been observed. He can also help with those who simply do not want to try all the methods of correcting the error and ready to return the state of the system for several days or months ago. However, of course, provided that there is a recovery point on the hard disk. About how the rollback procedure is performed is written in the method 1 of the link below.
Read more: Restoration of the system in Windows 7
From this article, you learned not only how to include the "Diagnostic Policy Service", but also how to restore it in case of various errors and failures that interfere with running the process correctly.