
Sometimes users face this situation when the Windows 7 operating system is automatically rebooted during critical errors or at the end of installing updates. Not everyone is satisfied with this state of affairs, therefore, there is a desire to get rid of this option. We offer to familiarize yourself with different methods of solving the task to pick up optimal for yourself.
Turn off the automatic reboot of Windows 7
As mentioned earlier, there are different reasons for which the utility is required to disable the auto operation. Each method below is suitable in a specific situation, for example, the first is dedicated to cancel a restart during critical errors, and all other are aimed at system updates. Let's figure it out with each option in order so that you can choose the appropriate.Method 1: WINAERO TWEAKER program
There is a free program called Winaero Tweaker, whose functionality allows you to simplify the execution of a plurality of various system settings, including the cancellation of the reboot of the computer after installing updates. This method will suit those users to whom all subsequent methods will seem complex, and only a few simple steps should be done to perform this:
Go to the official website of WINAERO TWEAKER
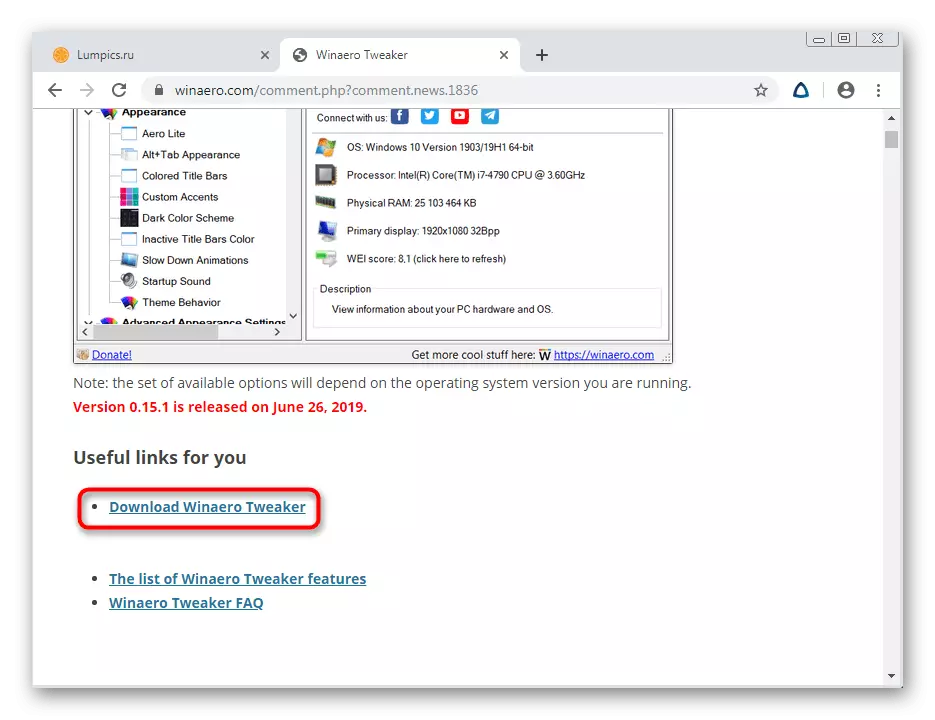
- Go to the official website of Winaero Tweaker, using the reference attached above. By default, this program should be displayed immediately on the main page, but if you did not find it there, scroll through it slightly down and in the right column called "Software by Winaero" the first on the list will be Winaero Tweaker. Click on the link link to open the download page.
- There click on the "Download Winaero Tweaker" button.
- You will be moved to a new tab where you need to click on a similar inscription.
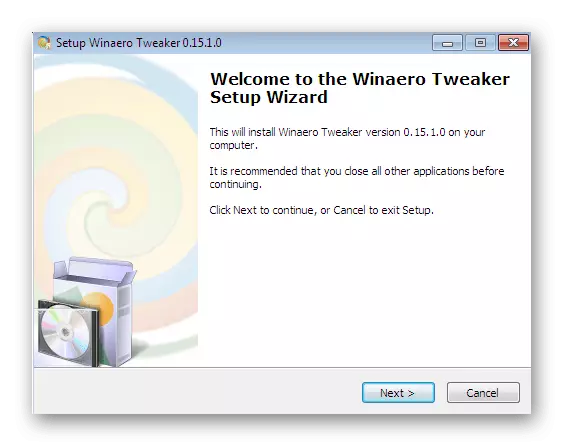
- Expect the end of the archive download, and then start it through any convenient software.
- You may not even unpack the contents, simply double click on the LCM on the executable file.
- Make a banal software installation procedure, and then open it.
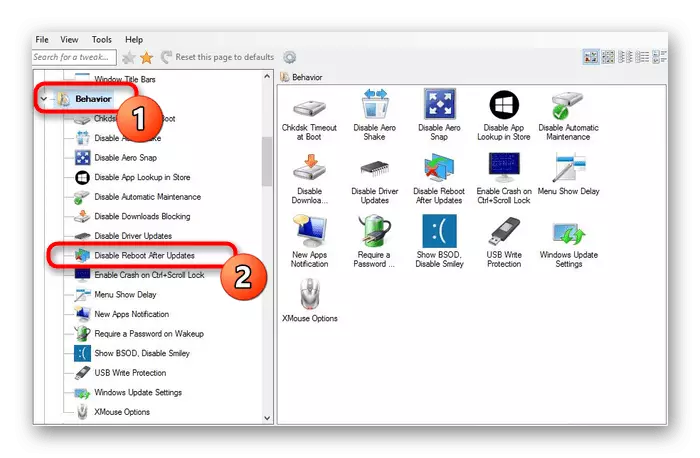
- In the "Behavior" section, use the "Disable Reboot After Updates" option to disable this option.


Additionally, we suggest familiarizing yourself with other functions of this application. Perhaps among them you will find the settings of appearance or defined system parameters you are interested. If there is no desire to use third-party software to achieve the goal, go to familiarization with the following ways.
Method 2: Configuration Options "System Failure"
An option with changing the configuration option "System failure" is the only solution to cancel the PC reload during critical errors. Everyone who wants to cancel this action should be performed:
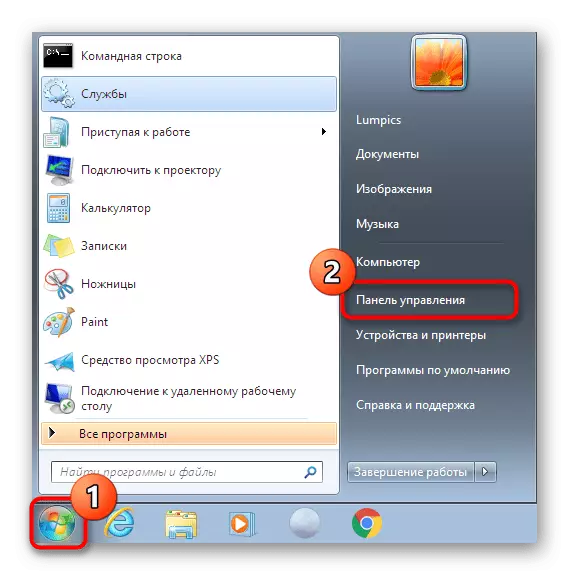
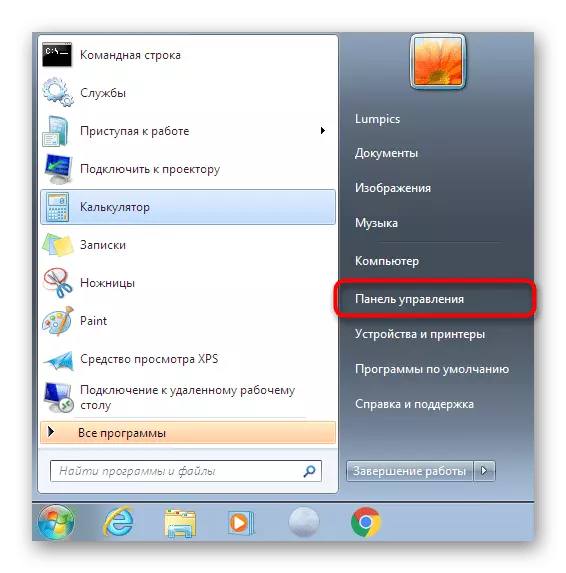
- Open the Start menu and click on the corresponding button responsible for the transition to the "Control Panel".
- Here you need a category called "System". To get there, the easiest way to switch viewing on the "badges" in the upper right corner.
- In the panel, find the inscription "Advanced system parameters" and make the left click on it.
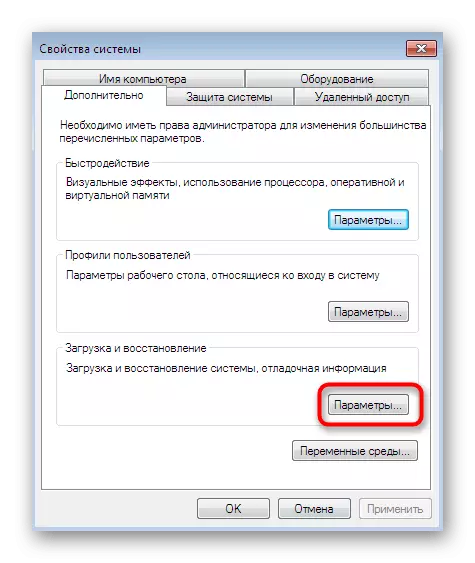
- The "Advanced" tab opens. In the lower part of it, find the "Download and Recovery" block and click on "Parameters".
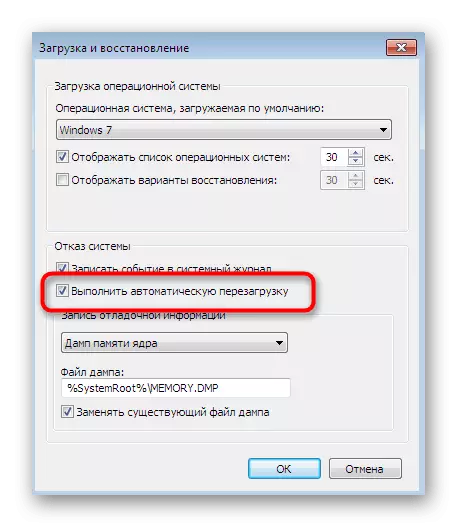
- Remove the checkbox from the "Automatic Reload" item.
- Apply the changes by clicking on "OK".


All changes will be applied instantly and you can immediately move to normal interaction with the operating system, without fearing that it suddenly leaves for a reboot.
Method 3: Editing Local Group Policy
We will specify that the "Local Group Policy Editor" is missing in Windows 7 home basic / extended and initial, so all subsequent recommendations are suitable only for holders of assemblies that have not entered this list. This editor is an improved graphic version of the registry editor, allowing users much faster and easier to customize certain parameters. Now we use this component to disable the automatic restart of the PC after installing updates.
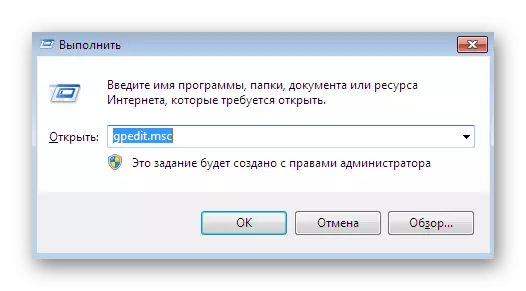
- Run the "Perform" utility with the clamping of the standard hot key Win + R, then write in the input field the gpedit.msc command and press the ENTER key.
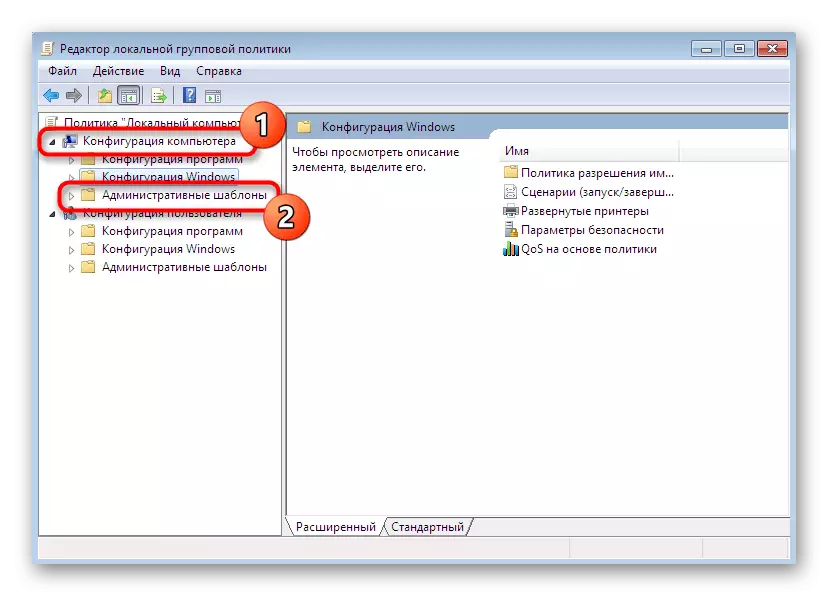
- Wait until the editor is launched. It may take a few minutes to it, which directly depends on the speed of the computer. Here in the "Computer Configuration" section, select the "Administrative Templates" directory.
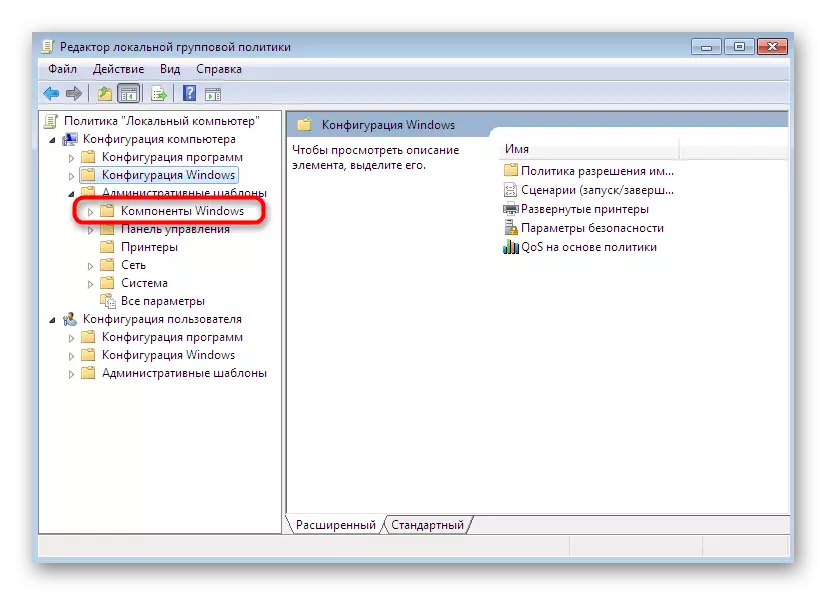
- Expand Windows Components folder.
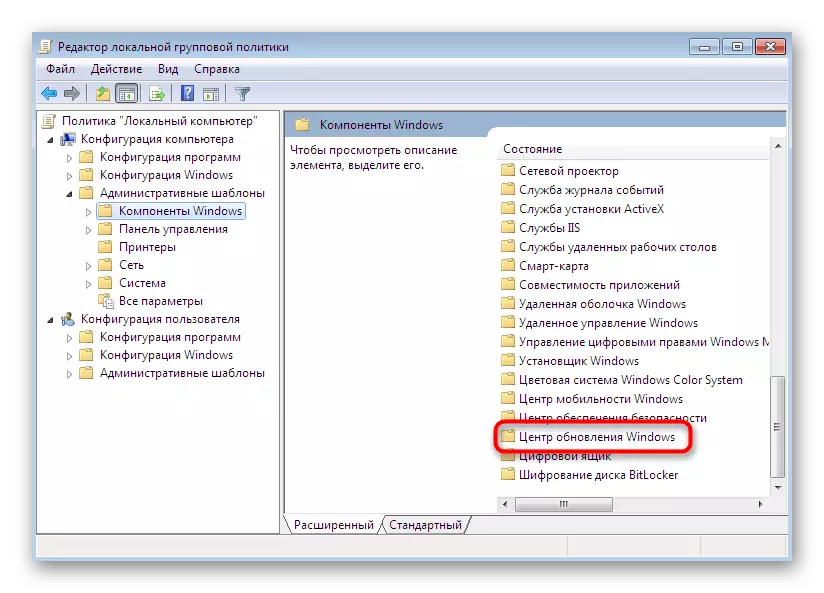
- In the main section of the window, find the "Windows Update Center" component and click on it twice the left mouse button.
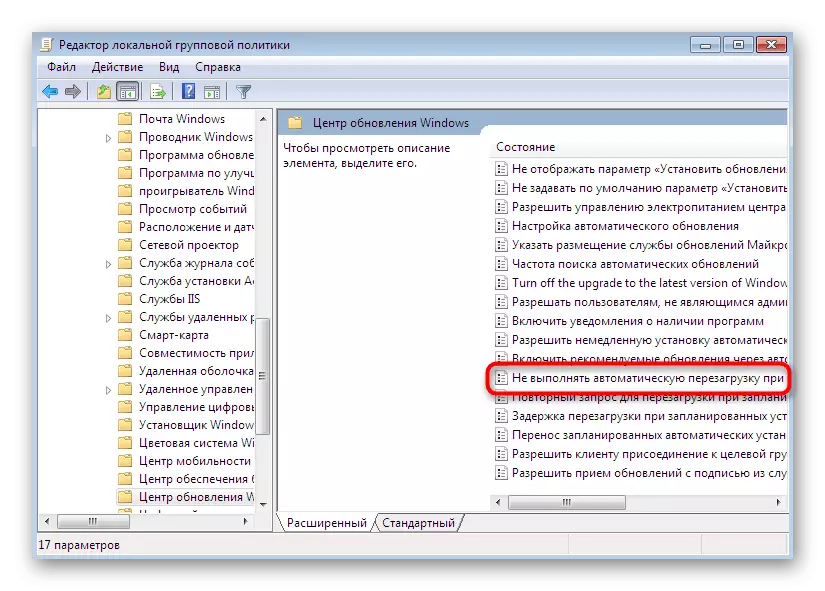
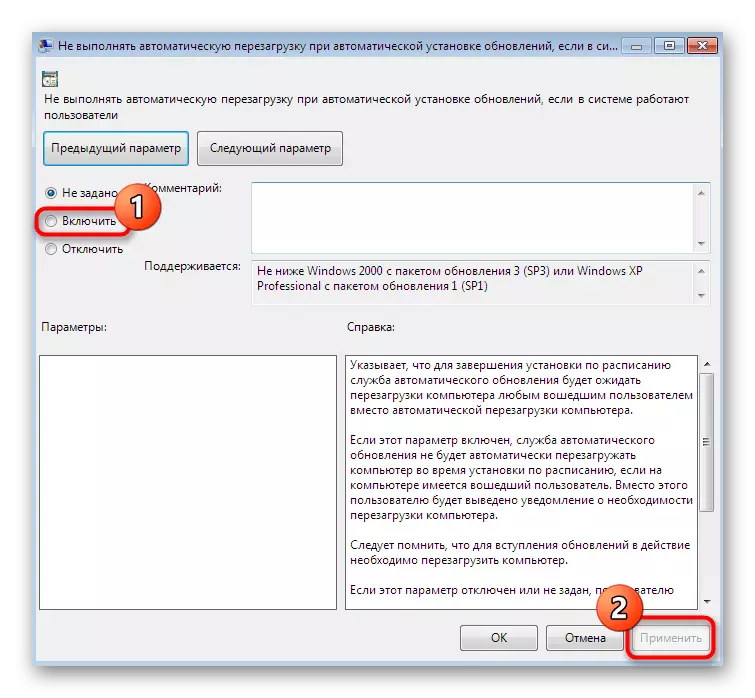
- Navigate to edit the "Do not perform an automatic reboot when you automatically install updates if users are running in the system," clicking twice the LX for this line.
- Here, mark the mark "Enable" by the marker, and then apply the changes.
You can return to the "Local Group Policy Editor" to change the parameter if it is necessary. Worders of those versions of OS, who do not have this application, we advise you to refer to the following method.
Method 4: Editing Registry Parameter
The option using the registry editor will be appropriate only in that situation if there is no local group policies on the PC, since it will be a little more difficult to edit it. The whole point is to manually search and edit the parameter, and in the absence of it will have to create it manually.
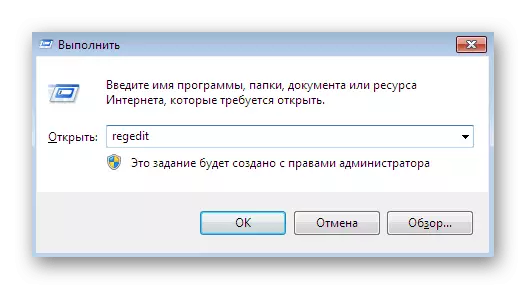
- Run the "Run" utility (Win + R), where to enter the REGEDIT and press the ENTER key.
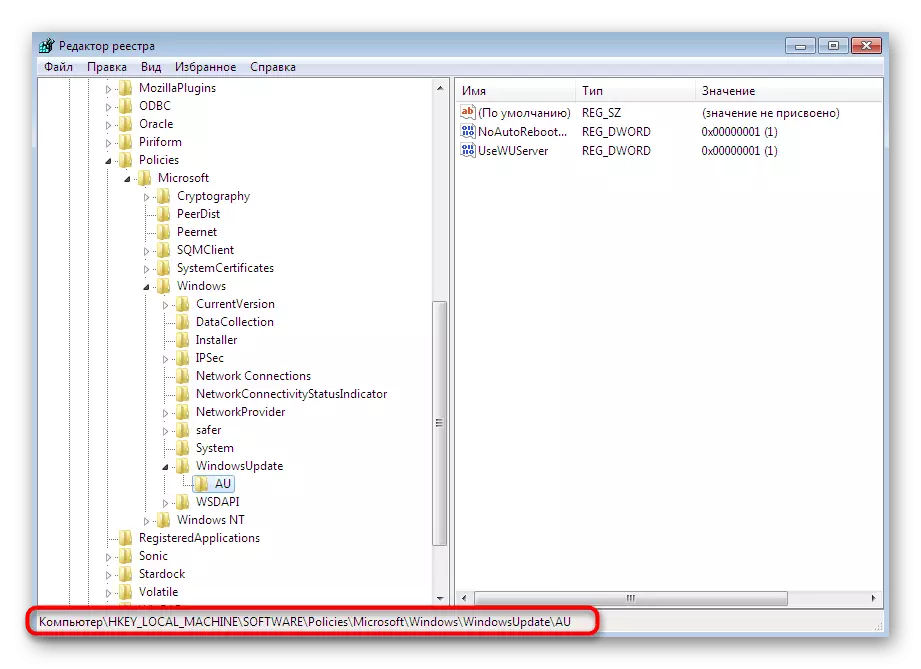
- Go along the path of HKEY_LOCAL_MACHINE \ SOFTWARE \ POLICIES \ Microsoft \ Windows \ WindowsUpdate \ AU. If the ultimate folder does not exist, create it manually using the built-in options. To do this, click on the WindowsupDate folder with the right mouse button and select "Create"> "Section". Cover it as "AU" - within this folder and further actions will occur.
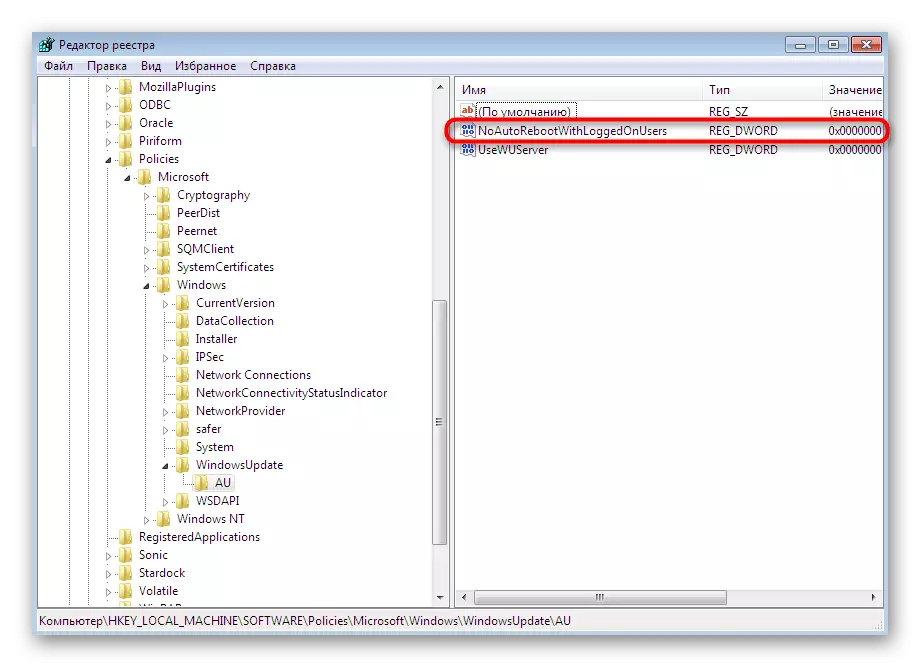
- Lay in the root of the folder parameter "reg_dword" with the name "NoautorebootWithLoggedonusers". Double-click on it to the LKM to go to edit. If the parameter is absent, inside the AU folder, right-click, hover the mouse over the "Create"> "DWORD parameter (32 bits)" and set the name "noautorebootwithloggedonusers".
- Set the value "1", and then save the changes.

Always after editing the registry, you must restart the computer so that all changes take effect. Do it after completing the work or now, if any documents do not need to preserve.
Method 5: Disable the task in the "job scheduler"
We delivered this option to the last place, as the task with a reboot of the computer is not always added to the Planner menu, in addition, this editing will only help in a single case while downloading updates. When they start set the next time, the task will be activated again. If it is satisfied with it, you will need to perform such steps:
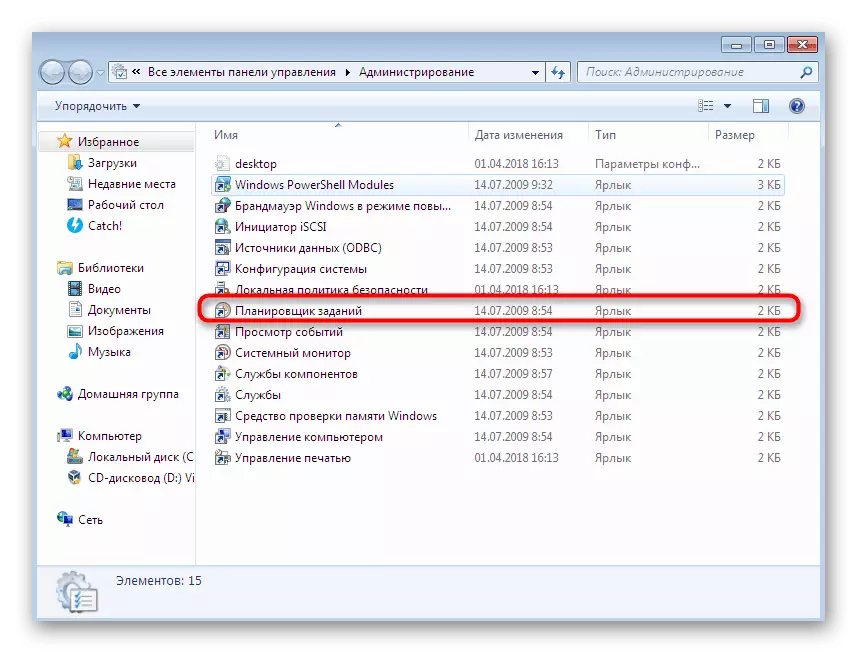
- Go to "Control Panel" convenient for you, for example, opening the "Start" menu.
- Here, move to "Administration".
- Choose a classic job scheduler application.
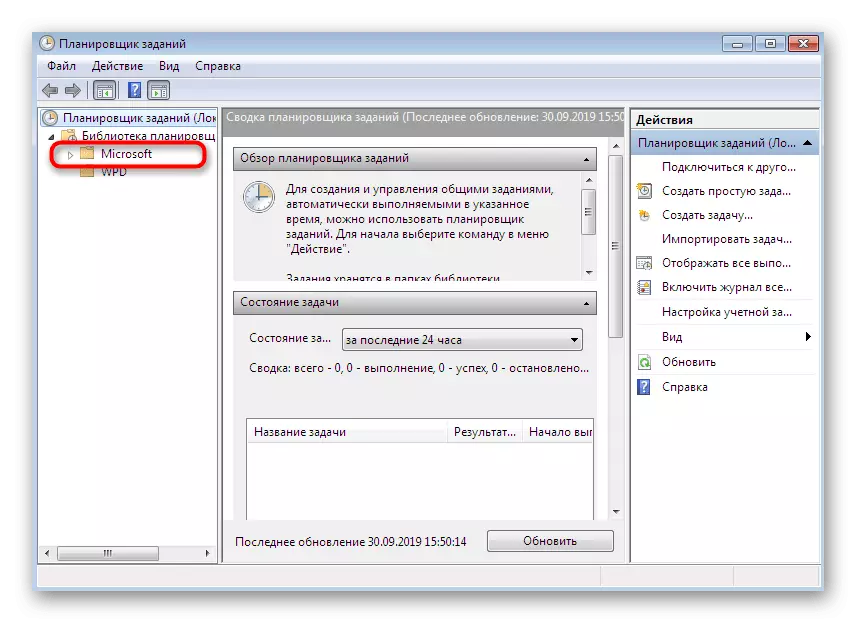
- Expand the library, sometimes clicking on it LKM.
- Select a directory called "Microsoft".
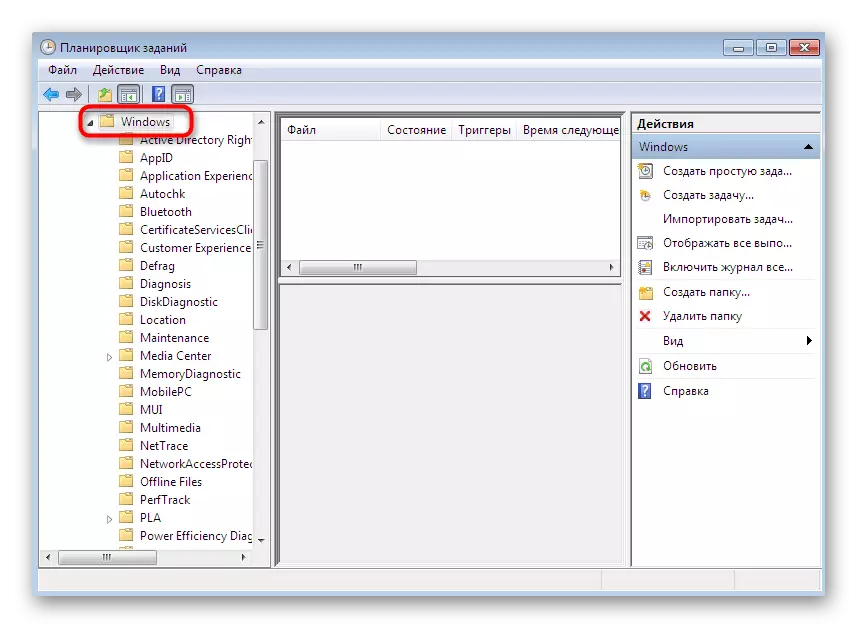
- Open the subfolder "Windows".
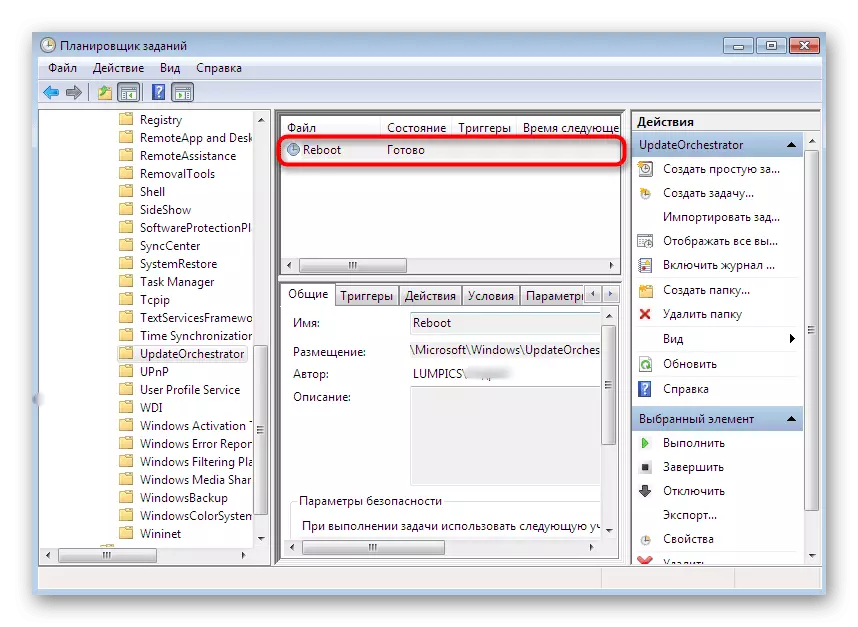
- Lay here the "UpdateOrchestrator" directory and highlight it.
- The REBOOT file is displayed in the right menu. Click on the PCM to display options.
- In the context menu, specify the "Disable" option.


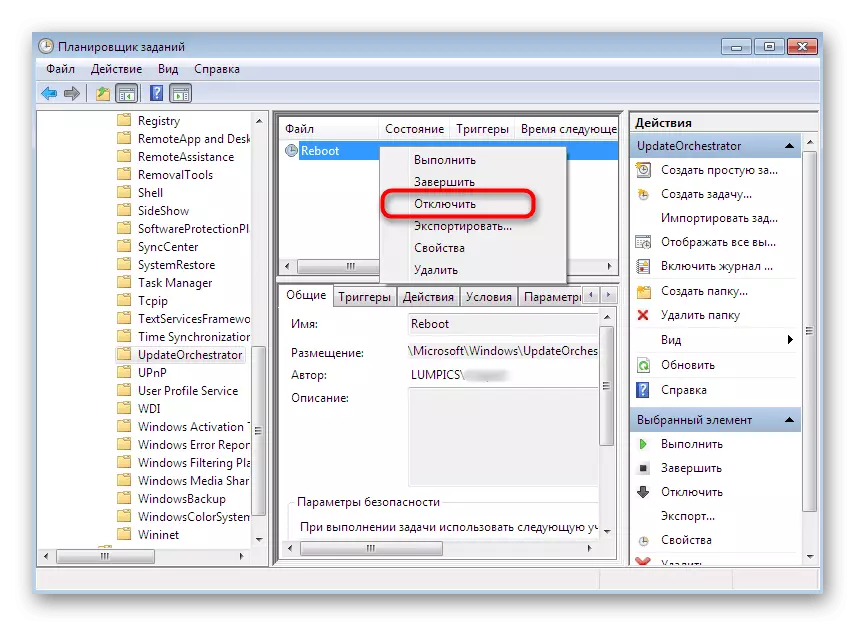
Now you can be sure that with the current installation of updates, the computer will not be rebooted, and the notification will appear with the proposal to do it manually. However, we will repeat once again that, with the next scan, the task will be created again.
As you can see, there are completely different options for disabling the automatic reboot of the operating system. You can familiarize yourself with everyone to stay at some one, which will seem as simple as possible to quickly and effectively cope with the task.