
The network disk is called a logical volume that performs the role of the public file storage at the local network. Administrators or users with appropriate rights can easily connect an unlimited number of such media by setting up access levels. In the article, we want to talk about three ways to perform this operation, taking the example of the Windows 7 operating system for an example, and at the end we will also tell me about correcting troubleshooting if they somehow arose.
Connect the network drive in Windows 7
The whole essence of creating a new network disk is to implement certain actions through a special master that runs in several ways. However, there are also certain nuances depending on the types of drives and the goals for which they are created. All of this read in the instructions below. First, let's figure it out with a standard option, gradually moving to more complex and rarely used. However, if you have not yet configured a local network, a home or corporate group, you must certainly do it in advance, because without this configuration, the network drive is simply not added.Read more:
Connecting and configuring a local network on Windows 7
Creating a "home group" in Windows 7
Method 1: Computer menu
As already mentioned above, a specially created master is responsible for adding the resource today. By default, it is in the "My Computer" section, and we suggest run it now, which looks like this:
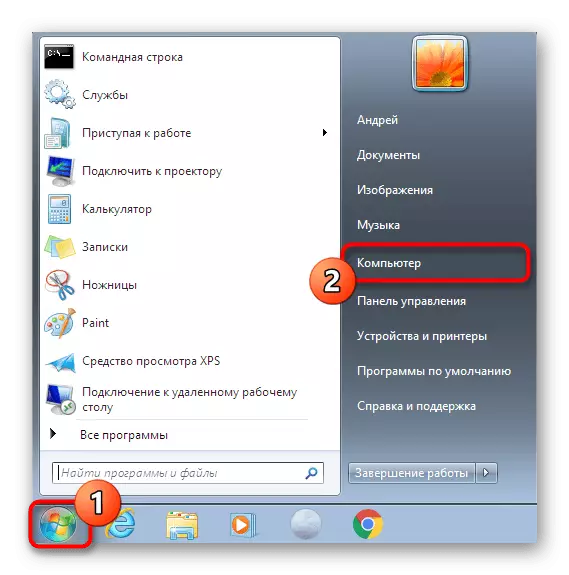
- Open the "Start" and go to the "Computer" section.
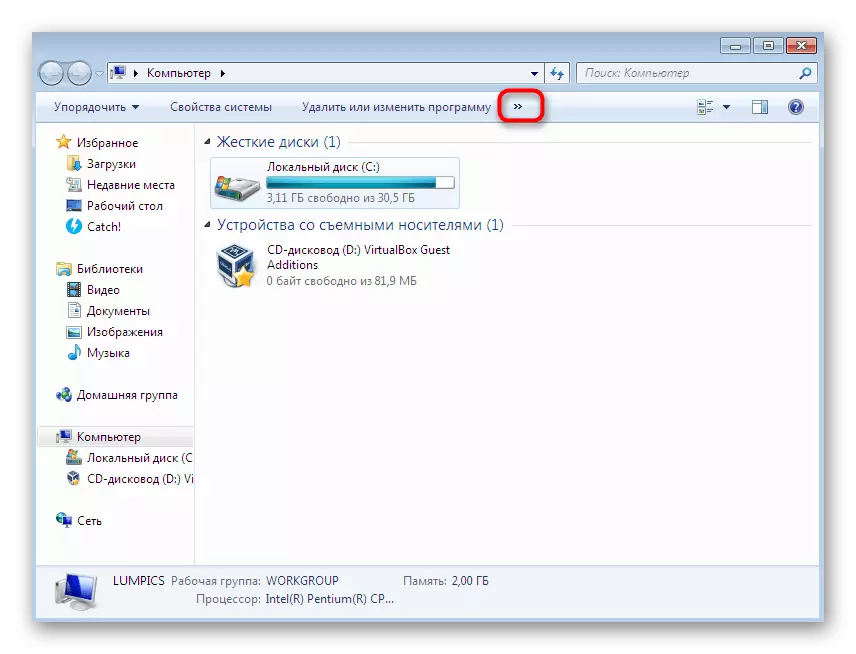
- If all the elements of the top panel did not fit in one line, click on the icon in the form of arrows to the right.
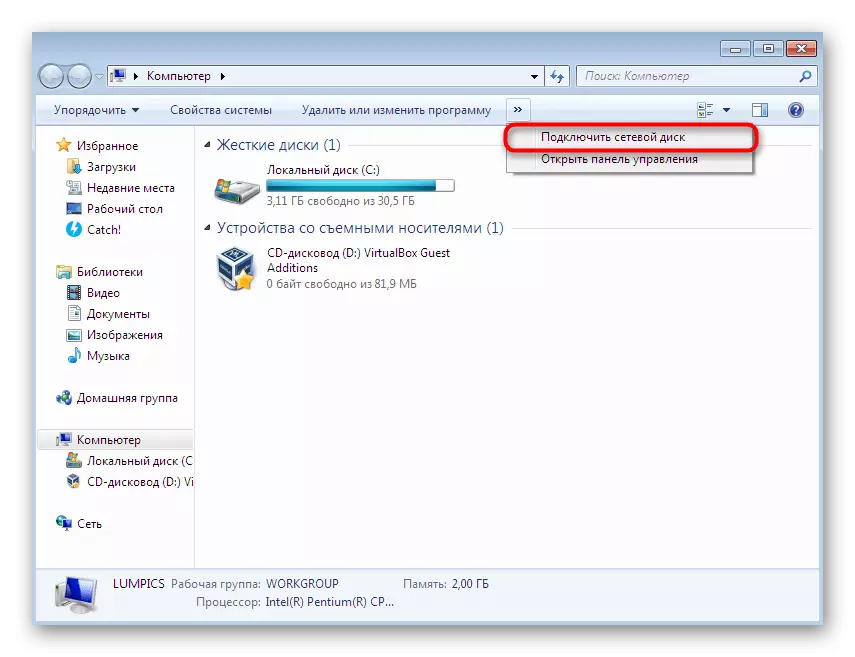
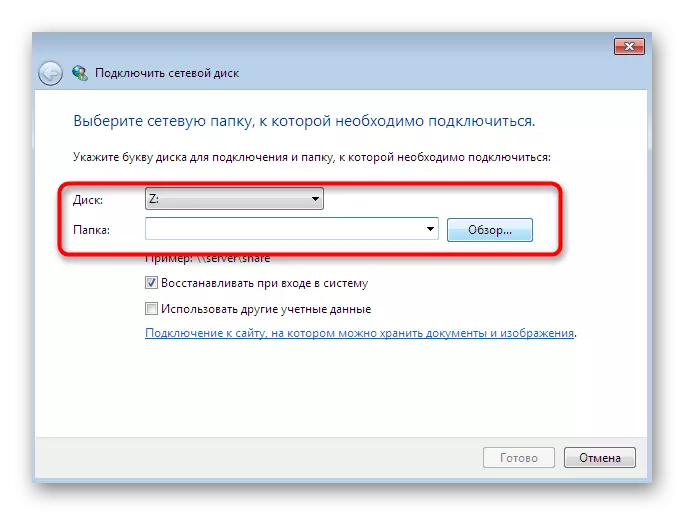
- In the context menu that appears, select "Connect a network drive".
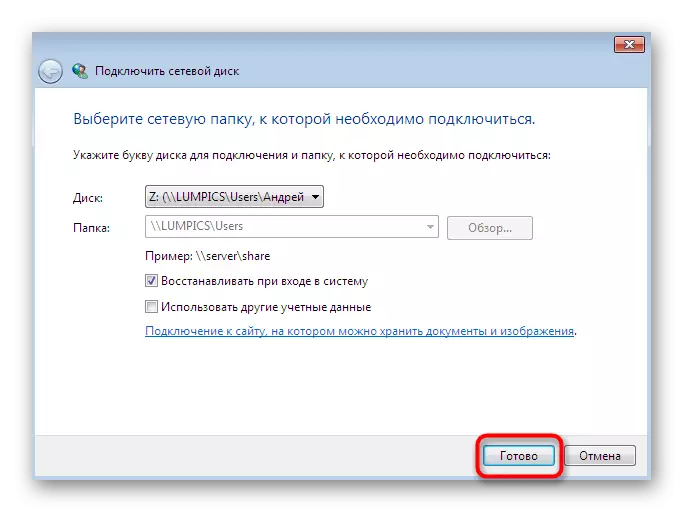
- Now you should do the main configuration. As a disk, specify the tab you want to make a network, and then connect the folder to it.
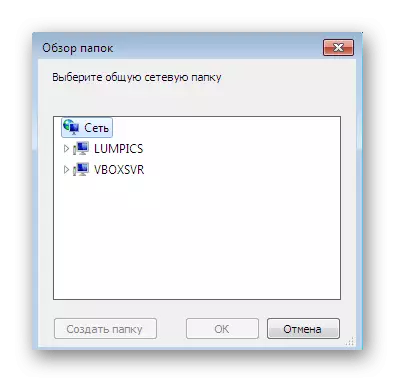
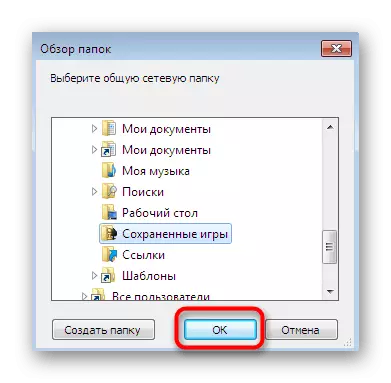
- The choice of a general directory is carried out through a standard browser, so this will not definitely have any problems.
- Just select the available folder that is not protected systemically, and then click on OK.
- After completion, make sure that all actions are made correctly and click on the "Finish" button.
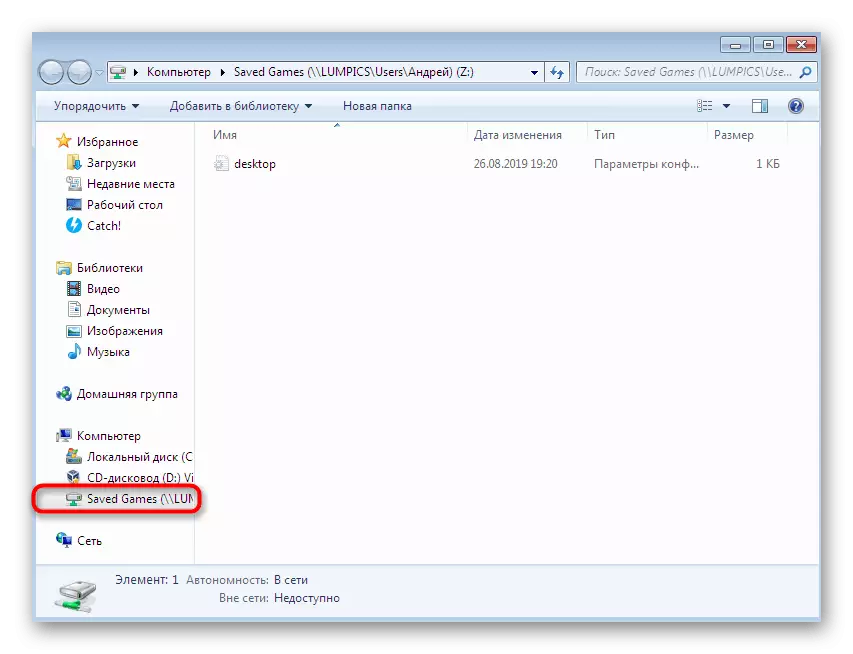
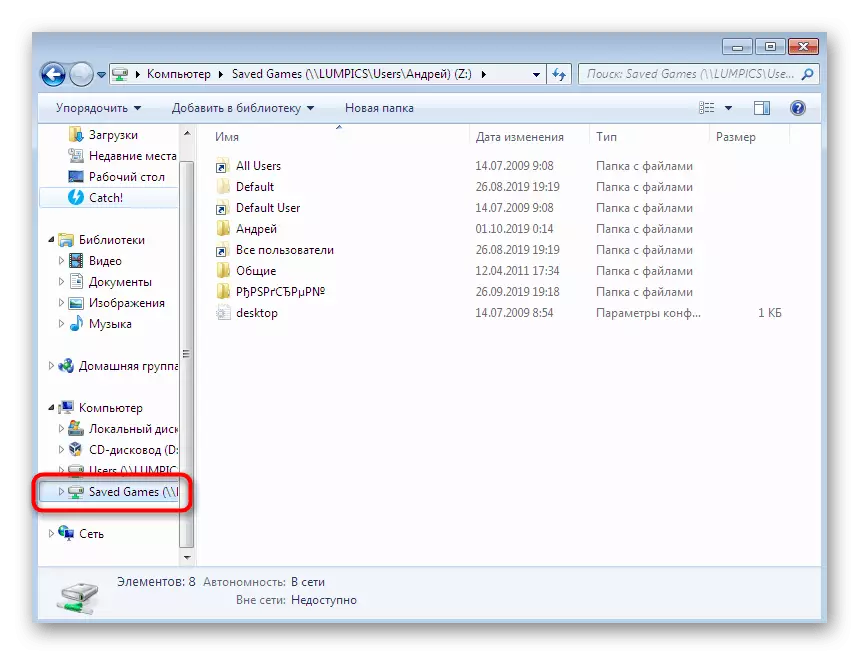
- After that, you will immediately moved to the general section and you can manage it.
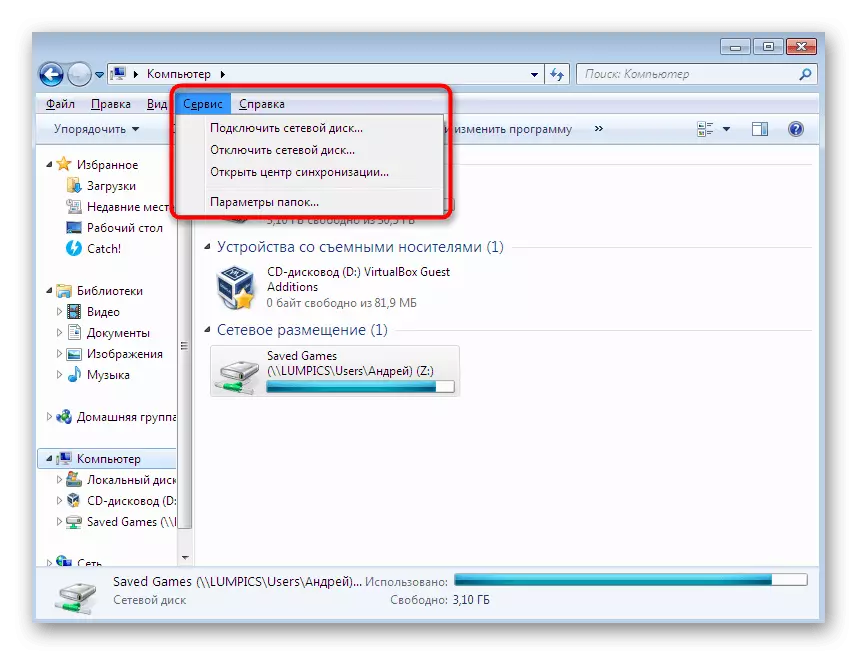
- If for some reason the connection button is not displayed on the above panel above, you can start the wizard through the "Service" section. Additional menu bar opens by clicking on the ALT key.
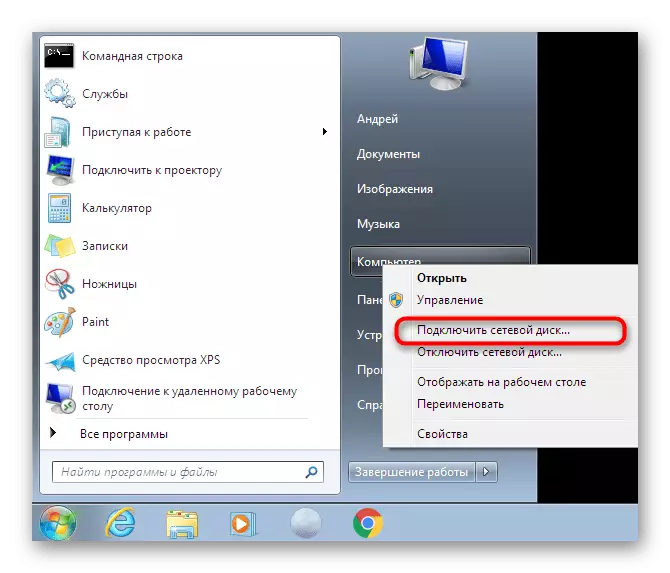
- This is done and clicking right-click on the "Computer" section in the "Start" menu.

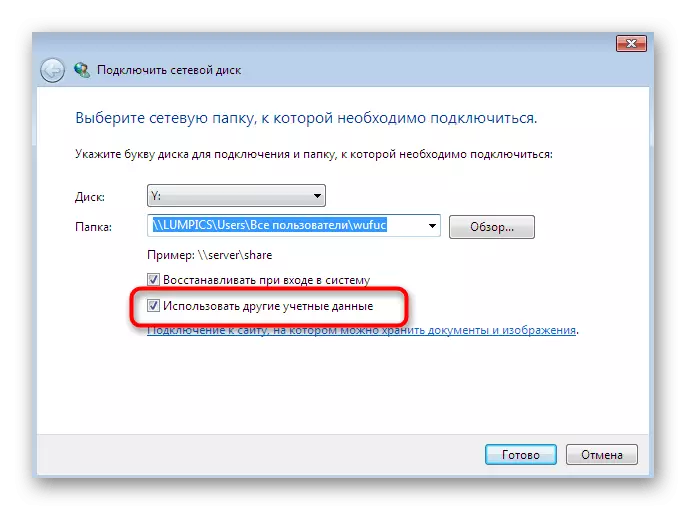
Separately, we want to affect the example of creating a network disk, which is subject to other accounts. This type of creation is rarely used, and differs from the usual only one item, but it will be very useful to some users.
- In the "Connect Network Disk" window, check the "Use other credentials" item, then perform the remaining settings that have already mentioned earlier.
- After clicking on the "Finish" button, an additional Windows Security window will appear. In it, specify the name of the user incoming in the current domain, and its password to confirm the person.
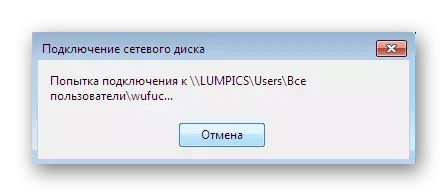
- Expect to complete the connection attempt to the specified path.
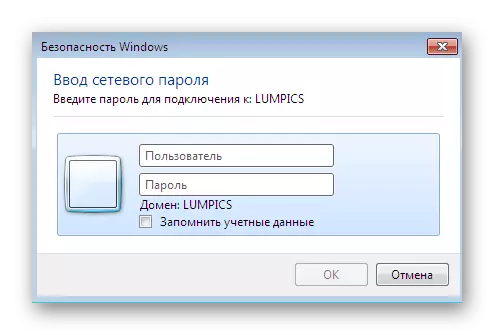
This connection option will be useful to those users who do not want to create a new session of the operating system using another profile credentials. However, you still have to know the name and password, to confirm the action in the Windows Security Window.
Method 2: Standard PC Network Location
There is an alternative method for creating a network logical volume for those users who wish to cope as quickly as possible with this task using one of the standard locations. Its essence is to start the wizard through the root of the home directory, which allows the browser to immediately select one of the connected partitions of the hard disk.
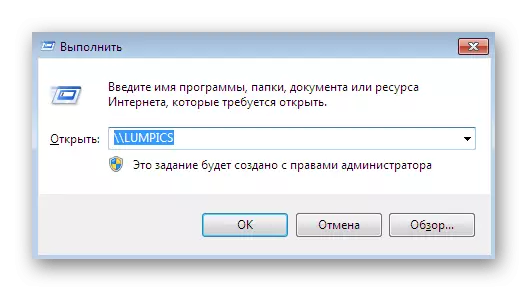
- Open the "Run" utility, where in the Input field write the computer name following the example \\ Lumpics, where Lumpics is the name of the PC. To activate the command, click on "OK" or ENTER key.
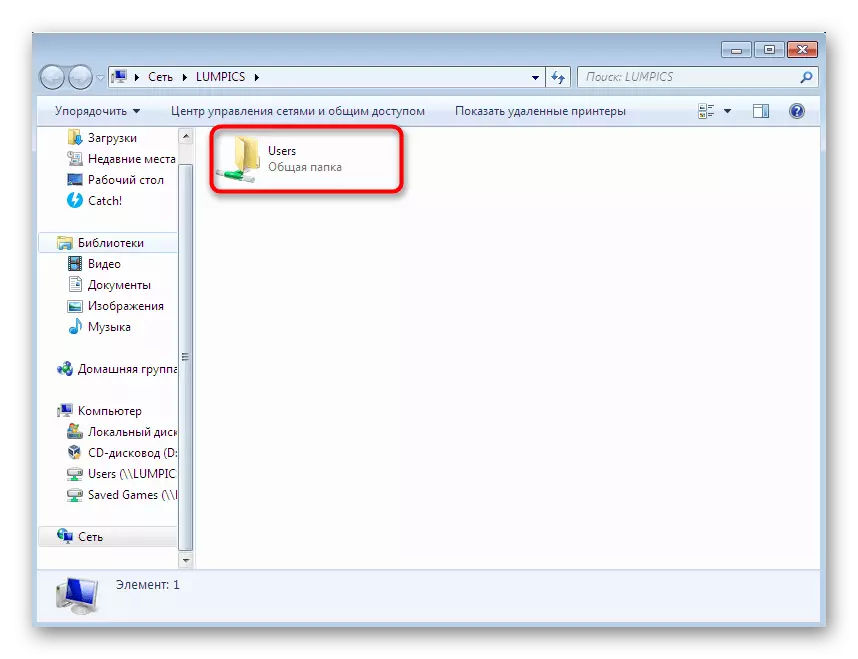
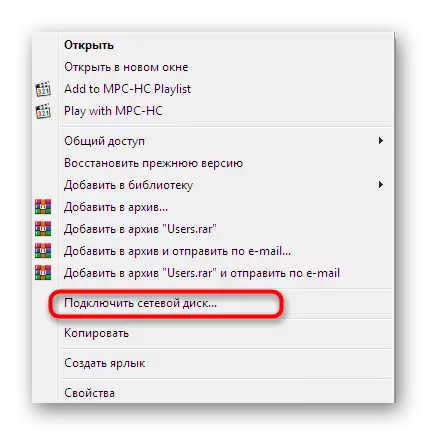
- Here, select the "Users" directory and right-click on it.
- In the context menu that opens, find the item "Connect a network drive".
- Use the same configuration about which we have already spoken earlier, and then click on "Finish".
- You will immediately move to the root of the connected volume, and if its settings remained standard, then the "Users" folder will perform as this disk.
As mentioned above, this method is focused on those users who wish to quickly choose a standard disk to create a network location or prefers to use such actions when working with a local network.
Method 3: Connecting Yandex.Disk as a network
Certain users actively involve Yandex.Disk service, which allows you to store important documents in the cloud. However, all files downloaded there are and on a local storage, which can also be connected as a network disc. The connection technique in this case is slightly different because you have to add a website for storing documents and images. This default function is present in the wizard under consideration today, and you can learn everything about this connection by reading the later material.Read more: How to connect Yandex.Disk as a network drive
Above you have been familiar with the three methods for creating network logic volumes for shared access. We want to draw your attention that the third option is identical to almost all such cloud storage, only the name of the directories and sites is changing to send the objects received.
Solving Possible troubleshooting
Not always the connection of the network drive is successful. During this process, the user can get certain errors or adding simply will not happen. There is no definite solution to this problem, so you have to go through every affordable fix. I would like to start with editing the registry parameters, since it is almost always configuration limitations that interfere with the correct connection of the logical drive. You need to perform such actions:
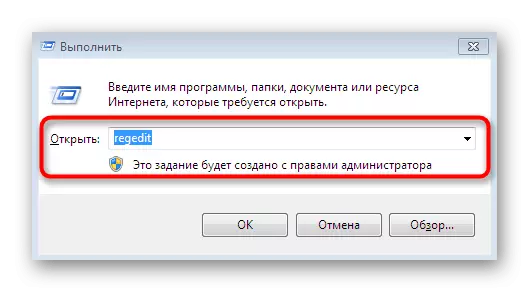
- Open the "Run" utility by clapping the hot key Win + R. In the input field, write Regedit and press the Enter key or OK.
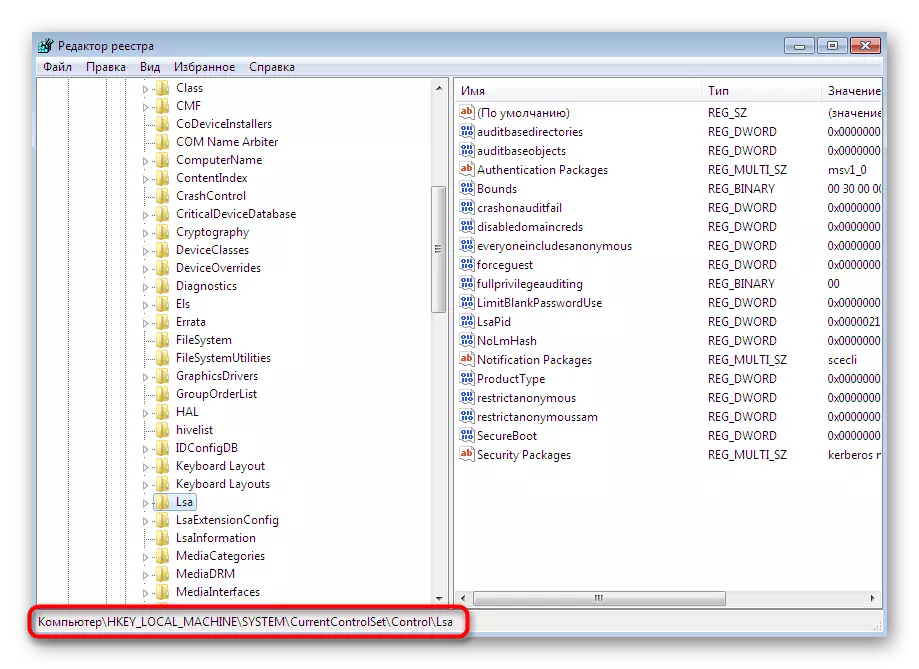
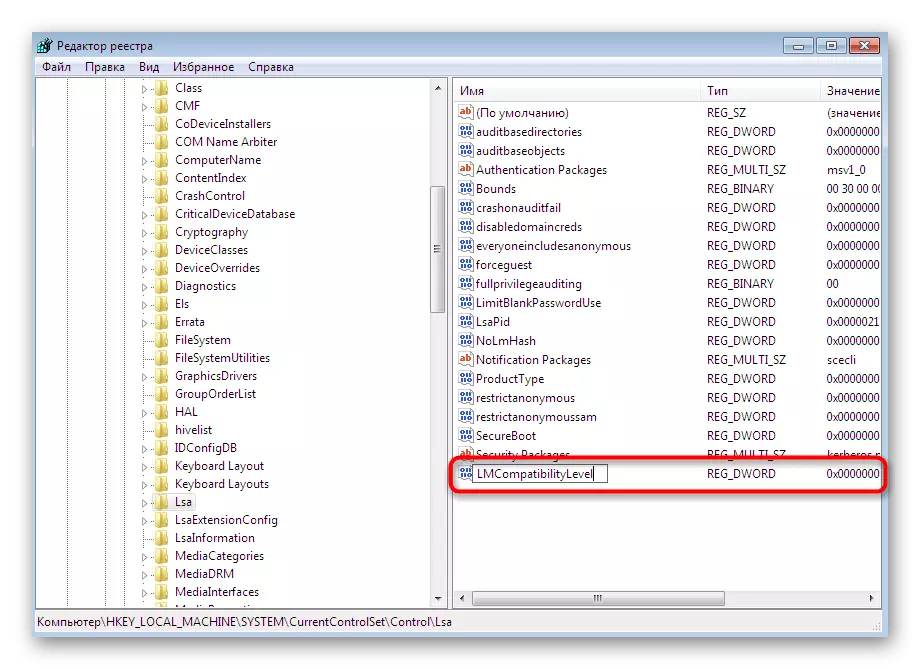
- Go along the path of HKEY_LOCAL_MACHINE \ SYSTEM \ CURRENTCONTROLSET \ CONTROL \ LSA, being in the ultimate directory.
- Here you will need to create the DWORD parameter. To do this, click on an empty location with the right mouse button and select the appropriate option in the "Create" menu.
- Set the name "lmcompatibilityleleb".
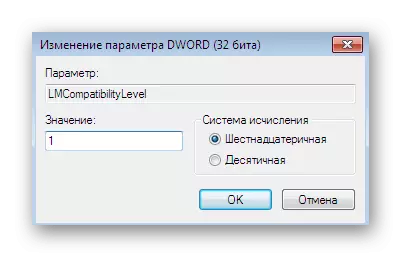
- Click on the parameter twice to go to its properties. Put the value "1", and then click on "OK".
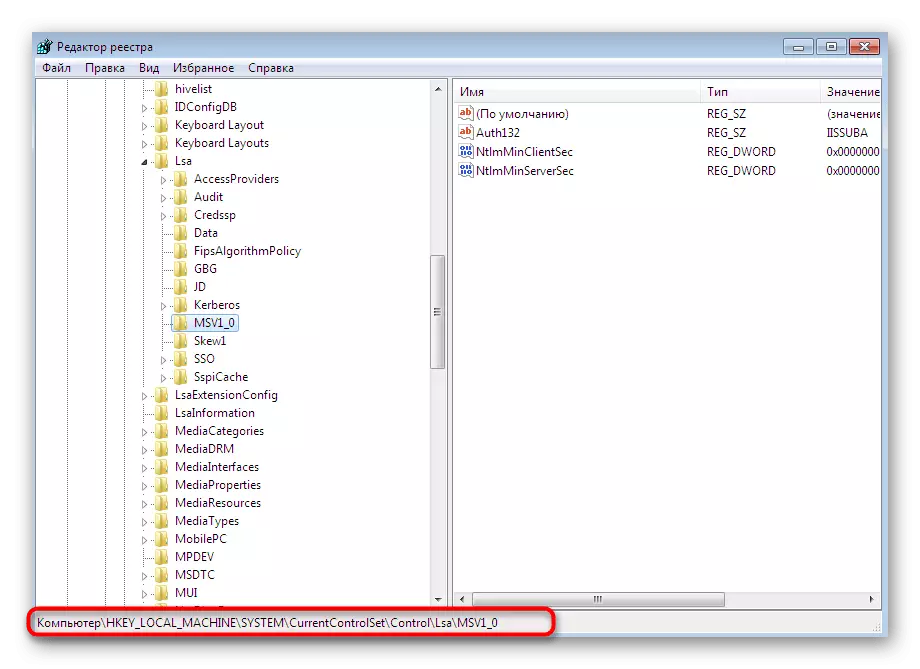
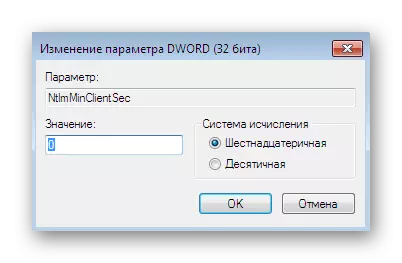
- Now you are interested in the path HKEY_LOCAL_MACHINE \ SYSTEM \ CURRENTCONTROLSET \ CONTROL \ LSA \ MSV1_0, that is, in the LSA directory you need to go to the "MSV1_0" folder.
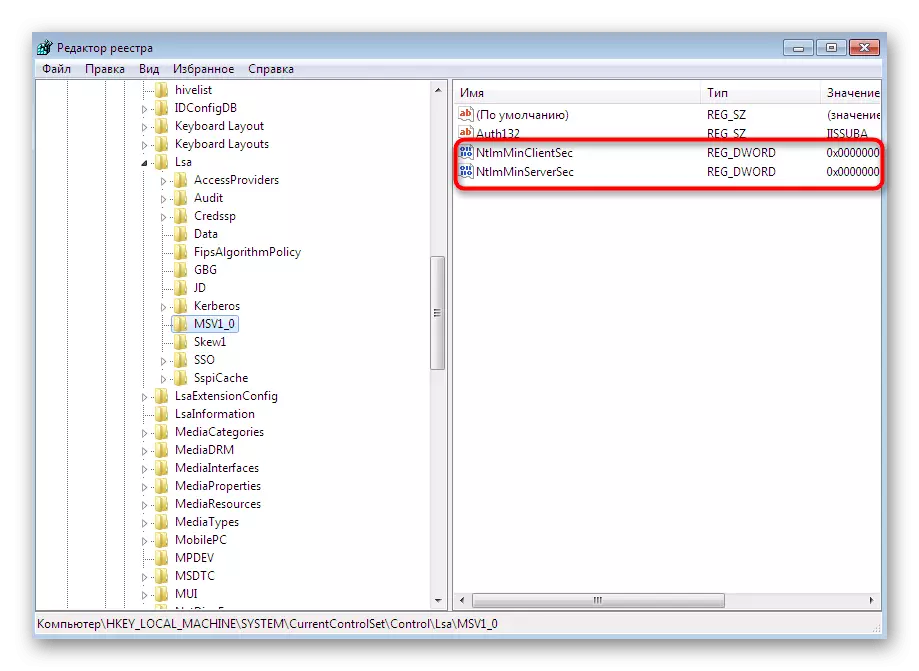
- Here, find two parameters "NTLMMInClientSec" and "NTLMMInServerse".
- Set both "0" values and save the changes.

As it happens most often, all changes made to the registry editor come into force only after rebooting the computer. Do it and go to new attempts to create a network disk.
All other correction methods of the problem under consideration are similar to those used when dealing with problems of displaying a network environment. On our site there is already a separate article on this topic. We recommend to examine the solutions given there and use them to eliminate errors when connecting a network drive.
Read more: Solving a problem with the visibility of the network environment in Windows 7
Today you have been acquainted not only with the methods of connecting the network disk, but also learned about the ways to correct problems arising when performing this operation. Due to this, it will be possible to cope with the task quickly and easily.