
To date, almost every person has a computer or a laptop that is connected to the Internet. Unfortunately, not always the connection with the global network passes smoothly. From this article, you will learn about the Methods of Error Correction "DNS server does not respond" on devices running Windows 10.
Does not answer the DNS server in Windows 10
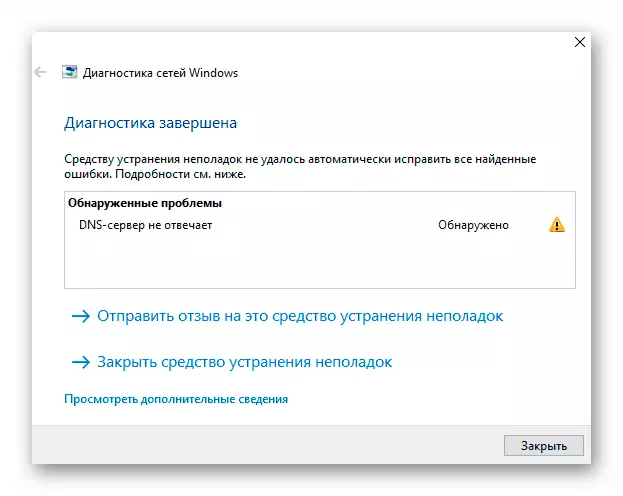
This error may occur both in the browser itself when opening the site, and separately from it, in the form of a message from the "Windows Diagnostics Wizard". She looks like this:
There is no single solution to the problem, since it is impossible to call exactly the source of its occurrence. In this article we have collected a set of recommendations that must be helped.
We strongly recommend before performing all actions to call first in the technical support of your provider. Make sure the problem is not on their side.
Method 1: Restart device
No matter how trally it sounds, but the reboot of the computer allows you to eliminate the lion's share of all known errors. If an ordinary failure in the DNS service or the settings of your network card occurred, then this method will help help. Follow these steps:
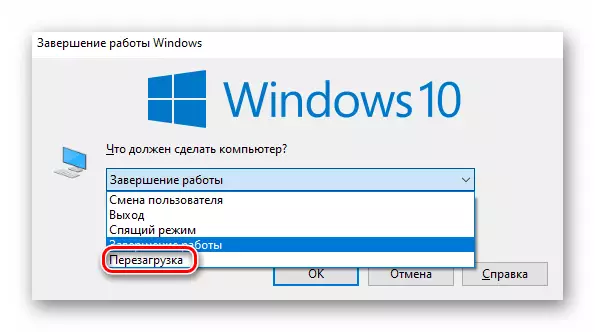
- On the desktop, press the "Alt + F4" keys simultaneously. In the only field of the window that appears, select the "Reboot" string and press "ENTER" on the keyboard.
- Wait for a complete restart of the device and check the Internet connection again.
If you connect to the global network through the router, then try to restart it at definitely. With the process of restarting the router, you can read in more detail on the example of the following article.
Read more: Reboot router TP-LINK
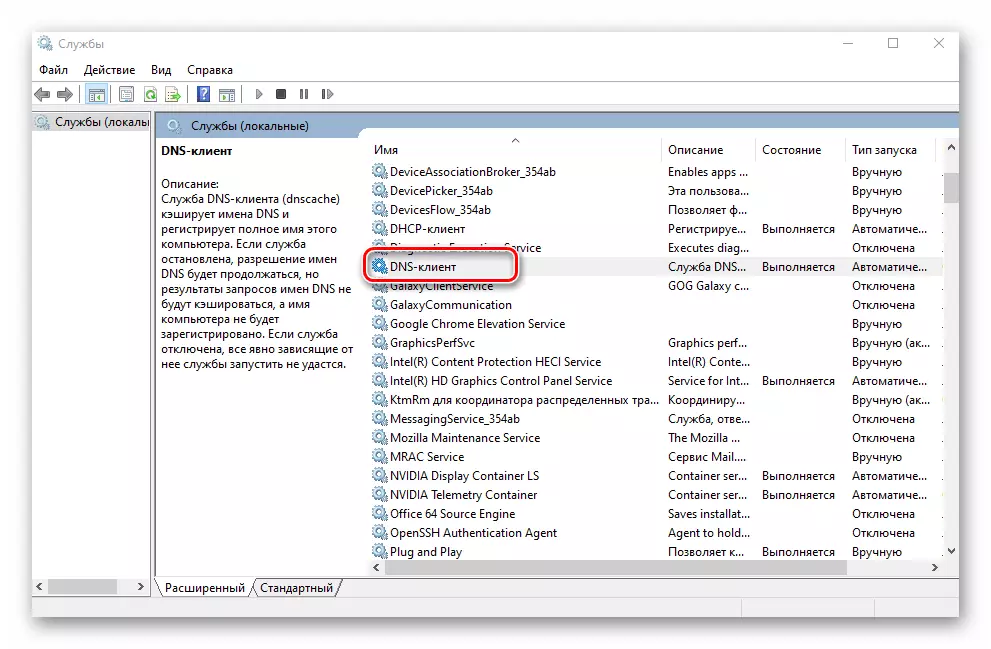
Method 2: Checking DNS service
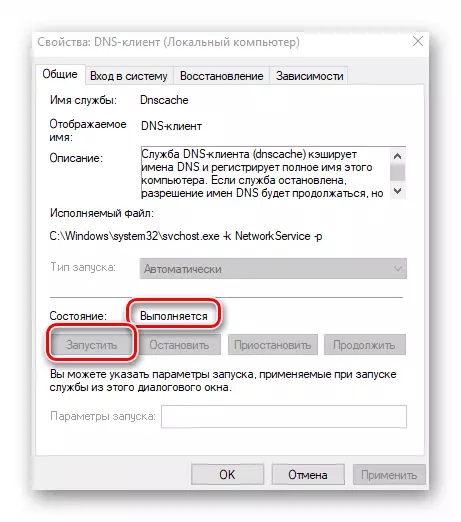
Sometimes the error source is the disabled service "DNS client". In this case, it is necessary to check its condition and turn on if it was deactivated.
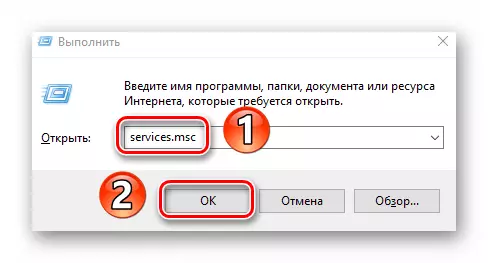
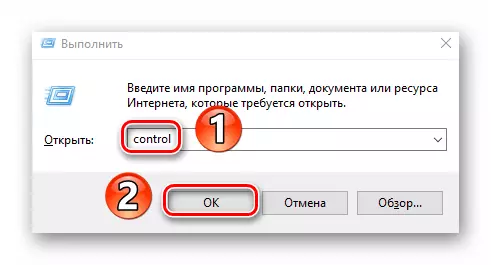
- Press the keyboard at the same time the Win + R keys. In the only field of the opened window, write the Services.msc command, then click OK to continue.
- The list of services that are installed in the system will appear on the screen. Find among them the "DNS client" and click on it twice with the left mouse button.
- If in the "Status" line you will see the inscription "disabled", click the "Run" button, which is below. After that restart the device.
- Otherwise, just close the open windows and go to the execution of other methods.
Method 3: Reset Network
In Windows 10 there is a special function that allows you to completely reset all network settings. These actions solve many problems that are connected to the Internet connection, including the error with DNS.
Before performing the following recommendations, be sure to make sure that passwords and network adapter settings are recorded, since in the reset process they will be deleted.
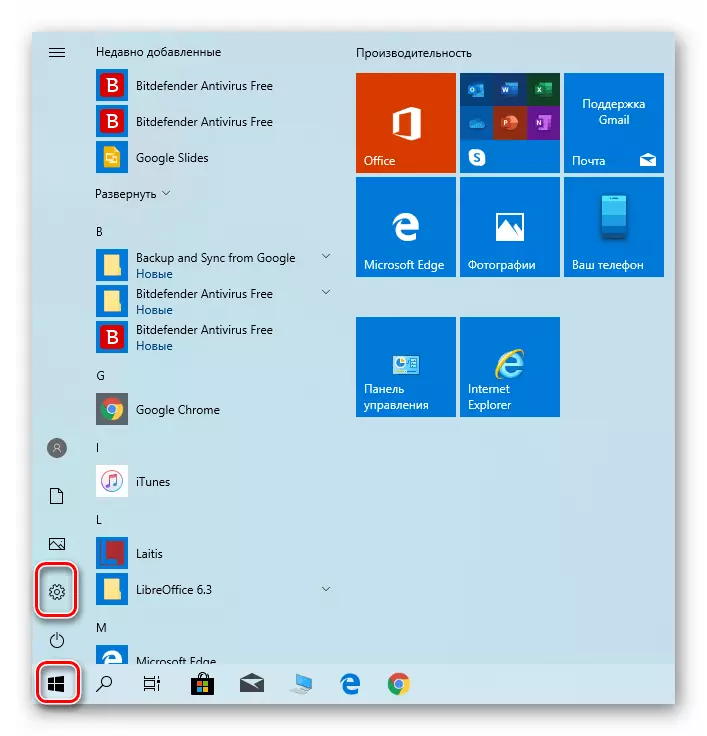
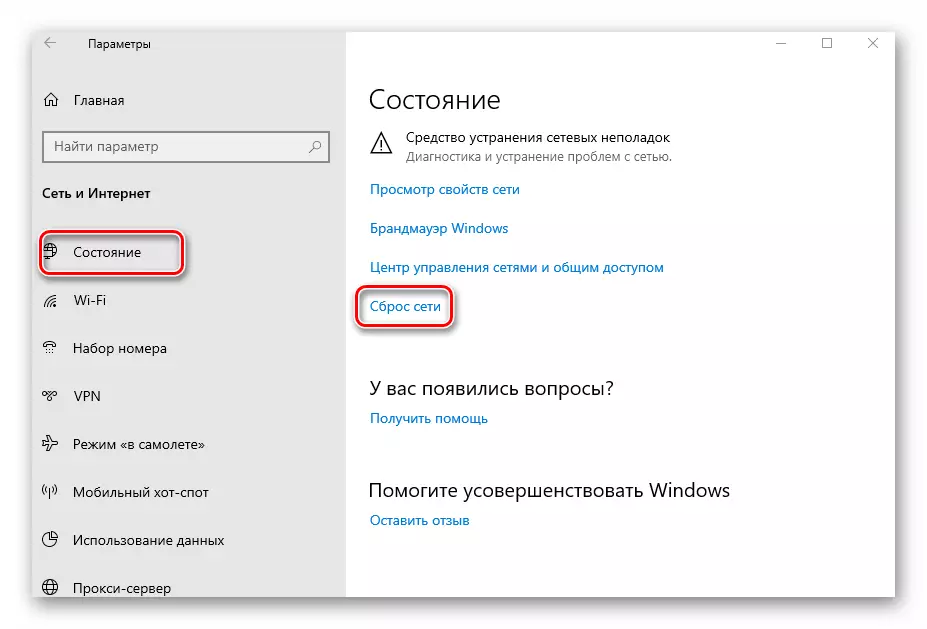
- Click the Start button. In the menu that opens, click on the "Parameters" button.
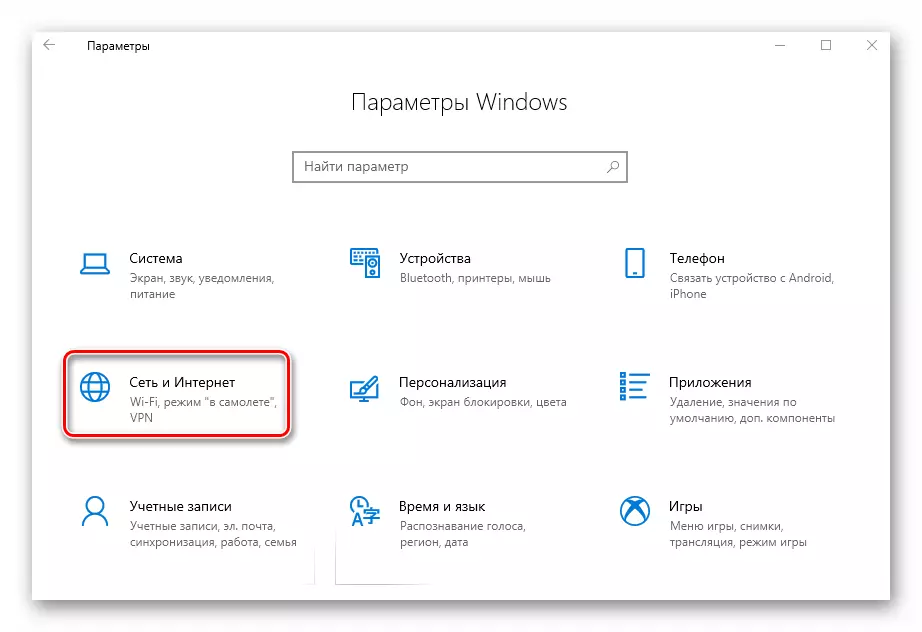
- Next, go to the "Network and Internet" section.
- The result will open a new window. Make sure that the "Status" subsection is selected in the left part, then scroll the right side of the window to the bottom, find the "Reset Network" string and press it.
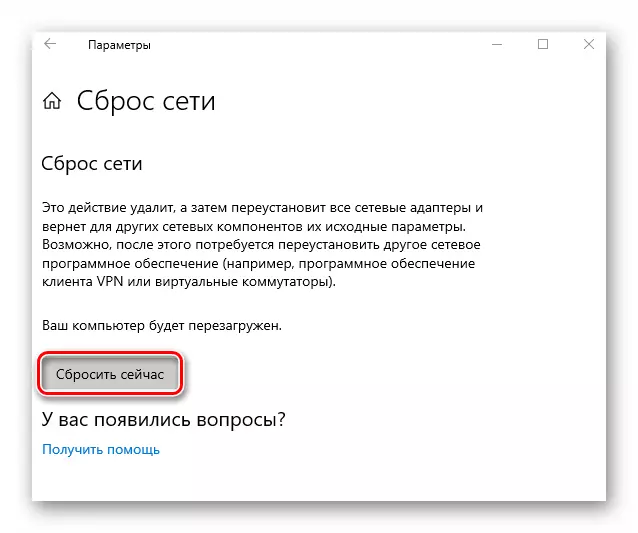
- You will see a brief description of the upcoming operation. To continue, click the "Reset Now" button.
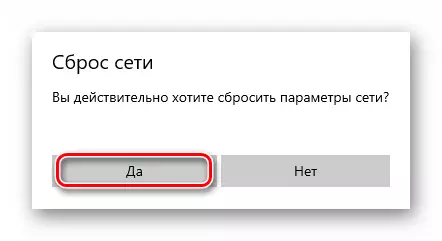
- In the window that appears, click on the "Yes" button to confirm the action.
- After that you will have 5 minutes to save all open documents and closing programs. A message appears on the screen indicating the exact time rebooting system. We advise you to wait for it, and not to restart the computer manually.

After rebooting, all network parameters will be reset. If necessary, connect again to Wi-Fi or enter the network card settings. Try again to go to any site. Most likely, the problem will be solved.
Method 4: Change DNS
If none of the methods described above have brought a positive result, it makes sense to try to change the DNS address. By default, you use the DNS topics that provides the provider. You can change it for both a specific computer and a router. We will describe in detail how to do both of these actions.
For computer
Use this method, provided that your computer connects to the Internet through the wire.
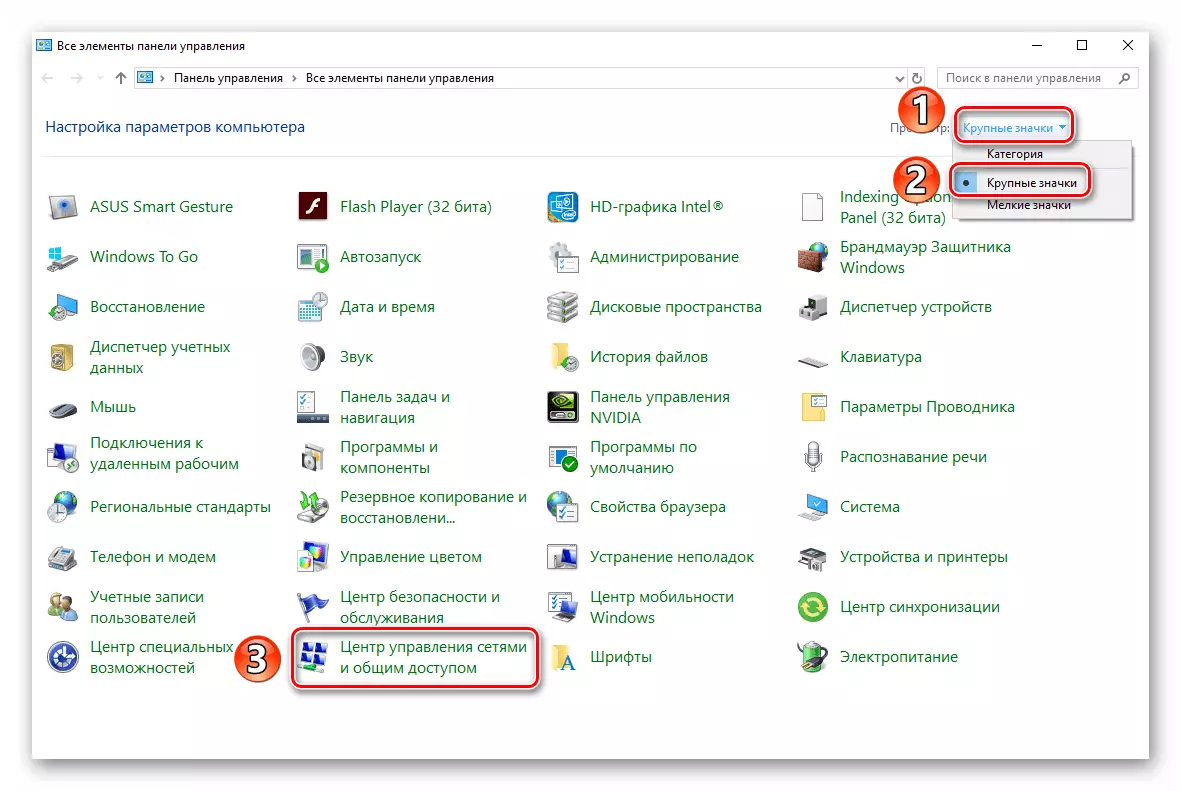
- Open the Windows Control Panel in any convenient way. Alternatively, click the "Win + R" key combination, enter the Control command to the window that opens and click on the OK button.
Read more: Opening the "Control Panel" on a computer with Windows 10
- Next, switch the item display mode to the "Large Icons" position and click on the "Network and Common Access Center" section.
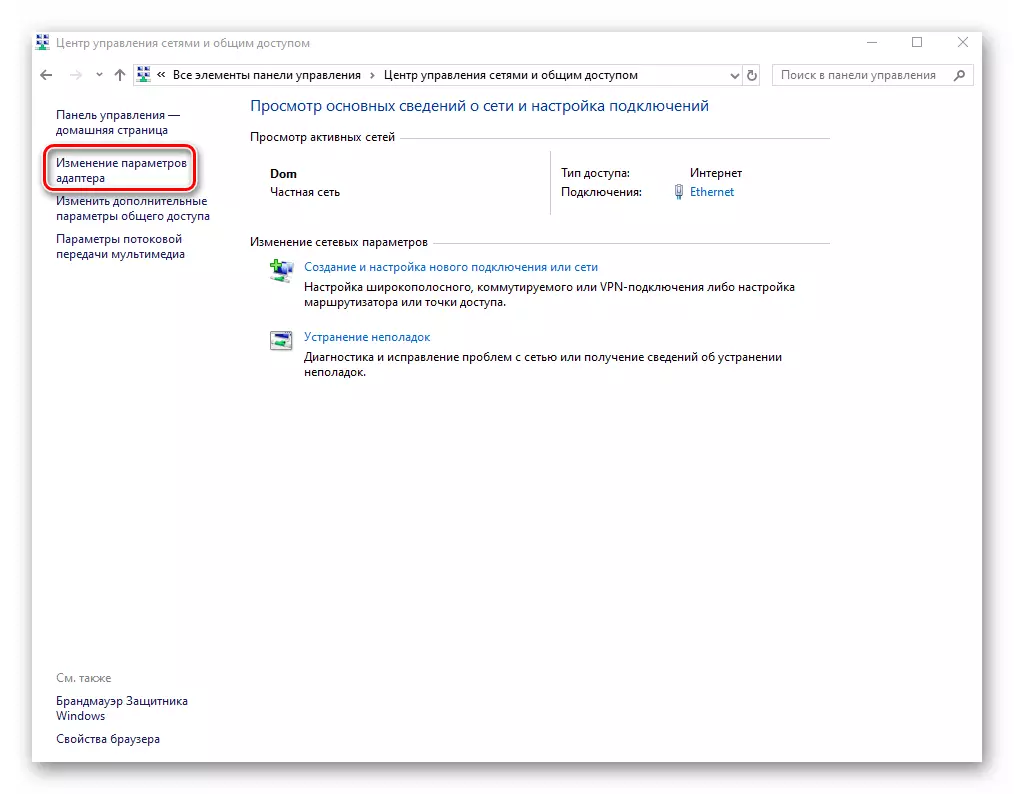
- In the next window, click on the "Changing Adapter Settings" string. It is located in the left top.
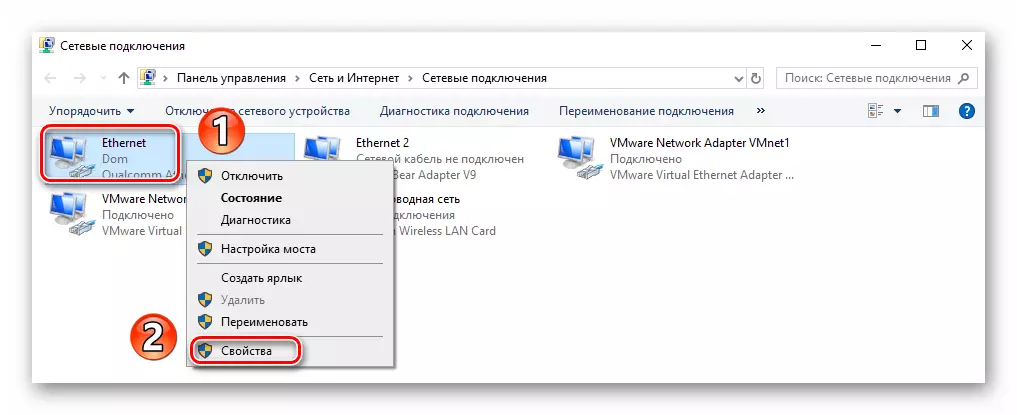
- As a result, you will see all the network connections that are on the computer. Find that of them through which the device connects to the Internet. Click on it right-click and select the "Properties" string.
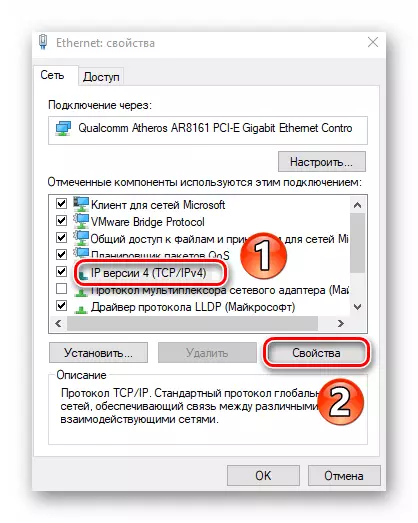
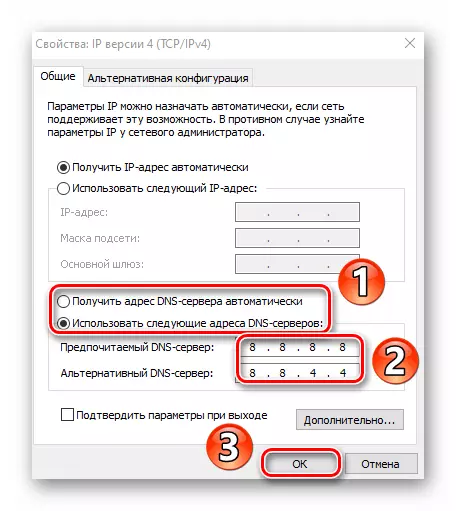
- In the window that opens, select the "IP version 4 (TCP / IPv4) string" Single click LKM. After that, click the "Properties" button.
- Note the bottom of the window, which will result in the screen. If you have a mark near the "Get the DNS server address automatically" row, switch it to manual mode and suck the following values:
- Preferred DNS server: 8.8.8.8.
- Alternative DNS server: 8.8.4.4.
This is a public DNS address from Google. They always work and have good speed indicators. Upon completion, click "OK".
- If you already have the parameters of the DNS server, try simply to replace them with the values specified above.
Close all previously open windows and restart the computer. If this does not fix the situation, for forget to return all settings in the original state.
For router
The actions described below will suit to those users who are connected to the Internet via Wi-Fi. As an example, we use the TP-LINK router. For devices of other performance manufacturers will be similar, only the input address in the control panel can and / or will be different.
- Open any browser, in the address bar, write the following address and click "ENTER":
192.168.0.1
For some firmware, the address may be viewed 192.168.1.1
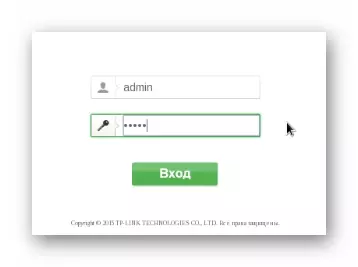
- The router control interface opens. To get started, enter the login and password in the form that appears. If you have not changed anything, they both will have the value of Admin.
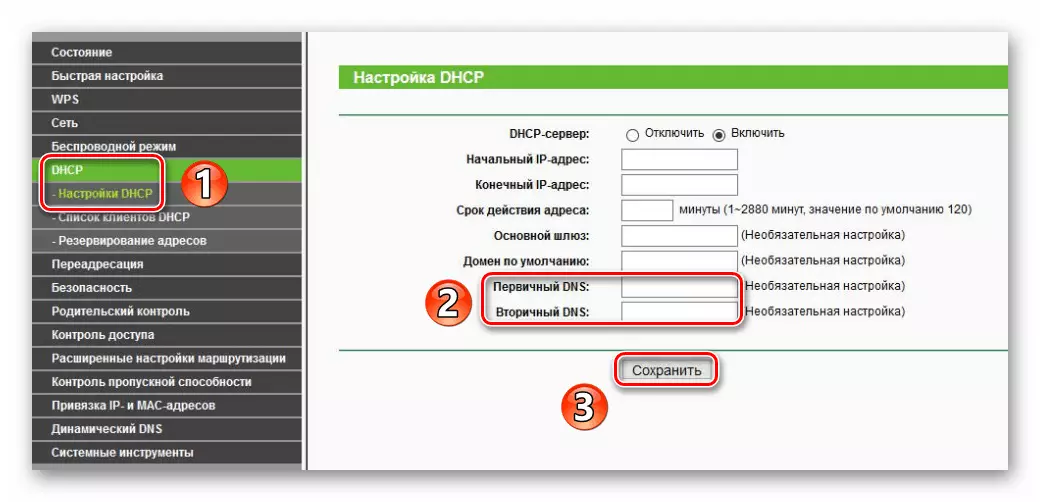
- On the left side of the interface, go to the "DHCP" section, and then in the DHCP Settings subsection. In the central part of the window, find the fields "Primary DNS" and "Secondary DNS". Enter the already known addresses in them:
8.8.8.8.
8.8.4.4.
Then click "Save".
- Next, go to the "System Instruments" section, and from it to the subsection "Reboot". After that, click the same button in the center of the window.
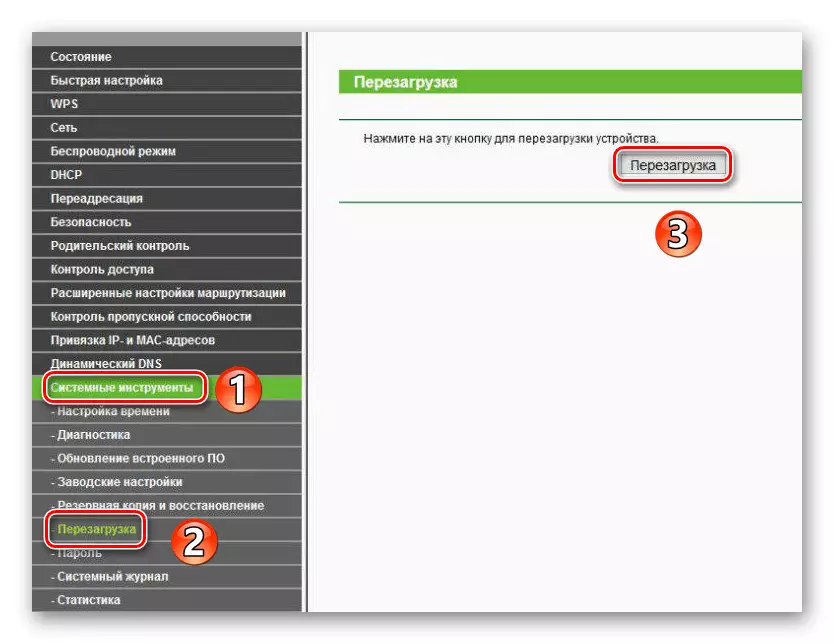
Wait for the full restart of the router and try to go to any site. As a result, the error "DNS server does not respond" should disappear.
Thus, you learned about the methods of solving a problem with the DNS server. As a conclusion, we would like to note that some users also help temporary disabling antivirus and protective plug-ins in the browser.
Read more: Disable antivirus