

Recently, more and more sites are blocked by Internet providers for various reasons. In this regard, ordinary users cannot access web resources, since the blocking goes through the location in the IP address. However, enthusiasts have long been created special programs and additions, allowing such prohibitions by replacing this address. Hola refers to the number of similar solutions, taking place among the leading extensions for browsers that allow you to connect to the VPN server. Next, we want to affect this topic, disagreeing in detail the interaction with this tool in Google Chrome.
We use Hola extension in Google Chrome
The essence of Hola's work is that the user selects the site from the list, goes to it, and the new connection is created through a remote VPN server with a country selection. In the future, the user can easily change the server by simply clicking on a specially reserved button. In premium versions, more options are available for the connection, the speed will be higher and more stable. We offer to study every step of actions with HOLA to find out everything about this application and decide whether it is worth it to acquire or at least download it.Step 1: Installation
Always the process of interaction with any expansion begins with its installation. This operation is extremely simple, so we will not stop on it for a long time. We will show only three short actions that will be useful only to beginners.
Download HOLA from Google WebStore
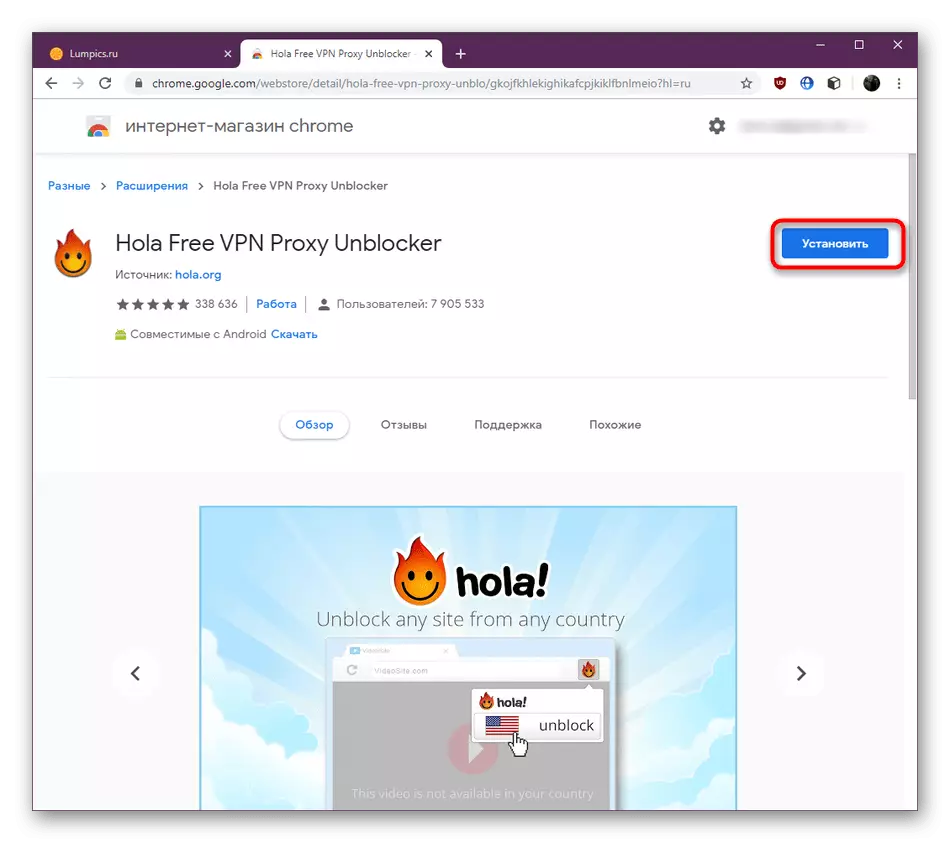
- Click on the link above to go to the HOLA Installation page. In the window that appears, click on "Install".
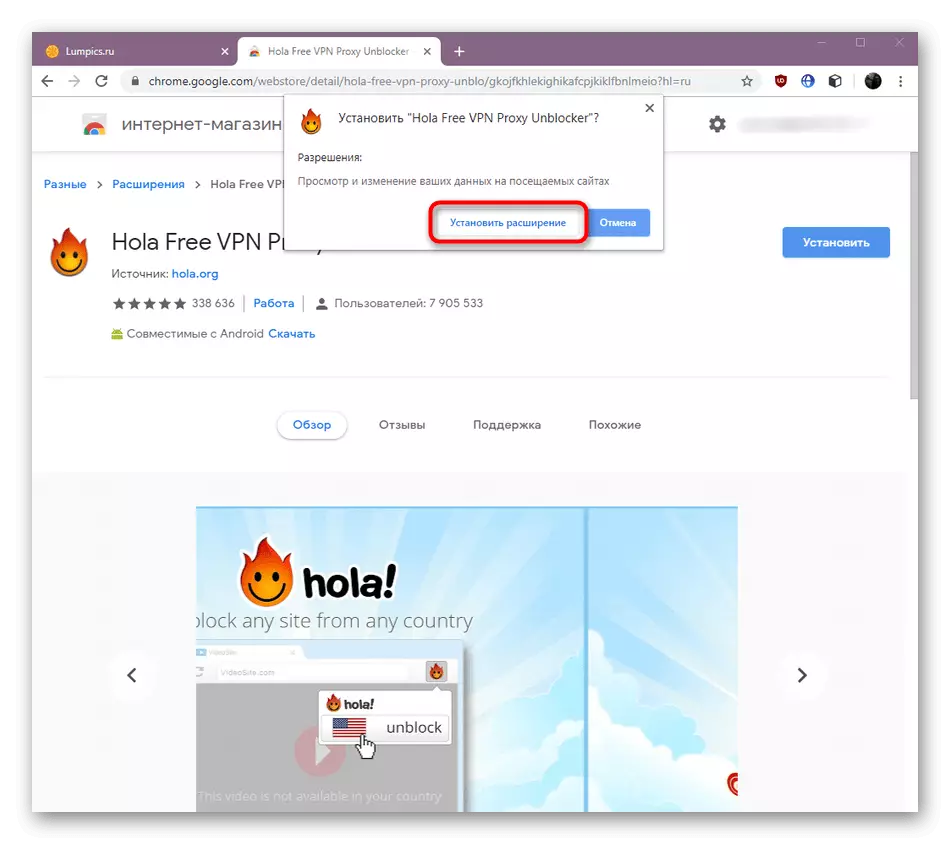
- Confirm your installation desire when displaying the appropriate notification.
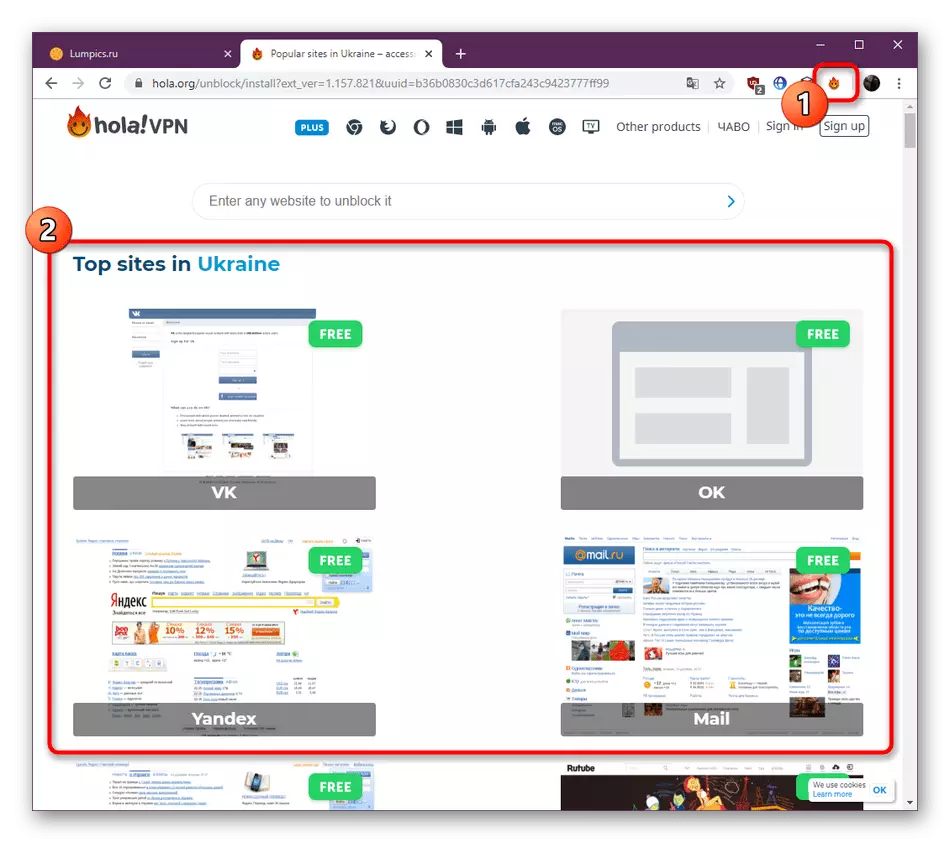
- After that, you will be redirected to the page for further transition to locked sites, and the icon will appear on top, clicking on which the main extension control menu opens.
Almost always the installation procedure is successful, and only units are faced with any problems. If you also appeared, we recommend to seek help to separate material on our website. There you will find detailed instructions for correcting such difficulties.
Read more: What to do if extensions are not installed in Google Chrome
Step 2: Editing General Parameters
After completing the installation, configure the expansion to itself to create full-fledged conditions for comfortable use. Options in Hola are not so much, so you can figure them out literally in a few minutes.
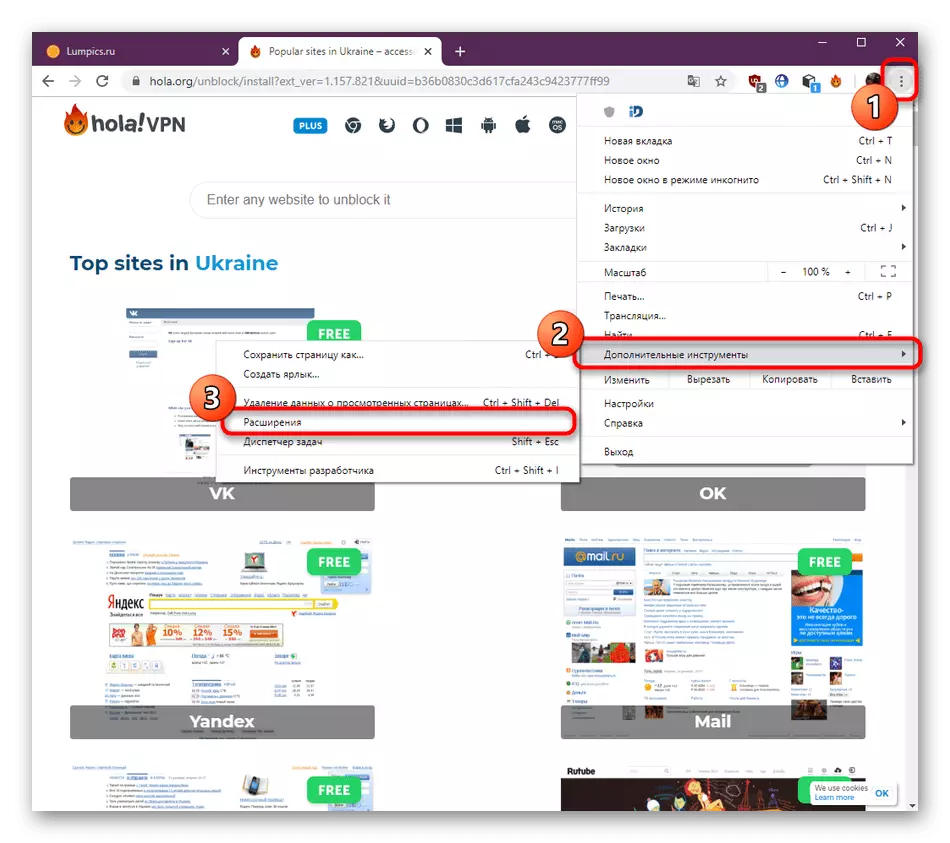
- First, let's talk about activating the work of the addition when opening private windows. Sometimes it becomes useful to the users who are interested in increasing anonymity. The first stage is to switch to the control window by all extensions. Open the browser menu by clicking on the button in the form of three vertical points. In the context menu that appears, hover the cursor over the "Advanced Tools" and select "Parameters".
- In the drop-down tab, please go down to find the hola tile. There click on "more".
- Below you will find the option "Allow use in incognito mode". Slide the slider to activate this option.
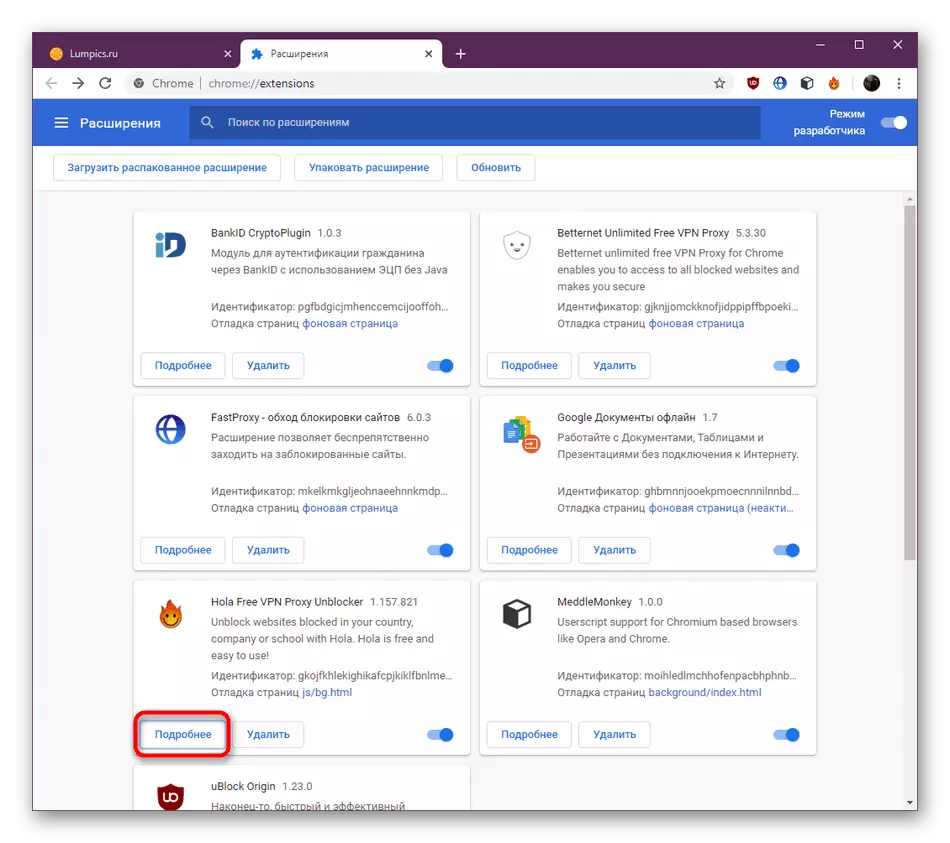
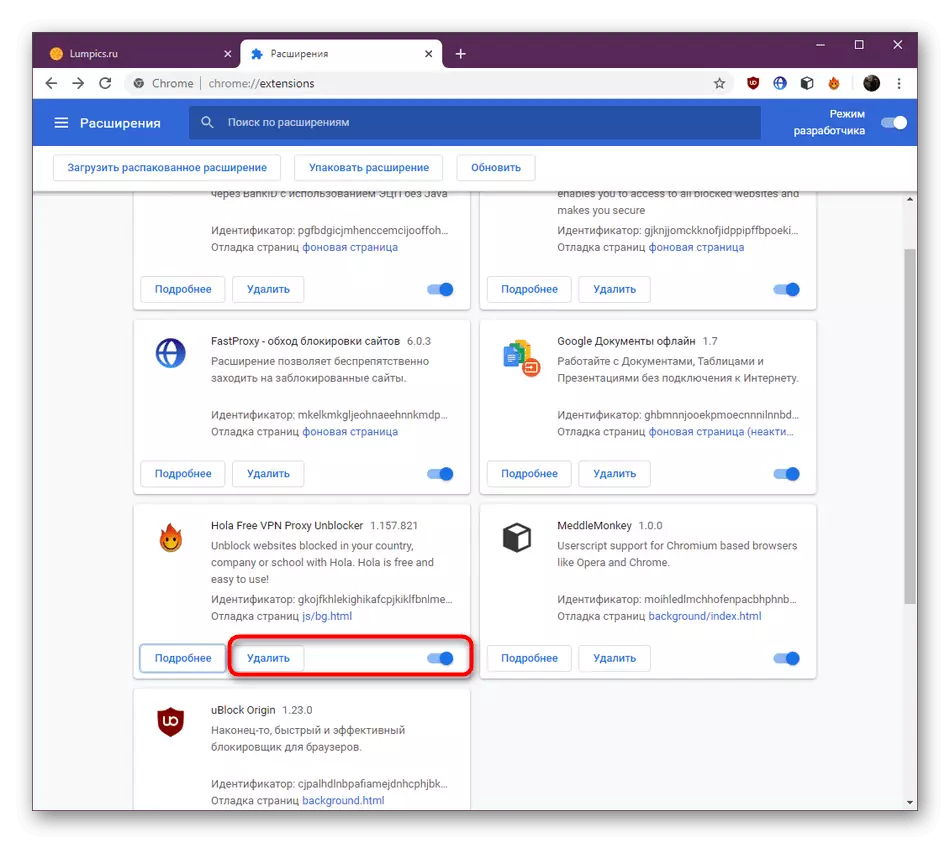
- When you return to the previous menu, you will see two separate buttons that allow you to disable the application or remove it at all from the browser.
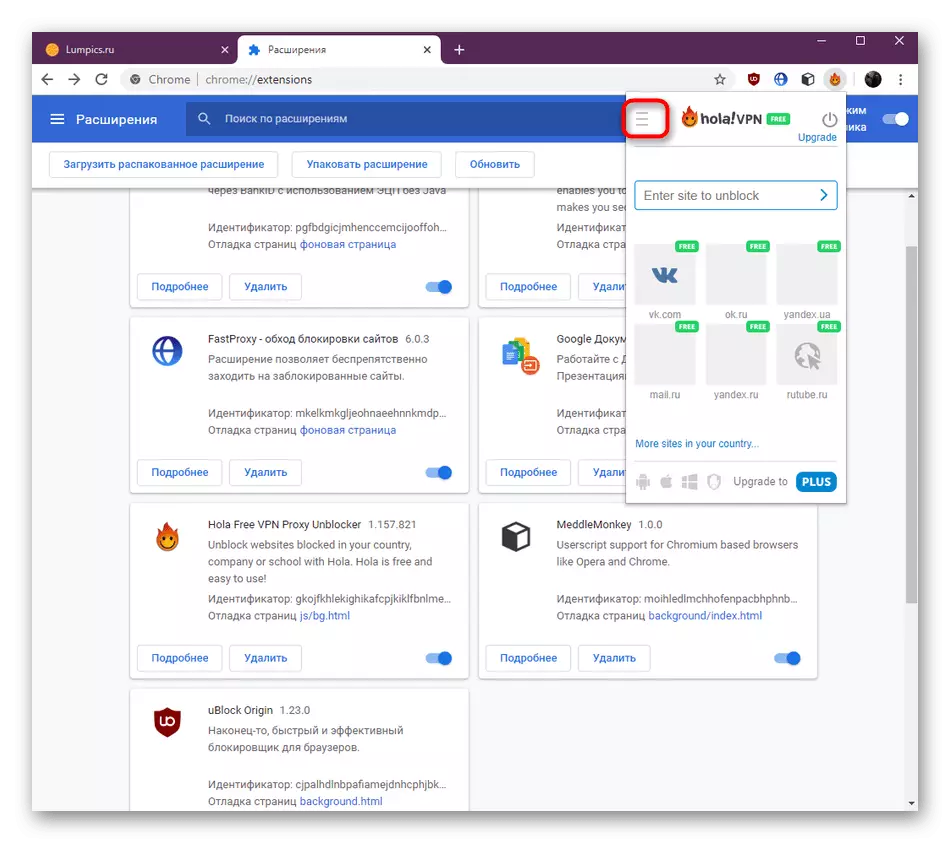
- Now let's affect the parameters that are configured in the HOLA menu itself. To do this, click on the appropriate icon and open the optional menu by clicking on the button in the form of three horizontal lines.
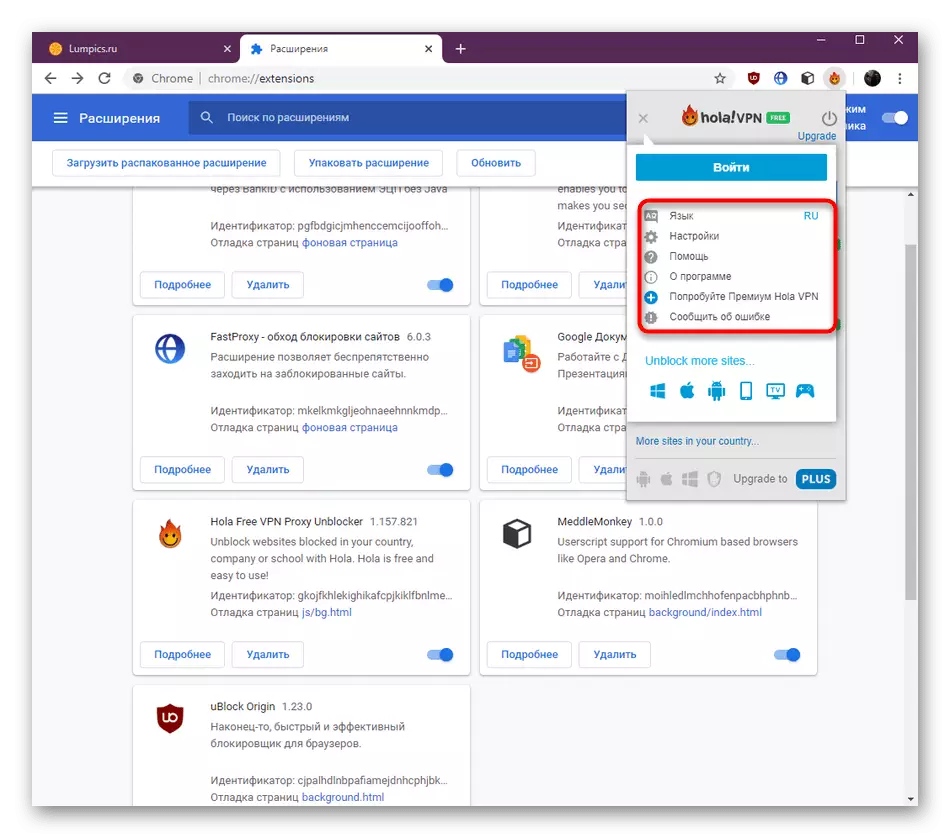
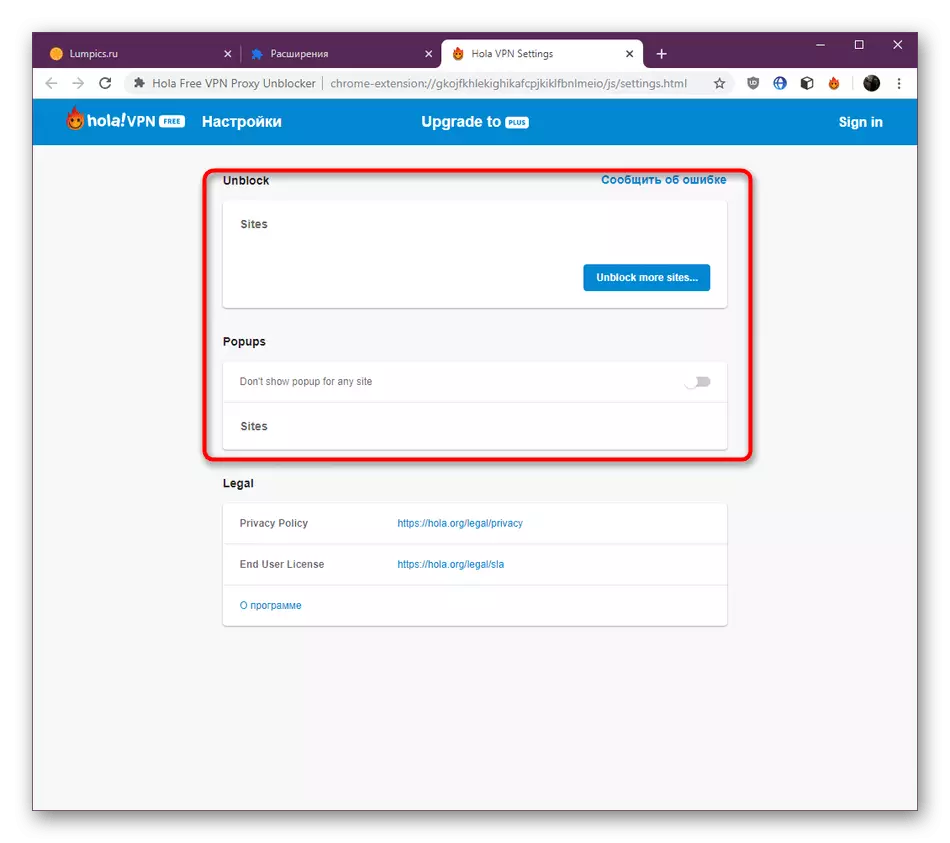
- Here you are watching several points. You can immediately change the language to another convenient, get help on the official resource, learn more about the program or go to the settings.
- The configuration section contains only two useful items. The first allows you to add an unlimited number of sites to the list for automatic unlocking during the transition. The second is responsible for the emergence of pop-ups on specific pages.
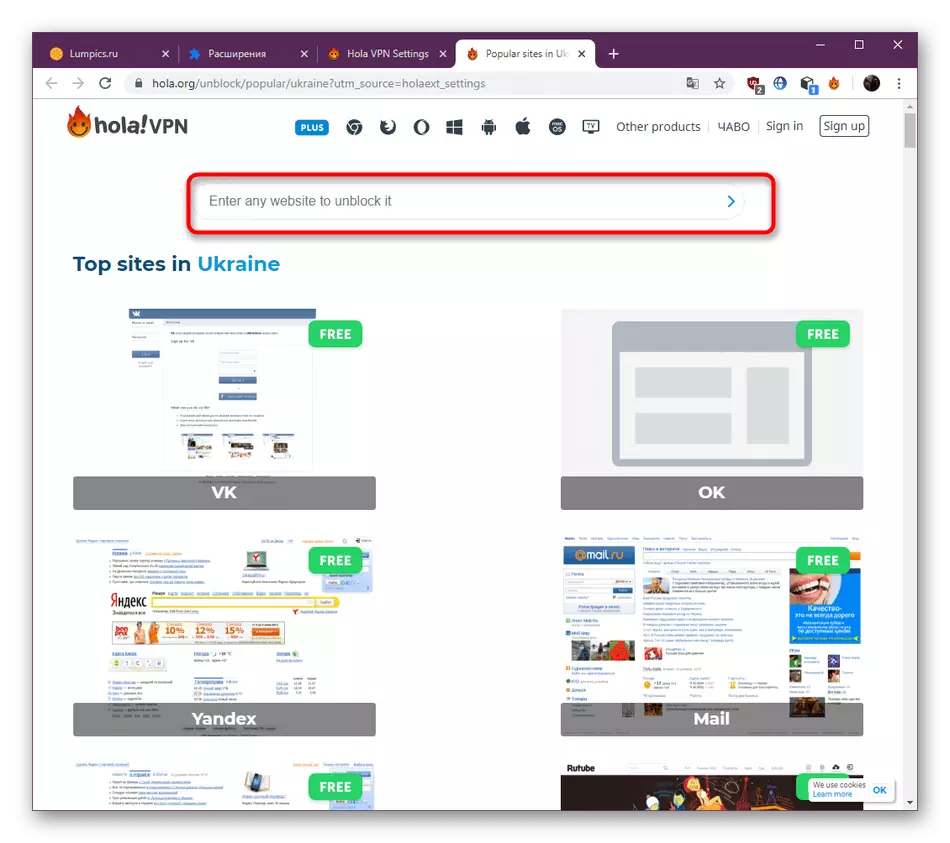
- When configuring your own list of necessary sites, use the built-in search to add addresses.

You got acquainted with all the important parameters that belong to Hola. Use the necessary to set the optimal configuration and proceed to unlock sites.
Step 3: Unlocking sites
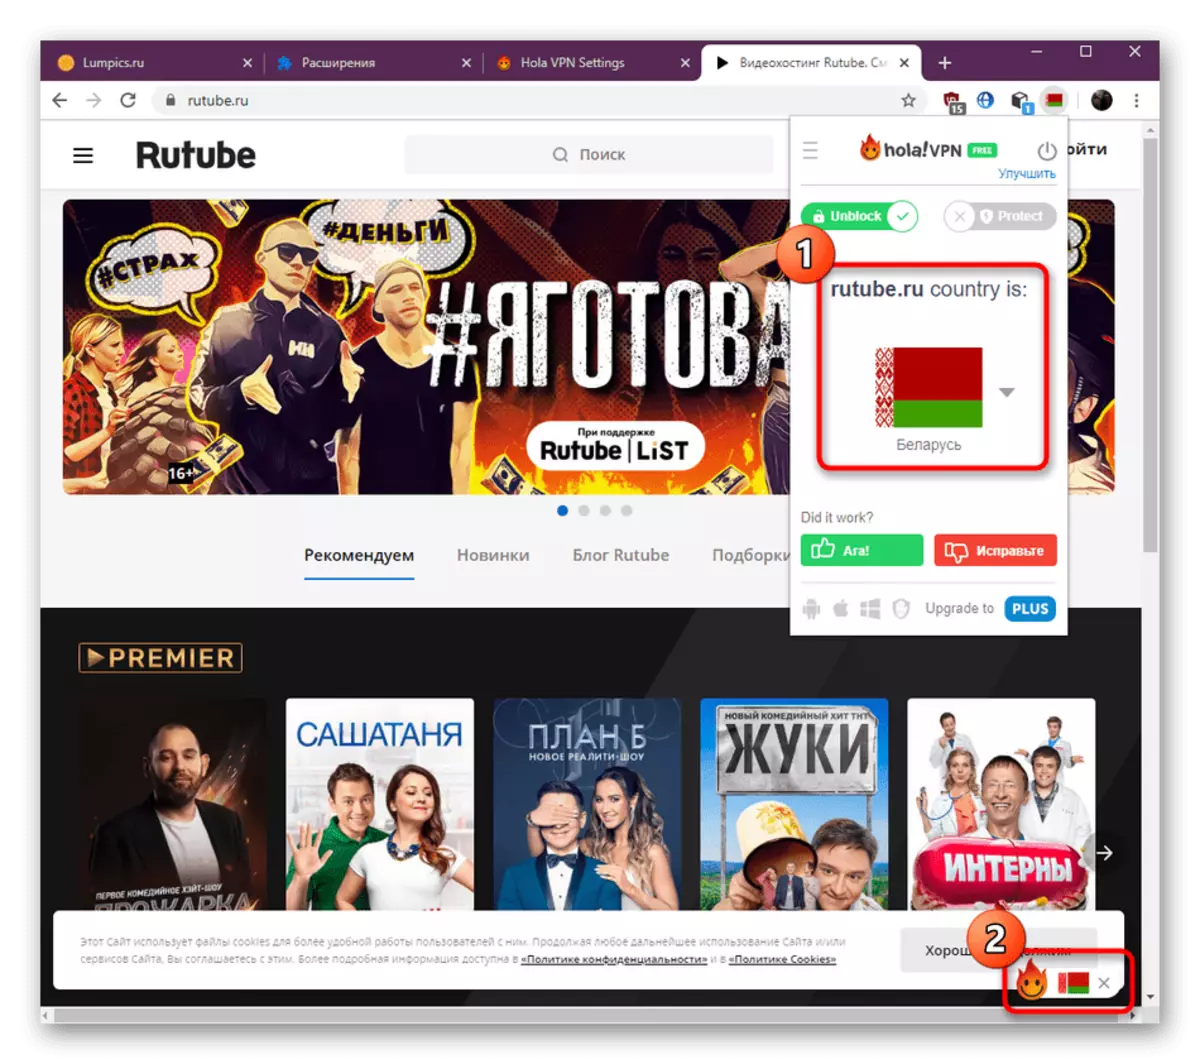
We proceed to the most important actions for which HOLA was installed at all - open access to locked web resources. As you know, an extension is started with the direct transition to the required page, and then you can already set additional parameters, which is carried out like this:
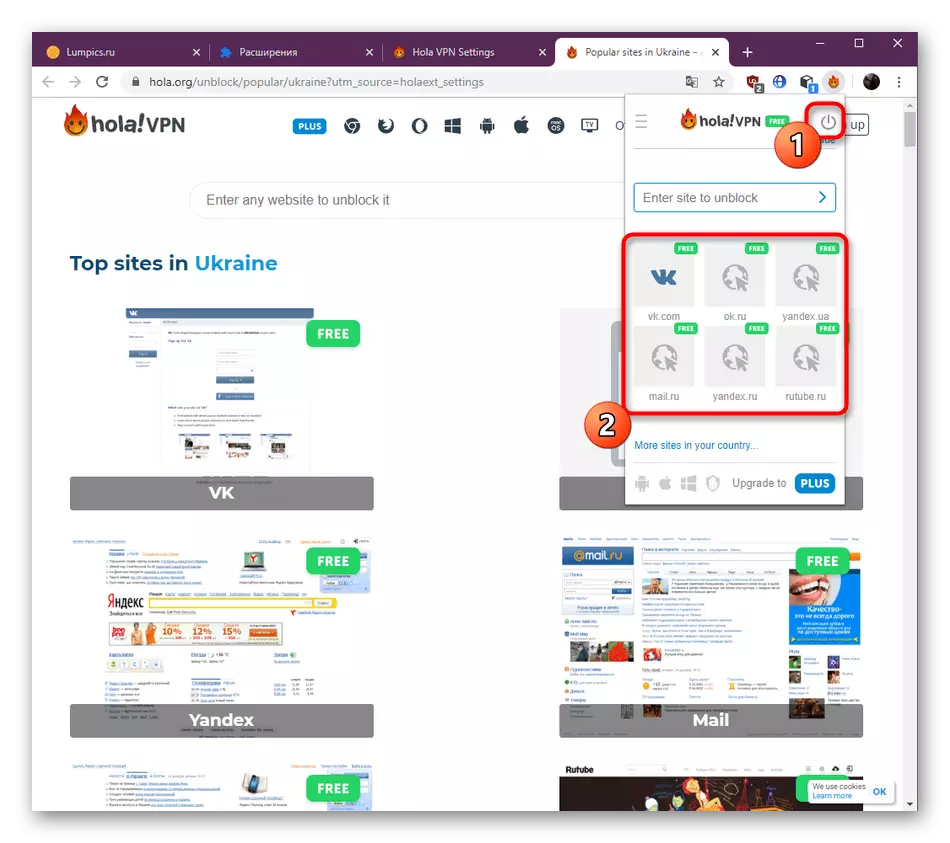
- Turn on the HOLA yourself or use the links located in the menu.
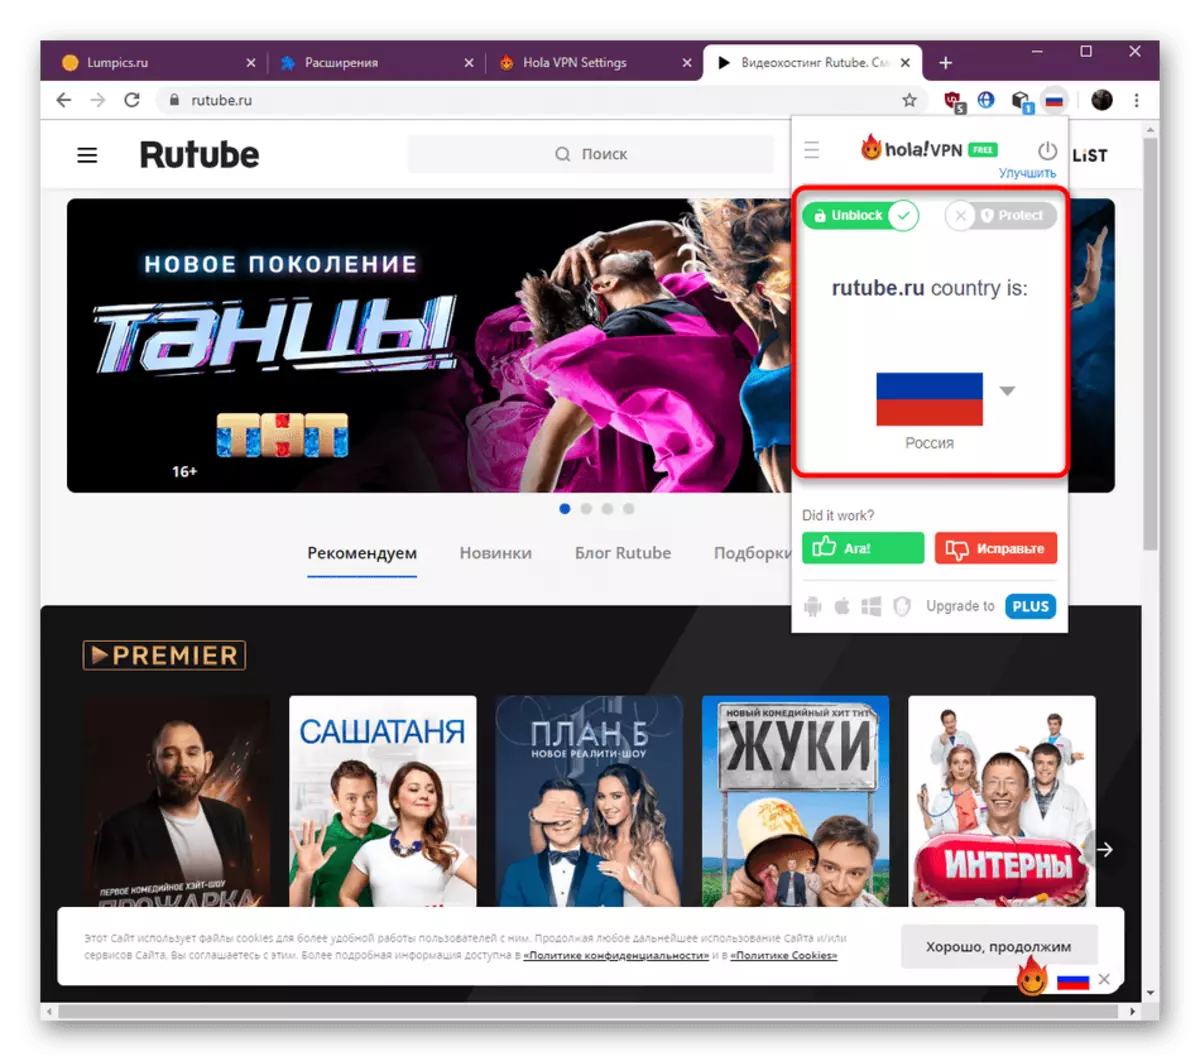
- After you are notified that the country is automatically selected and the connection has passed successfully. Click on the state flag if you want to change the server.
- In the list that appears, select the appropriate option. When using the standard free version, this list will be limited.
- After changing the page will be rebooted, and the server information will immediately be updated.
This is such a hard way to connect to VPN through the program under consideration. As you can see, even a novice user can cope with this, and if necessary, you can create your own panel to quickly go to pages using the settings that have already been mentioned.
Step 4: Acquisition of Premium Version
We advise you to study this stage only to those users who have already decided to purchase the full version of HOLA to stabilize the connection and obtain a larger list of available servers. Purchase is carried out by performing the following actions:
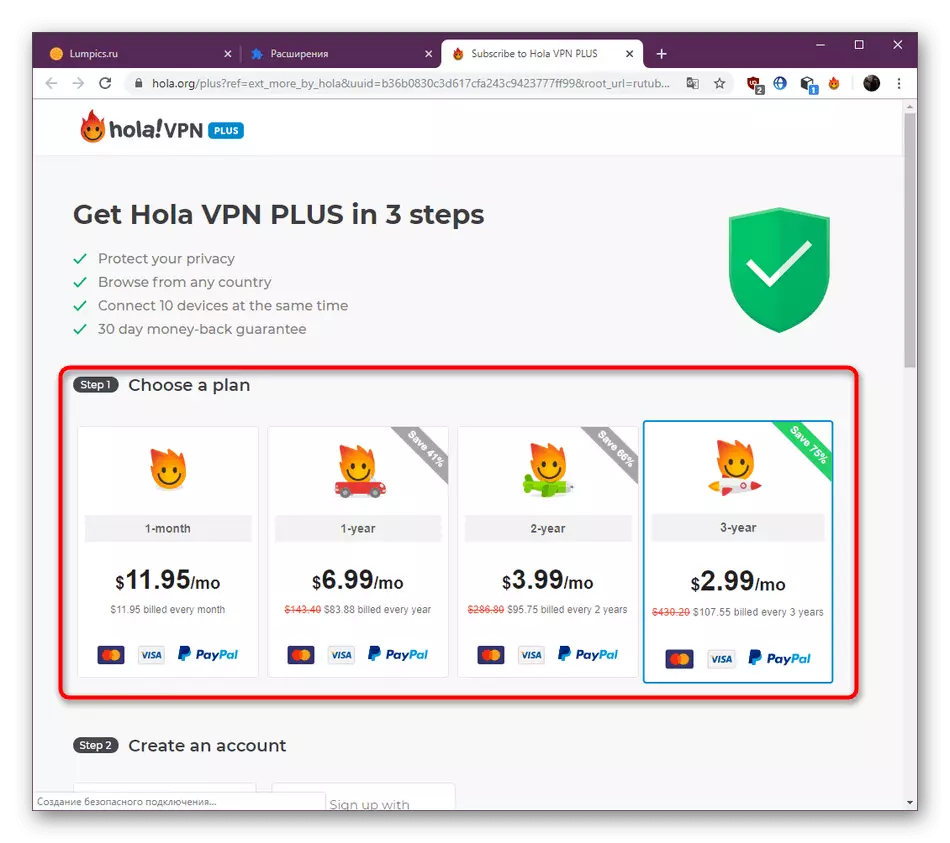
- Open the HOLA control menu and downstairs click on the Upgrade to Plus button.
- It will automatically go to the version of the plus receipt page. Here, fulfill the first step by selecting the appropriate tariff plan.
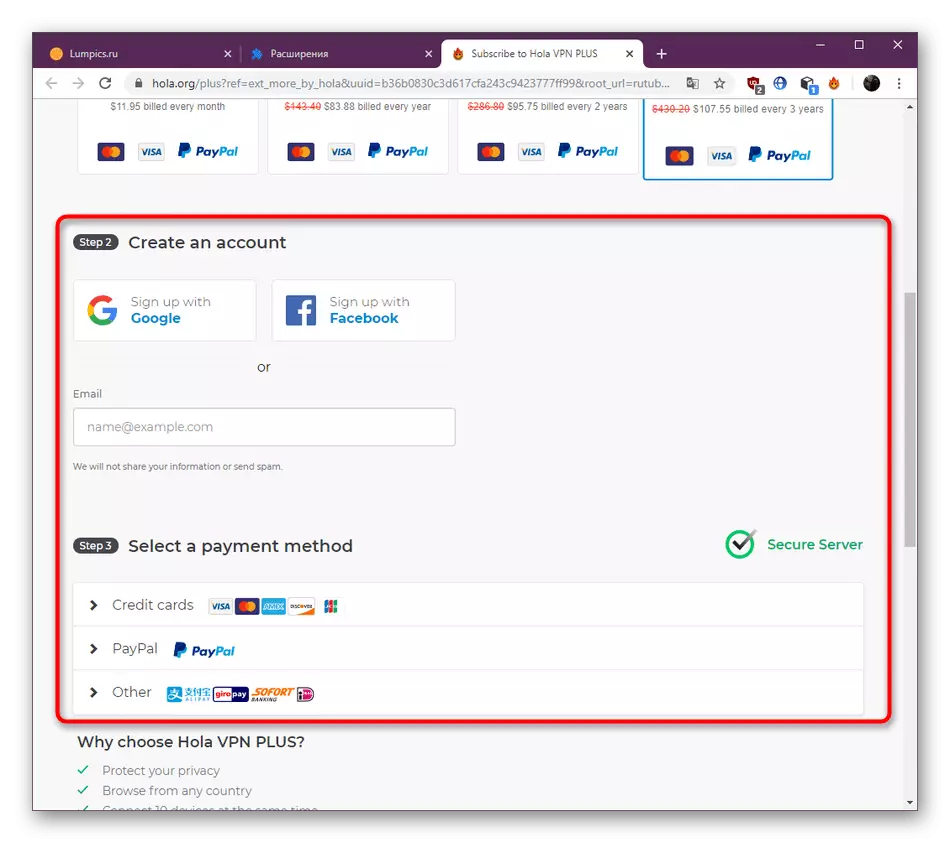
- The second step is to create an account, which will be tied to this supplement. It takes this in order to accidentally not lose access to the license. In the end, it remains to choose only a convenient payment method and wait for the key.
Today we have acquainted you with all aspects of interaction with the expansion of HOLA. As you can see, it is perfect for users from different categories, opening access to previously blocked sites. If, after exploring the material, you decided not to download this application, we advise you to read another article on our website by clicking on the reference below.
Read more: Methods for bypassing locked sites in Google Chrome