

None of the systems providing an internet connection on stationary computers or laptops does not work perfectly. From time to time, various failures associated with the errors of the operating system, drivers or with some external factors of the connected devices can appear. Sometimes it leads to the appearance of an error with the text "The default gateway is not available." As part of today's article, we want to show how this situation is solved using the example of Windows 10.
We decide the error "The default gateway, not available" in Windows 10
In most cases, the mentioned error occurs on laptops that use a wireless connection, but the PC holders with an Ethernet connection can also be encountered with a similar problem. Because of this, some of the following methods will focus only on a certain type of network, which we will report in advance. Now we offer to restart the computer and the router if you did not make it earlier. Provided that the situation was not corrected and the Internet is still unavailable, go to the following options.Method 1: Network Adapter Power Management
The easiest and simple effective method for solving the task is to change the properties of the adapter power supply. First of all, it is intended for owners of wireless adapters, but also those who use Ethernet can also come in handy. By default, the system can turn off the component to provide minimal energy consumption, so it is necessary to reassign the parameter that is carried out as follows:
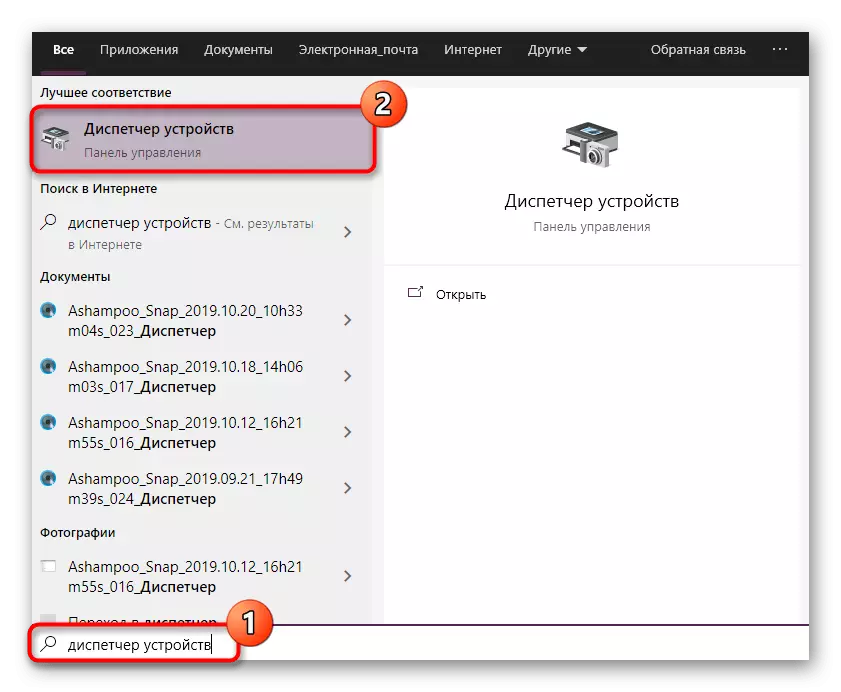
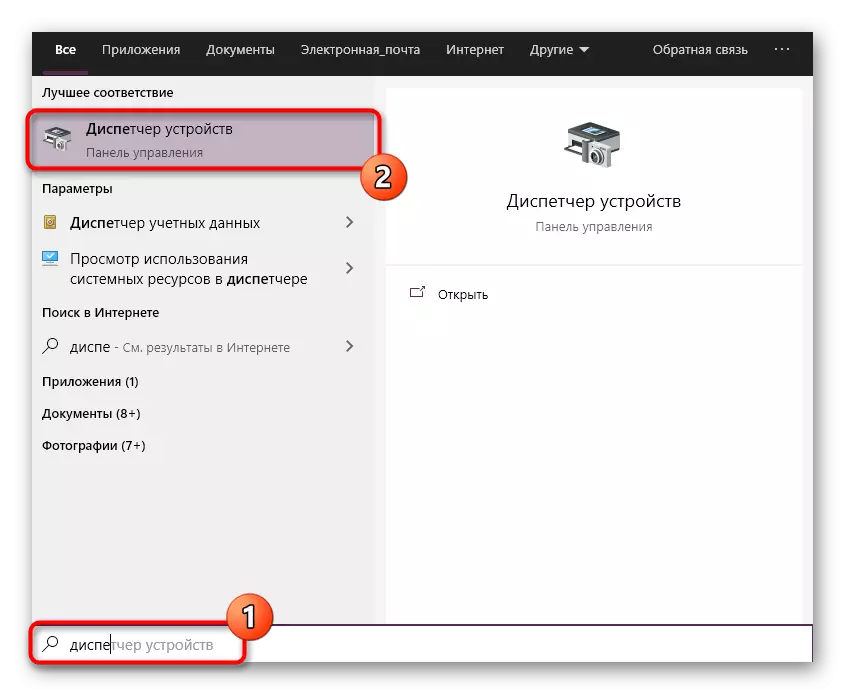
- Open the "Start" and through the search to go to the Device Manager section.
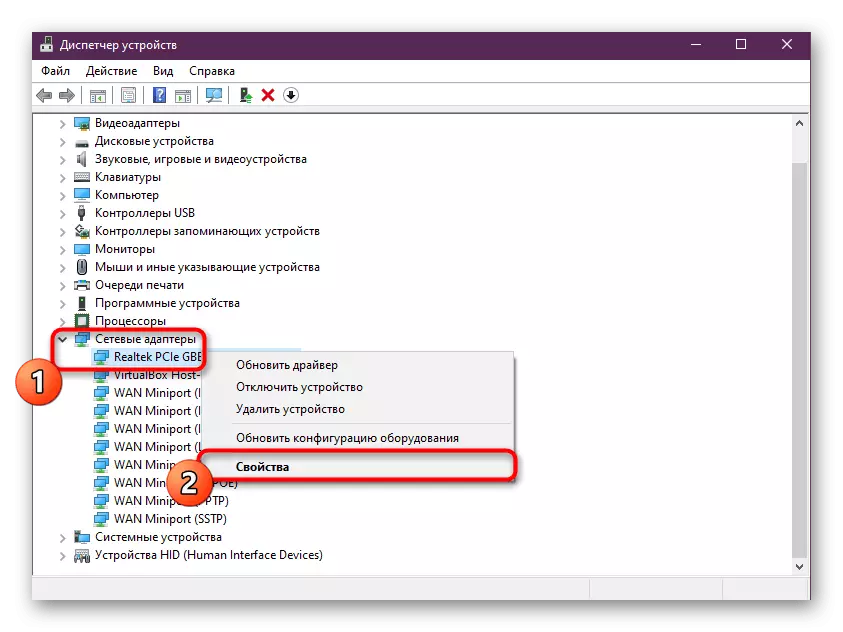
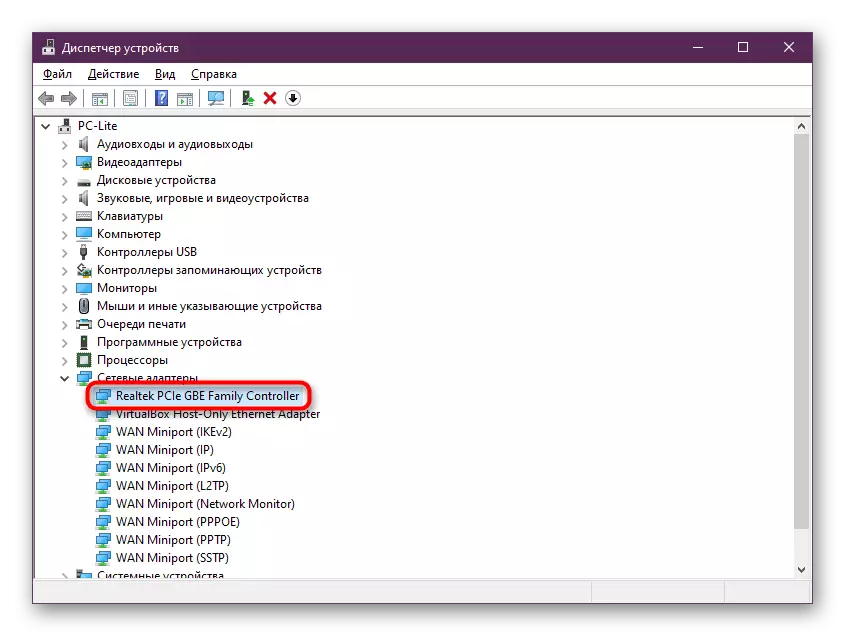
- Here, expand the section with network adapters, select Active, click on it by PCM and, through the context menu, open the "Properties".
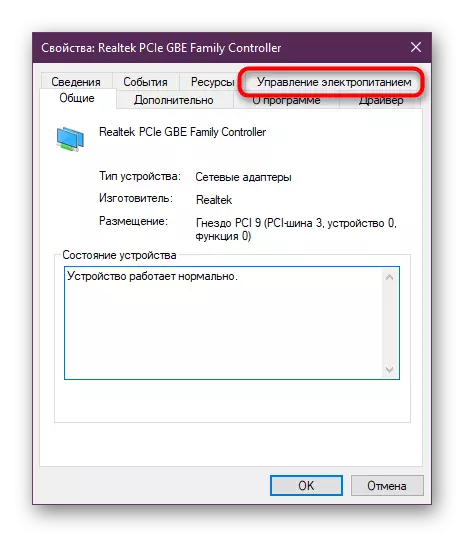
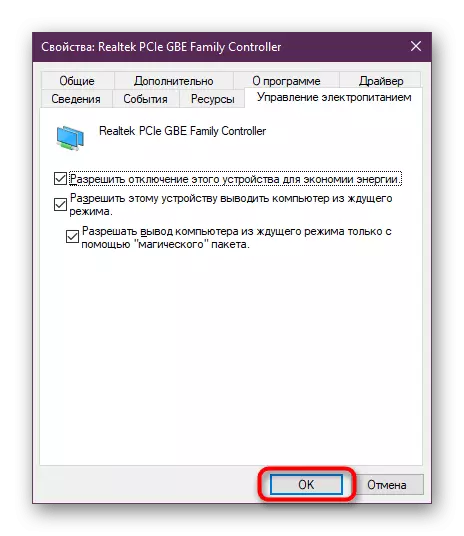
- In the window that appears, you are interested in the Power Management tab.
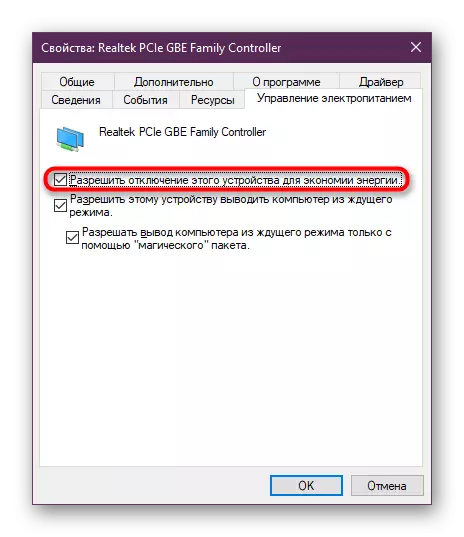
- Remove the marker from the "Allow shutdown of this device to save energy".
- Apply the changes by clicking ok.
After that, it is recommended to restart the computer or a router to update the network parameters and re-connect. Run the browser or check the network availability to any other convenient option.
Method 2: Changing the Wireless Adapter Power Parameters
The following instruction is already intended exclusively for those users who use Wi-Fi to connect to the network. Its essence is to set the power parameters to the maximum performance, so that no failures occur during the device during the functioning of the device, including with access to the gateway.
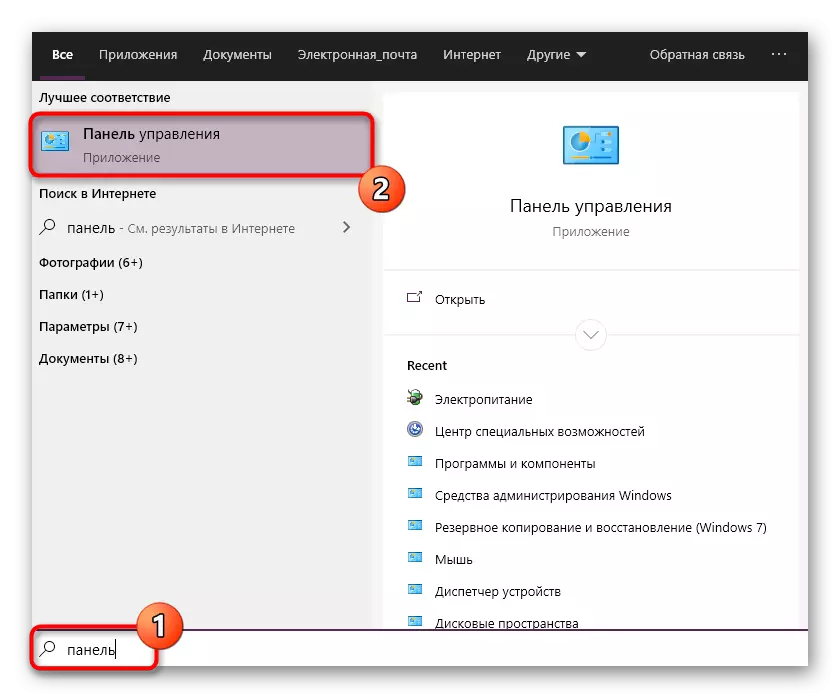
- Open the "Start" and find the "Control panel" view through the search.
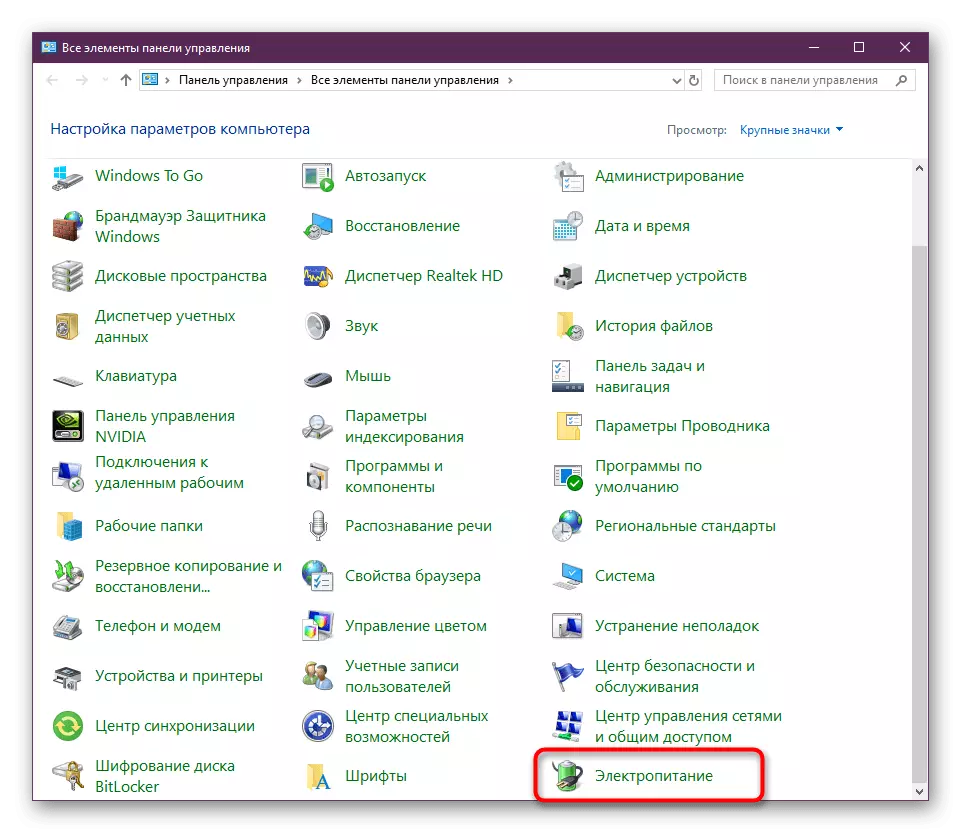
- Run down the list to go from there to the "Power" section.
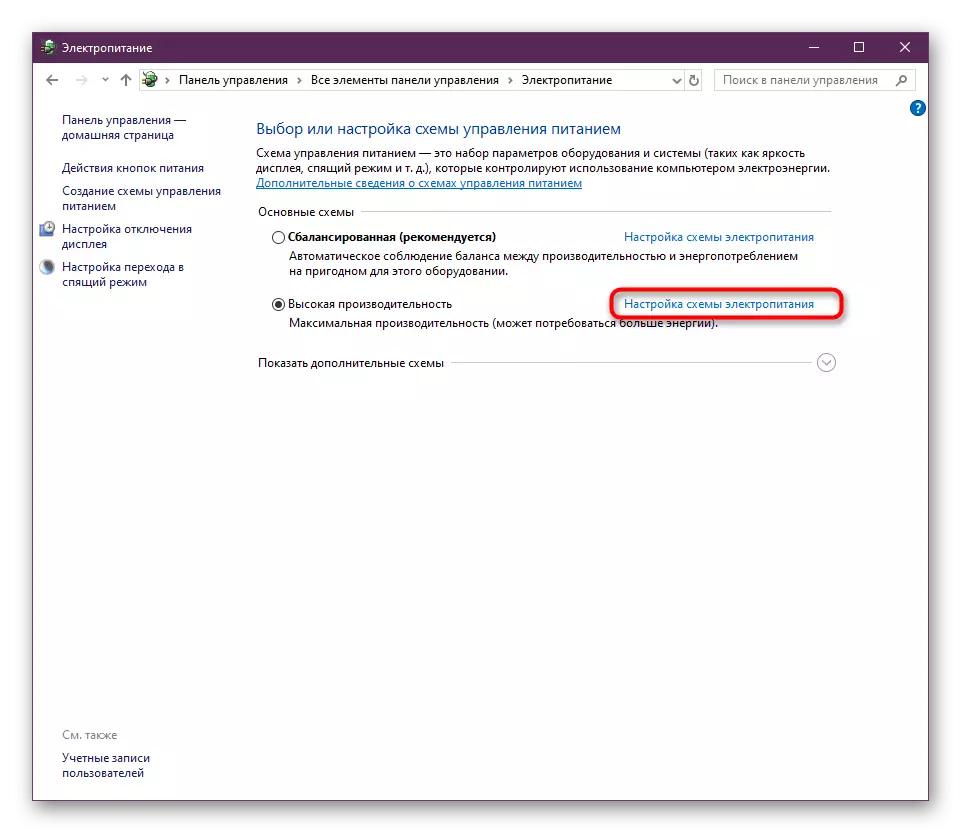
- You will see a list of available schemes. Open the settings of the one that is indicated by the marker as the main one.
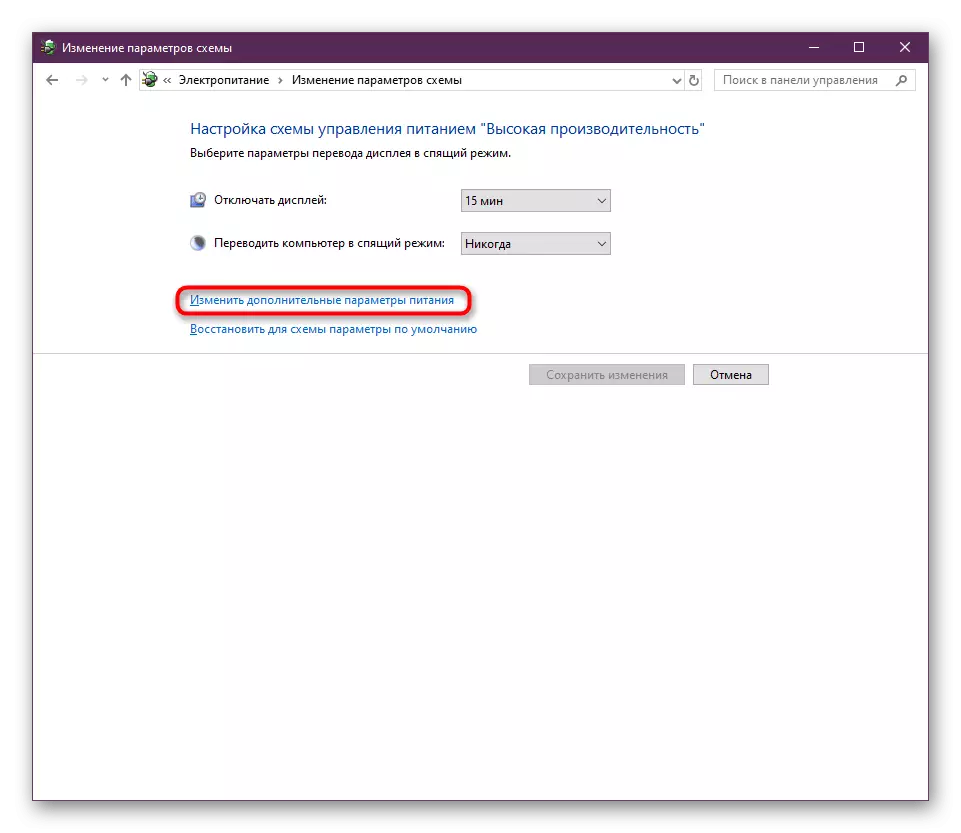
- Click on the inscription "Change Advanced Power Parameters".
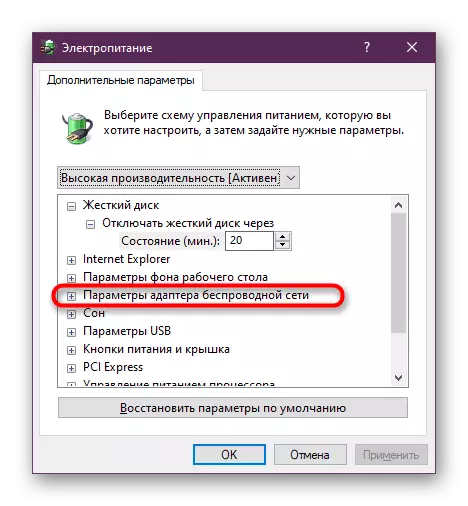
- Expand the "Wireless Adapter" category.
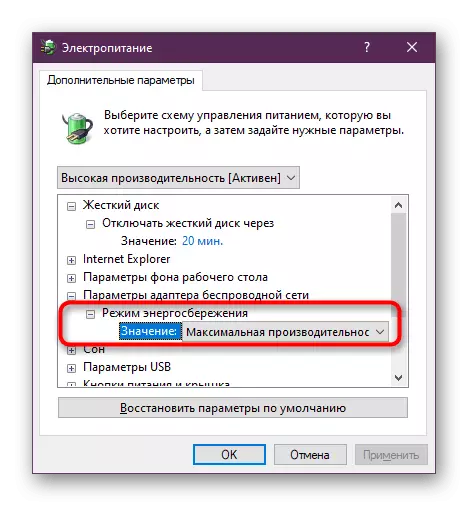
- Set the power saving parameter to the "Maximum Performance" state. After that, apply the changes and close the window.
In mandatory, create a new Windows session, restarting the computer, and also do not forget about the router.
Method 3: Manual Installing Adapter IP Address
Initially, the IP address of the router in the operating system is automatically through the settings and parameters of the software. Sometimes it causes conflicts leading to problems with access to the network. We recommend performing the manual IP configuration to try to solve the resulting problem.
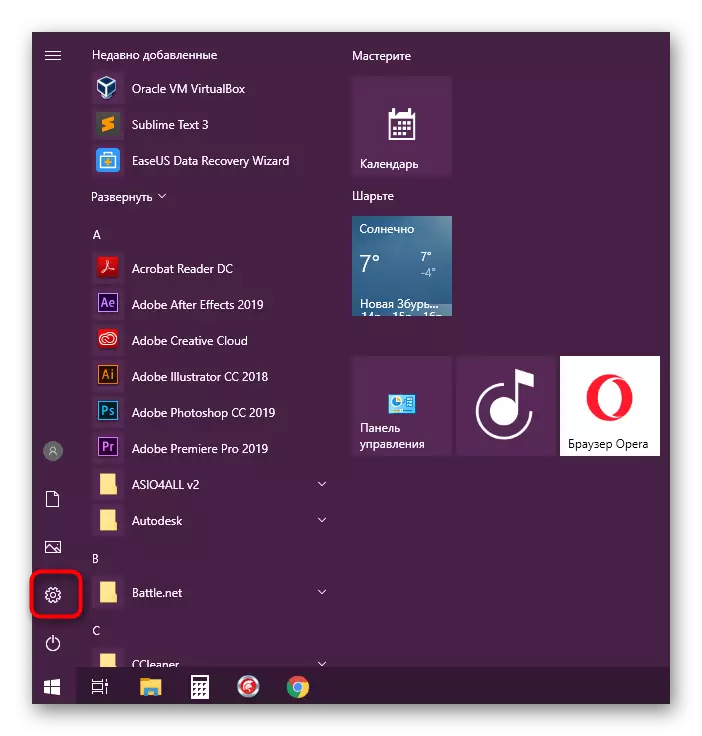
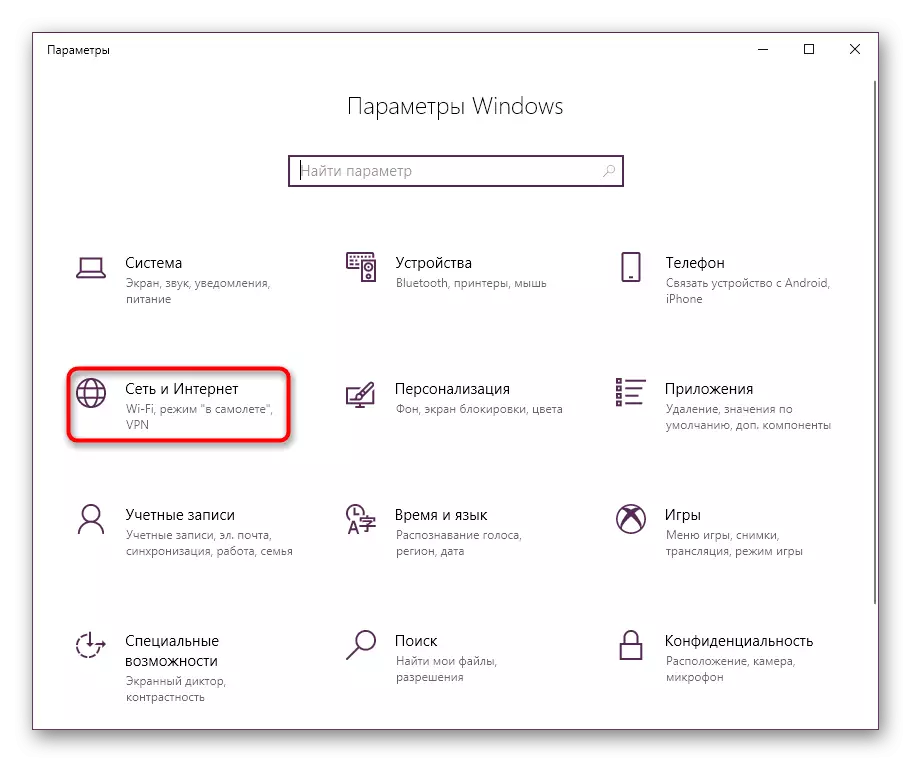
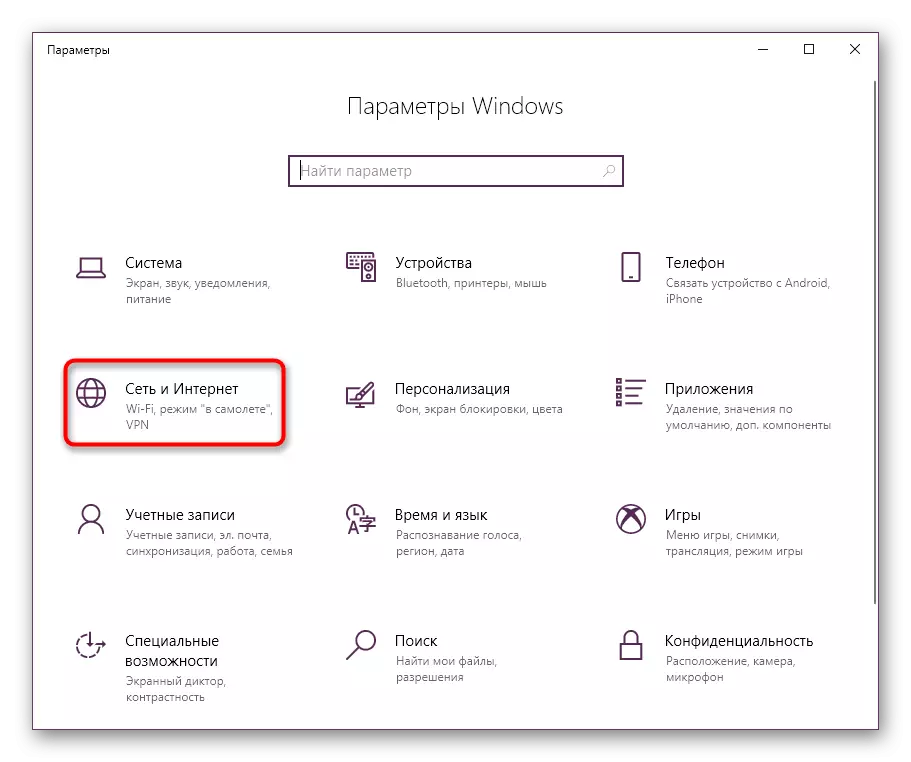
- Open the "Start" and go to "Parameters" by clicking on the corresponding icon in the form of a gear.
- Here you are interested in the "Network and Internet" section.
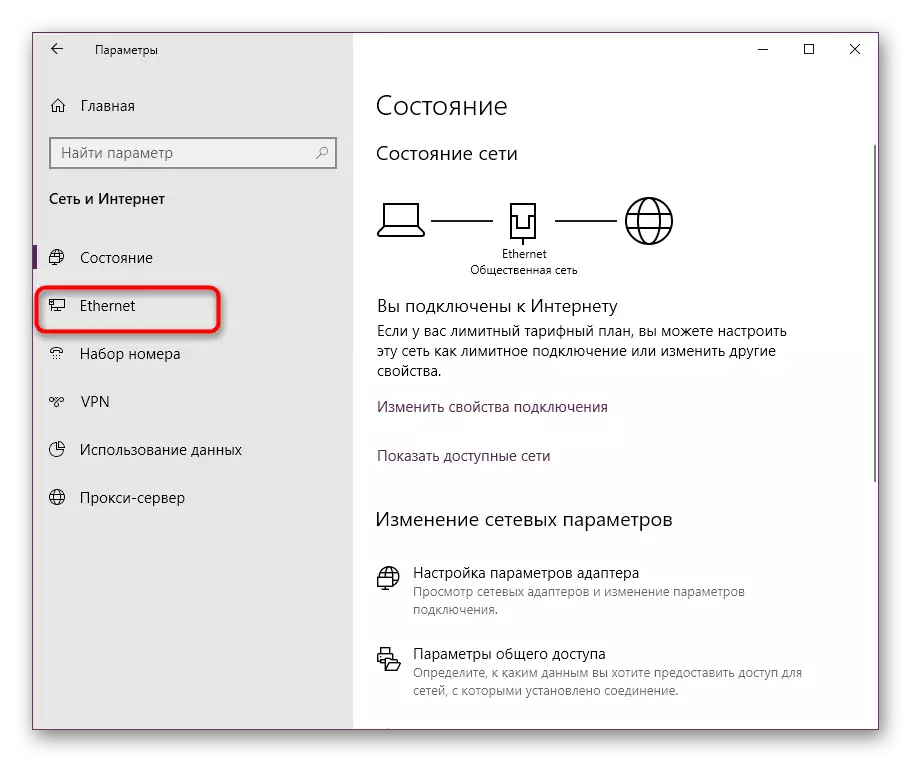
- Use the left pane to proceed to the parameters of your connection. Choose a string depending on the type of connection - "Ethernet" or "Wi-Fi".
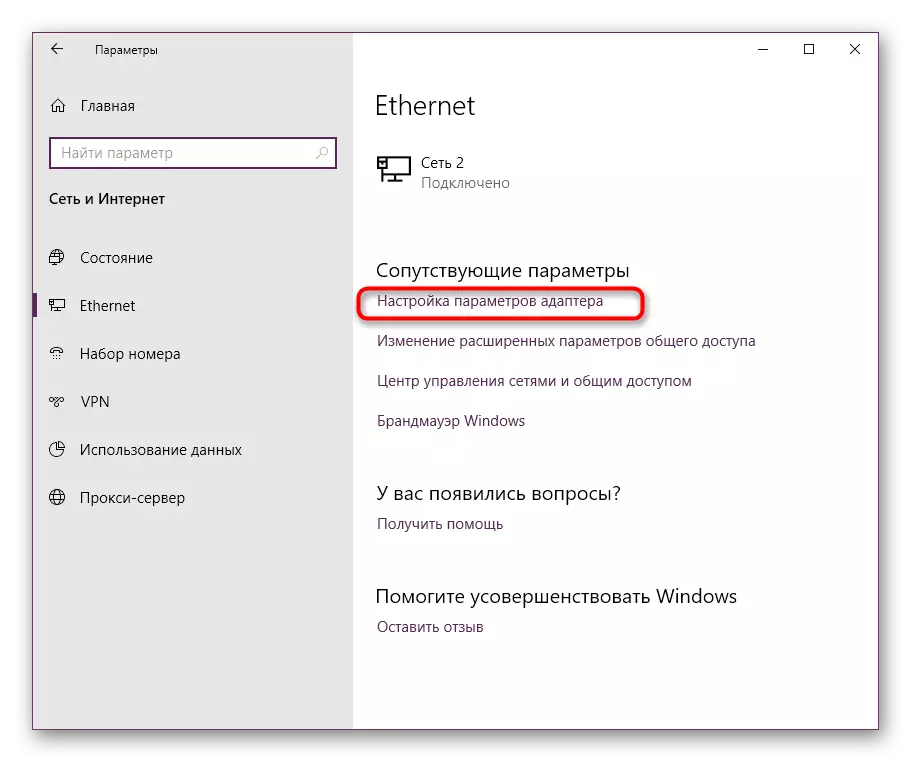
- Next, click on the "Configure Adapter Settings" row.
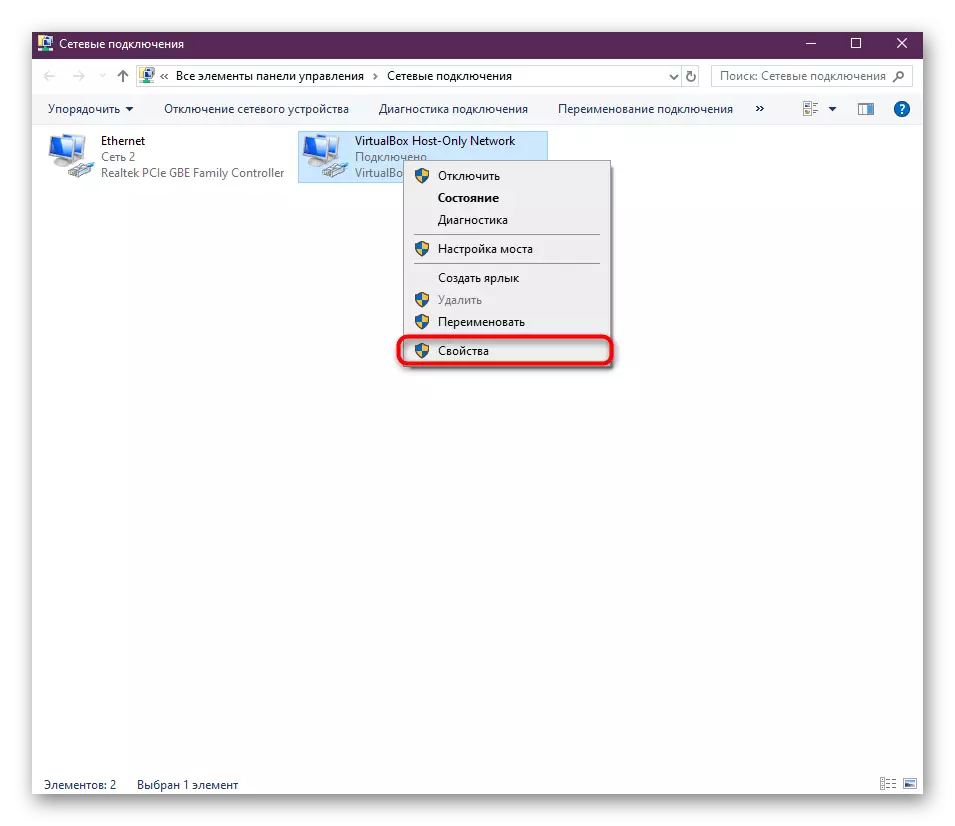
- Click on the PCM connected device and select "Properties".
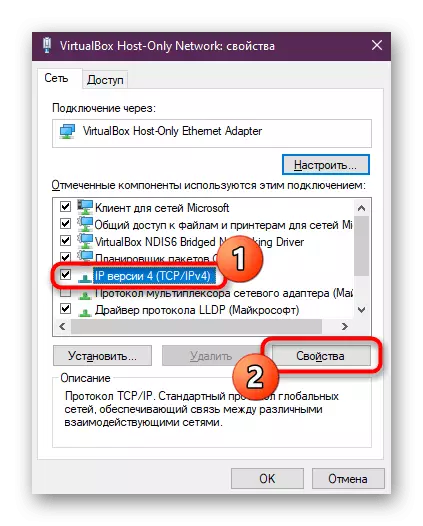
- Highlight the "IP version 4 (TCP / IPv4)" string and click on the active button "Properties".
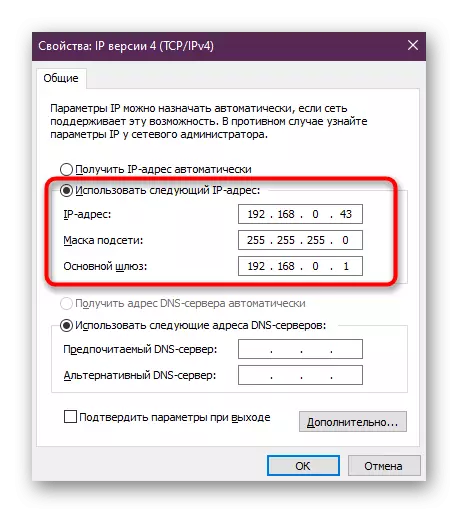
- Mark the marker item "Use the following IP address". Look at the sticker, which is located behind the router. Find there IP address. Most often it has a view of 192.168.0.1 or 192.168.1.1. Enter it in the first line by changing the last number into arbitrary. In the "Main Gateway" string, enter the address received without changes.
If, after making changes, no result will not be observed, it is better to return that configuration that was before that in the future there is no additional troubleshooting due to the unsuitable manual setting.
Method 4: Reinstalling Drivers
The following option is to reinstall the network adapter drivers. Sometimes it is precisely because of the incorrect operation of software components and an error "The default gateway is not available" appears. To begin with, you will need to get rid of the old driver, and then install a new version. If the error in question appears from time to time and overall the Internet works, download the driver before you delete the old version of its version, otherwise there may be problems with downloading the new version of this software. Detailed instructions on this are looking for in another material on our website by clicking the link below.
Read more: Search and installation driver for network card
- Open the Device Manager in the same way that there was already a speech earlier.
- Navigate to the properties of the network adapter.
- On the Driver tab, roll back it or select the "Delete Device" option if the first option is not available.
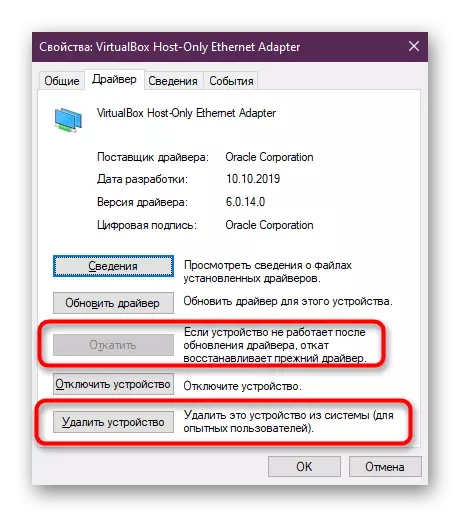
It remains to install the driver of the latest version, downloading it from the official site.
Method 5: Enabling FIPS Functions
In the Windows operating system there are many security technologies that ensure reliable exchange of information. FIPS belongs here. This option is associated with a network adapter and is responsible for the incoming and outgoing traffic. If you still receive a notification of the unavailability of the default gateway when connecting via Wi-Fi, we advise you to activate the FIPS for a wireless adapter, which is as follows:
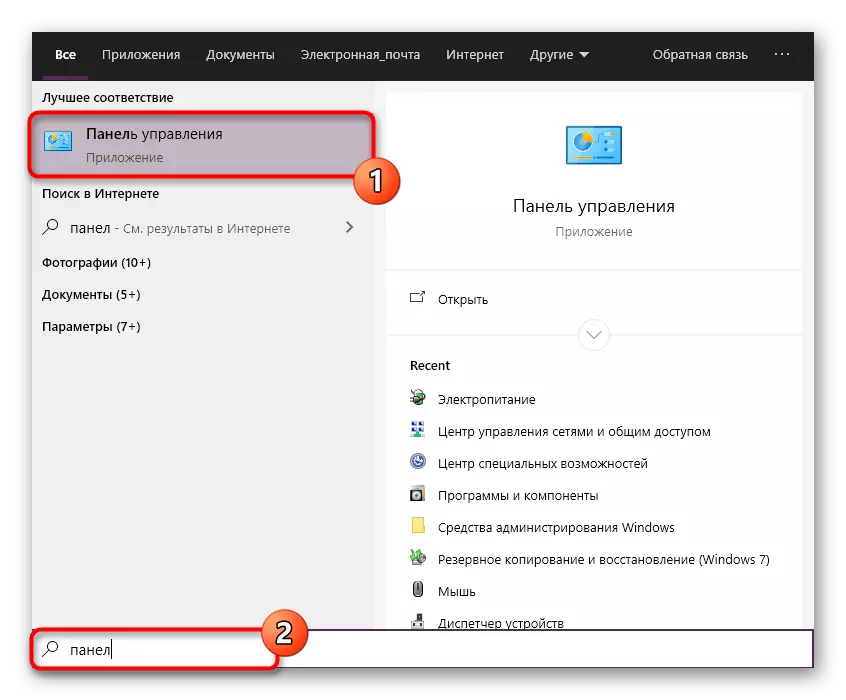
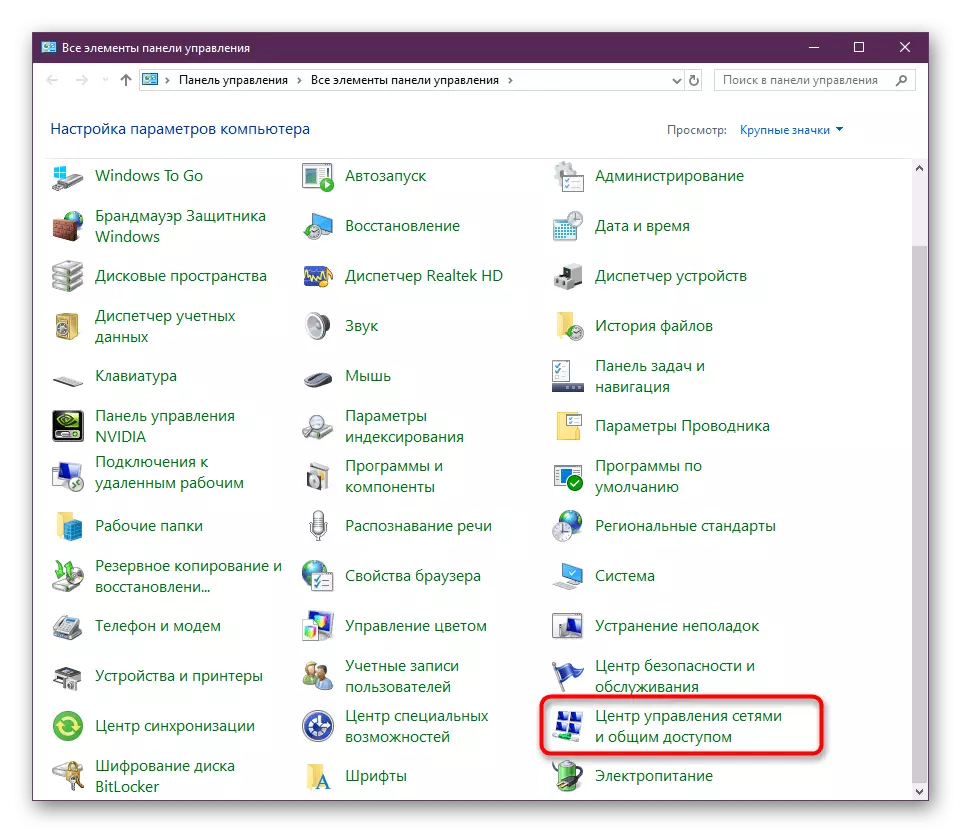
- Let's briefly consider an alternative method of transition to the parameters of the adapter. To do this, open the "Start" and go to the "Control Panel".
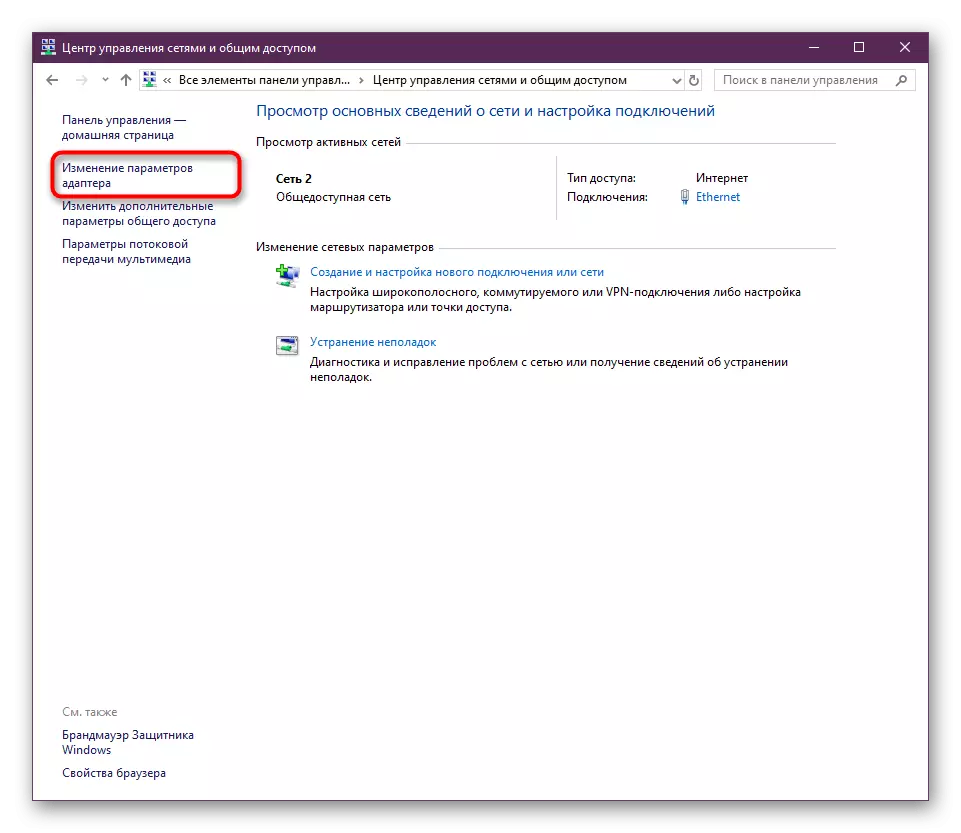
- Here go to the "Network and Shared Access Center" section.
- Use the left pane to move to the category "Changing the Adapter Settings".
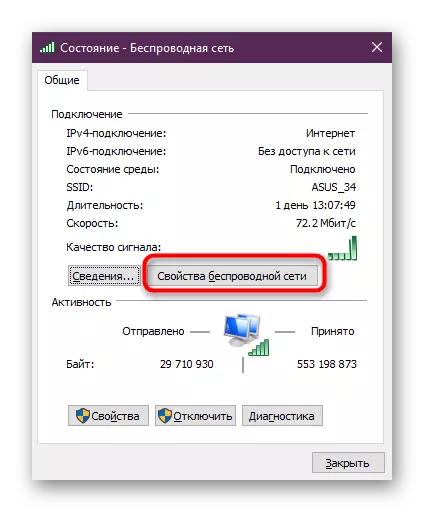
- Double click on the active wireless network icon.
- Press the left mouse button on the inscription "Wireless Network Properties".
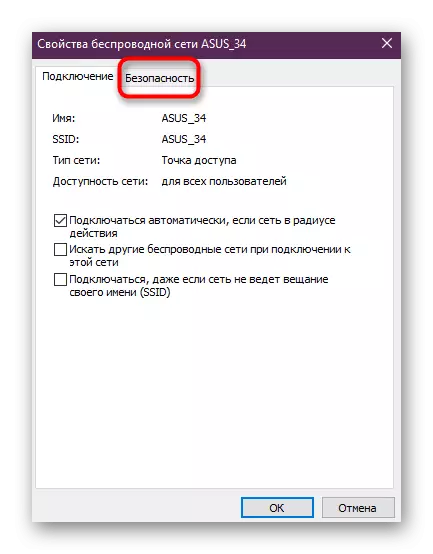
- Switch to the Safety tab.
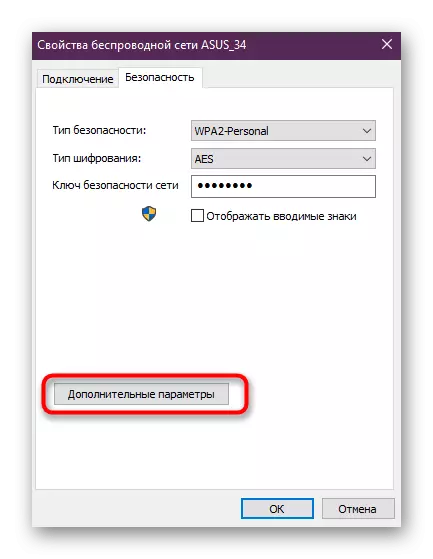
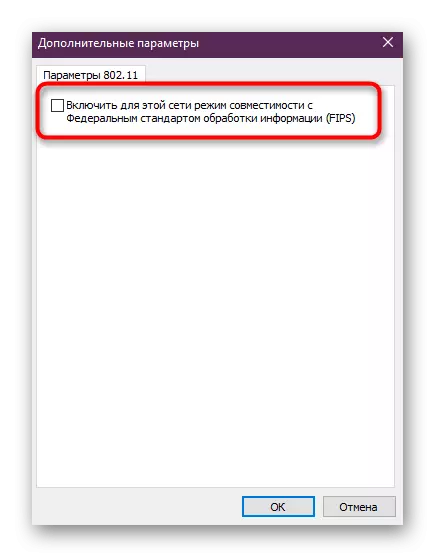
- Open additional parameters.
- Mark the marker item "Enable for this network compatibility mode with federal standard information processing (FIPS)".
After that, do not forget to restart the computer and the router so that new parameters are applied, and a new configuration has been created for connecting to the Internet.
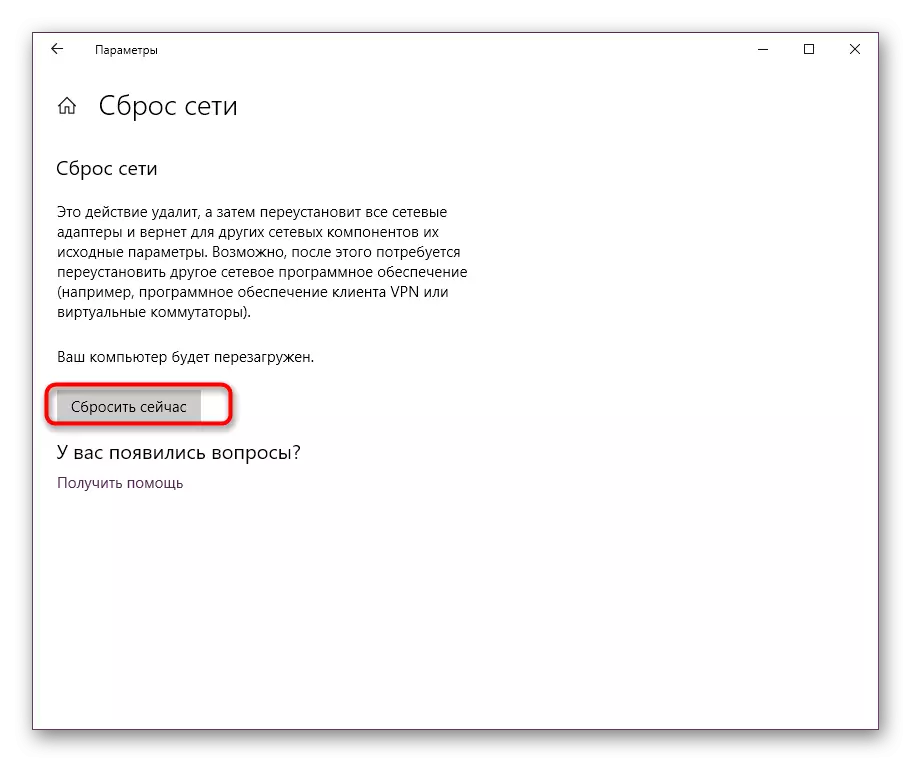
Method 6: Reset Network
We gradually go to the radical methods that should be performed only if the previous options did not bring due results. The first such method is to reset the network parameters, after which it will be re-updated. All this is automatically carried out, and from the user you only need to run the appropriate operation.
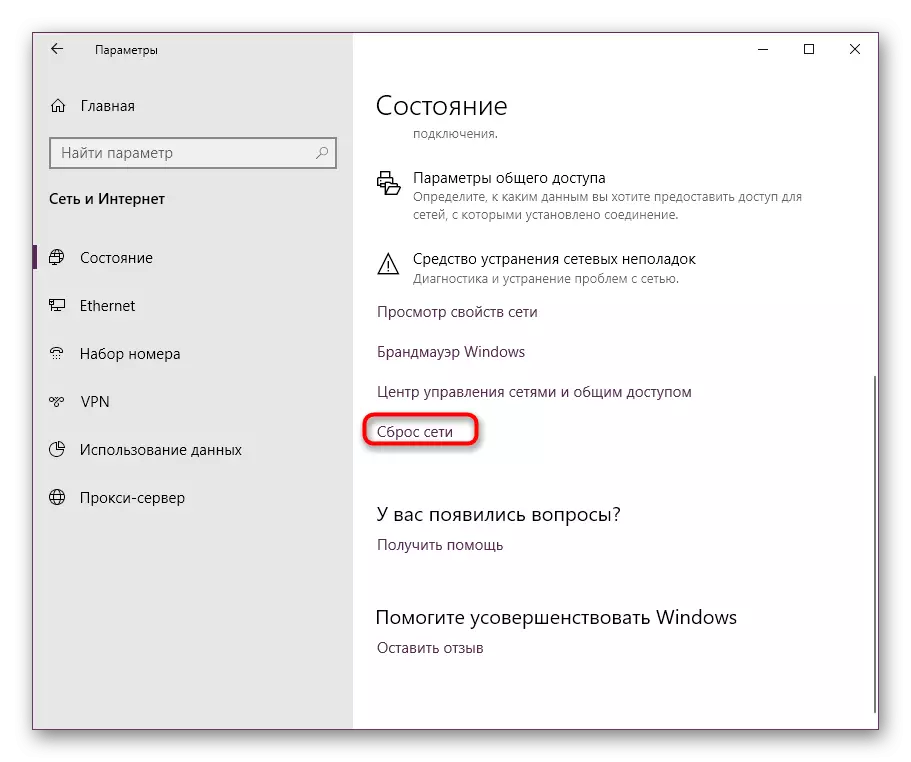
- Go to "Parameters" through the Start menu.
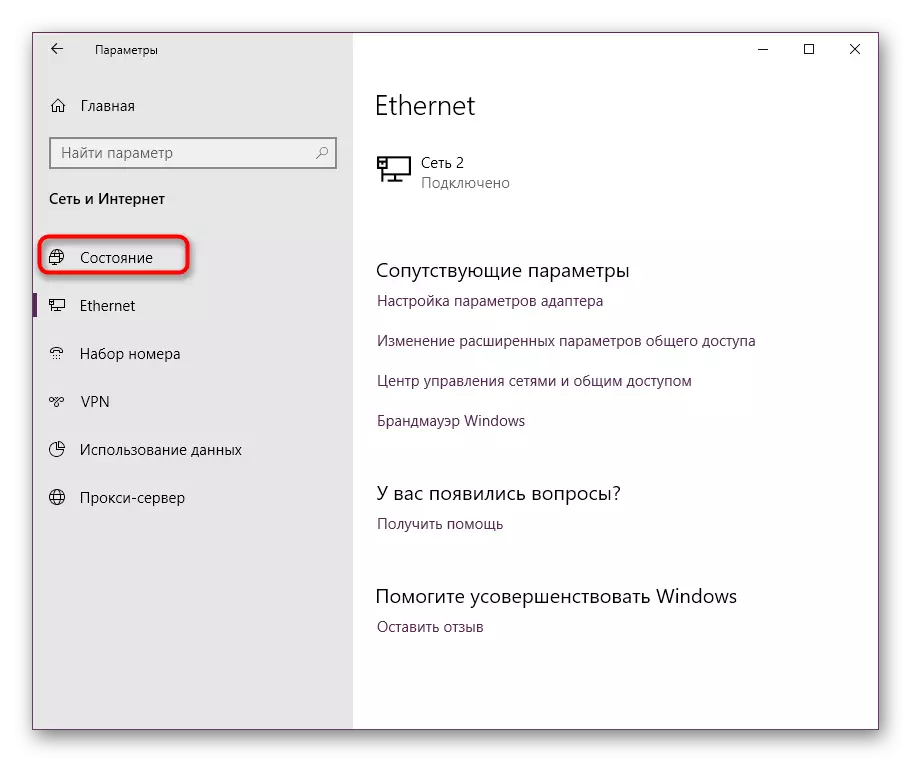
- Here you are interested in the item "Network and the Internet".
- Through the left panel, select the category "Status".
- Click on the "Relief" link.
- Confirm the beginning of the reset process. After that, the computer will be automatically rebooted, and the configuration will be updated.
Method 7: Restore system files
The penultimate way of our today's article implies the restoration of system files through the funds built into the OS. The first of them is called SFC and automatically check and restore the integrity of certain objects. Use the means called the DISM to start another check type if SFC has completed its error. Read about all of this in the maximum detailed form in the material indicated below. If some files are restored, check whether the availability of the gateway has begun.
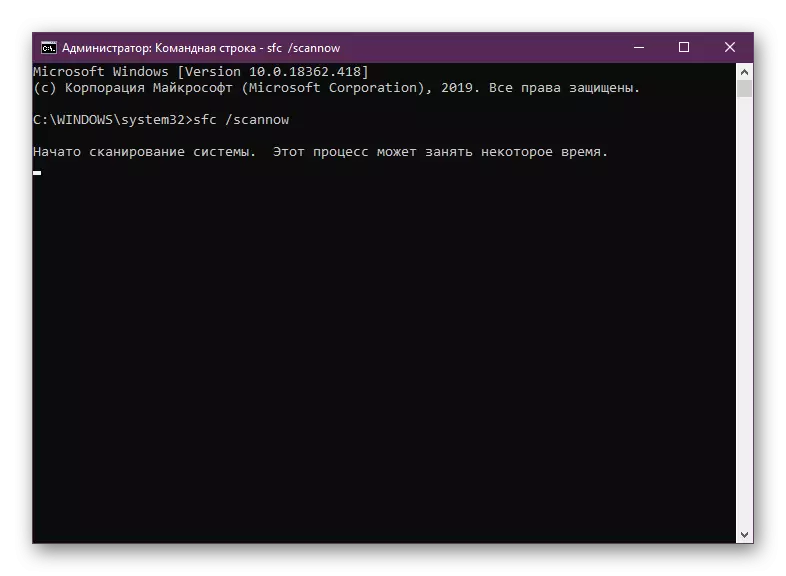
Read more: Using and restoring system file integrity check in Windows 10
Method 8: Windows Restore
At the end, we want to talk about the restoration of the operating system. It is necessary to implement this only if nothing of the above has brought proper result. It is possible that the default challenges have begun just because of the irreversible OS failures. Then the correction of this situation is carried out only through reset to the standard settings. This was written by another author on our website in the next article.
Read more: We restore Windows 10 to the original state
Now you know about all methods that allow you to correct the problem "The default gateway, installed by default" in Windows 10. As you can see, each option has a different level of efficiency and an action algorithm. Use them in turn to quickly find a suitable solution.