

Many Apple ecosystem users have heard of such opportunities as "family access", involving the joint operation of services, subscriptions, purchases and other options with close or simply familiar Apple ID owners. The article proposes a step-by-step instruction for enabling and configuring this useful function on the iPhone.
Family access on Apple devices
Before switching to the execution of manipulations that imply activate and configuring "family access", it will be useful to learn about the possibilities and features of this function obtained as a result.- Within the framework of the Cominted Function Group of Persons, the participants can "transfer" to each other purchases from the App Store, share the subscriptions to Apple's branded services, including the icloud cloud (subject to the acquisition of a paid tariff by the Organizer of the Family).
Step 2: Adding Shared Participants
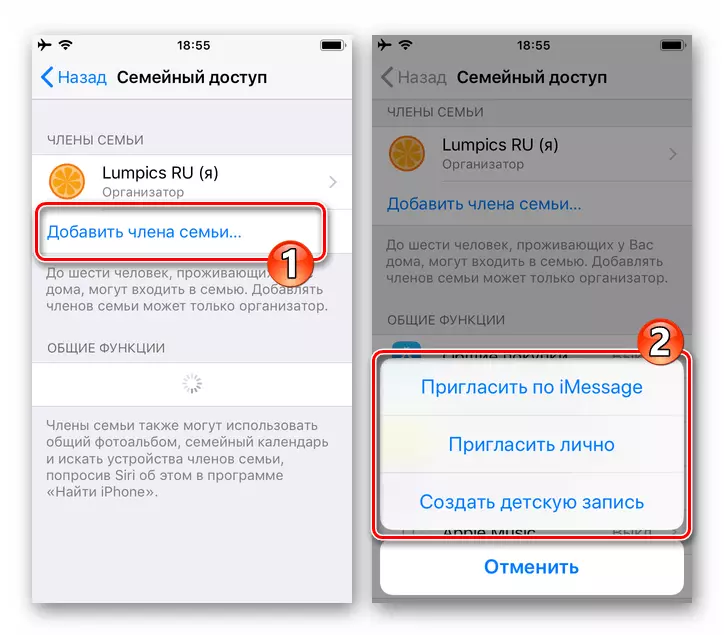
- On the "Family Access" screen under its own, now "organizer", name, click "Add a family member ...". Select the delivery method of an invitation to the participant of the group being generated in the menu that opens and execute one of the following items of this instruction.
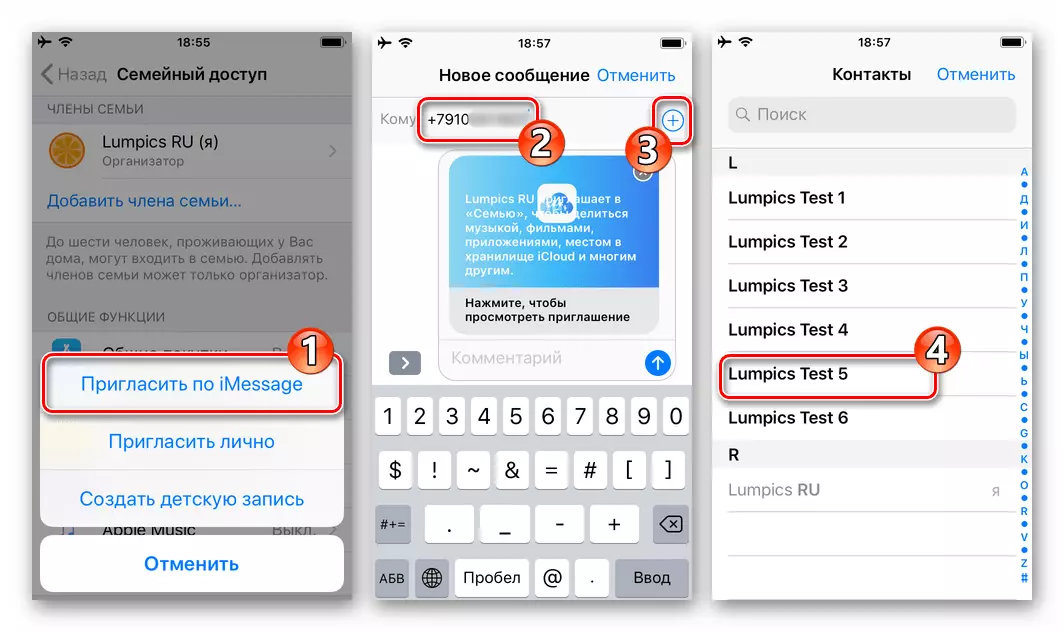
- "Invite on iMessage."
- Enter the phone number of the user who is invited to the user's family or select its contact in the iPhone address book, touching "+" near the "To:" field.
- Optionally, add your own comment to the formed invitation message and then tap "Send".
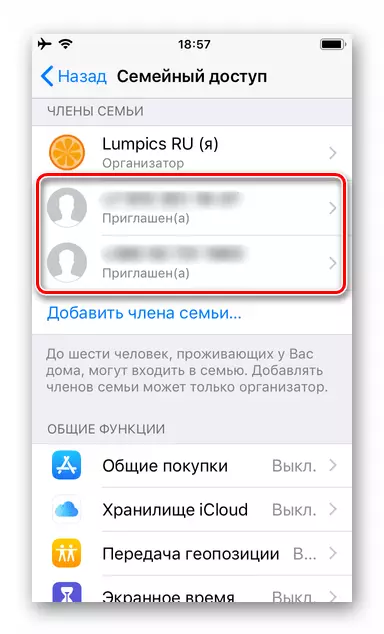
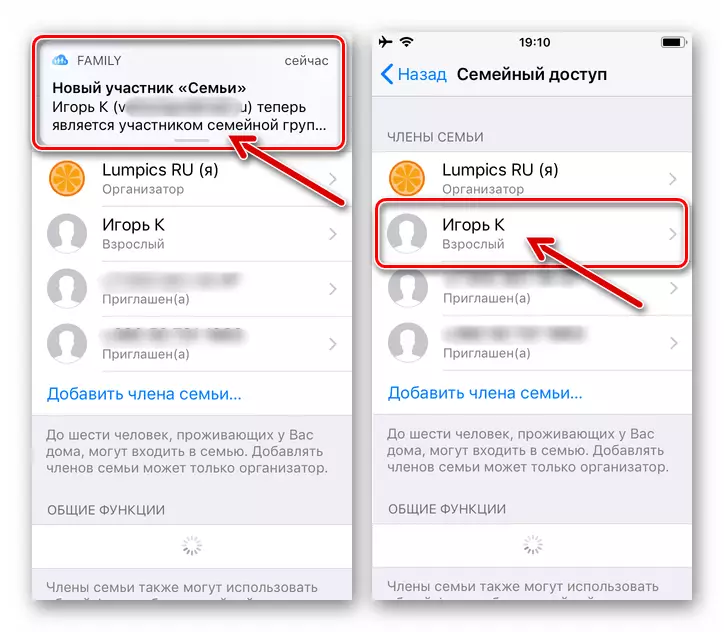
- Next, wait until the user entered into the group will confirm its consent to participate in "family-run" by transitioning by link from the message sent by you.

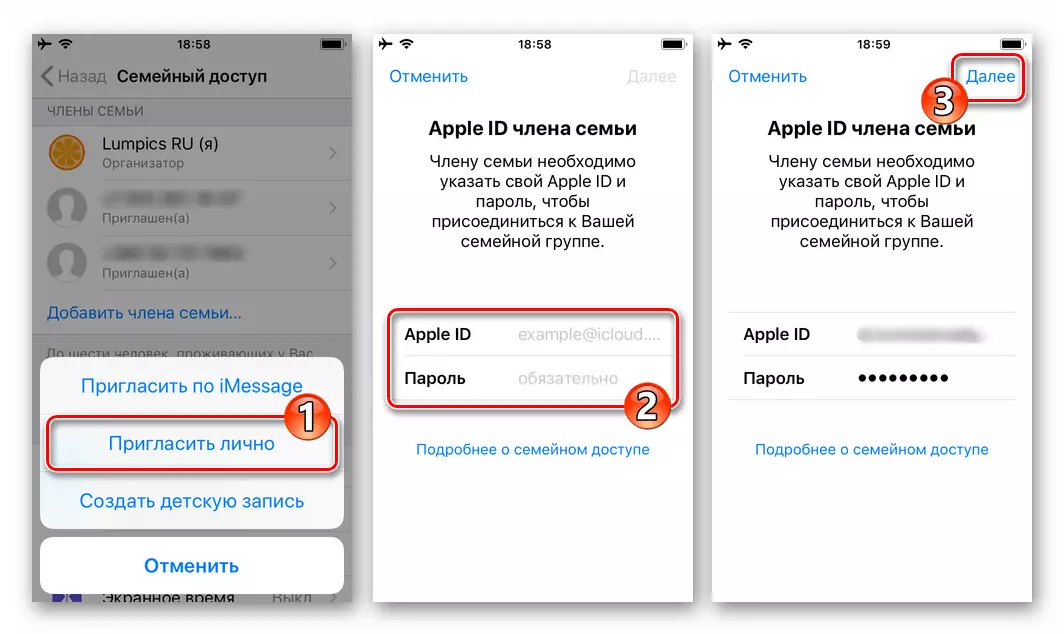
- "Invite personally."
- If the family being added to the family is located nearby, tap at the specified menu item, and then provide the invited smartphone to enter your Apple ID and password on the screen that opens. Upon completion of the information system, you need to touch the "Next" at the top of the screen on the right.
- As a result, the specified identifier will appear in the Family Members list.
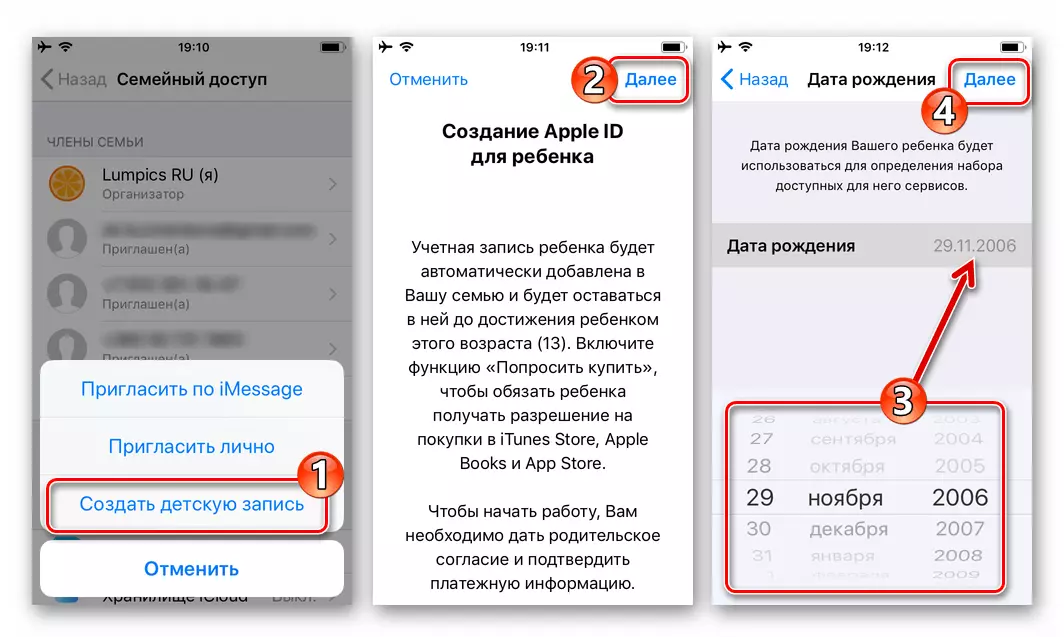
- "Create a children's recording."
- Click "Next" on the screen, which opens after selecting the specified item in the menu. Tap "Next" by entering the birth date of the child.
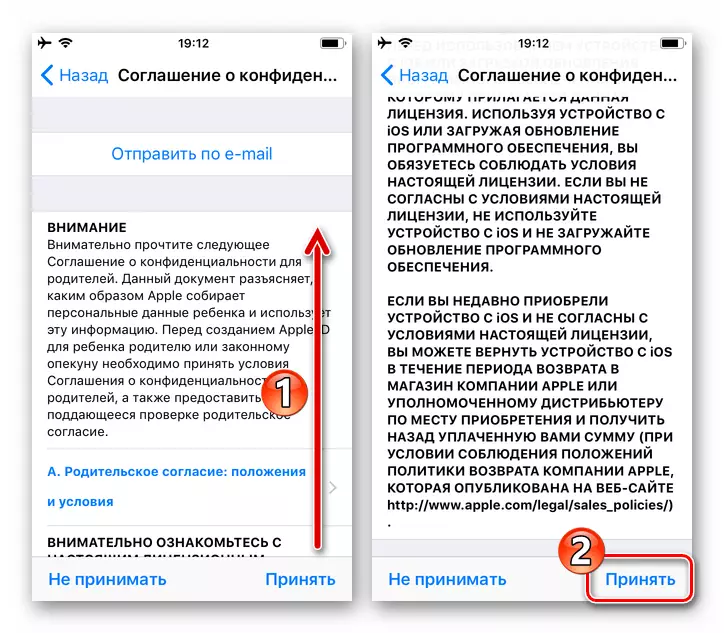
- Check out the "Confidentiality Agreement" and click "Accept" at the bottom of the screen.
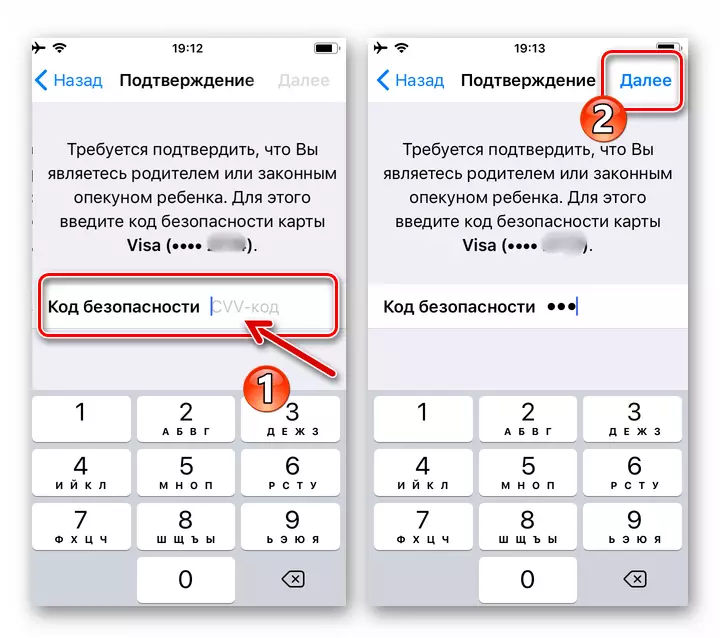
- Now confirm the payment information by entering the CVV code of the map attached to your EPL AIDI.
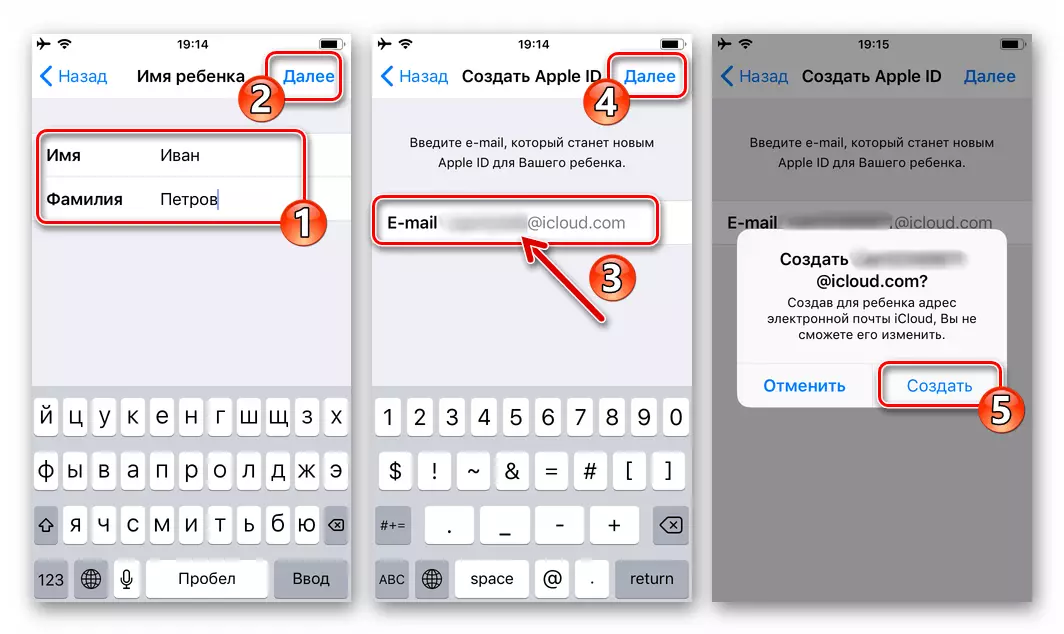
- Touch "Next" on the following two screens by entering the name of the child and creating an account ([email protected]), and then click "Create".
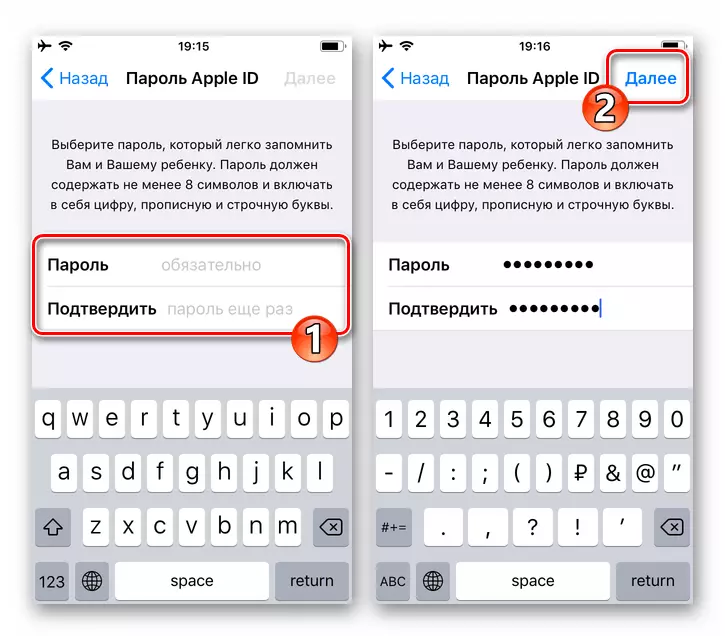
- Come up with and double-click the password to access the "Children's" account created.
- Choose three control questions and, remember, make answers to them in the fields with this requirement.
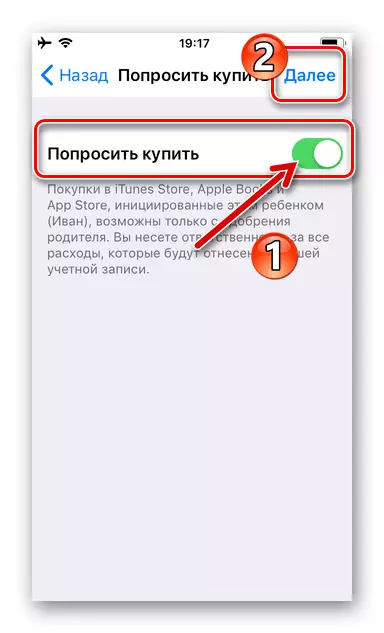
- Using the switch, determine the default setting of the activated option "Ask to buy", then tap "Next".
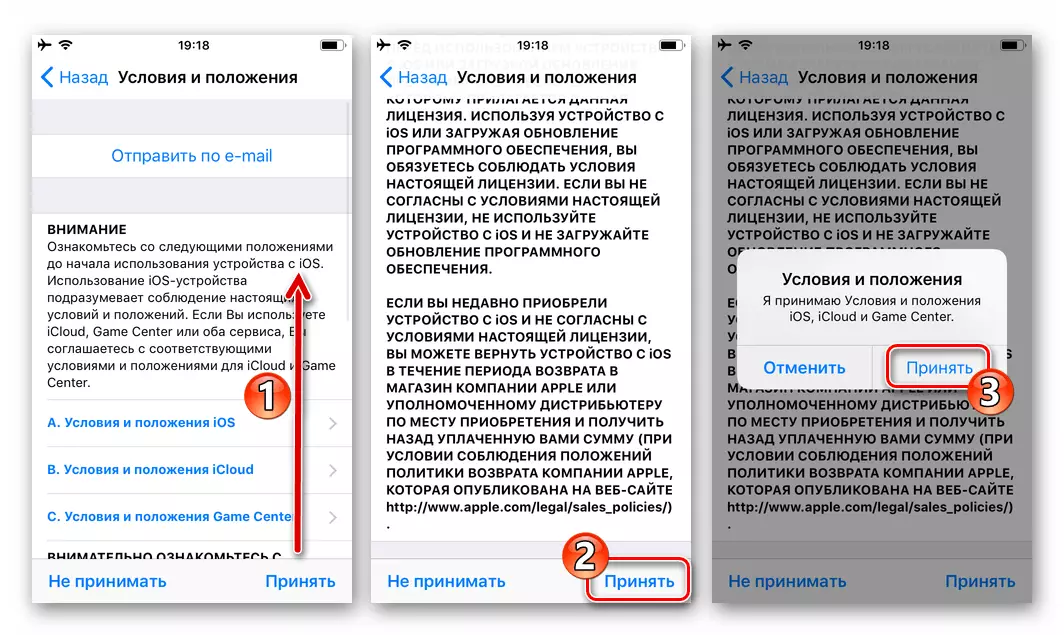
- Double click "Accept" by reading the "conditions and provisions",
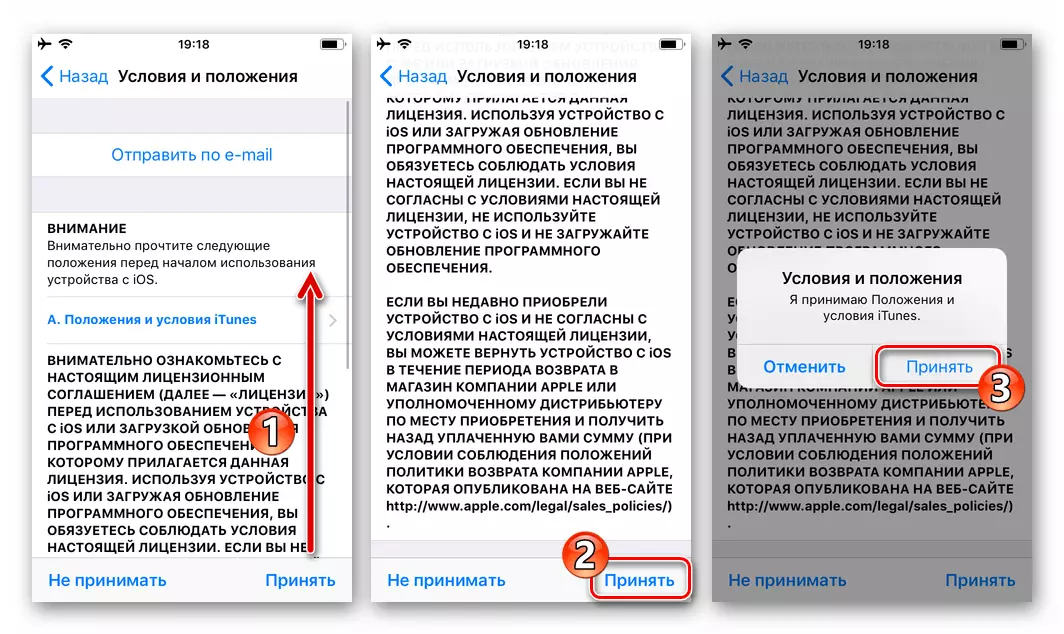
And do the same in terms of access to iTunes Store.
- As a result, the "children's" EPL AIDI will be created and automatically added to the "family".


Step 3: Apple General Access Activation
After the list of participants in the group described above will be formed, the function in question will automatically be configured on all devices involved.
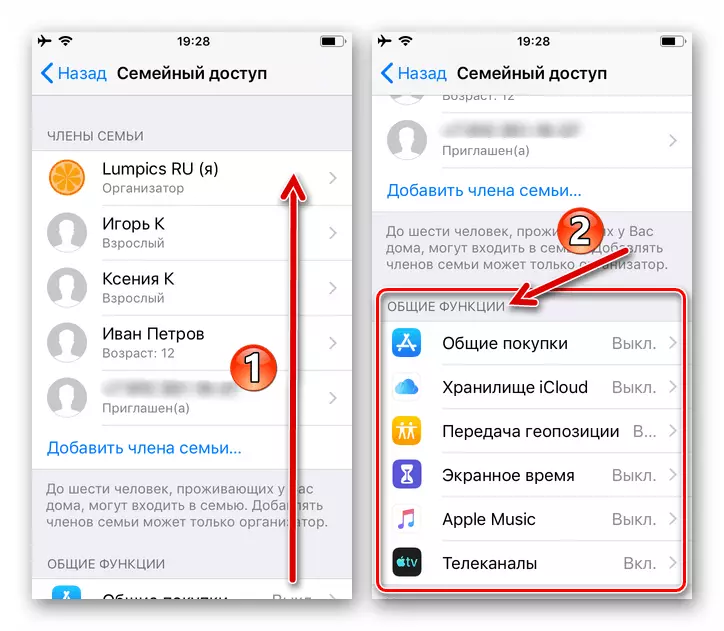
Now, turning to the items from the "Common Functions" list on the "Family Access" screen, you can quickly enable and configure:
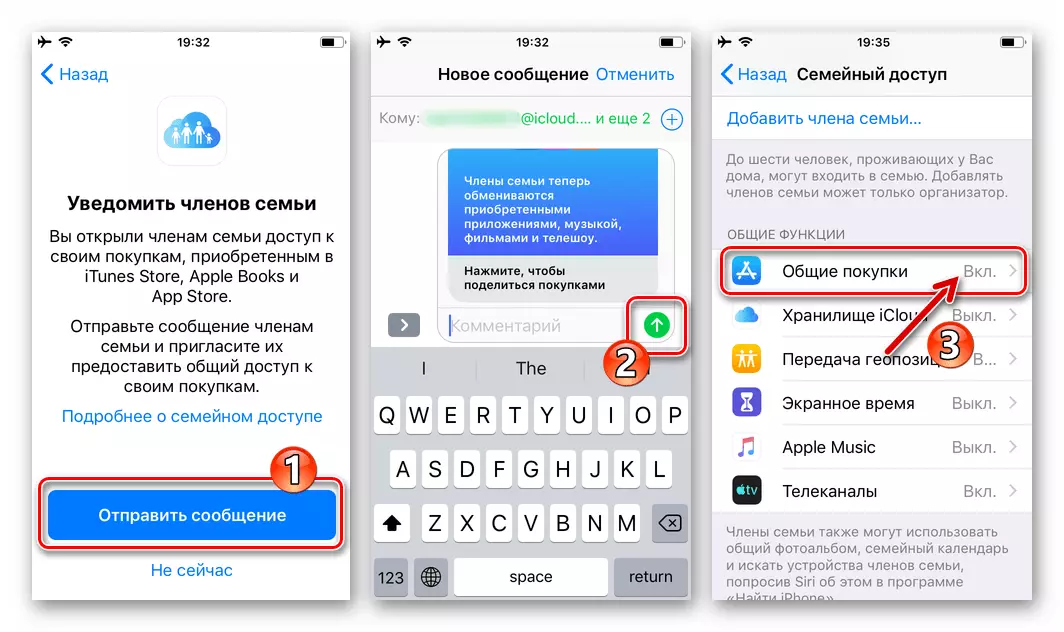
- "Common Shopping".
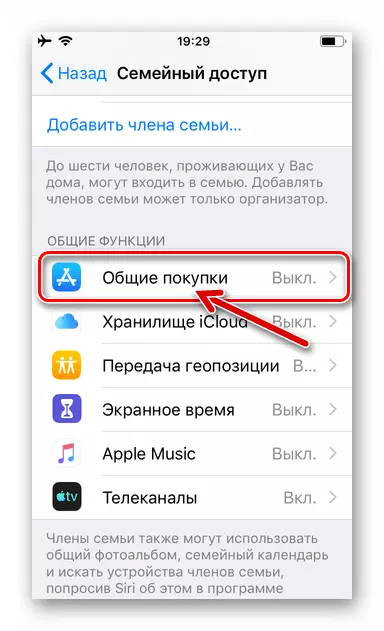
Select this section to open family members the ability to share programs from the App Store, books from Apple Books, music, movies and TV shows from iTunes Store:
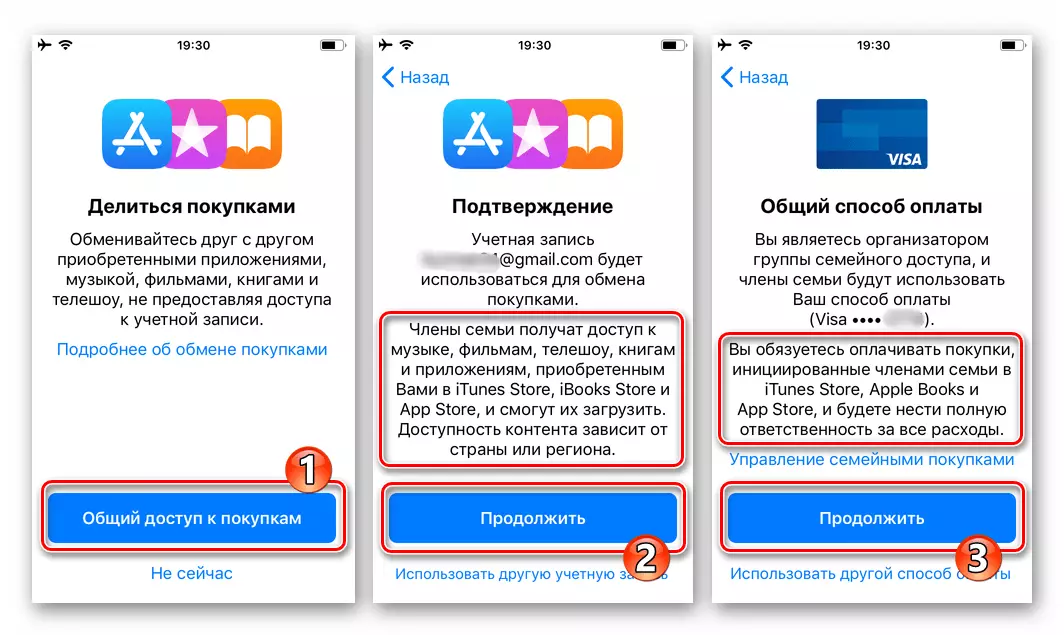
- Touch the "Sharing Purchase" button, and then, carefully reading the iPhone with the iPhone screen, double click "Continue".
- As a result, the "Shared Shopping" option will be activated. Optionally, you can "send a message" other participants in the group, with the aim of notifying the manipulation.
- ICLOUD Storage - Click to provide general access to the ICloud cloud service tariff plan. (It is possible after increasing the volume of the repository up to 200 GB or more on a fee).

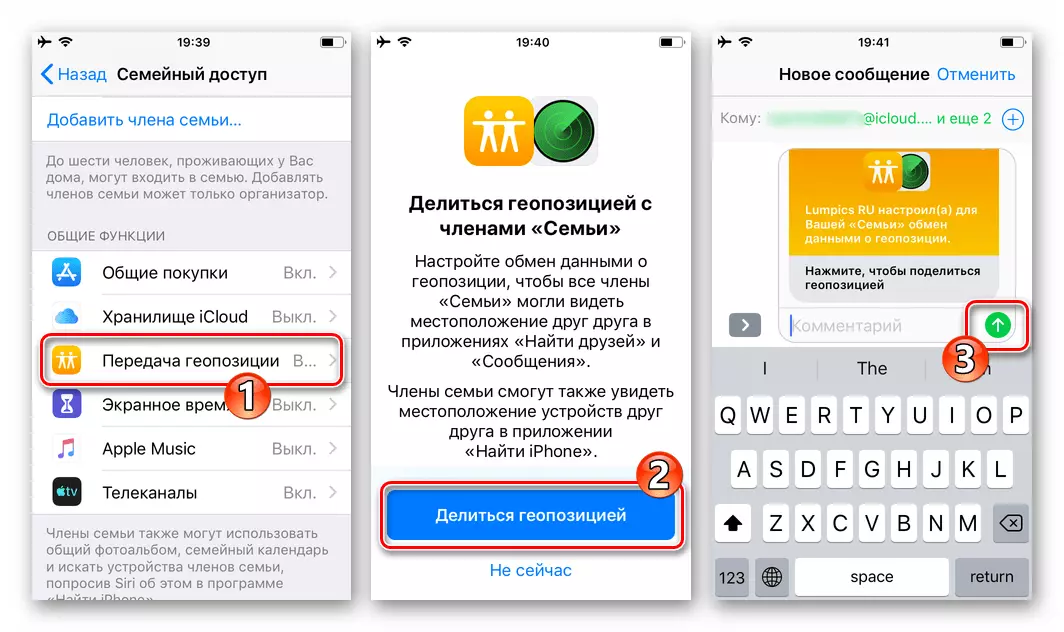
- "GEOPOZY" - GENERAL PARTICIPANTS The ability to find each other using the "Find iPhone" application. Include "Share geoposition" on the screen that opens as a result of selecting the screen function and then send a notice of the opportunity to members of the family.
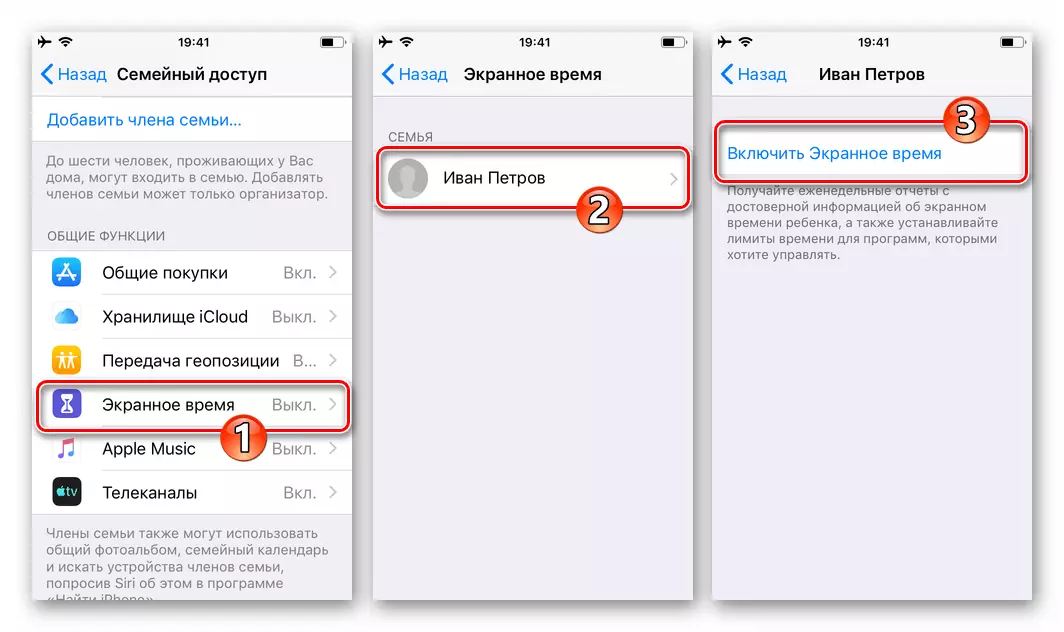
- "Screen Time." Excellent method of organizing parental control over "Children's" Apple ID:
- Touch the item name, on the screen that opens, click on the child's name and then tap "Enable Open Time".
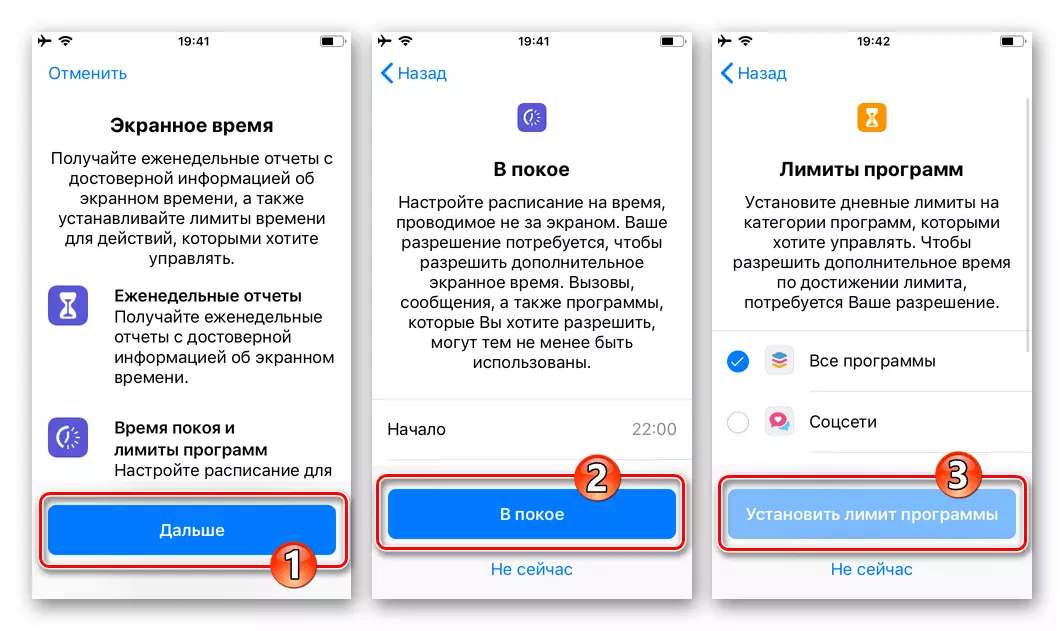
- Click "Further", and then determine the schedule of the mode "at rest" and set the "Program Limits".
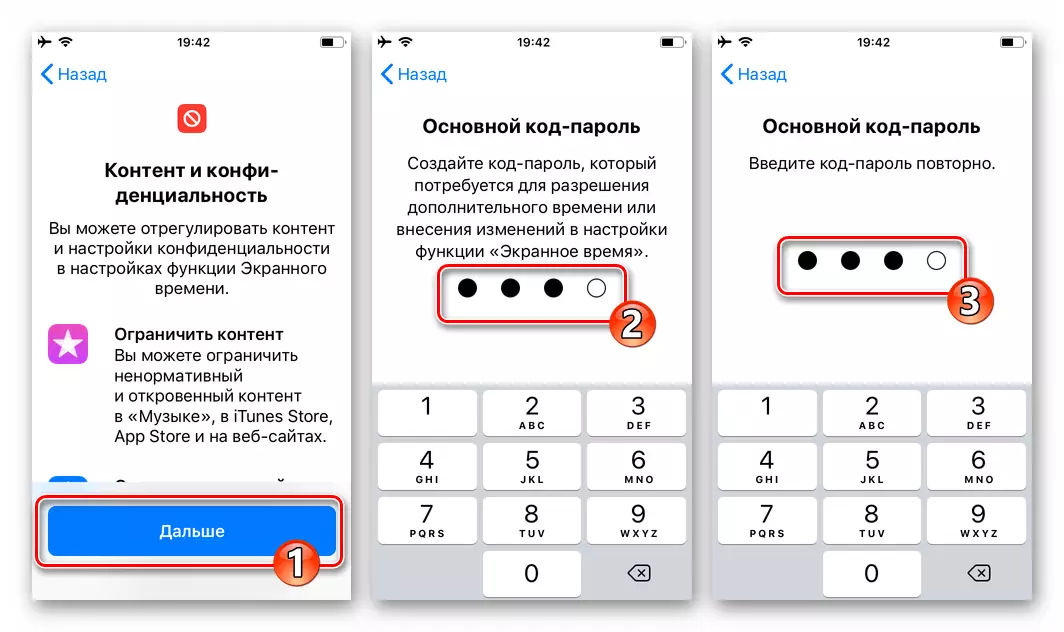
- Next, it will be possible to limit the content of the content and configure privacy parameters, after which it will be necessary to install a password code to prevent unauthorized changes in the use of iPhone modes.
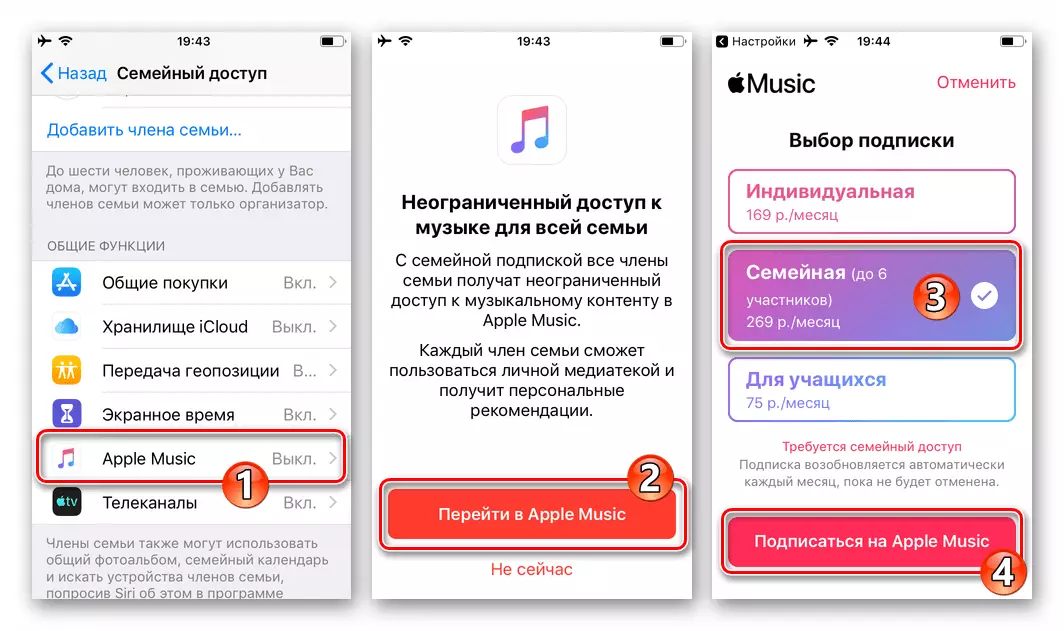
- "Apple Music" - if you have issued a family (!) Subscription in the Music service "Couperin Giant" or are going to do this, then you have the opportunity to invite to its joint use of participants in the family group.
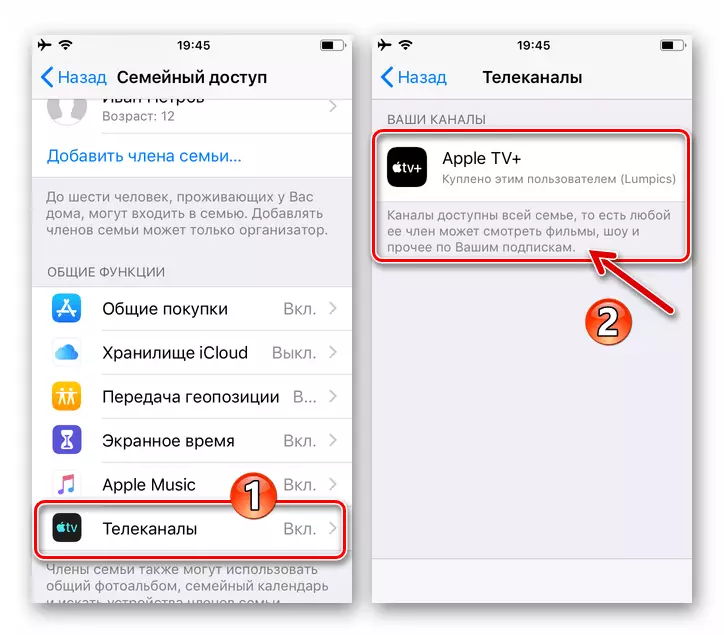
- "TV channels" - a joint access to the use of the Apple TV service is configured.
General photo album
For quick and efficient sharing photos and video recordings in the framework of the "family" created and configured as a result of the execution of the instructions:
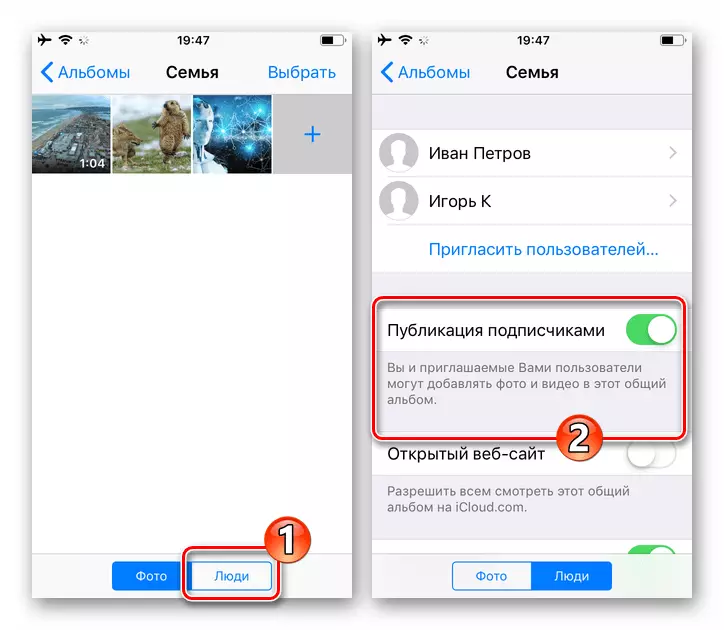
- Go to the "Photo" program, open the "Albums" section, in the General Albums area, tap the "Family" cover.
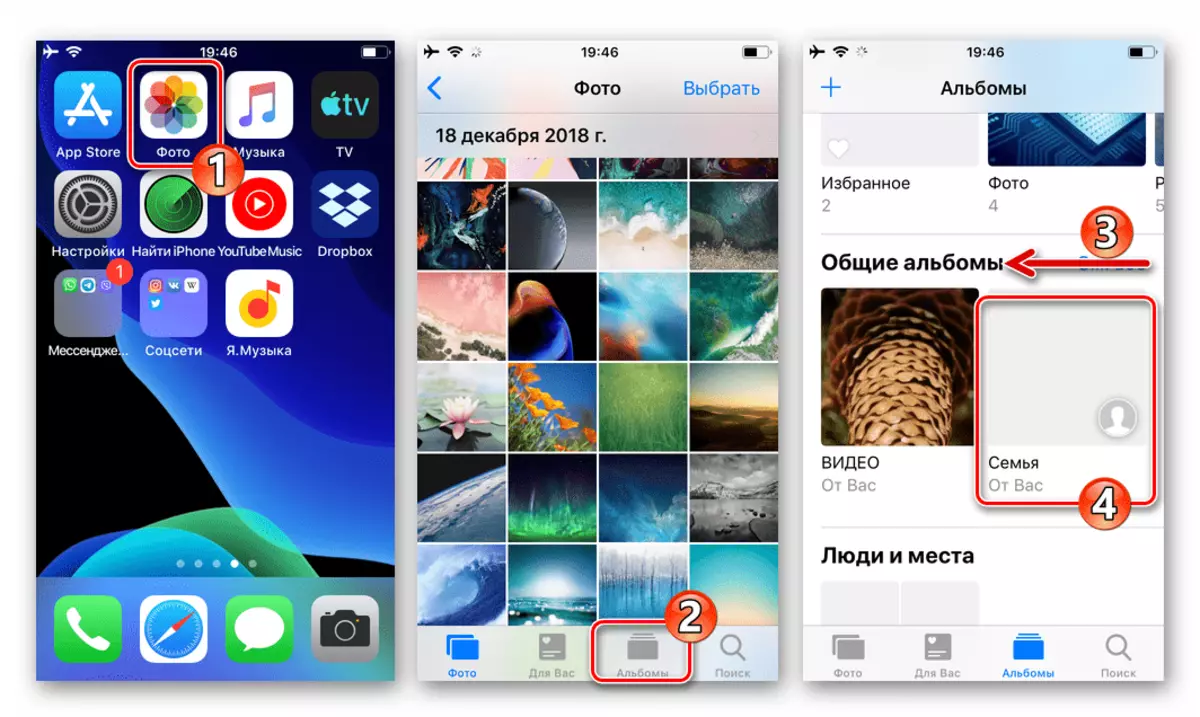
- Touch "+", select a media file (s) which you want to share with family members, tap "ready", and on the next screen, click "Publish".

- Now photos and videos posted in the general album will be available to other members of the group. Of course, they can also hold the above-described procedure for publishing media files from their devices.
How to Disable Family Access to iPhone
Termination of family members' sharing to individual or all Apple services by the Group organizer is carried out in the same section of the IOS parameters as the inclusion.
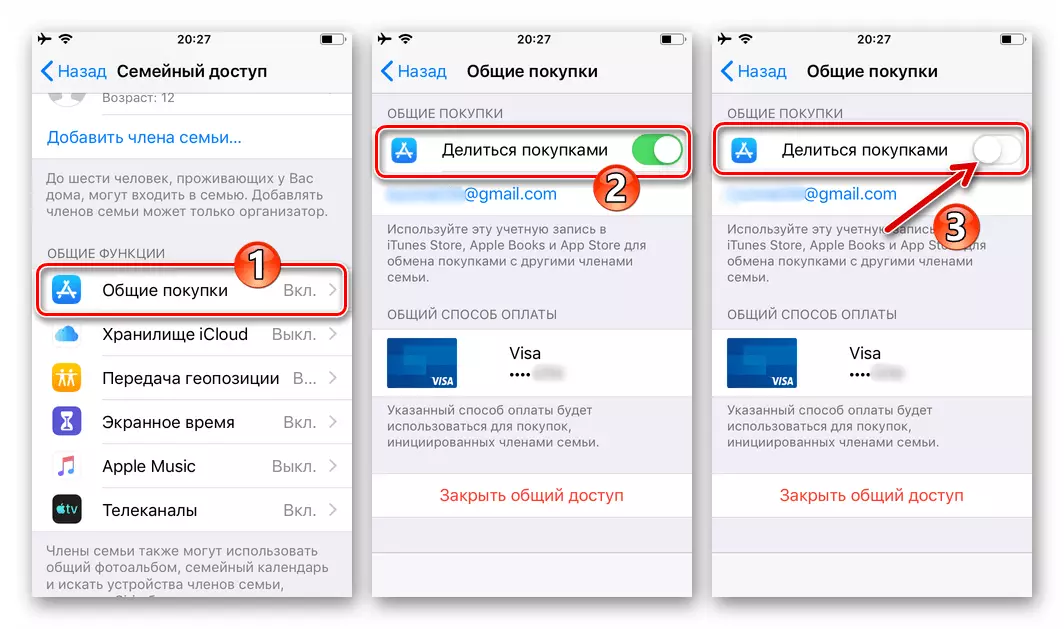
- To deactivate or adjust the level of access of other persons to one or another service, tap on its name in the "General functions" list. On the example of "shopping":
- Open the screen with the settings and move the "Share Shopping" switch if, for example, temporarily plan to prohibit other users access to your purchased on the App Store and / or iTunes positions.
- Click "Close Sharing" if you decide to completely stop using the ability.

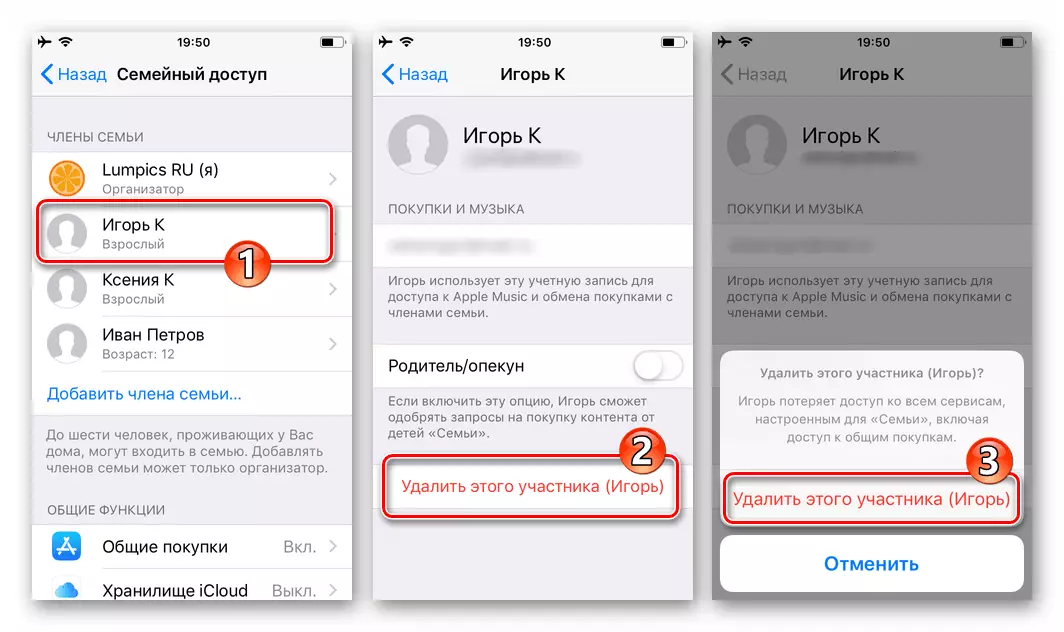
- To eliminate the participant of the "family" from her, tap by his name in the list "Family members", click "Delete this member (name)" and confirm your intentions.
Clearing the list of users is completely, you, respectively, "Disable" the "Family Access" feature on your iPhone, or rather deactivate it within the framework of your own Apple ID.
Conclusion
As you can see, enabling and configuring the functions considered in the article on the iPhone are carried out by performing completely simple manipulations. At the same time, the possibilities provided within the framework of "family access" make it possible to fully take advantage of the joint use of content and software, and in some cases, and significantly save funds.
- On the "Family Access" screen under its own, now "organizer", name, click "Add a family member ...". Select the delivery method of an invitation to the participant of the group being generated in the menu that opens and execute one of the following items of this instruction.