

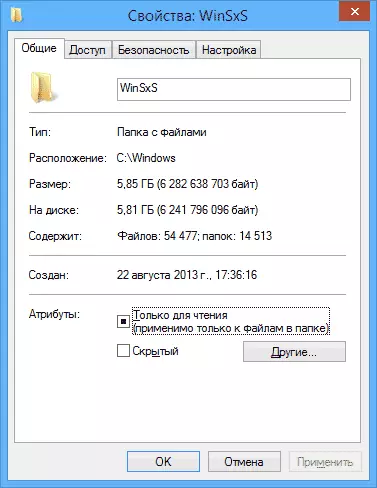
The WINSXS folder stores backup copies of the operating system system files prior to updates (and not only, about something else). That is, whenever you receive and install Windows updates, information about changing files is saved to this folder, these files themselves so that you have the ability to delete the update and roll back the changes made.
After some time, the WINSXS folder can occupy a lot of space on the hard disk - several gigabytes, while the size of this all the time increases with the installation of new Windows updates. Fortunately, clear the contents of this folder are relatively easy to clean the contents. And if the computer works after the last updates without any problems, this action is relatively safe.
Also in Windows 10, the WINSXS folder is used, for example, to reset Windows 10 to its original state - i.e. The files needed to automatically reinstall exactly from it. Additionally, since you have a problem with free hard disk space, I recommend to familiarize the article: how to clear the disk from unnecessary files, how to find out what is done on the disk.
Clearing WinSXS folder in Windows 10
Before talking about cleaning the WINSXS component storage folder, I want to warn about some important things: Do not attempt to delete this folder. . Just the opportunity to see users who have a WINSXS folder is not deleted, they use methods similar to those described in the article. Request the resolution from TrustedInstaller and in the end you remove it (or part of the system files from it), after which they are surprised why the system is not loaded.
In Windows 10, the WINSXS folder stores not only update-related files, but also the files of the system itself used during operation, as well as to return the OS to the original state or perform some recovery-related operations. So: I do not recommend any self-identity when cleaning and reducing the size of this folder. The following actions are safe for the system and allow you to clear the WINSXS folder in Windows 10 only from unnecessary backups created when updating the system.
- Run the command line on behalf of the administrator (for example, through the right click on the Start button)
- Enter the Dism.exe / Online / CleanUp-image / AnalyzeComponentstore command and press ENTER. The component storage folder will be analyzed and you will see a message about the need for cleaning it.

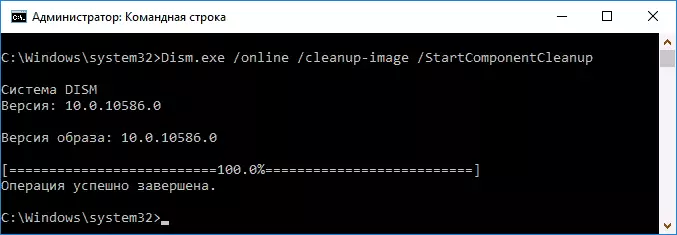
- Enter the Dism.exe / Online / CleanUp-Image / StartCompontentCleanUp command and press ENTER to start automatically cleaning the WINSXS folder.
One important point: should not be abused by this team. In some cases, when Windows 10 update backups in the WINSXS folder, after cleaning, the folder may even light up. Those. It makes sense to clean the cleaning when the specified folder is too, in your opinion, there is no bit (5-7 GB is not too).
Also cleaning WINSXS can be made automatically in the free DISM ++ program
How to Clean WinSXS folder in Windows 7
To clean WinSXS in Windows 7 SP1, you need to pre-install the optional update of KB2852386, which adds the corresponding point in the disk cleaning utility.
Here's how to do it:
- Go to the Windows 7 Update Center - this can be done via the control panel or use the start-up menu.
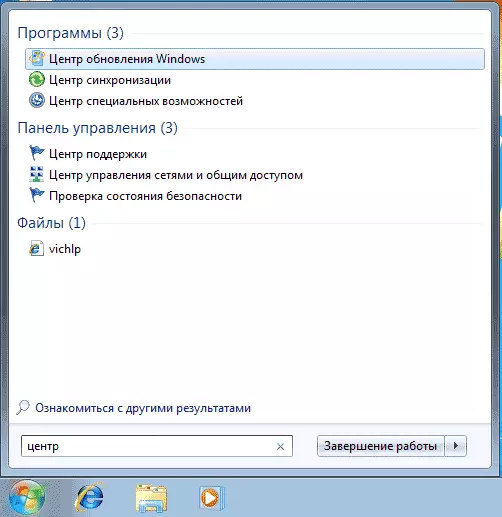
- Click "Search for updates" in the menu on the left and wait. After that, click on optional updates.

- Find and check the optional update of KB2852386 and install it.

- Restart the computer.
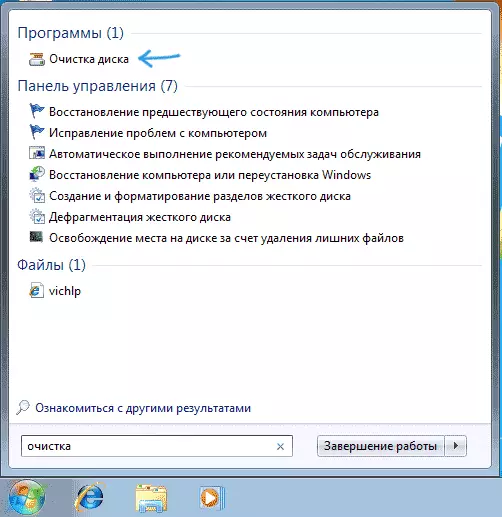
After that, in order to delete the contents of the WINSXS folder, run the disk cleaning utility (also, quickly use the search), click the "Clearing system files" button and select "Clear Windows Updates" or "Backup Files Service Package".

Deleting WinSXS content in Windows 8 and 8.1
In the latest versions of Windows, the ability to delete backup updates are available in the default disc cleaning utility. That is, in order to delete files in WINSXS, you must do the following:
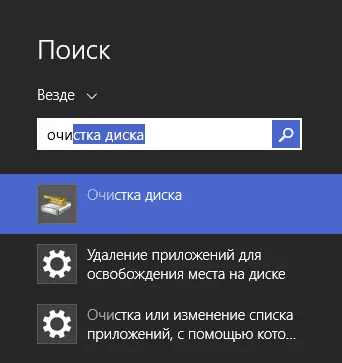
- Run the "Cleaning Disk" utility. To do this, you can use the search screen.
- Press the "Cleaning System File" button
- Select "Clearing Windows Updates"

In addition, in Windows 8.1 there is another way to clear this folder:
- Run the command prompt on behalf of the administrator (for this press Win + X keys on the keyboard and select the desired menu item).
- Enter the Dism.exe / Online / CleanUp-Image / StartCompontentCleanUp / ResetBase command
Also, with Dism.exe, you can find out exactly how much WINSXS folder in Windows 8 takes place, use the following command to use the following command:
Dism.exe / Online / CleanUp-image / AnalyzeComponentstore
Automatic cleaning of backup updates in WINSXS
In addition to cleaning the contents of this folder manually, you can use the Windows job scheduler, so that it happens automatically.

To do this, you need to create a simple task of StartCompontentCleanUp in Microsoft \ Windows \ Servic with the desired execution periodicity.
I hope the article will be useful and will warn from unwanted actions. In case of issues, ask, I will try to answer.