

Almost every advanced user Ubuntu is interested in ensuring security for its network. In addition, many use certain network utilities that will function correctly only after making specific rules in the firewall. Today we want to talk about configuring the Firewall on the example of UFW (Uncomplicated Firewall). This is the easiest tool for implementing the rules of the firewall, so it is recommended for novice users and those who are not satisfied with too complex IPTABLES functionality. Let's step by step, consider the entire setup procedure, disassemble every step in the most detailed as possible.
Configure UFW in Ubuntu
You do not need to install UFW into the operating system because it is present there by default. However, in a standard form, it is inactive and does not have any rules at all. First, we will deal with activation, and then consider the main actions. However, the priority should be examined by syntax, and it usually concerns those users who plan to use this firewall on an ongoing basis.Step 1: Studying Syntax
As you know, UFW is a console utility, which means that it is carried out through the standard "terminal" or any other user. The interaction of this kind is done with the help of specially installed commands. All of them are always in the documentation, but it does not make sense to read a huge bunch of materials, especially in the case of today's instrument. The input principle looks like this: Sudo UFW Options Action Parameters. Sudo is responsible for running on behalf of the superuser, UFW is a standard argument denoting the program called, and the remaining phrases and define the rules installed. It is for them that we want to stop in more detail.
- Enable is a standard parameter responsible for turning on the firewall. In this case, it will be automatically added to the autoload.
- Disable - Disables UFW and removes it from autoload.
- RELOAD - Used to restart the Firewall. Especially relevant after installing new rules.
- Default - denotes that the next option will be installed by default.
- Logging - activates the creation of log files in which all basic information on the action of the firewall will be stored.
- RESET - resets all settings up to standard.
- Status - Used to view the current state.
- Show - Quick view of firewall reports. Additional options are applicable to this parameter, but we will talk about them in a separate step.
- Allow is involved when adding permissive rules.
- Deny is the same, but applied to prohibit.
- Reject - adds the discarding rule.
- Limit - Installing the limiting rules.
- Delete - removes the specified rule.
- INSERT - inserts the rule.
As you can see, there are not a lot of teams. They are accurately less than in other available firewalls, and you can remember the syntax after several attempts to interact with UFW. It remains only to deal with an example of a configuration, which the following steps of today's material will be devoted.
Step 2: Enable / Disable / Reset Settings
We decided to highlight several configuration moments into one stage, since they are partially interconnected and similar to implementation. As you already know, UFW is initially in a disconnected state, so let's activate it by applying only one command.
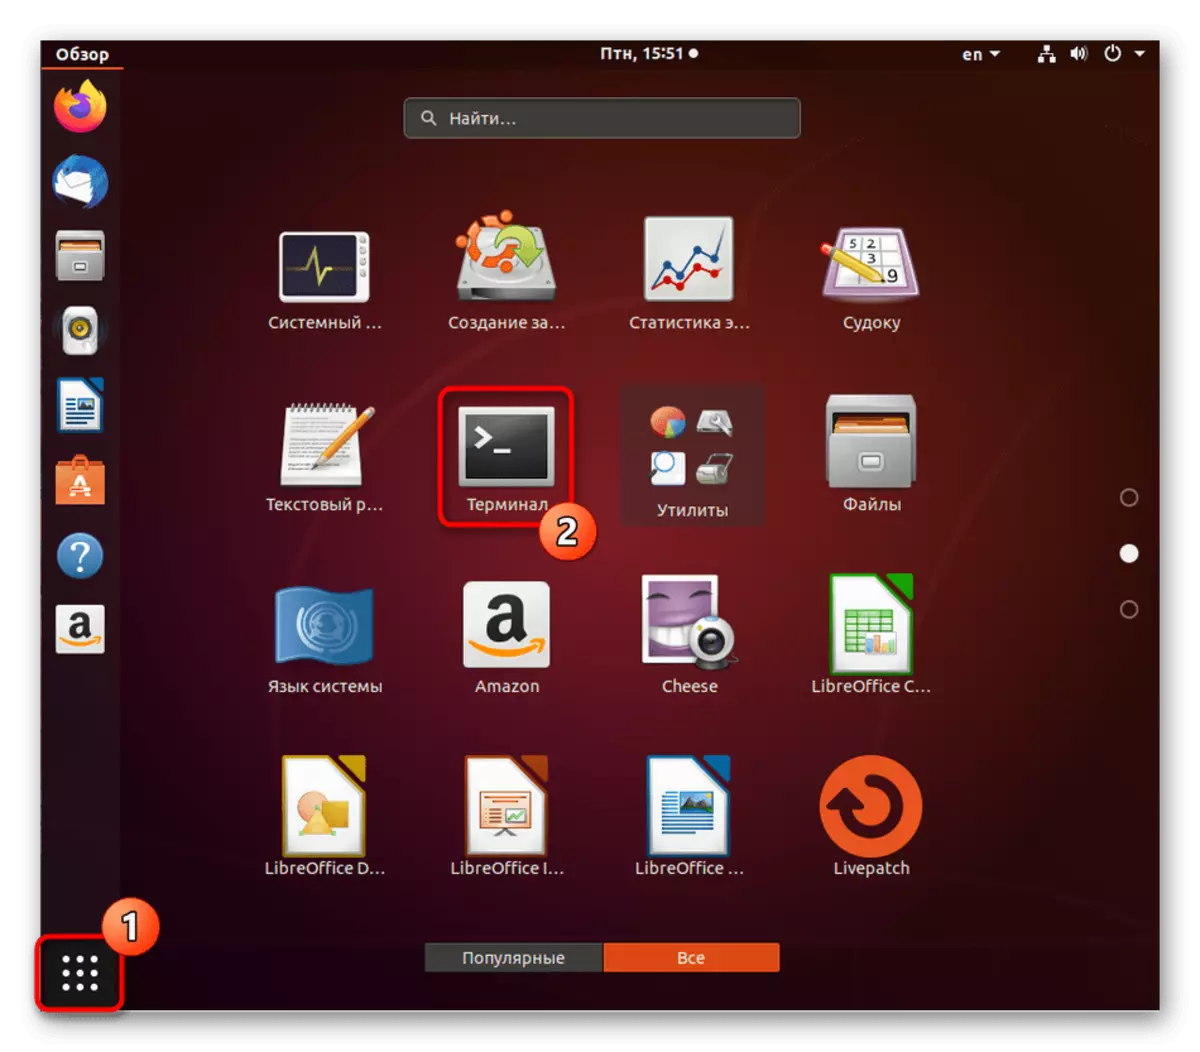
- Open the panel with applications and run the "Terminal". You can open the console and another way convenient for you.
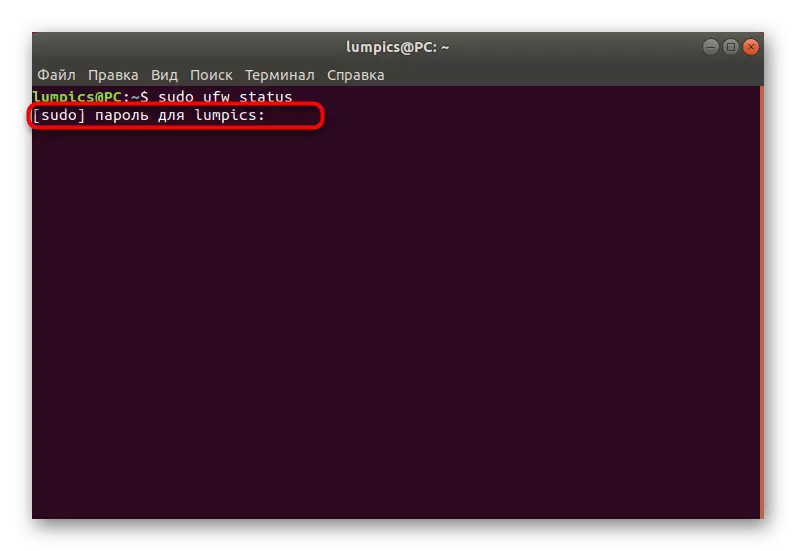
- Before performing activation, check, perhaps earlier you or another application has already activated the firewall. This is done by entering the Sudo UFW Status command.
- Enter the password to get the superuser rights and press ENTER. Note that at the same time, the input method characters are not displayed in the security row.
- In the new line you will receive information about the current state of UFW.
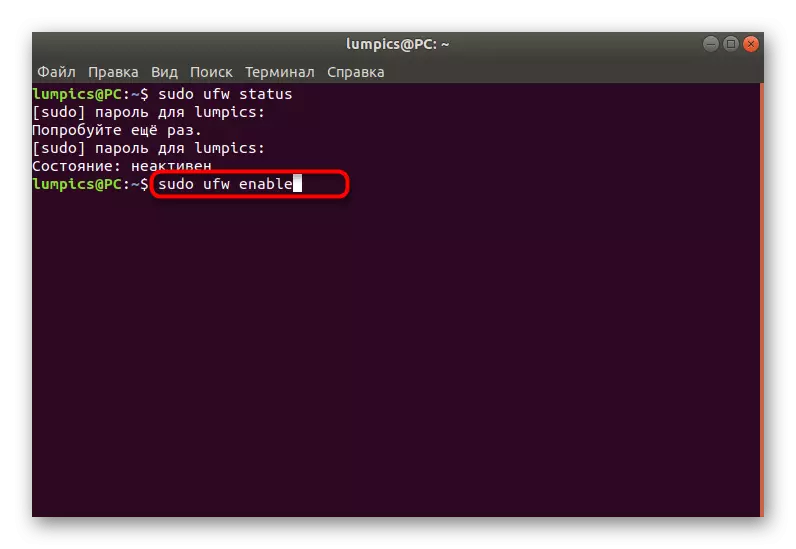
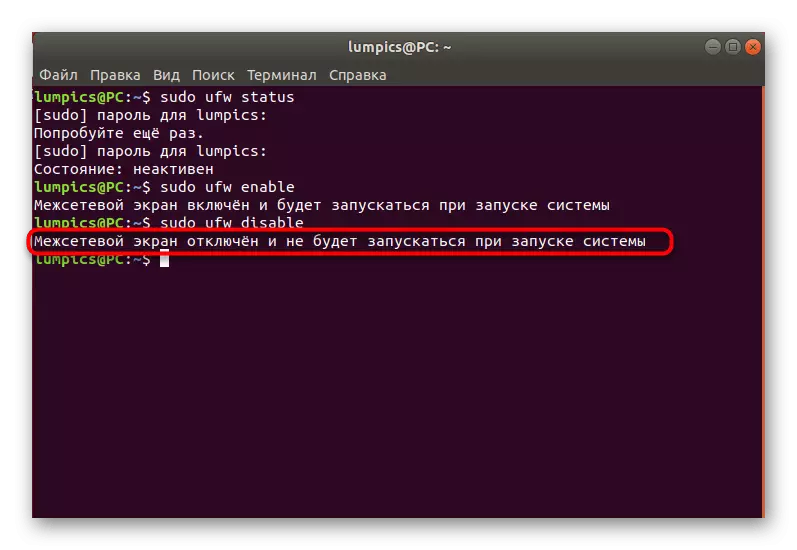
- The activation of the firewall is performed through the parameter already mentioned above, and the entire command looks like this: sudo ufw enable.
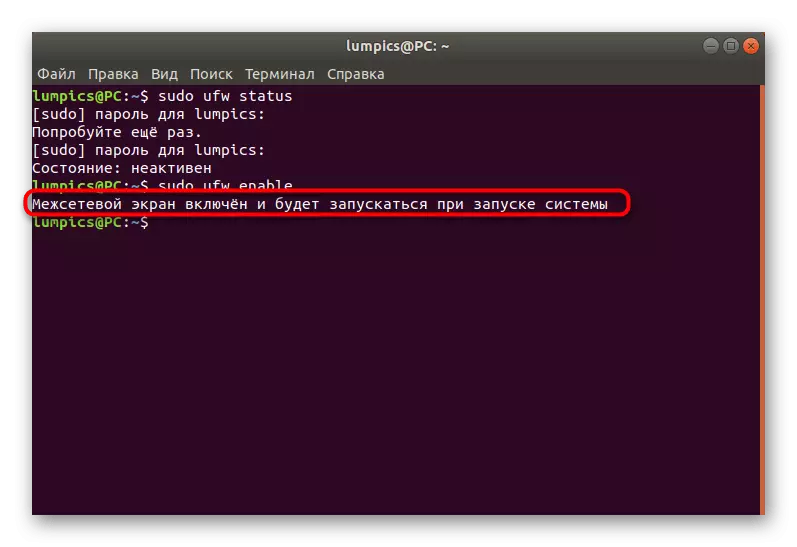
- You will notify that the firewall is enabled and will run along with the operating system.
- Use Sudo UFW Disable to shut down.
- Deactivation will notify almost the same message.
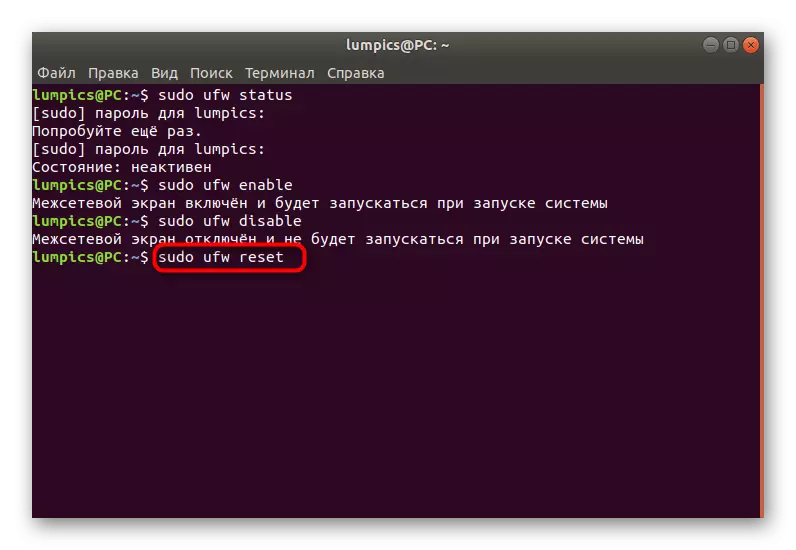
- In the future, if you need to reset the rules or you need to do this now, insert the Sudo UFW Reset command and press the ENTER key.
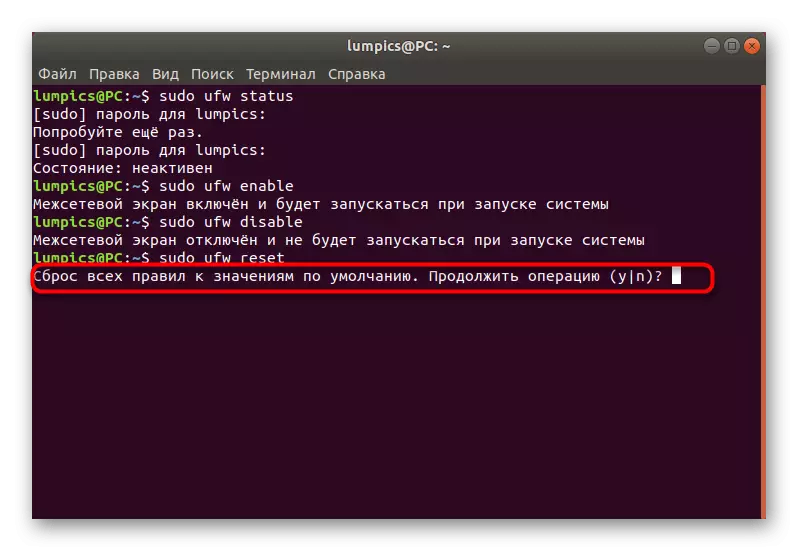
- Confirm the reset by selecting the appropriate answer.
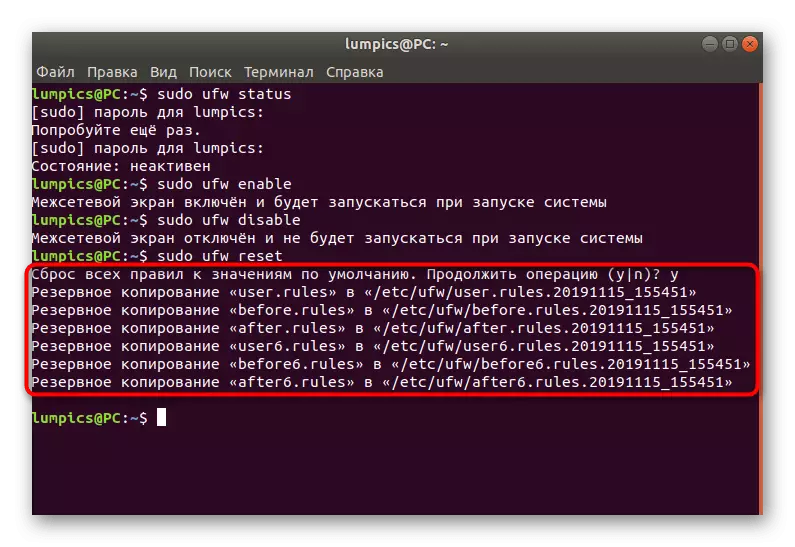
- You will see six different rows with backup addresses. You can move at any time to this location to restore the parameters.


Now you know what kind of teams are responsible for managing the general behavior of the Firewall under consideration. All other steps will focus solely on the configuration, and the parameters themselves are given as an example, that is, you must change them, repulscing from your needs.
Step 3: Setting the default rules
In mandatory, apply the default rules that will relate to all incoming and outgoing compounds not mentioned separately. This means that all incoming connections that are not indicated by manually will be blocked, and the outgoing are successful. The whole scheme is implemented as follows:
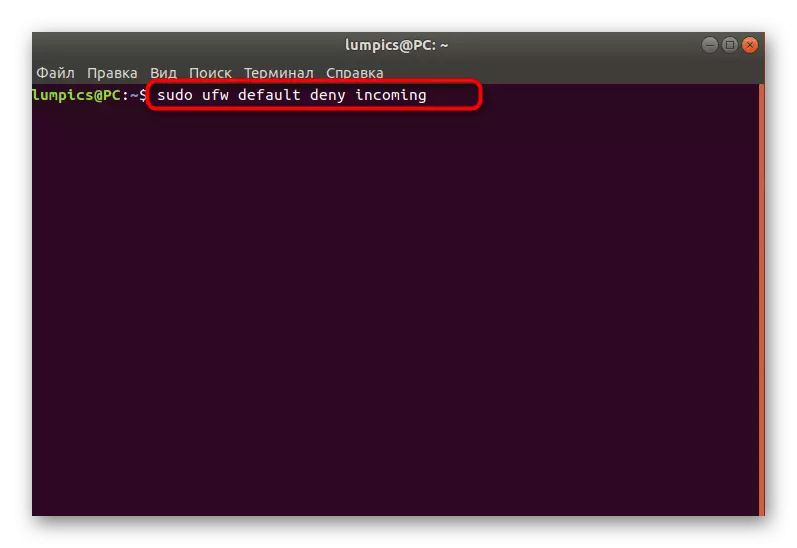
- Run the new session of the console and enter the Sudo UFW Default Deny Incoming command. Activate it by pressing the ENTER key. If you have already familiarized yourself with the syntax rules specified above, you know that this means blocking all incoming connections.
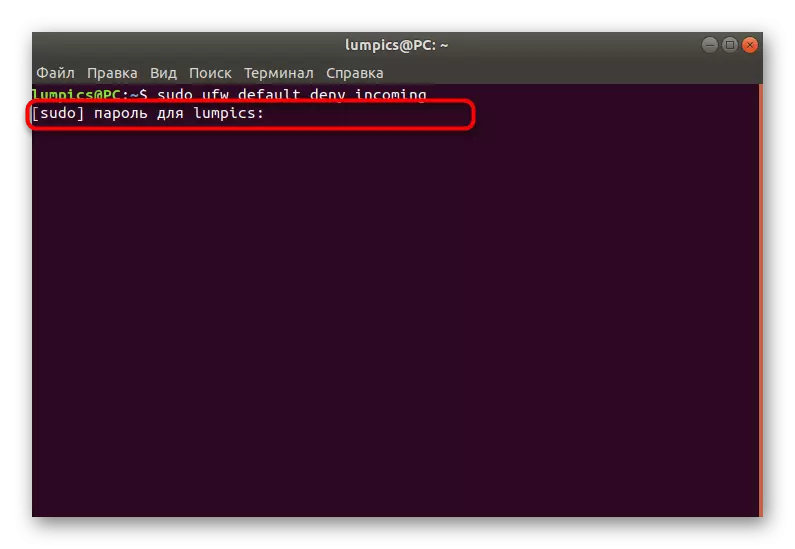
- In mandatory, you will need to enter a superuser password. You will specify it every time when you start a new console session.
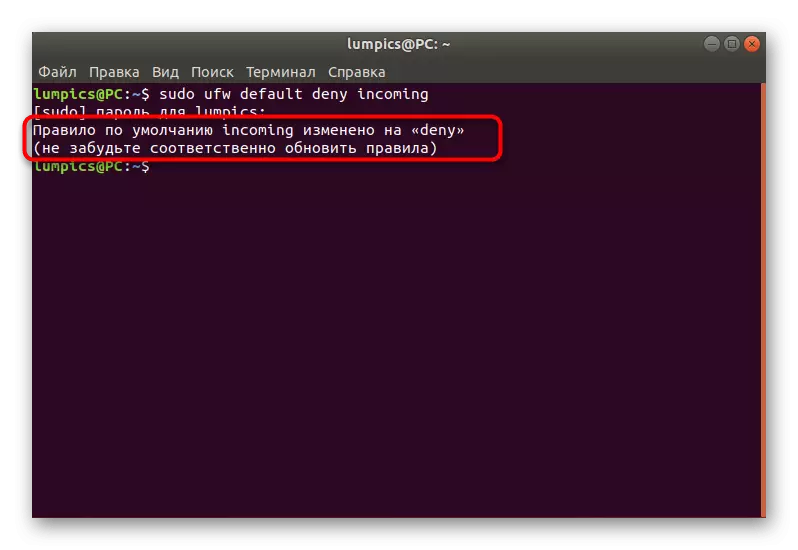
- After applying the command, you will be notified that the default rule entered into force.
- Accordingly, you will need to set the second command that will resolve outgoing compounds. It looks like this: sudo UFW Default Allow outgoing.
- Once again a message appears on the application of the rule.


Now you can not worry about the fact that any unknown incoming connection attempts will be successful and someone will be able to access your network. If you are not going to block absolutely all incoming connection attempts, skip the above rule and move to the creation of your own, having studied the next step in detail.
Step 4: Adding your own rules of the firewall
Firewall rules - the main adjustable option for which users and use UFW. We will consider an example of permission from access, as well as do not forget about the blocking by ports now, look at the OpenSsh tool. To begin with, you need to remember additional syntax commands responsible for adding rules:
- UFW ALLOW_name_
- UFW Allow Port
- UFW Allow Port / Protocol
After that, you can safely start creating permissive or prohibitive rules. Let's deal with each type of politician in order.
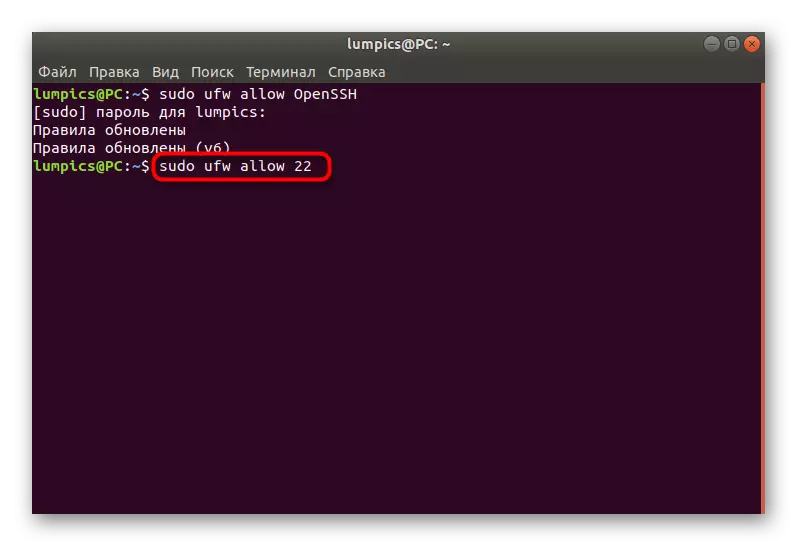
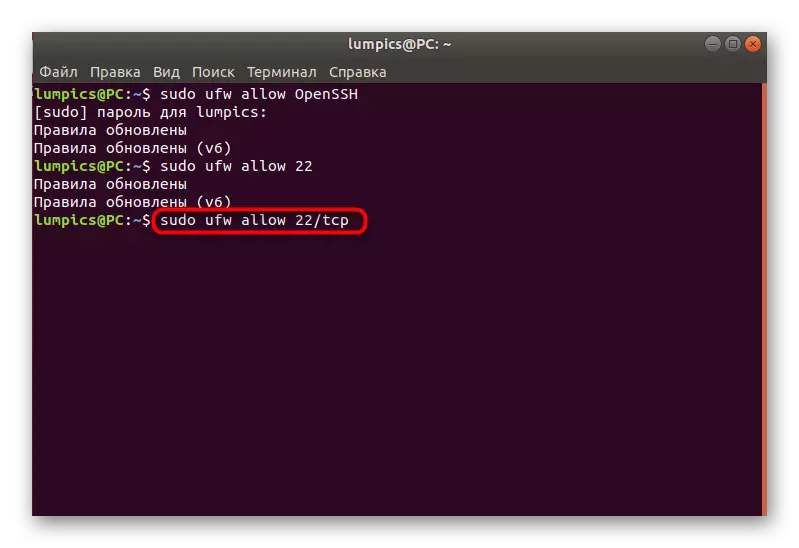
- Use Sudo UFW Allow OpenSSH to open access to the service ports.
- You will be notified that the rules have been updated.
- You can open access by specifying the port, not the name of the service name, which looks like this: sudo Ufw Allow 22.
- The same thing happens through the port / protocol - Sudo UFW Allow 22 / TCP.
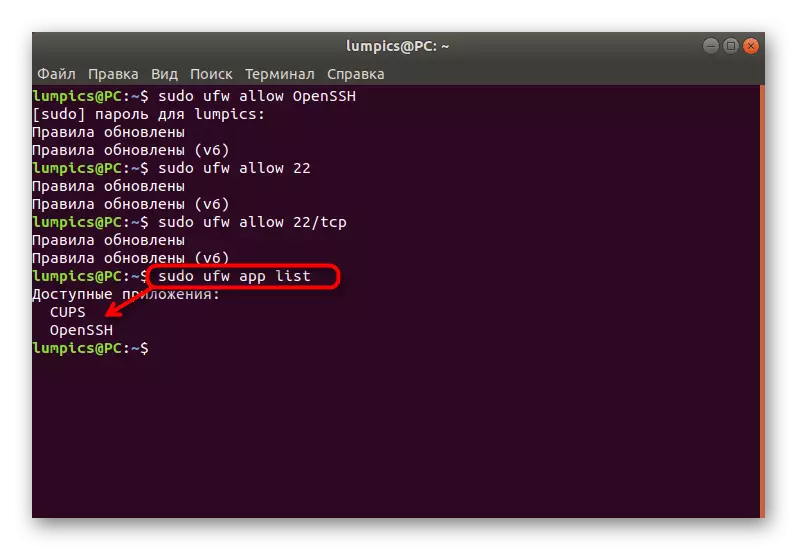
- After making the rules, check the list of available applications by entering the Sudo UFW App List. If everything was applied successfully, the required service will appear in one of the following lines.
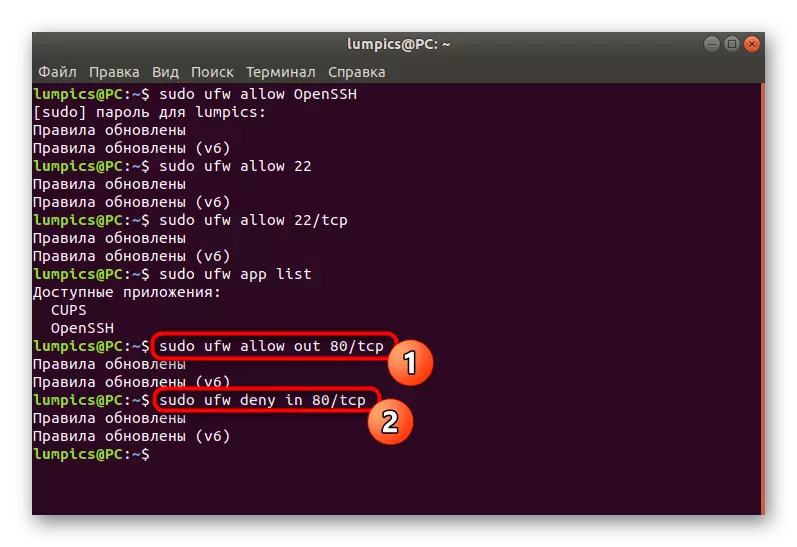
- As for permissions and prohibit traffic transmission over ports, this is done by entering the UFW Allow syntax direction. In the screenshot, you then see an example of the resolution of outgoing traffic on the port (Sudo UFW ALLOW OUT 80 / TCP), as well as prohibiting policies for the same direction in the part (Sudo UFW DENY IN 80 / TCP).
- If you are interested in an example of adding a policy by entering a wider syntax designation, use the UFW Allow Proto example protocol from IP_ Software to IP_NAGE port_name.


Step 5: Installing Limit Rules
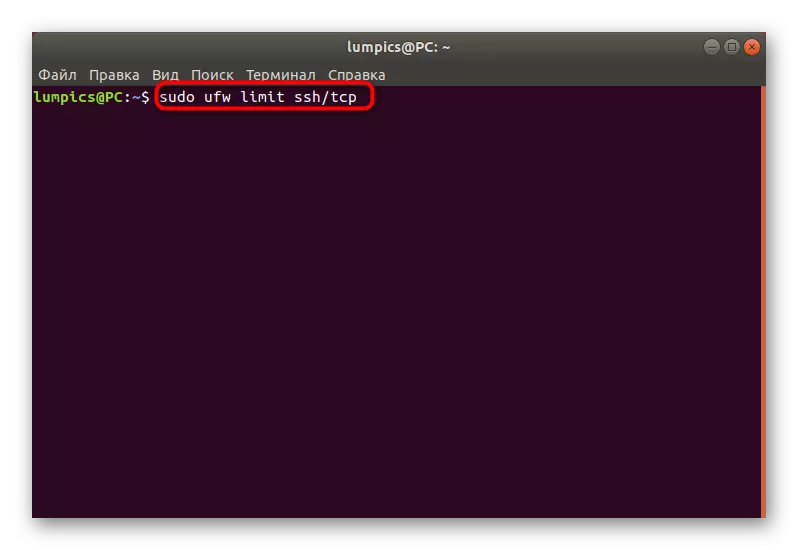
We brought the topic of installation of the Limit rules in a separate stage, since it will be necessary to talk more about this. This rule limits the number of connected IP addresses to one port. The most obvious use of this parameter is to protect against attacks that intend to passwords. Installation of standard policies like this:
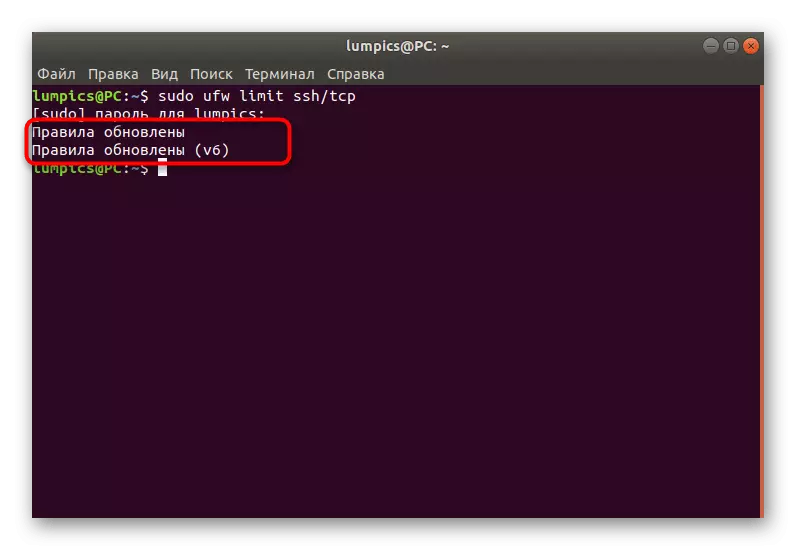
- In the console, sudo UFW Limit SSH / TCP and click on ENTER.
- Enter the password from your superuser account.
- You will be notified that the update of the rules has passed successfully.

In the same way, policies of restrictions and other applications are established. Use for this service name, port or port / protocol.
Step 6: View UFW status
Sometimes you need to watch the current status of the firewall not only in terms of activity, but also established rules. For this, there is a separate team that we have said earlier, and now we will consider it in more detail.
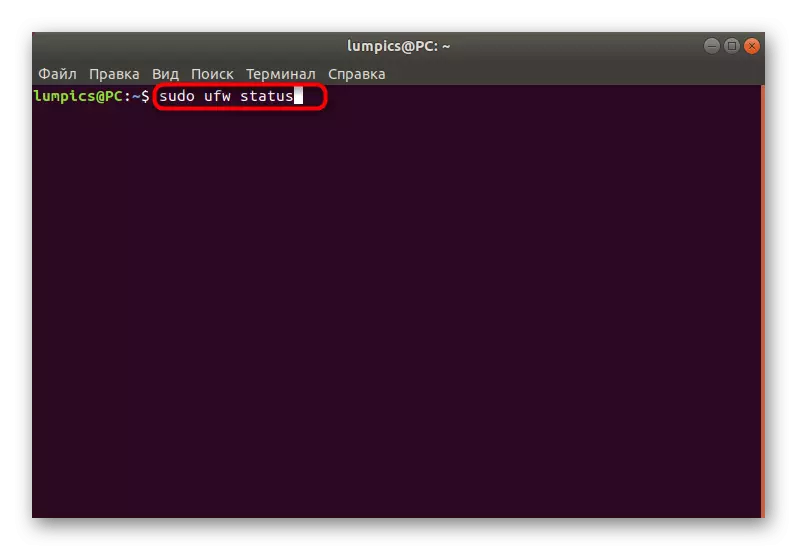
- Sunday sudo UFW Status to get standard information.
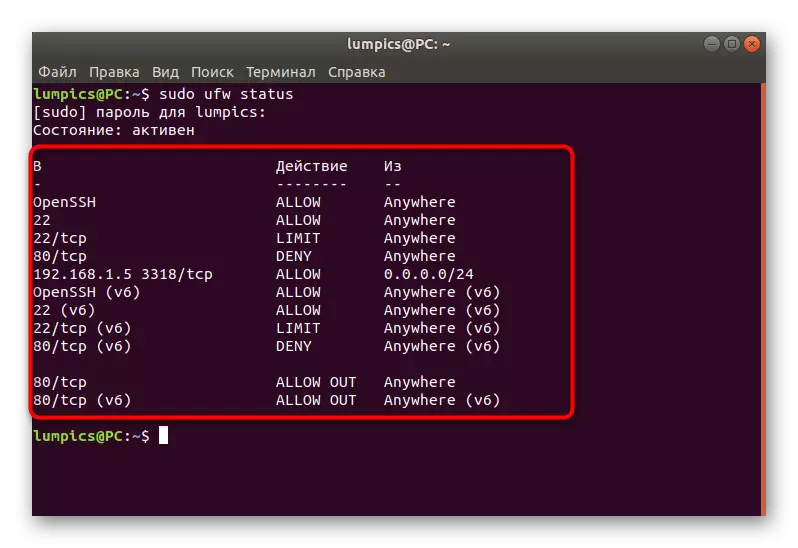
- New lines will display all set policies to addresses, protocols and service names. On the right shows actions and directions.
- More detailed information is displayed when using an additional argument, and the command acquires the type of Sudo UFW Status Verbose.
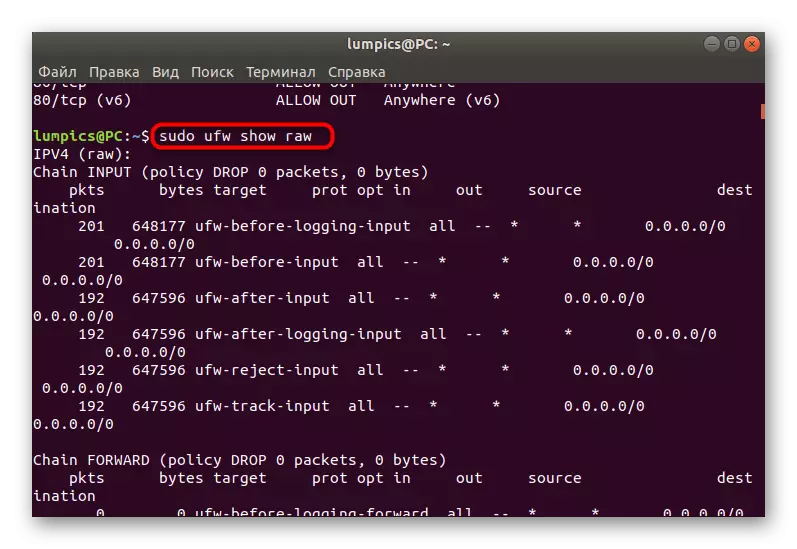
- The list of all rules in incomprehensible for beginners of the user is displayed through the sudo UFW Show Raw.

There are other options that displays certain information about the existing rules and state of the firewall. Let's briefly run on all of them:
- RAW - Shows all active rules using the iPTables submission format.
- Builtins - Includes only the rules added as default.
- Before-Rules - Displays policies performed before accepting a package from an external source.
- User-Rules - respectively, shows the policy added by the user.
- After-Rules is the same as before-rules, but includes only those rules that are activated already after making packages.
- Logging-Rules - Displays information about the events that are logged in.
- Listening - Used to view active (listened) ports.
- Added - involved when viewing recently added rules.
In the time you need for you, you can use any of these options to get the desired information and use it for your own purposes.
Step 7: Delete existing rules
Some users, having received the necessary information about existing rules, wish to delete some of them to establish a connection or set new policies. The faced firewall allows you to do this at any available moment, which is carried out like this:
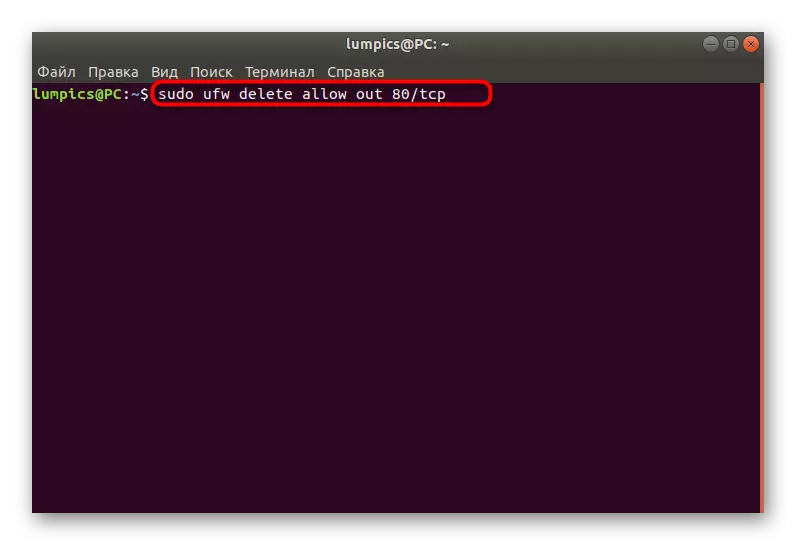
- Insert the Sudo UFW Delete Allow Out 80 / TCP command. It will automatically delete the rule allowing outgoing connections via port / protocol 80 / TCP.
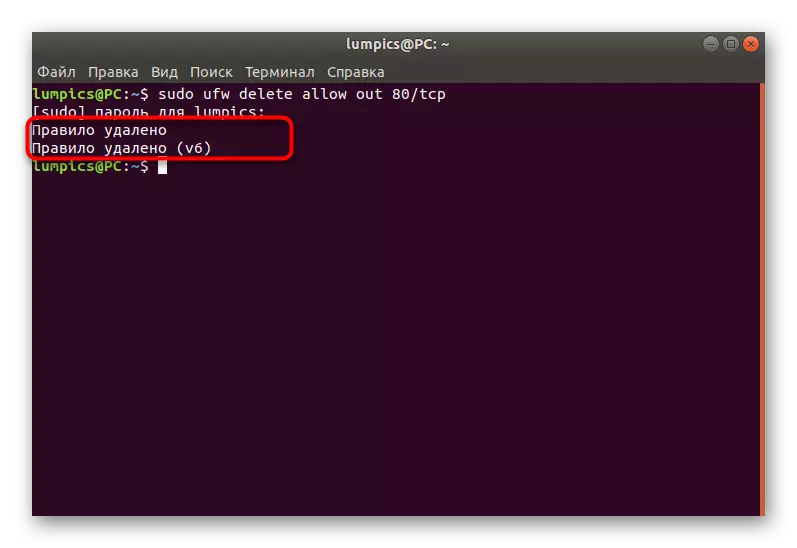
- You will be notified that the policy is successfully removed both for IPv4 and IPv6.
- The same applies to prohibitive connections, for example, Sudo UFW Delete Deny In 80 / TCP.

Use the status view options to copy the required rules and delete them in the same way as demonstrated in the example.
Step 8: Turning on Logging
The last stage of today's article implies an activation of the option that automatically will save the UFW behavior information in a separate file. It is necessary for not all users, but applies like this:
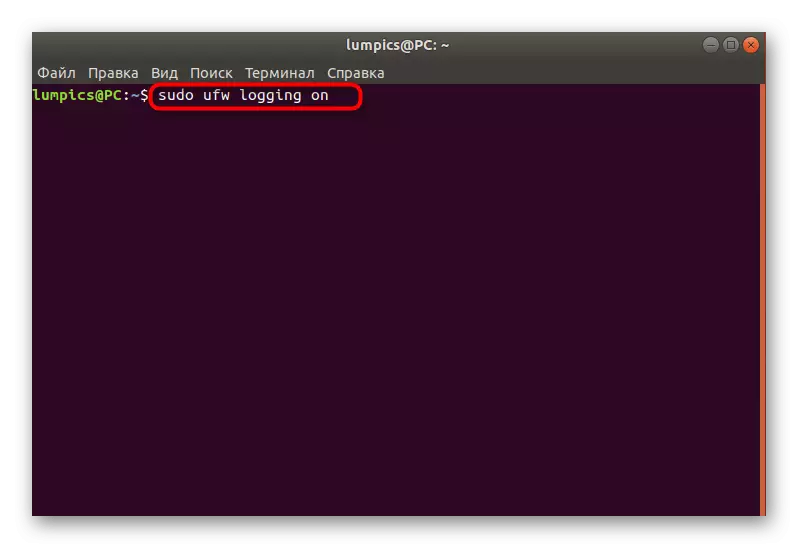
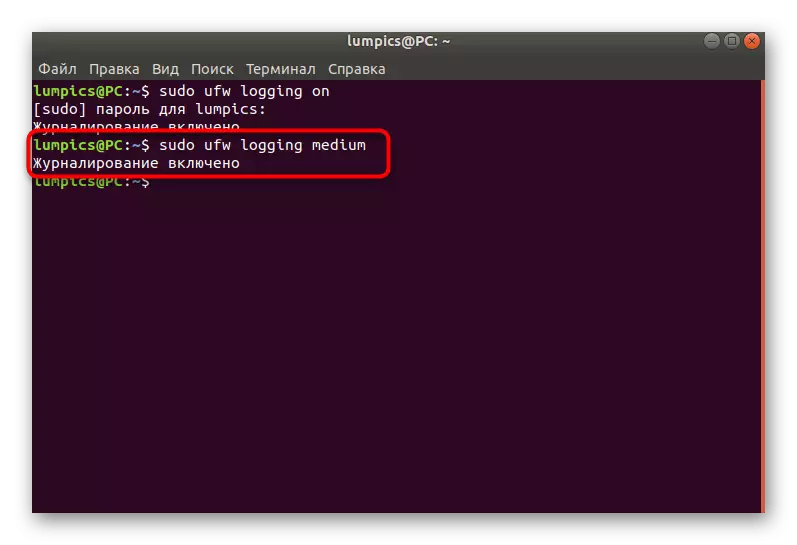
- Write a sudo UFW Logging ON and press ENTER.
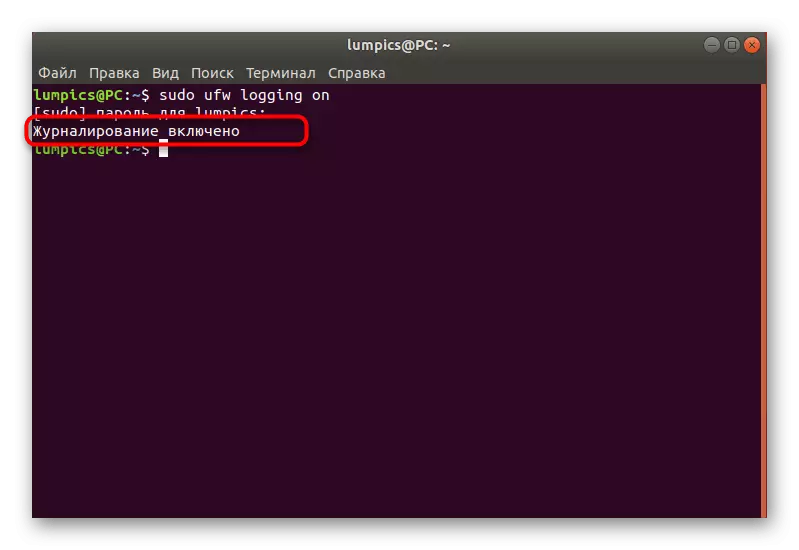
- Wait for the notice that the log will now be saved.
- You can apply another option, for example, Sudo Ufw Logging Medium. There is still a Low (saves information only about blocked packages) and High (saves all information). The average option writes into the magazine locked and allowed packets.
Above you studied as much as eight steps, which are used to configure the UFW firewall in the Ubuntu operating system. As you can see, this is a very simple firewall, which is even suitable for novice users due to the ease of exploration of syntax. UFW can still be bolder to call a good replacement standard IPTABLES if it does not suit you.