

Viber is currently one of the most functional services in its niche, which means that among the opportunities they provide are not quite familiar to many users, but very useful and in demand. The following article demonstrates how to implement one of them - the transfer of data on the location of its Android-device or iPhone through the messenger.
Location definition function in Viber
The ability to be implemented solely with the devices operating under the management of Android and iOS devices, the Viber program for Windows sending geolokation is not directly supported!
Before switching to the transfer of your geoposition through Viber to another person registered in the service, to ensure the efficiency of the operation, it is necessary to include in all modern android smartphones and iPhone software and hardware module for determining the location of the device, as well as provide the messenger access to this component.
- In order to turn on the geolocation module on the device, depending on the operating system managers:
- In the Android environment, follow the following instructions:
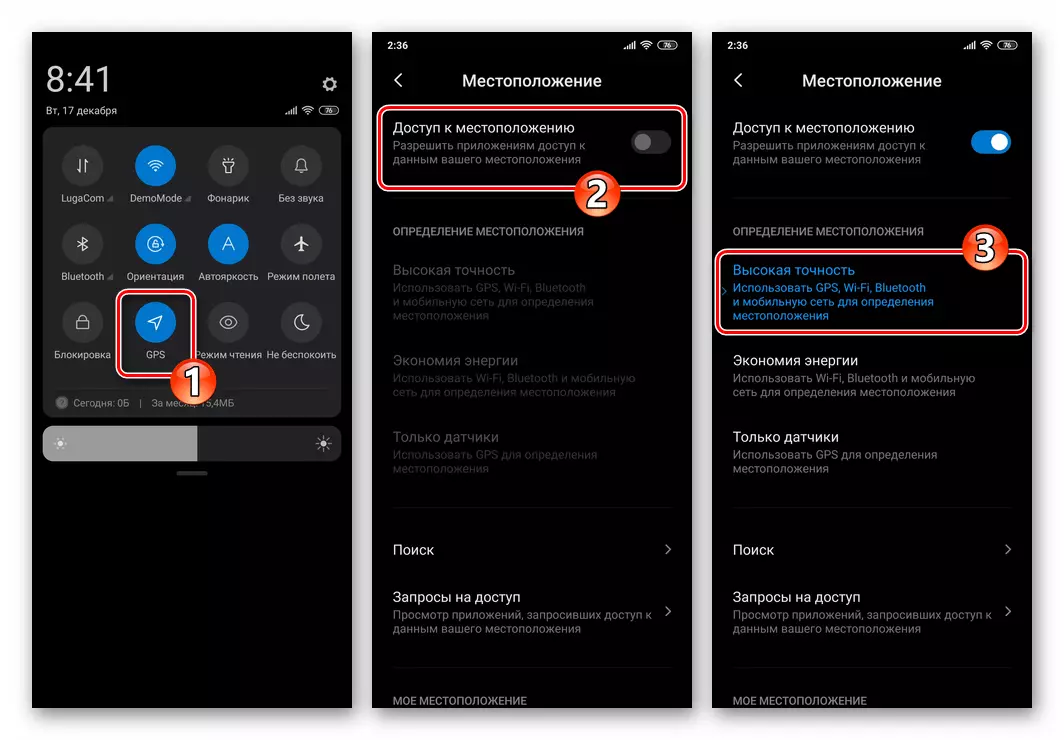
Read more: How to enable geolocation on Android devices
- If you are the owner of the iOS device, to activate geolocation services, use the recommendations from the material available on our website:
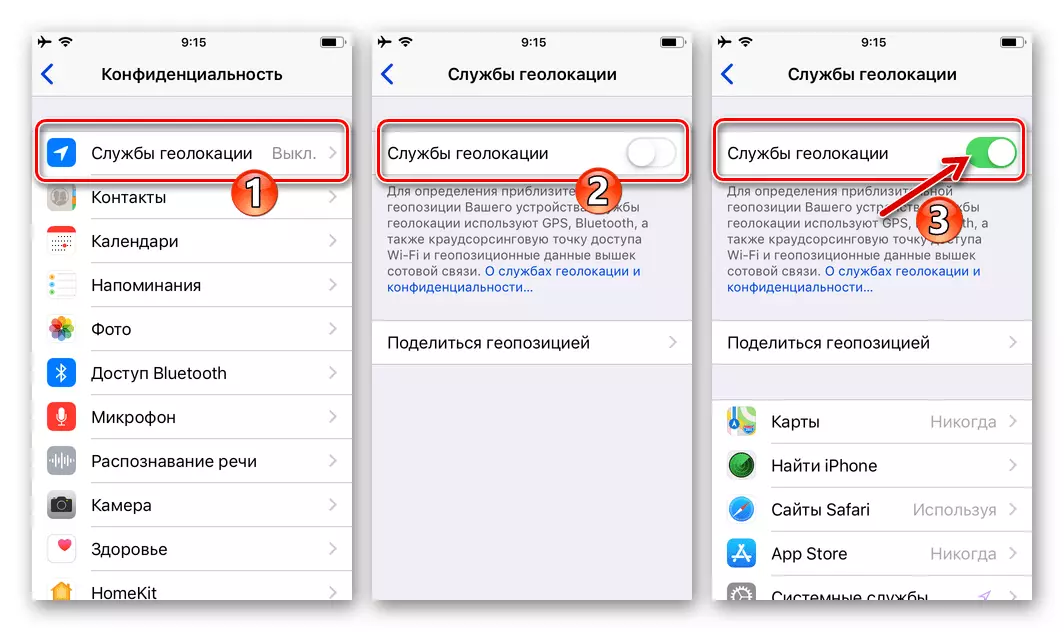
Read more: How to enable geolocation on the iPhone
- In the Android environment, follow the following instructions:
- Procedures for providing permission to use Mobile OS modules, including those responsible for the operation of geolocation, are described in the configuration of the Vaiber application on smartphones running the "green robot" and apple-device items.
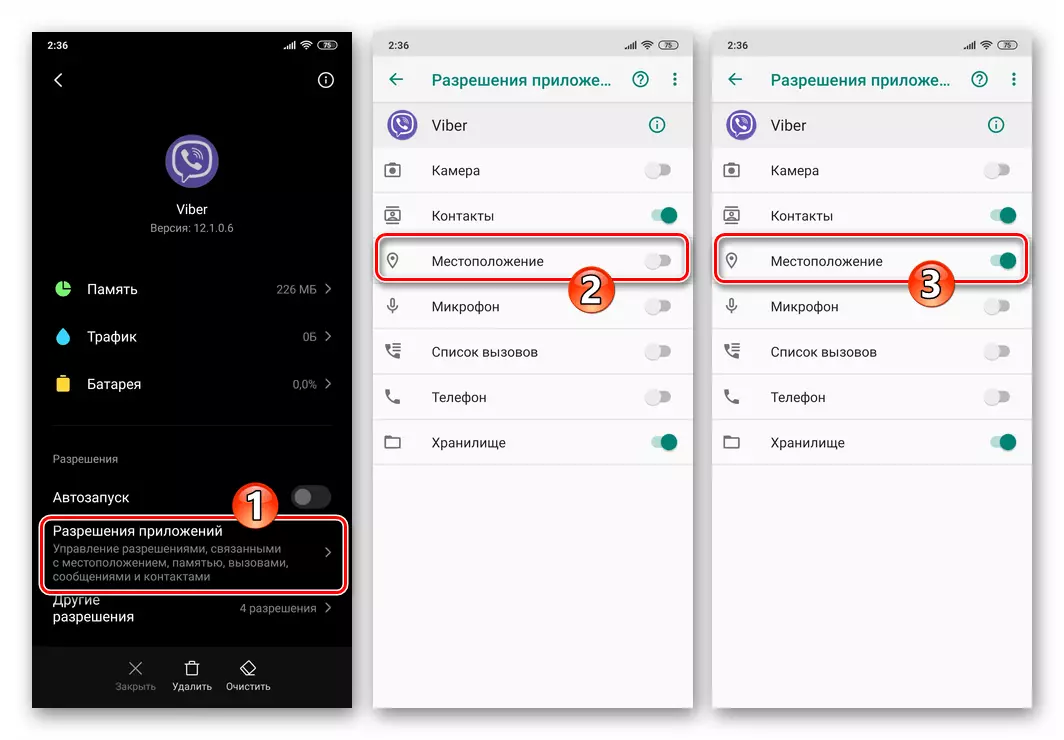
Read more: Customize Messenger Viber in Android and iOS environment
How to send geopaic to Viber for Android
Through Viber for Android, you can share data about your location with the interlocutor of one-time, as well as customize chat, including group, in such a way that each sent message will be accompanied by a geometry.Method 1: Unite Send Geoposition
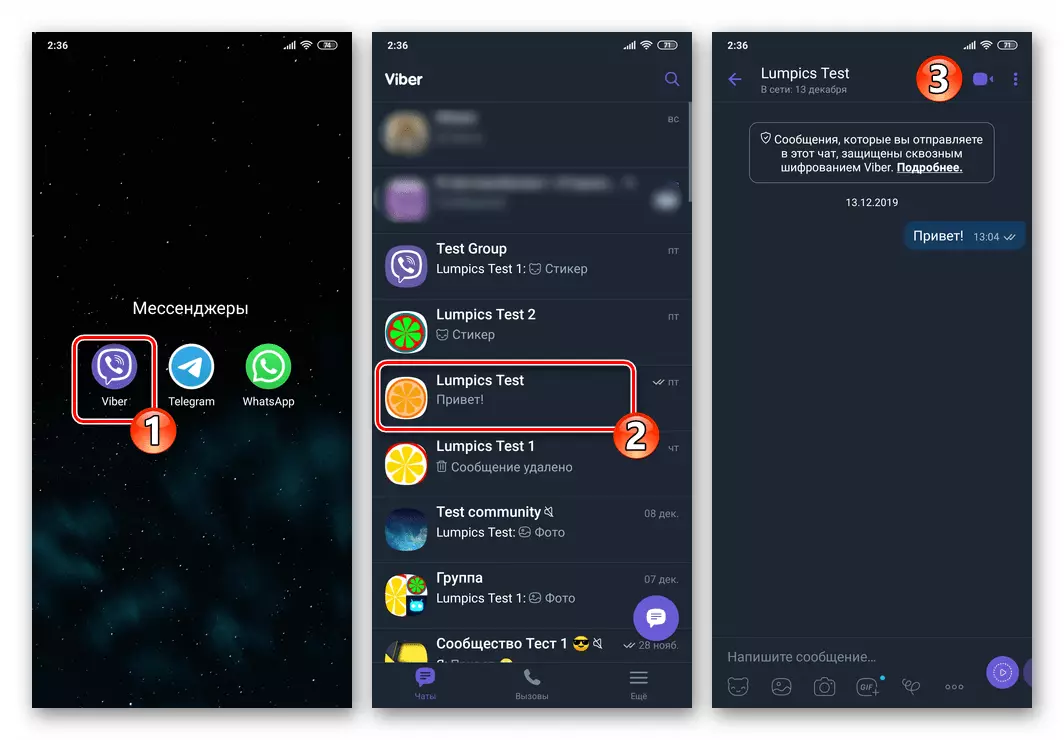
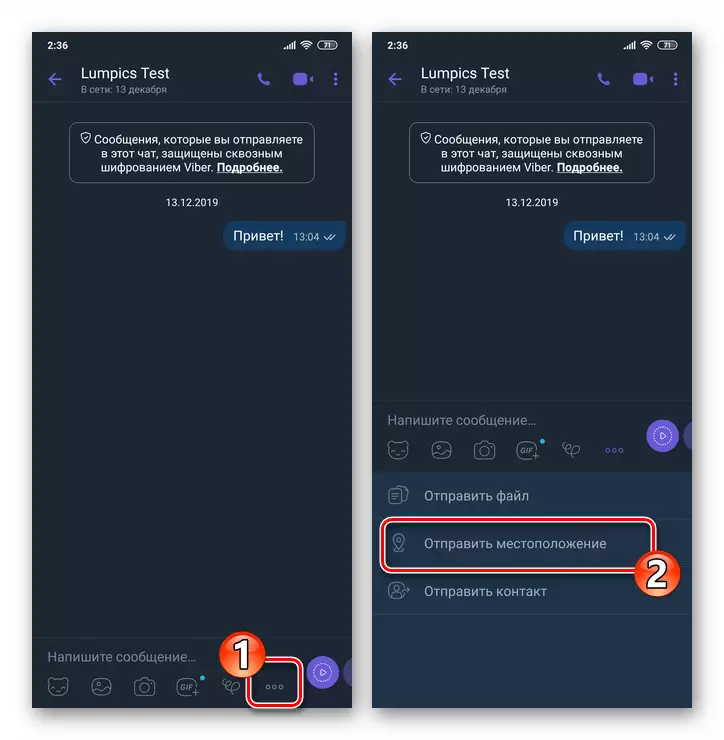
- Open the messenger and go to the chat where you must pass your current coordinates.
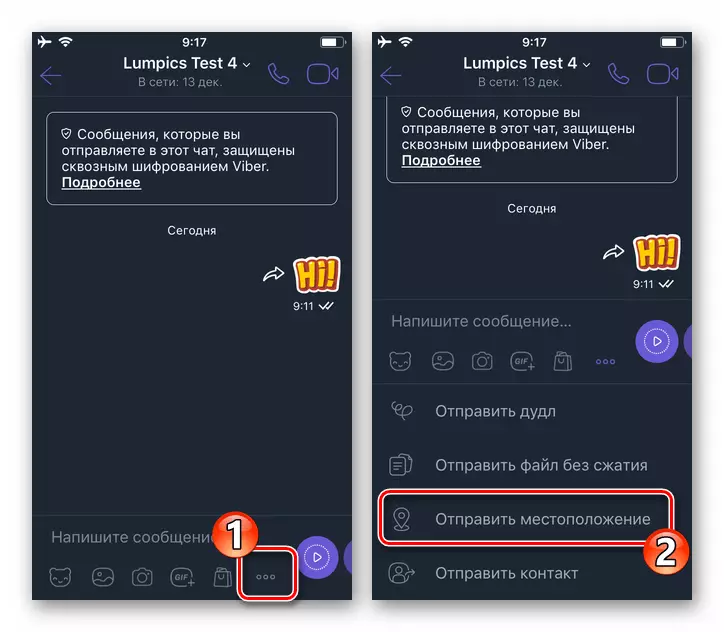
- In an attachment menu message located under the entry field, click on the "..." icon. Next, select "Send Location" in the list of available features.
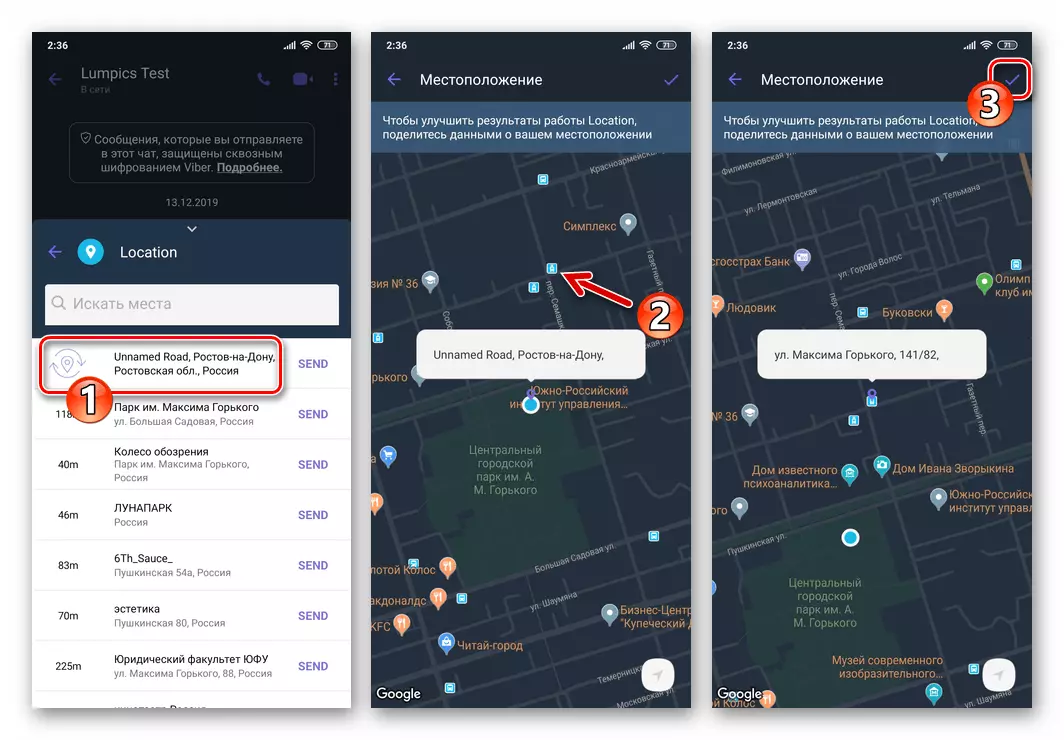
- In the address list displayed on the screen, the first item will display information about the current (in the opinion of the messenger) of your device's geopositions and further the dots on the map. If the data defined by the application is not entirely accurate, you can touch the area with them and adjust the installation by setting the mark on the opened screen with the card. To complete the action, tap the check mark at the top of the screen on the right.
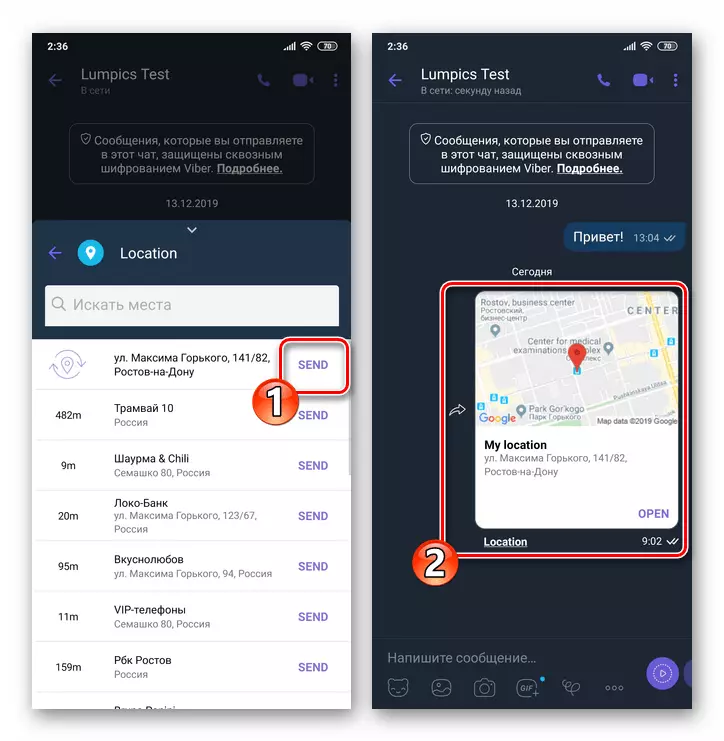
- Touch "Send" to the right of the sent information, as a result of which they will instantly transferred to the interlocutor.
Method 2: Geometers for all messages
- Open the chat with the person who wish to transmit your geoposition simultaneously with sending each message, regardless of its type.
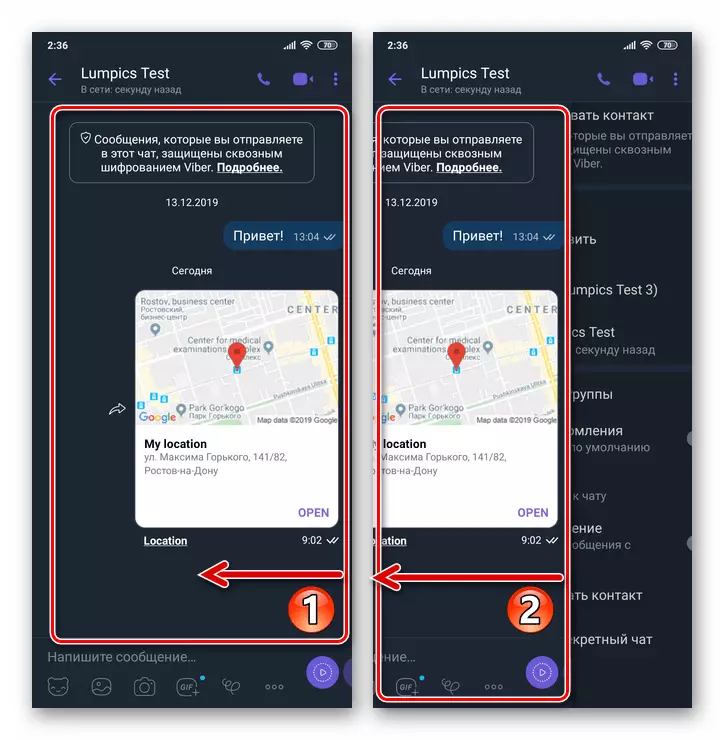
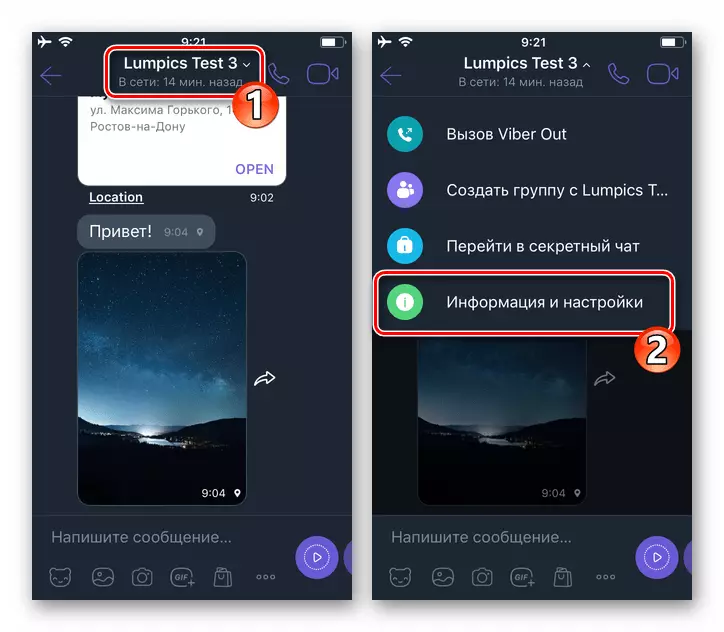
- Touch the dialog / group header
Or press three points at the top of the screen on the right and select "Information" in the menu
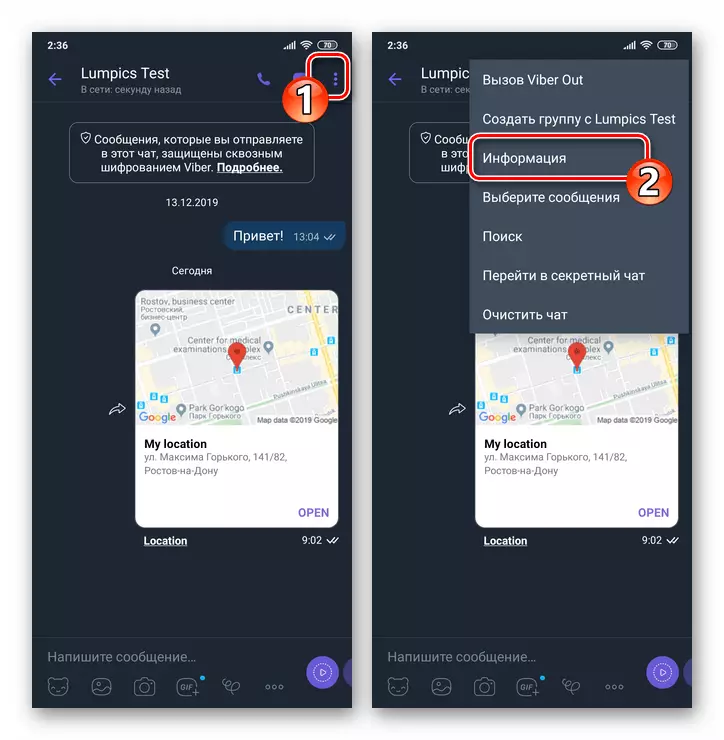
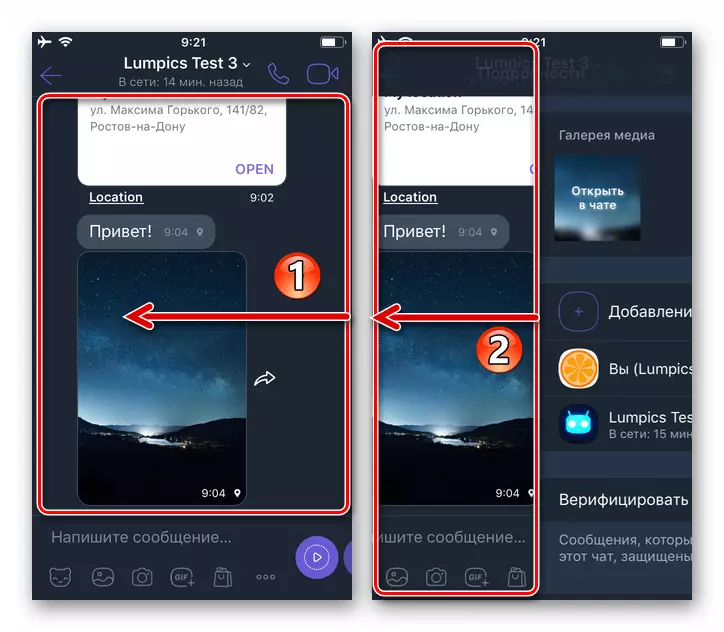
Or wipe the area with the history of the correspondence left.
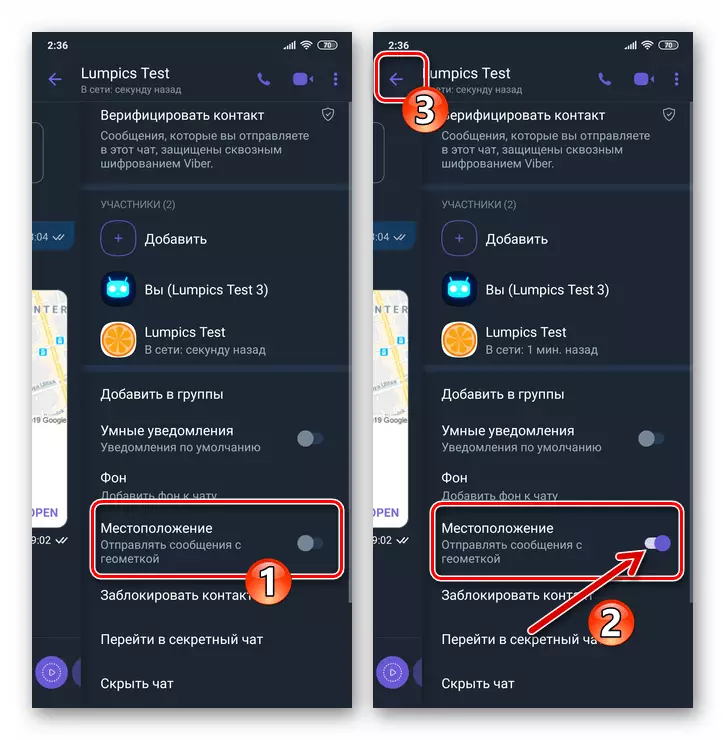
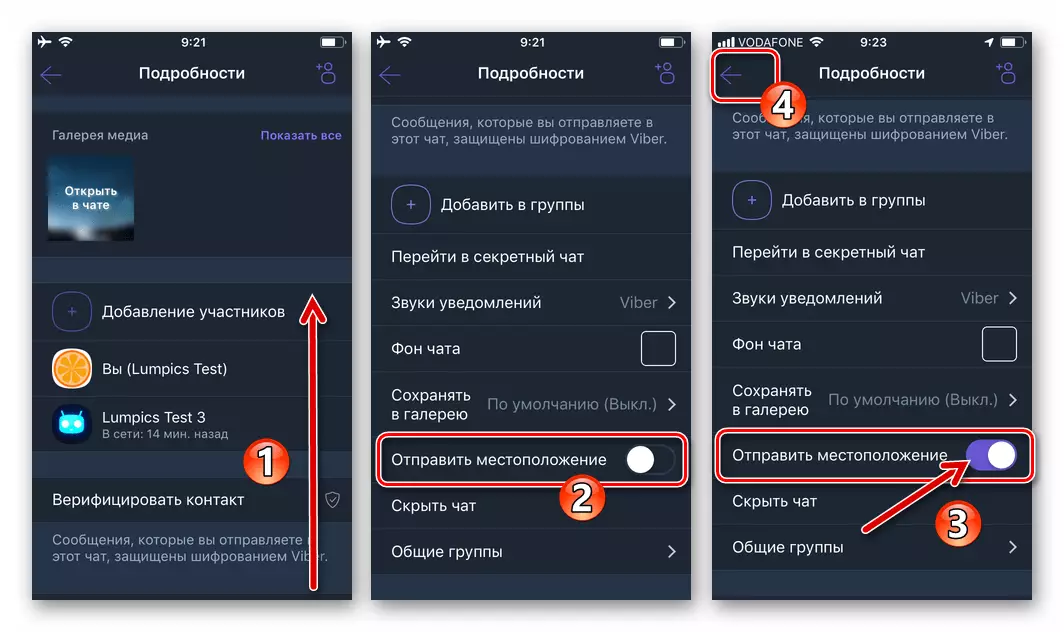
- Any of the Action Instructions specified in the previous paragraph will open a panel with chat information and its settings. Activate here Located opposite the name "Location" Options Switch, then close the list of parameters.
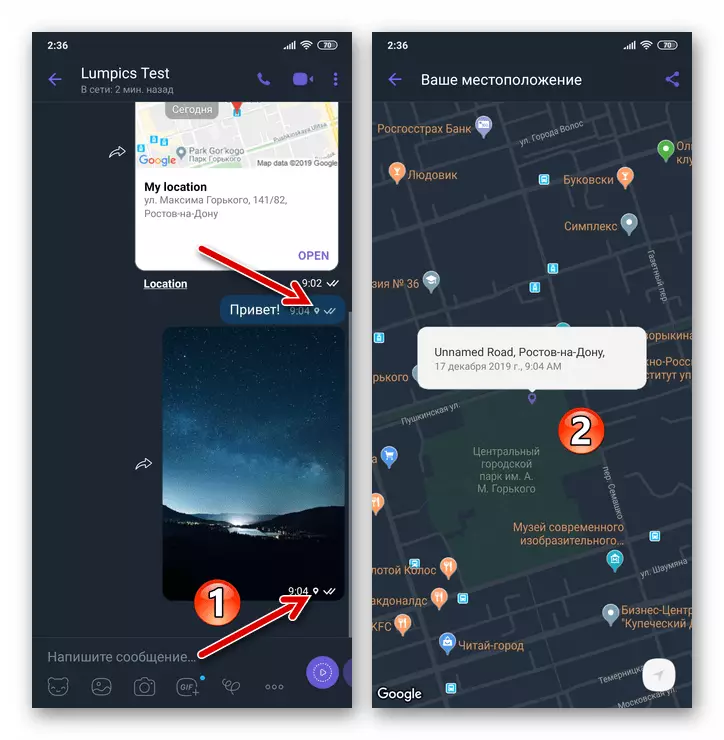
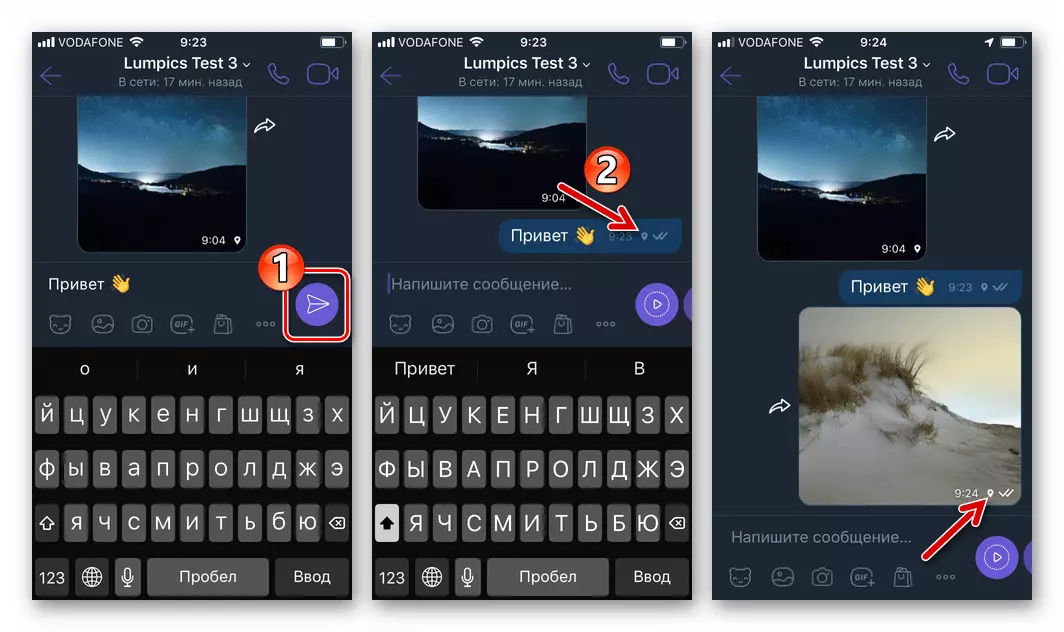
- From now on, in the field of each message sent by you next to the sending time, the "Geometric" icon - touching it, you or your interlocutor will open the demonstrating location of the device at the time of sending a message to the map.
How to send a geoposition to Viber for iOS
With the help of the iOS program installed on the iPhone program, as well as through the above version of the Android messenger, it is possible to transfer its geoposition to one by one, as well as ensure the shipment of the geometry to this or another companion to chat on a permanent basis.Method 1: Unite Send Geoposition
- Open the Vaiber program on the iPhone and go to the chat with the user-recipient user of your location.
- Touch the three points in the message input field of the message to the icons row. In the menu that opens, select "Send Location".
- Next, tap "Send geolocation", after which the task is voiced in the title title turns out to be solved.
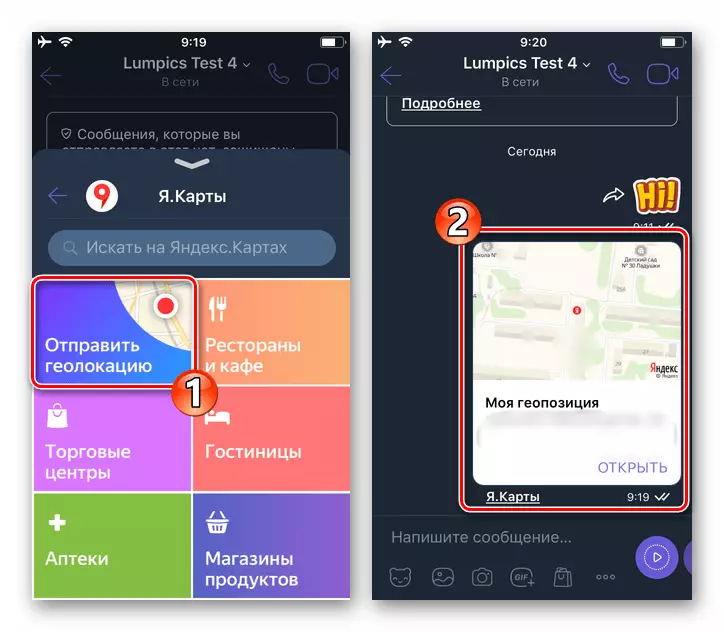
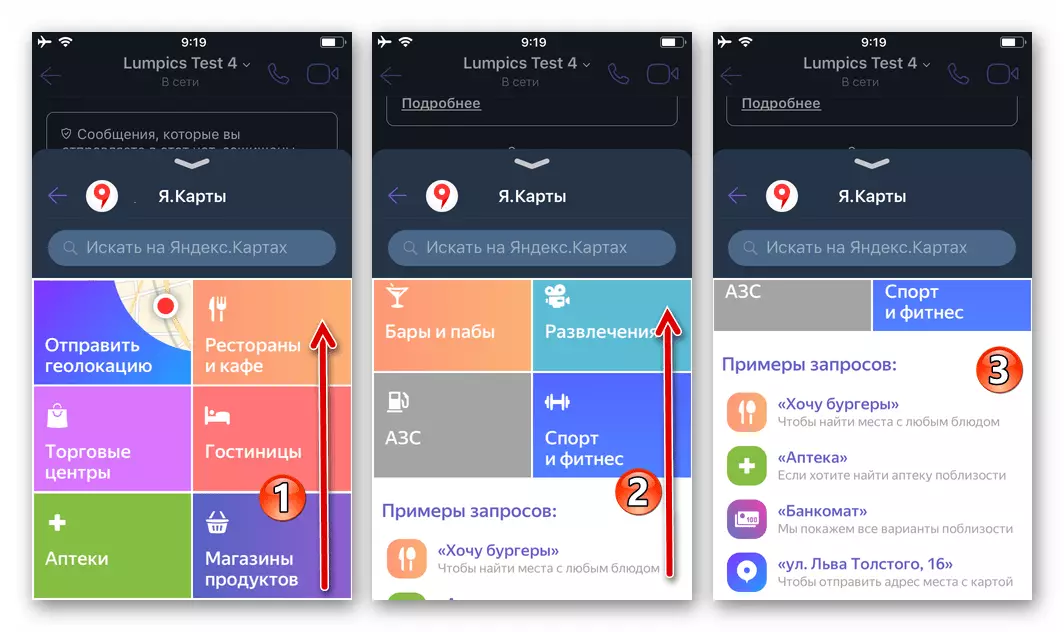
In addition to information about its own location, the coordinates of the infrastructure objects located in close proximity to you, touching one of the categories of categories, and then selecting the data you want.
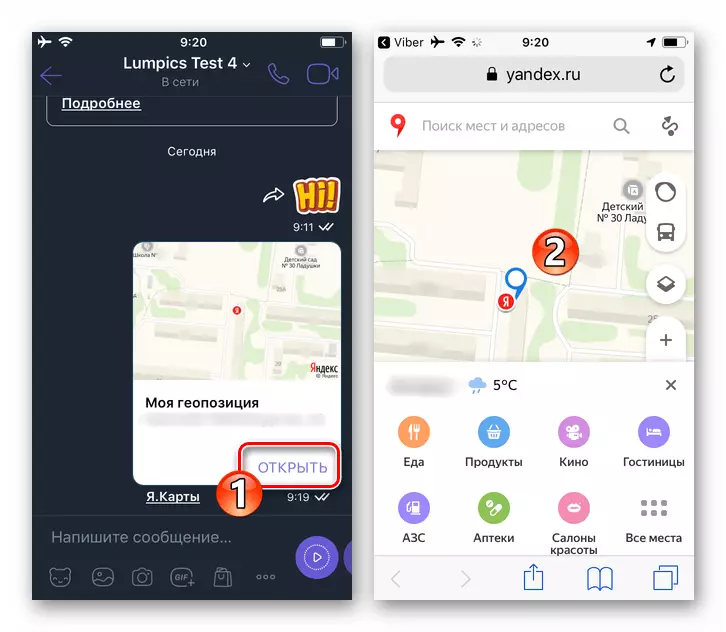
- As a result of selecting a particular geoposition when executing the previous point of instructions, the data is instantly sent to the addressee and upon receipt it will be able to view detailed information on the map, touching "open" in your posts.

Method 2: Geometers for all messages
- Run the messenger and open the dialogue or group chat, where you plan to send messages with automatically attached geometries.
- Go to the "Details" screen, taping the title of the conversation at the top of the screen and touching the "Information and Settings" in the menu that opens.
In addition, the list of chat settings may be caused by losing the area with messages to the left.
- Scroll through the list applicable to the correspondence options and activate the switch located opposite the name. Next, you can return to the chat.
- From now on, a geometka will be attached to all the dialogue or group chat described in the manner described above, which is confirmed by the display of the corresponding icon to the left of the message status. Tapping on the specified icon, the recipient will open the map where detailed information about your location.
Conclusion
Regardless of the OS used to access the Viber Mobile Device, sending data on its own location to the interlocutor in the messenger does not cause any difficulties and is available almost at any time. In the aspect of the accuracy of the definition of geoposition, the main role is plays not a messenger, but geolocation services operating on Android devices and iPhone.