

Sometimes users face the need to make new data into the printer driver - for example, when you want to configure it for a specific type of paper or add a new device to the package to support the old device. Today we will tell you what methods of solving this problem exist.
Add data to printer
Setting up the control interface of the software kit and manipulation with its files is differ fundamentally, so each option will be considered separately.Method 1: Driver Setup
Configuring the softe of the printing device is a fairly simple task. The main complexity lies in the diversity of service software interfaces from different manufacturers, as well as the lack of Russian localization in some of them. It is not possible to consider all possible combinations within this article possible, therefore, for example, you will limit ourselves to the Canon Manufacturer Printing Equipment Control Panel.
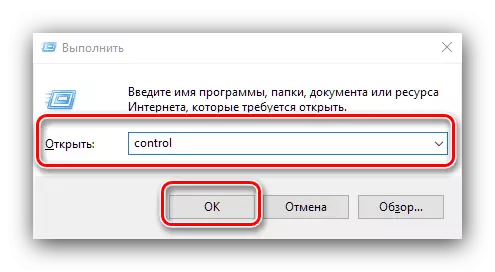
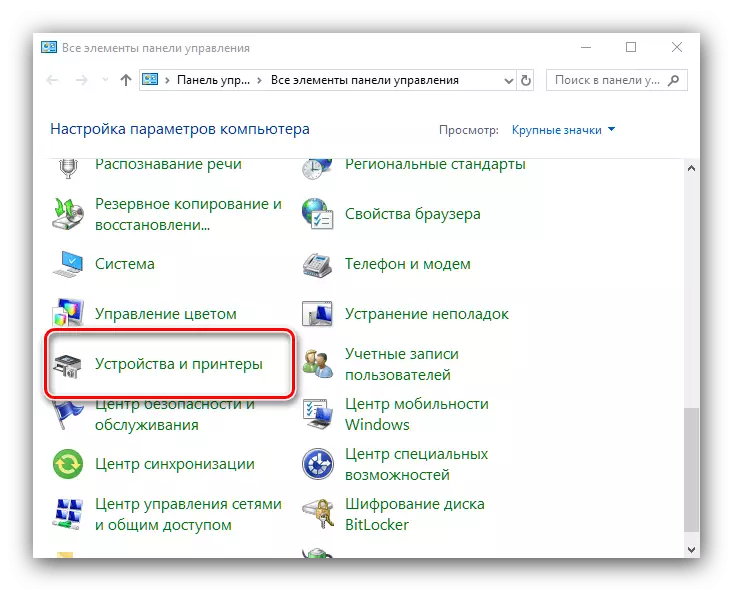
- Open the "Run" by pressing the Win + R keys. Enter the CONTROL command and click OK.
- In the "Control Panel", select "Devices and Printers".
- Find the desired printer, then select it and press the right mouse button. In the context menu, select the option "Print Setup".
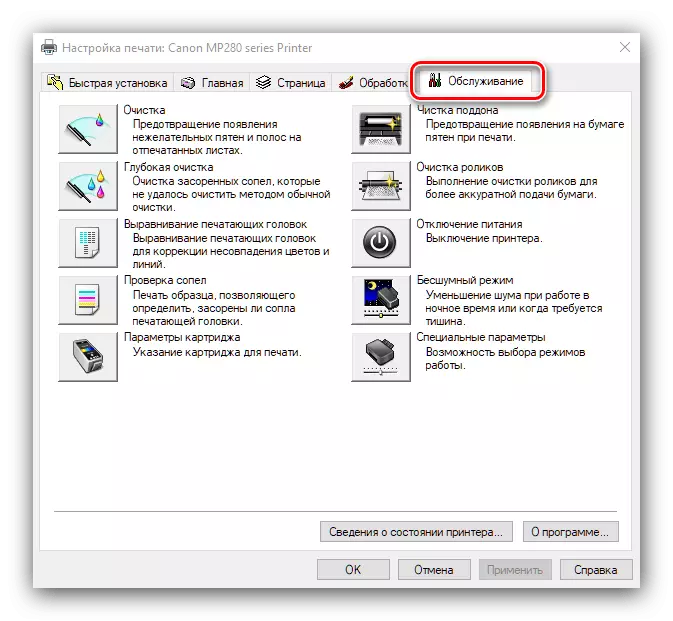
- The interface of the service software canon allows you to finely configure the behavior of the device. Briefly consider the available tab options:
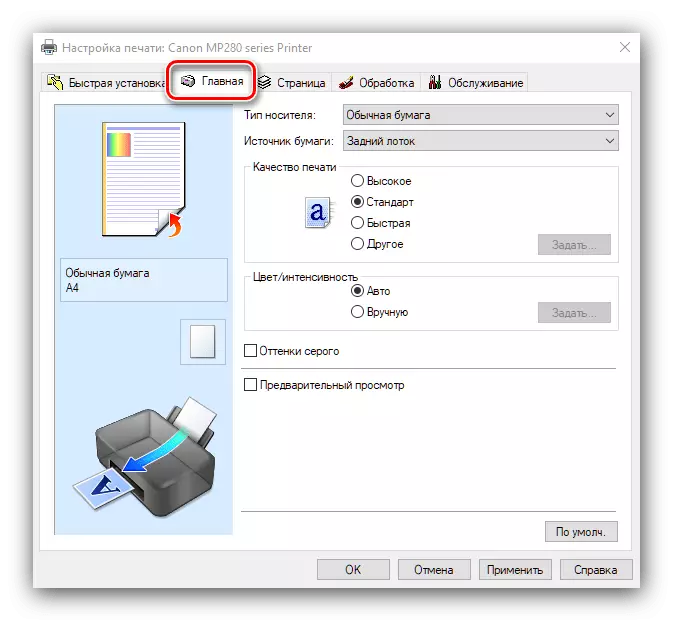
- "Fast Installation" - You can configure all the necessary parameters to once;
- "Home" - duplicates the capabilities of the previous tab;
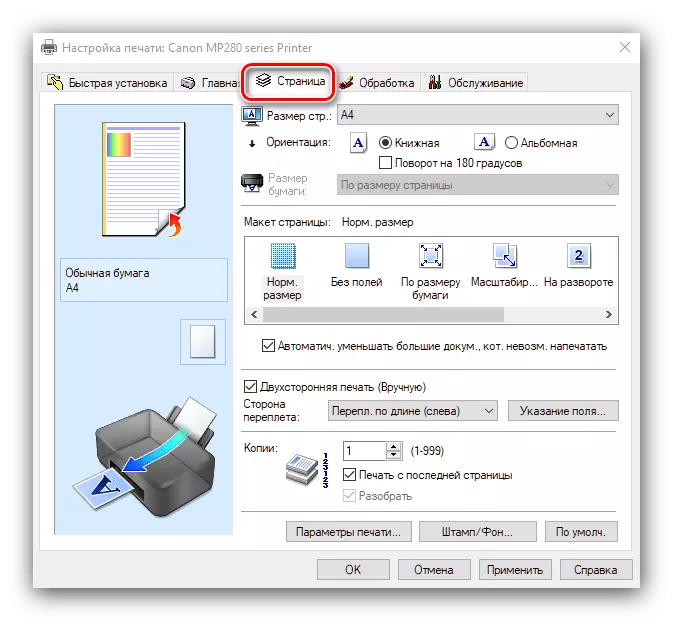
- "Pages" - contains the print options of individual sheets, such as specifying the paper type, layout configuration, the ability to add a stamp to sheet and so on;
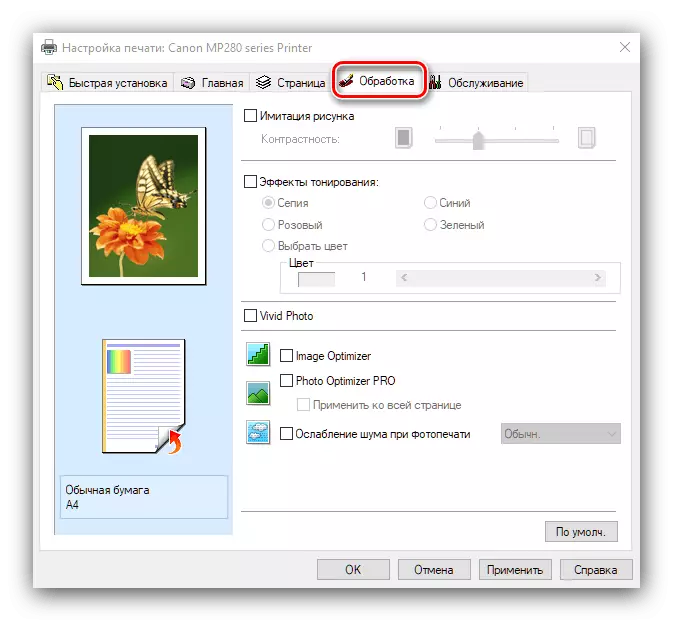
- "Processing" - the parameters for improving the quality of the printed photos;
- "Service" - contains in themselves the utilities of the printer, such as the launch of cleaning the nozzles of the print head or pallet, the choice of low noise operation mode and the ability to turn off the device.


After making all the required changes, close the setting tool. The reboot of the computer is usually not required.
Method 2: Editing Driver Data
If you need, for example, add unsupported printing equipment to a particular set of suitable service software, the task is proportionally complicated. First of all, preparatory measures should be taken.
Preparation
At this stage you need to do the following:
- Administrator's powers are needed to access the drivers directory.
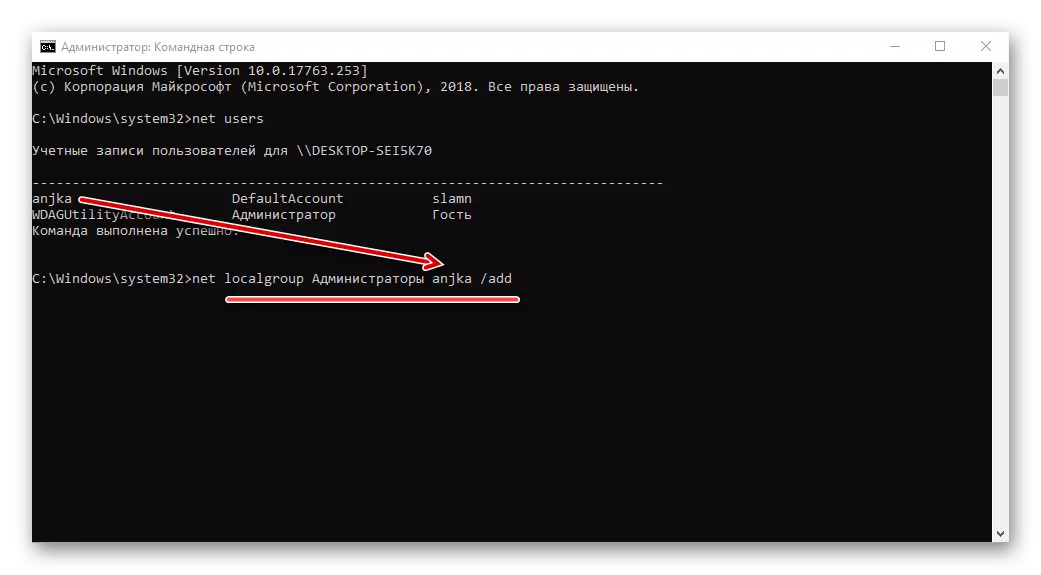
Lesson: how to get administrator rights in Windows 7 and Windows 10
- It will also be necessary to find out the exact data you want to enter into the driver. Most often it is an equipment ID.

Lesson: how to get equipment ID
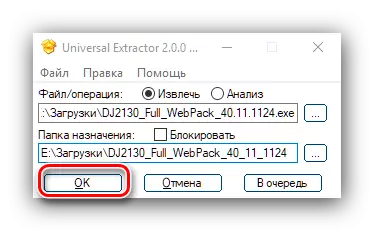
- For work it may be necessary to unpack the installer in EXE or MSI formats. The best solution for this purpose is Universal Extractor.

- It is also not superfluous to temporarily enable the display of file extensions.
Read more: Enabling file extensions display in Windows 7 and Windows 10
This preparatory stage is completed and you can move to the basic actions.
Editing drivers
A few words about what we will change and how. In any service software for peripheral equipment, there is a text file in an INF format, where, among other data, contains information about the device supported by the package. Therefore, we need to add the identifier of the desired printer to this information.
Important! Operation is possible only for already installed service software!
- Go to the directory in which the installation package of the service software is located. The latter will be in the form of a zip archive or one of two formats of executable files. Regardless of the type, the package will be required to unpack. In the first case, you can do without a third-party program.
Lesson: how to work with zip files
For the second option, UNIVERSAL EXTRACTOR is useful, about which we mentioned above. To use the program, simply select the desired document, right-click and select "Open to UniexTract".

In the Tools window, specify where you want to unpack exe, then press the "OK" button.
- Further actions depend on the software of which manufacturer is required to edit, since they all contain INF files in different places. Focus on expanding the document.
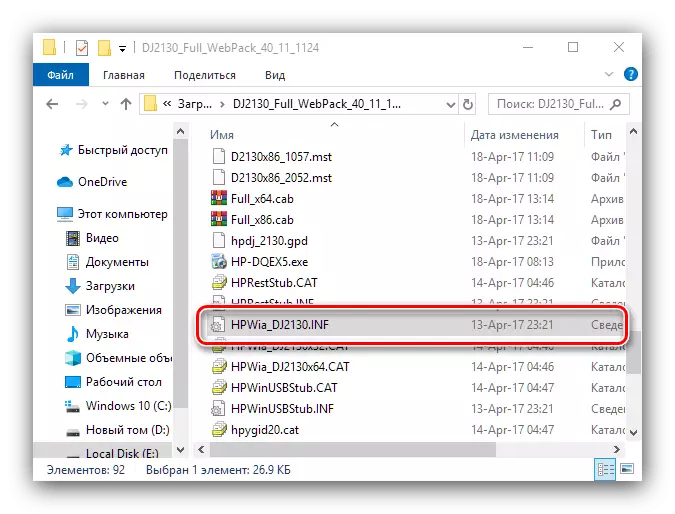
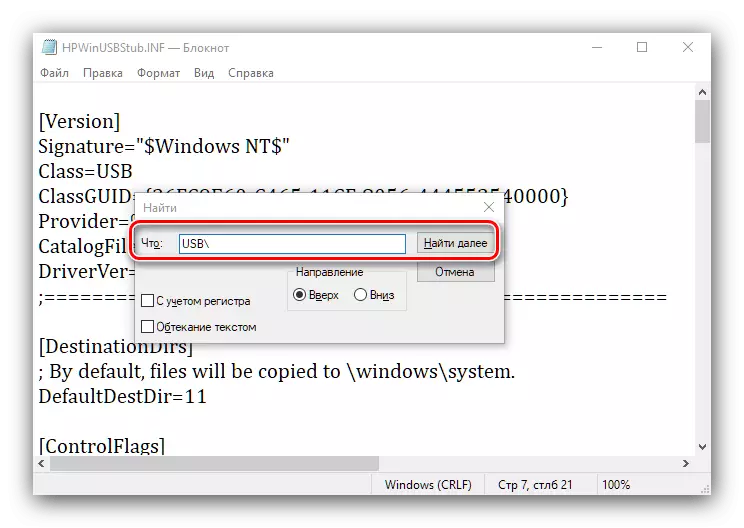
To open the INF file, it is enough just double-click on it with the left mouse button - these default documents are associated with "Notepad".
- After opening, use the CTRL + F key combination. This action will start the search box, enter the USB request in it (or LPT, if the previous one has not worked) and click "Find Next".
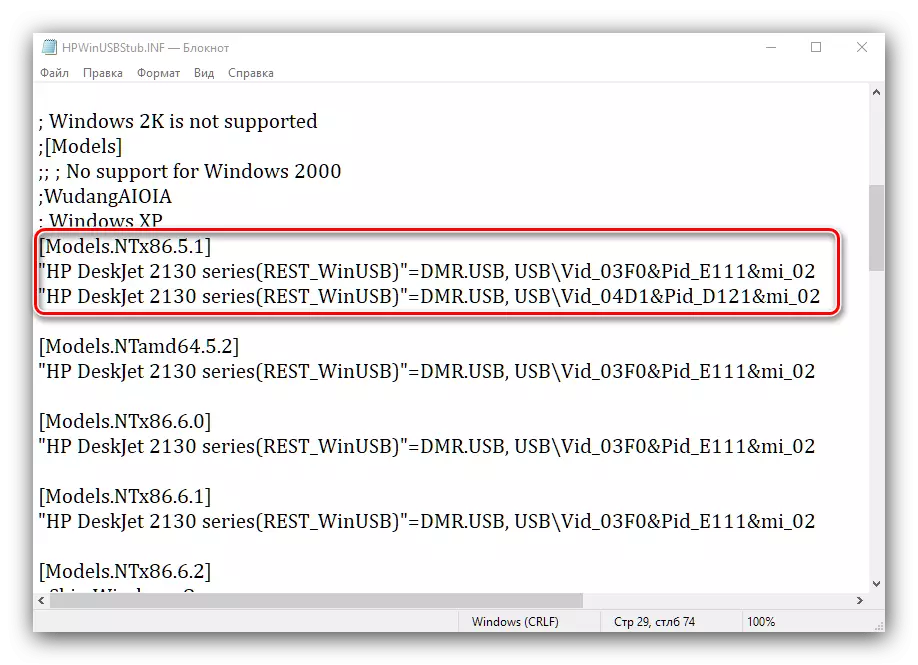
- The system will move you to the hardware ID list, which are supported by an editable set of software. Copy the last string, then move the cursor to its end and press ENTER. Insert the copied to the new line, then enter the ID of the desired device instead of the existing one.
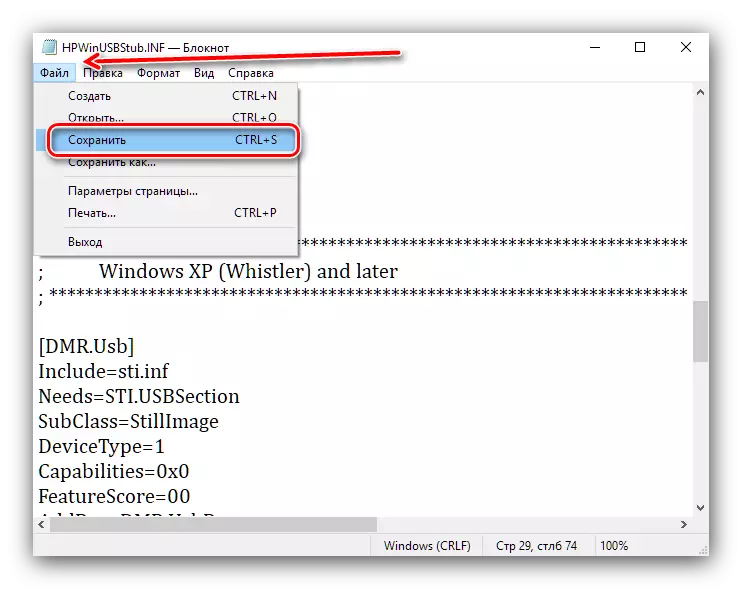
- Next, use the F3 key and repeat the operation for all the results found. Then use the file "File" - "Save", then close the "Notepad".
- To install the edited driver, you should use the instruction below.
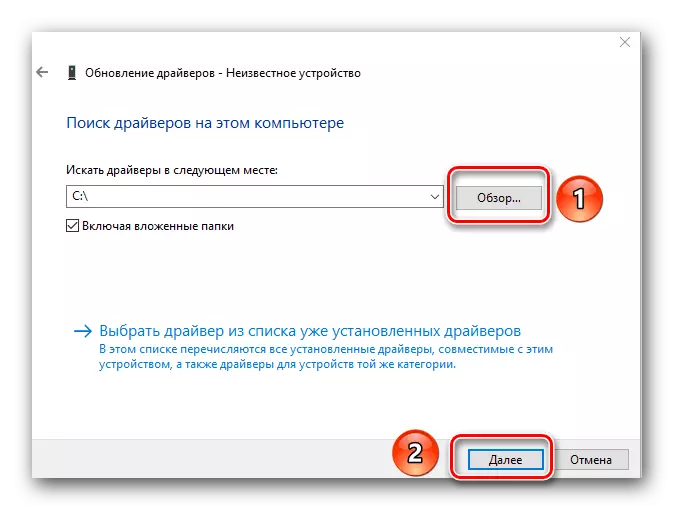
Lesson: Installing Drivers Standard Windows

After rebooting, try to connect to a PC or a laptop your old printer - most likely, it will earn normal.
Solving some problems
Both of the above methods do not always work correctly, but in most cases it is corrected.
There is no printer control panel
If in step 3 of the first method does not happen, it says about one of the two problems. The first is not installed on your computer on your computer, and the printer works on the basic kit in the system built into the system, in which there is no setup tools. The second - the manufacturer did not provide for such a component. The solution in the first case is obvious - this is the download and installation of a suitable kit, whereas in the second it remains only to contact the manufacturer.
When editing an INF file, changes are not saved.
Sometimes an attempt to save the changes entered in the INF leads to an error with the text "denied access". This means that you are editing a document protected from overwriting. Perform the following:
- Close the file without saving. Return to its location, then select the target document, click PCM and select the "Properties" item in the context menu.
- Next, go to the "General" tab and locate the block with the name "Attributes". If the "read-only" option is a tick, remove it.

Next, sequentially click "Apply" and "OK".
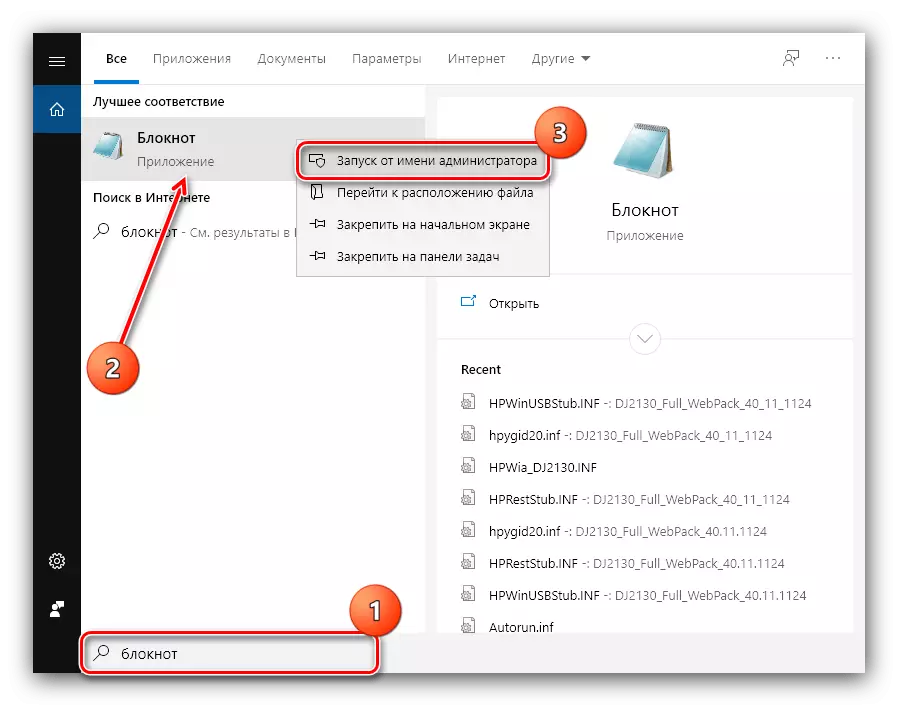
- Try to open the INF, edit and save it. If the problem is still observed, act as: close "Notepad", then use the search tool. On Windows 7 it is available from the "Start" menu, while Windows 10 is displayed in the taskbar. Enter a notebook in the string, then click on the found application and select "Open on behalf of the administrator" ("Run on the administrator").
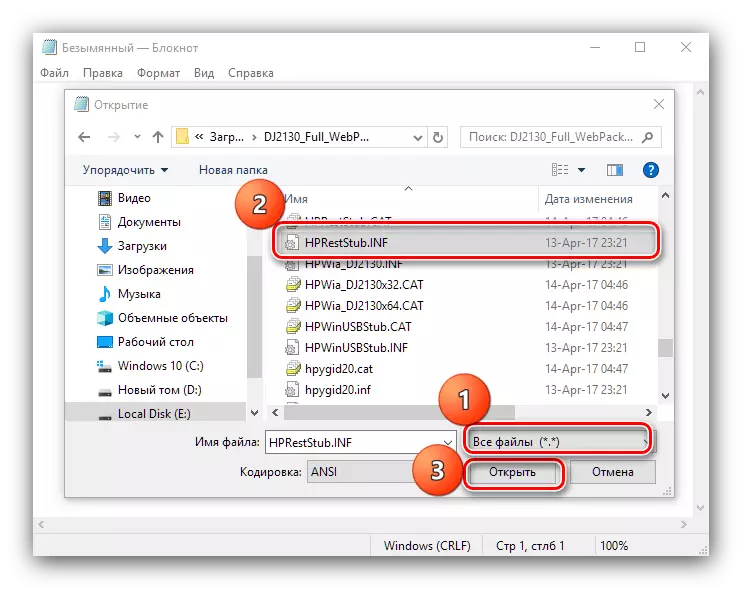
In the Application window, select File - "Open".

Through the "Explorer", find and open a problem document. You will need to translate recognition to "All Files" mode.

Make the necessary changes and save them, this time everything should pass without problems.
Conclusion
Now you know how to add data to the printer driver. As we see, the method is only two, but they are quite simple in performance even for a novice user.