

Usually, no additional icons are displayed on the desktop in Windows 10, but some users face green ticks. Accordingly, questions immediately arise that these are for badges, with which they are connected and how to remove them. Today we will try to answer these questions, tolding all the possible causes of these designations in the operating system.
We solve the problem with green ticks on shortcuts in Windows 10
The most obvious reason for the appearance of green ticks on individual files is an active synchronization mode that functions through the standard means onedrive in Windows. This tool is almost always activated by the user manually, for example, after completing the installation of the operating system, and is responsible for synchronizing objects with cloud storage and other connected computers. In the image below, you see small footnotes with which ondrive marks synchronized files.

You can solve this situation in two ways - by disconnecting the display of tick and synchronization deactivation. Each user itself determines which methods to choose, and we will analyze them in detail by presenting the relevant instructions. However, first we will stop at a remote method, which relates to the owners of the famous antivirus.
Method 1: Disconnection Norton Online Backup
If you have a solution from Norton on your computer, you most likely, the Online Backup feature is now active. It is responsible for creating backup copies of certain files with the subsequent possibility of their recovery. All those objects whose copies have already been created are marked with green tickles. You can solve this situation only by disconnecting the function itself if you do not need it. Read more about this in the official instruction, while moving on the following link.

Using Norton Online Backup to back up files
Method 2: Disable the display of green ticks
This method will suit to all those users who do not want to disable synchronization, but wants to get rid of green ticks, which from time to time appear near the shortcuts on the desktop. In such a situation, you will have to manually set several important parameters of personalization, which is happening:
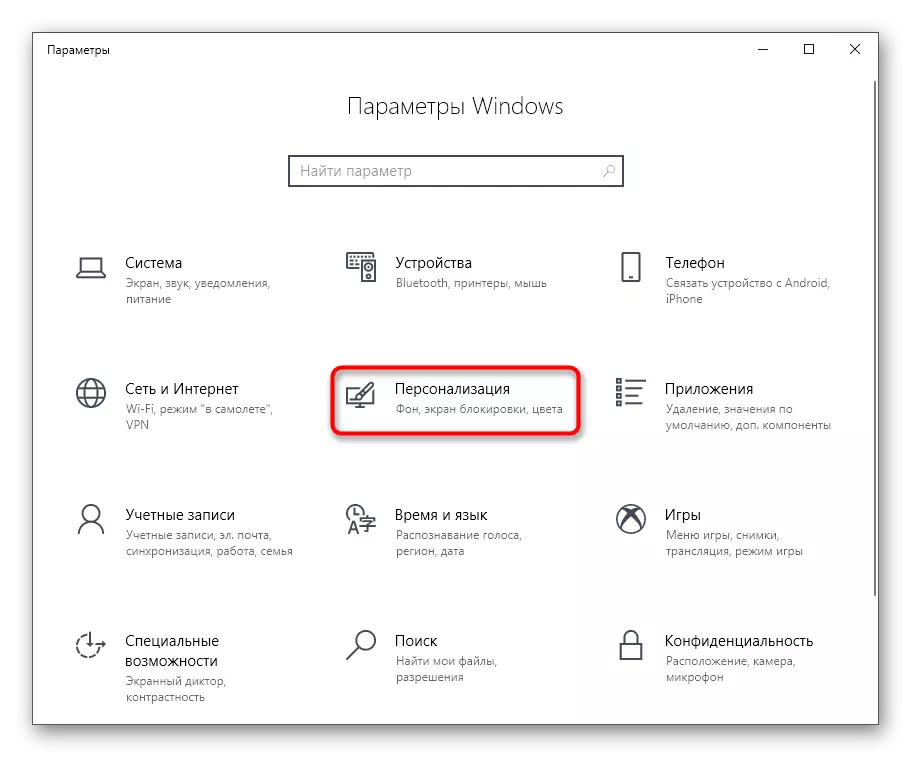
- Open "Start" and go to "Parameters".
- Here, select the "Personalization" section.
- Use the menu on the left to move to the category "Topics".
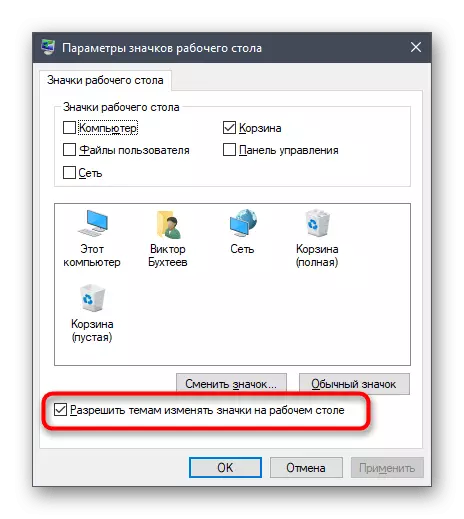
- In the "Related Parameters" section, click on the inscription "Desktop Icons Settings".
- In the displayed window, remove the checkbox from the "Allow topics to change the icons on the desktop" and apply the changes.
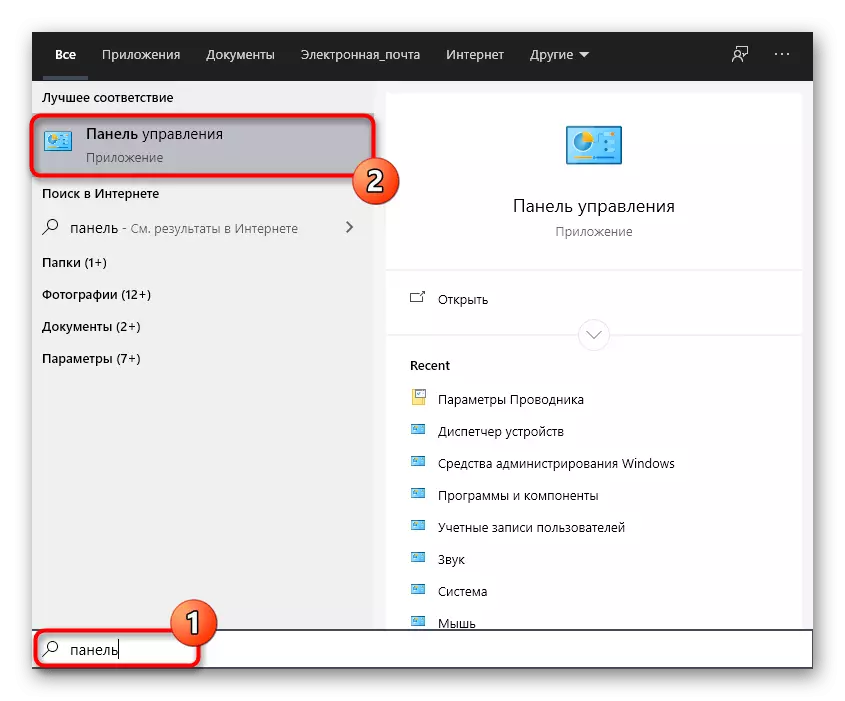
- After that, close the current window and move the "Control" application through the "Start".
- Go to "Explorer Parameters".
- Move the View tab.
- Run down the list, where to remove the checkbox from the "Show Notifications of the Sync Supplier", and then click on "Apply".
- Close the window and click PCM on an empty place on the taskbar. In the context menu that appears, select "Task Manager".
- Lay "Explorer", click on this line with the right mouse button and restart this process to update the desktop.


Now synchronization via ONEDRIVE will still be active, but at the same time notifying drawings on icons and folders will no longer appear. If the "Explorer" restart does not help, create a new session of the operating system, restarting the computer. So all the changes will take effect.
Method 3: Disable synchronization in OneDrive
The last method of our today's article will suit those users who are interested in full disabling synchronization in OneDrive. Accordingly, after this procedure, green ticks near the files will automatically disappear.
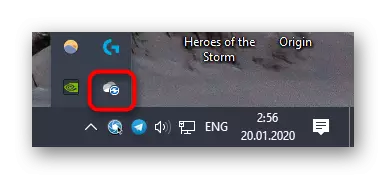
- Find the ONEDRIVE icon on the taskbar and click on it right-click.
- In the context menu that appears, select "Parameters".
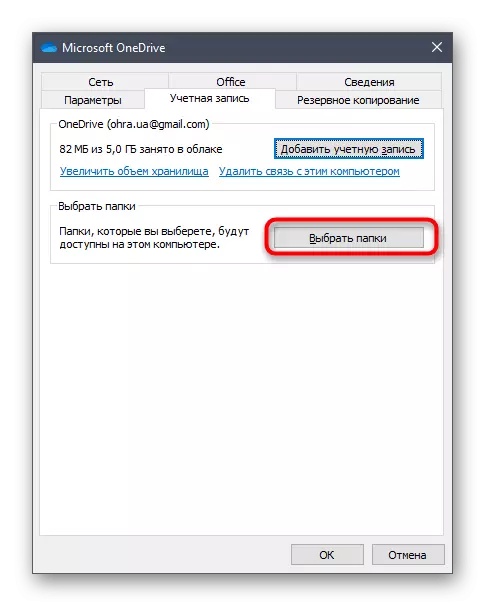
- Go to the Account tab.
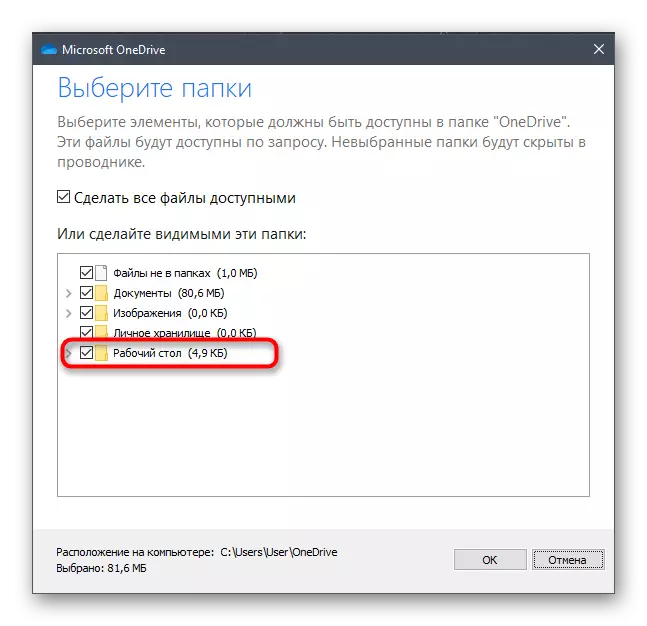
- Click on the "Select folders" button.
- Remove the checkbox from the desktop and other locations where you want to disable synchronization.


Now it is recommended to restart the computer or "conductor" as it was shown in the previous method.
Today we dealt with the advent of green ticks near the icons on the desktop in Windows 10. You have been familiar with three methods that allow you to get rid of these icons. Use the appropriate instruction to cope with the task.