

What you need to install windows 7
To install Windows 7, the operating system distribution is required - a CD or flash drive with installation files. If you already have a bootable medium - excellent. If not, then you can create it yourself. Here I will introduce only a couple of the most simple ways, if for some reason they will not fit, the full list of ways to create a boot flash drive and boot disk can be found in the "Instructions" section on this site. In order to make the boot disk (or USB flash drive) you will need an image of ISO Windows 7.
One of the fastest ways to make a bootable media for installing Windows 7 - use the official Microsoft USB / DVD DOWNLOAD utility, which can be downloaded by reference: https://www.microsoft.com/ru-ru/download/windows-usb-dvd -Download-Tool.
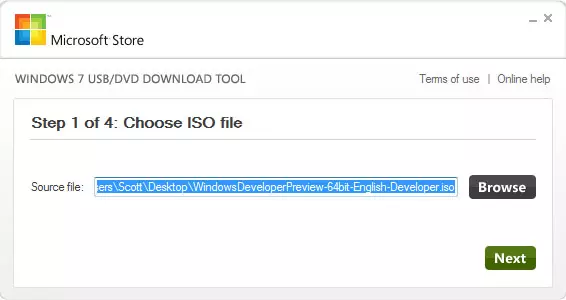
Creating bootable flash drives and disks in USB / DVD Download Tool
After downloading and installing the program, four steps separate you from creating an installation disk: Select an ISO image with Windows 7 distribution files, indicate that they will write them, wait for the program shutdown.
Now that you have, where to install Windows 7, we turn to the next step.
Installing download from a flash drive or disk in BIOS
By default, the overwhelming majority of computers are loaded from the hard disk, we will also need to download from a flash drive or disk created at the previous stage. To do this, go to the computer's BIOS, which is usually done by pressing DEL or other keys immediately after its inclusion, even before Windows load starts. Depending on the version and the manufacturer of the BIOS, the key key may distinguish, but usually it is Del or F2. After you enter the BIOS, you will need to find the item responsible for the download sequence that may be in different places: Advanced Setup - Boot Device Priority (Download Priority) or First Boot Device, Second Boot Device (First Download Device, Second Download device - to the first item you need to put a disk or flash drive).If you do not know how to set the download from the desired media, then read the instructions how to download from the flash drive to the BIOS (opens in a new window). For DVD disk, this is done in the same way. After completing the BIOS setting to boot from a flash drive or disk, save the settings.
Windows 7 installation process
When the computer restarts after applying the BIOS settings made at the previous stage and boot from the Windows 7 installation media, on a black background you will see an inscription Press any key to download from a DVD disc or an inscription of similar content in English. Click it.
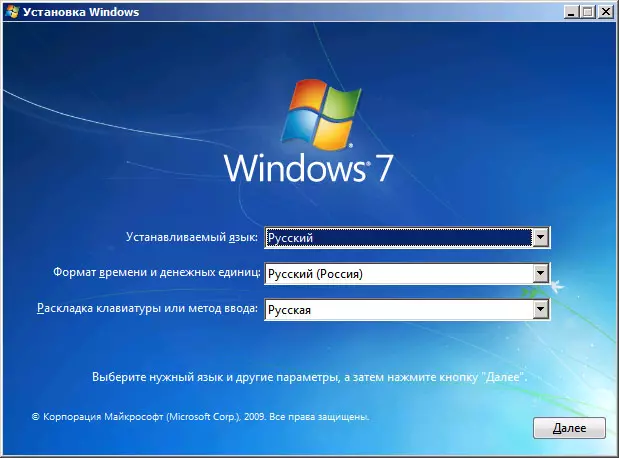
Select language when installing Windows 7
After that, over short time, Windows 7 files will be downloaded, and the language selection window will appear for installation. Choose your language. At the next stage, you will need to set input parameters, time format and monetary units and the language of the operating system itself.
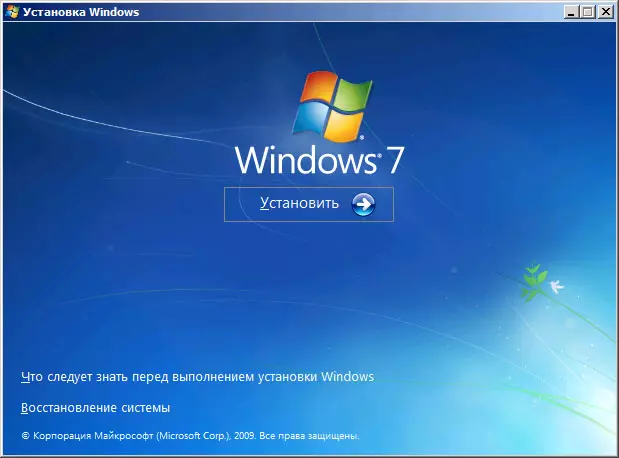
Install Windows 7.
After selecting the language of the system, the following screen will appear offering installing Windows 7. From the same screen, you can start the system recovery. Click "Set". Check out the Windows 7 license terms, check the item that you accept the license terms and click "Next".
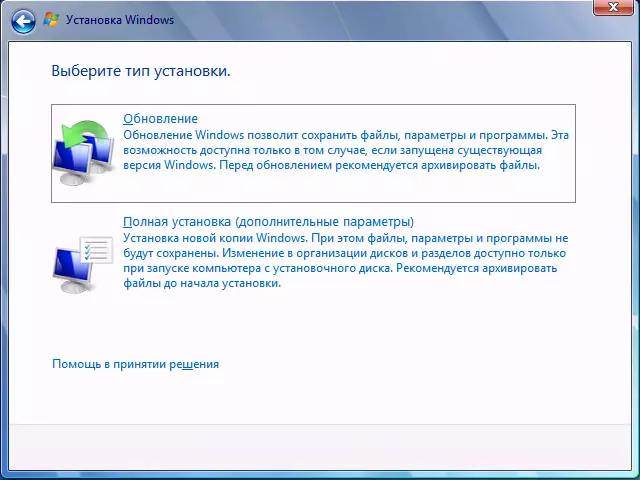
Select the installation type of Windows 7
Now you need to select the installation type of Windows 7. In this manual, we will consider the clean installation of Windows 7 without saving any programs and files of the previous operating system. This is usually the best option, since it does not leave different "garbage" from the previous installation. Click "Full Setup (optional parameters).
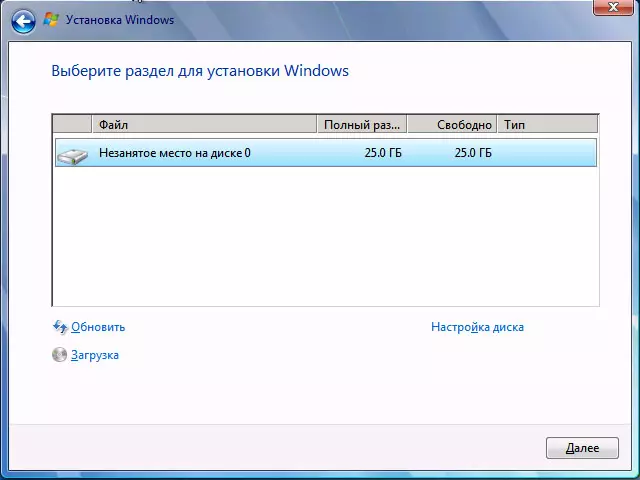
Select a disk or section to install
In the next dialog box, you will see a proposal to select a hard disk or partition of the hard disk to install Windows 7. Using the "Disk Setup" item, you can delete, create and format the partitions on the hard disk (split the disk on two or connect two to one , for example). How to do it is described in the instructions how to split the disk (opens in a new window). After the necessary steps with a hard disk are completed, and the desired section is selected, click "Next".
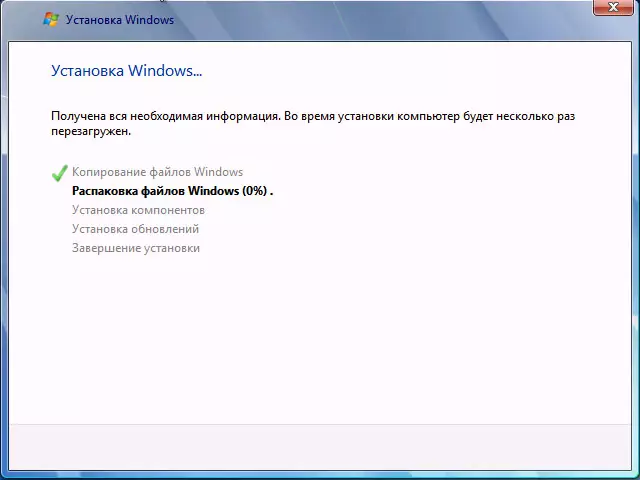
Windows 7 installation process
The Windows 7 installation process will begin onto a computer that can occupy different times. The computer can reboot several times. I recommend to return the download from the hard disk to the BIOS to the BIOS, so as not to see each time the invitation to click any key to install Windows 7. The disk or boot flash drive is better to leave the installation connected before the installation is complete.
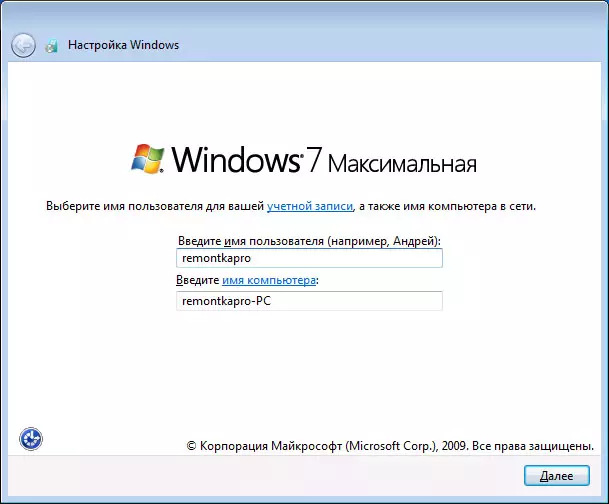
Enter the username and computer name
After the Windows 7 installation program comes all the necessary operations, update the registry entry and starts the service, you will see the offer to enter the username and the name of the computer. They can be introduced in Russian, but I recommend using the Latin. Then it will be prompted to install a password for the Windows account. Here at your discretion - you can install, or you can not.
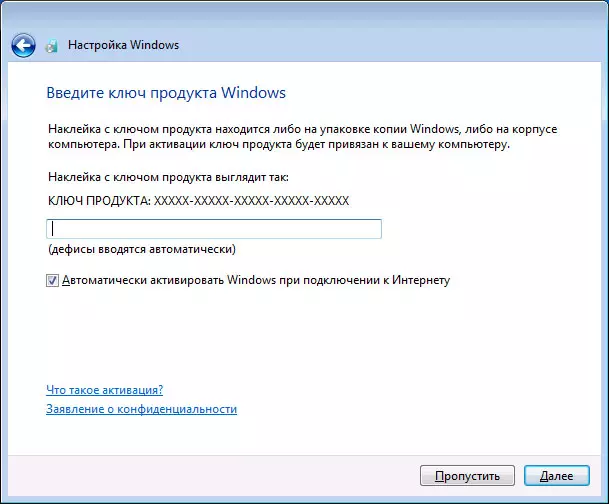
Enter Windows 7 key
The next step is to enter the product key. In some cases, this step can be skipped. It is worth noting that if Windows 7 has been pre-installed on your computer and the key is on the sticker, and you install exactly the same version of Windows 7, you can use the key with stickers - it will work. On the screen "Help automatically protect your computer and improve Windows" beginners, I recommend to stop on the "Use recommended parameters" option.

Setting date and time in Windows 7
The next setting step is to set the time parameters and the date of Windows. Everything should be clear here. I recommend to remove the checkbox "Automatic transition to summer time and back," since this transition is now not used now. Click "Next".
If there is a network on a computer, you will be offered to choose which network you have - home, public or working. If you are using a Wi-Fi router to access the Internet, you can put "home". In the event that the Internet provider's cable is directly connected to the computer, it is better to choose "public".
Installing Windows 7 Completed
Wait for Windows 7 parameters and loading the operating system. On this installation of Windows 7 completed. The next important stage is the installation of Windows 7 drivers, which I will write in detail in the next article.