
Not always the standard display colors settings are suitable for the user after connecting the device itself to the computer. This usually concerns people often interacting with graphics that are engaged in, for example, drawing or processing photos. In such situations, it is especially important to configure the correct transmission of colors. Today we want to tell about the three methods of fulfilling the task in Windows 10, considering each of them.
Calibrate monitor colors in Windows 10
As you already know, there are different methods for calibrating the colors of the monitor. Some of them do not bring any result at all, since the configuration is carried out on the eye. It concerns these specialized online services and universal images, which, as their creators declare, should help cope with the setting. We will miss these options, because they are simply ineffective, and immediately move on to proven methods, starting from the most effective, but expensive.Method 1: Calibrator Use
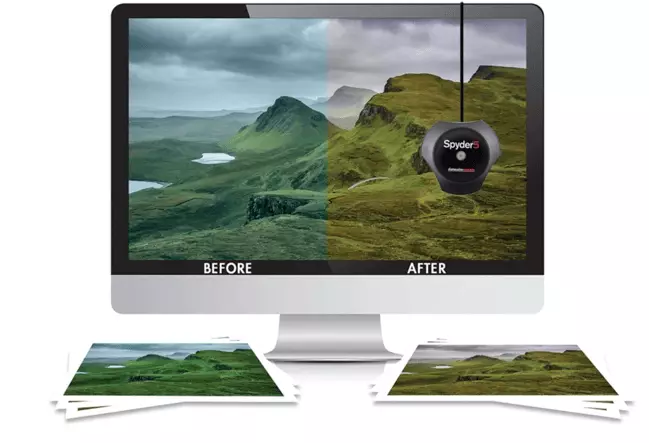
Calibrator - expensive equipment connected to a computer via a USB cable and having branded software. It makes sense to use it only to the users who professionally engaged in graphics and needs the most accurate setting of colors. The most popular calibrator in the market - Datacolor Spyder5Pro. Through it, the surrounding space is first carried out, and then connecting to the computer and install the device itself on the display. It will be required from five to fifteen minutes to process information, and after that, through the software in automatic mode, several available profiles will be created. Each user already chooses the best option for itself, pushing out the image seen.
Of course, such a means is not all for the pocket, so we stopped on it only briefly. All those who wanted to be interested in the calibrator, we strongly recommend before buying to study the reviews of professionals and instructions for the instruction. After the acquisition, read the official documentation to find out exactly how to perform correct calibration, because this algorithm depends directly from the device model.
Method 2: Side Software
Special programs are essentially an improved version of the standard tool of the operating system, but sometimes turn out to be more effective, so we decided to include such a software in the format of today's article. We offer to familiarize yourself with the principle of interaction on the example of one of the most popular applications called Cltest.
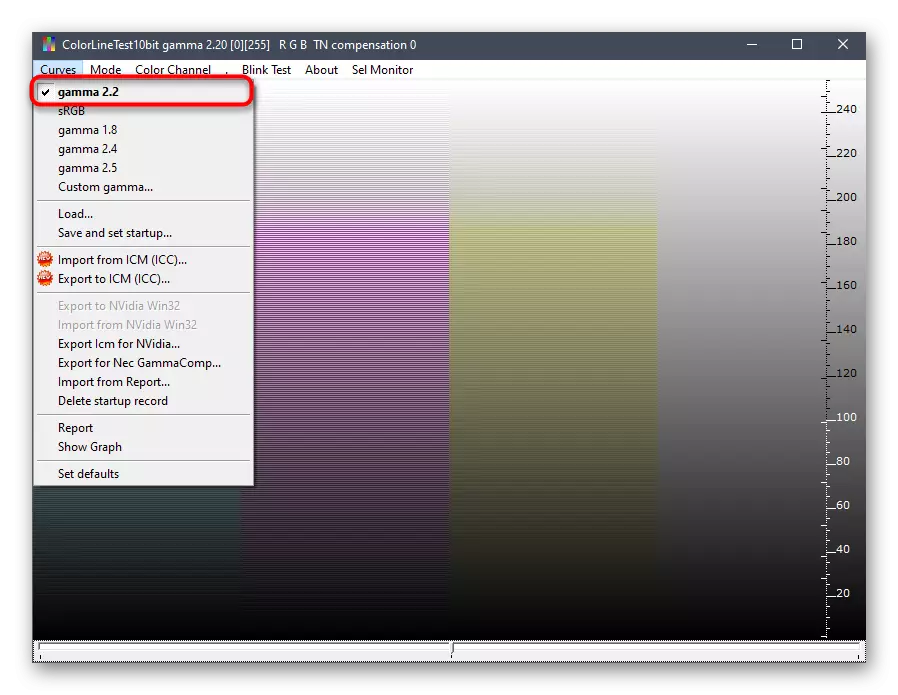
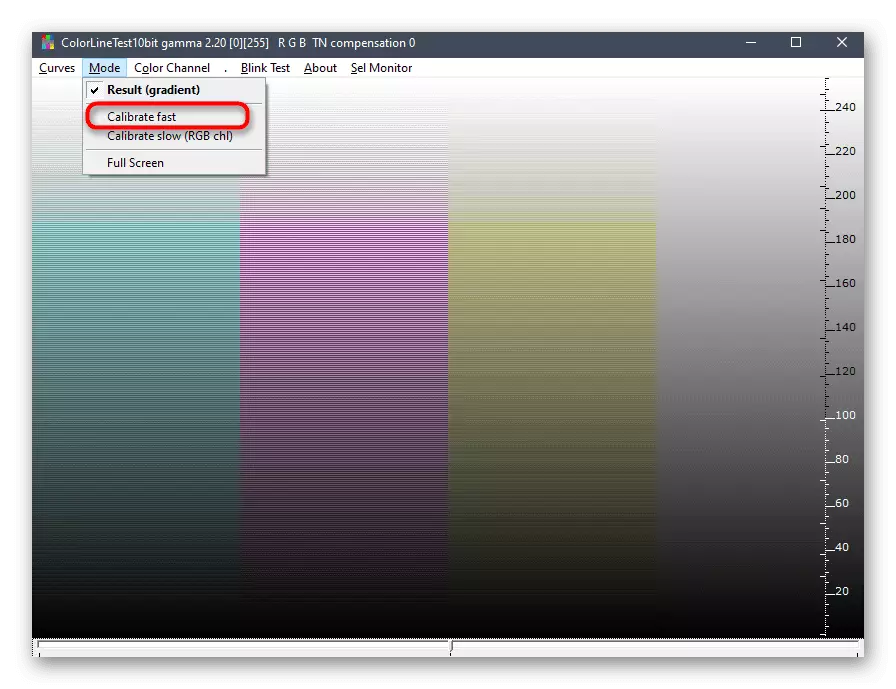
- Take advantage of the link left above to read the review on CLTEST and download it to your computer. After installation, start the program and immediately in the "Curves" section, make sure that the "GAMMA 2.2" mode is set, since it is most suitable for ordinary users.
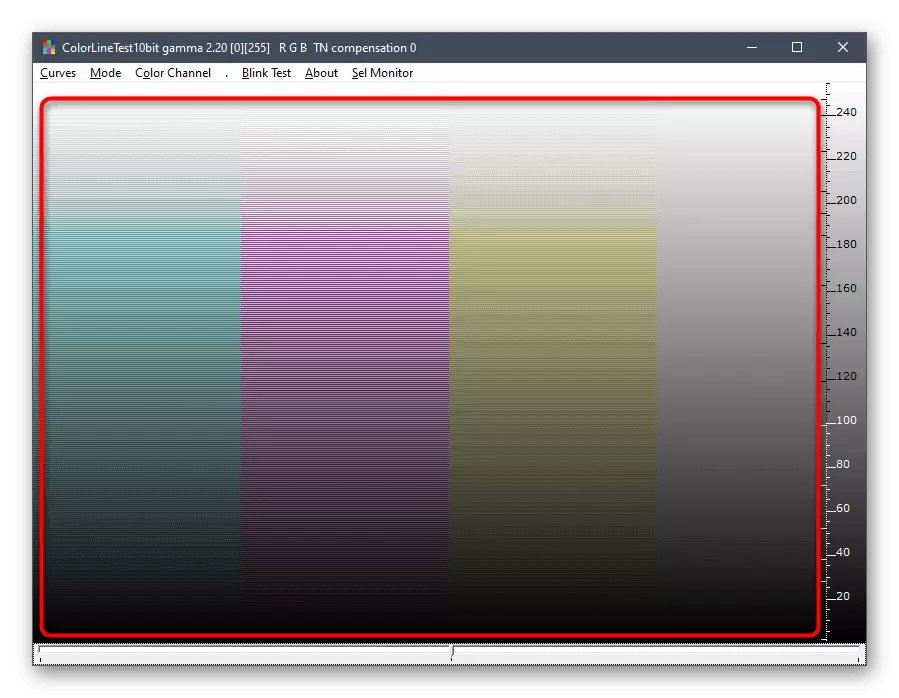
- Now look at the main window where color stripes are displayed or just gray canvas. If the bands themselves are slightly distinguishable, it does not make sense to calibrate. Otherwise, go further.
- In the Mode pop-up menu, select "Calibrate Fast" to run the fast setup process.
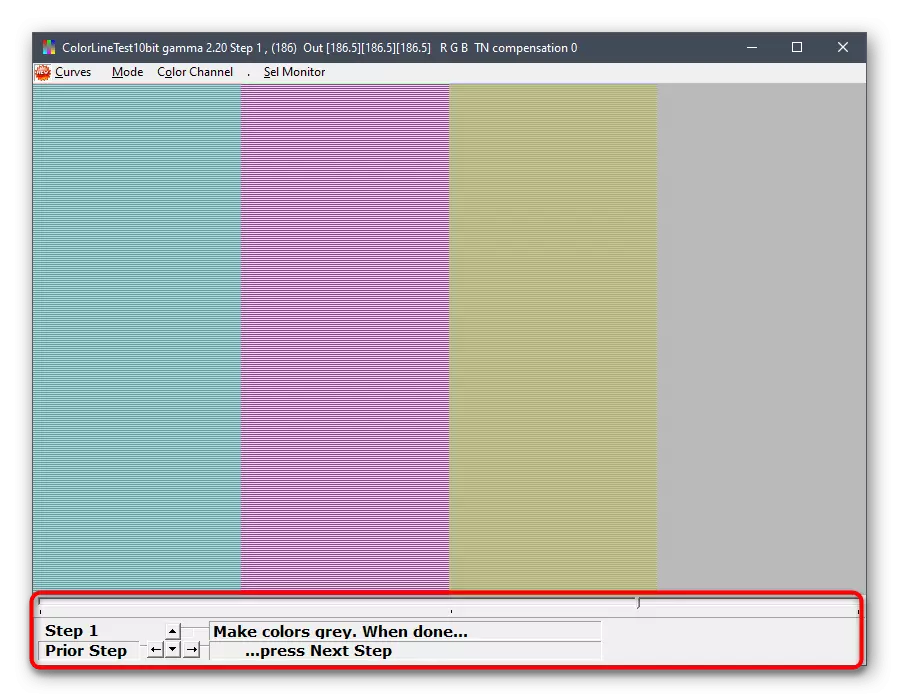
- This operation lasts seven steps. During each, the image is replaced on the screen. Follow the instructions displayed in this window to achieve an optimal result, and then move further. Almost always from the user, it is necessary to ensure that everything cannon become gray, and color stripes slightly clarified. Their display increases or decreases using the up and down arrow on the keyboard, and the transition to the next or previous step is performed through left and right, respectively.
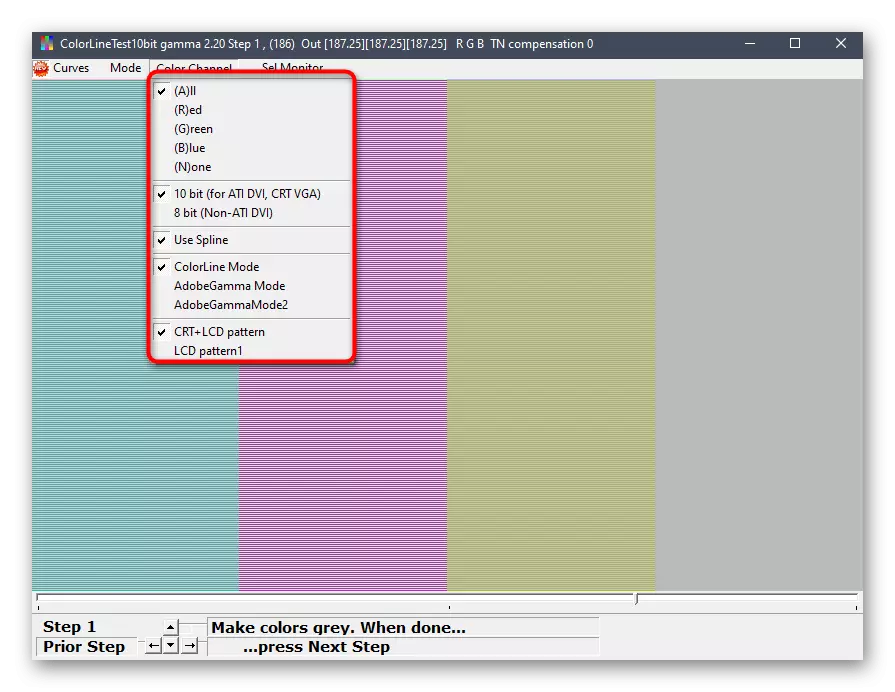
- If some of the colors are displayed incorrectly, you have to create a separate configuration for it through the "Color Channel" mode. Mark the desired color checkbox, and then repeat all the steps.
After passing all the steps, the program will propose to leave the current configuration or replace it with the previous one. At any time, you can reset the settings to the default state if the result is not satisfied with you.
Note that not all users satisfy the functionality of CLTEST. Such users we recommend reading a separate material on our website, which is devoted to the review of programs intended for the monitor calibration. There you can explore their main features and understand whether any of the solutions presented for the monitor used is suitable.
Read more: Monitor calibration programs
Method 3: Built-in Windows
Above, we have already mentioned the existence of a special built-in tools that allows you to create a comprehensive configuration of colors for the monitor. Now we offer to stay in more detail on it, the setup process itself, as much as possible, the configuration process itself so that even novice users do not have any questions on this topic.
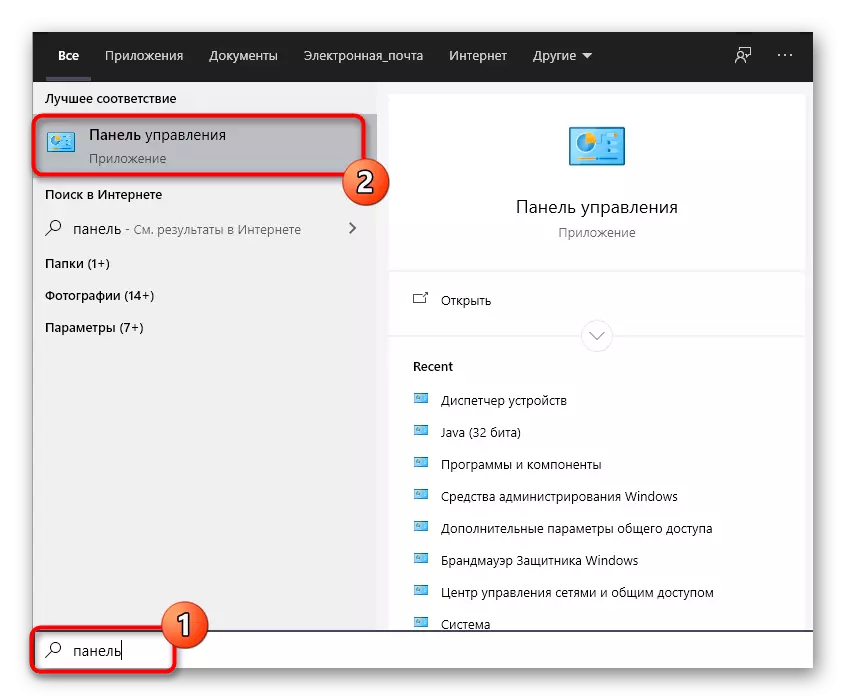
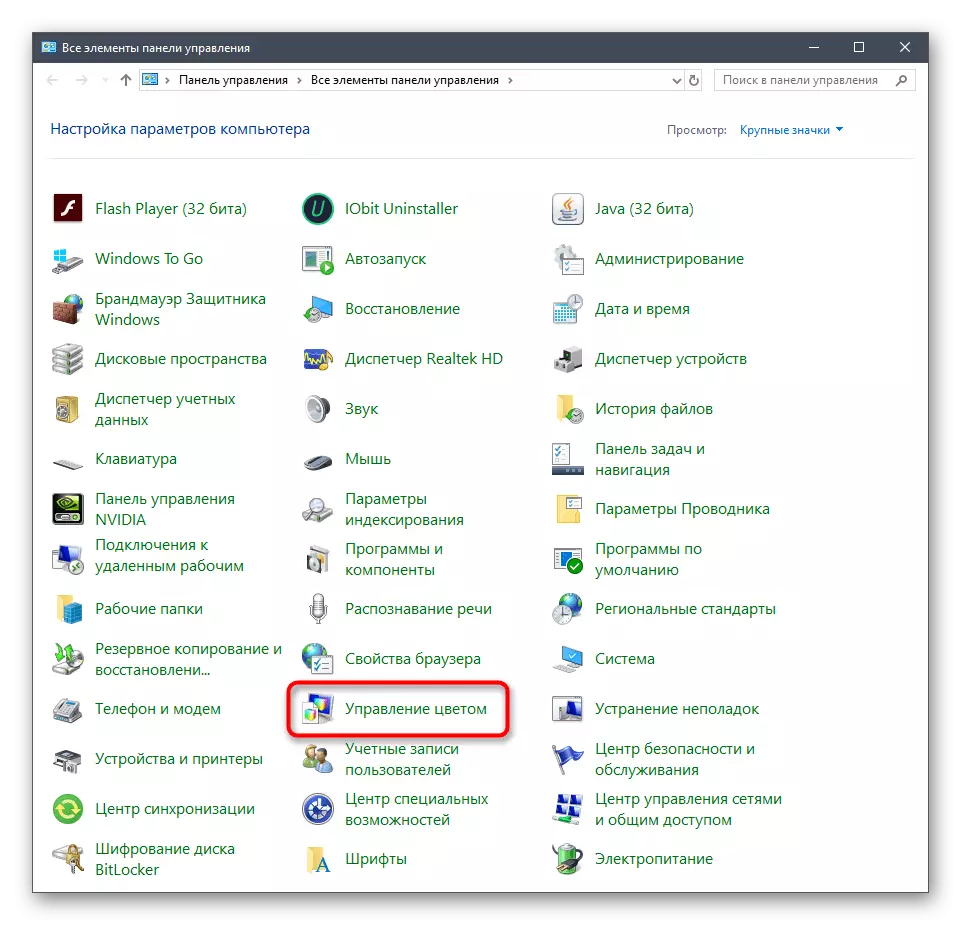
- First you need to start this tool. Open the "Start", through the search for finding the "Control Panel" application and start it.
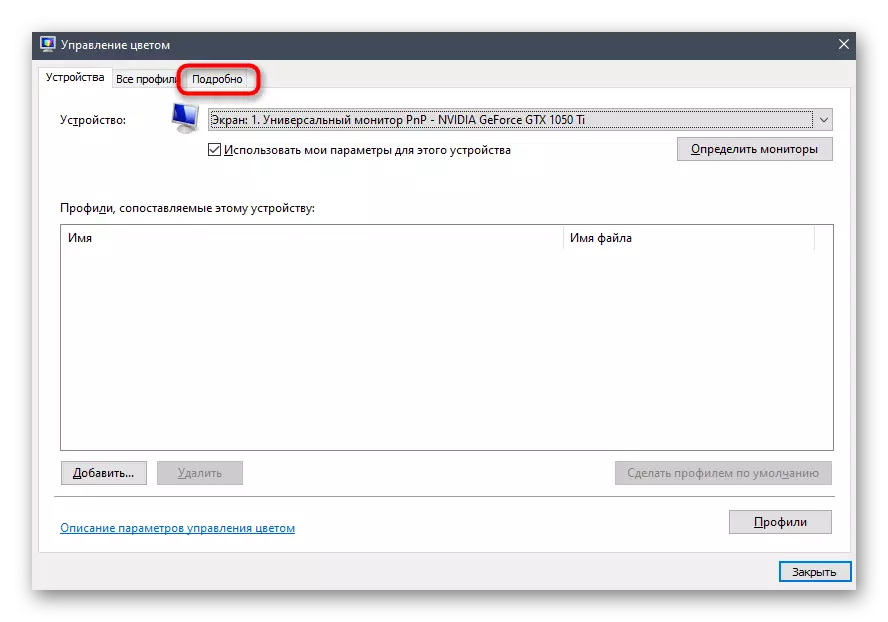
- Move to the "Color Management" section.
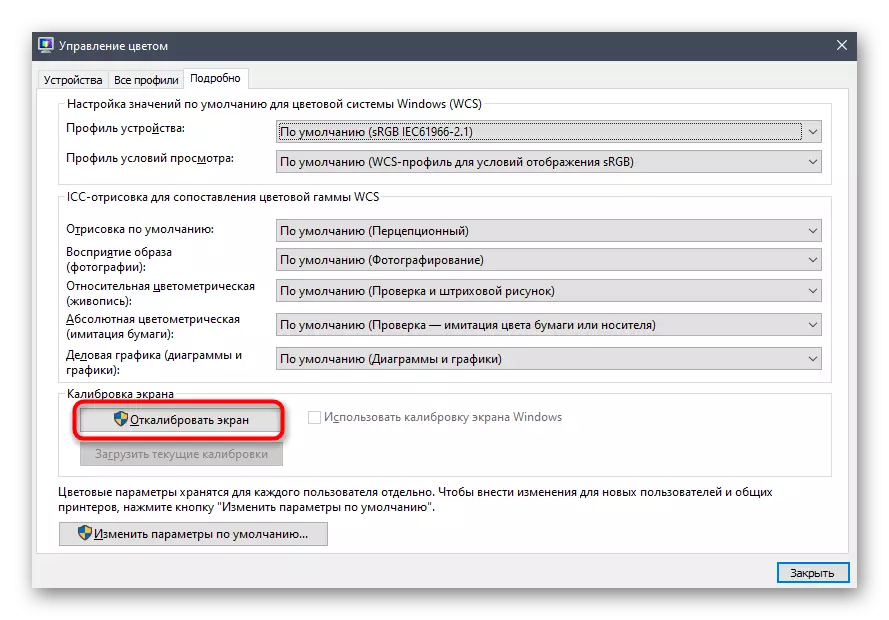
- Here you are interested in the tab "Details".
- Once on it, click on the allotted button "Failure Screen".
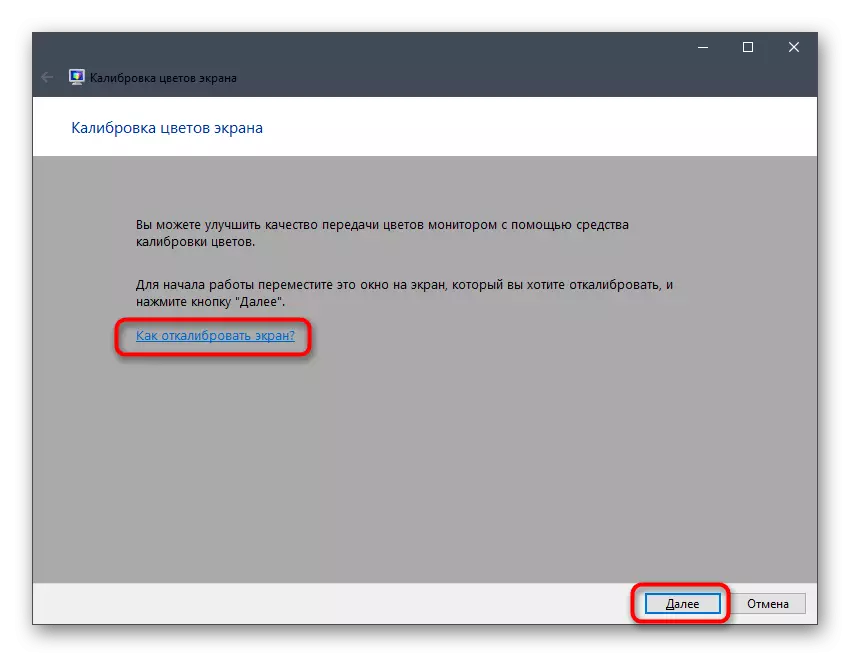
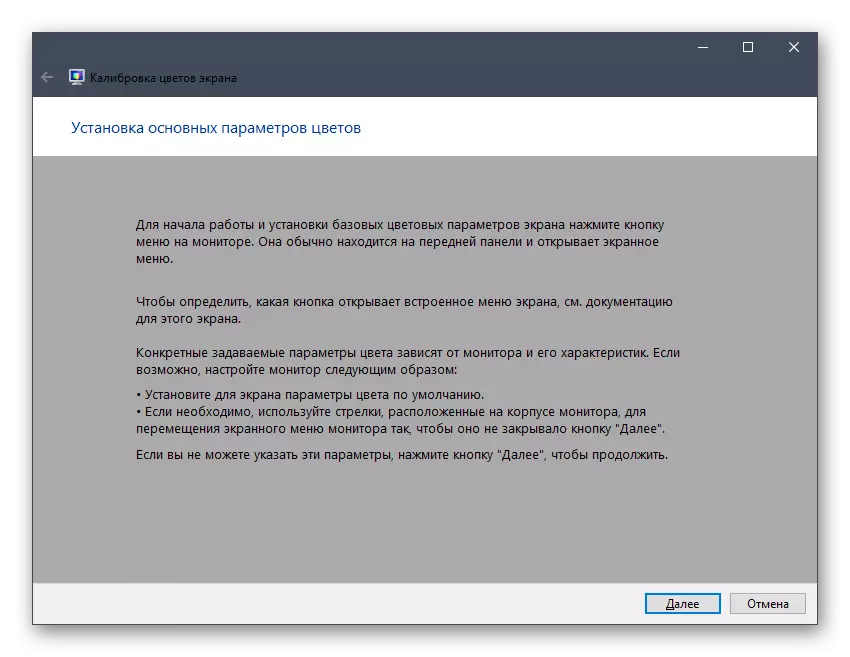
- The setup wizard window appears. Here Microsoft is recommended to read your own guide to implement this editing. If you are readily proceed by clicking on "Next".
- Learn the first recommendation, which is to install the default settings in the built-in Monitor Settings menu. Do it only if the model supports such a menu.
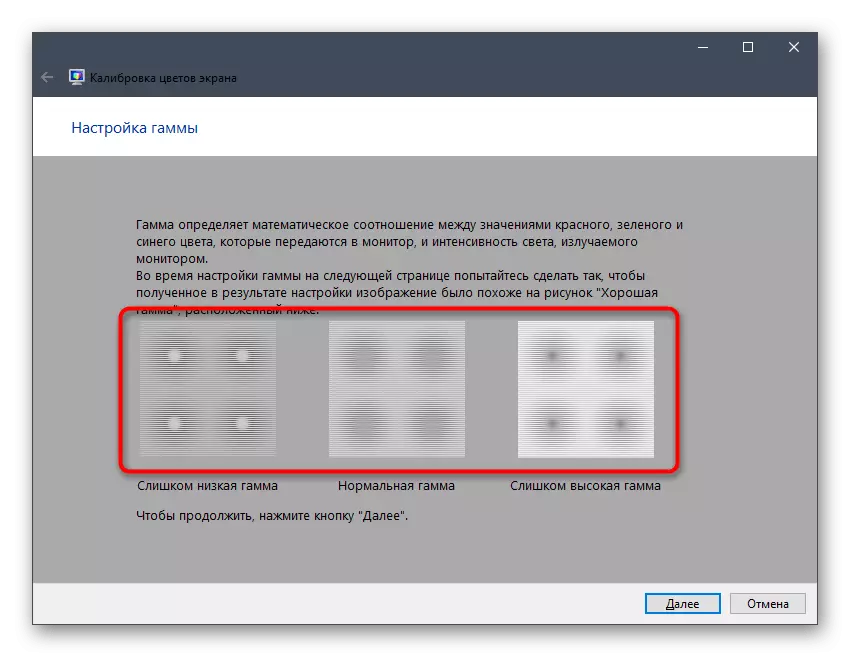
- The first stage is the gamma settings. In the window, you see display examples. In the center there is an ideal option to which you need to strive. Remember it and go further.
- Adjust the position of the slider until the desired result will achieve.
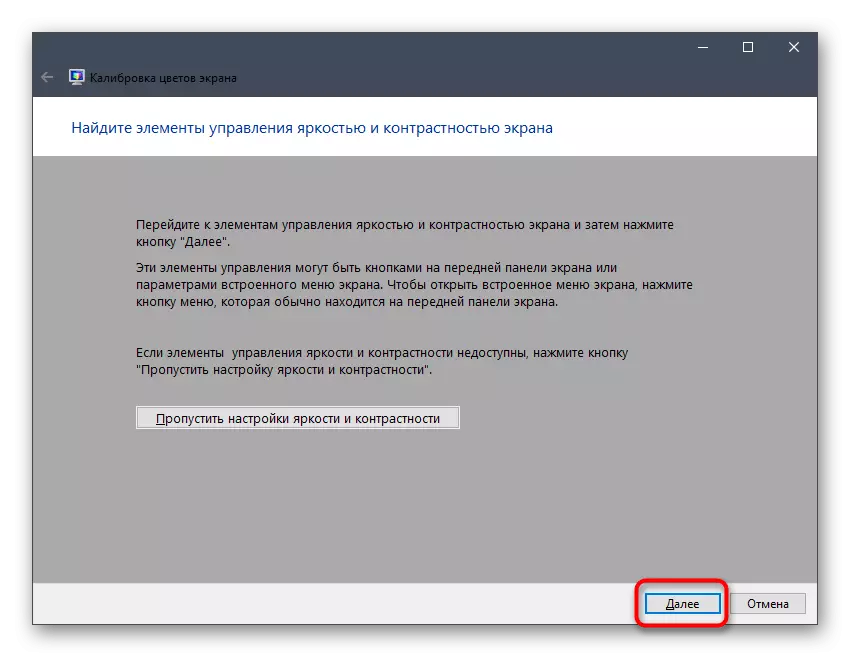
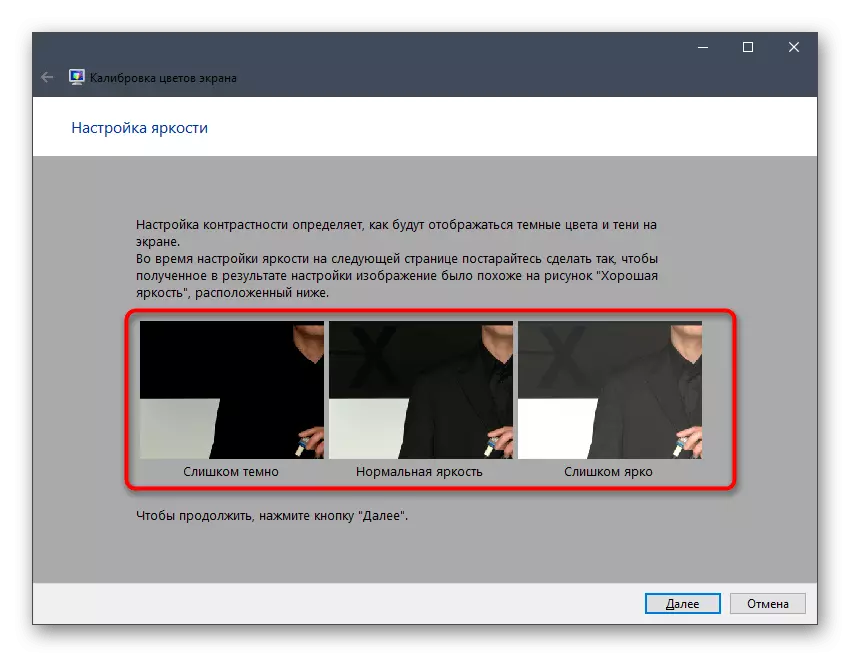
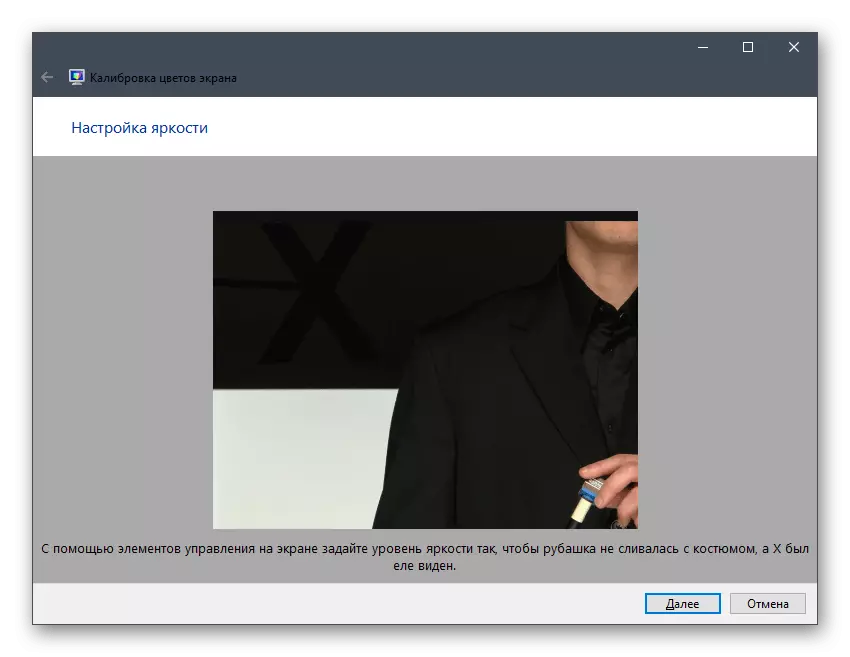
- After that, the operation of adjusting the brightness and contrast of the screen begins. To do this operation is better only to those users who have a monitor on the built-in menus or specially reserved buttons responsible for setting up these parameters. If this is not possible, you have to skip this step.
- When tuning the brightness, you will also have to remember the normal display of the picture.
- Then the image itself will appear in a larger format. Use the buttons or the built-in menu to adjust the color.
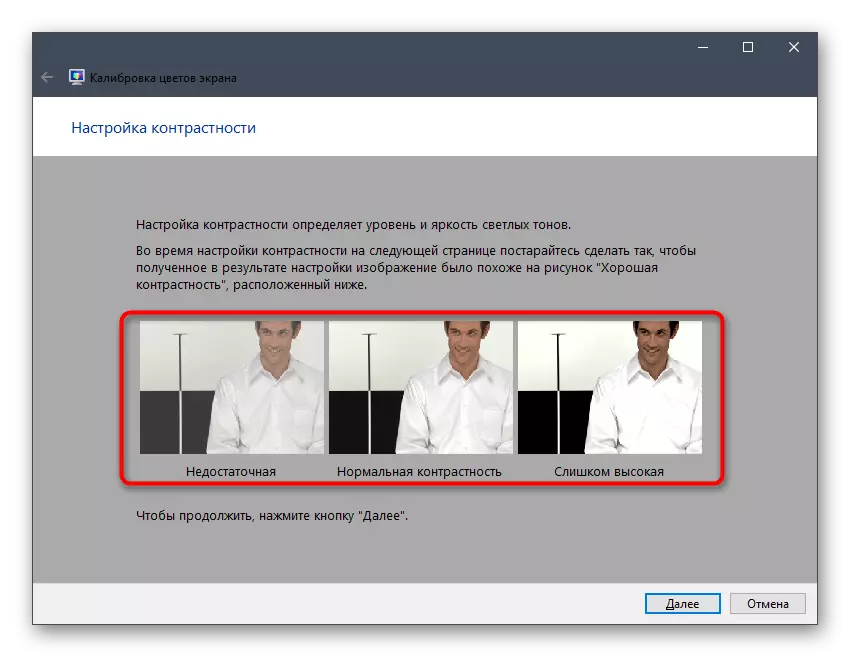
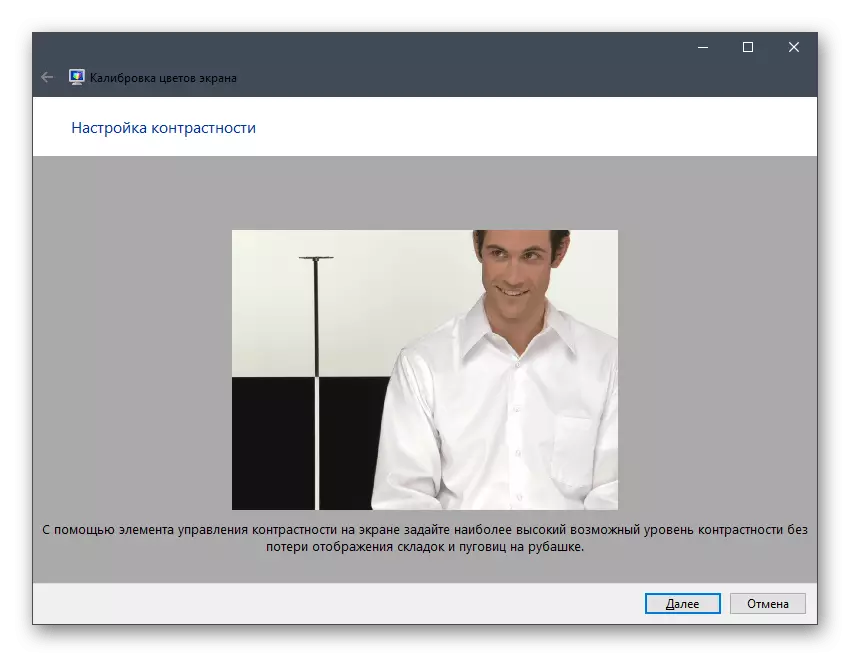
- The same is to be done with contrast. For a start, look at the three pictures shown.
- After that, regulate and proceed to the next step only when the final result will arrange you.
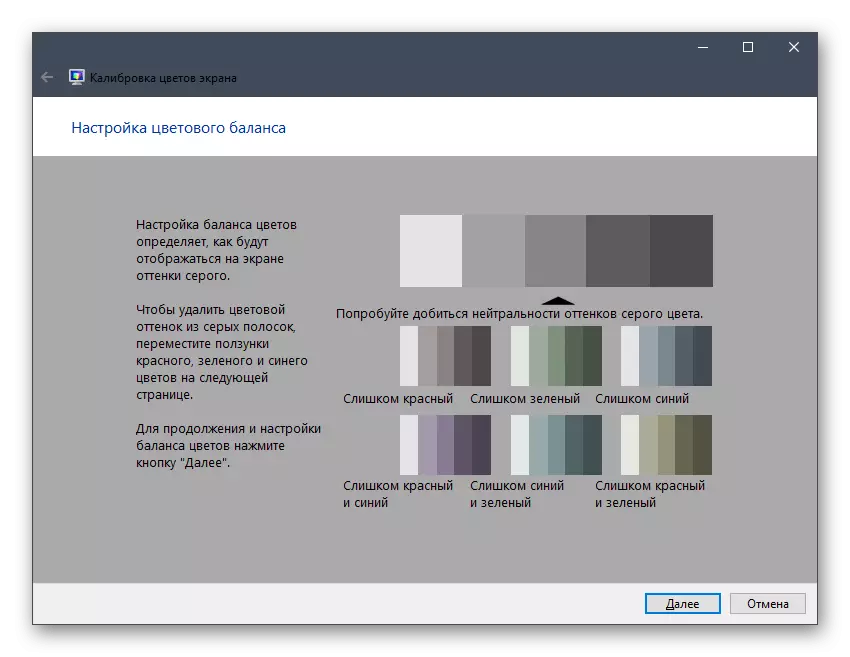
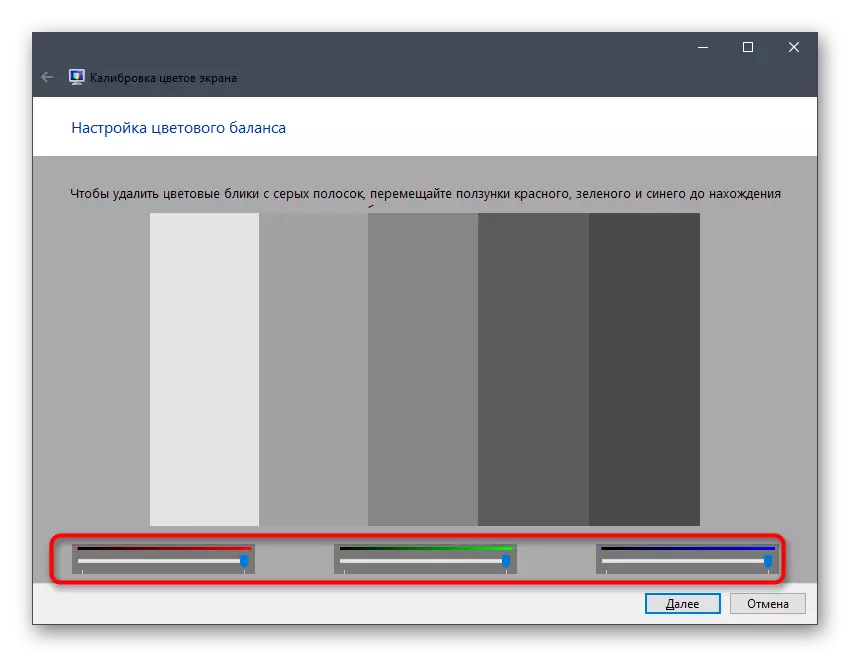
- Check out the color balance configuration instructions. The criteria described here will have to be applied in the next step, so remember the basic recommendations.
- Adjust the horizontal sliders to achieve due effect.
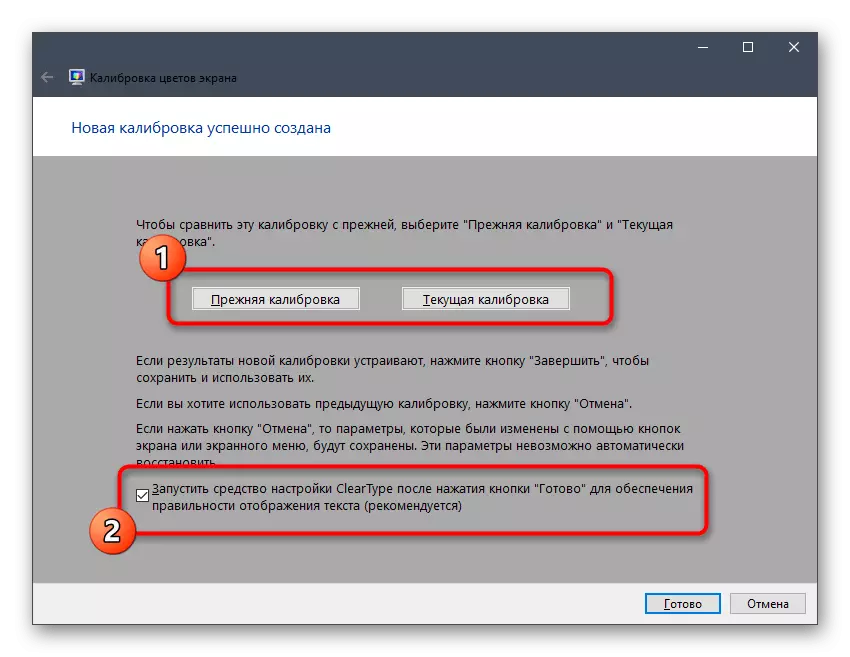
- This screen configuration is completed. You can choose the current calibration or return the previous one, as well as run the ClearType tool immediately after exiting this window to work and on the color display.

As can be seen, there is nothing difficult in setting up the screen through the standard tool. You can only carefully study the instructions and not neglect the recommendations in order to result in the desired result of the display of colors.
As part of this article, you were familiar with the three options for calibrating the colors of the monitor. It remains only to choose the optimal to implement it and get the most correctly transmitting the image on the display. However, this is not all actions that it is advisable to fulfill to ensure complete comfort of interaction with the monitor. Read about other manipulations in another article on our site by clicking on the following link.
Read more: Configuring the monitor for comfortable and safe operation