
The need to transfer the operating system from one solid-state disk to another without its reinstallation occurs in two cases. The first is the replacement of the system drive to a more capacious, and the second is the planned replacement due to the deterioration of the characteristics. Considering the widespread distribution of CDD among users, this procedure is more than relevant.
Transferring the installed Windows system to a new SSD
The transfer itself is a process in which the system is accurately copied with all settings, user profiles and drivers. To solve this problem there is a specialized software that will look at more detail below.Before proceeding with the transfer, connect a new disc to the computer. After that, make sure that it is recognized by the BIOS and the system. In case of problems with its display, refer to the lesson on the link below.
Lesson: Why does the computer sees SSD
Method 1: Minitool Partition Wizard
Minitool Partition Wizard is a software tool for working with information carriers, including devices based on Nand-memory.
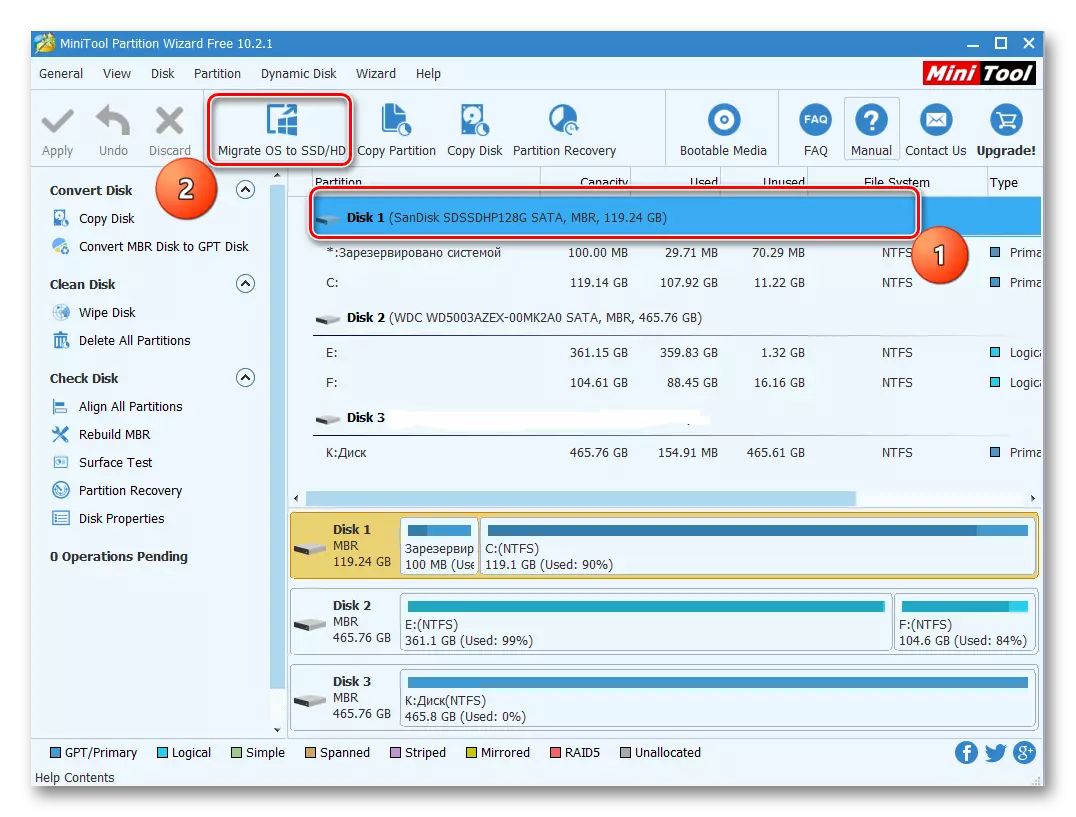
- Run the program and click on the "Migrate OS to SSD / HD" panel, after selecting the system disk.
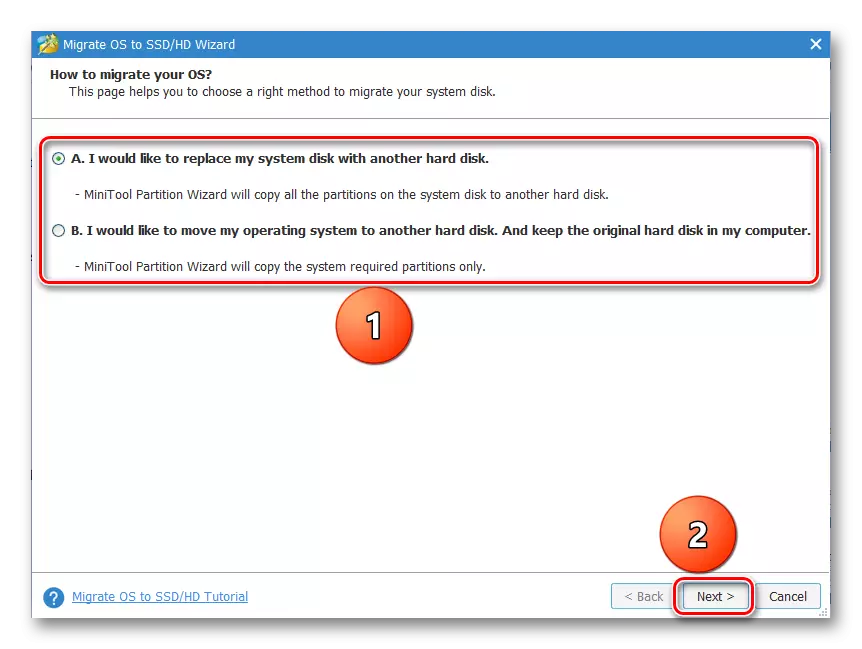
- Next, we are determined with the transfer options, in one of which all sections of the system drive are copied, and in the other - only Windows itself with all the settings. Selecting the appropriate, press "Next".
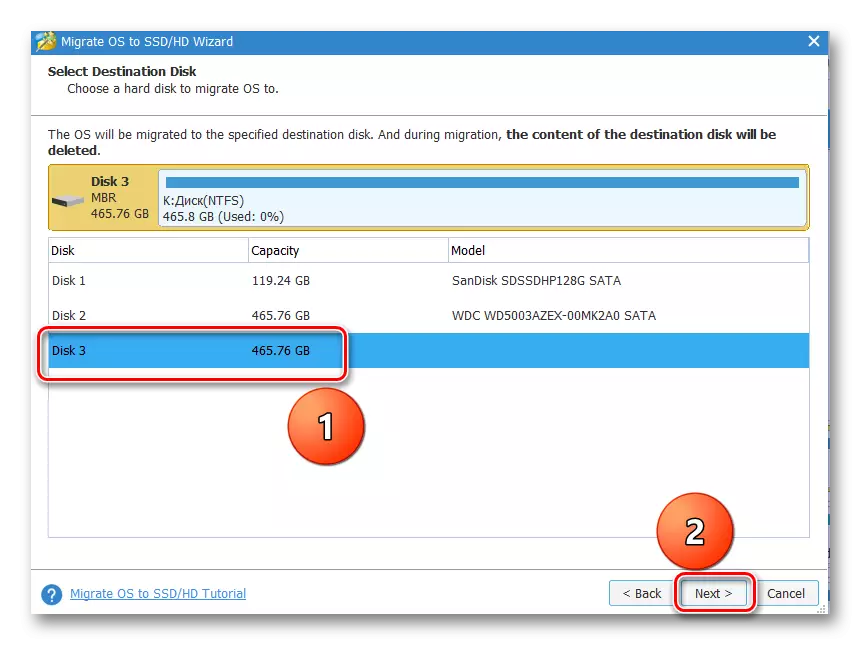
- We select the drive to which the system will be moved.
- A window is displayed with a message that all data will be erased. In it, click "Yes".
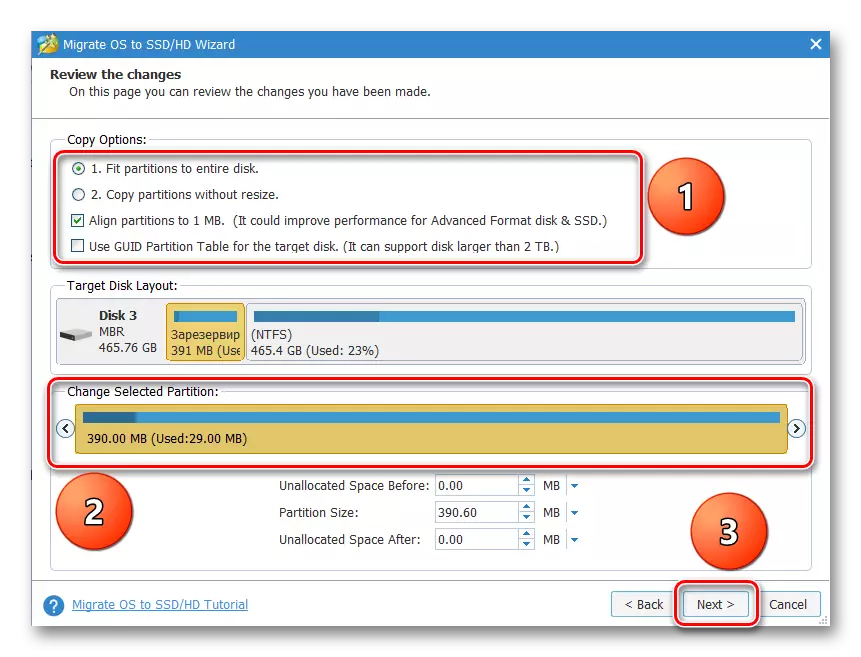
- Expose copy options. Two options are available - this is "Fit Partition to Entire Disk" and "Copy Partitions Worthout Resize". In the first sections of the original disk, they will be combined and placed in a single space of the target SSD, and in the second copy will be performed unchanged. Also mark also the "Align Partitions to 1 Mb" marker - this will increase the performance of SSD. The "USE GUID Partition Table for the Target Disk" field is left blank, since this option is in demand only for information storage devices with a volume of more than 2 TB. In the Target Disk Layout tab, the partitions of the target disk are displayed, the dimensions of which are adjustable using the slider below.
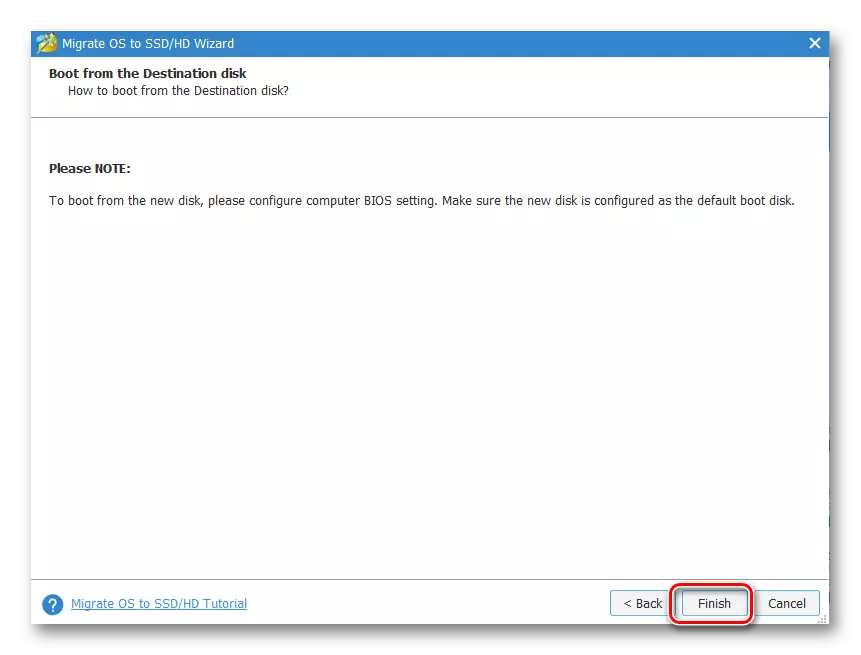
- Next, the program displays a warning that it is necessary to configure the OS boot from the new disk to the BIOS. Click "FINISH".
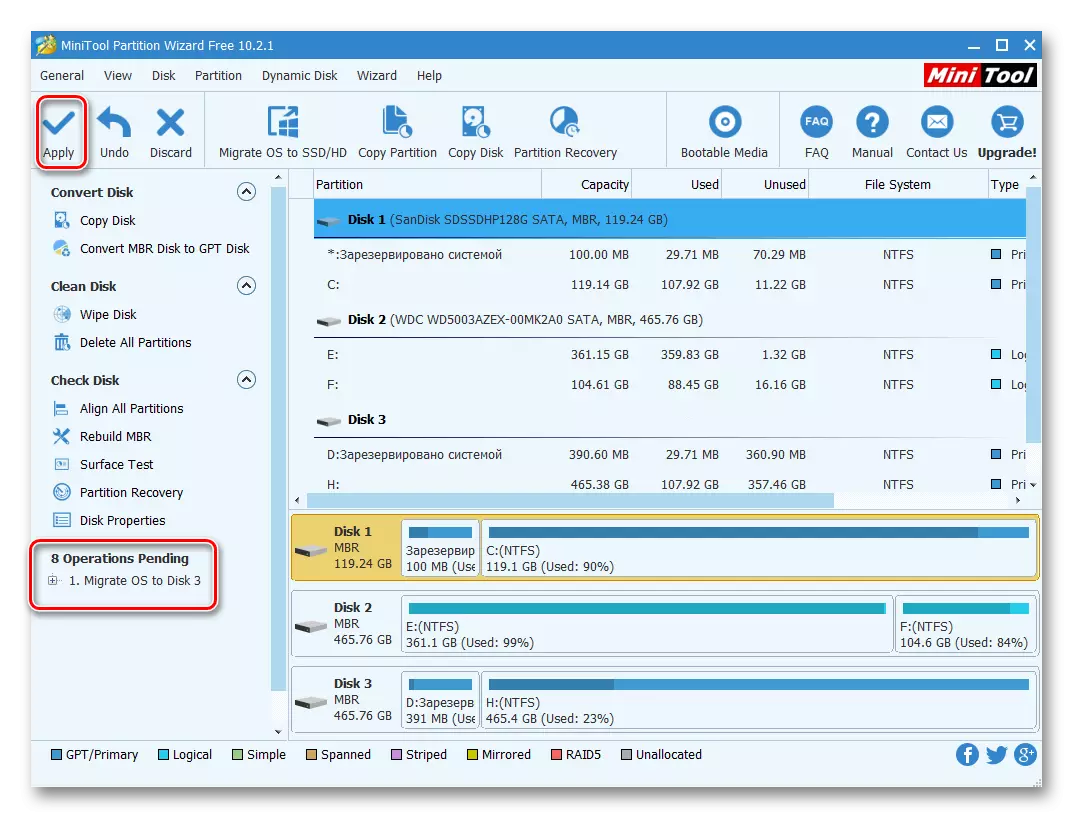
- The main program window opens in which you click "Apply" to run the scheduled changes.
- Next, the migration process will begin, after which the drive, which was copied to the OS, will be ready for operation. To download the system, you need to set specific settings in the BIOS.
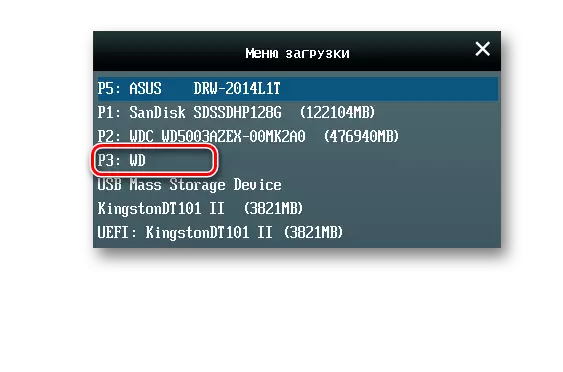
- Enter the BIOS by pressing the key when the PC starts. In the window that appears, click on the field with the inscription "Load menu" or press simply "F8".
- Next appears a window, in which we select the desired drive, after which an automatic reboot will occur.


The disadvantages of the program include what it works with the entire disk space, and not with sections. Therefore, if there are sections with data on the target SDD, it is necessary to transfer them to another place, otherwise all the information will be destroyed.
Method 3: Macrium Reflect
To solve the task, MACRIUM REFLECT is also suitable, which is a software for backup and cloning drives.
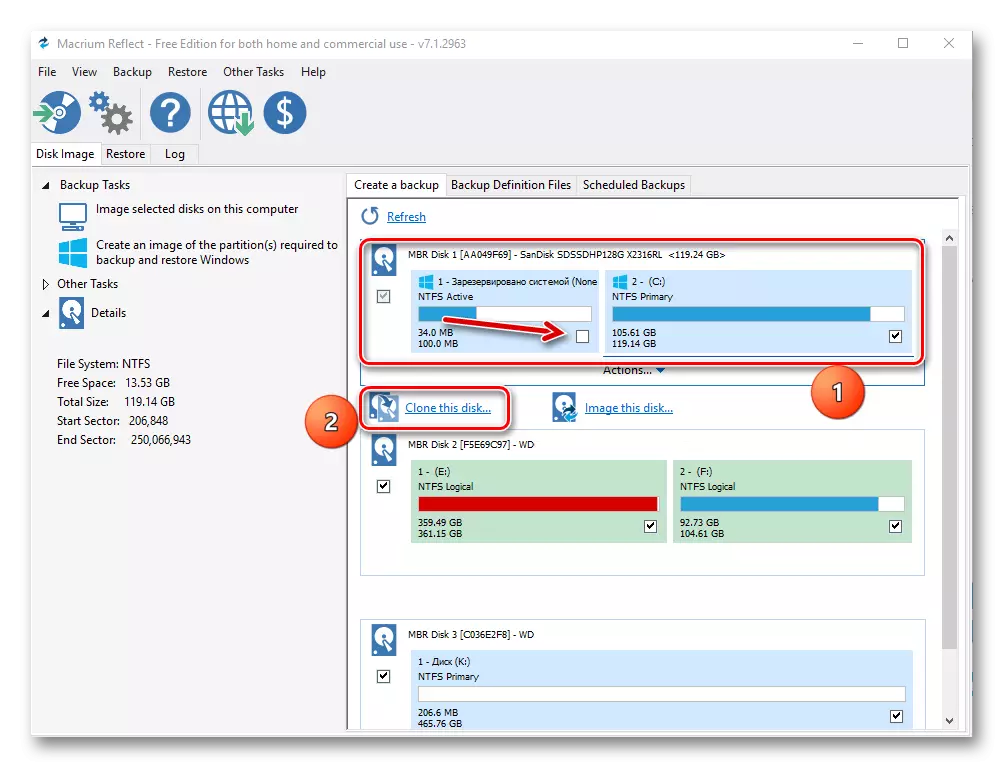
- Run the application and click "Clone This Disk", after selecting the original SSD. Do not forget to mark the checkbox "Reserved by the System" section.
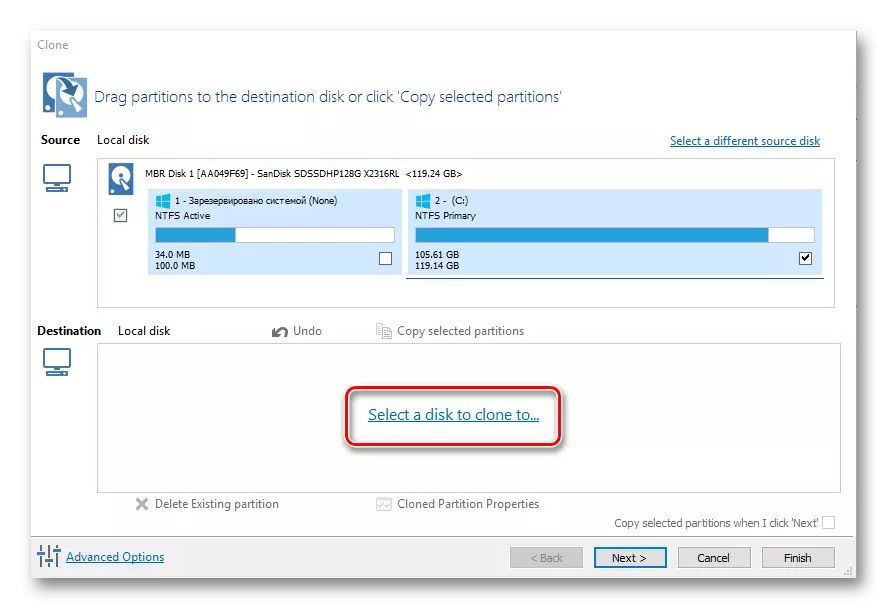
- Next, we are determined with the disk to which the data will be copied. To do this, click "Select a Disk to Clone To".
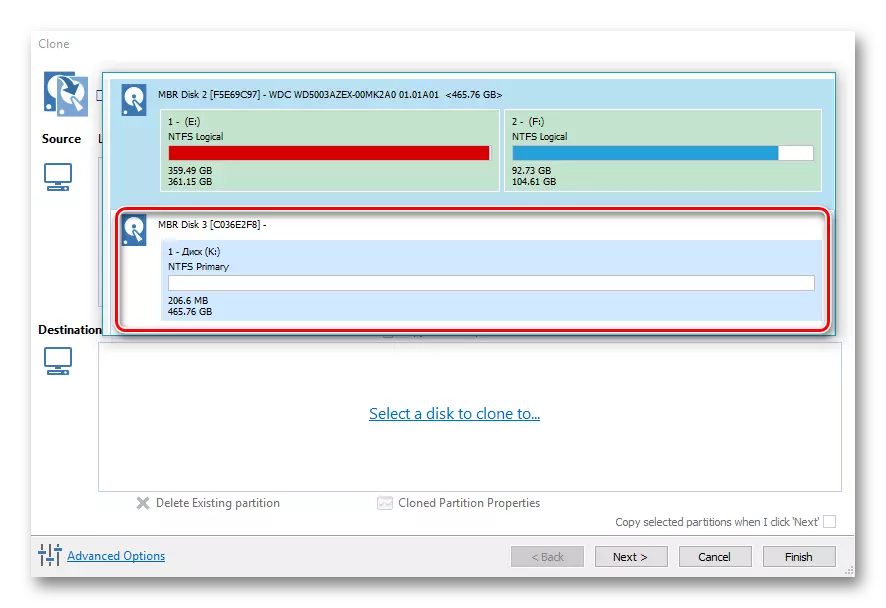
- In the window that opens, choose the desired CDD from the list.
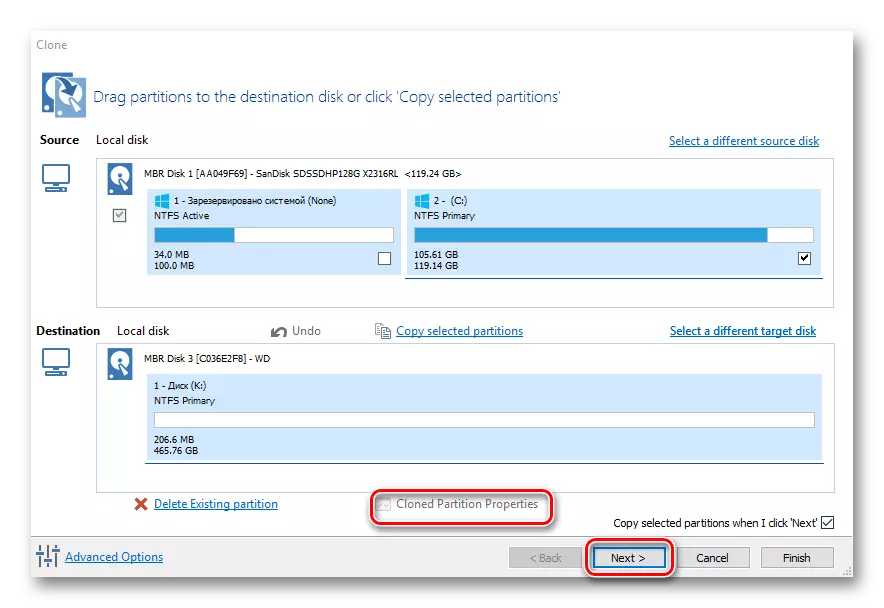
- The next window displays information on the OS transfer procedure. If partitions are available on the drive, you can configure the cloning parameters by clicking on Cloned Partition Properties. In particular, it is possible to set the size of the system volume here and appoint him to him. In our case, on the source drive, only one partition, so this command is inactive.
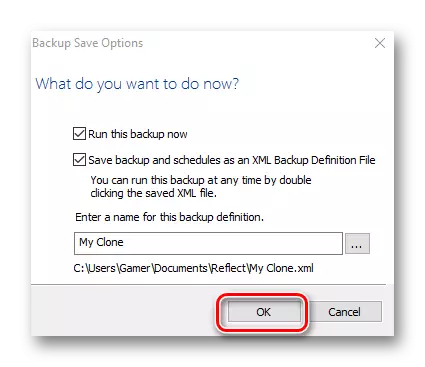
- If you wish, you can schedule the launch of the schedule procedure.
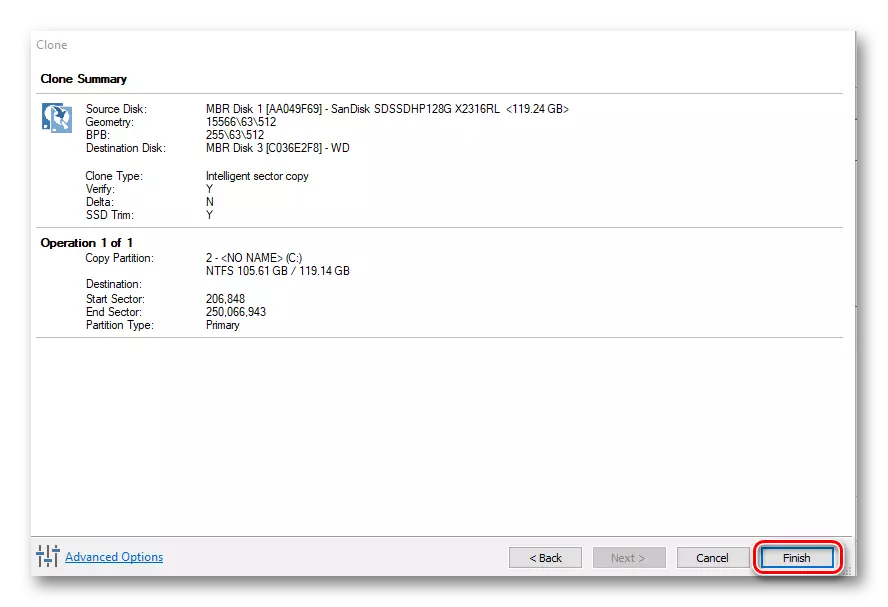
- The "Clone" window displays summary cloning parameters. Run the process by clicking on FINISH.
- A warning is displayed that it is necessary to create a system recovery point. We leave markers on the default fields and click "OK".
Upon completion of the transfer procedure, the message "Clone Completed" is displayed, after which it will be possible to boot from a new disk.
All reviewed programs are coping with the task of the OS transfer task on another SSD. The most simple and understandable interface is implemented in Paragon Drive Copy, moreover, unlike the rest, he has the support of the Russian language. At the same time, using Minitool Partition Wizard and Macrium Reflect it is also possible to make different manipulations with sections.