

From time to time, all categories of users have the need to be remotely connected to a particular computer. Today we will look at several methods for doing this operation.
Remote connection options
Basically, the solution of the tasks set today provides specialized software, both paid and free. In some cases, the toolkit can be useful and built into Windows. Consider all possible options in order.Method 1: TeamViewer
TeamViewer is free (for non-commercial use) tool that provides the user with a complete set of features for remote administration. In addition, using this program you can configure remote access to the computer into several clicks. But before you connect, you will need to download the program, and this will need to be done not only on our PC, but also on the one to which we will connect.
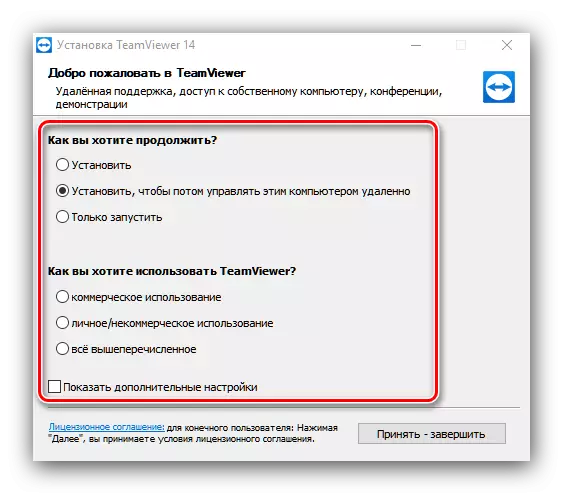
- Run the executable file after loading. Three options are available - use with installation; Install only the client part and use without installation. If the program is running on a computer that is planned to be managed remotely, you can select the second option to "install to control this computer that is remotely". In this case, TeamViewer will install a module for connecting. If the launch is planned for a PC, from which other devices will be controlled, suitable as the first and third options. For single use, the option "Personal / Non-Profit Use" is also suitable. By installing the desired options, click "Accept - complete."
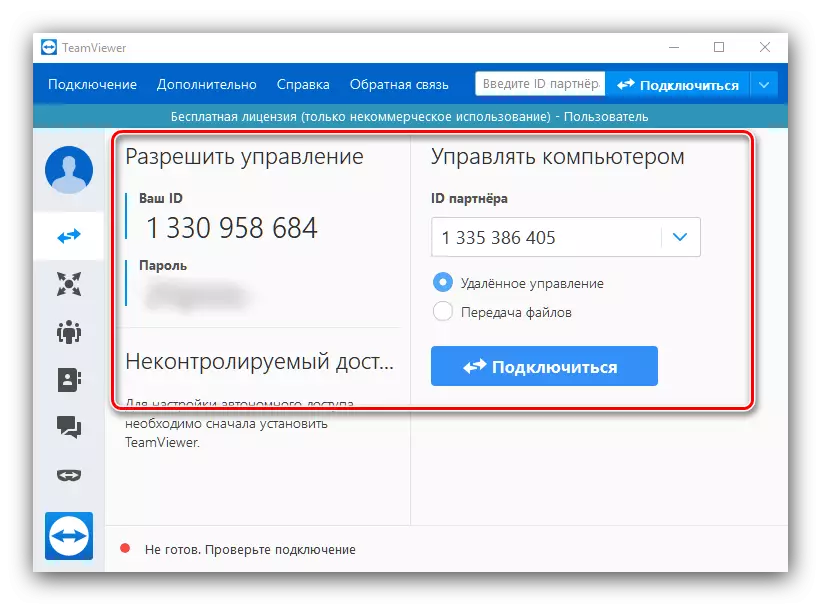
- Next, the main program window will be open, where two fields will be interested in - "Your ID" and "Password". This data will be used to connect to a computer.
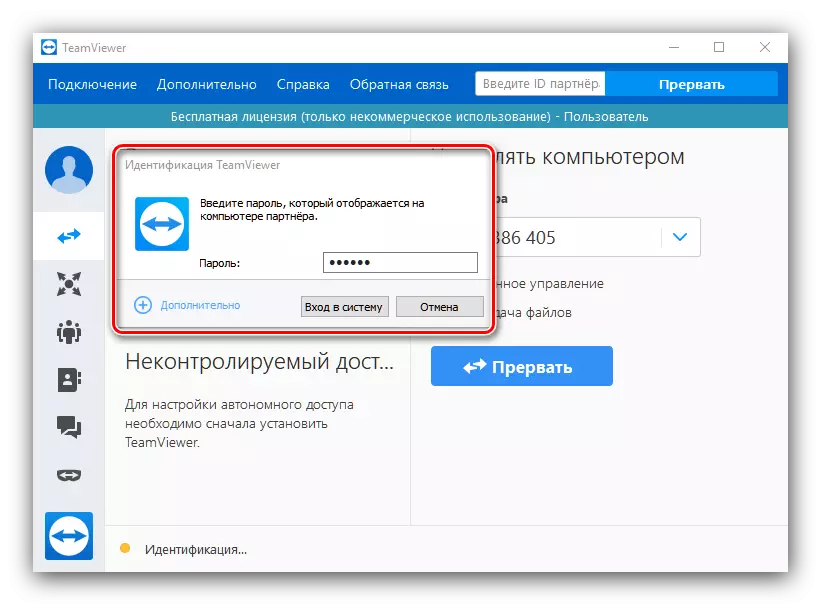
- As soon as the program is running and on the client computer, you can start connecting. To do this, in the "Partner ID" field, you must enter the appropriate number (ID) and click the "Connect to Partner" button. Then the program will ask you to enter a password (displayed in the "Password" field). Next will be established with a remote PC.
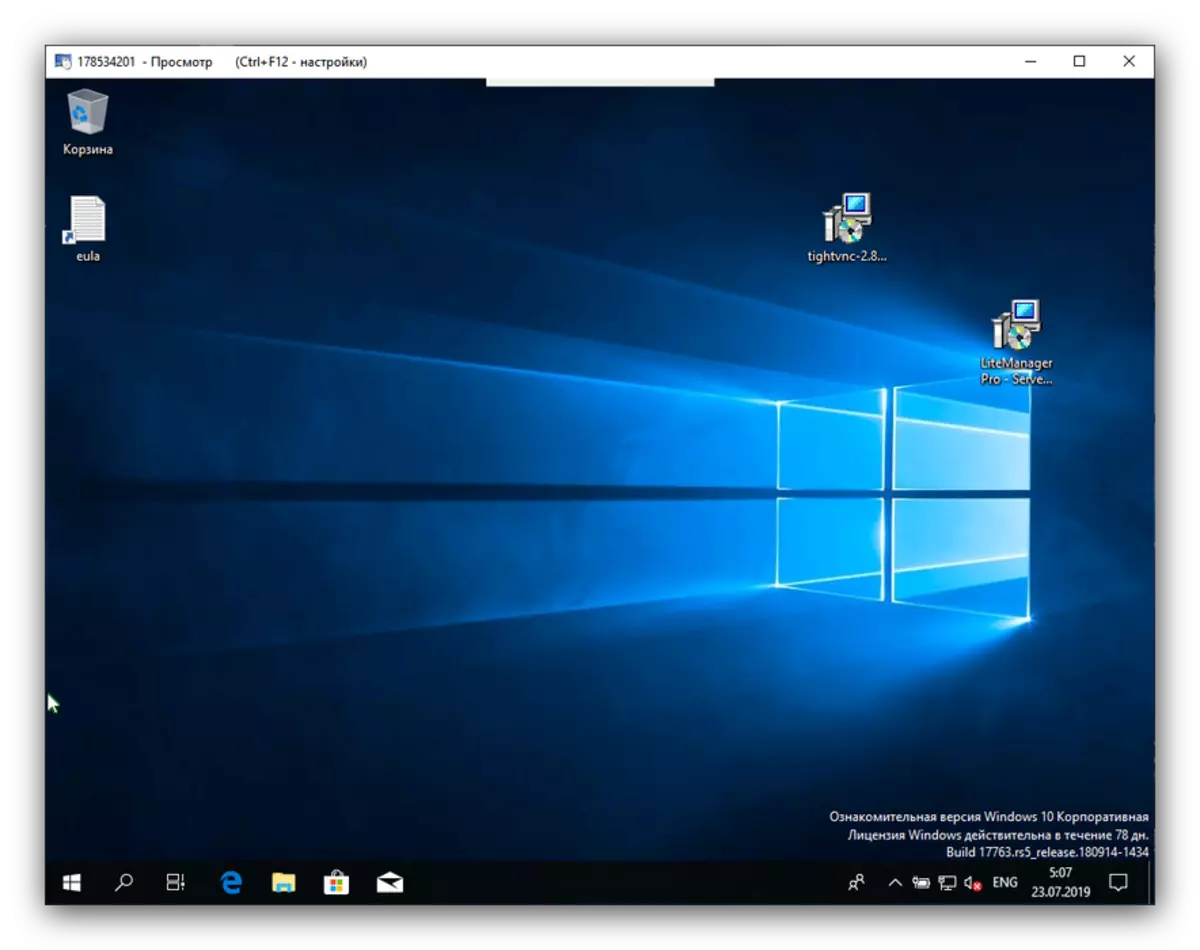
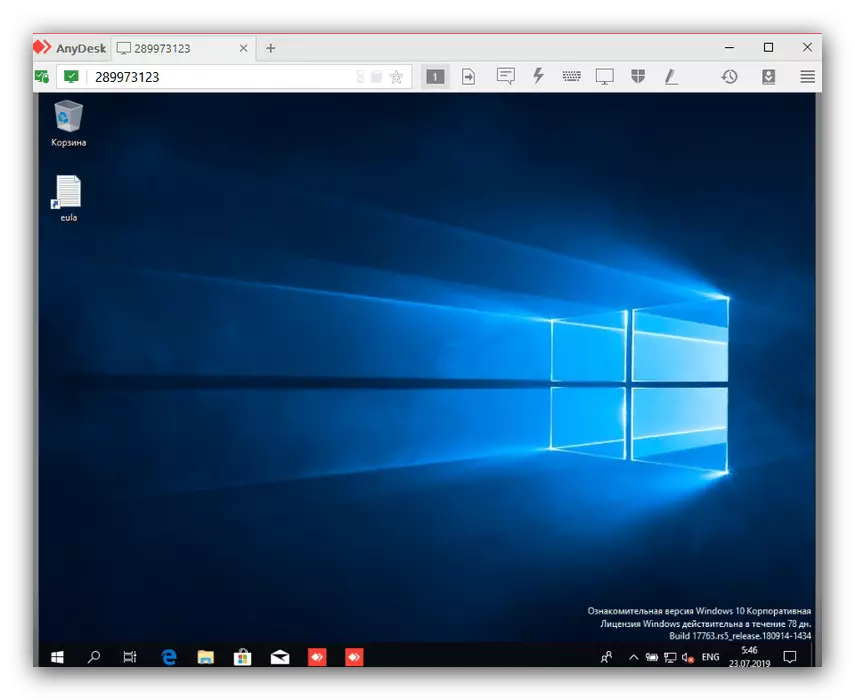
- After installing the connection, the desktop will appear.
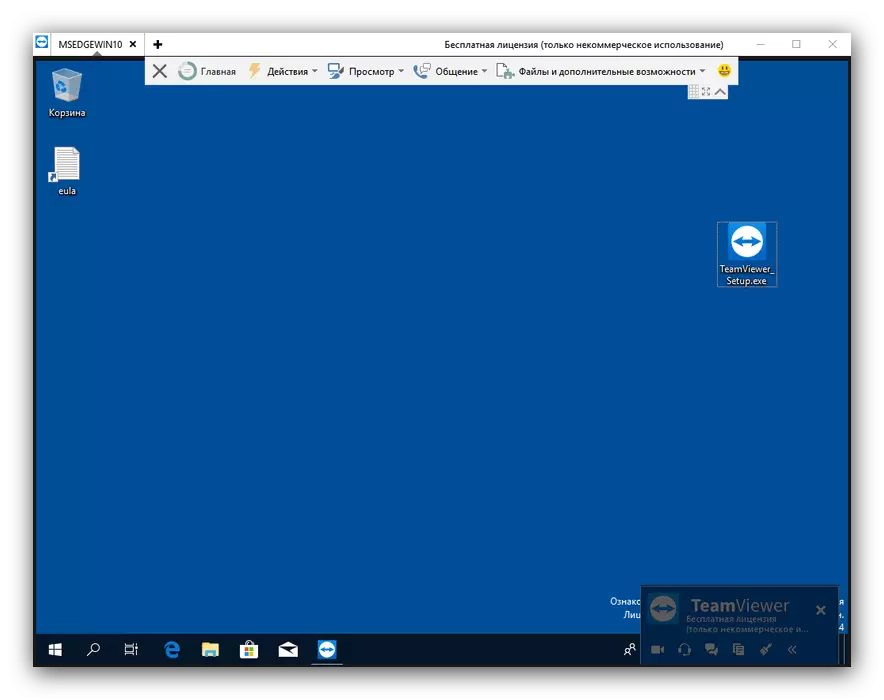
Timwiere is one of the most popular and convenient solutions for remote work. The picture spoil unless the rare bugs of the connection.
Method 2: TIGHTVNC
Another option of remote connection to the PC will be activated by the TIGHTVNC application, which is also to solve the task supplied today.
Download TightVNC from the official site
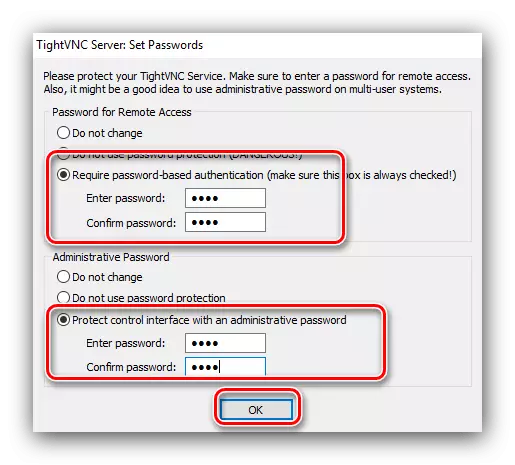
- Load the software package and install it on both target computers. In the process, a proposal will appear to set passwords for connecting and accessing administrative options - we recommend setting both.
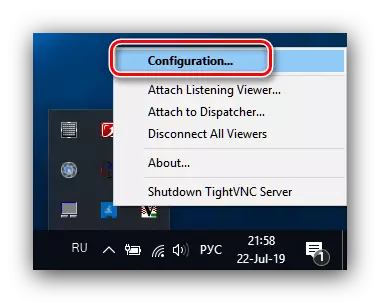
- After installing the components, go to the application configuration. First of all, you should configure the server part, that is, the one is installed on the computer to which we will connect. Find the application icon in the system tray, click on it with the right mouse button and select the "Configuration" option.
- First of all, check if all items are noted on the Server tab - these options are responsible for the connection.
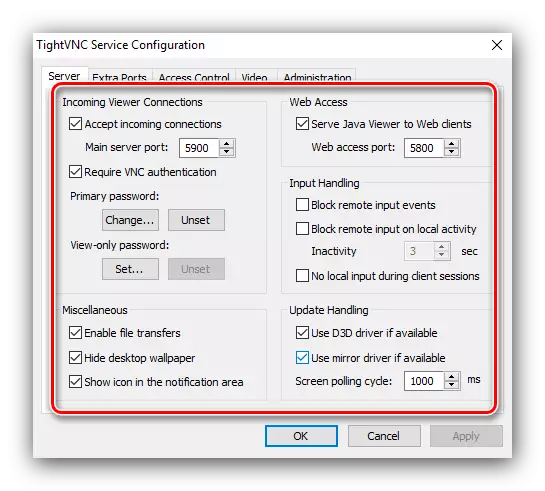
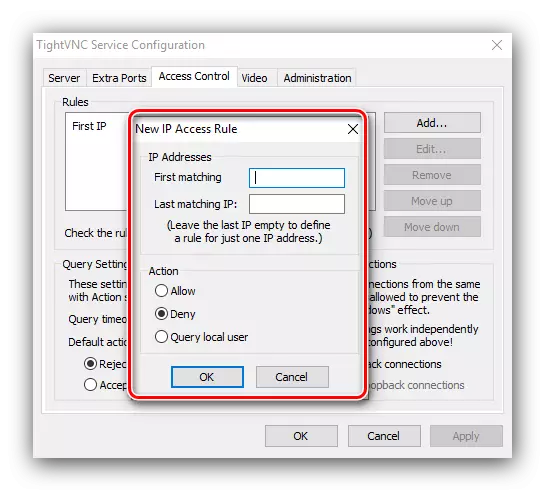
Advanced users will also not prevent visit the Access Control section, in which you can set the range of IP addresses from which the connection will be connected to this computer. Click the "Add" button, then enter the address or pool address in the address dialog box, then click OK.
- Next, you need to find out the IP address of the machine server. On how to do it, you can learn from the article on the link below.
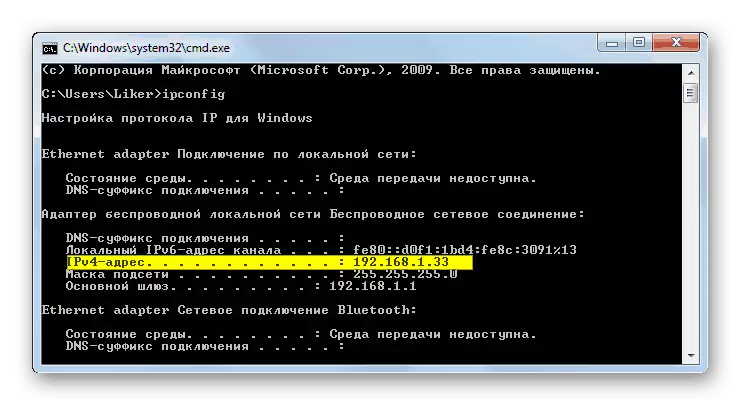
Read more: learn the IP address of the computer
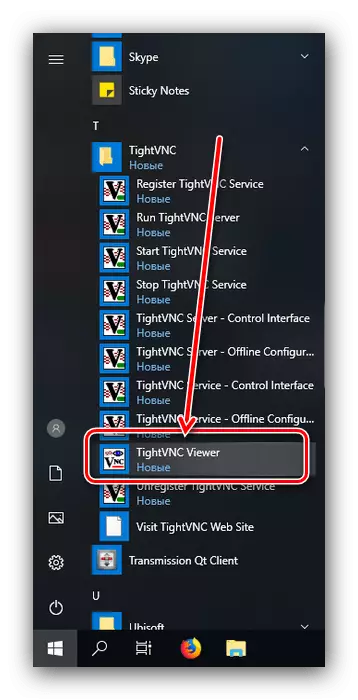
- To connect, open the TightVNC Viewer on the client machine - to do this through the application folder in the Start menu.
- In the "REMOTE HOST" field, enter the address of the target PC.
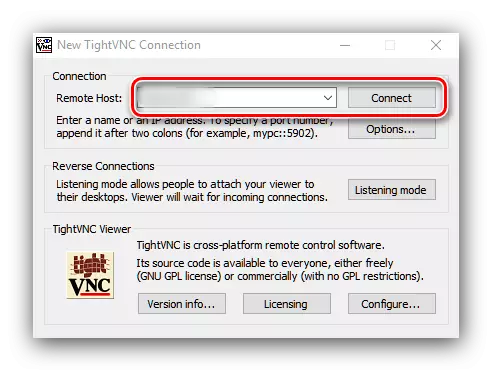
In addition to the IP, in some cases it may be necessary to additionally enter the connection port, if a value is different from the default set. In this case, the input circuit varies slightly - IP and port are entered through a colon:
* Address *: * port *
Both values should be prescribed without stars.
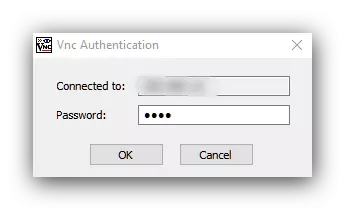
- Check the correctness of the input of the desired data, then press "Connect". If the password is set to connect, you will need to enter it.
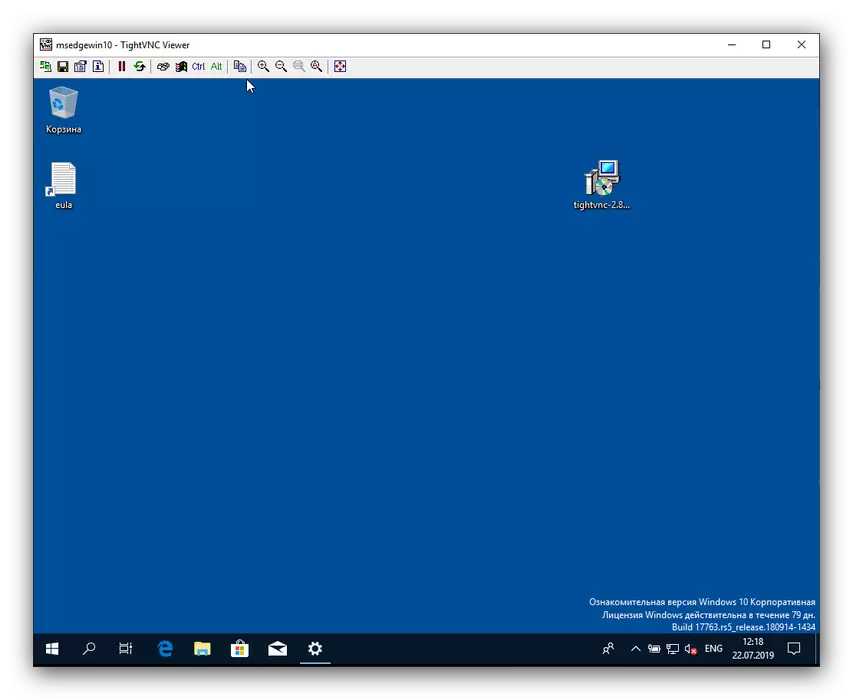
- Wait until the connection is set. If everything is done correctly, you will appear before you the desktop of the remote computer, with which you can already work.
As you can see, nothing complicated - TIGHTVNC is very easy to control and configure, besides perfectly free.
Method 3: Litemanager
Another application by which you can organize a remote connection to another computer - LiteManager.
Download LiteManager from the official site
- In contrast to the previous solution, the Litevemer has separate installers for server and client options. You should start the installation from the first to move the LiteManager Pro file - Server to the machine to which you want to connect, and run it. In the process, a window will appear with the automatic Windows Firewall configuration confirmation - make sure that the desired check mark is marked.

At the end of the installation, a proposal will appear to set a password for connecting, as well as solve the connection via ID. The latter resembles a similar solution at TeamViewer.
- Now you should install the client version on the main computer. This procedure does not imply any specific nuances and is performed in the same way as in the case of any other Windows application.
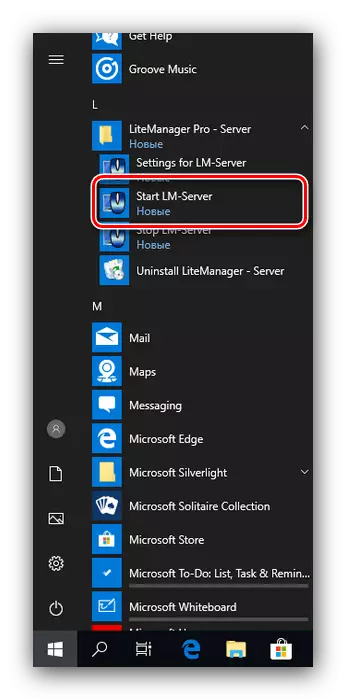
- To install the connection, make sure that the LiteManager server is running on the target. By default, it is turned off - you can start the application through the same file in the program folder in the Start menu.
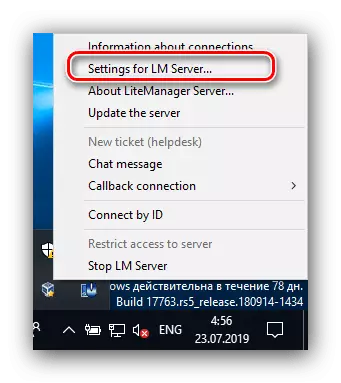
After starting, the server will need to configure. To do this, open the system tray, find the LiteManager icon, click on it with the right mouse button and select the option "Settings for LM Server".
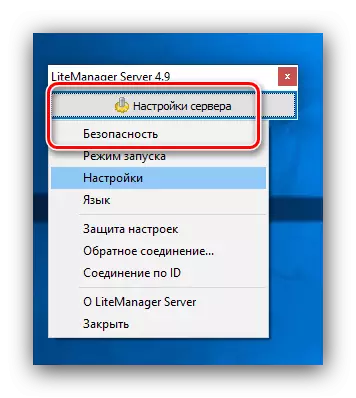
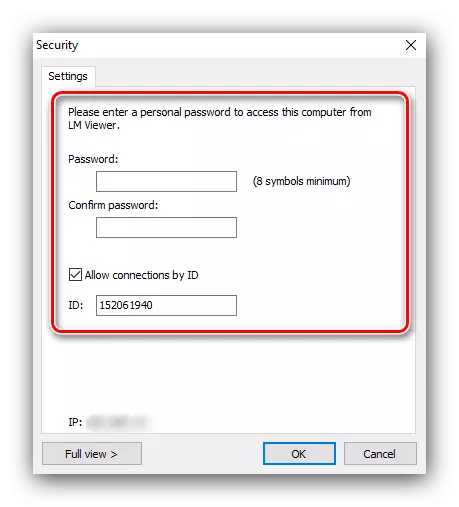
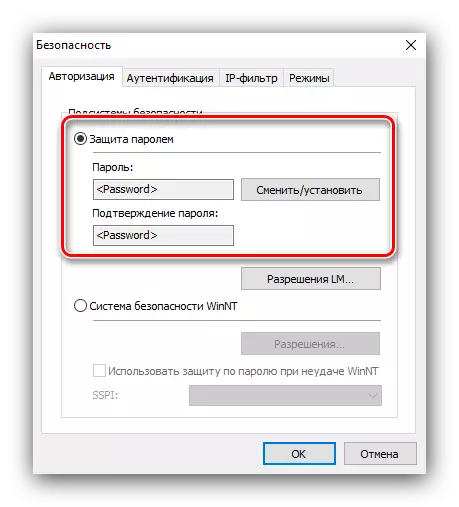
Click on the Server Settings button and select Safety.
On the Authorization tab, make sure that the Password Protection item is marked, then click "Change / Set", then enter an eight-digit password in both text fields.
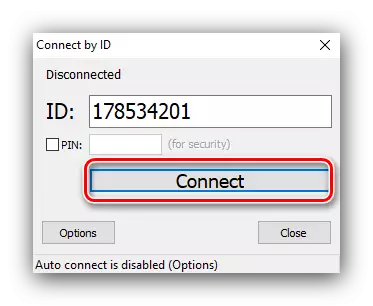
- To start the server, use the icon in the tray again, but this time simply click on it with the left button. A small window will appear with the ID value, remember it or write it down. You can also set a PIN code to protect against an unwanted connection. Click "Connect" to start the server.
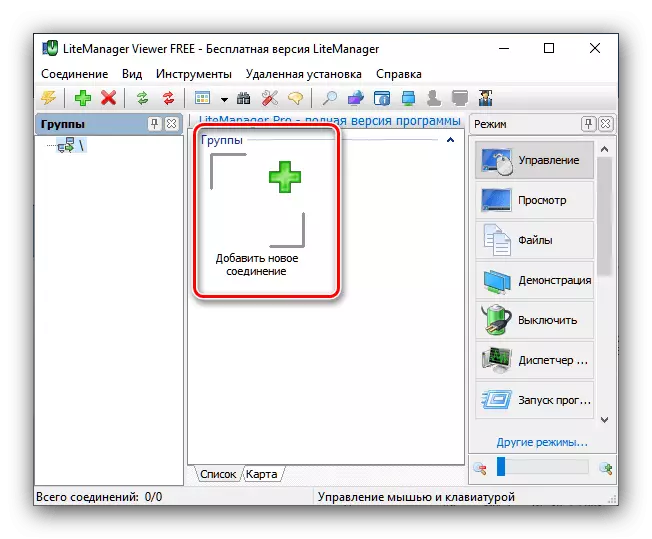
- The client option can be launched from a shortcut on the "desktop". In the Application window, double click on the left mouse button on the "Add New Connection" item.
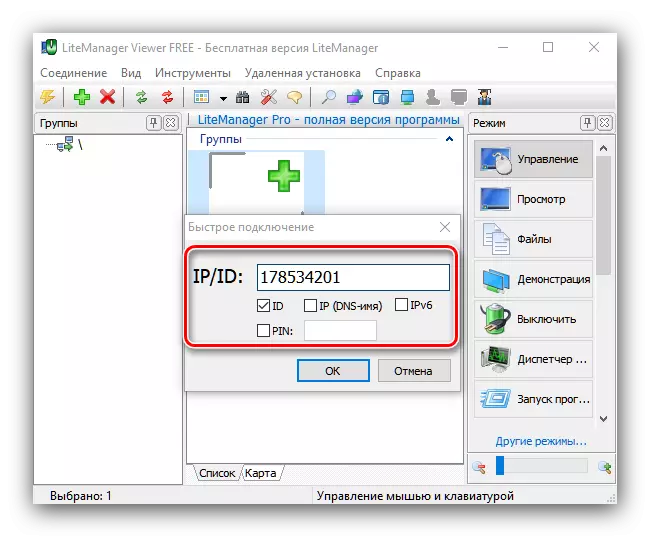
In the pop-up window, enter ID and PIN, if you specified in the previous step, and click OK.
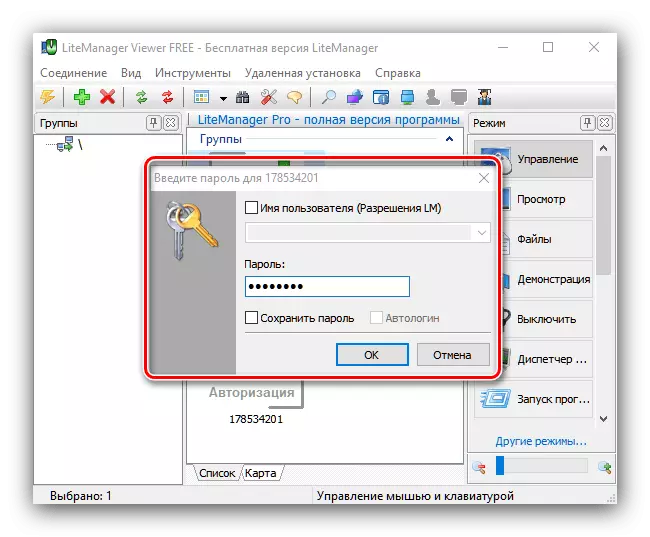
You will need to enter a password specified in the server settings in the previous step.
- Using the "Modes" menu, located on the right side of the client manager, select the desired connection option - for example, "view", then double-click on the connected connection.
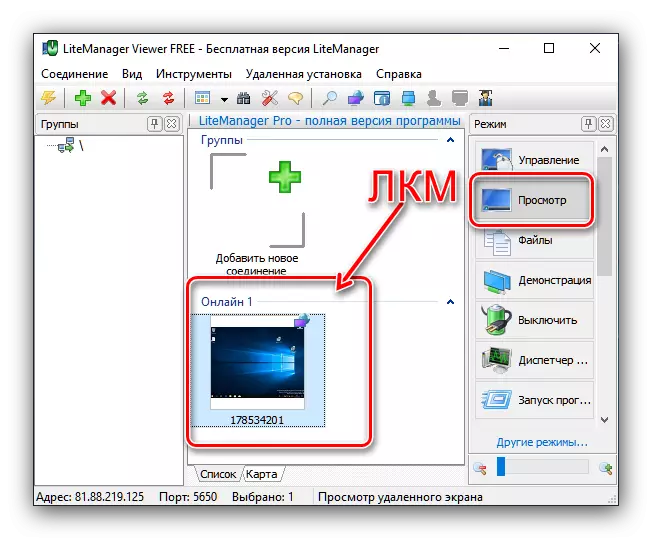
You can now view the contents of the remote computer screen.
The light chamber is a slightly more complex solution than those discussed above, but provides good safety settings and the general functionality of working with a remote machine.
Method 4: AnyDesk
An excellent alternative to all previously mentioned programs is AnyDesk. To use it, it is not even necessary to be installed on the computer.
- Download the executable file for Windows and place the server first first, then on the client machine.
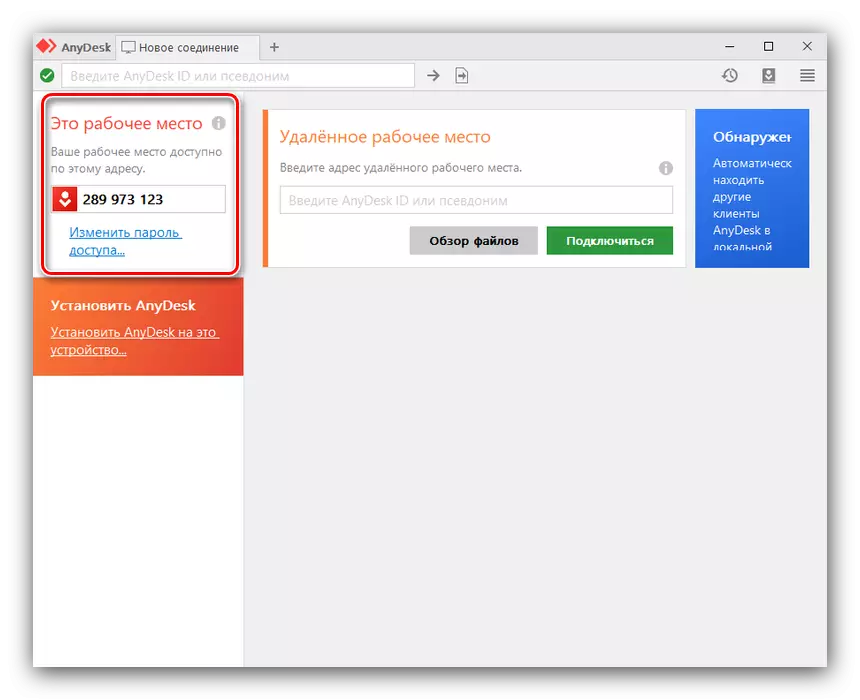
- Run the option on the computer to which you want to connect. Find the "this workplace" block on the left part of the window, and in it - a text string with a PC ID. Write down or remember this sequence.
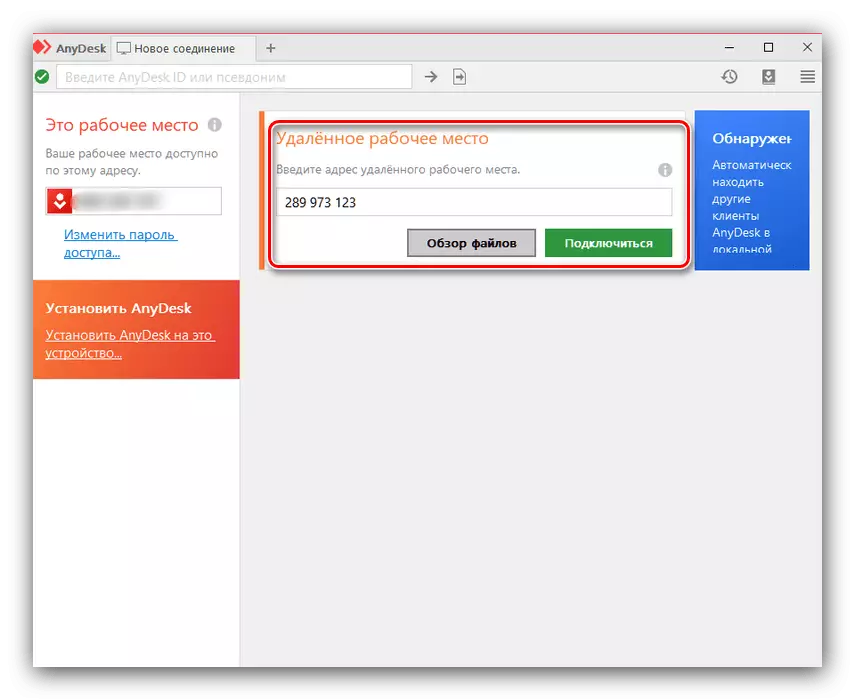
- Now run the application on the client computer. In the "Remote Workplace" block, enter the identifier data obtained in the previous step, and click "Connect".
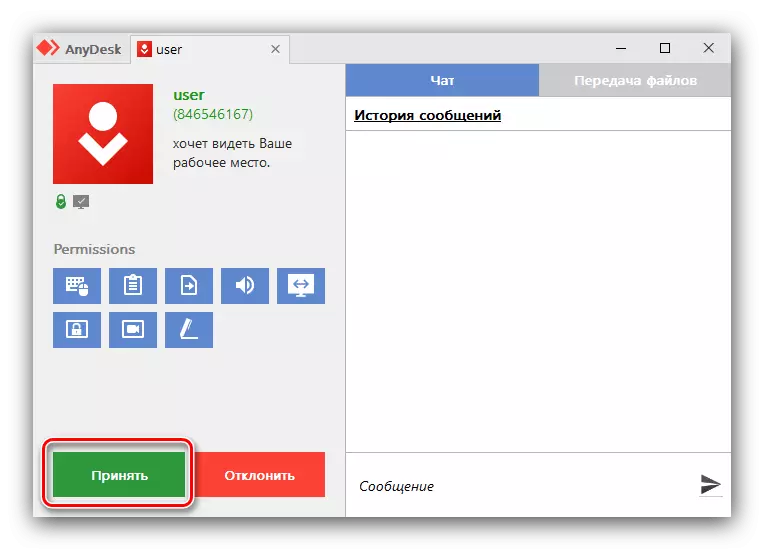
- The server machine will require a call to connect.
- After installing the connection, the remote computer will be available for manipulations from the client.
As you can see, use AnyDesk much easier than other applications from today's article, but this solution does not provide direct connection and uses its own server, which can be fraught with security threats.
Method 5: System
In Windows 7 and above, Microsoft has embedded the remote access to other machines in the same local network. Its use is carried out in two stages - setting up and actually connected.
Setting
To begin with, you will configure the computer to which we will connect. The process is to install a static IP for this machine, as well as the inclusion of the remote access function.
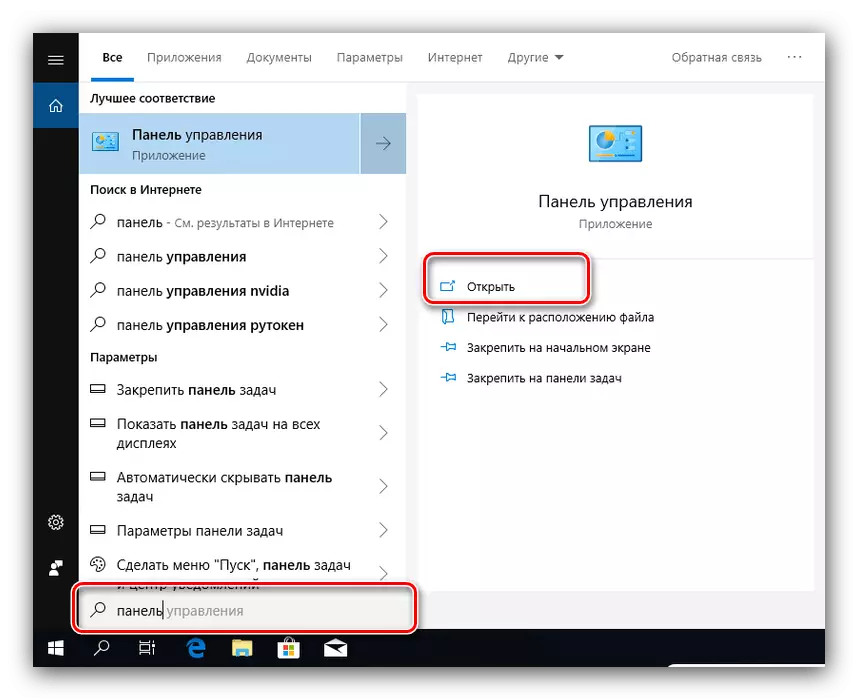
- Use "Search" to find and open the "Control Panel".
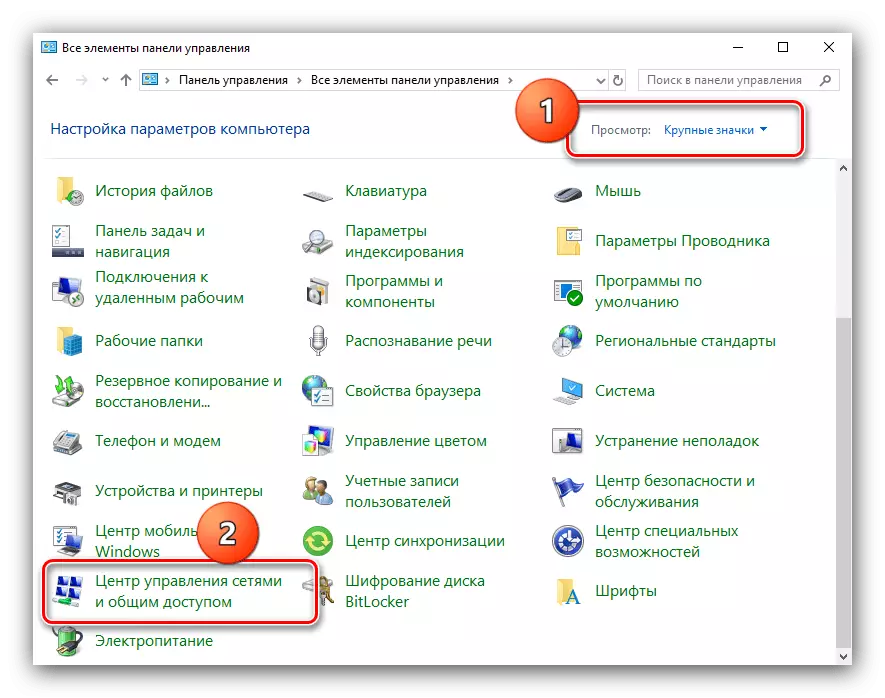
- Switch the display of icons in "Large", then open the "Network and Shared Access Center" item.
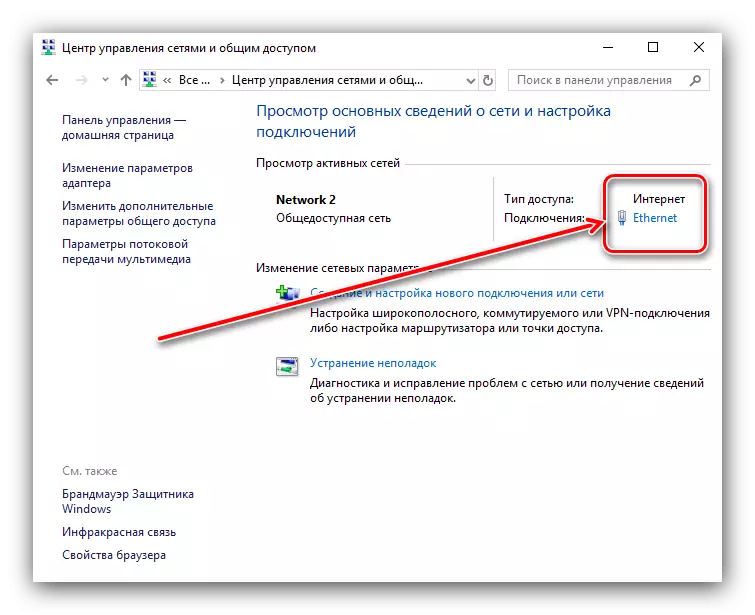
- Find a link that matches the Internet connection adapter, and click on it with the left mouse button.
- Next, open "Details".
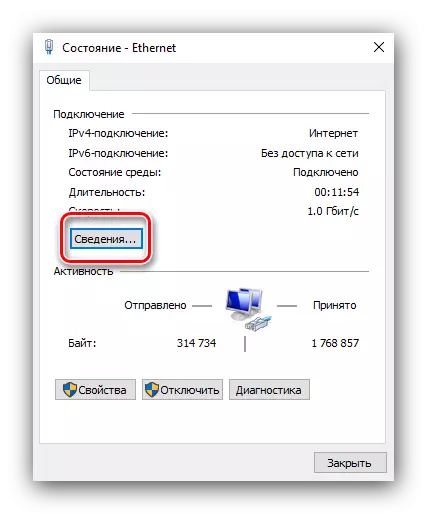
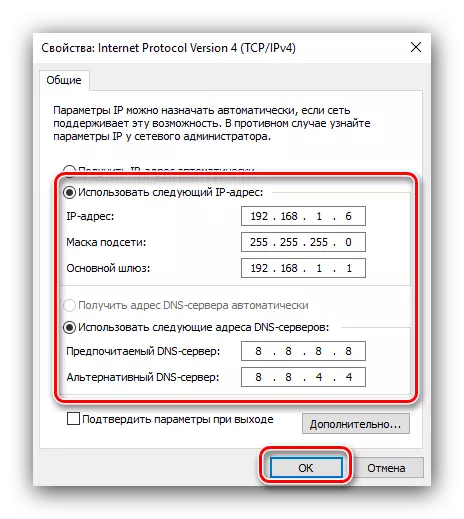
Copy the values from the "IPv4 Address" position, the default gateway, "DNS servers", they will need it for the next step.
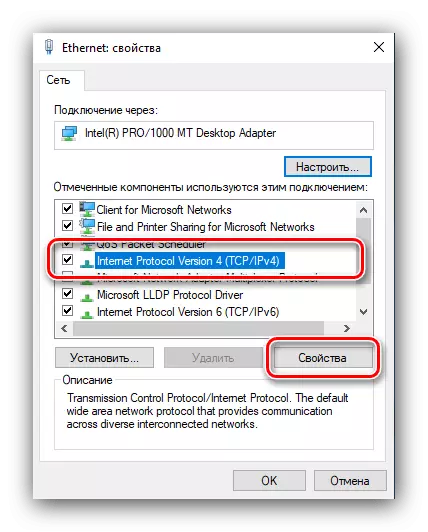
- Close the "Information" and click the "Properties" button.
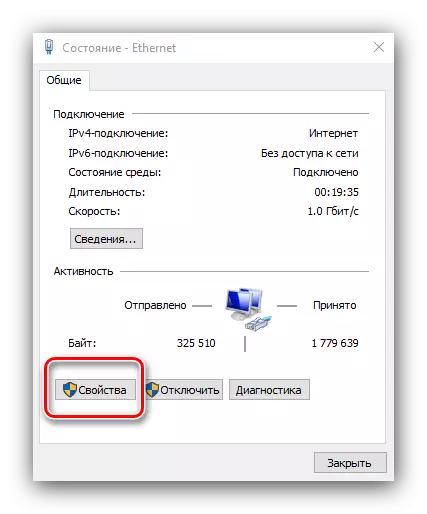
Find the "Internet Protocol Network V4" in the list, select it and click "Properties".
- Switch to manual entry of addresses and enter the values received in the connection information in the previous step to the appropriate fields.
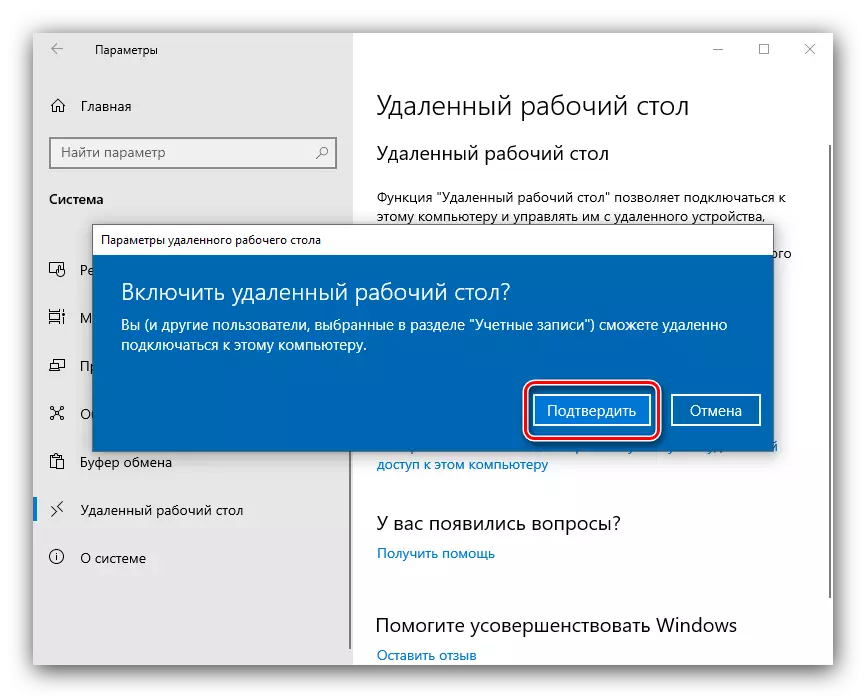
- Now you need to enable the remote access feature. On Windows 10, you will need to open "Parameters" (more convenient to the combination of Win + i), then select "System".
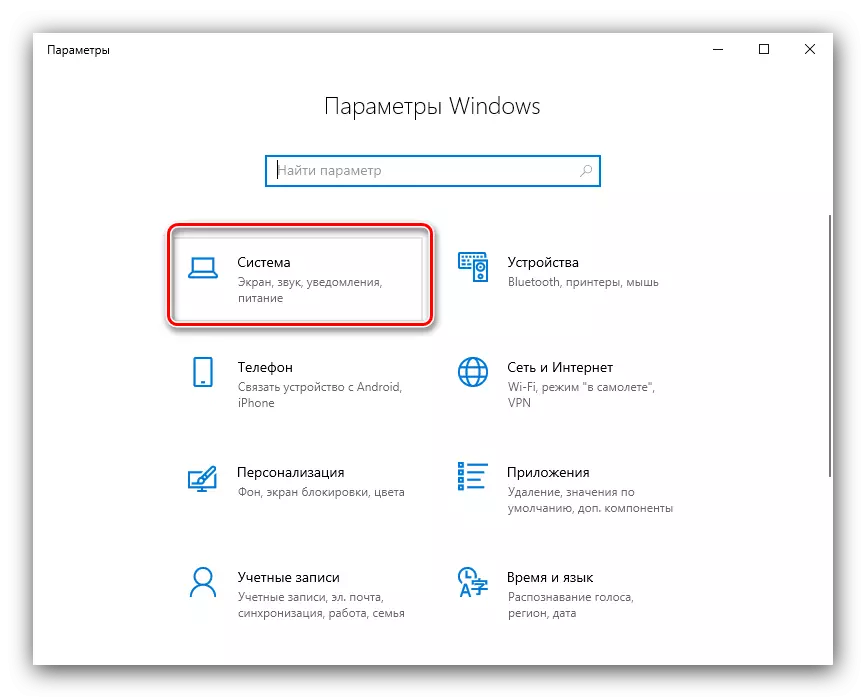
In the system settings, we find the "Remote Desktop" item and activate the switch.
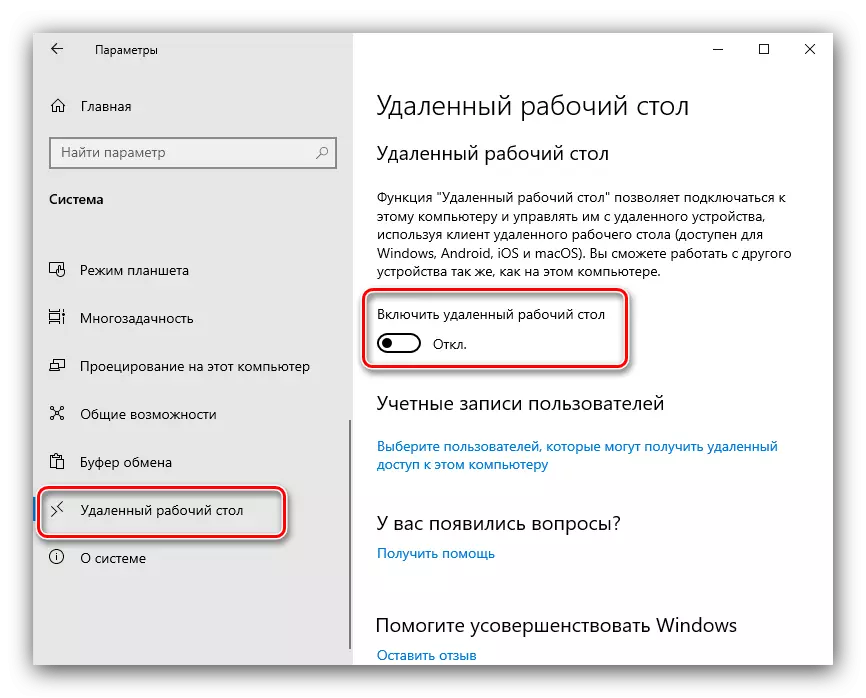
It will be necessary to confirm the operation.
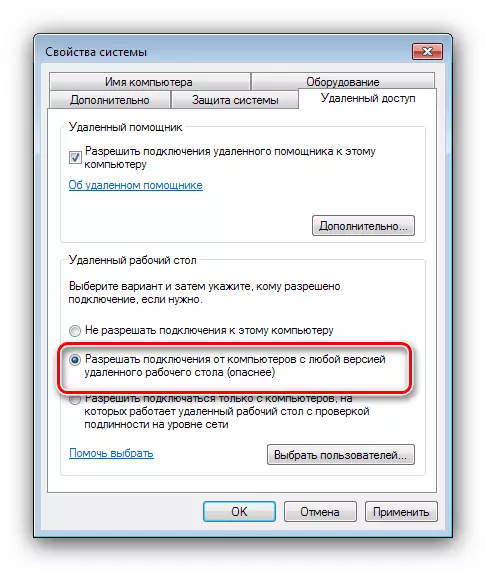
- On Windows 7 and over, open the "Control Panel", "System" items - "Setting the remote access" and check the "Allow connections from computers with any version of the remote desktop ...".

Remote connection
After all the preparations, you can go to the connection setting.
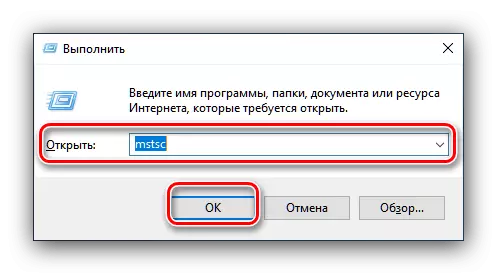
- Call the Win + R keys with a combination of the Win + R keys, enter the MSTSC command and click OK.
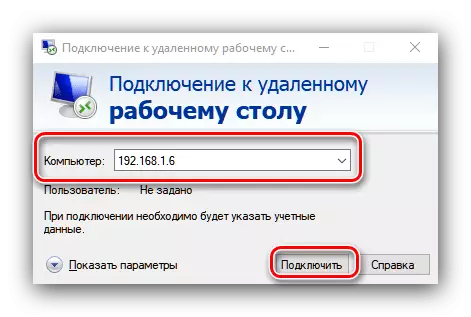
- Enter the static computer address configured earlier and click "Connect".
- A proposal will appear to enter account credentials from the target computer. Enter the name and password, and click "OK".
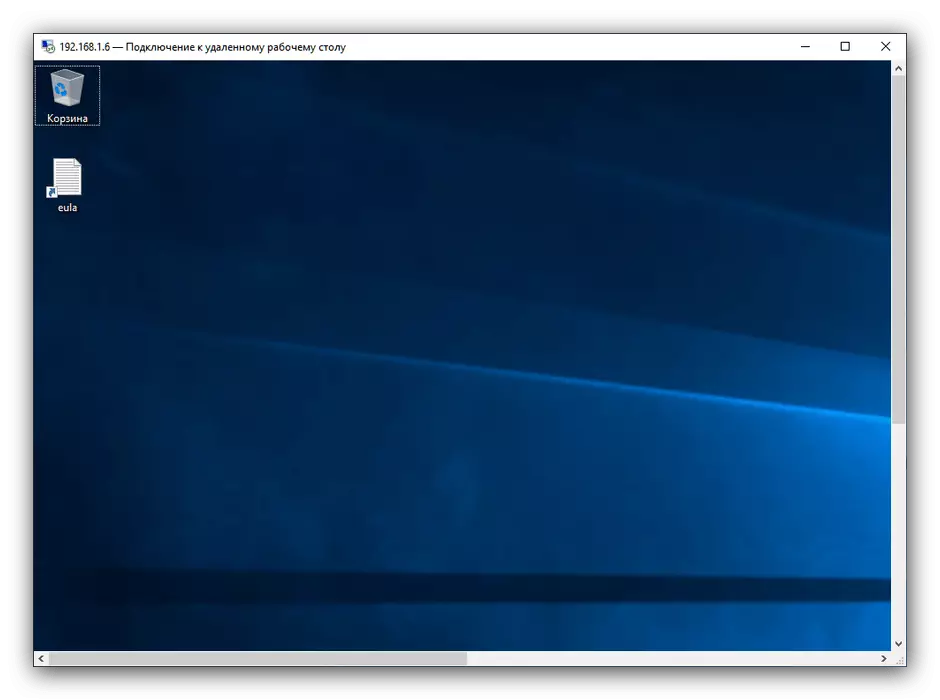
- Wait until the connection is set, then a window with a remote desktop will appear before you.

The system method has one obvious disadvantage - it only works for computers on the local network. There is an option to enable this to work through the Internet, however, it requires a user of some specific skills and unsafe.
Conclusion
We reviewed several ways to have a remote connection to another computer. Finally, we want to remind - be attentive using the proposed solutions, since there is a risk of losing personal information.