
With the need to delete one, several or all images, the systematization and storage of which are trusted by Google photos, almost all service users are facing. This procedure can be performed not by the only method, end with various results, and in the article we will consider not only its practical implementation, but also the nuances that may have to take into account before the destruction of the files.
Before you carry out the removal of photos of the photo procedure, it is recommended to learn all the ways to carry out it, that is, to familiarize yourself with the material to the end and use the approach that will lead to the effect you need!
Option 1: Full removal
If you have a task to completely destroy pictures in Google, you can erase their source files and from memory connected to the system system, and from the cloud storage, it will be easy. You can use for the implementation of the procedure as a PC browser and an application-installed application client of the service under consideration.Method 1: Android and iPhone
Depending on which option of the Google application, you are involved - for android or ayos, the actions to remove the provided images of the image will be slightly different, so consider the implementation of the procedure in the medium of each OS separately.
Android
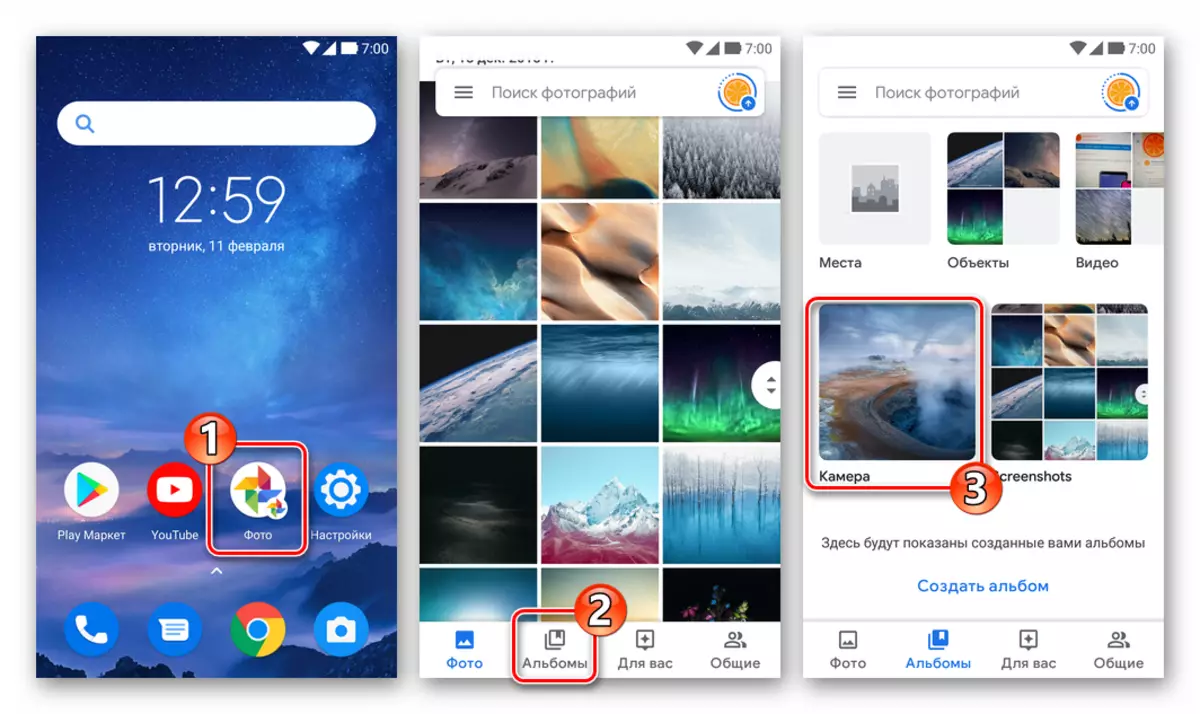
- Run the Google photo application on the Android device, go to the display of the display of the object showing the premises (for example, open the album containing an unnecessary photo).
iOS.
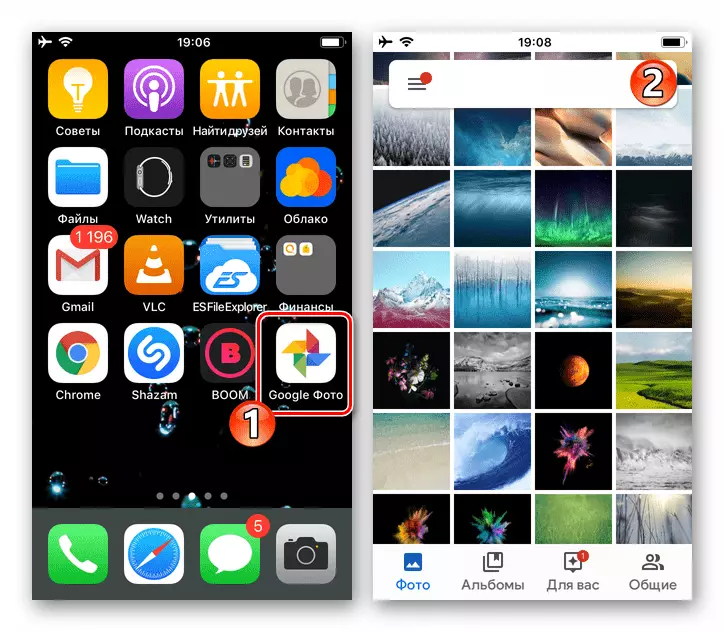
- Open the Google Photo for iOS, find the preview of the image to the "Photo" tab or go to the "album", where unnecessary pictures are poured.
Method 2: Computer
A more versatile and often more convenient tool for the removal procedure from Google photo, rather than a mobile application on Android-device or iPhone, is any browser available from a desktop or laptop.
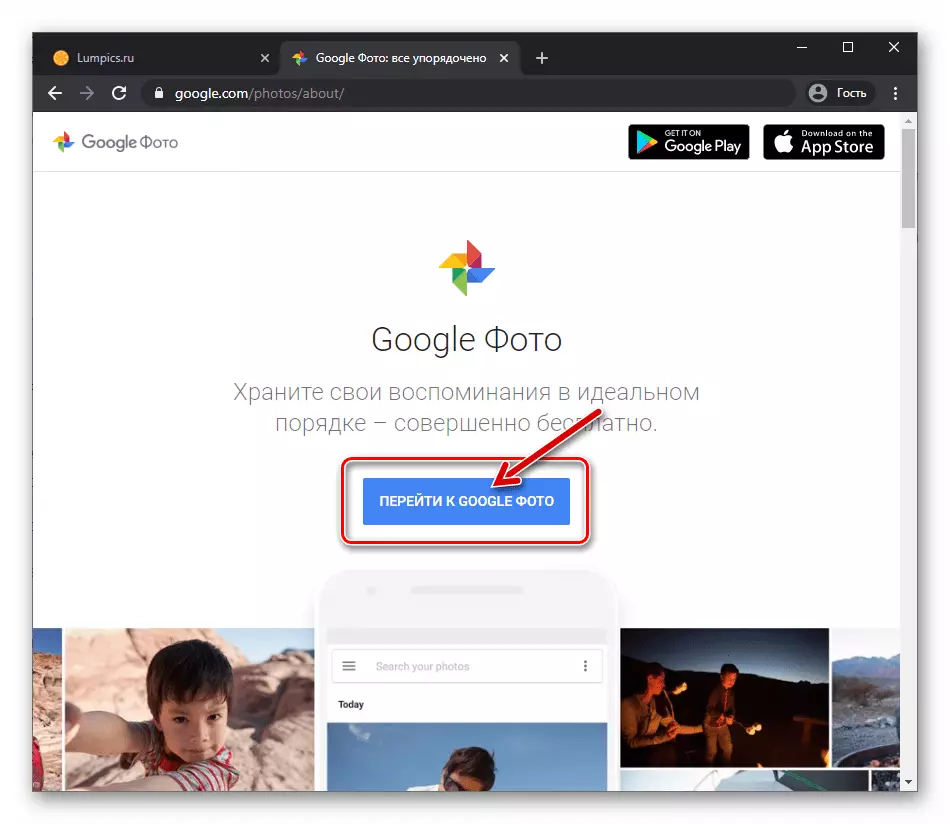
- Run your preferred web browser (in the Google Chrome example) on the PC and go to the service under consideration - photos.google.com. Click "Go to Google Photo" on the page that opens.
Open Google Photo Photos
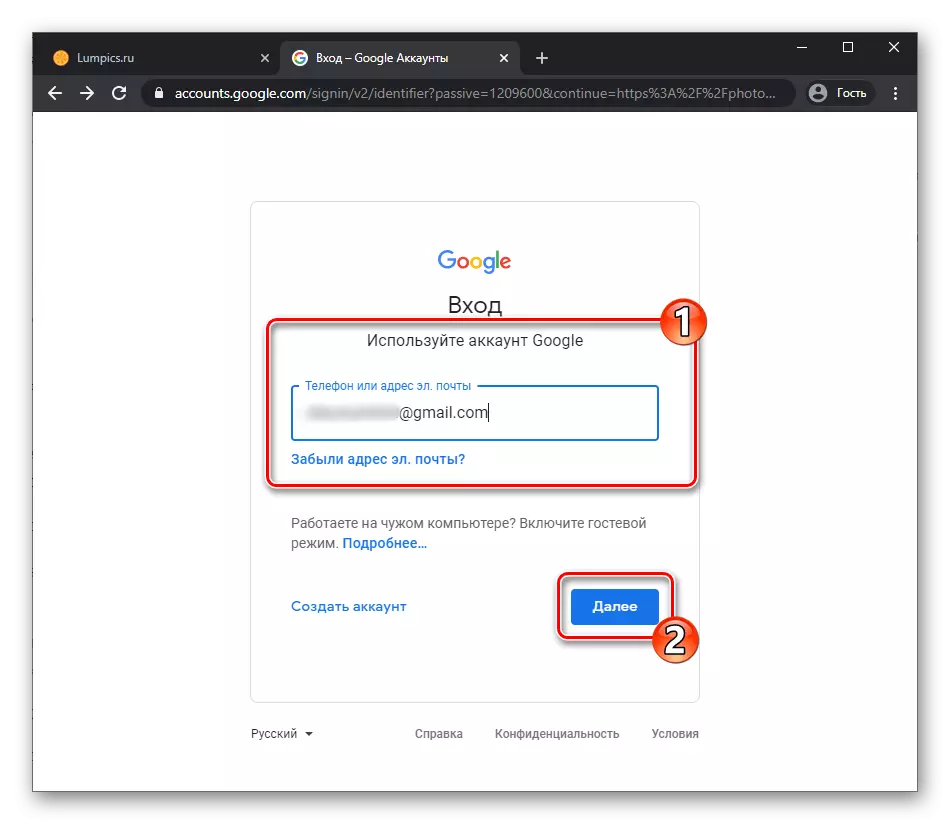
- Log in to the service by providing login and password from Google account, which is used on your mobile device.
Option 2: Deleting from the device, but not from the cloud
In a situation when the removal of images is scheduled to be implemented in order to release the place in the mobile device repository, it is not at all necessary to destroy the files - in Google photo there is a special function that allows you to store your pictures without any problems on the servers owned by the "Corporation" server and from there Or extract if necessary.
Android
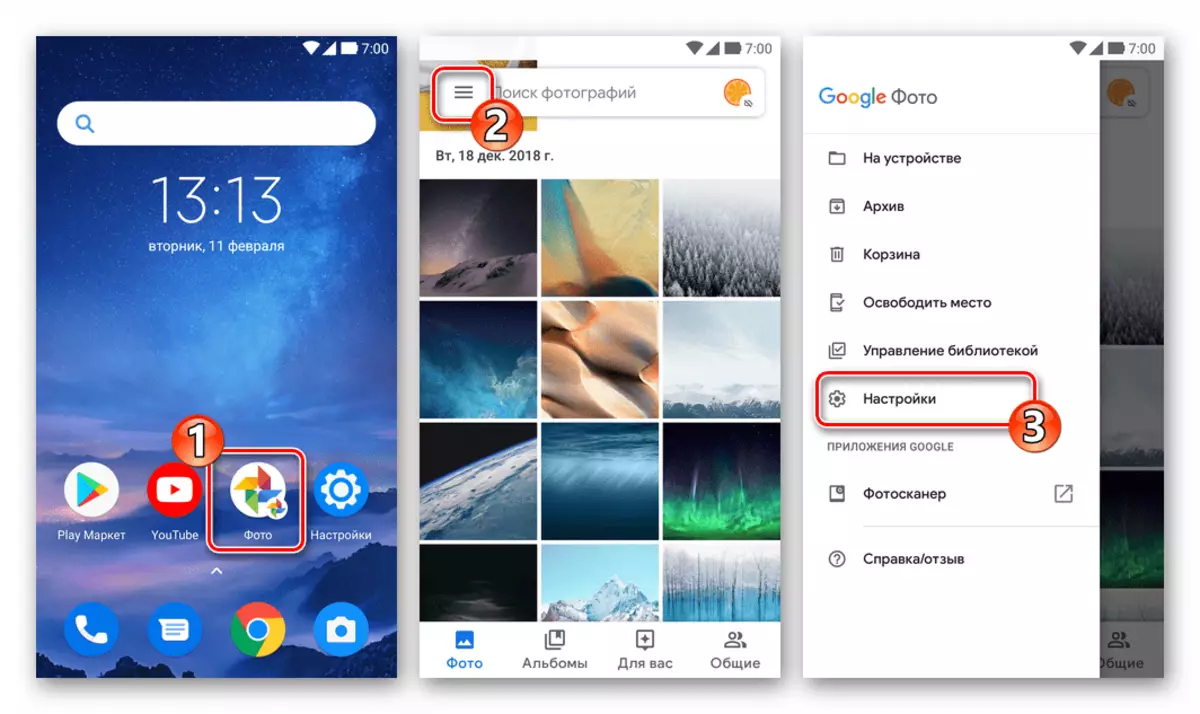
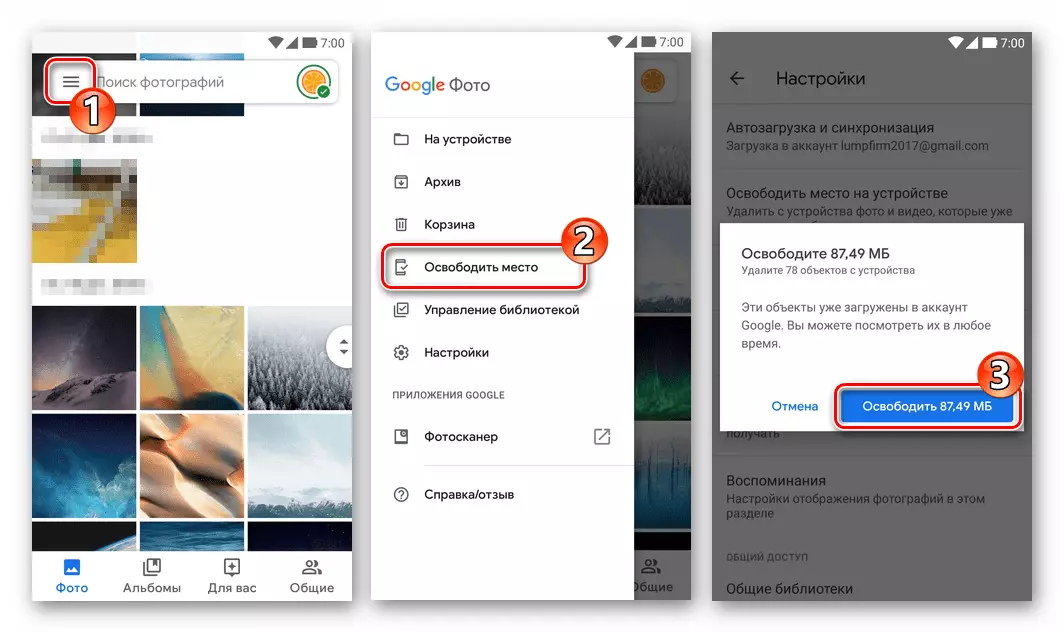
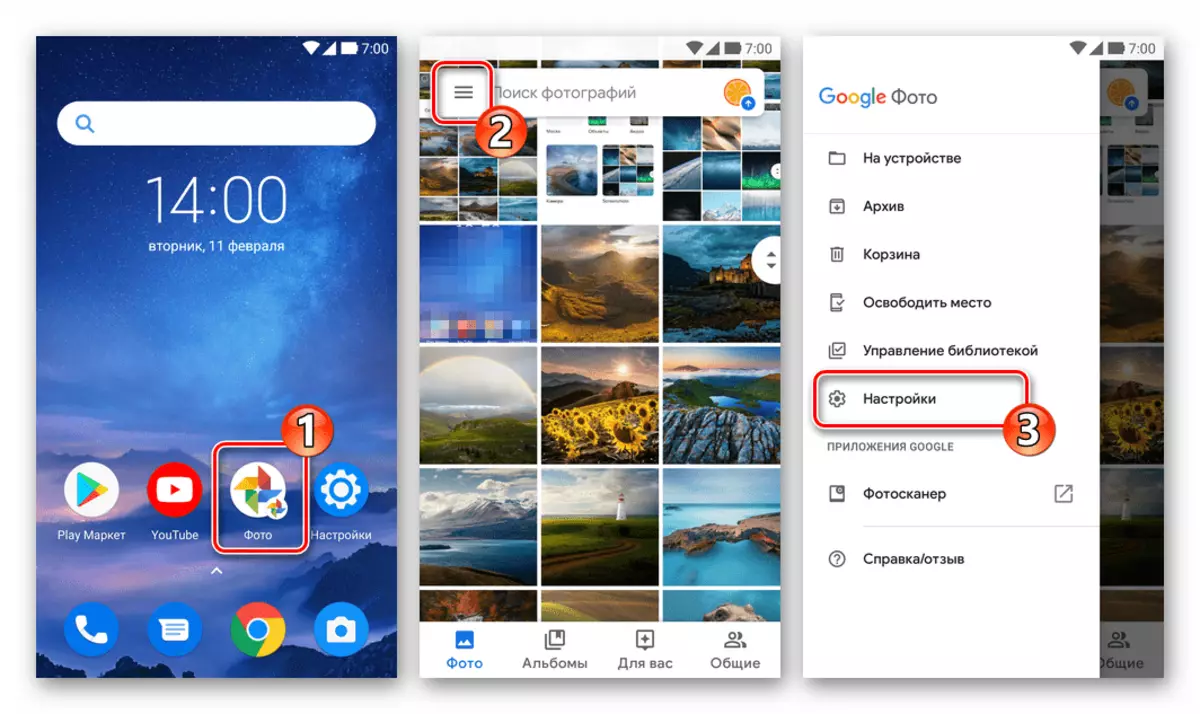
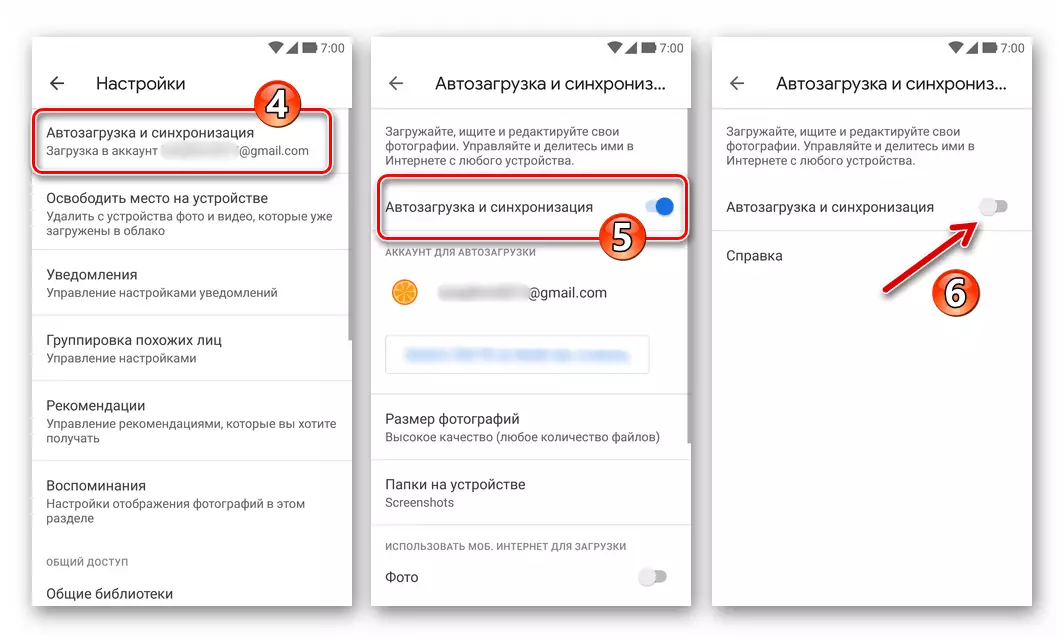
- Run google photo, call the main application menu and go from it to "Settings".
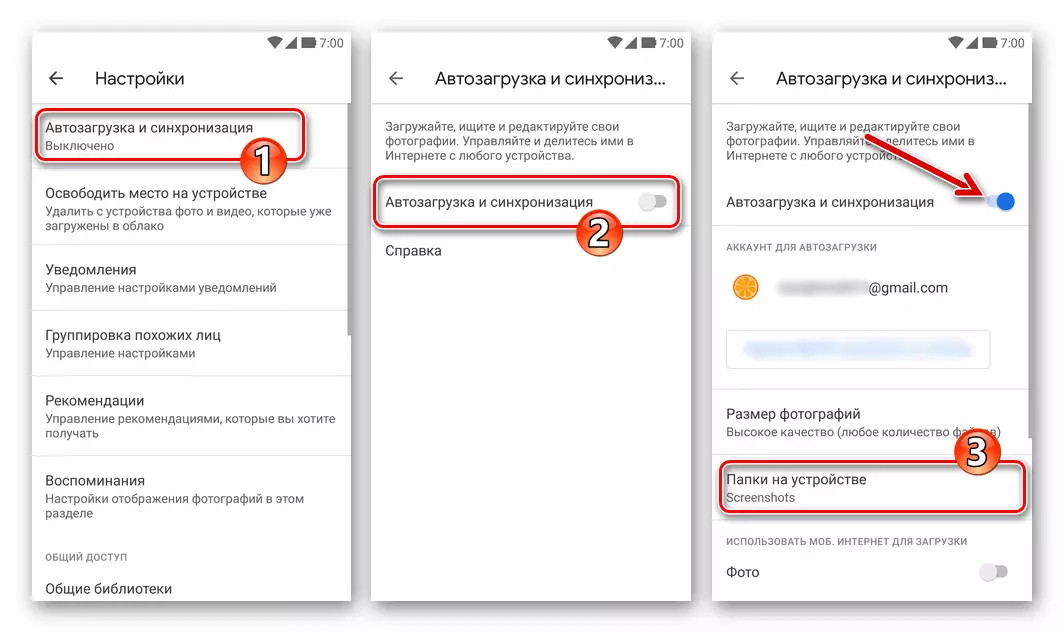
- Open the "Auto-load and synchronization" parameters and on the next screen, activate the same option, if this has not been done earlier. Additionally, determine the "folders on the device", the files from which will be unloaded into the cloud (the pictures created by the device cameras are copied automatically).
- Next, if the reverse situation is stated, it is recommended to connect the device to the Wi-Fi network and wait until copies of all the objects specified in step will be unloaded into the cloud storage - this process occurs in the background, control it in any way difficult, and the duration depends From the number of images in the memory of the device.
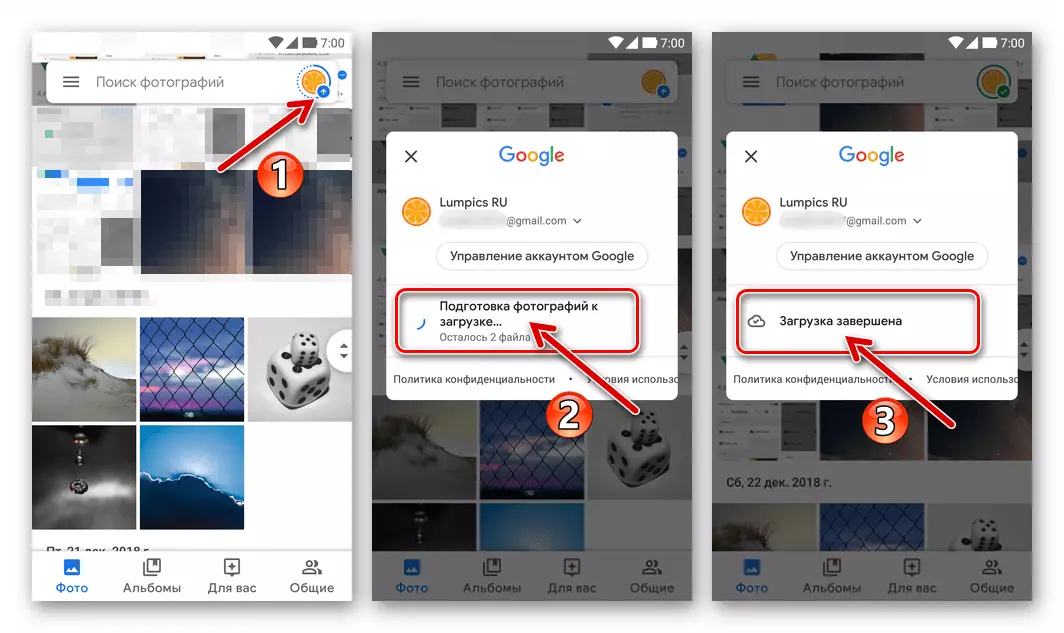
- In the main menu of the application, select "Release the place", and then tap on the "Free Number of MB" button.
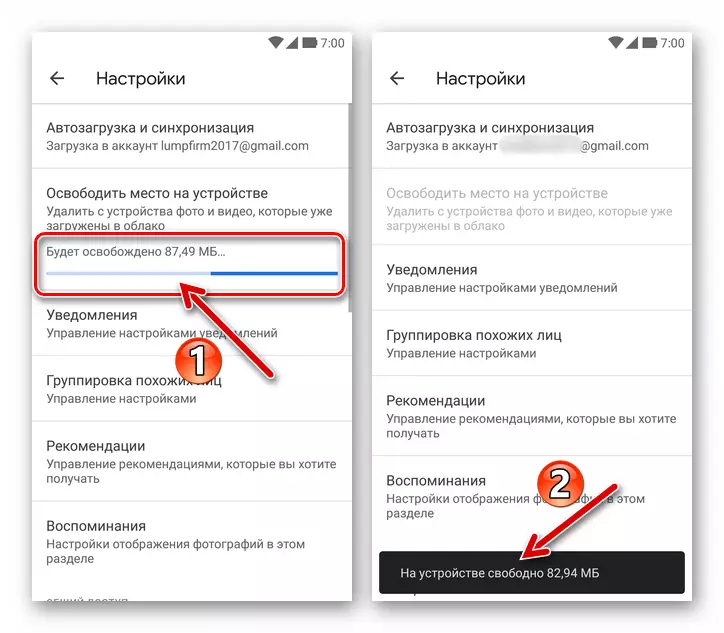
Wait for the removal from the device repository copies placed in the file cloud.
- In the future, as the new images are generated, so that they do not occupy in the device's memory, the execution of the previous point of instructions will need to be repeated periodically.
iOS.
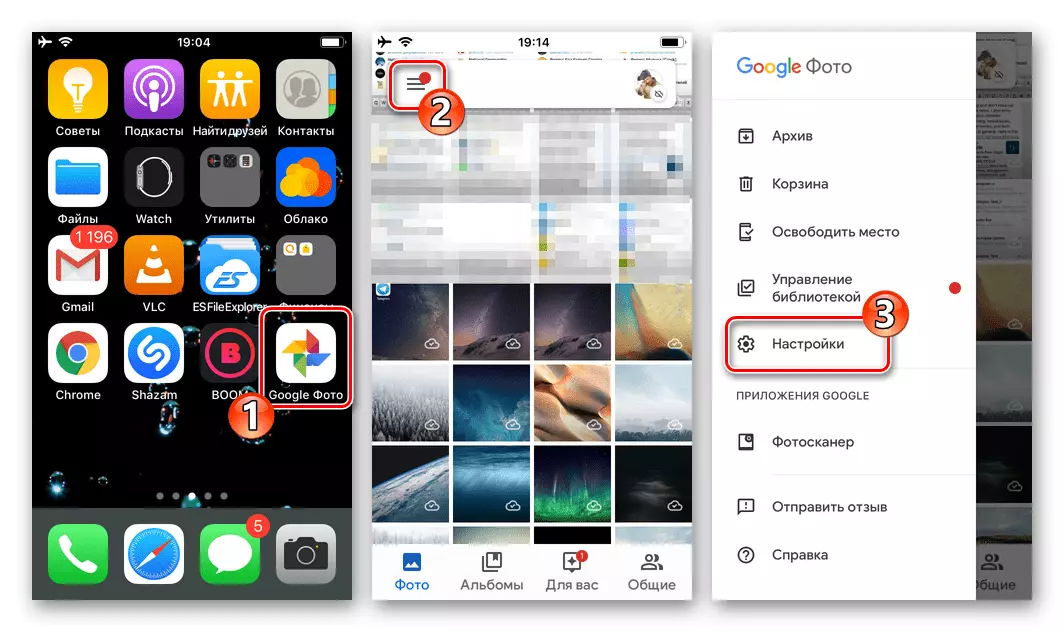
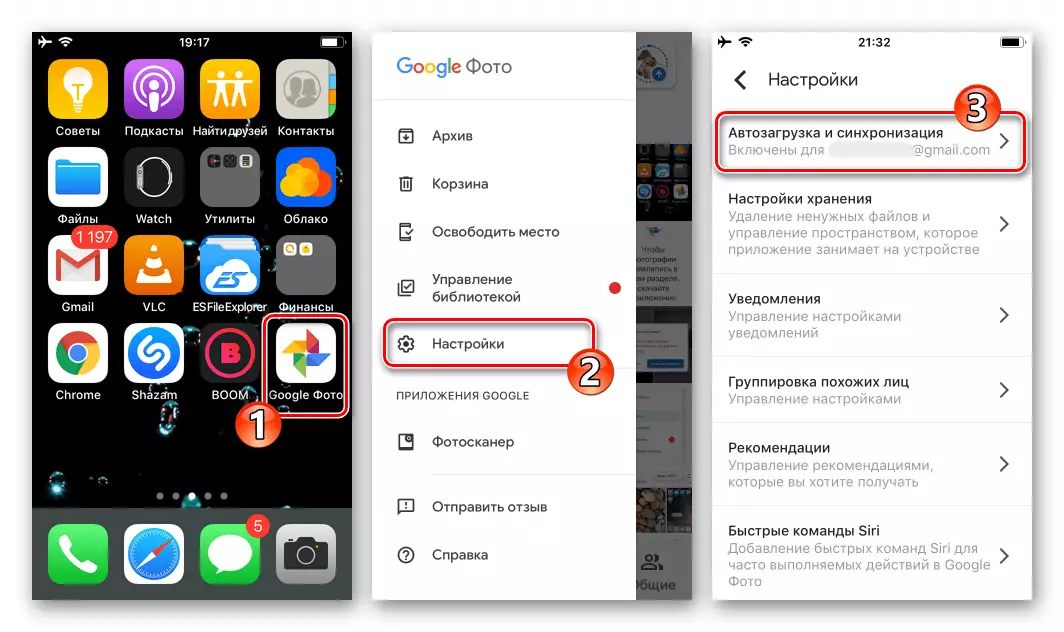
- Open Google Photo on the iPhone. Tapping along three Chertoks at the top of the left, call the main program menu and select "Settings" in it.
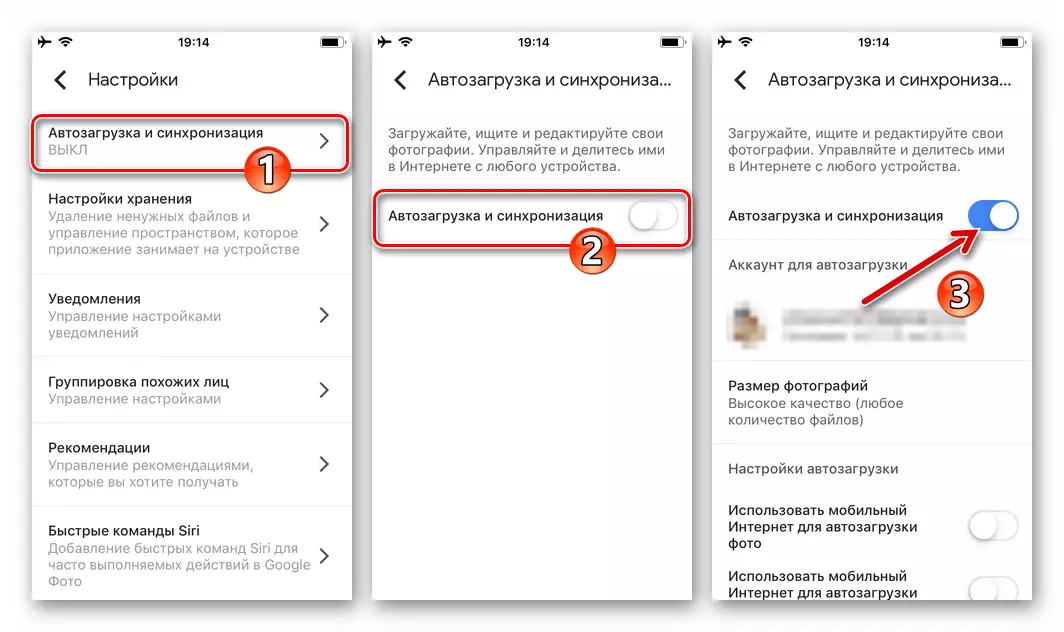
- Navigate to the first section of the "Auto-load and synchronization" parameters and activate the same option if you did not make it earlier. Return to "Settings".
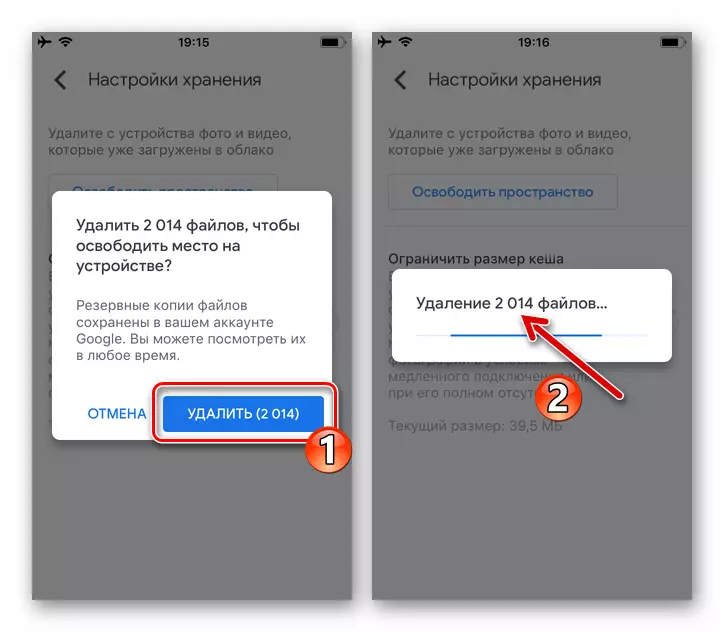
- Select "Storage Settings" in the list of program parameter categories, then on the screen that opens, tap the "Free Space" button. In response to the desired request, click on the "Delete (Number of Objects)" button.
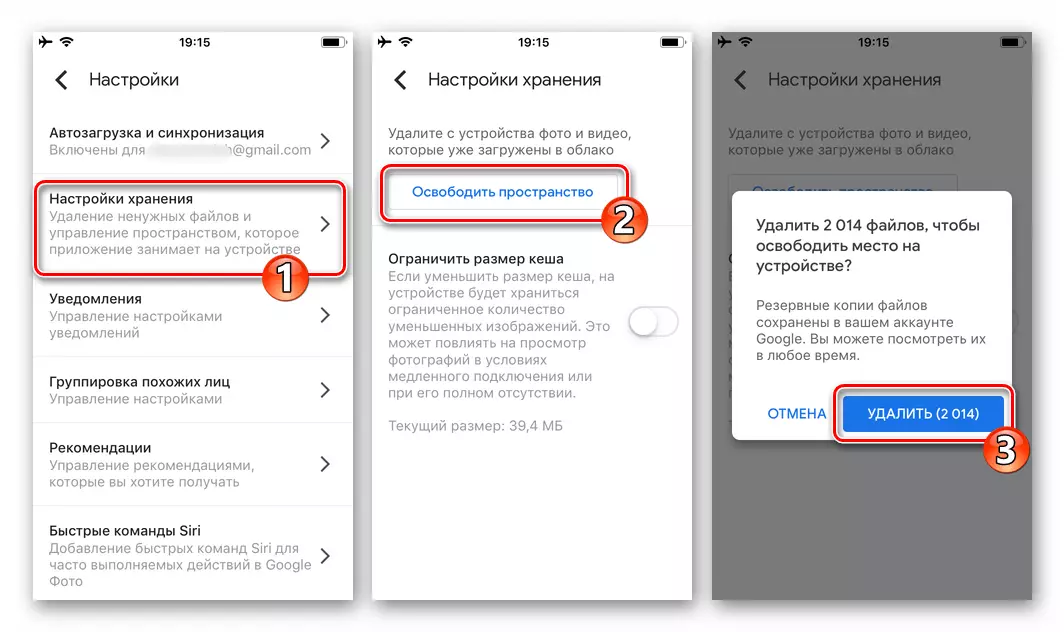
- Once again, confirm the intention to clear the memory of the device, as a result of which your files will be removed from iPhone and Aiklaud, but will continue to be available from the Google photo program in the presence of the Internet on the device.
Option 3: Removal from the cloud, but not from the device
The most carefully should be acting if the files placed in Google should be removed from the service, but at the same time it is not planned to produce their destruction. The system under consideration "believes" is that if you remove pictures from the cloud, then you are not needed at all, and therefore, for example, the refusal to use the system under consideration must be "reinsured". In other words, always check the presence of copies of the images you need outside the repository provided by the "Corporation" before initiating their removal.
Android
Android users can use to solve the task of cleaning the service from copies of their own pictures next reception.
- Make sure the copies of the Google files unloaded into the cloud cloud are given on your device. This is especially important if you used the place to save the device described above in the device's memory, that is, activated the "Auto-load and synchronization" option and used the "Release Place" function. To view the files present in the local storage and download them in the absence:
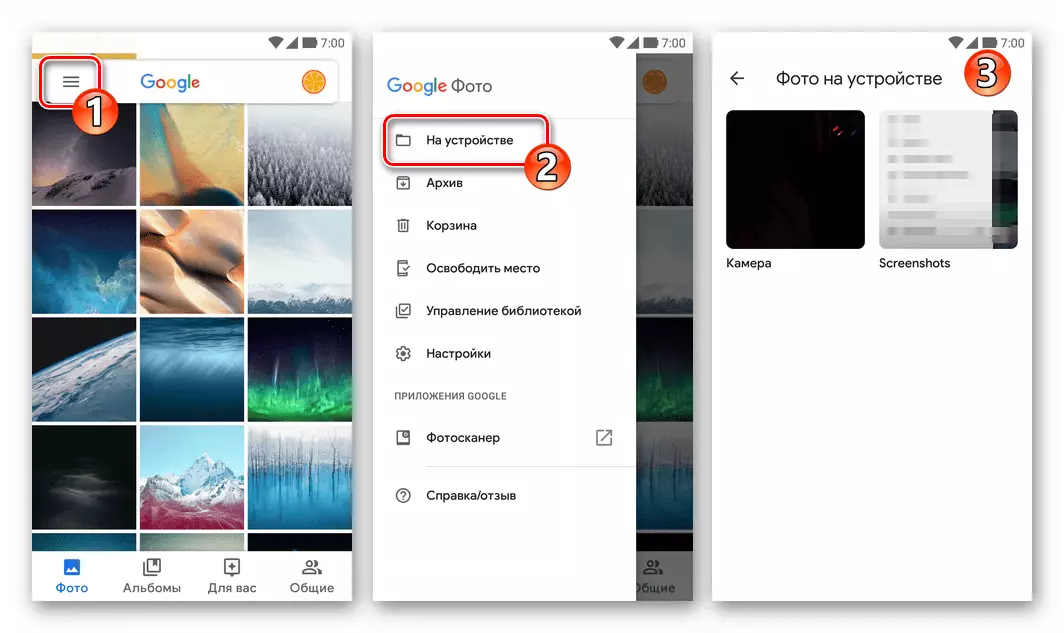
- Open Google Photos, Call the Main Application Menu and select the item "on the device" in it.
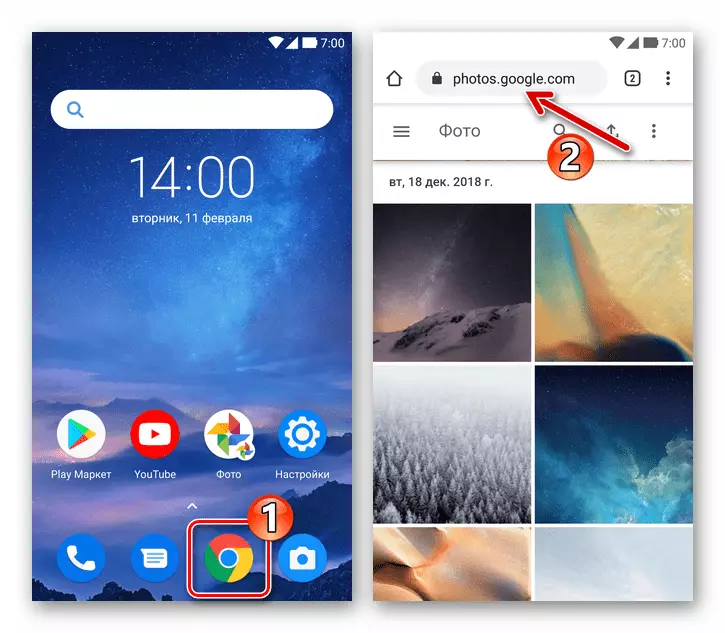
- If the desired images are missing in the device's memory, they must be downloaded from the cloud. To do this, open any browser, go to photos.google.com. If necessary, log in to the service.
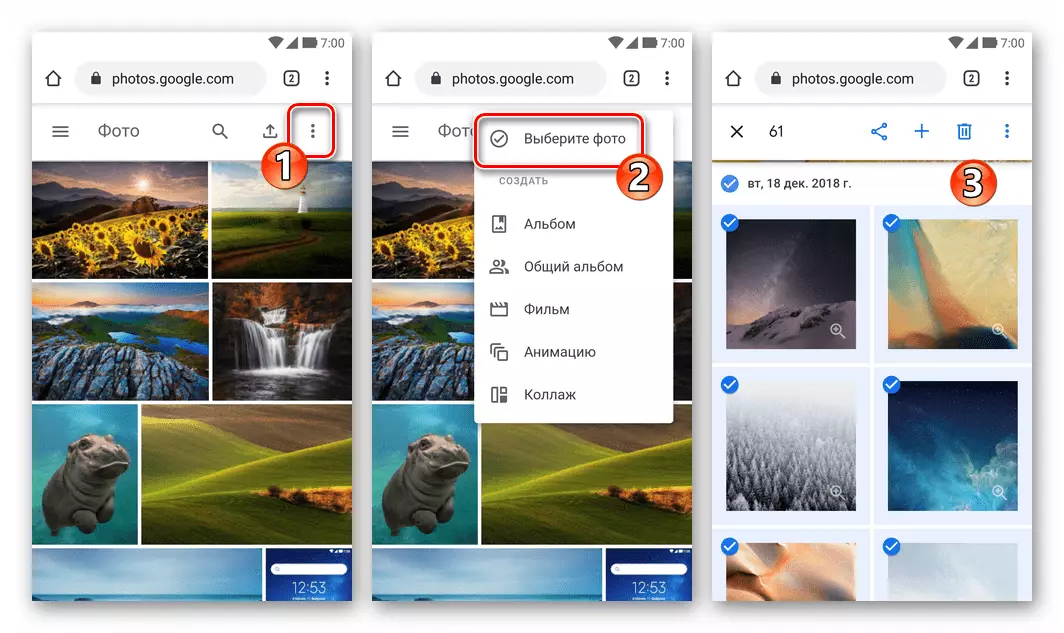
Touch the three points in the row of icons above the list of snapshots and video list, tap "Select a photo" in the menu displayed. Set the marks on all the objects you need.
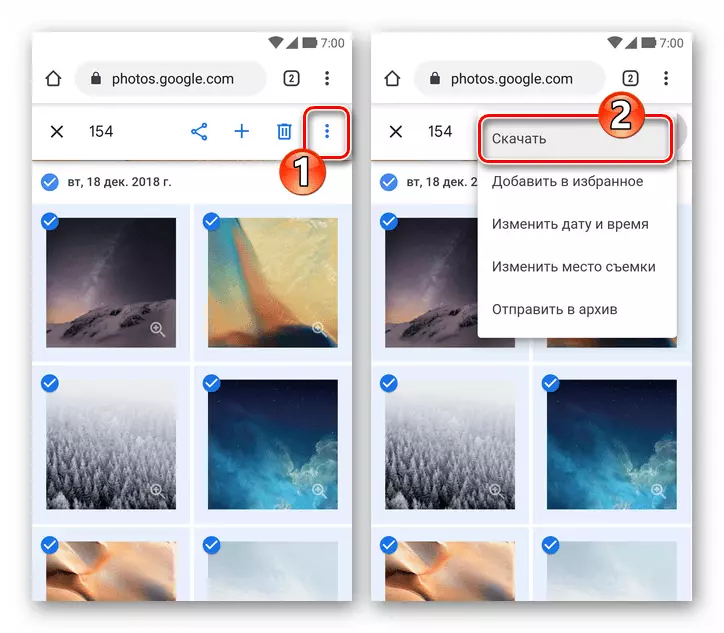
Next, tap three points in the menu of the tool over the list of miniatures and select "Download" in the list of action list.
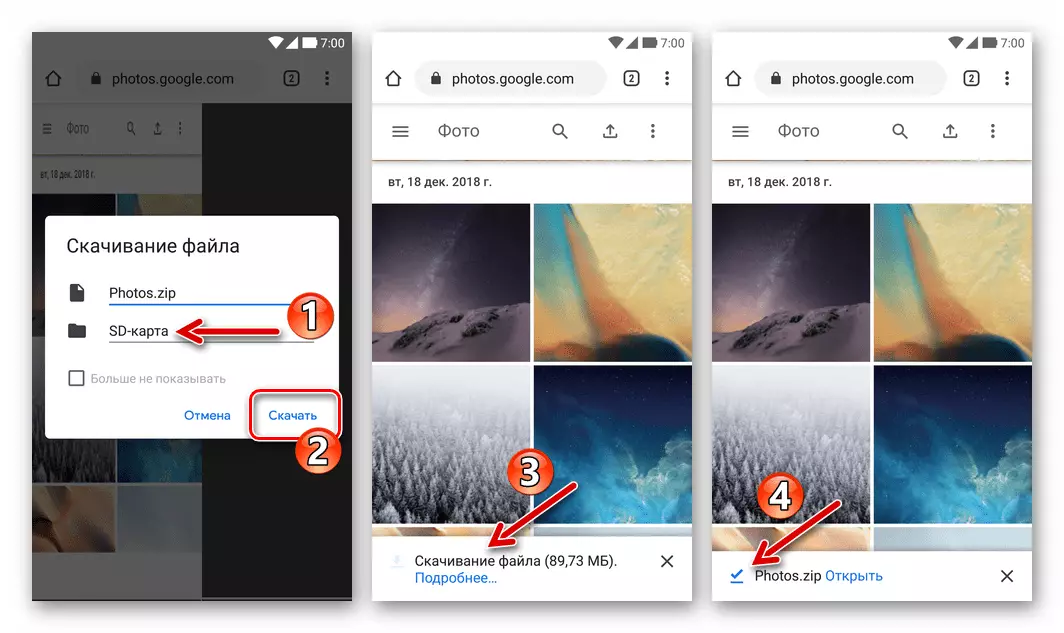
Specify the path of saving the archive with your photos in the window that opens and tap "Download". Wait for the download of the archive - afterwards to gain access to the photo previously discharged and the photo, it will need to be unpacked using an Android or file manager with such a function (for example, ES File Explorer).
- Open Google Photos, Call the Main Application Menu and select the item "on the device" in it.
- Important! Return to the Google photo app, go to "Settings" from its main menu
And disconnect the "Auto-load and synchronization" option.
If in the future the use of the service is not planned, you can completely delete its application client from the device.
iOS.
In order to refuse to use the Google Photo on the iPhone and the destruction of the photos placed in it without removing them from the device, you can act in this way:
- If you have used the "Auto-loading and synchronization" function in Google Photos, open the program, go to "Settings"
And disconnect it.

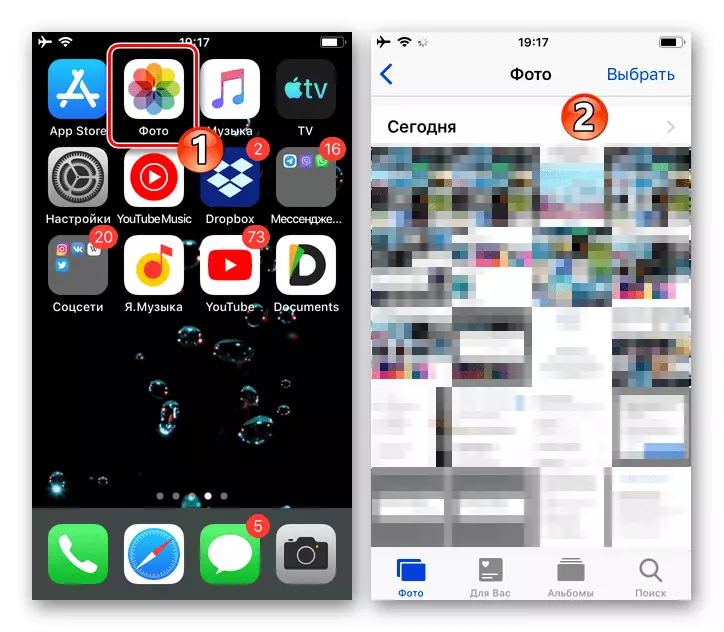
- Make sure that all the images you need are poured on the iPhone. The easiest way to do this by opening the IOS program "Photo".
- If there are no objects, that is, they were unloaded into the Google cloud and deleted from the device's memory, they must be returned to "on their place":
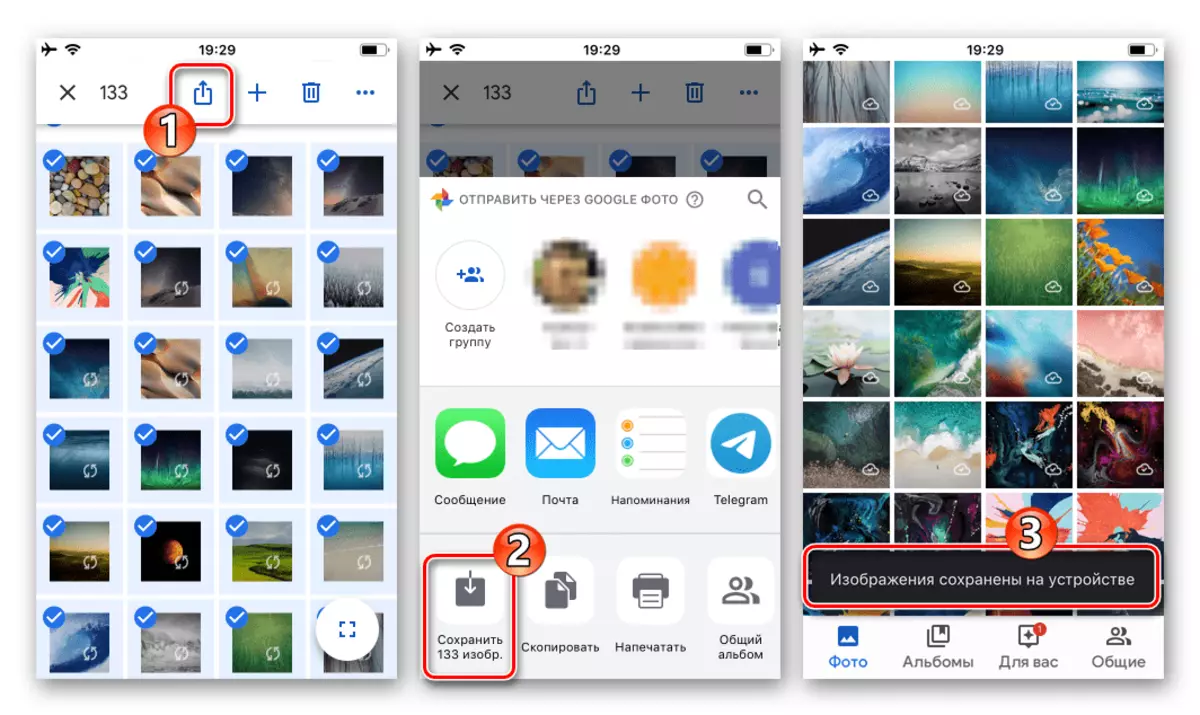
- Open the Google Photos and by clicking on the section displaying your pictures, set the marks on the preview of all objects that you want to save in the iPhone memory. To speed up the procedure for selecting files, tap on the left from the dates to create their sets to checkboxes.
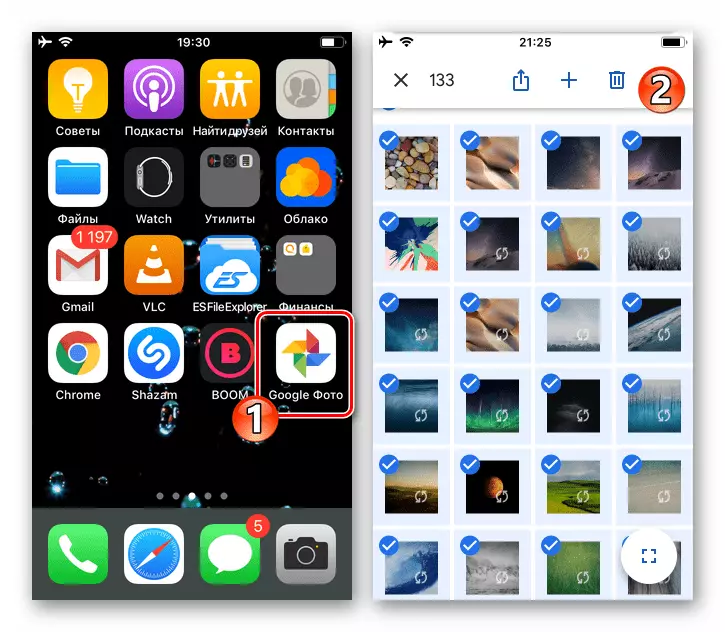
- After completing the selection of several necessary or noting all the objects, tap the "Send" icon at the top of the toolbar. Next, select the "Save Objects" feature in the bottom row of the displayed area "Send via" and expect the completion of the "Saving" process.
- Open the Google Photos and by clicking on the section displaying your pictures, set the marks on the preview of all objects that you want to save in the iPhone memory. To speed up the procedure for selecting files, tap on the left from the dates to create their sets to checkboxes.
- Make sure that all the necessary files are given in the device's memory, make the removal of images from the cloud storage facilitated through the photos.google.com website. The procedure can and conveniently implement from the computer, acting on the "Option 1" instruction described above - "Method 2", but also everything is implemented using any browser for iOS (in the example - Safari.).
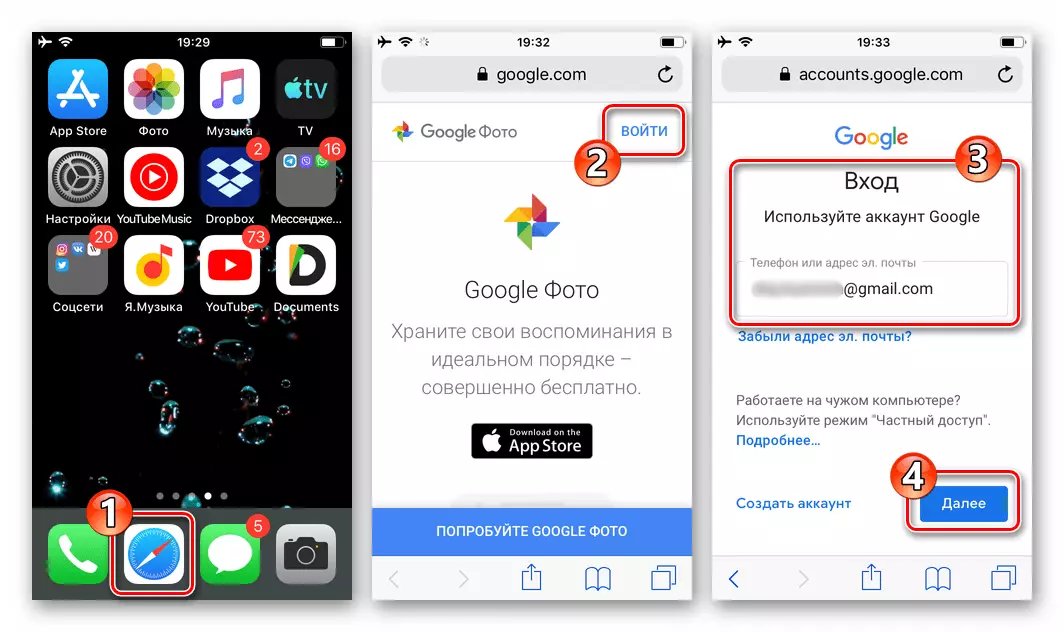
- Open the site photos.google.com in the web browser on the iPhone, log in in the system.
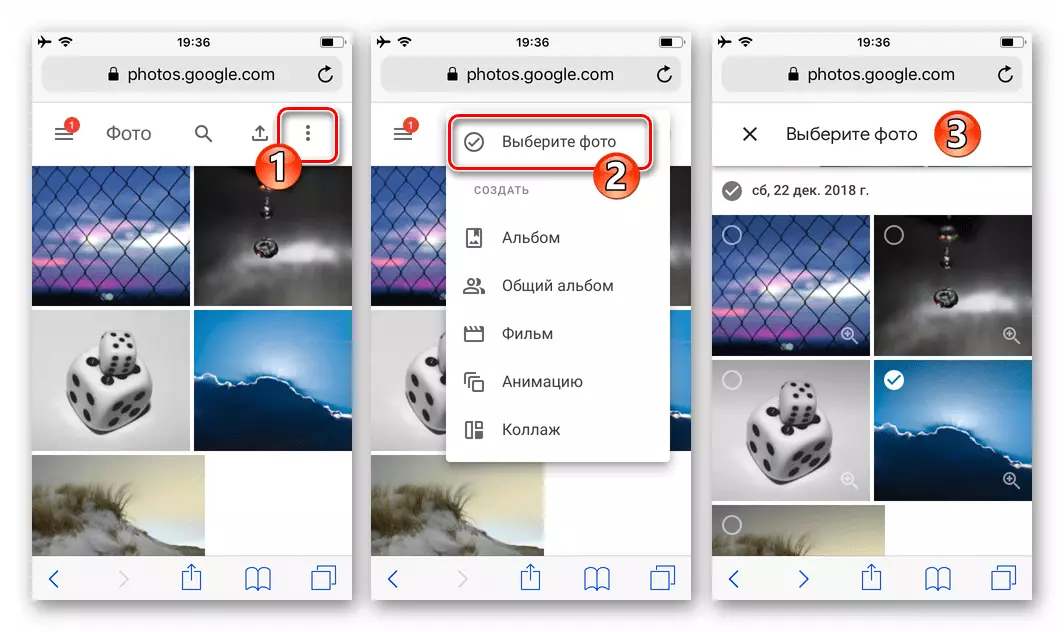
- Click on the three-point page located in the upper right corner, tap the name "Select a photo" option in the menu displayed.
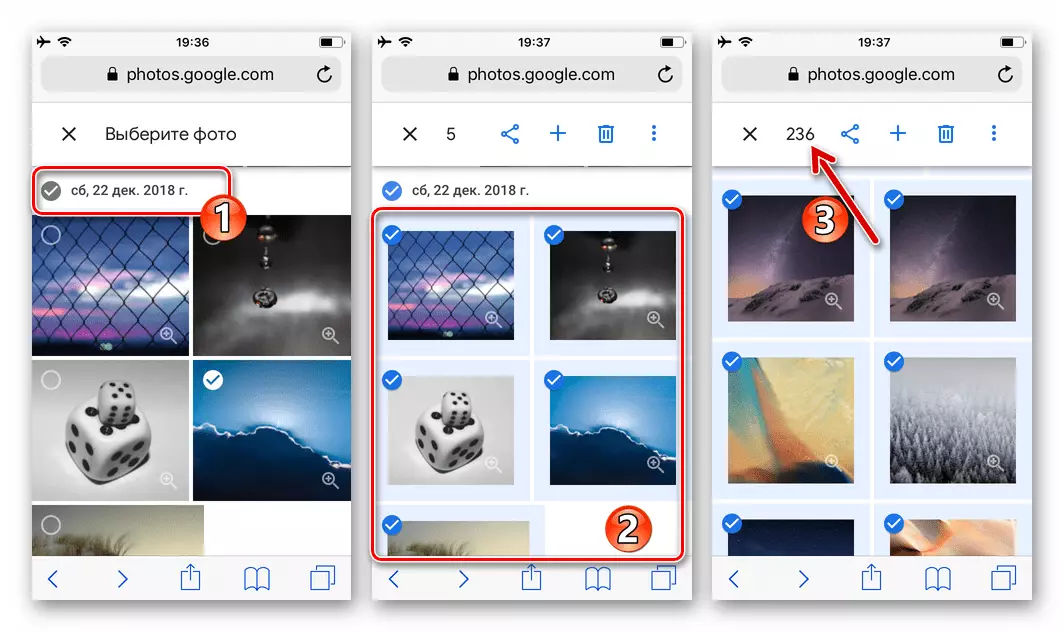
- Equip the preview of all removed from the image service. To quickly allocate many objects, click on checkboxes near the dates of their creation.
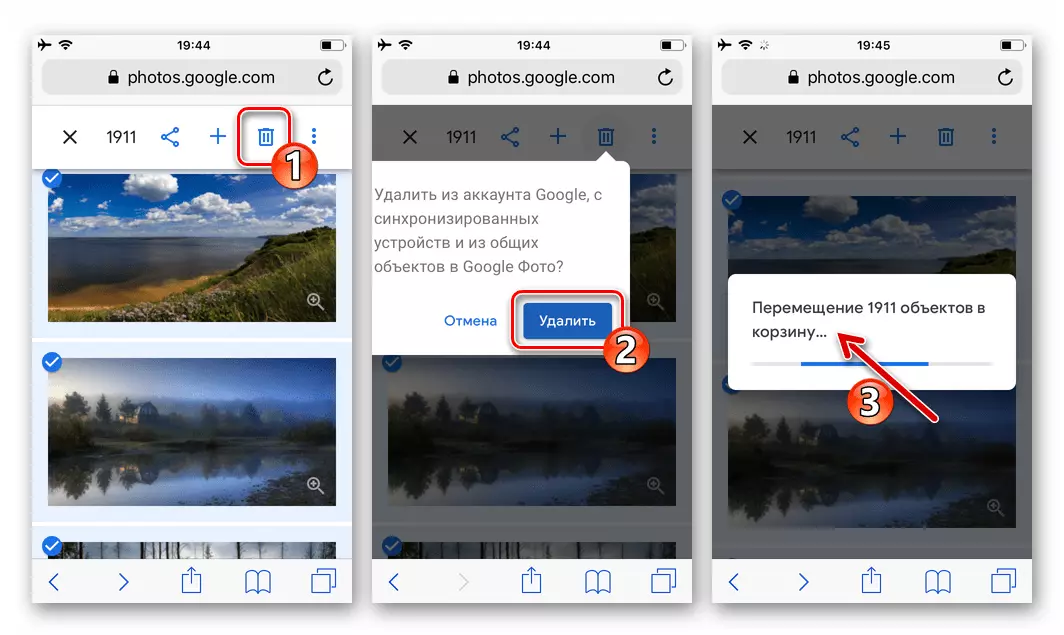
- Click on the "Basket" icon in the toolbox pictures located above the list, confirm the displayed site query, tapping under it "Delete". Expect the completion of the movement of objects in the "basket".
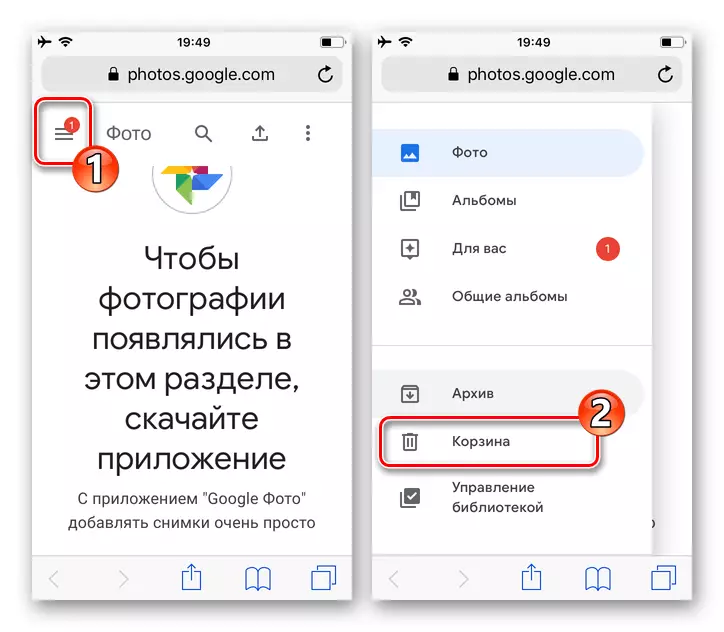
- If you want to destroy the files are irretrievably and immediately, TAP on three chests at the top on the left, call the menu, select "Basket" in it.
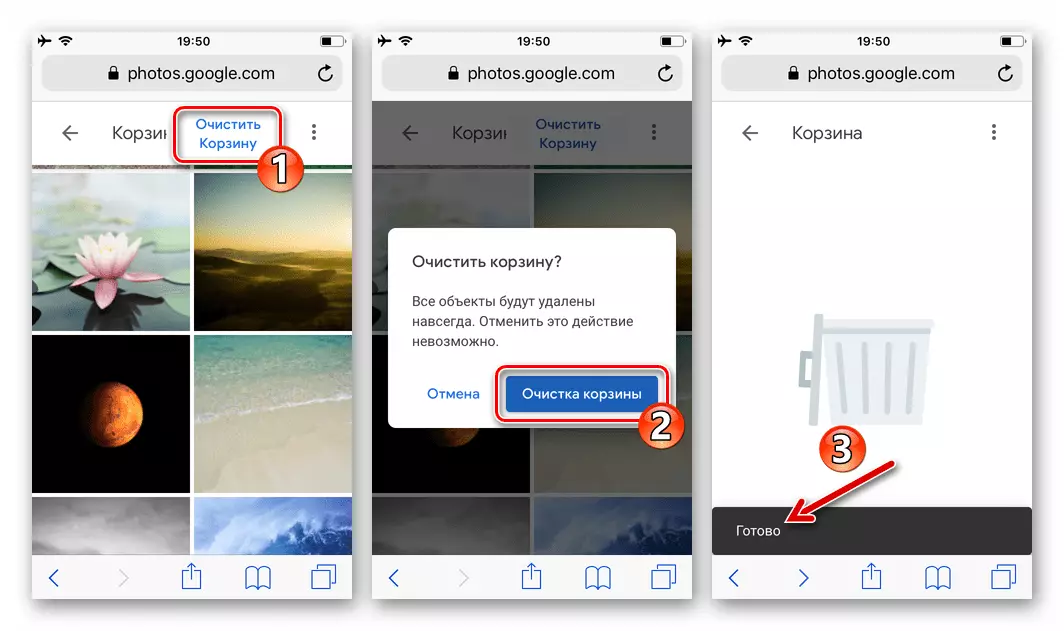
Click "Clear Basket", confirm the need to clean the cleaning operation in the query window and wait for it to complete.
As you can see, regardless of which particular result, you need to get in the course of the procedure for deleting files from Google photo, it is easy to perform. It is only important to choose the right approach and act according to the appropriate one or another situation and the desired effect of the algorithm.
- If you have used the "Auto-loading and synchronization" function in Google Photos, open the program, go to "Settings"
- Run google photo, call the main application menu and go from it to "Settings".
- Run your preferred web browser (in the Google Chrome example) on the PC and go to the service under consideration - photos.google.com. Click "Go to Google Photo" on the page that opens.
- Open the Google Photo for iOS, find the preview of the image to the "Photo" tab or go to the "album", where unnecessary pictures are poured.