

Direct X is a technology needed to launch games, 3D-modeling, rendering of video and other multimedia tasks. It connects the computer equipment (video card, sound fee, etc.) and software that is trying to get access to it, provided that this equipment supports it. Today we will tell about the way of removing DirectX, if, for example, its files are damaged, and they cannot be updated.
Important information
Direct X 12 is a set of components embedded in Windows 10, which means that it is not removed in the standard way. He gets his updates along with the update of the system. Therefore, when problems appear, first try updating Windows to the latest version. How to do this is a separate article on our website.

Read more: Update Windows 10 to the latest version
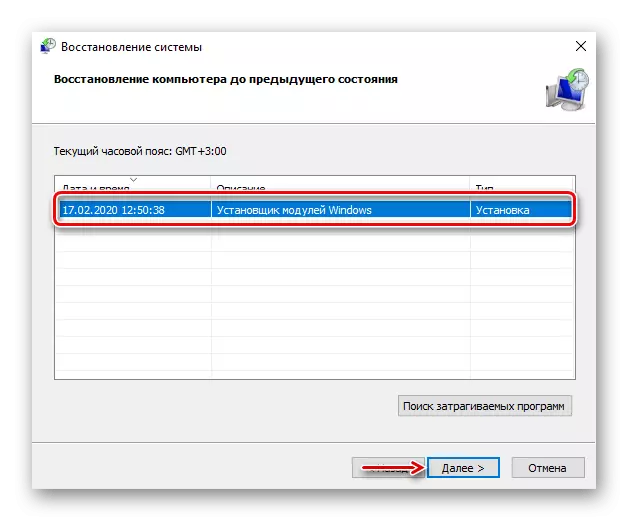
Removing components that are part of the system, prepare for any consequences. Considering that it is necessary to use third-party software there is a chance that after deleting the DirectX libraries, the system will start working incorrectly. Therefore, create a Windows 10 recovery point so that it can be returned to the operating status, or a backup of the system. We also wrote about this in detail in individual articles.
Read more:
How to create a Windows 10 recovery point
Rollback to the recovery point in Windows 10
How to create a backup of Windows 10
Delete Direct X.
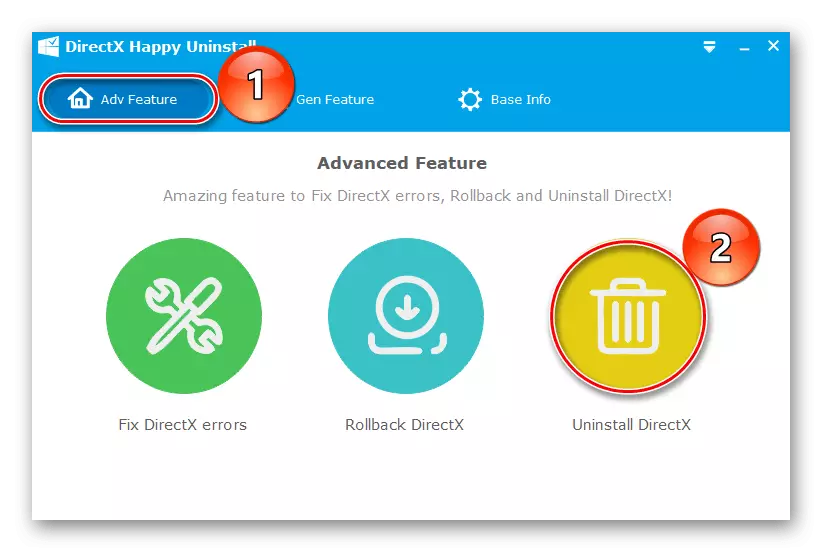
DirectX HAPPY Uninstall (DHU) is a DX management tool. Despite the English-language interface, the program is easy to use - with just a few mouse clicks, you can backup Direct X, delete its current version and even set a new set of components.
DHU works only on 64-bit systems, and a license is provided for full use. Since at the moment this is the only work software to remove DirectX from Windows 10, the developers have allowed themselves to make it paid. Restriction As usual concerns the most important functions: "Fix error" and "Delete DX".
Download DirectX Happy Uninstall from the official site
- Before deleting, it is recommended to make a backup. To do this, go to the "GEN FEATURES" tab and click "Backup DirectX".

Next, click "Start Backup".
- To restore then the components, click "Restore DirectX".

If the DIRECTX error message is caused, you can first try to eliminate them. To do this, go to the tab "ADV FEATURE" and press "FIX DirectX Errors" , then - "START FIX DX" . A page with downloads to download the DIRECTX data packet will be used to eliminate errors. Load the archive, unpack it and run the file. "RunMe" . Next, just wait for DHU to complete the work.
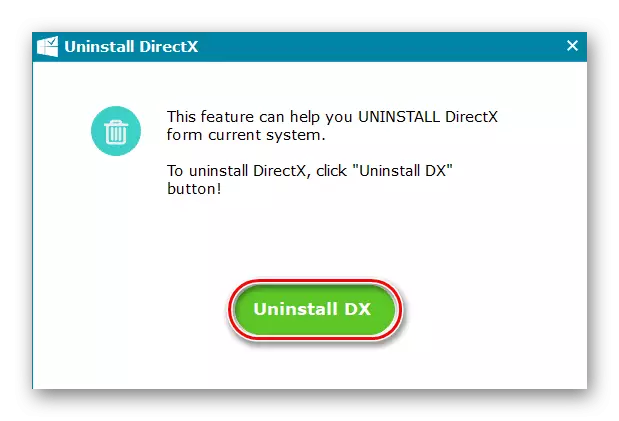
- To delete Direct X, click "Uninstall DirectX".
Then click "Uninstall DX". We are waiting for the completion of the process and reboot the computer.

Remote components can also be installed using DHU, but it is better to fill the missing libraries from the official Microsoft website.
See also: How to install DirectX
We hope that your problem will decide before the removal of DirectX. But even if it came to this, think about the concomitant causes. If you simply cannot run a program or game, in the system requirements that the earlier version of DX is specified, you need to know that the Direct X 12 contains all the necessary components from previous libraries, and therefore the reason may be in another.