

Dynamically connected library called UnityPlayer.dll is initially absent in the operating system and is used only by some games to perform certain actions. From this we can conclude that it hits with a third-party application. However, if the installation was not entirely successful or any failures appeared on the PC, while the user will see a notification associated with this file on the screen. Today we want to demonstrate the available methods of solving this problem, told in detail about each of them.
Method 1: Manual Install UnityPlayer.dll
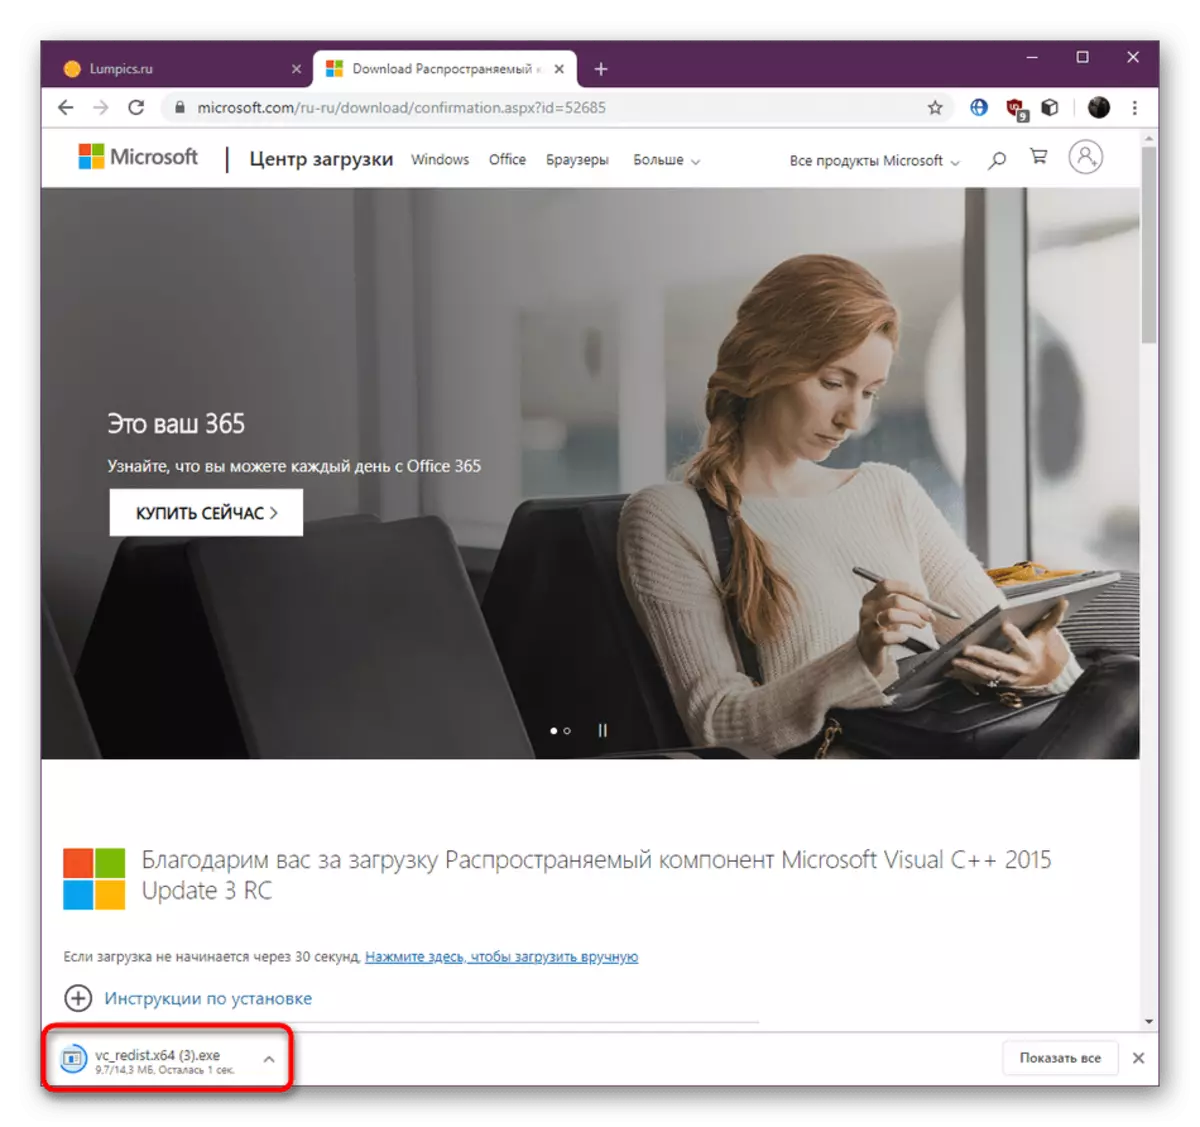
The first method considered within the framework of today's material is the manual installation of UnityPlayer.dll.It is only necessary to download the user using the button above, open the C: \ Windows \ System32 folder (if Windows 32-bit) or C: \ Windows \ SYSWOW64 (if Windows is 64-bit) and drag the download just performed. As you can see, manually installation procedure is simple, but the method discussed above may be unsuitable for certain users. In such cases, we advise you to explore alternative options that are presented in another article on our website.
Read more: How to install the DLL library to the Windows system
Method 2: Re-installation of the game with disabled antivirus
You already know that UnityPlayer.dll is missing in the operating system, and is installed on the PC along with some third-party software or application. Sometimes this leads to the fact that the current antivirus protection suspects this library in its harmfulness and deletes it or sends it to quarantine. If you are faced with a problem at the first start of the software and at the same time you have an antivirus on your computer, it is better to turn it off and re-install the software. Read more about this in other materials on our website.
Read more:
Removing games on a computer with Windows 10
Removing the game in Steam
Disable antivirus
Installing a disk game on a computer
Method 3: DirectX Update
There is a popular and frequently necessary library of additional files called DirectX. Its absence in the operating system can provoke the emergence of various errors, including with the UNITYPlayer.dll considered today. Windows 7 users can use the following instruction to check for updates for this package, and the owners of "dozens" we offer to immediately move to the end of this method.
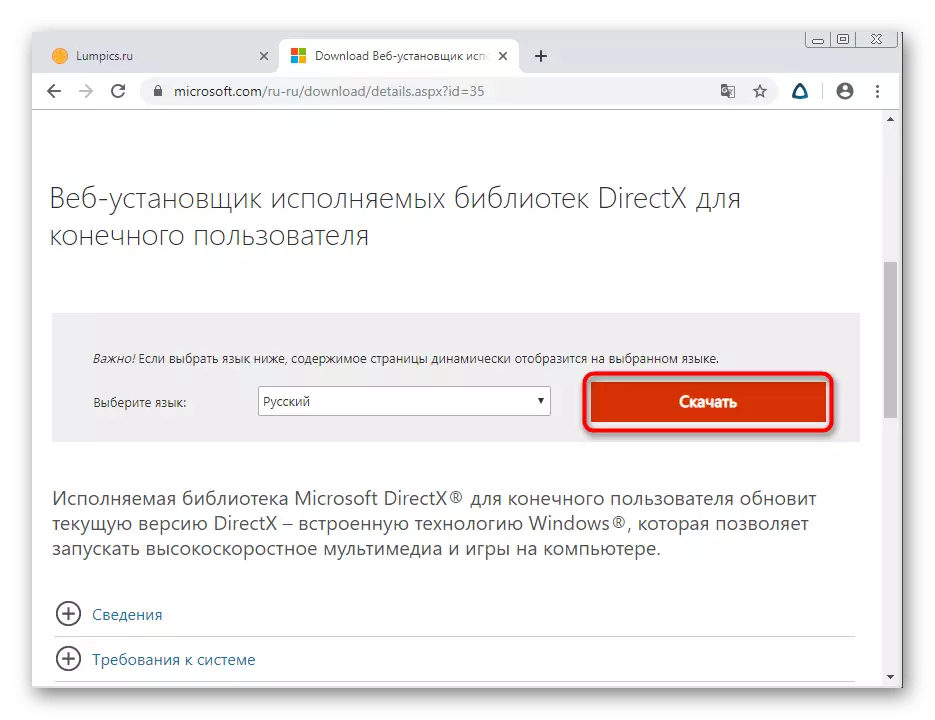
Go to DIRECTX download from the official website
- Provide the above link to go to the official web installer boot page of the DirectX executable library. This tool immediately checks all updates and establishes them if necessary. To download, click on the corresponding red button.
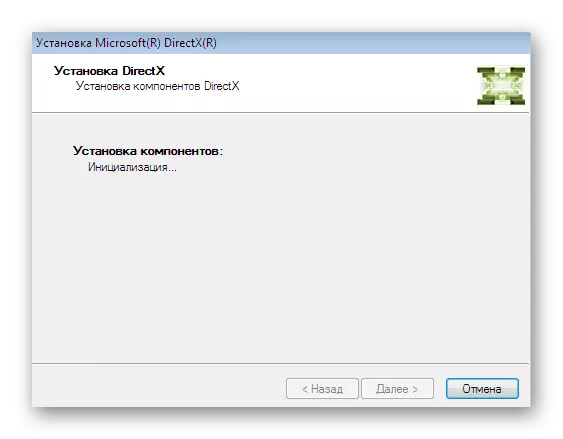
- Upon completion of the download, open the exe file received.
- Take the terms of the license agreement and go to the next step.
- Cancel the Bing setting by removing the checkbox from a specially designated item if you do not need this panel.
- Expect the end of installing components, while do not break off the Internet connection, otherwise the installation will be interrupted.
- At the end you will receive a notice that updates have been installed or is not required, since all files are already on the computer.


As you know, the latest available version of DirectX in Windows 10 is installed when the OS is installed, so the owners of this version do not need to be independently updating the component. However, during the interaction with PCs, problems may arise, leading to the appearance of failures in files of this library, so you have to reinstall DirectX. It is necessary to do this only in cases where other methods did not bring the proper effect.
Read more: Reinstalling and adding the missing DIRECTX components in Windows 10
Method 4: Installing Visual C ++ 2015
On the official website of the Unity Player developers, it is indicated that a dynamically connected unityPlayer.dll library is directly related to an additional OS package called Visual C ++ version 2015. Accordingly, if this component is not set, errors may appear during the launch of programs or games indicating the absence of a DLL file or other problems associated with it. We advise you to check whether the Visual C ++ 2015 is installed on the computer, and if necessary, add it as shown below.
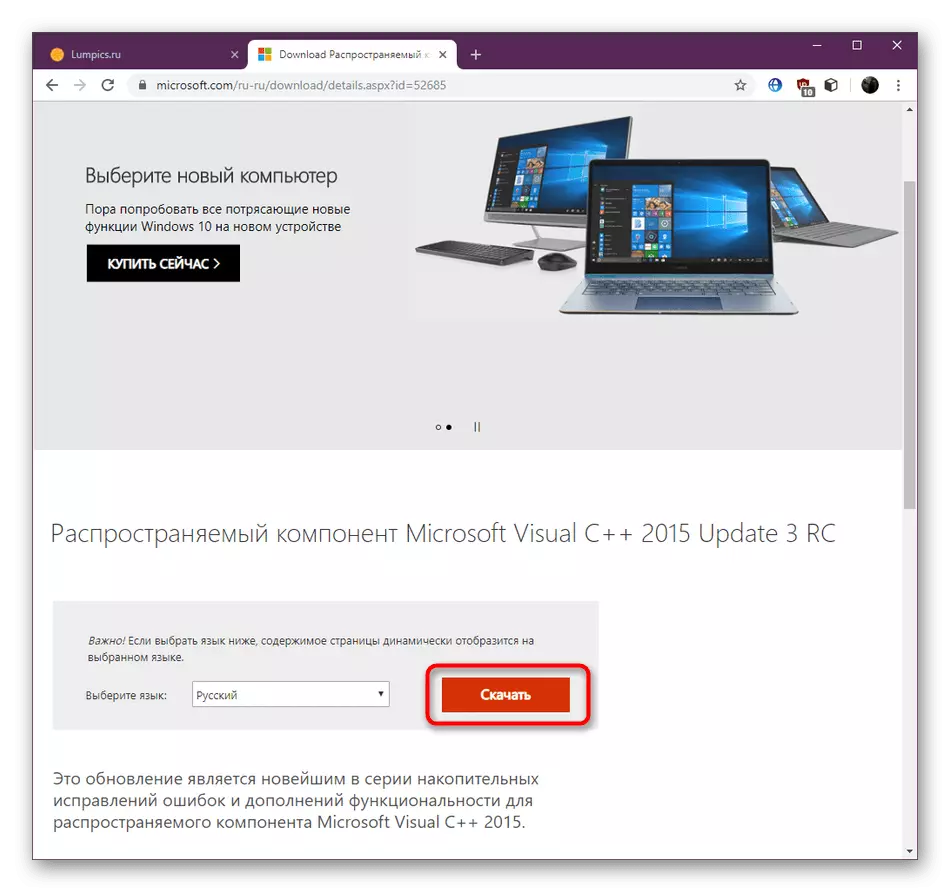
Go to download Visual C ++ 2015 from the official website
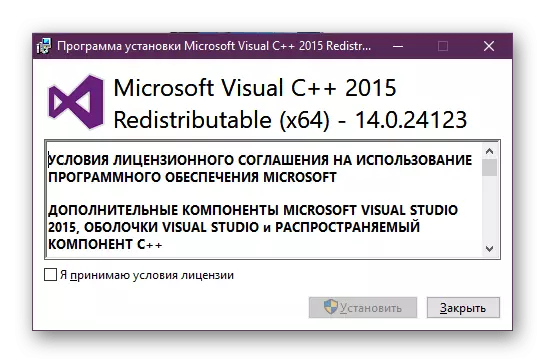
- Above is the link to the official Microsoft website, from which you can download Visual C ++ 2015. To do this, click on a specially designated button.
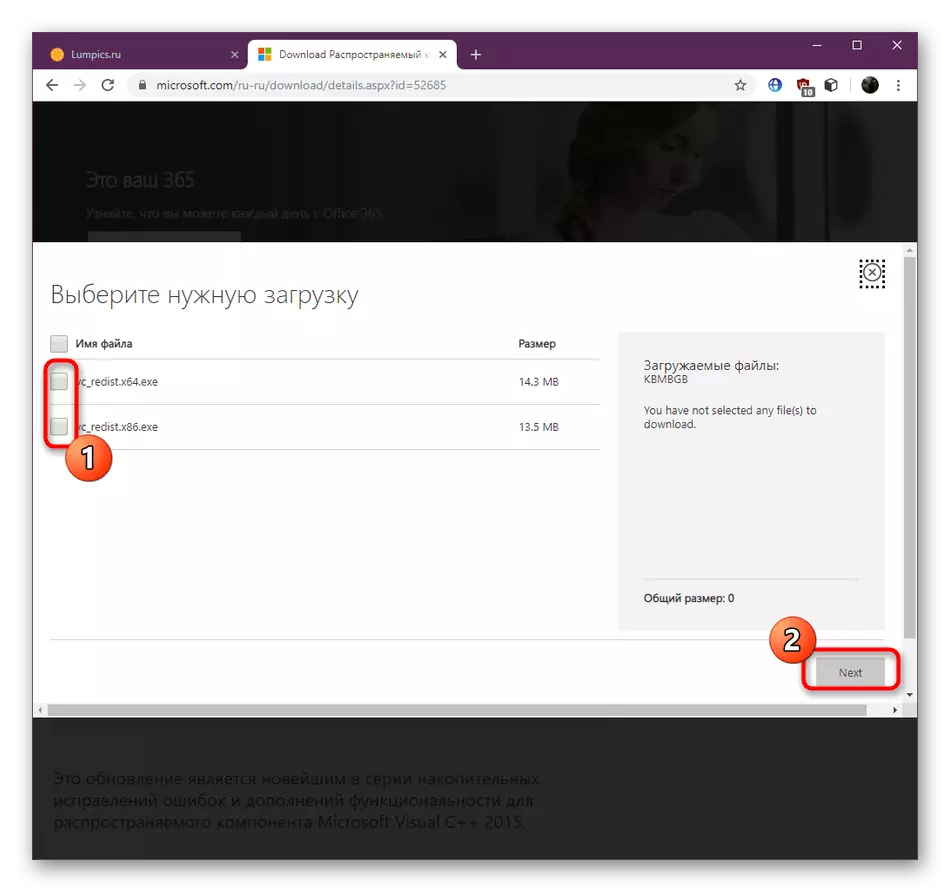
- WINDOWERS Windows 64 BIT, you will need to select both version files, and only "VC_Redist.x86.exe" should be noted by the owners of 32-bit systems. After that click on "Next".
- The executable file will start. Upon completion, run this object.
- Take the terms of the agreement to activate the Set button. Click on it by running the installation procedure.
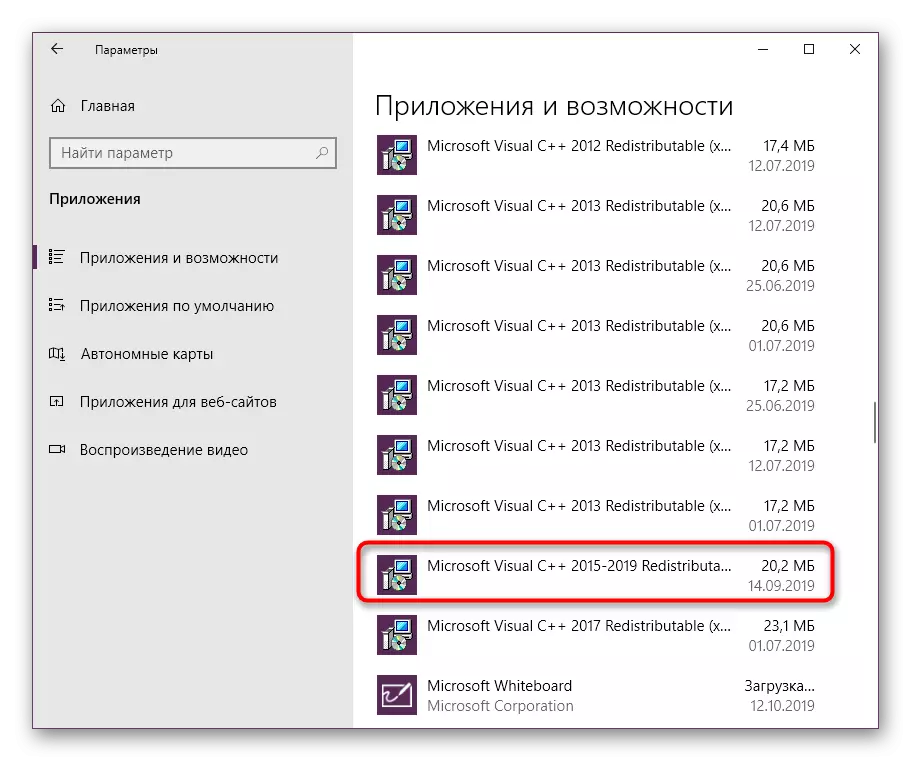
- In the "Applications" or "Programs and Components" menu, you can make sure that the component in question has been successfully added to the operating system.
All changes made after installing Visual C ++ will take effect immediately without the need to pre-restart the computer, so you can proceed to test the problematic software. If an error with unityPlayer.dll still appears, read the following way.
Method 5: Updating graphics drivers
Go to methods that are less frequently effective compared to the above. The first of these options is to update the graphics adapter drivers. UnityPlayer.dll actively interacts with the graphic component, so partly is associated with the video card software. Check Driver Update You can different options. Read more about it in the article from another author further.

Read more: NVIDIA / AMD Radeon Video Card Drivers Update
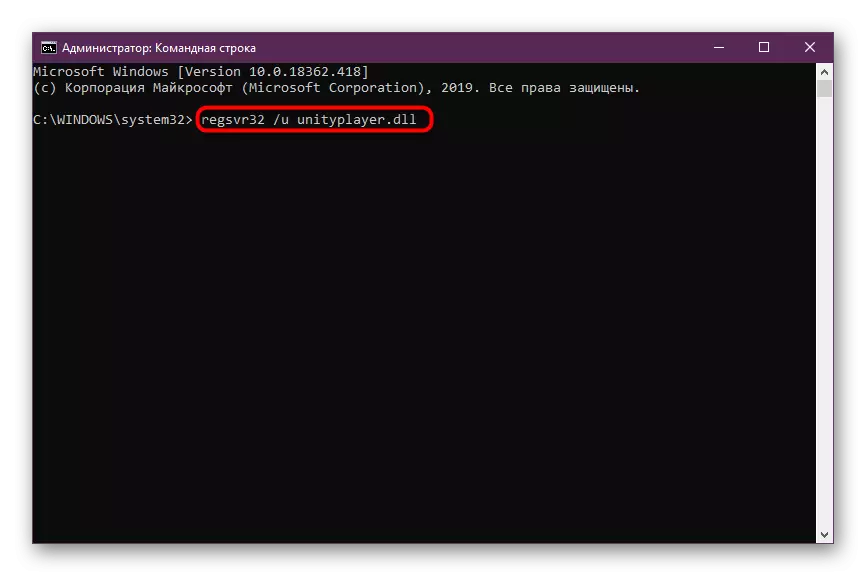
Method 6: Re-registration UnityPlayer.dll
The re-registration principle is to preliminarly cancel the current installation of the file and its manual installation through a special utility. It is necessary to do this if the systemic means for some reason did not work properly. However, it happens quite rarely, therefore this method is on its position.
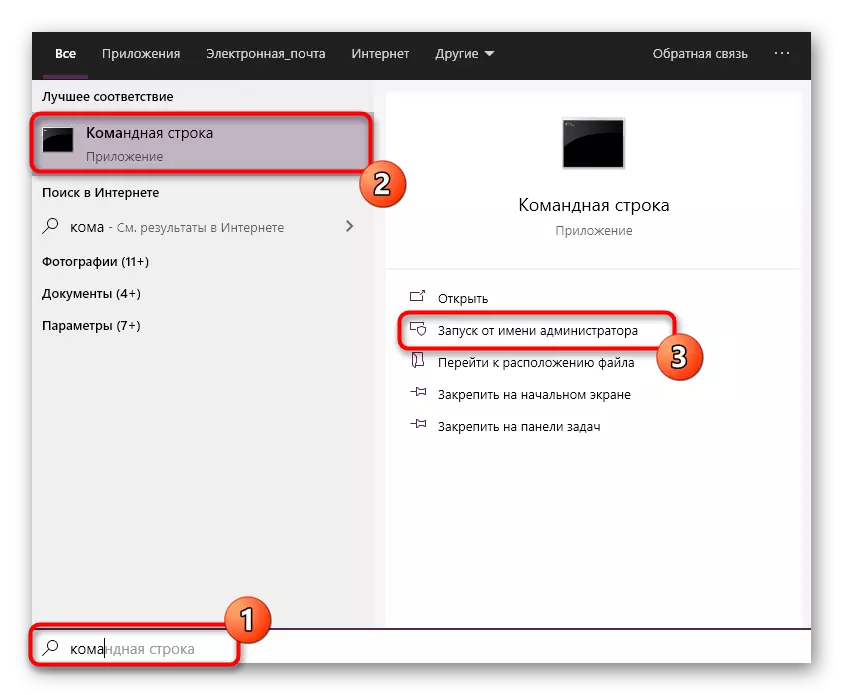
- Open the "Start" and find the "Command Line" there. Be sure to run it on behalf of the administrator.
- Use the REGSVR32 / U UnityPlayer.dll command to cancel the current file registration. Activate it by pressing the ENTER key. When any notifications appear in pop-up windows, ignore them by simply by pressing the button in the form of a cross for closing.
- Use a similar REGSVR32 / I UnityPlayer.dll command for manual registration of a dynamically connected library.
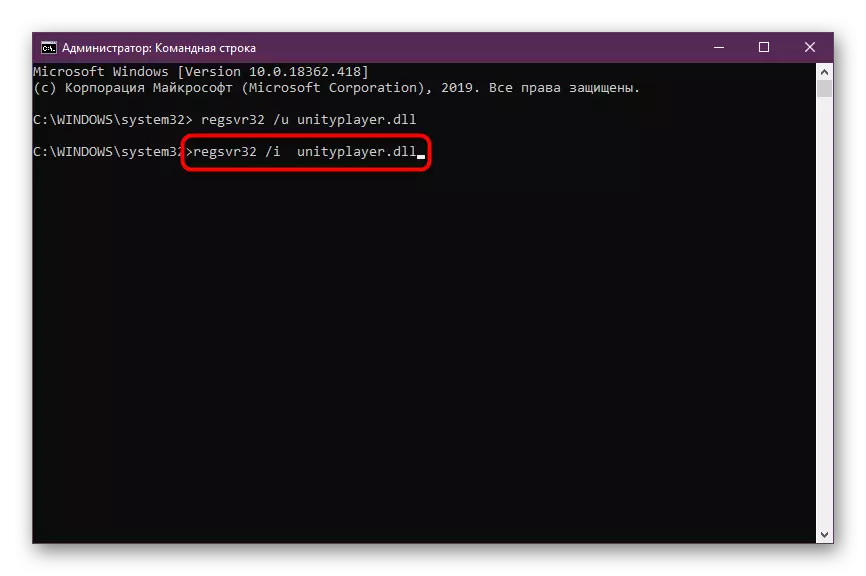
All changes will be applied in the same session of the operating system, it means that it is not necessary to restart the PC, you can immediately move on to check the effectiveness of the actions performed.
Method 7: Windows Update
Sometimes the lack of recent updates for the OS also leads to the emergence of the problems we are talking about in this article. Each user is important to maintain the actual state of its computer to avoid the emergence of such difficulties, so we propose briefly familiarize yourself with the following instruction.
- Open "Start" and go to "Control Panel" or "Parameters".
- Select the category "Windows Update Center" category, and if you work on a PC running Windows 10, you will have to open "Update and Security".
- It remains only to click on the button "Check availability of updates" to start this process.


After that, automatic scanning will begin, and at its end you will be notified of the received updates. The installation will also start automatically, and the operation will be completed when the computer is restarted. If you have an additional questions about the installation of updates or it has difficulties, refer to the materials presented below.
Read more:
Install updates for Windows 10 manually
Troubleshooting Windows Update Problems
Method 8: Delete Citrix Workspace
We delivered this method to the last place, since extremely few users face today's error, having a program on a computer to distribute cloud storage titled Citrix Workspace. It is she who conflicts with a installed application by calling an error with unityPlayer.dll. It is recommended to get rid of this tool at the time of installing third-party software, and then it can be returned to the operating system again. Read more about uninstalling.
Read more: Deleting programs in Windows
You should not exclude the fact that you just got a program that works incorrectly, so none of the methods brought proper result. Try to find another version of software or its analogues to troubleshoot the UnityPlayer.dll library.