
Over time, the operating system accumulates a huge number of different drivers for both embedded components and peripheral devices. Sometimes the need for such software simply disappears or for some reason it does not function properly, which leads to the removal of all files associated with this driver. Not all users know how exactly the uninstallation of such components is carried out, so today we want to familiarize you with all available methods of implementing the goal in Windows 10.
Method 1: Side Software
I would like to start with the consideration of third-party resources that allow you to clear the OS from unnecessary drivers. This method will be optimal for the most beginning users who are not confident in their abilities or simply want to simplify the uninstall process. There are many different applications whose functionality is focused on deleting software. Unfortunately, we will not be able to consider them all, however, we offer on the example of one program called DRIVER FUSION disassemble the general principles of uninstalling.
- Click on the link above to go to DRIVER FUSION to a detailed review and download the program from the official site. After completing the installation of a free or full version, start the software and go through the left panel to the "Driver Cleaner" section.
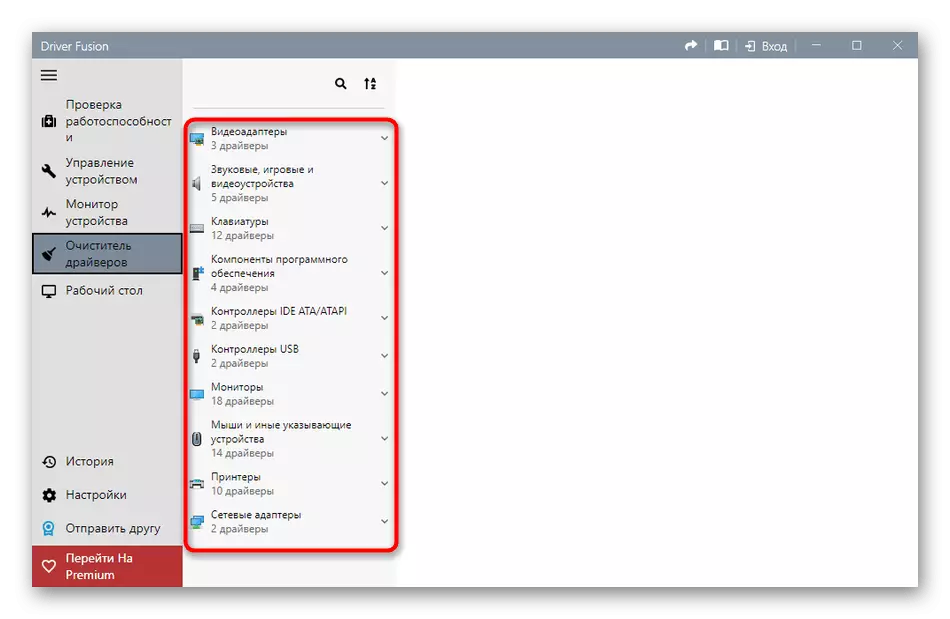
- Here, check out the list of categories of equipment. Select the one to which equipment with unnecessary or incorrect drivers.
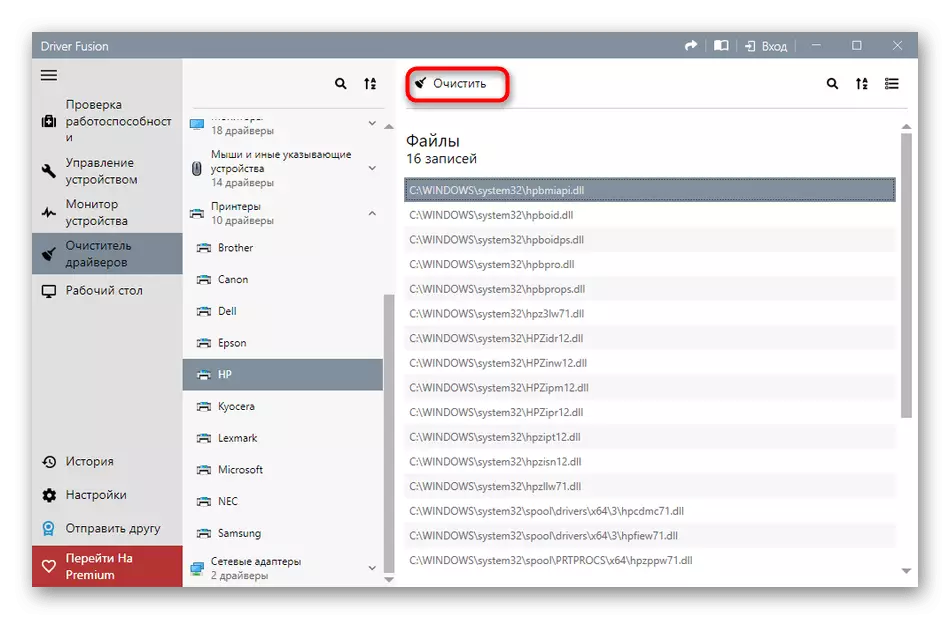
- After selecting a component or separate device, you can view the list of installed files. To clean it, click on the specially designated button, located in the center at the top of the window.
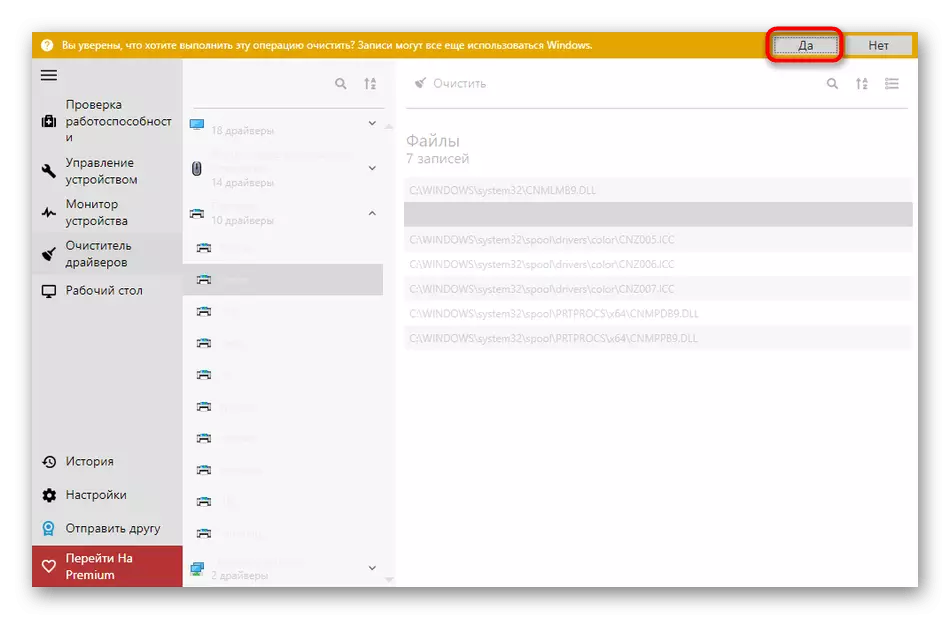
- Confirm the uninstallation by selecting the "Yes" option.
- When using a trial version, you will be notified that some of their files cannot be removed. Getting rid of them will occur only after purchasing a premium assembly, which is the lack of DRIVER FUSION.


If the disadvantages of the above application are critical or it does not suit for any other reasons, we advise you to study the review of other popular thematic decisions on our website, where the author paints in detail the minuses and advantages of all representatives of such software. This review will help choose a suitable software and quickly get rid of unnecessary drivers.
Read more: Programs for removing drivers
Method 2: Device Manager Menu
The following methods described in today's material will imply the use of the built-in operating system functionality. Most often, users use the Device Manager menu to get rid of unnecessary drivers, so we will talk about it first.
- To begin with, we will pay attention to users who cannot normally log in to Windows after unsuccessful installation of drivers, which most often concerns graphic software. In this case, the removal can only be done through the safe mode. In Windows 10, the entrance to it is carried out through the loading flash drive or disk. Read more about it next.
Read more: Safe mode in Windows 10
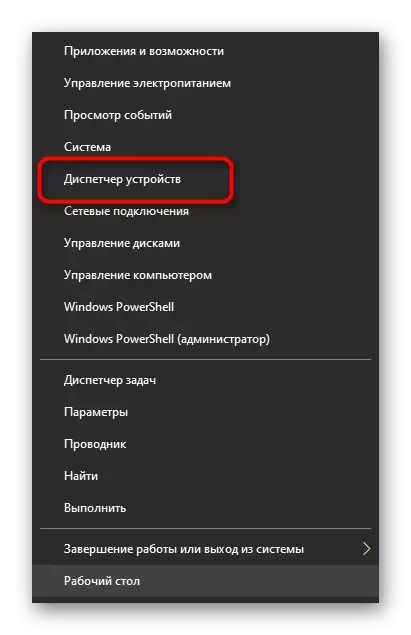
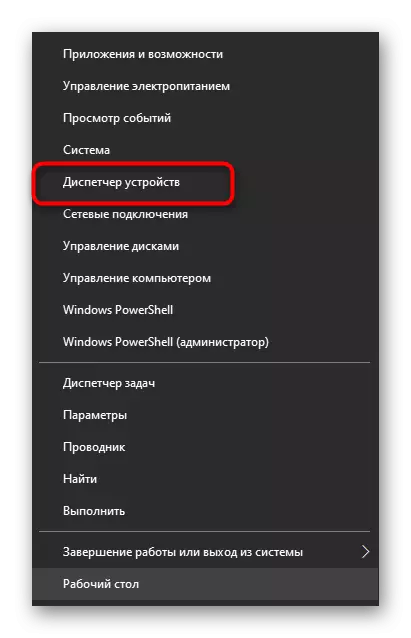
- After a successful login in the OS, right-click on the "Start" and in the context menu that opens, go to the Device Manager.
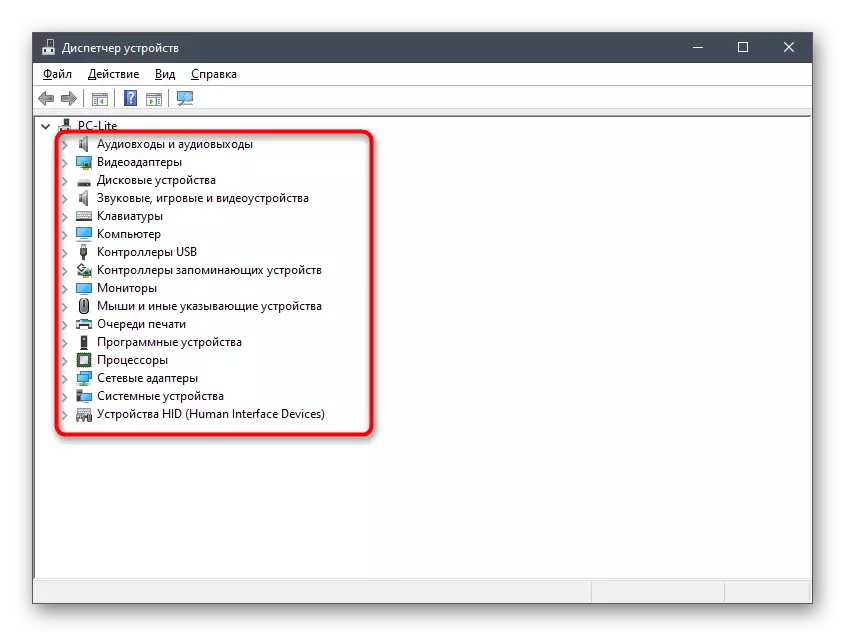
- Browse the list of presented categories and expand the one to which the necessary equipment belongs.
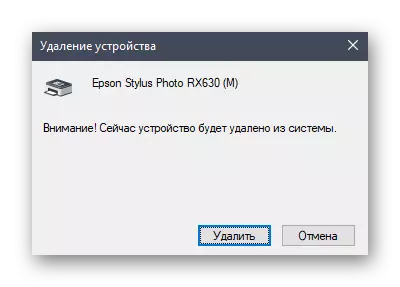
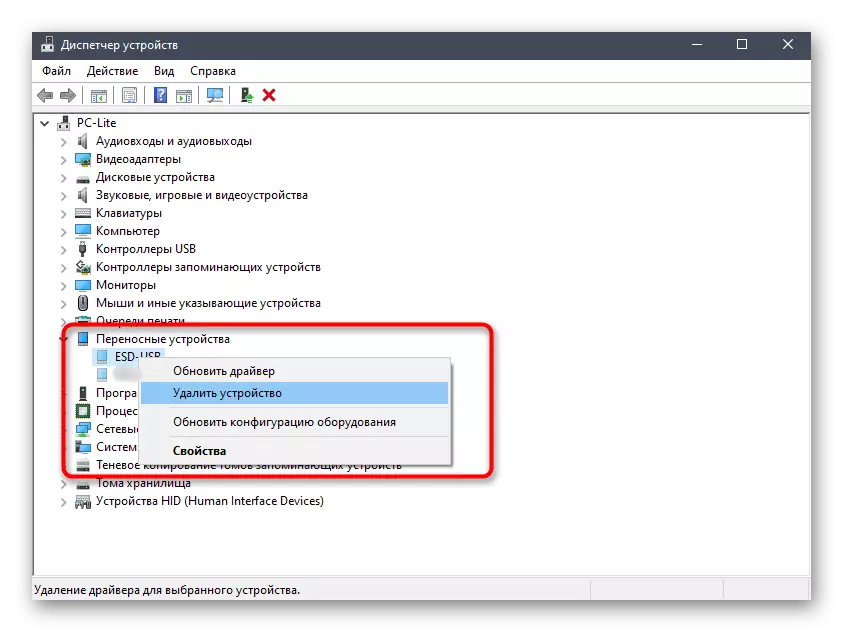
- Click the Row to the PCM device and select Delete Device.
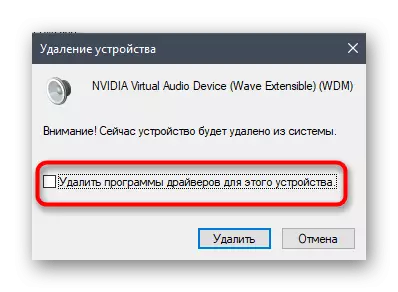
- Confirm your deletion in the warning window that appears.
- If there is an item "Delete drivers for this device" in the same window, it is necessary to mark it with a check mark.

After that, the list of devices will immediately be updated, and you will only have to restart the computer so that all changes take effect. If you are in safe mode, go out of it as shown in another instructions on our website, go to which you can by clicking on the link below.
Usually, in the window that opens, it is enough to just follow the instructions and read the various footnotes carefully to know which components are removed and what it will lead to. Upon completion, do not forget to restart your computer to update information. In most situations, this can be done directly from the uninstaller window.
Method 4: Print Management application
The name of this method already suggests that it will only suit to those users who wish to remove printer drivers. Windows 10 has a separate classic application that allows not only to view a list of all files associated with printing equipment, but also remove unnecessary literally into several clicks. Sometimes this method is more efficient than previous ones, because it erases any mention of the printer in the system.
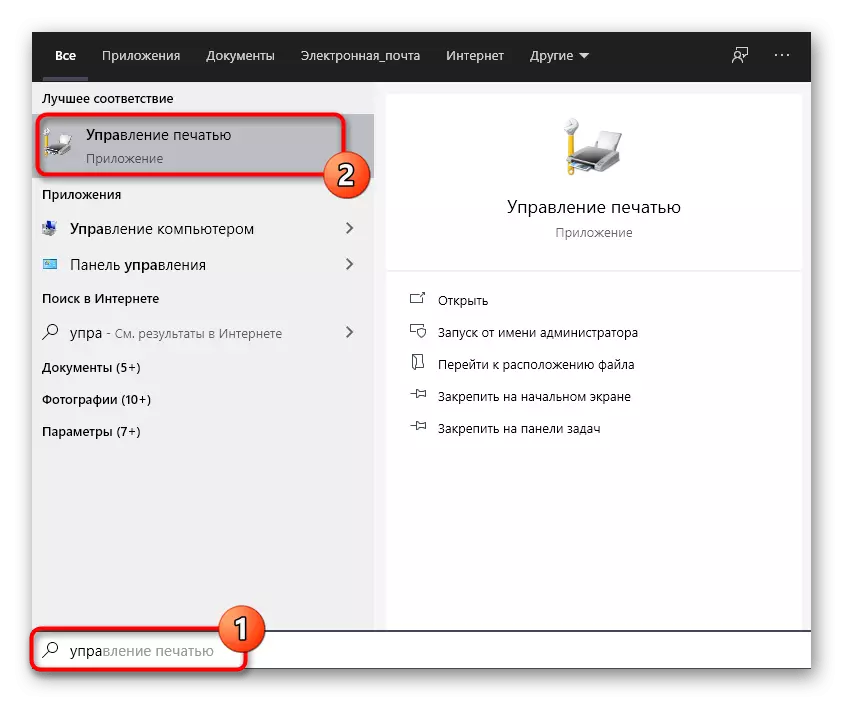
- To open the "Print Management" application, expand the "Start" and enter its name in the search.
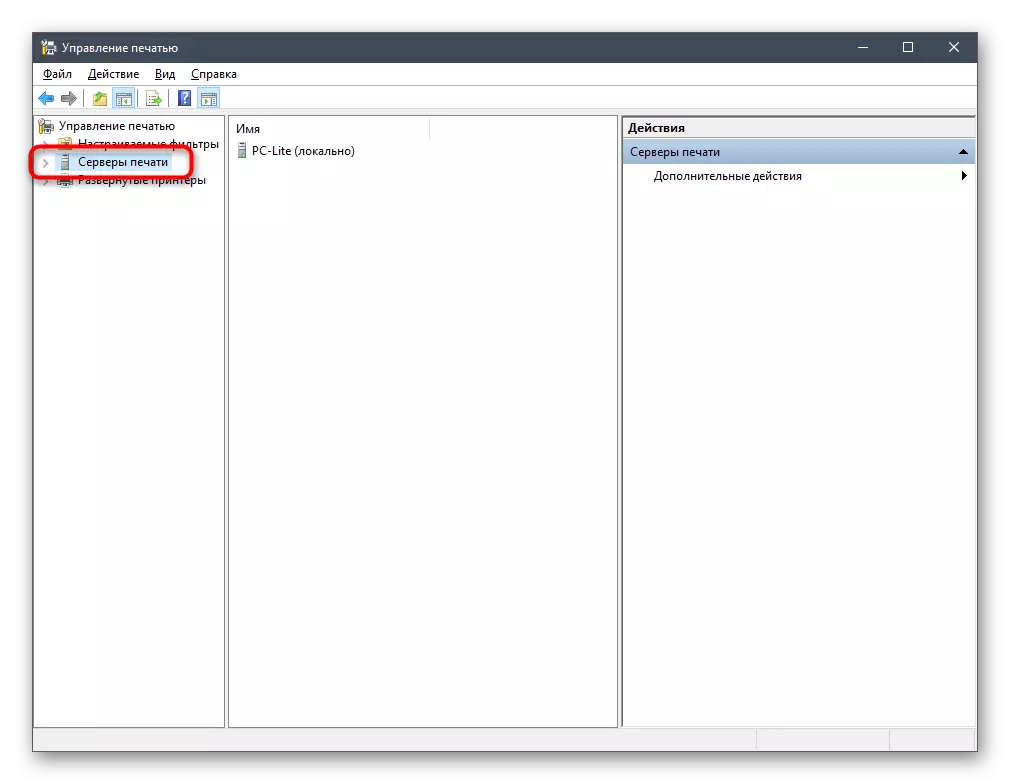
- In the window that opens on the left pane, expand the "Print Servers" section.
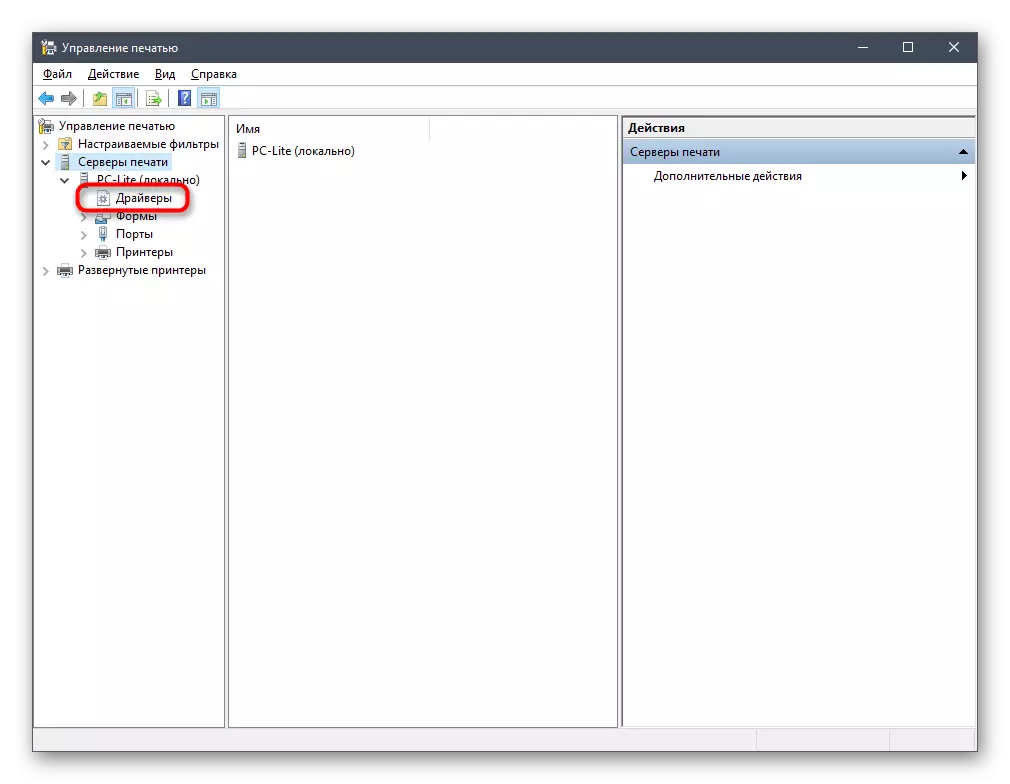
- Expand the "Drivers" category.
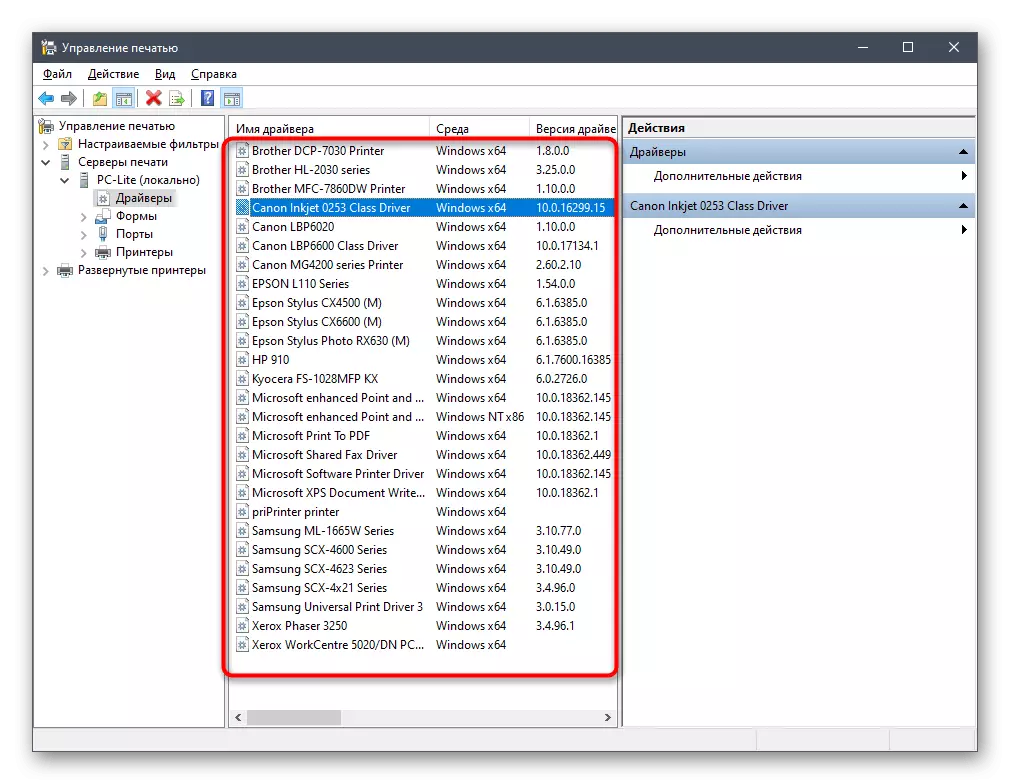
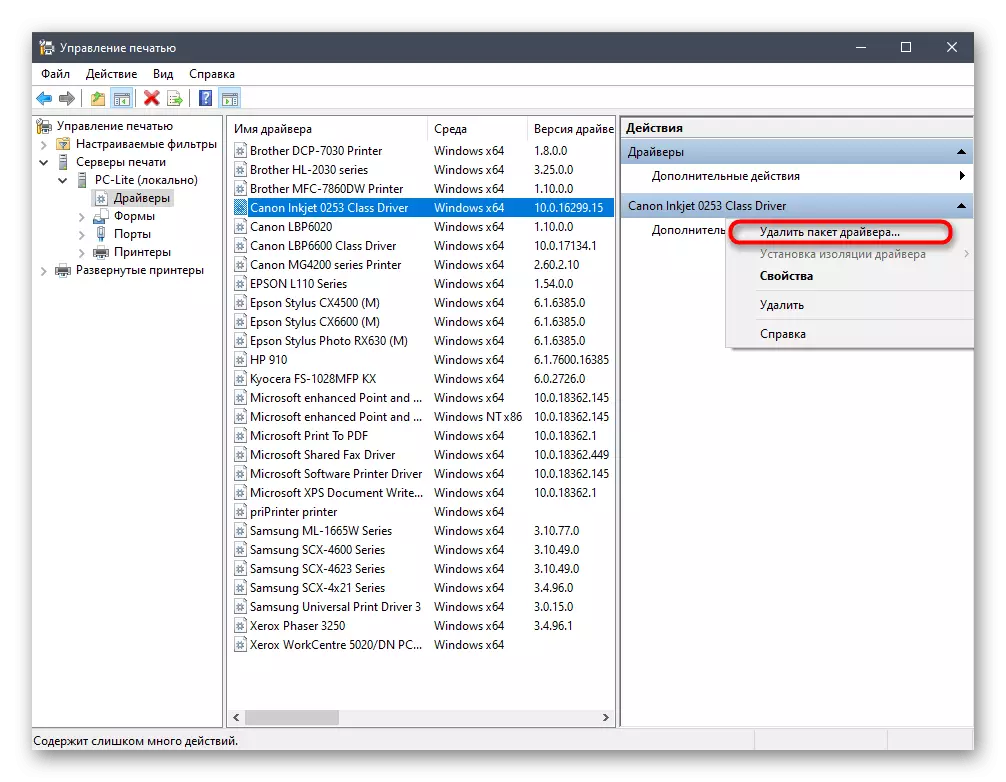
- Check out the list of available files and specify the appropriate.
- In the Additional Action menu, select Delete Driver Package.
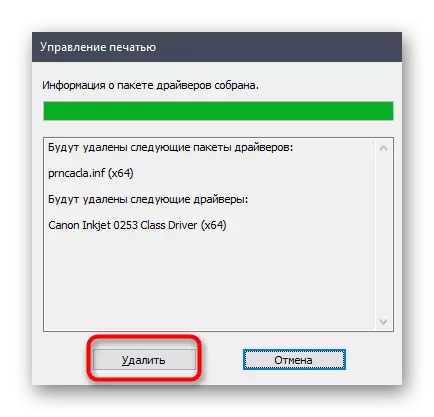
- Confirm your intentions in uninstallation.
- Expect the end of this process. Progress and all necessary parts will be displayed on the screen.
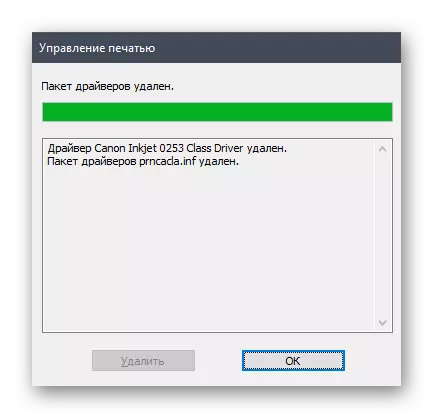
- After the notification is notified, the "Dial Package" can close the current window.

In the same way, any drivers associated with printing equipment and scanners are cleared, which are connected to a computer with a further installation of the appropriate software.
Method 5: Deleting hidden devices
If you pay attention to the method 2, then notice that only the drivers of the equipment that is now connected to a computer can be removed through the Device Manager. As for disconnected devices, they are in a hidden state and many of them will never be connected to this PC. There is a method that allows you to remove such hidden devices through the same menu, but for this you have to perform one simple setting.
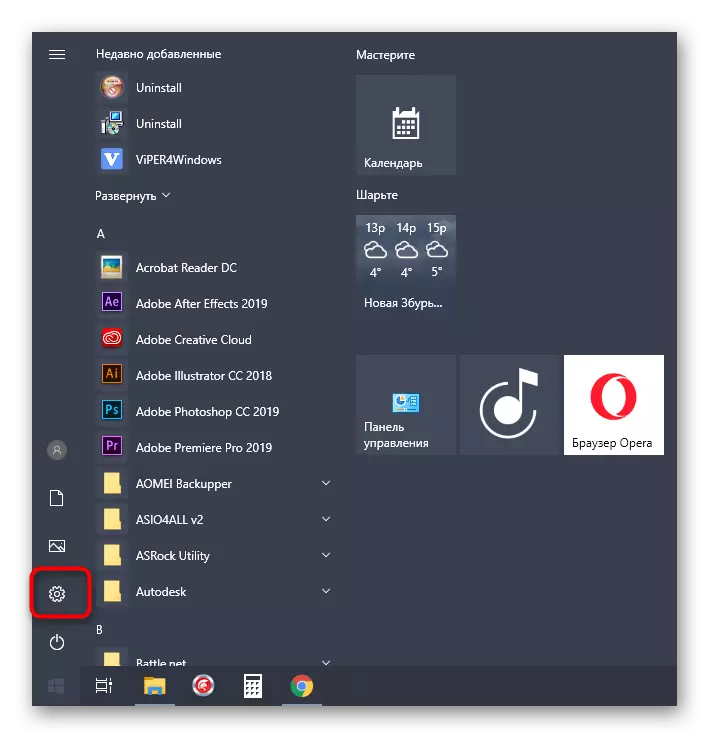
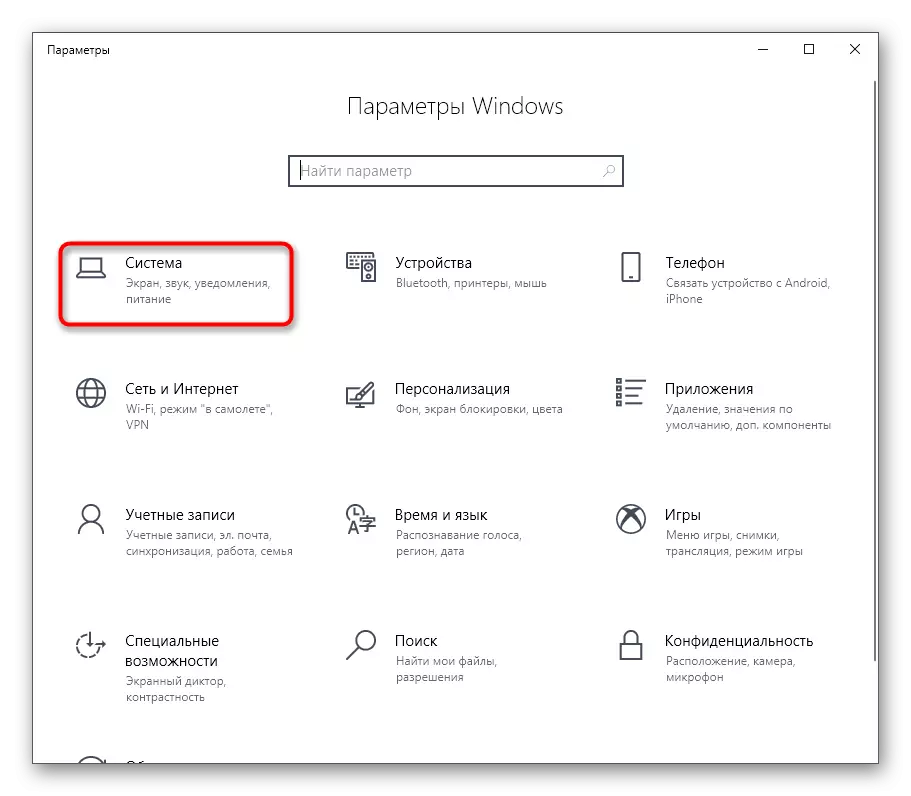
- Open the "Start" and go to "Parameters" by clicking on a specially designated button in the form of a gear.
- In the window that opens, you are interested in the section "System".
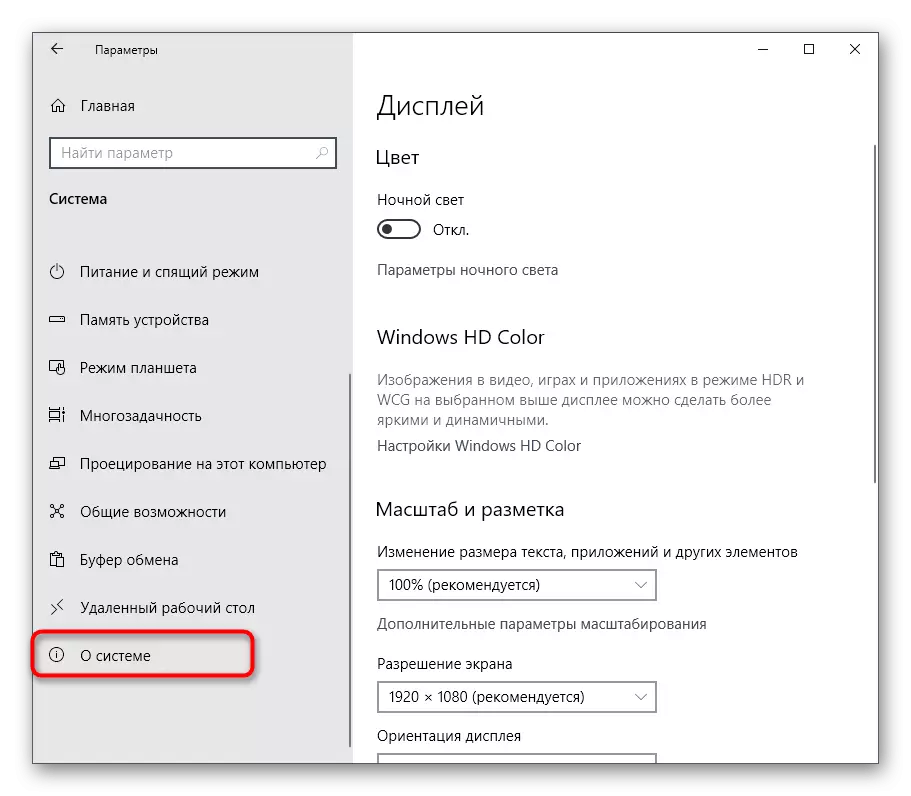
- Run at the bottom of the left pane and go to the "About System".
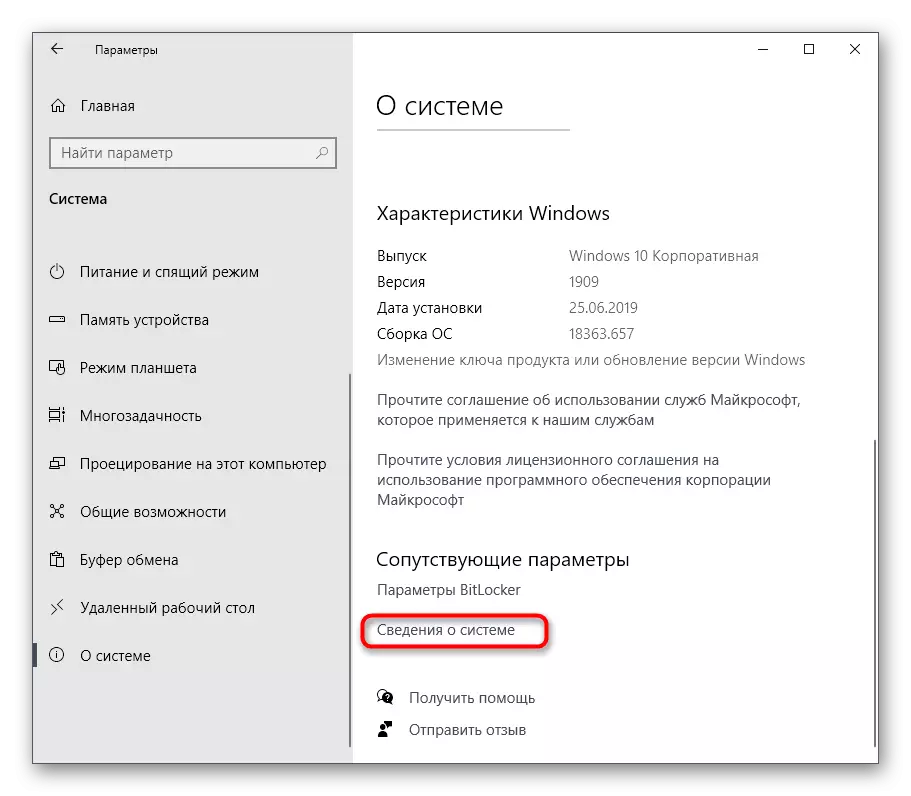
- In this window, find the line "System Information" and click on it with the left mouse button.
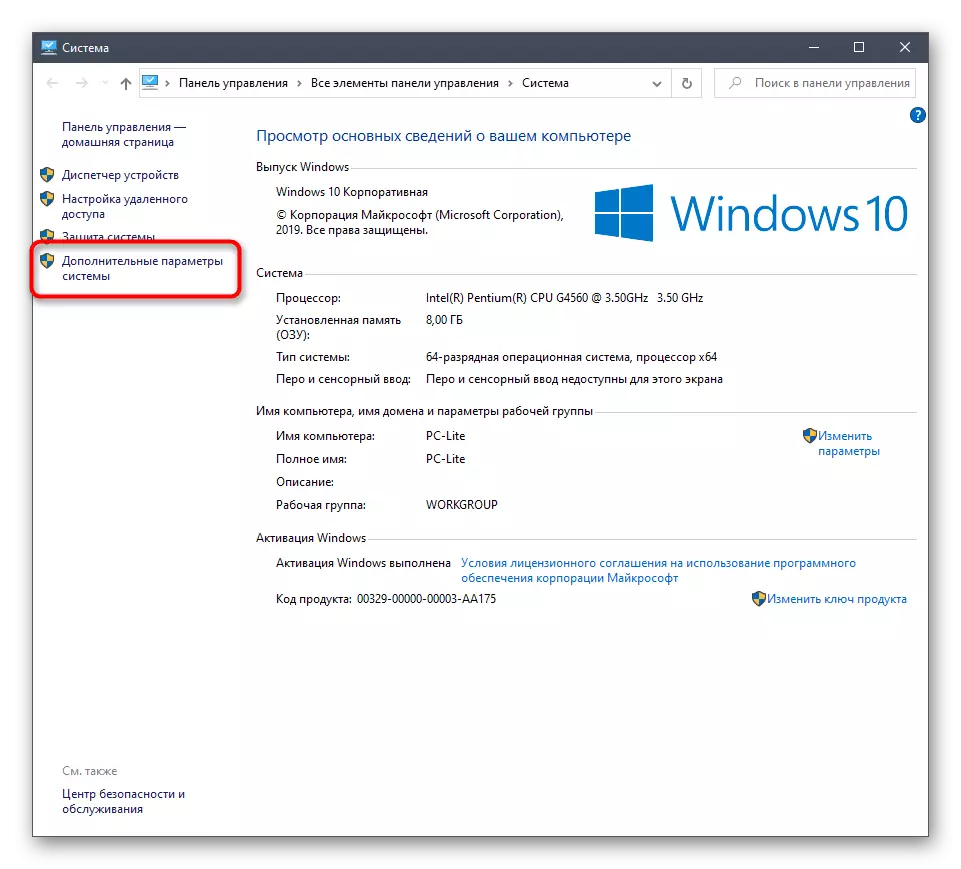
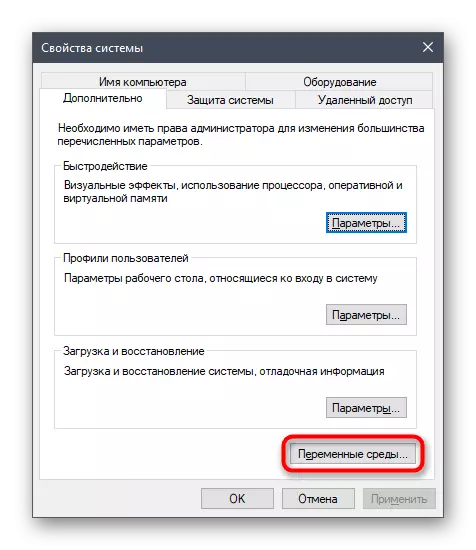
- The new "System" menu will open, where the "Advanced system options" clicks should be pressed.
- In the "System Properties" on the "Advanced" tab, click on the "Wednesday variables" button.
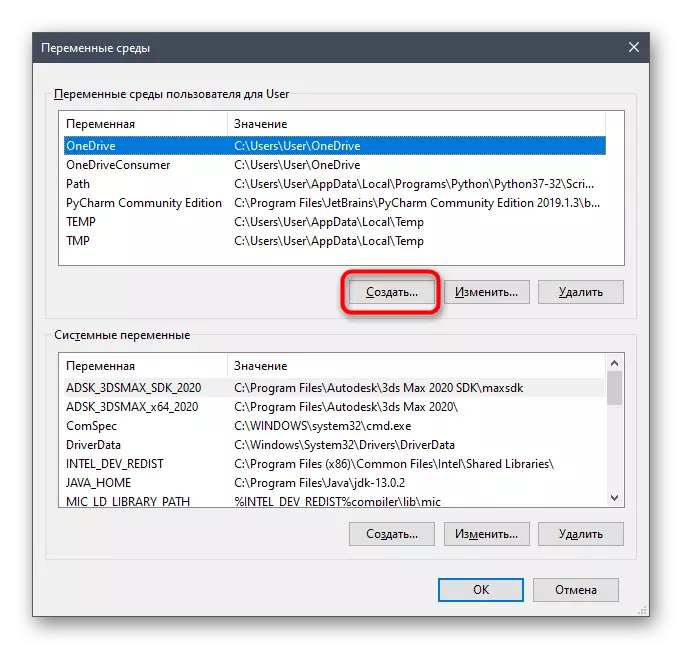
- The first unit is called "User Wednesday Variables". Under it is the "Create" button, on which and click.
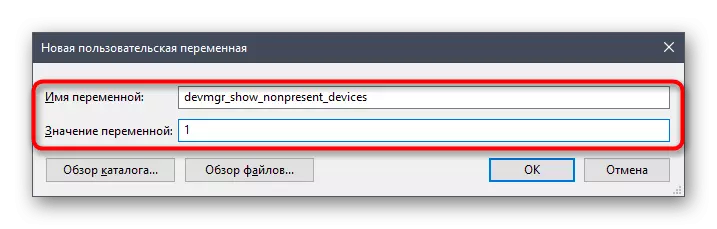
- Set the name of the variable "devmgr_show_nonpresent_devices" and set it the value "1", then apply the changes.
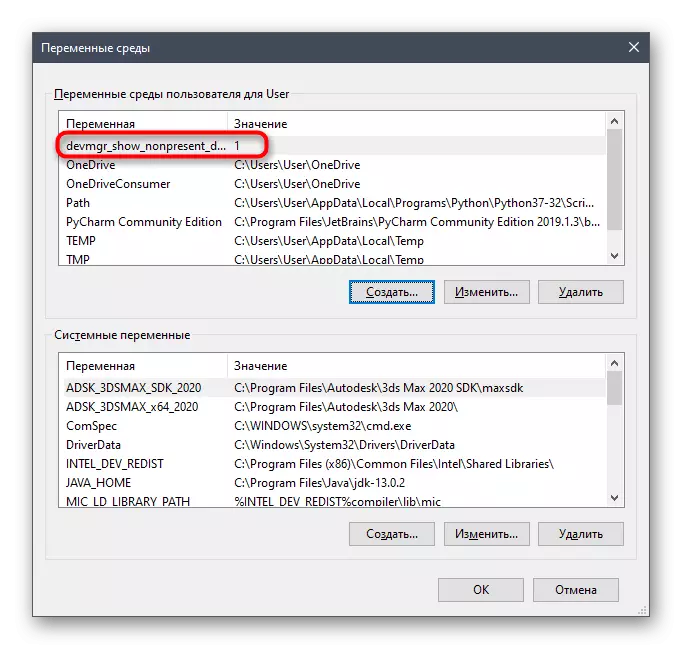
- Check the current setting by finding the variable created in the block.
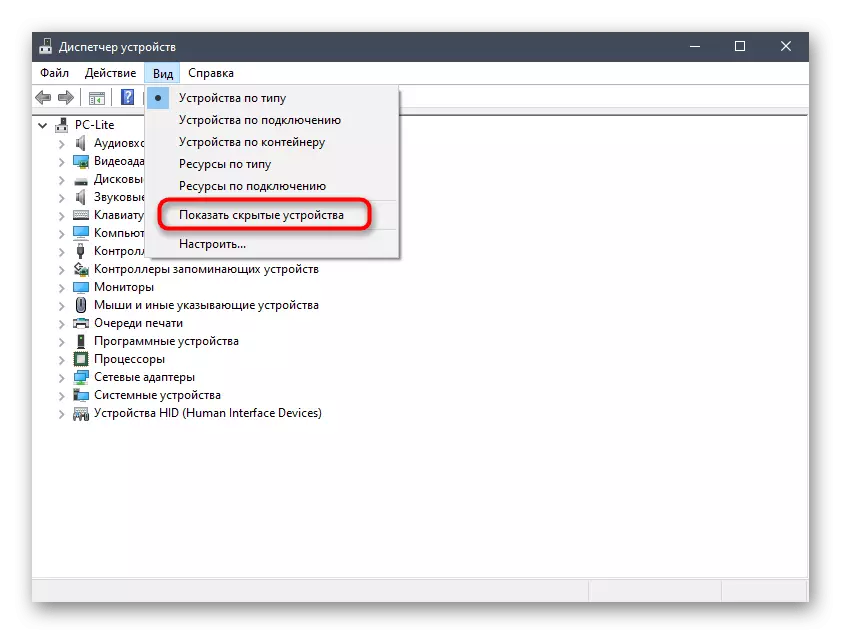
- Now it remains only to display hidden equipment and remove it. To do this, open the Device Manager in any convenient way.
- In the "View" pop-up menu, activate the "Show Hidden Devices" item.
- All hidden devices will be highlighted in blue. Find the required, click on the PCM line and click "Delete the device".
Now, when you repeatedly connect the remote device, the operating system does not recognize it and re-install will begin. If there is no longer need to display hidden devices, you can disable this feature by removing the checkbox from the item above.
Within the framework of today's article, we told about five methods of removing drivers in Windows 10. You only have to choose interests and following simple instructions, quickly cope with the task, applying a minimum amount of effort.