

In social VKontakte Network Users with major communities and numerous audiences of participants face the problem of inability to process messages and other requests. As a consequence, many biblical hosts resort to a bot was built on the VK API and capable of automatically performing many logical operations.
Creating a bot VKontakte
First of all, it is important to pay attention to the fact that the creation process can be divided into two types:
- written manually using its own code, contacting the social network API;
- written by professionals, configured and connected to one or more of your communities.
The main difference between the specified types of bots is that in the first case, each nuance of the program's performance directly depends on you, and in the second the general state of the bot follows the specialists who are reinforced.
In addition to this, it is worth noting that most of the existing trusted services providing bots work on a paid basis with the possibility of temporary demo access and limited features. This phenomenon is associated with the need to reduce the load on the program, which, with an overpressure of users, is not able to function normally, processing requests in a timely manner.
Note that programs on the VC website will function normally only if the site rules are followed. Otherwise, the program can be blocked.

Within the framework of this article, we will consider the highest-quality services providing a bot for a community that performs various tasks.
Method 1: Bot for community messages
VKontakte communities with quite numerous and, which is no less important, the active audience is often special bots for the internal message system. Such an approach will allow without delays to process the typed requests of users in huge quantities, without requiring a lively reaction of the administration due to pre-built logical chains with commands. As the same bot will be a third-party online service Robochat, providing a very impressive list of tools and the possibility of free use.
Go to online service Robochat
Step 1: Registration and Preparation
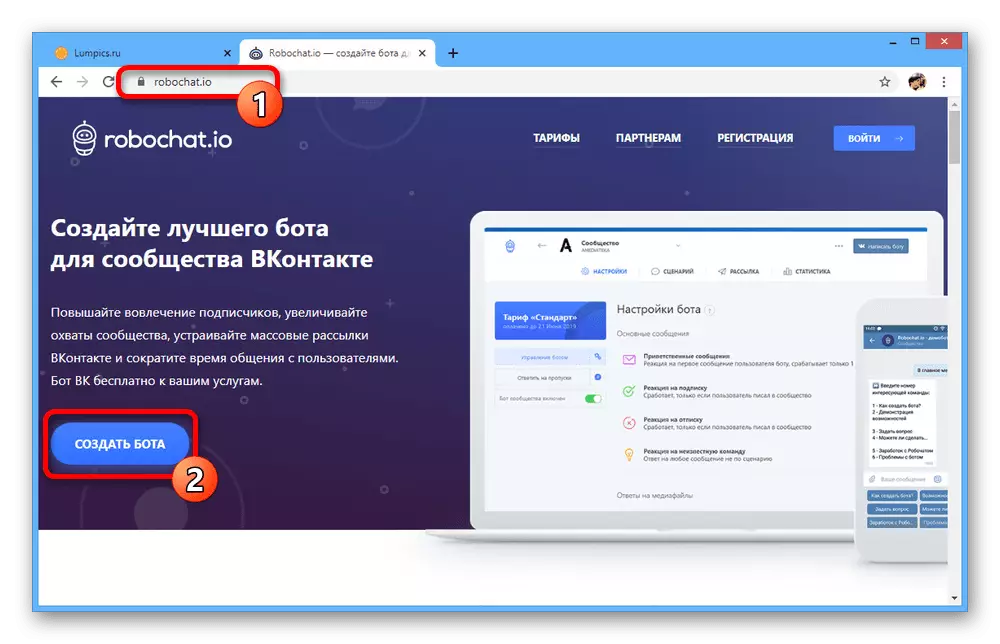
- First of all, it is necessary to register on the Robochat website. To do this, use the above link and on the main page click "Create a bot".
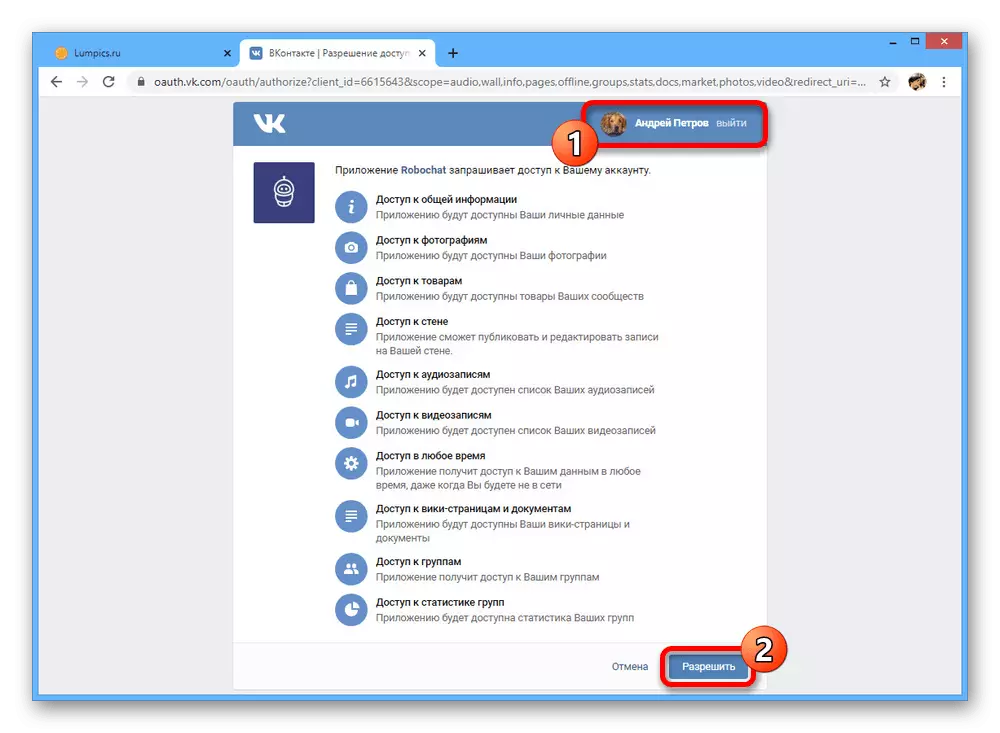
- In the section with the registration form you can resort to standard registration, specifying an email and password followed by confirmation. However, to subsequently repeat the actions on the account binding on the social network, it is best to immediately press the "VKontakte" button.
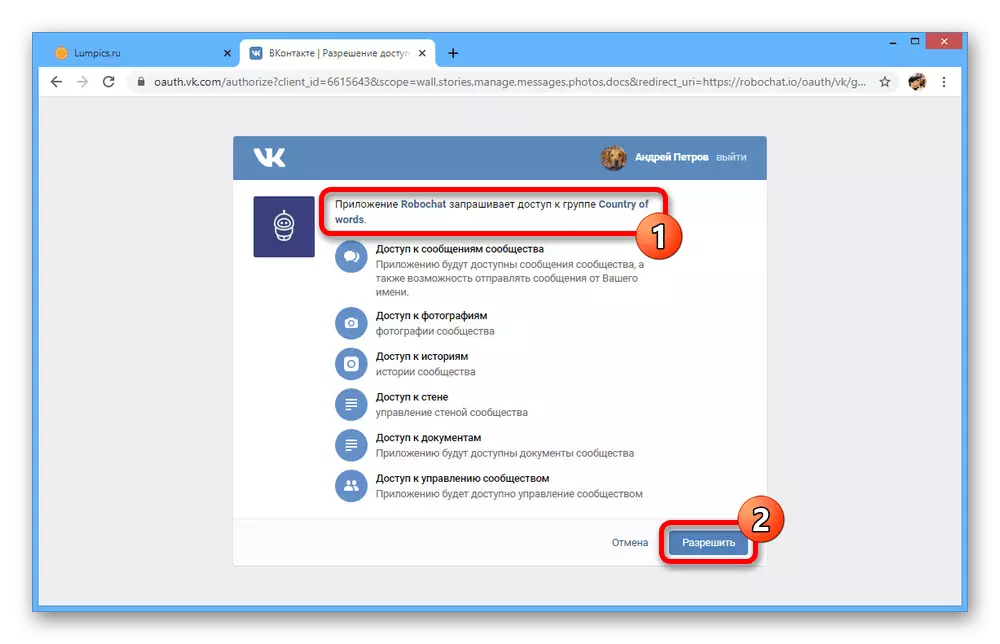
- Through an additional window, perform authorization on the VK page, if you have not done this earlier, and under the list of requirements, click the Allow button. This is necessary only for registration, since this bot supports exclusively group and public pages.
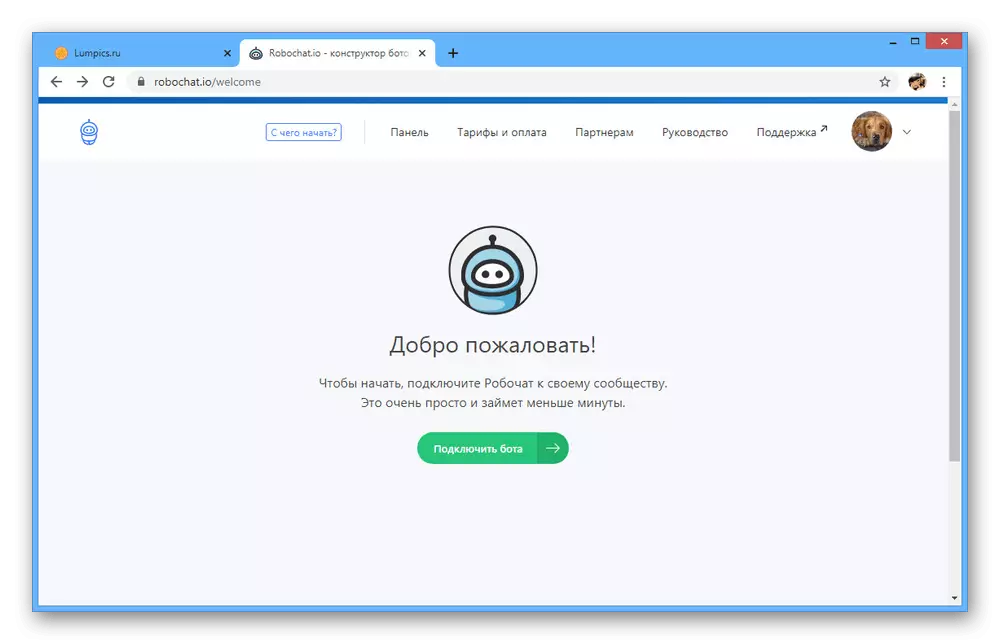
If registration goes successfully, after the transition you will find yourself on the starting screen of the personal account.

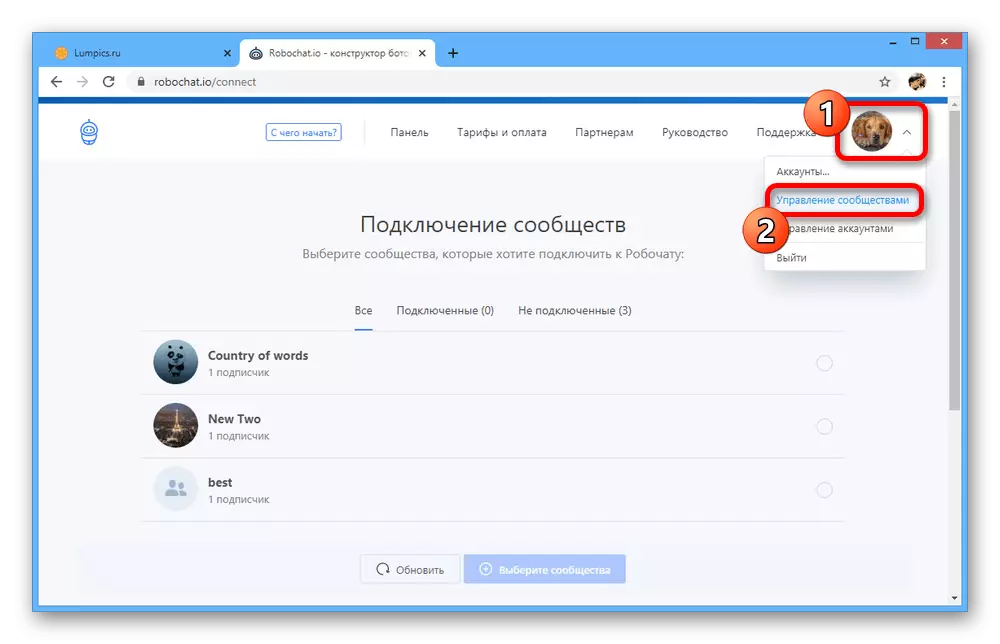
Step 2: Community Connection
- Despite the successful account registration using the VKontakte account, now you need to bind the community. You can do this in the section "Community Management", accessible through the main menu in the upper right corner.
- Click the "All" or "Not connected" tab, click on the desired group to select and click the "Connect" button at the bottom of the page. At the same time, you can bind several communities at once.
- In each selected group, it will be necessary to confirm the provision of access on a separate page. After that, you can proceed to the settings.

Step 3: Selection of Template
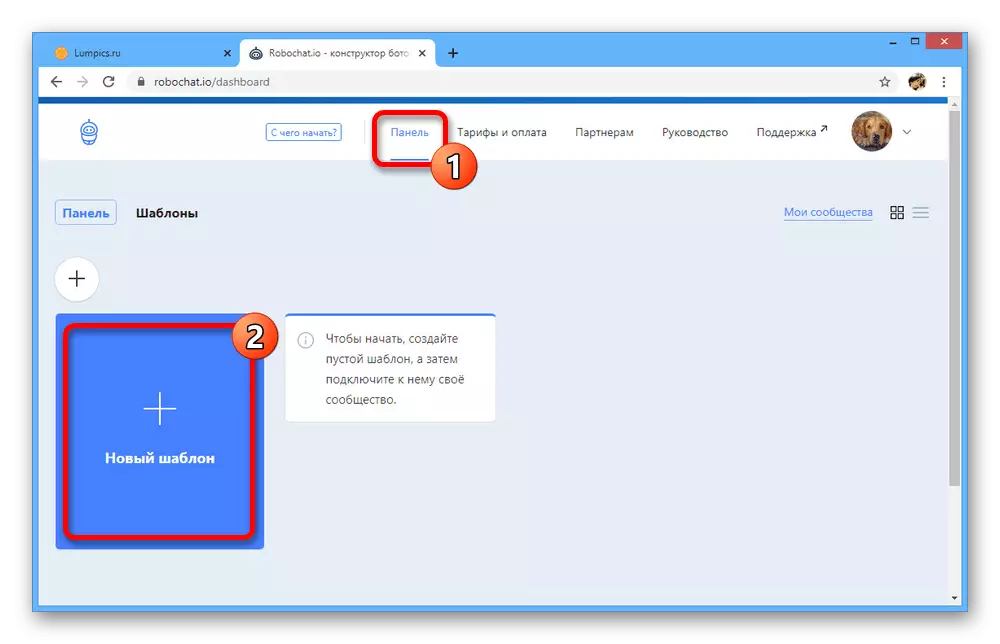
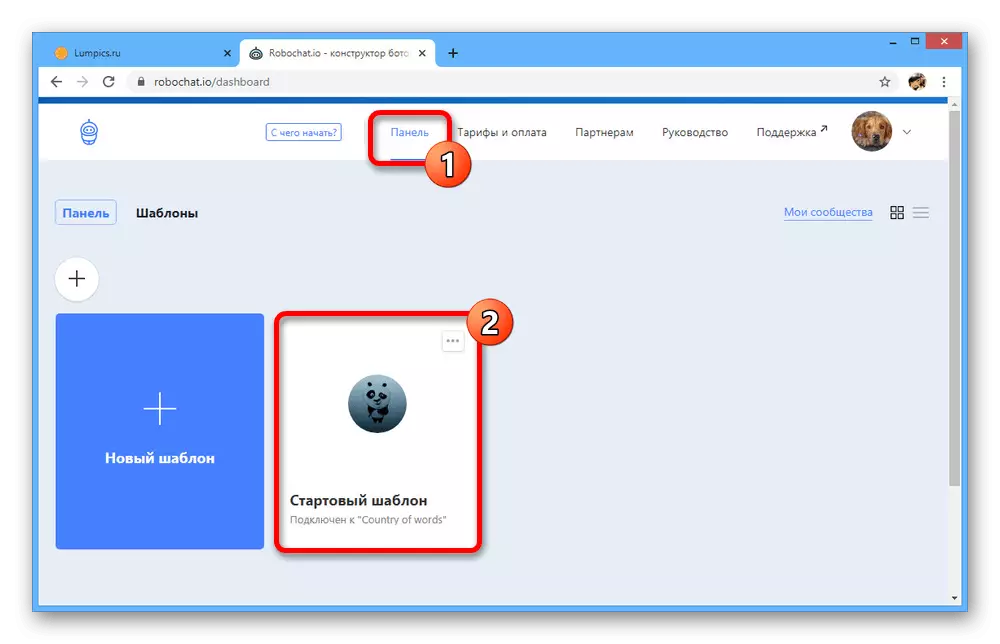
- Now you need to choose a template for the future bot, with the list of which you can find in the section "Panel" after clicking the "New Template" button.
- Choose one of the options depending on your bot requirements. But consider, not all options are suitable for processing messages.
- When the template is selected in the pop-up window, you must confirm using the "Use" button.
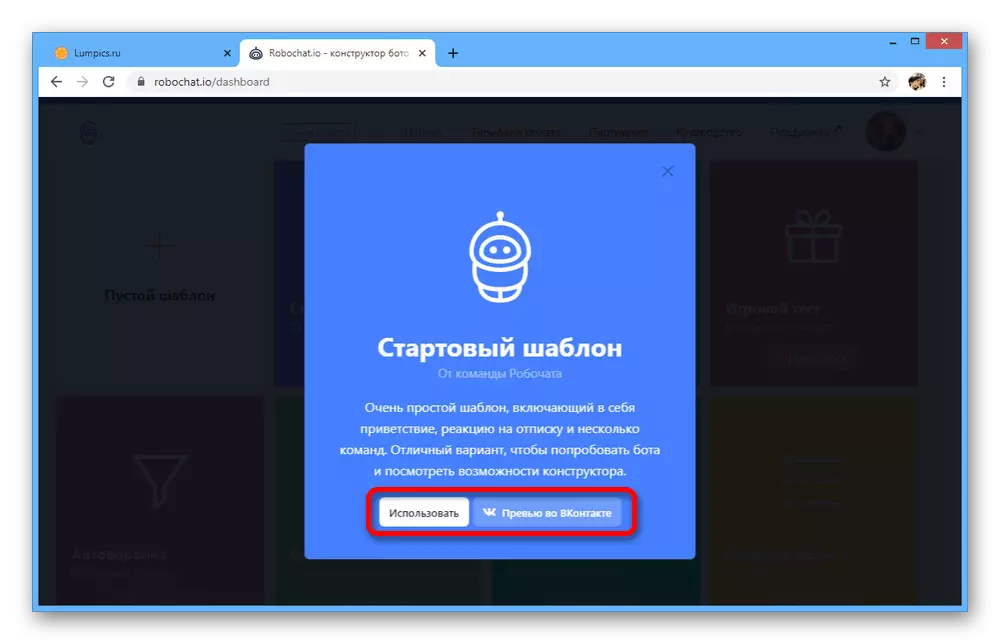
If necessary, you can also use the "Preview in VKontakte" option to go to the social network site and visually see the work of the selected template.
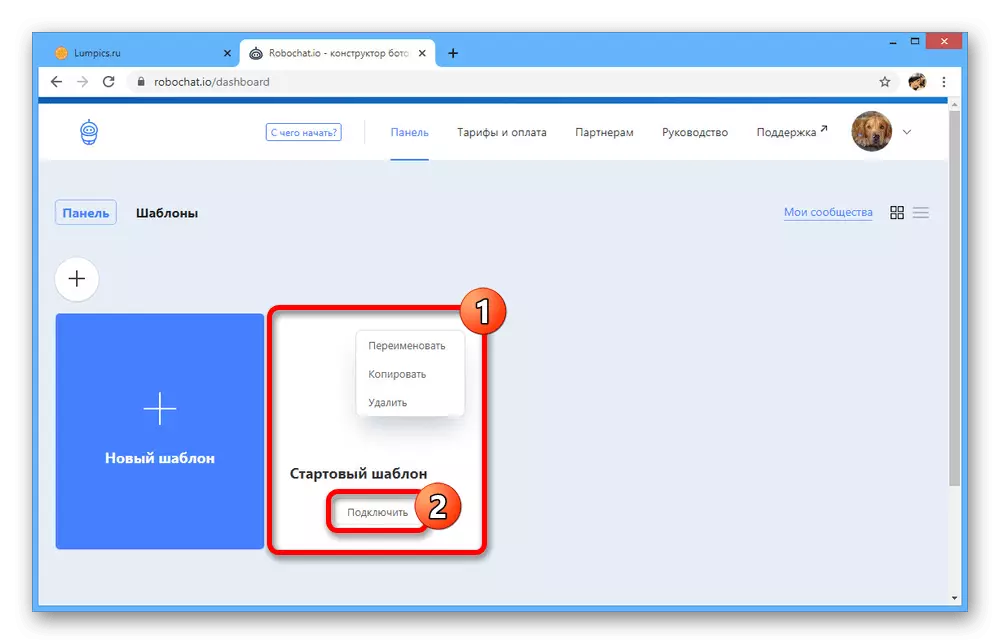
- Each added option on the "Panel" page can be renamed, copied or deleted. To edit, use the "Connect" button.
- To complete, select the community added on one of the previous steps, and click "Connect". As a result, the public will be attached to the bot.


Step 4: Bottack Settings
- To proceed to the basic parameters of the bot, open the "Panel" section and click on the desired option.
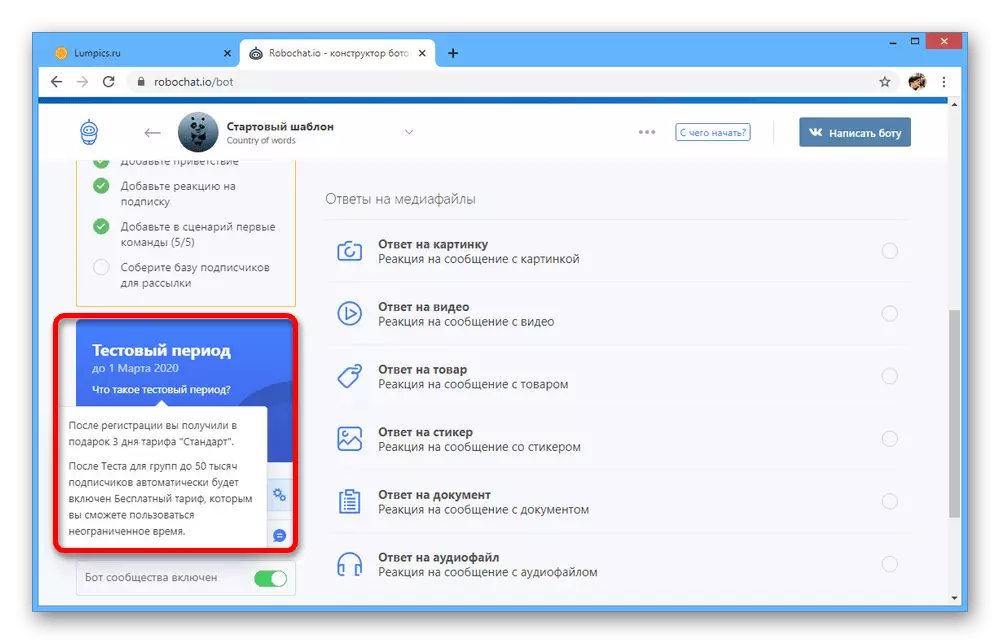
The accessibility of the tools in the next section directly depends on the tariff you used. The most optimal is the "standard" automatically operating after registration within three days.
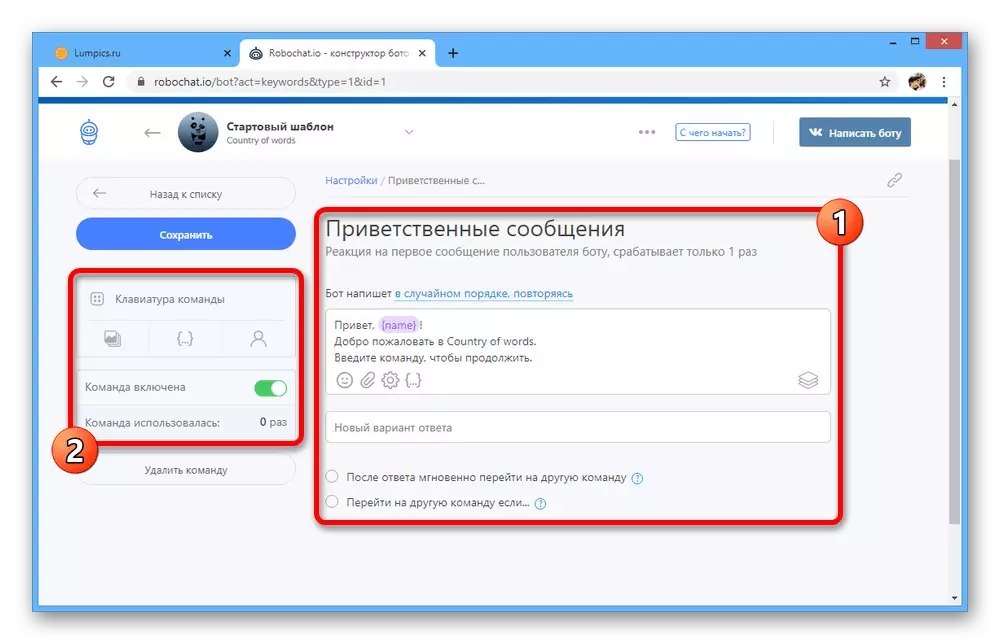
- In the "Basic Messages" block you can edit the bot settings. For example, create a unique welcome message or the correct reaction to unknown commands.

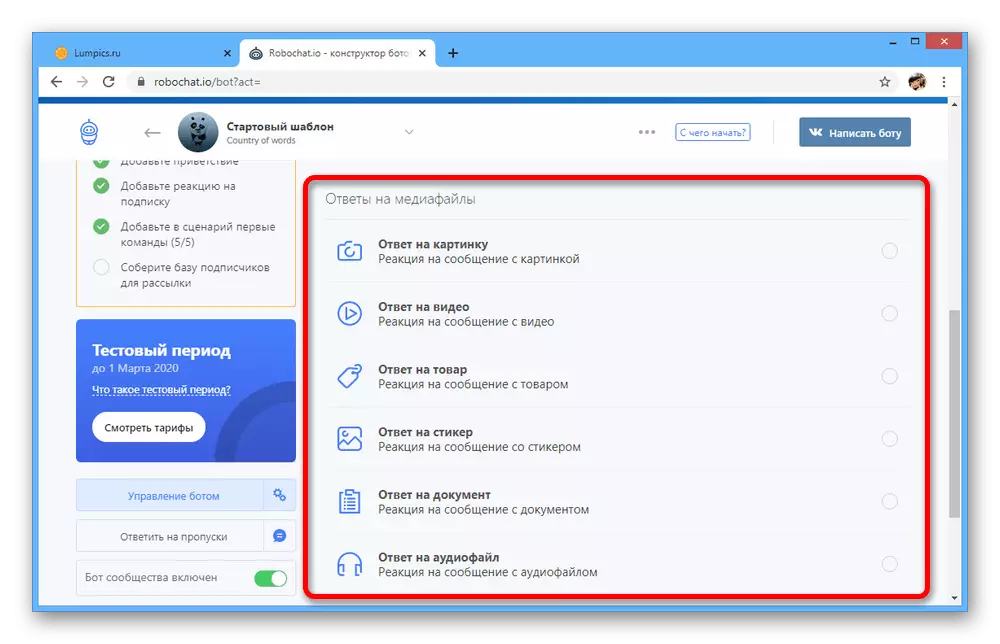
In addition, another page "Answers to Media Files" is available on the same page, working as well as the previous one.
- When configuring a separate reaction, you will have several text fields with the possibility of adding emoji, media files and scenarios.
- Use the parameters to adjust the behavior of the bot at your discretion. It is difficult to give some specific tips due to the already simple interface.

Step 5: Preparation of scenarios
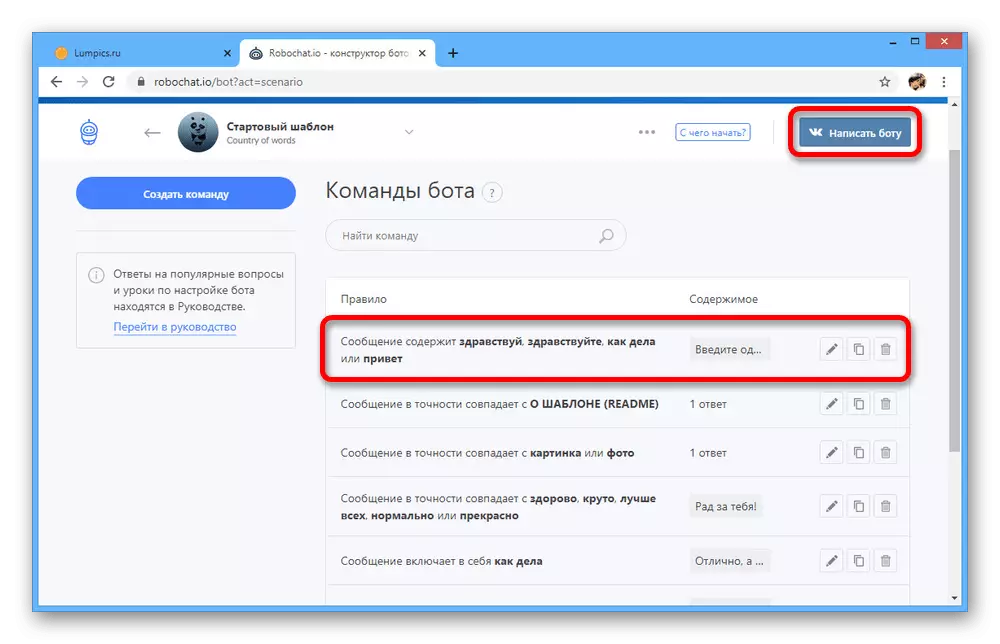
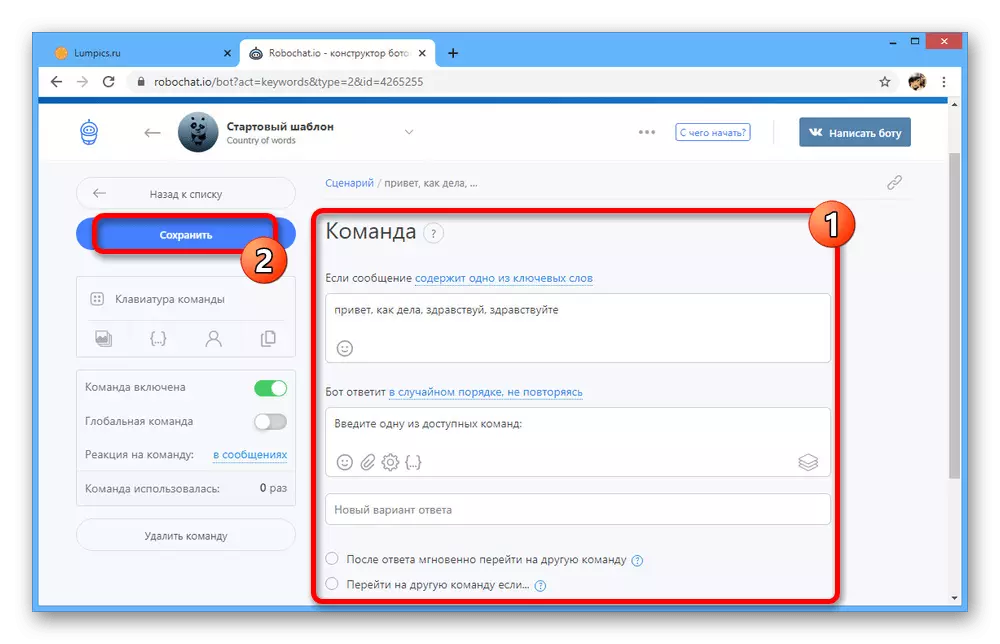
- The last stage of preparation of the bot is creating scripts on the Scenario page. This section can also be used before the previous step to prepare logical chains in advance.
- Click the "Create Team" button on the previously specified page and configure. To work properly, you must specify keywords or phrase through the comma, add a template for the reaction in the "Bot" block and be sure to choose one of the reaction options by clicking on the link above the desired field.
- This stage cannot be called simple, but at the same time you will easily achieve the desired result, if you have a clear idea of the work of the bot. In addition, the online service provides its own tips in the editor.
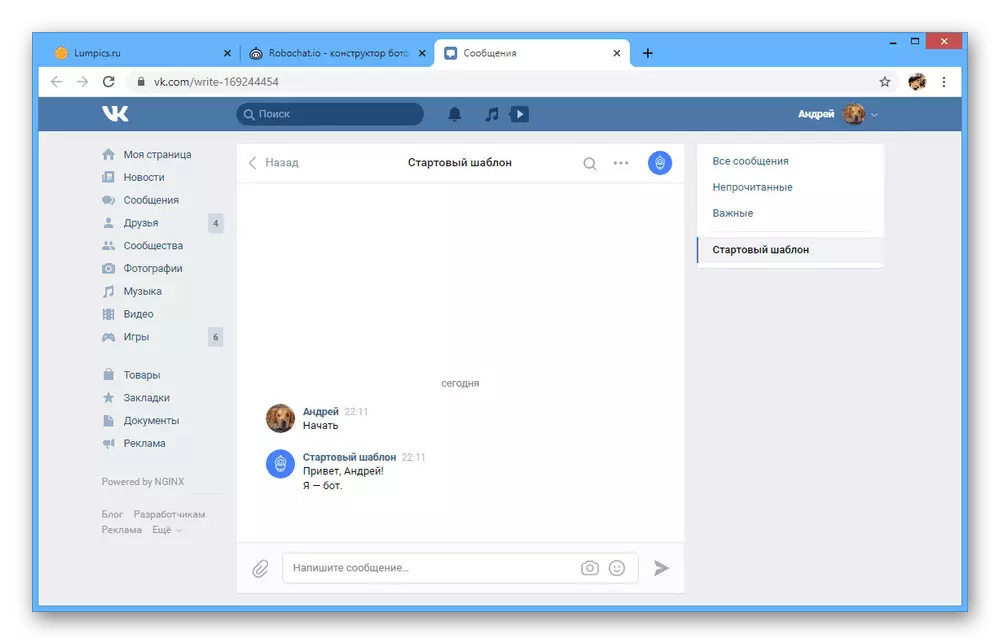
You can check the scripts after saving you can immediately in the connected community by clicking the "Write Bot" button in the upper right corner.
- In addition to these options, this online service can be used to automatically post messages.
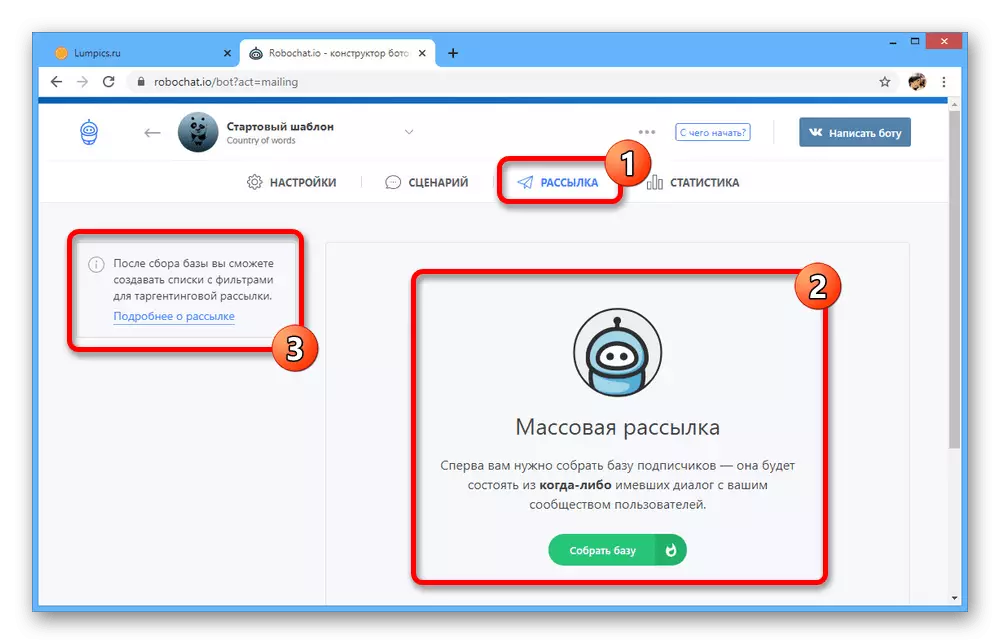
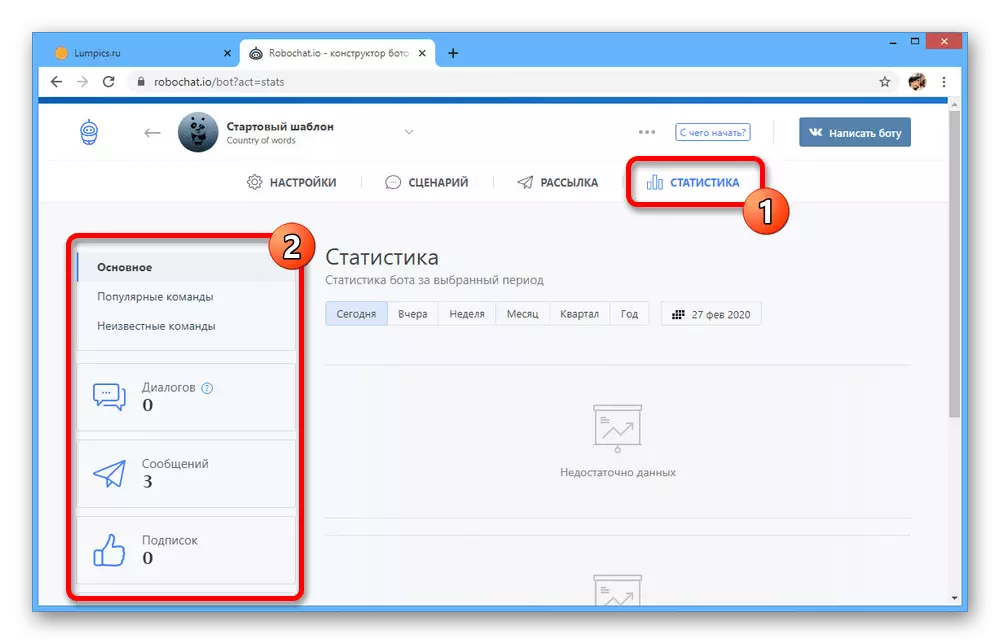
To check the bot, be sure to check out the "Statistics" section, instantly locking any action.

Despite the large number of similar services that provide in many ways, Robochat demonstrates stable operation and a simple interface that makes it better. Moreover, there is a test period, limited, but still an affordable free rate, and quite reasonable prices for services.
Method 2: Chat Bot for Community
In many groups, VKontakte can be found chat, in which the community participants actively communicate. At the same time, quite often directly from administrators there is a need to respond to questions that have already been once set by other users and received the corresponding answer.
Just in order to simplify the chat management process, a service was developed to create a groupcloud chat bot.
Thanks to the capabilities provided, you can configure the program for a group in detail and no longer worry that any user will leave the list of participants without receiving a proper answer to their questions.
The official website of the GROUPCLOUD service
- Go to the official site groupcloud.
- In the center of the page, click the "Try Free" button.
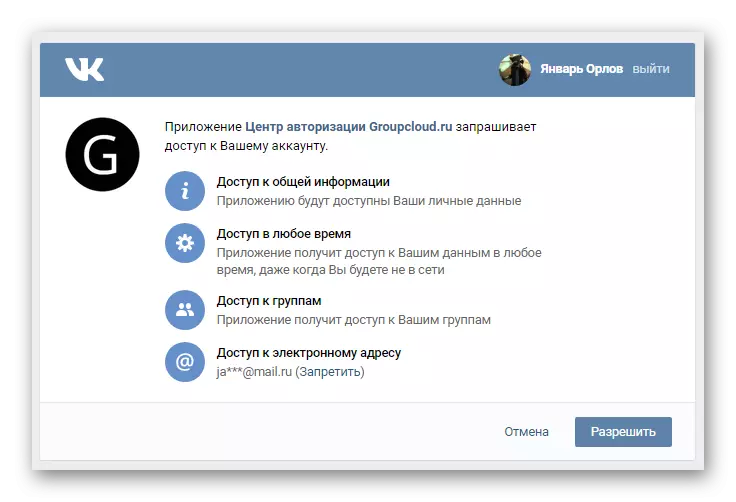
- Allow your access to your Vkontakte page.
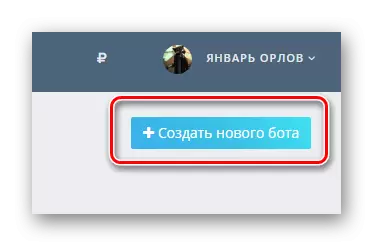
- On the tab that opens later in the upper right corner, find the "Create a new bot" button and click on it.
- Enter the name of the new bot and click the "Create" button.
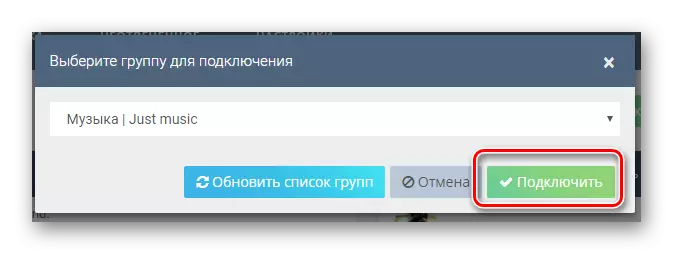
- On the next page you need to use the "Connect a new group to the bot" button and specify the community in which the created chat bot should work.
- Specify the desired group and click on the inscription "Connect".
- Allow the bot to connect to the community and operate with the data specified on the corresponding page.

You can also click on the button "To learn more" To clarify many additional aspects regarding the work of this service.

The bot is possible to activate only in those communities that include the application chat.

All subsequent actions are associated directly with the bot setting on your personal preferences and requirements for the program.
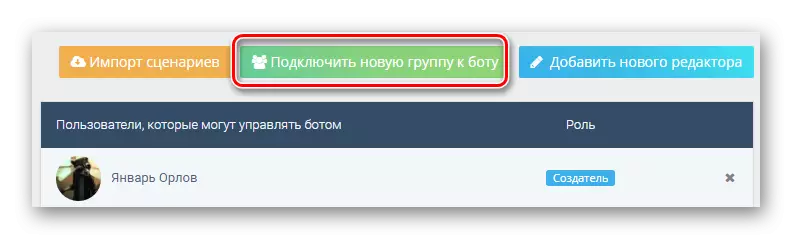
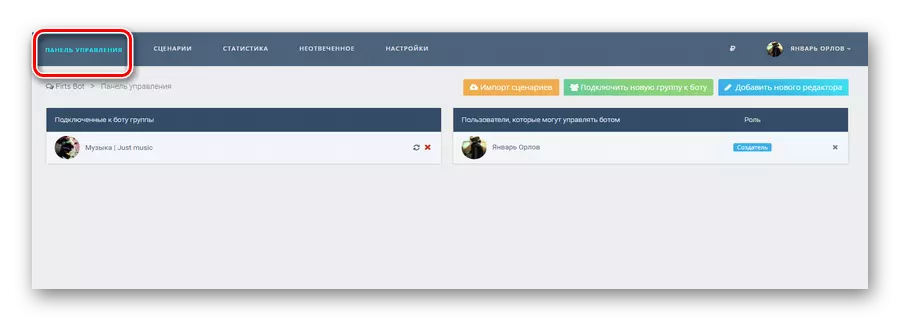
- The "Control Panel" tab is designed to control the work of the bot. It is here that you can assign additional administrators who can interfere with the program and connect new groups.
- On the Scenario page you can register a bot structure, on the basis of which it will perform certain actions.
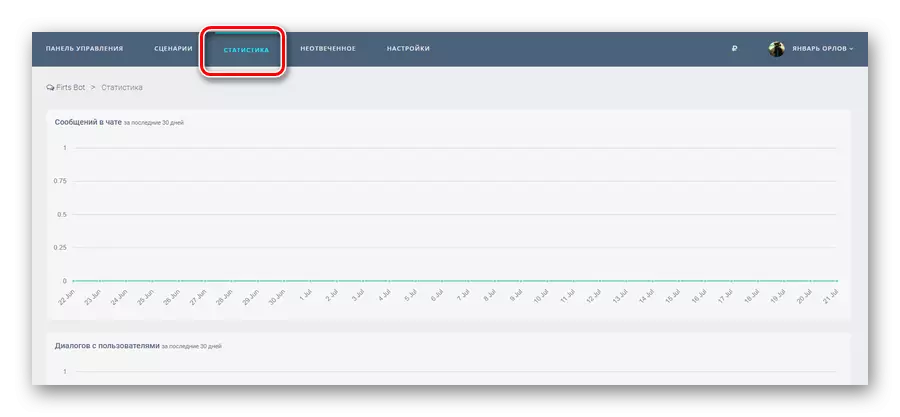
- Thanks to the "Statistics" tab, you can track the work of the bot and in the event of oddities in the behavior, refine scenarios.
- The next item "not responded" is intended solely to collect messages, which bot could not give an answer due to errors in the script.
- The last presented tab "Settings" allows you to set the basic parameters for the bot on which the entire subsequent work of this program in the chat in the community is based.


Subject to a diligent relationship to the exhibition of all possible parameters, this service guarantees the maximum stable bot.
Do not forget how to use the settings button "Save".
On this review of the most popular services to create a bot can be considered complete. If you have questions, we are always happy to help.