
The most common problem when trying to use a discrete graphics adapter - the absence of it in the operating system, which makes it impossible to correctly output the image and causes the monitor through the integrated video card. In Windows 7, this can be caused by different reasons, for example, the lack of relevant drivers or failures in the functioning of important components responsible for determining the devices connected via PCI. With all this, the user will deal with independently, starting from the simplest and obvious way.
Method 1: Installing suitable drivers
If you see only the built-in schedule and the "Standard VGA Graphic Adapter" line and the Discrete Video Card is not displayed at all, most likely, the problem is missing or incorrectly installed drivers, which are just necessary for correctly detecting the component. Wrouders of laptops find suitable files will be easier, because they only have to study the laptop housing to find out its exact model, and then use the search on the official site, finding "VGA Drivers". We offer to familiarize yourself with this operation in another manual, where you will find universal recommendations.
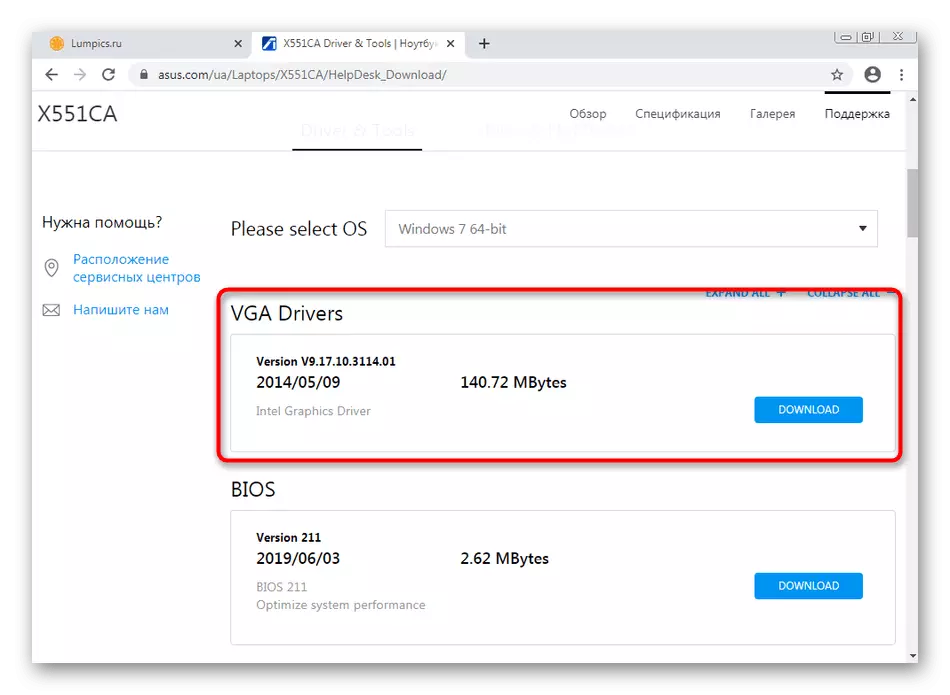
Read more: Installation of drivers for laptop
As for the PC owners with discrete video cards from different manufacturers, then it will not be possible to determine its exact model through the OS. Then you need to pay attention to the box from the component, instruction or marking on the housing, if you do not remember which model was purchased. After that, the transition to the AMD or NVIDIA site to download the relevant files is carried out. Additionally, we note that NVIDIA has a corporate online service that automatically scans the system and allows you to download missing software.
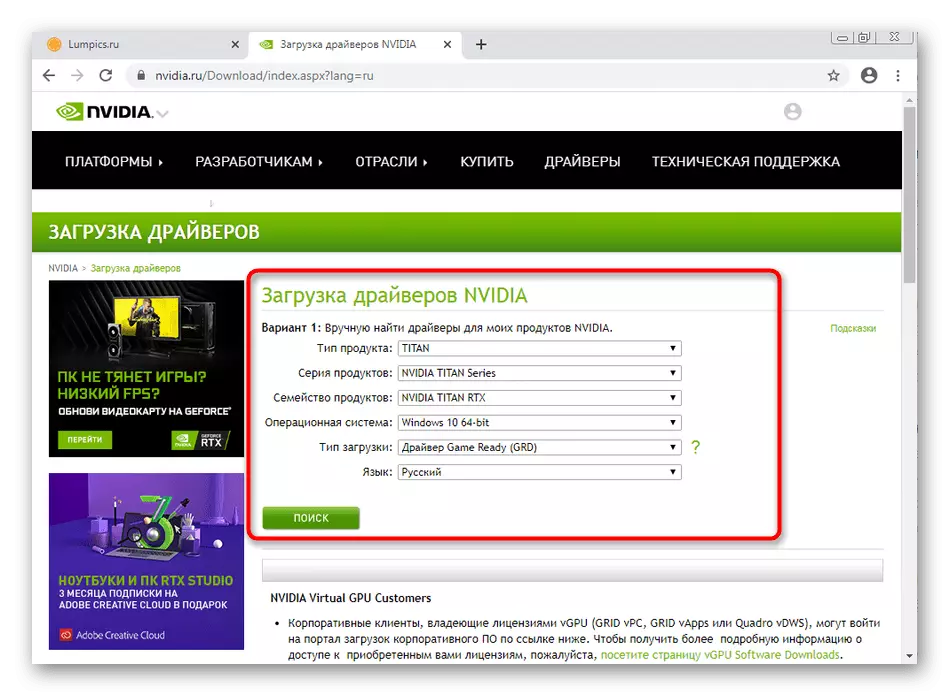
Read more: Installing drivers on a video card
The applications from third-party developers will also help to deal with this, the basic functionality of which is focused on automatic scanning and selection of missing files. Through them, you can download both files for all devices and only for a graphic adapter, removing the tick opposite all unnecessary lines. All necessary instructions and reviews on this occasion can be found below.
Read more:
How to update drivers on a computer through third-party programs
The best programs for installing drivers
Method 2: PCI Tire Driver Check
The PCI bus is an integral component of the modern motherboard through which the video card and other components with the corresponding connector occurs. To begin with, we recommend ensuring that the PCI bus driver is already installed in the OS, if one can be downloaded separately in principle. It is best to go to the official website of the system board manufacturer and see the list of files available for downloading files. If the PCI margin is found, download and install the component, restart the computer and check the performance of the graphics adapter.
Read more: Installing drivers for motherboard
In the case of a non-response of these actions, you can try to reset part of the Boot Configuration Data, which is performed through the standard OS. This action is complex and dangerous, so to begin with, you will have to create a backup copy of the changing file. Let's look at this method in order.
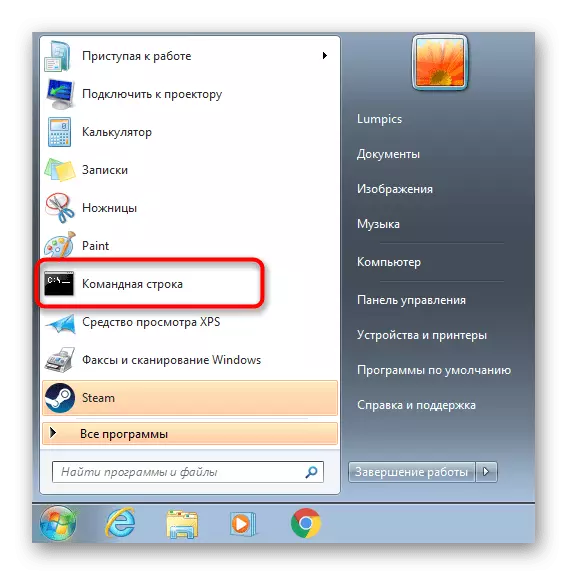
- Open "Start", find the application "Command Line" app and click on it right-click.
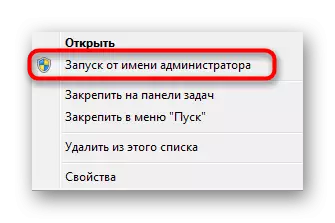
- In the context menu that appears, select the "Startup from the Administrator" string.
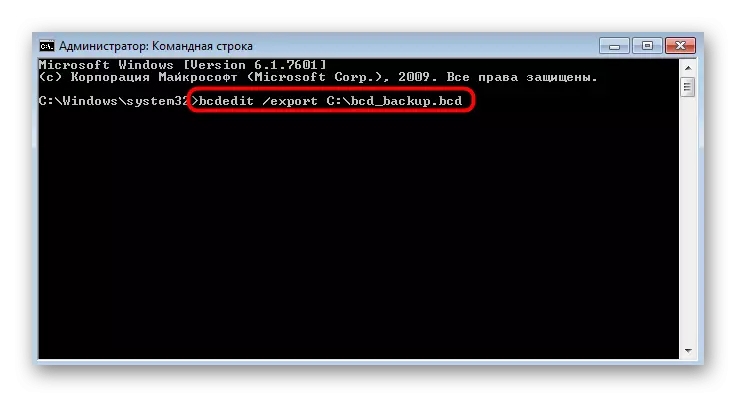
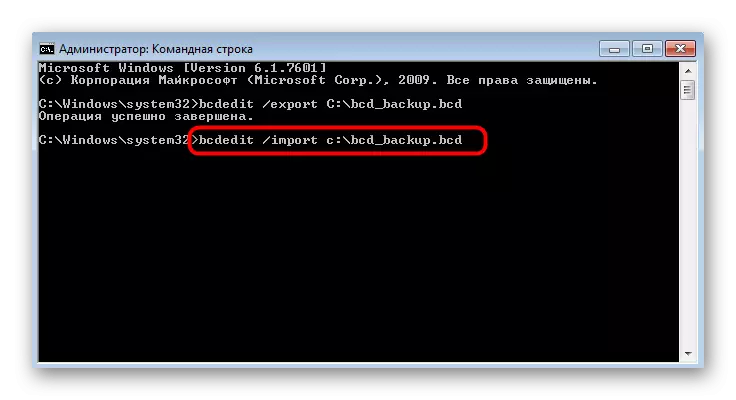
- Enter the bcdedit / export c: \ bcd_backup.bcd command, replacing C on the drive letter, where you want to save the backup file.
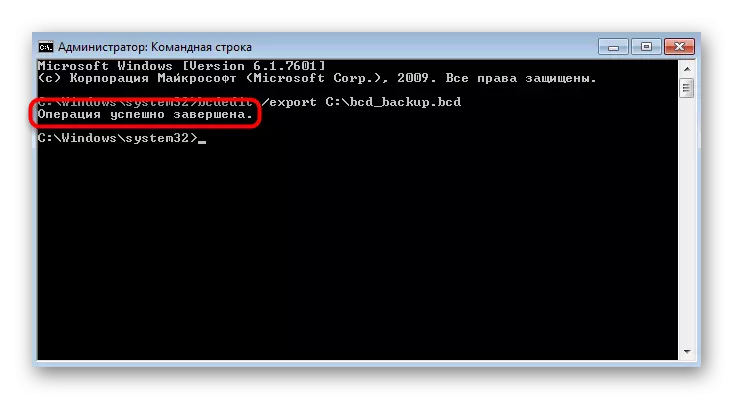
- After clicking on the Enter key, you will immediately see a notification of the successful completion of the operation.
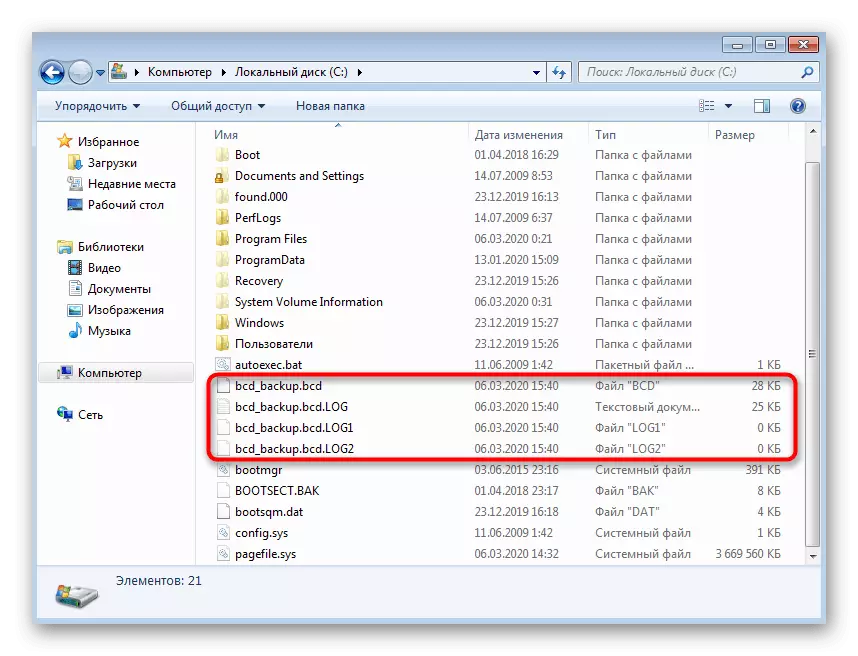
- Additionally, it is recommended to go to the place of maintaining objects and check their presence so that there are no problems with recovery in the future.
- Immediately note that recovery will be required only if there are some problems with the operation of the devices after rebooting the OS. This action is carried out by entering only one bcdedit / import c: \ bcd_backup.bcd command, where C is a disk label that stores a copy.
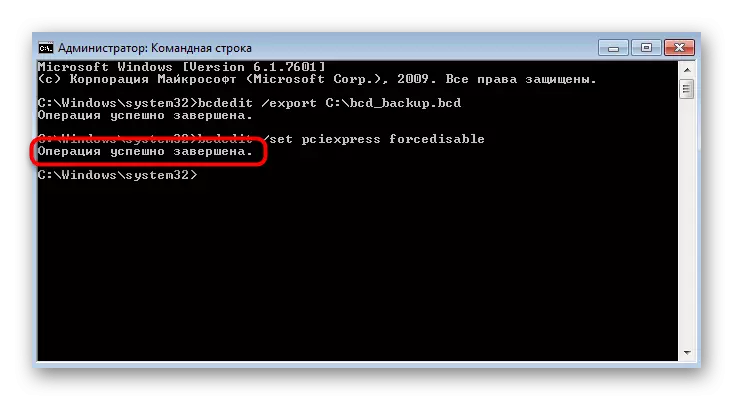
- After you were convinced of the correct save of the object, return to the console, enter the BCDEDITIT / SET PCIExpress Forcedisable command there and activate it.
- The screen will notify the success of the task. This means that you can restart the computer and check the performance of the video card.

Method 3: Checking BIOS settings
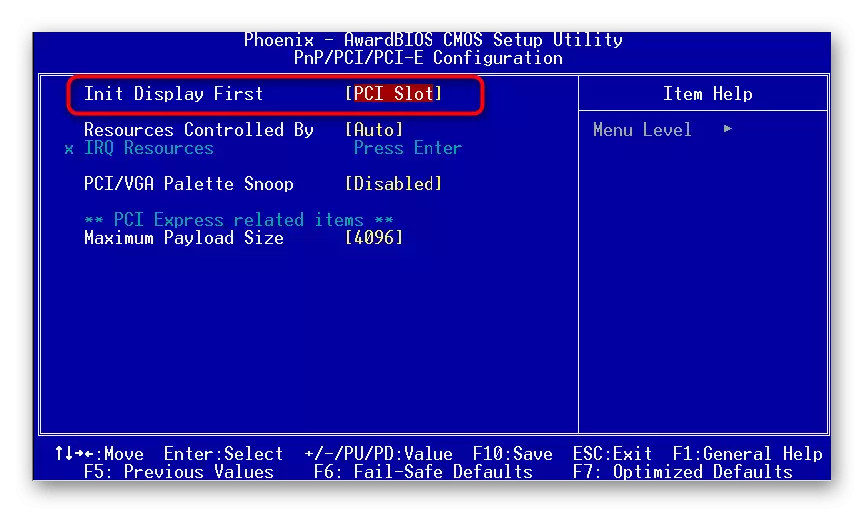
When using a discrete and integrated video card at the same time, it is important to pay attention to the BIOS parameters, because there is a parameter responsible for choosing a port for the primary display. Of course, if the "CPU Graphic" parameter is installed there, the integrated kernel will be read first, which may affect the display of the discrete video card, so this setting is recommended to change. To begin with, turn off the computer and when you restart, log in to the BIOS.
Read more: How to get to the BIOS on the computer
After that, the transition to the configuration is carried out depending on the BIOS version used. Prioritically pay attention to the partitions "Advanced" or "PCI-E Configuration". You need to find the item "Init Display First" and set it the value "PCI SLOT". Upon completion, apply the changes and exit BIOS by downloading the OS in normal mode.
Method 4: Check Windows loading mode 7
The reason with the incorrectly installed loading mode of Windows is rarely manifested, since users simply do not change it, respectively, problems may not occur. However, we still recommend checking the parameters to eliminate this factor. The problem itself is that if you set the option "Diagnostic Start" or "Selective Start", the Discrete Video Card driver will simply not load and it will stop displaying in the Device Manager.
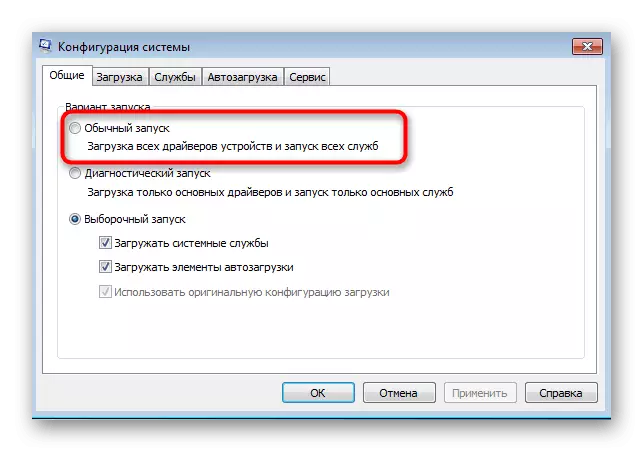
- Open the "Run" utility. To do this, it is easiest to use a combination of Win + R. In the Enter msconfig field and click the Enter key.
- In the "System Configuration" menu that appears, make sure that the marker is standing near the "Normal Start" item.
- If this is not so, change it and after click on "apply".

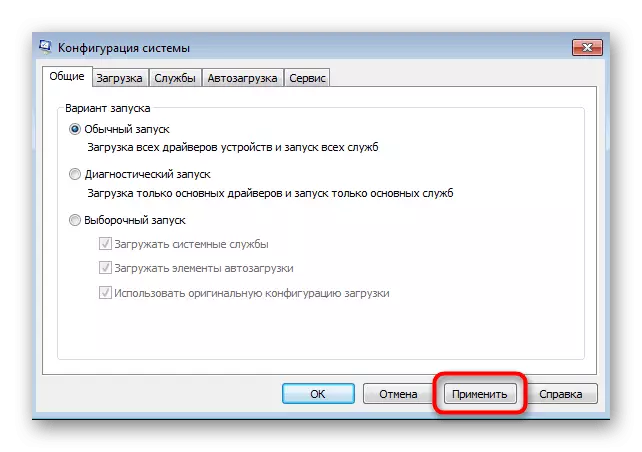
All changes will take effect only after rebooting the computer, so it is recommended to do it immediately to check if the method helped.
Method 5: Locking the automatic driver installation process
In Windows 7, there is a process that can automatically install a driver for specific graphic adapters if such files are available on branded servers. Most often after such installation, the device is displayed in the manager as "Standard VGA Graphic Adapter", and it interferes with the correct installation of user files.
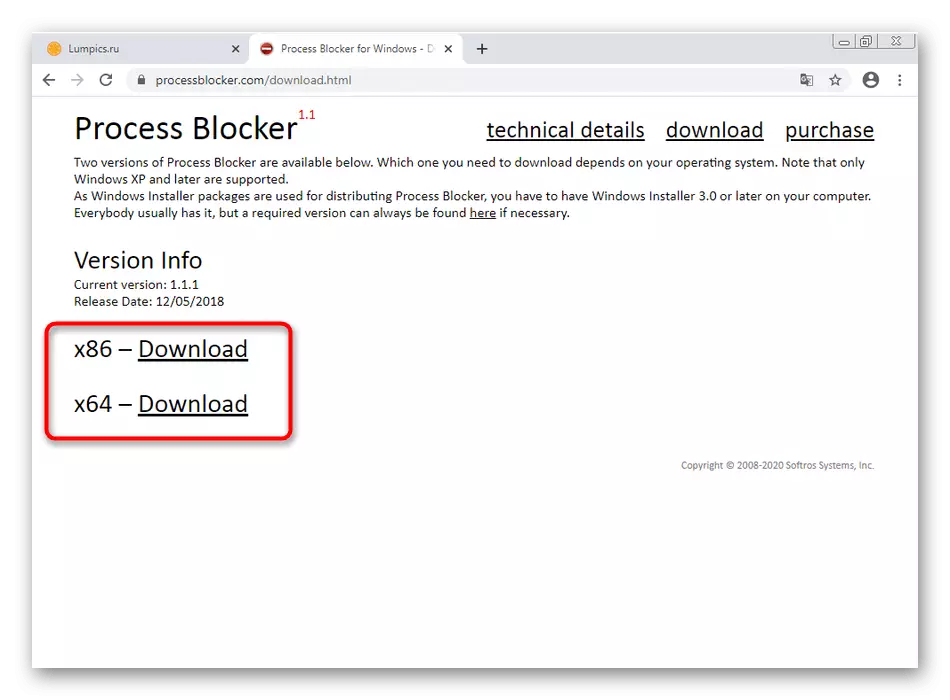
Download Process Blocker C Official Site
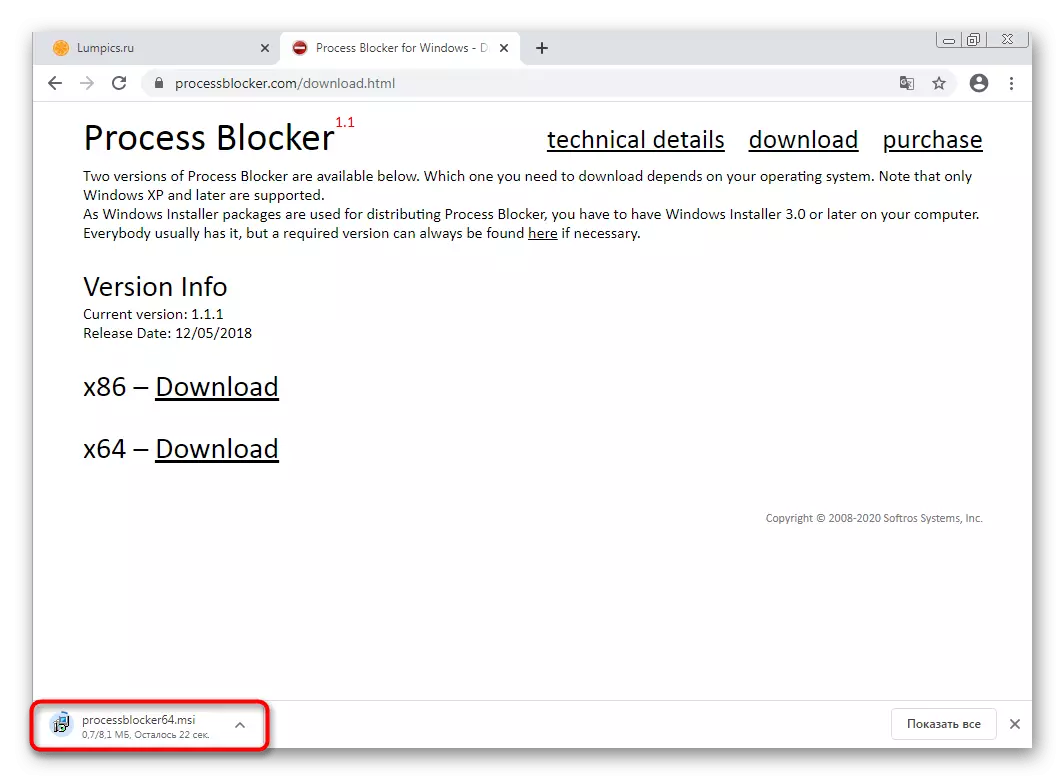
- Now we offer to block the standard application, in the background independently installing driver, which considers it necessary. It is best for this to use the PROCESS BLOCKER program, so click on the link above and download the appropriate version.
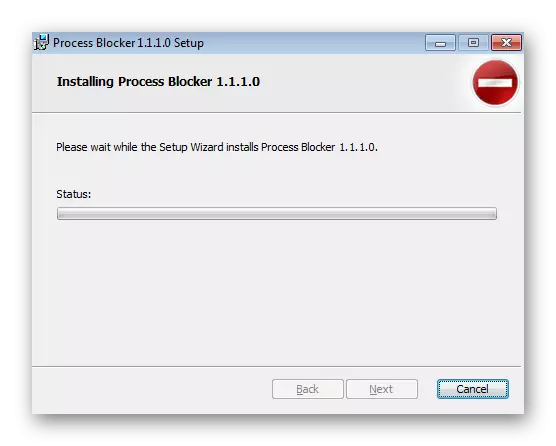
- After downloading, start the installer.
- Follow the simple instructions to install the Process Blocker on the computer.
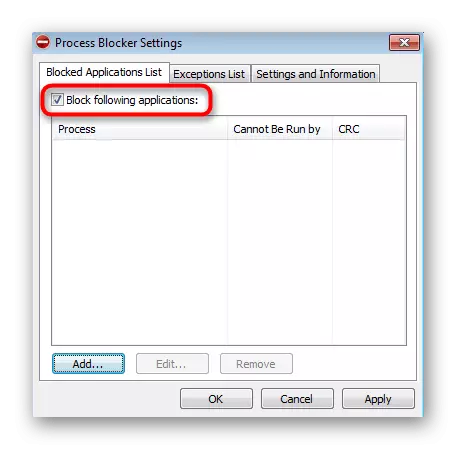
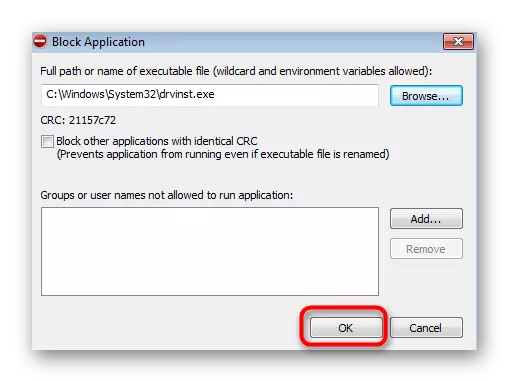
- After starting it, check the box near the Block Following Applications item.
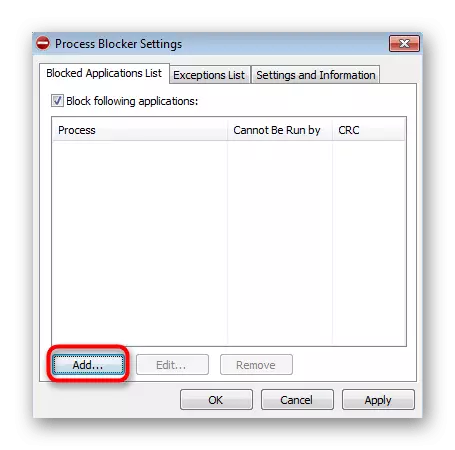
- Now the "add" button is activated, to which you want to go to add the process.
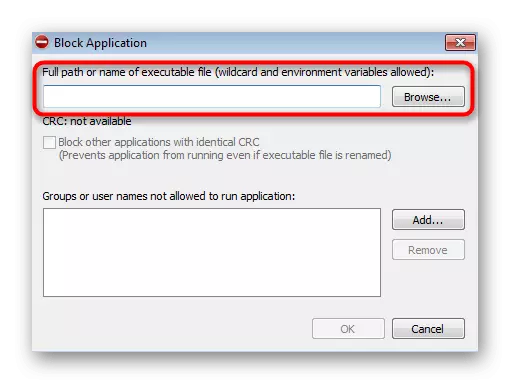
- In the menu that opens, click on "Browse".
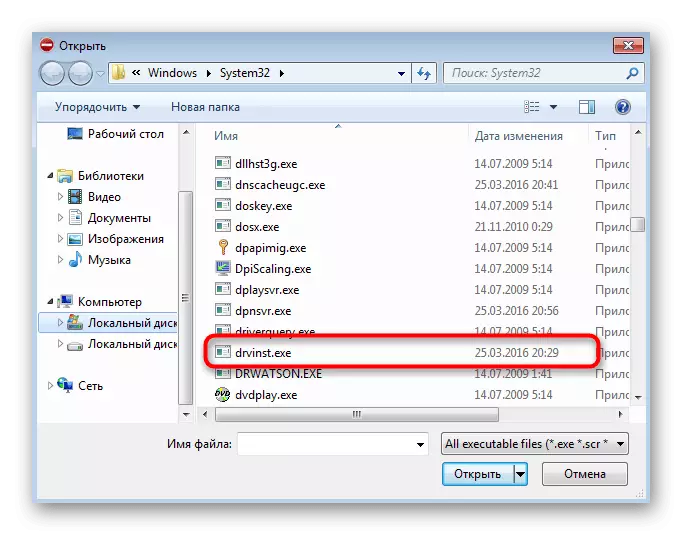
- The standard conductor window opens with the location of all system processes. Throw "drvinst.exe" there and select it.
- After that, in the BLOCK Applications window, it will only be left to "OK".
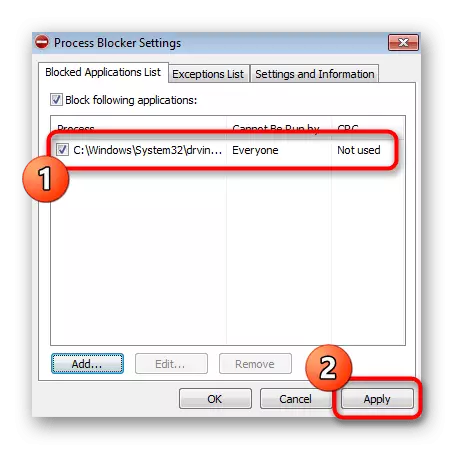
- Make sure that the application is a tick, and then apply all changes.
There is an alternative version of blocking an application that is implemented without using third-party software, but its effectiveness is not guaranteed, it depends on the availability of installed updates. However, if you do not want to download the Process Blocker, you can try to perform the following steps:
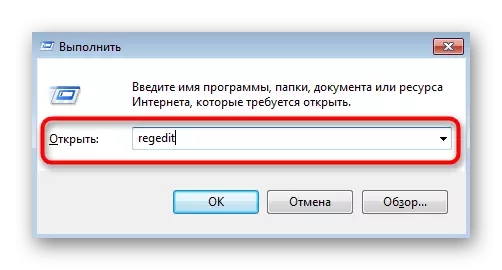
- Open "Run" and enter the REGEDIT there to go to the registry editor.
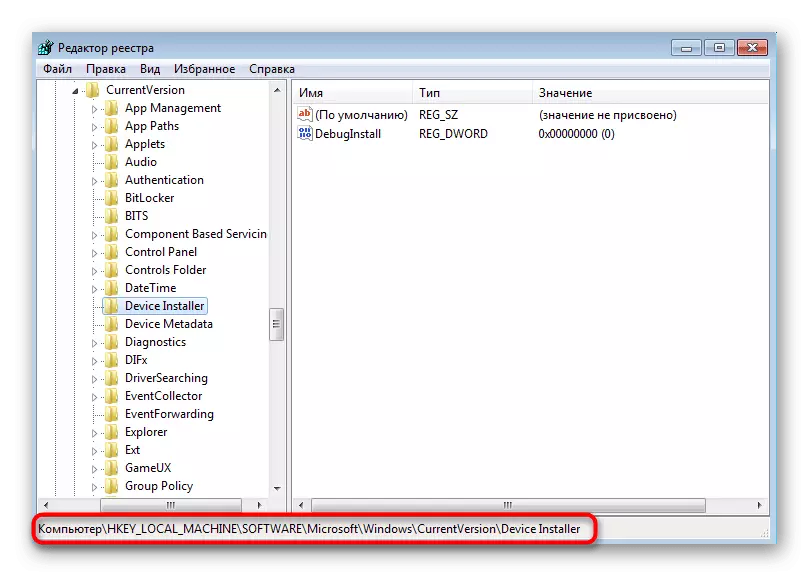
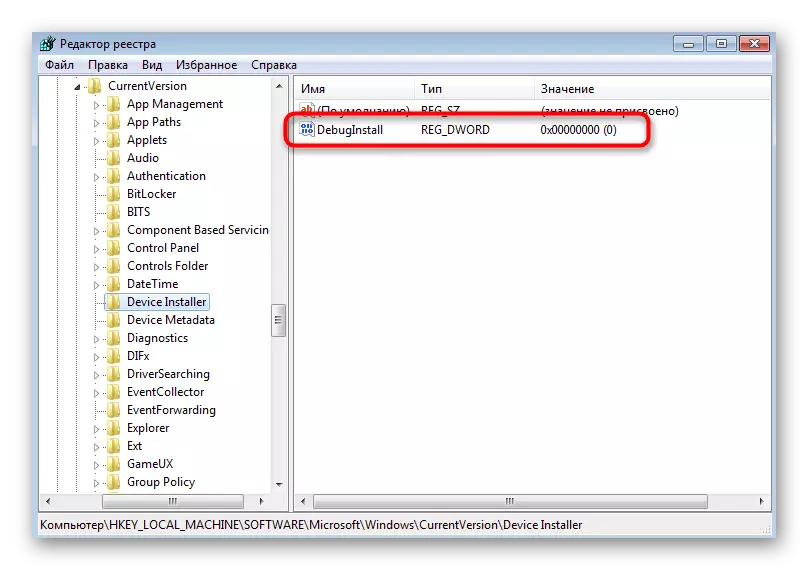
- Follow the path of HKEY_LOCAL_MACHINE \ SOFTWARE \ Microsoft \ Windows \ CurrentVersion \ Device Installer.
- Watch the DebugInstall parameter in the final directory and click on it twice to open properties.
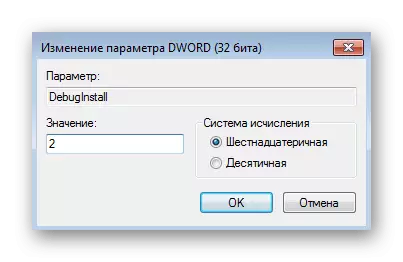
- Change the value to "2" and leave the registry editor.
Upon completion of blocking the automatic driver installation process, delete the current graphics adapter software through the Device Manager by selecting the "Delete Delete" item. Restart the computer and manually install the driver by following the recommendations from the method 1. After that, it is recommended to remove the blocking from the process on the same principle.
Method 6: Equipment Check
The latter method is comprehensive, since it is to diagnose the equipment. It often happens that the video card is not displayed in Windows 7 precisely on hardware reasons, and not software. Then you need to first check the connection and the overall performance of the component, as written in the materials below.
Read more:
How to understand what the video card burned
How to understand that the video card "dies"
Why does the motherboard sees a video card
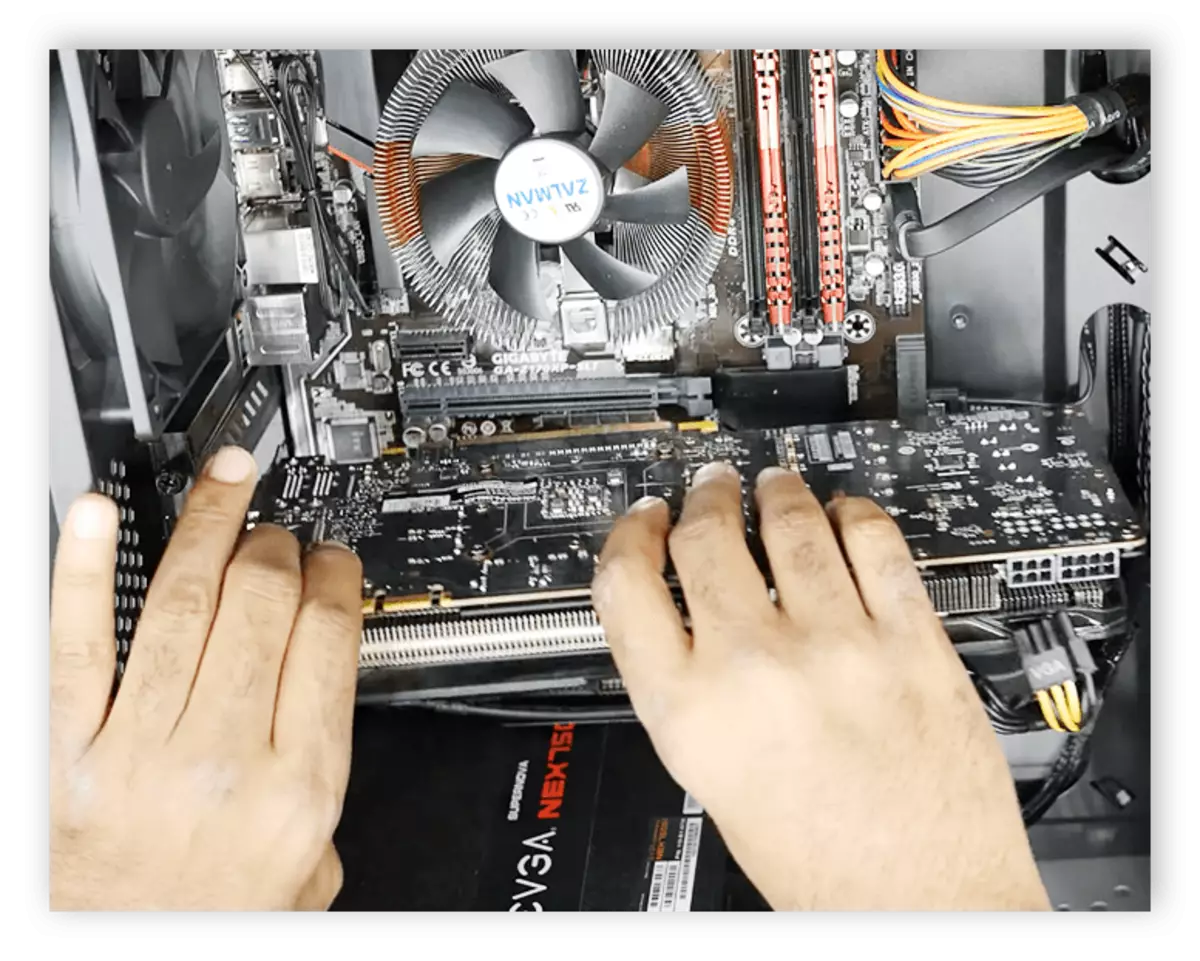
If you have only purchased a video card and connected it to a computer, it is worth paying attention to the presence of additional power cables that are connected to the power supply. Additionally, we note that some users do not look at the power of the power supply and buy expensive video cards, which simply lack performance. We advise you to make an independent calculation of the number of watt consumed to understand whether there is a sufficient stock (approximately 200 watts) for stable operation of the graphics adapter.
Read more: How to find out how much watts consumes a computer
It was all information about displaying a video card in Windows 7, which we wanted to tell today. You can only take advantage of each method to find a working and move to normal interaction with the computer.