

A system error with reference to the dynamic library d3dx9_37.dll The user most often can observe when trying to start the game that uses bulk graphics. The error context is as follows: "file d3dx9_37.dll is not found, the start of the application is not possible." The fact is that this library is responsible for the correct display of 3D objects, therefore, if there is a 3D graphics in the game, it will give an error. By the way, programs that use this technology are also quite a lot.
Method 1: Download D3DX9_37.DLL
The main cause of the error is in the system folder there is no file d3dx9_37.dll, therefore, to eliminate it, it is enough to place this file there. Now it will be told how to execute it, but first load the dynamic library on your PC.
So, after downloading the DLL, it must be copied to the system directory. Windows X64 is C: \ Windows \ SYSWOW64 and C: \ Windows \ System32, Windows X86 is just the last folder.
- Copy the file d3dx9_37.dll by clicking on it by PCM and selecting "Copy".
- Go to the system directory. Click in the directory on an empty place PCM and select "Paste".


On this installation, the lack of library applications can be considered complete. Try running a game or program that has given an error before it. If the message appears again, it means that you need to register the library. Expand "Start"> "Command Line", and run this application with administrator rights.
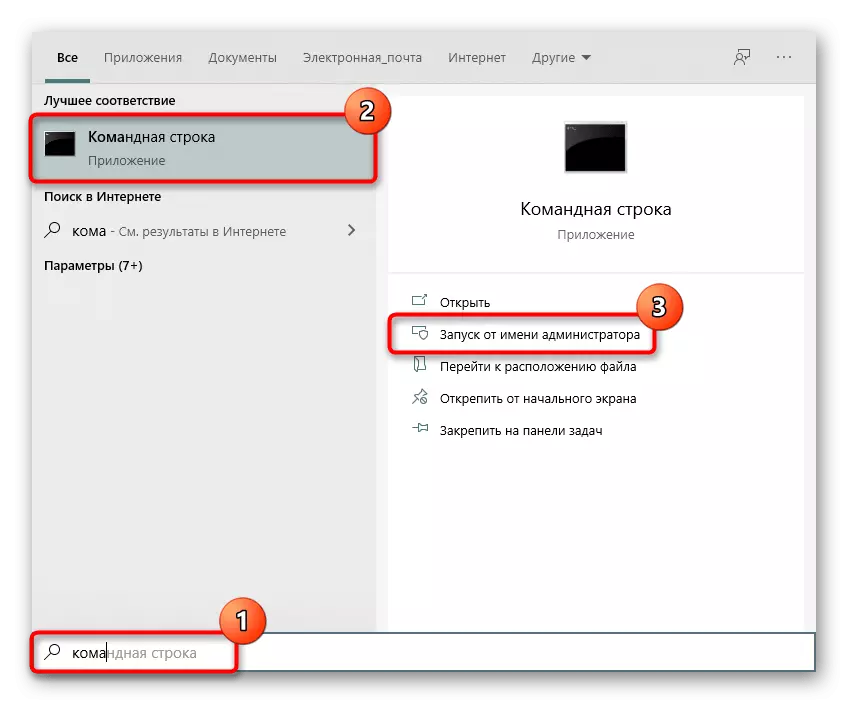
Write the REGSVR32 D3DX9_37.DLL command and press Enter, and if the file has been laid in two folders, then also regsvr32 "C: \ Windows \ syswow64 \ d3dx9_37.dll"

Other methods of performing this action are written in a separate material.
Read more: Register the DLL file in Windows
Method 2: Installation DirectX
The D3DX9_37.DLL library is an integral part of DirectX 9. Stripping from this, you can conclude - along with the DirectX, the library is installed and necessary to start games. But Windows 10 users have a slightly different situation: this set of libraries is built there by default, therefore, add and delete them is necessary differently, not as it will be shown below. Ways to add and update the DLL associated with the directories, read in another article by reference below.
Read more: Reinstalling and adding the missing DIRECTX components in Windows 10
Loading a package owners of older OS produce quite simple:
- Determine the OS language from the drop-down list and click "Download".
- Remove the marks from the items located on the left side of the window. This is necessary so that it does not boot unnecessary software. After that click on "refuse and continue."


Now let's move directly to the installation itself:
- Open the administrator's rights installer.
- Take the terms of the agreement by setting the mark next to the corresponding item, and click Next.
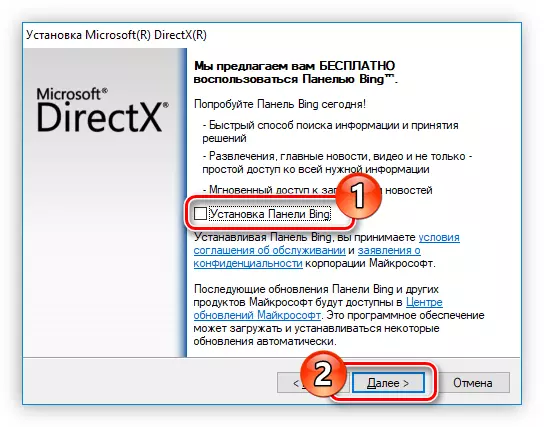
- If you do not want, along with DirectX, installing the Bing panel, then remove the checkbox from the corresponding item and click on the "Next" button. Otherwise, leave the tick untouched.
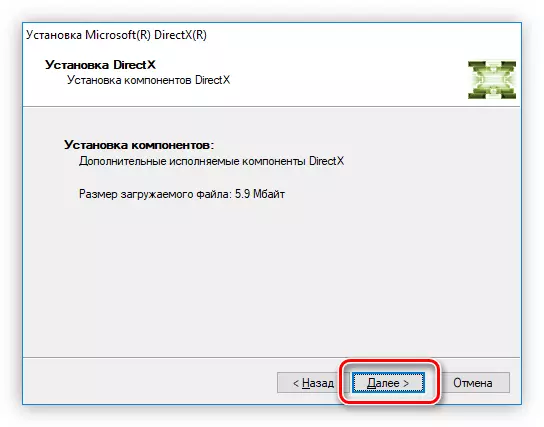
- Wait until the installer holds the initialization process, then click "Next".
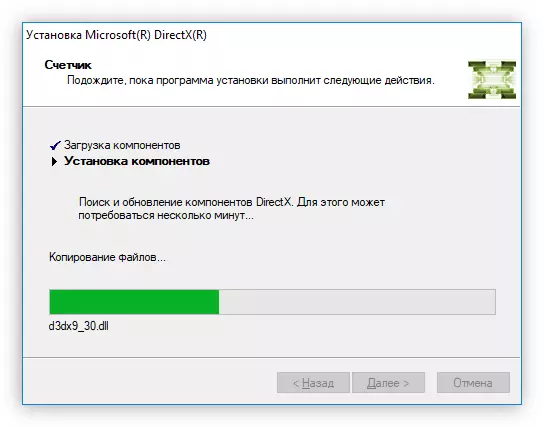
- Expect while all the necessary components are installed and installed.
- Click "Finish" to complete the installation.


After installing all DirectX components, the problem with the D3DX9_37.DLL library will be solved. By the way, it is the most effective way that guarantees 100% success.
Method 3: Operating System Update
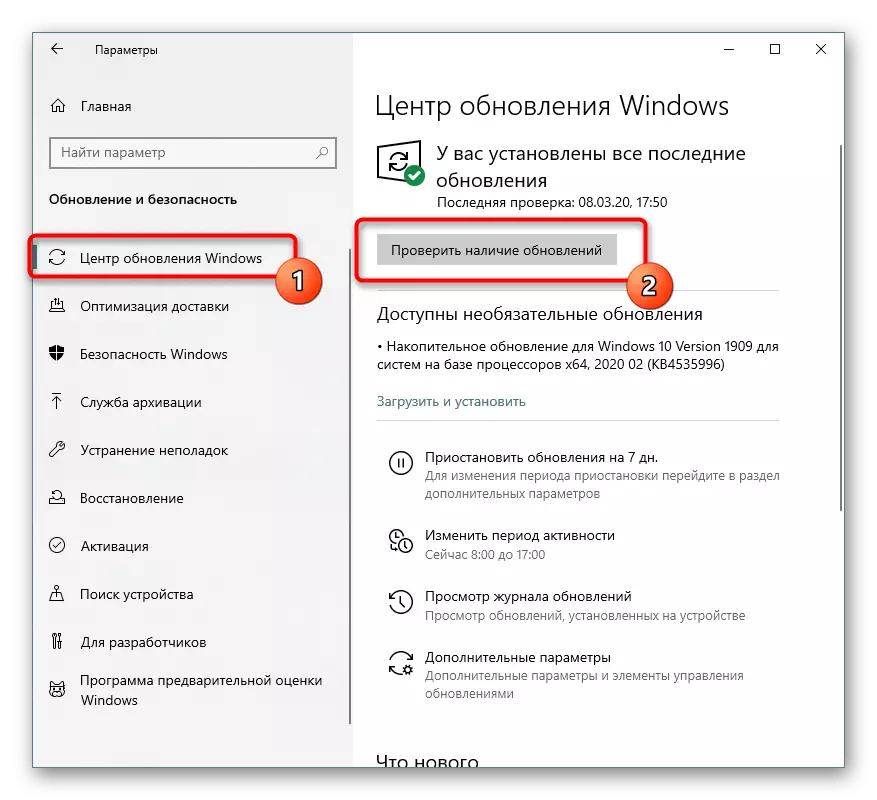
The option recommended first of all holders "dozens", because, as already mentioned above, the driver is already built into this version of the OS and is updated with the other files. However, the problem with it can be caused by various systemic conflicts, which is why there is a similar situation in Windows 7 and below. Therefore, it will not be superfluous to establish updates and in this case. If this fails to do for any reason (for example, an update is completed with an error), it is very important to correct so that in the future there is no similar problems with other files or applications.
Read more:
Installing updates on Windows 10 / Windows 7
Troubleshooting Windows 10 / Windows Upgrades 7
Method 4: Check Windows files for integrity
Any files stored on the accumulator may be damaged due to software and hardware problems. Sometimes it can directly or indirectly affect the D3DX9_37.dll, which is why it is in Windows, but it turns out not to be seen with different programs. In this regard, it will not be superfluous to check system files. For this, a special console utility is responsible - it also performs their recovery from the backup storage. And although this method is not always effective, in some cases it is using it that it is possible to deal with errors and failures of various nature.
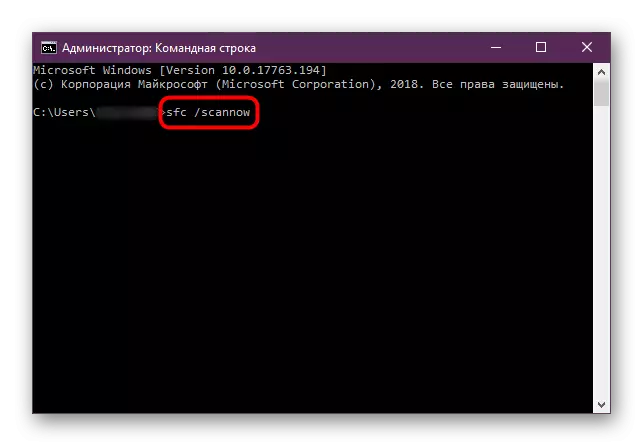
Read more: Using and restoring the integrity of system files in Windows
If this and other difficulties occur, which cannot be corrected or has suddenly become too much, we also recommend checking the system for viral infection, because it often can block the work of those ilic components of Windows.
Read more: Fighting computer viruses