
Method 1: Boot-Repair utility
First of all, we want to affect the decision for beginners. Credit with the recovery of GRUB in Ubuntu will help the boot-repAir utility. From the user you only need to install it and run error check. After that, all the issues found will be automatically corrected, and a detailed report appears on the screen. Additionally, in this tool, you can set additional parameters, for example, parallel to restore the MBR or the time for displaying the download menu. You already have a separate material on debugging GRUB through Boot-Repair. We suggest familiarizing yourself with it by using the reference below, and we go to the following methods.Read more: Grub bootload recovery via Boot-Repair in Ubuntu
Method 2: Manual Recovery Grub2
The advantage of this method is that the user does not have to install additional components, since all the tools for restoring the loader are already available in Ubuntu distributions. Disadvantages are only associated with the need of manual input of commands in the "Terminal", which sometimes causes difficulties from beginners. However, if you follow the following instructions, accurately performing each action, there should be no problems.
- The first thing will have to boot from LiveCD, since the complete breakage of the Grub2 loader means the impossibility of opening a standard shell. A detailed guide on this topic is on the official website of Support Ubuntu, aimed at newcomers, so we will not disassemble it now.
- After downloading in the LiveCD mode, open the "Terminal" conveniently and enter the Sudo Fdisk -L command there.
- Confirm it, specifying a password from the root.
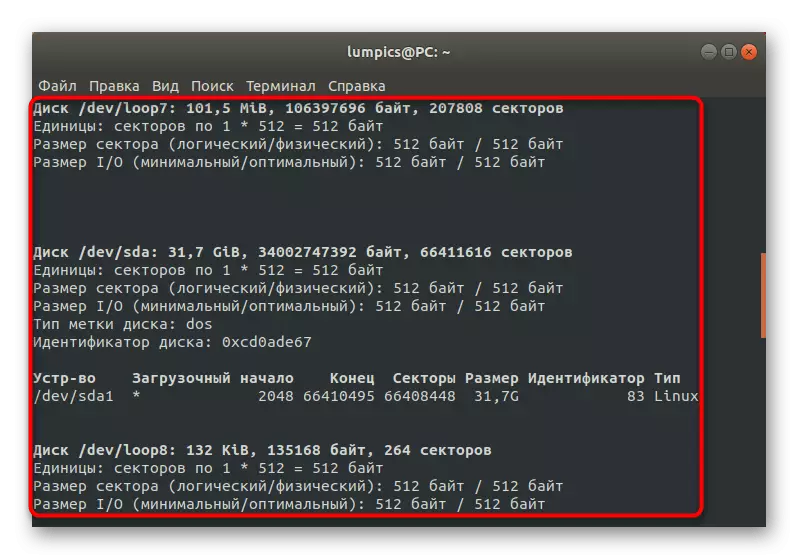
- As a result, a list of available disks will appear on the screen. Examine it and find the disk with the main system and the section where the bootloader is stored. Examples of the description of the desired sections you see the description below.
Disk / Dev / SDC: 14,5 GIB, 15514730496 Bytes, 30302208 Sectors
Units: sectors of 1 * 512 = 512 bytes
SECEM Size (Logical / Physical): 512 bytes / 512 bytes
I / O Size (Minimum / Optimal): 512 bytes / 512 bytes
DiskLabel Type: DOS
Disk Identifier: 0x38972eb0
Device Boot Start End Sectors Size ID TYPE
/ dev / sdc1 * 23949312 29882367 5933056 2.8G 7 HPFS / NTFS / EXFAT
/ dev / sdc2 29882368 30302207 419840 205m b W95 FAT32
/ Dev / SDC3 13551616 23949311 10397696 5G 83 Linux
/ dev / sdc4 2048 12621823 12619776 6G B W95 FAT32
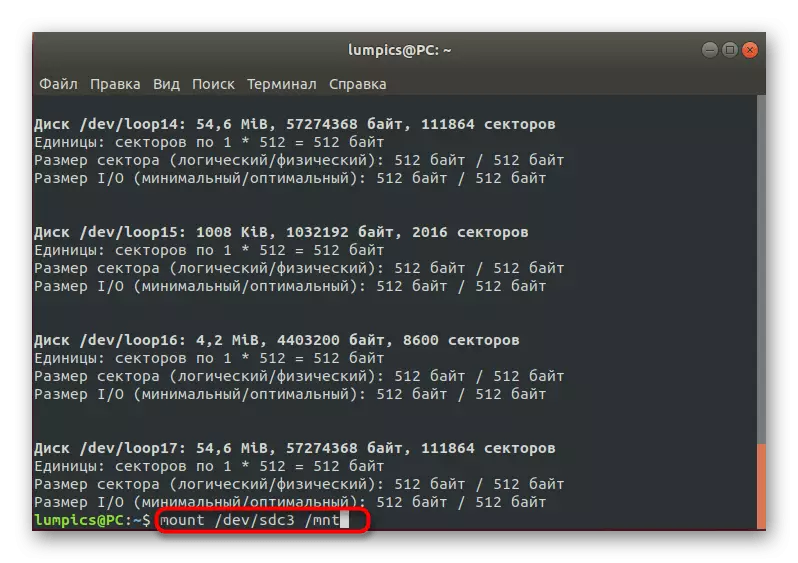
- Now the necessary file systems are not mounted in the required location, so let's do it. The first team has the Mount / Dev / SDC3 / MNT view. Here and in subsequent commands, replace the location of the disks to the previously defined.
- Second command - Mount / dev / SDC2 / MNT / BOOT. It is responsible for mounting the bootloader files.
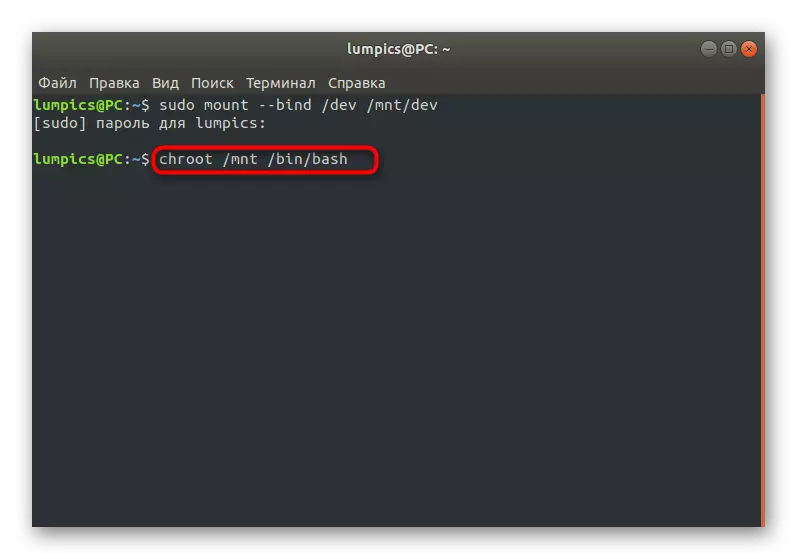
- Now let's carry out preparatory actions to log in. The first we are interested in the Sudo Mount --Bind / Dev / MNT / DEV team.
- The final mounting lines look like this: sudo mount --Bind / Sys / MNT / SYS and Sudo Mount --Bind / Proc / MNT / PROC.
- Then enter the desktop environment using the Chroot / MNT / BIN / BASH command.
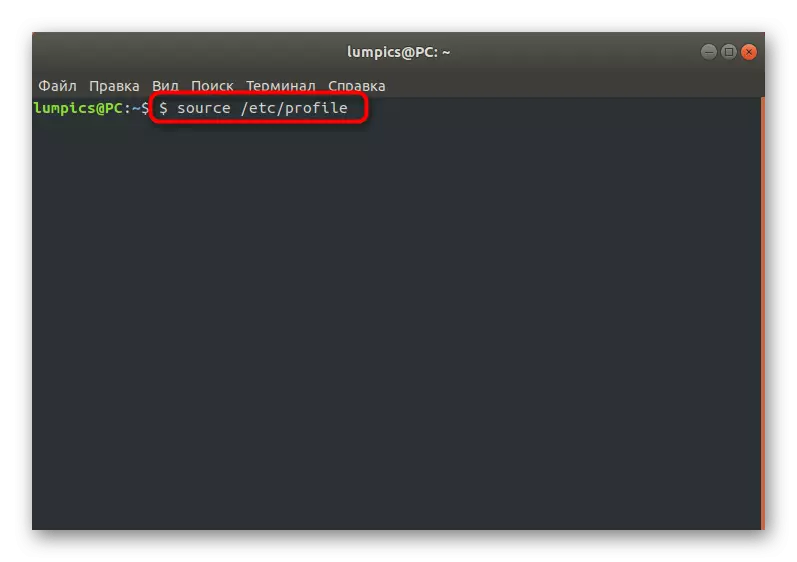
- In this location, specify the ENV-UPDATE command to download all updates of the profile variables.
- Complete this action by entering SOURCE / ETC / PROFILE.
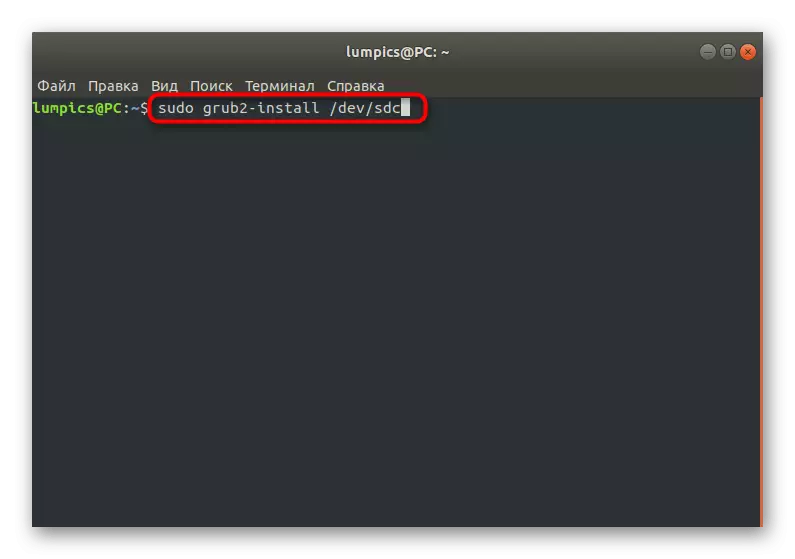
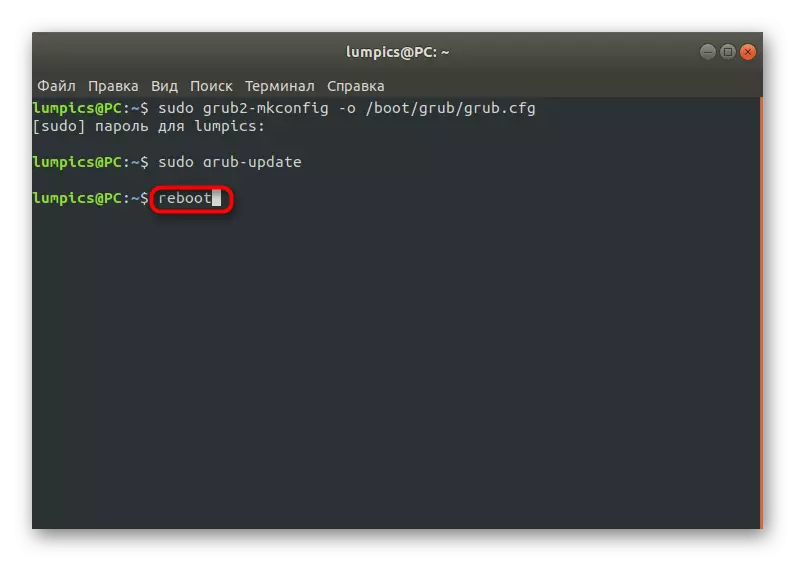
- Previous tasks were preparatory, and after successful execution, it is possible to proceed to direct restoration of GRUB2. To begin with, reinstall it using Sudo Grub2-Install / Dev / SDC, where / dev / sdc replace the name of your hard disk.
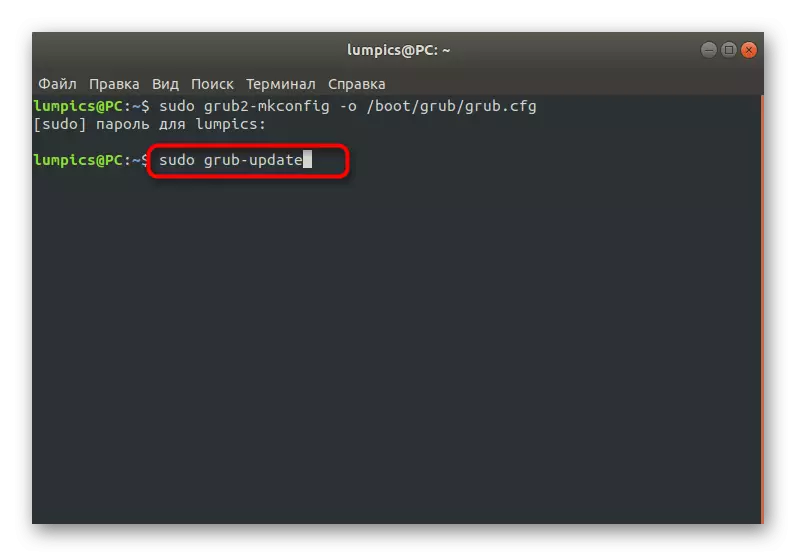
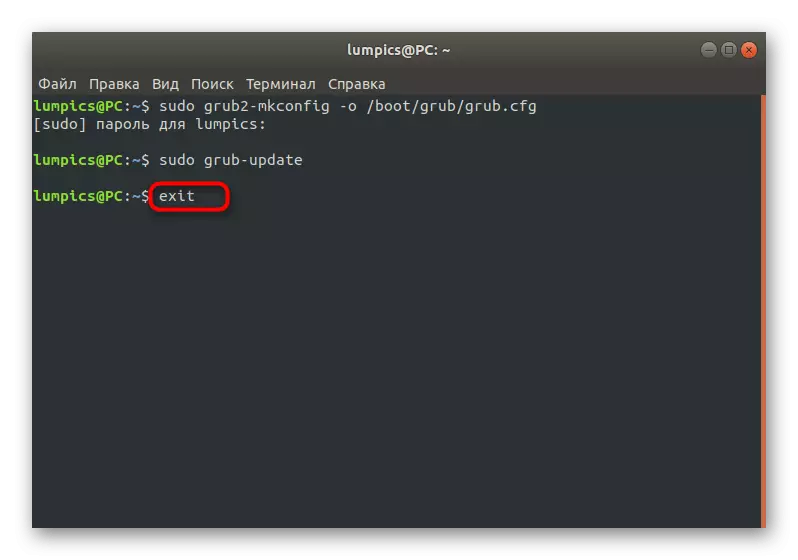
- After that, create a new configuration file that is responsible for the loader behavior: Sudo Grub2-mkconfig -o /Boot/Grub/Grub.cfg.
- Use the Sudo Grub-Update command to update all components.
- If no errors do not occur in the process, enter the exit to exit the environment.
- Restart the operating system to start correctly inclusion with the already recovered loader.
Ubuntu download instructions with LiveCD on the official website


As you can see, nothing complicated in the actions of the reduction of Grub2 with its full failure. In most cases, it is only required to use the above commands to achieve a positive result, without having received a single error. However, there is a simpler way that is useful for incomplete loader failure. We will talk about him next.
Method 3: manual recovery without LiveCD
Sometimes, users face situations when the Ubuntu load is not possible, but the "Minimal Bash Like Line Editing IS Supported" notification appears on the screen, and the active string is on to enter commands at the bottom. This is called the minimal environment of Bash, and the GRUB restoration is also available through it, the restoration of the GRUB is already available.
- In this shell, use the LS command to view a list of discs connected to a computer. It will look something like this: (HD2, MSDOS1, HD2, MSDOS2, HD2, MSDOS3, HD2, MSDOS4).
- In this terminal, you can only communicate with one disk at the same time, so select the section with the bootloader files and assign it environment variables by specifying SET ROOT = (HD2,2). HD2,2 Replace the desired name.
- Alternately, enter the following commands to perform the opening of the GRUB sheath.
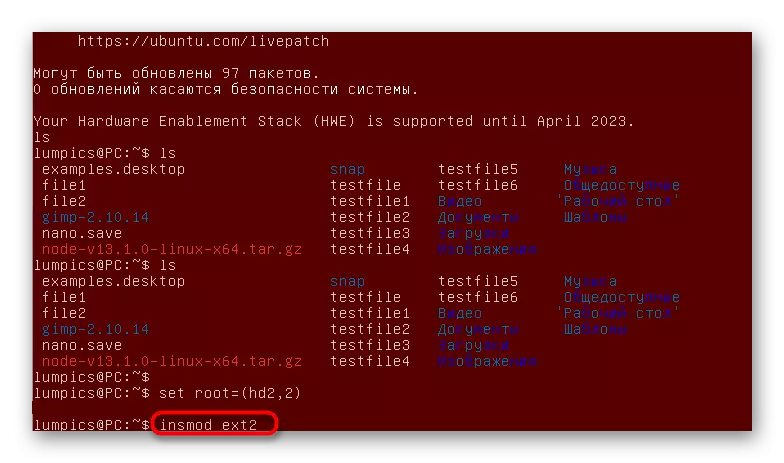
INSMOD EXT2.
Insmod Normal
Normal
- Run the kernel. In most cases, the Linux / Boot / VMLinuz command is suitable for this.
- It remains only to perform the standard load and in the "Terminal" of the operating system alternately perform the following commands:
boot.
Sudo Grub2-Install / Dev / SDA
Sudo Grub2-mkconfig -o /Boot/Grub/Grub.cfg


Now you are familiar with integer three ways to restore Grub in Ubuntu. As you can see, each of them is suitable in certain situations and implies the work of absolutely different algorithm of action. You can only choose the optimal method. Beginners we advise you to pay special attention to the first option, since it is the most effective for this category of users.