
Step 1: Choosing and downloading distribution
Start follow from preparatory work. First of all, it is necessary to determine the distribution of the Linux operating system and upload a virtual disk image to a local storage for further record. On our site there are separate materials according to these topics. We offer to study them in detail to understand what kind of assembly will be optimal for you if you have not yet decided on the choice.
Read more:
Popular Linux distributions
Select Linux distribution for a weak computer
Almost all distributions are loaded equally, but novice users may encounter difficulties in the implementation of this task. Today we take for the example of the most popular Ubuntu assembly, and you just have to follow the instructions below, given the features of the selected OS and the official site interface.
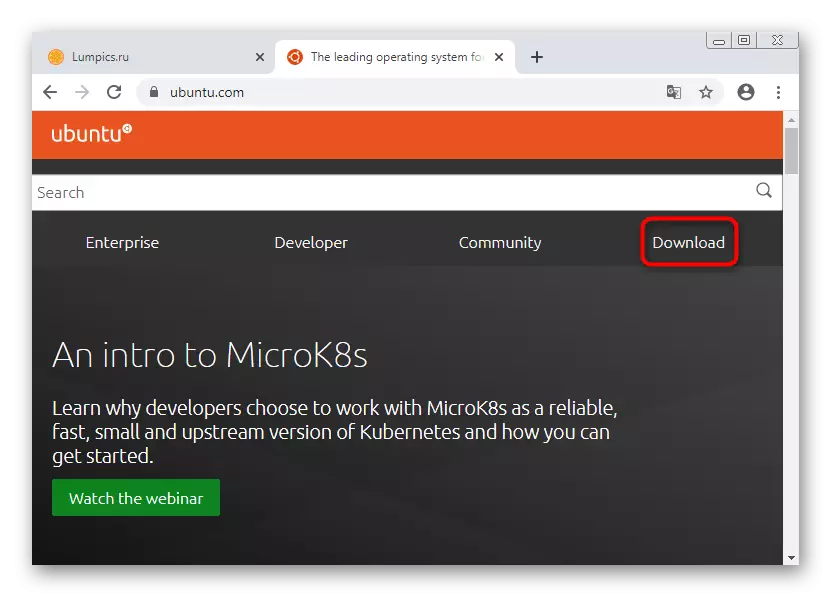
- Open the Distribution Loading page by finding it through the search engine. Here you are interested in the section "Download".
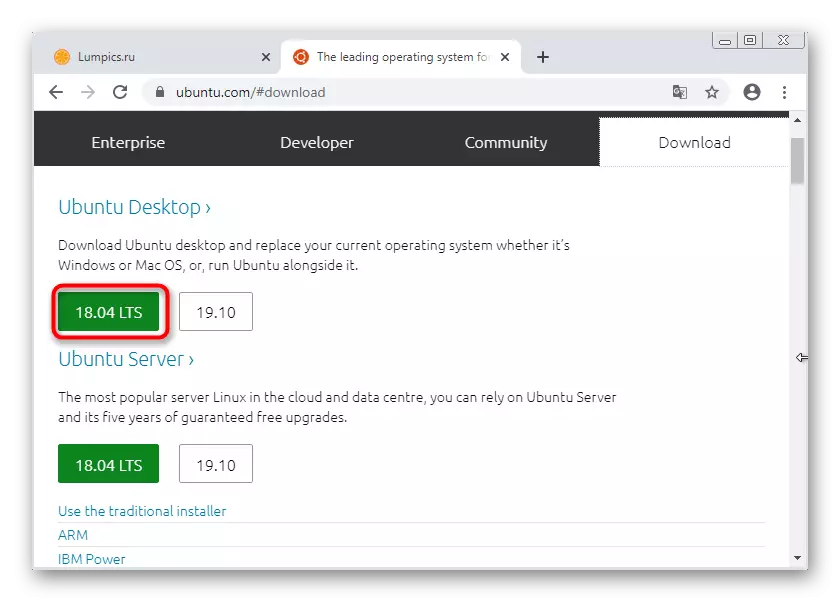
- Choose a suitable assembly. Take into account that on some sites there are several versions with different shells.
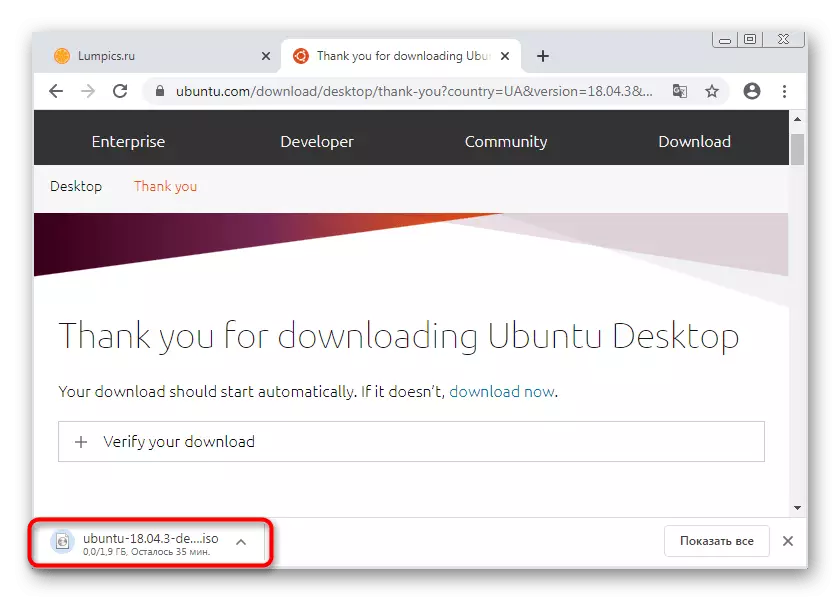
- The ISO image is started. Expect the download to complete, and then go to the next step.
Step 2: Disk Space Setup
Disk space will have to be adjusted separately to eventually run the correct installation of the operating system. Now you need to create a retained place on the hard disk by compressing existing volumes, which is as follows:
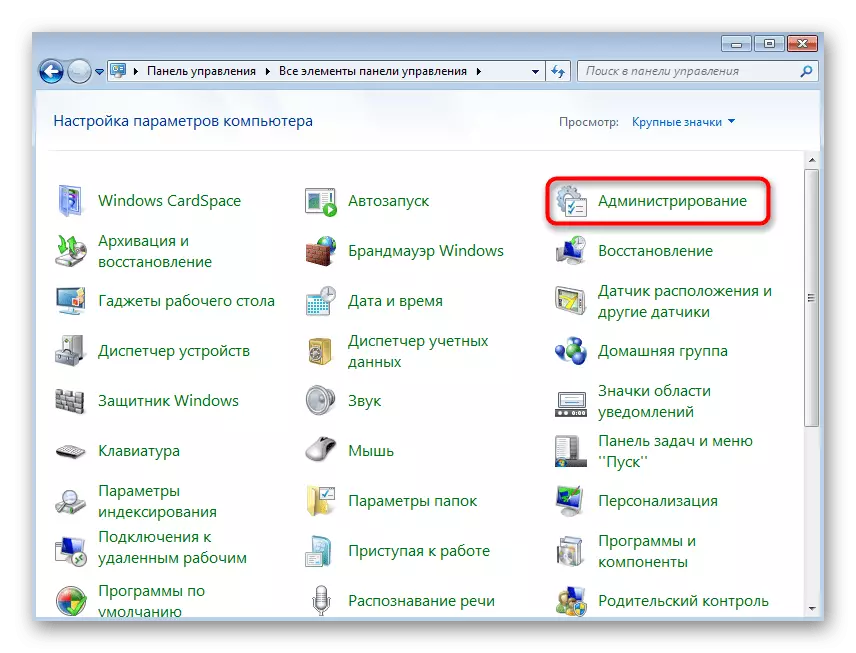
- In Windows 7, open "Start" and go to the "Control Panel" section.
- Here, open the "Administration" category.
- In the list, find the "Computer Management" string and click on it twice with the left mouse button.
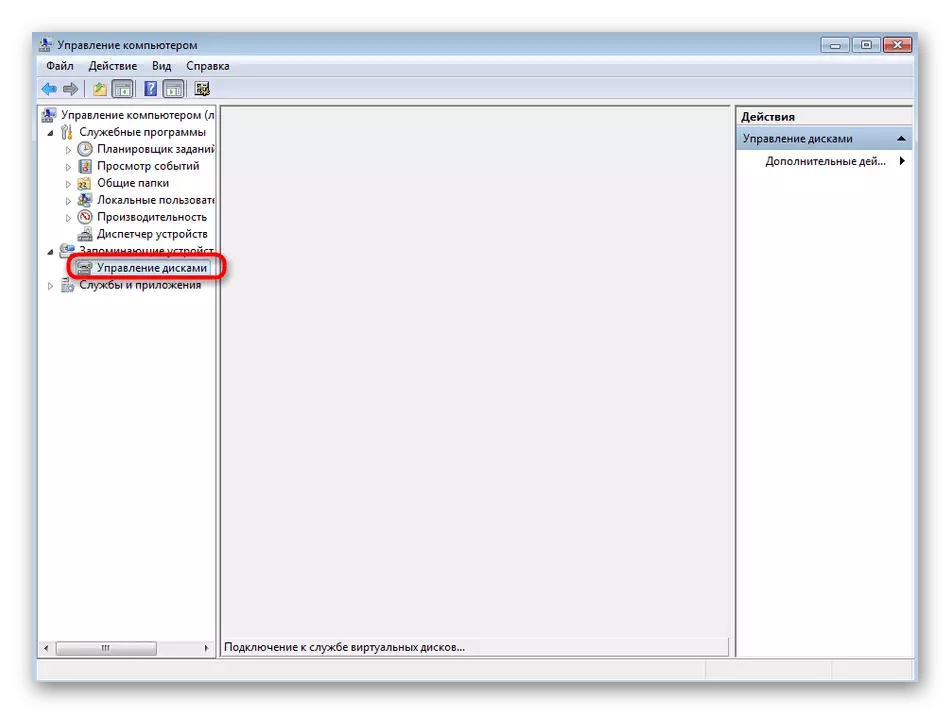
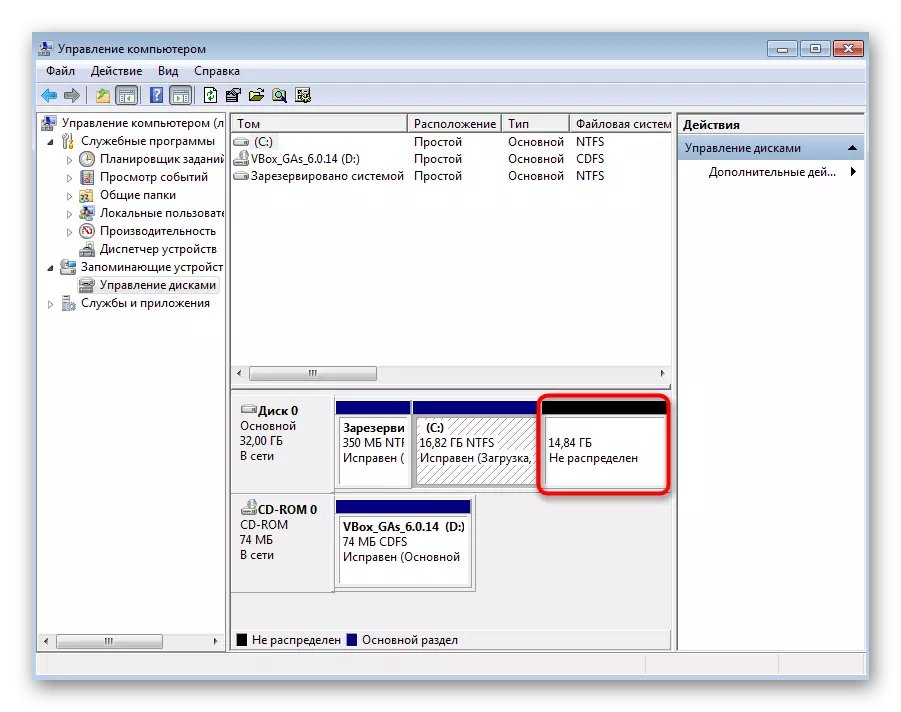
- In the menu that opens, use the left pane to move to "Disk Management".
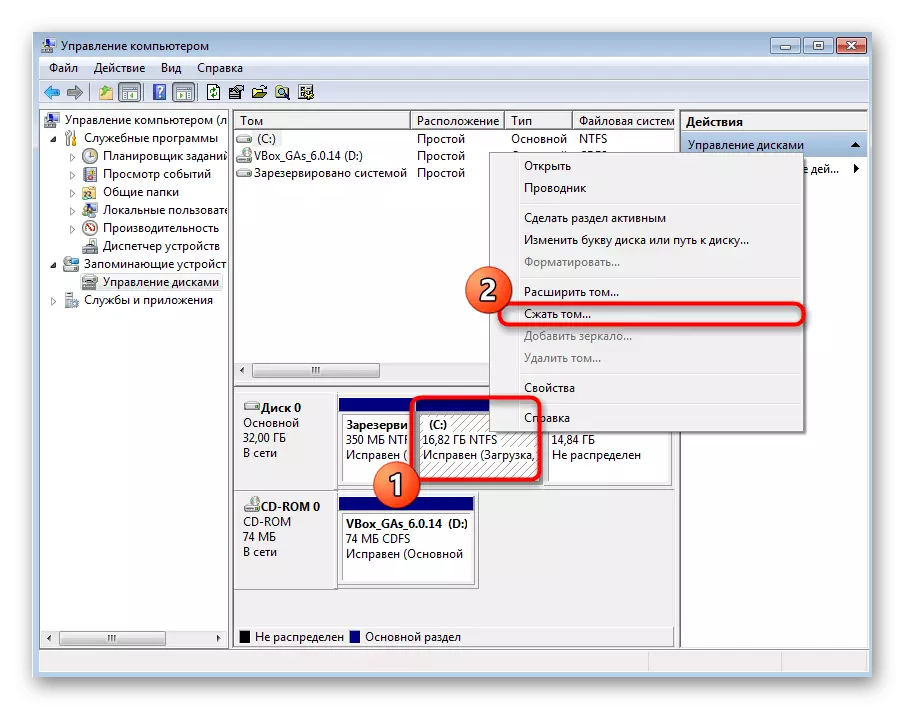
- It is advisable to use a logical volume D, which is involved in storing user files, but if it is missing, the system section is suitable. You can not worry, the separation will occur correctly automatically, so the bootloader does not suffer. Select Tom and click on it by PCM. In the context menu, find the "Squeeze Tom" item.
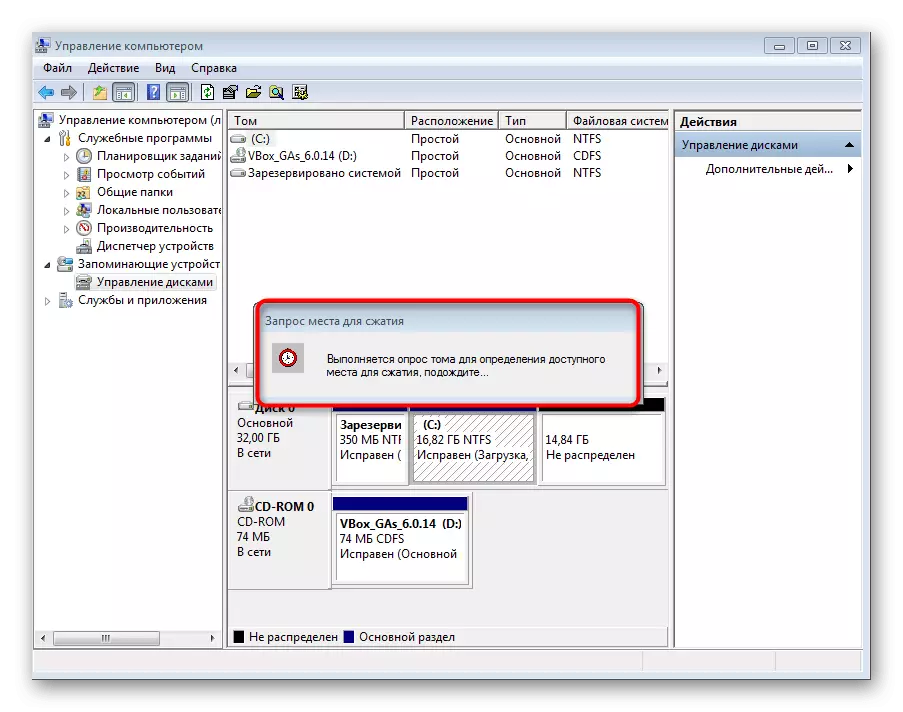
- Wait for the selection request to appear. It may take a few minutes.
- In the new displayed window, specify the desired size for compression. Consider that Linux user files will be stored in this volume, if you, of course, do not want to create another partition. At the end of the settings, click on "compress".
- Now there appeared space with the label "not distributed". It is on it that the future Linux file system will be formed.


As can be seen, the disk space management is not complicated, so even a beginner can cope with the task. After successful distribution of free space, you can move to the next step.
Step 3: Record ISO on BIOS USB flash drive and setup
In the first step, we downloaded the image of the distribution in ISO format. Unfortunately, it cannot be so easy to mount in the system to immediately start the installation. We will need a flash drive that will be bootable after conducting certain manipulations associated with the record of the virtual image. Read more about this in a separate article on our website.Read more: Hyde on the ISO image image on the Flash drive
After preparing the flash drive, you can immediately insert it into your computer and run it, and then downloading from removable media should begin. However, sometimes such an algorithm does not work, since the BIOS settings are incorrect. Fix this situation will help another manual, go to which you can by clicking on the following link.
Read more: Configure BIOS to download from a flash drive
Step 4: Preparation and Installation of Linux
As you already know, today we took Ubuntu for example, since this is the most popular distribution. Further, all actions will be discussed in the branded graphics installer. In most other assemblies, such installers have a similar form and the principle of action is practically no different, so you will only just pay attention to the following instructions and carefully read the contents displayed on the screen in the preparation for the Linux installation.
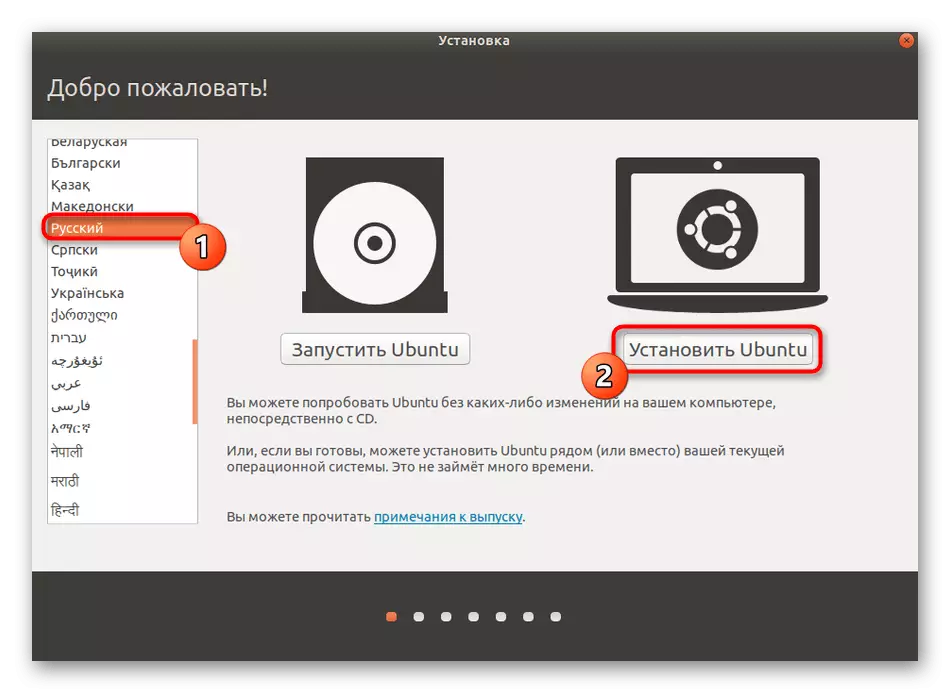
- Almost always the installation operation begins with a welcoming window. Here you can select your preferred interface language, and then click on "Set".
- Select the keyboard layout. In the same window, it can be checked immediately by activating the corresponding string.
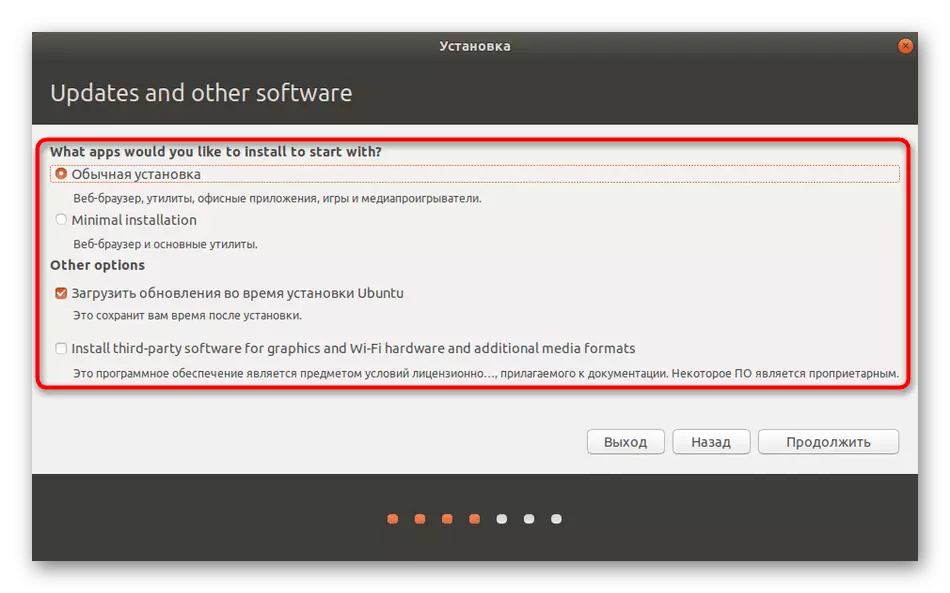
- Next, select the type of installation. For example, you can limit the minimum set of additional components or install absolutely all the software and utilities included in the shell. Here each user decides for itself, which parameters should be chosen.
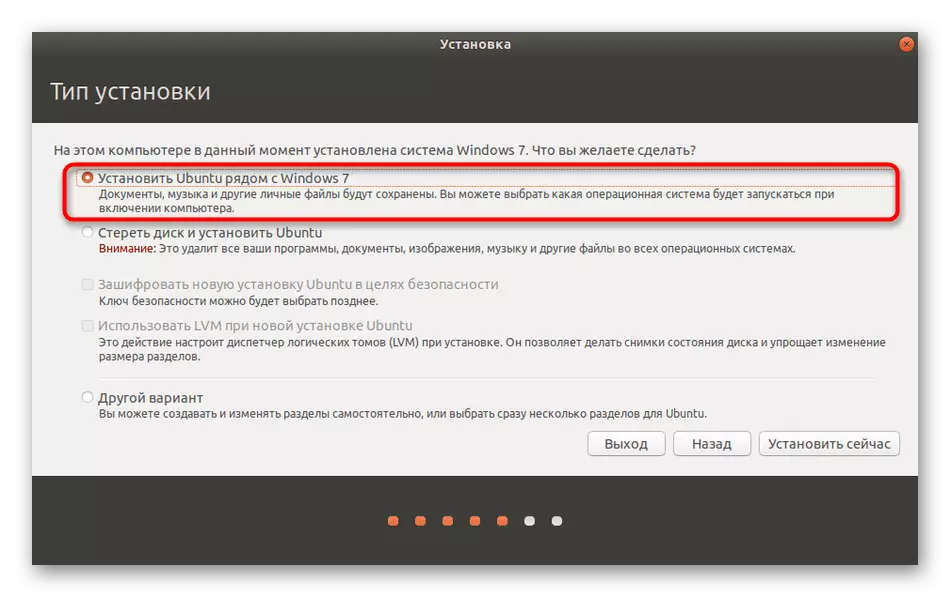
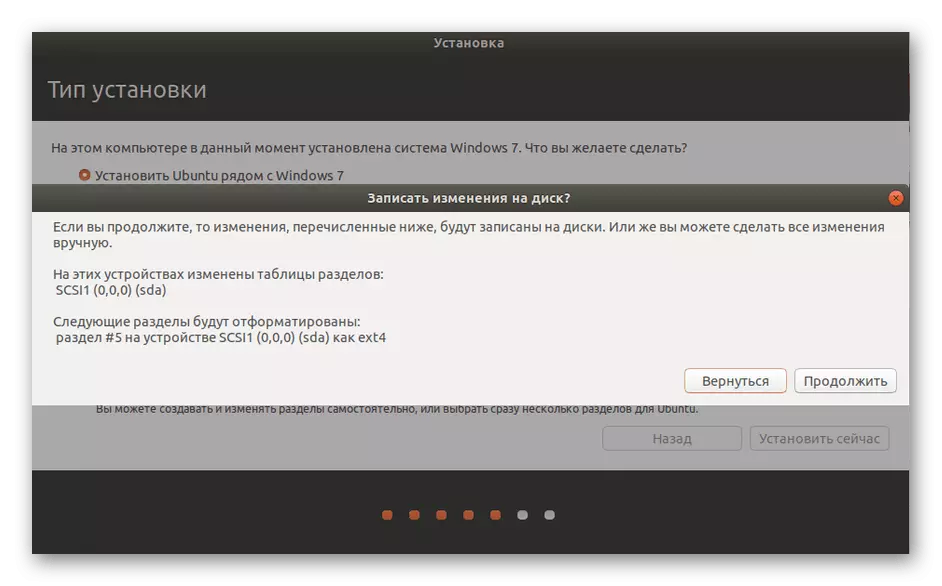
- Now the most important stage. The second window of the installation window is responsible for choosing a disc. Windows 7 will be detected automatically, which means that the "Install Ubuntu next to Windows 7" appears. It needs to be activated. Consider that in the second step we separated free space not just like that. If this was not done, the installer would offer to choose the option "Erase the disk and install Ubuntu", and the items you need would be necessary.
- Confirm changes to the disk to continue.
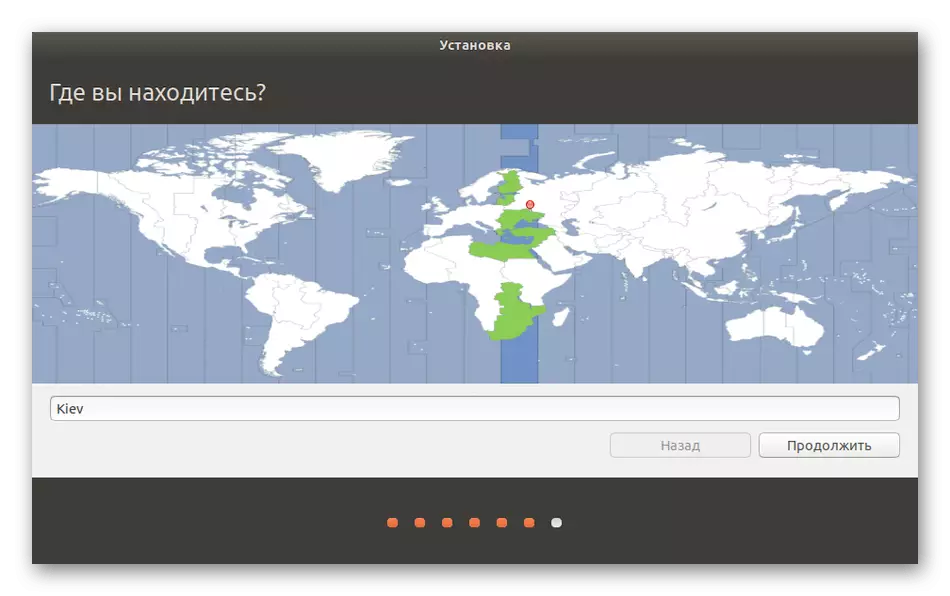
- Specify your region. This is necessary to synchronize time.
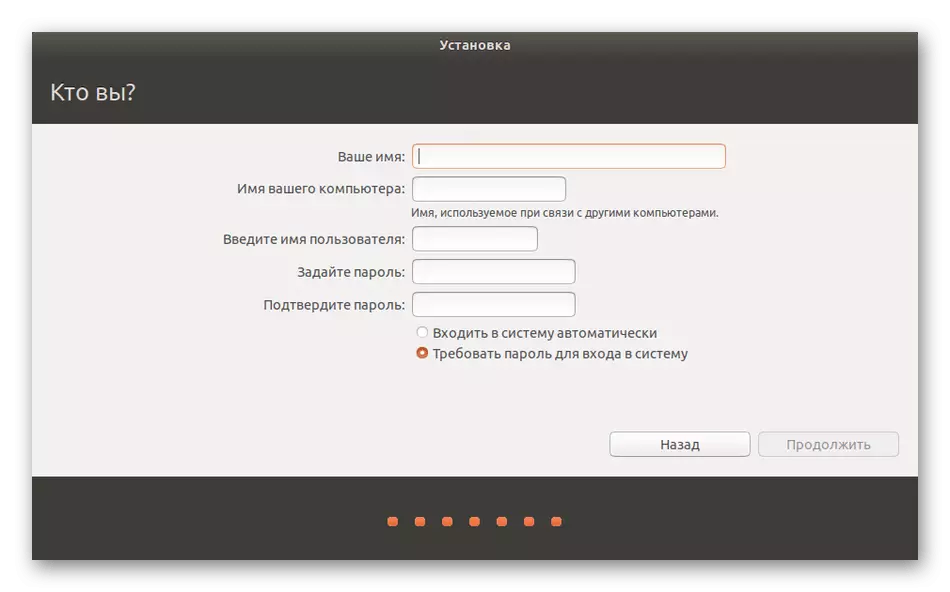
- The last step will be the creation of a new user. It is he who will be automatically added to the Sudo group and get all the rights to create accounts and manage them in the future.
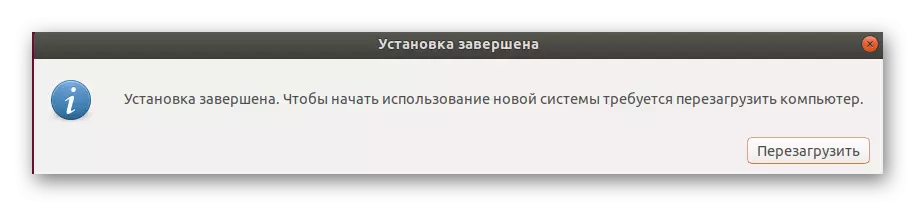
- Immediately after creating an account, installation will begin. It usually does not take much time, but it depends on the power of the computer.
- At the end, you will be notified of the successful installation. Click on the Restart button and you can remove the loading USB flash drive.


On our site there are separate instructions for installing other popular distributions. If you have any problems with this process, we suggest familiarizing yourself with the corresponding materials by clicking on one of the links below. It should be borne in mind that for the correct installation of the assembly next to Windows 7, you will need to select the appropriate mode or assign free space as a file system for the new OS.
Read more: Installing Archlinux / Astra Linux / Centos 7 / Kali Linux / Debian 9 / Linux Mint
Step 5: Run Linux or Windows 7
As you know, after this type of installation, the loaders of both operating systems will be upgraded. Now when you start a computer, you can choose which OS is now downloading. This happens like this:
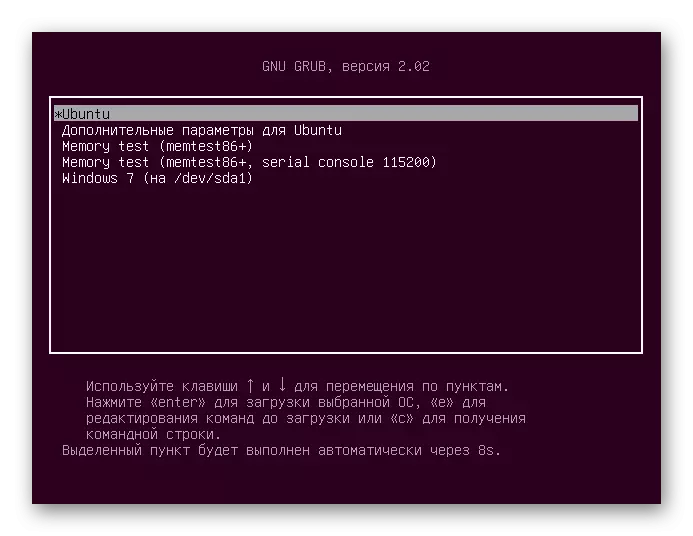
- After switching on, GNU GRUB is displayed on the screen. Move on the items using the arrow on the keyboard and activate the necessary by clicking on ENTER.
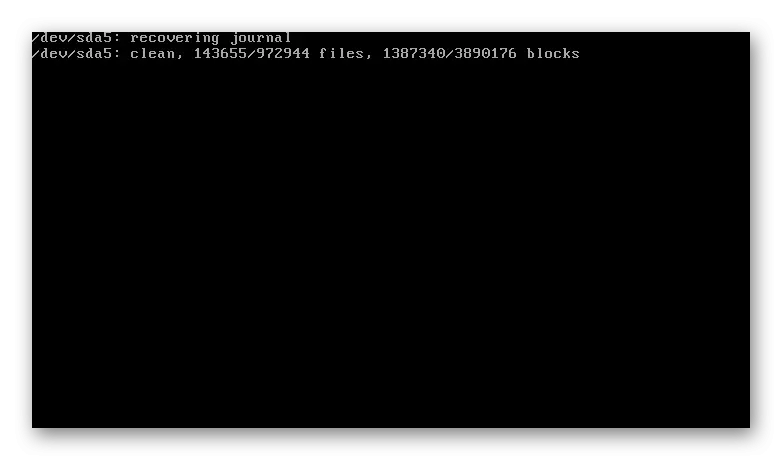
- Standard Distribution Loading.
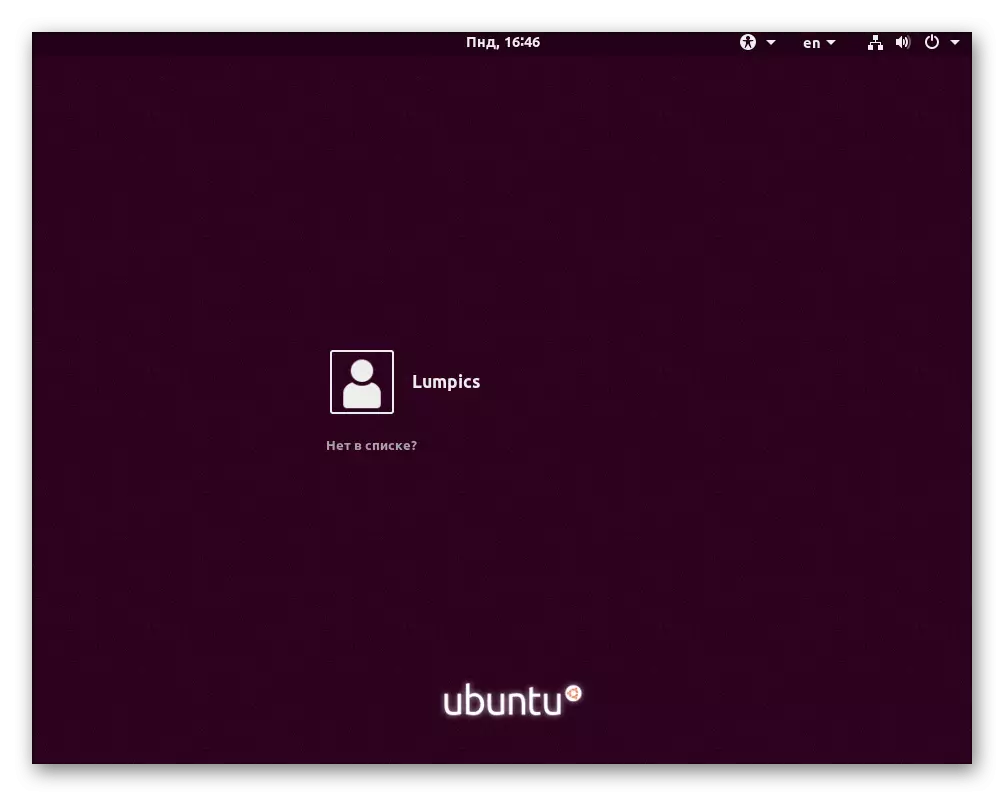
- The authorization window is displayed in the system, which means that all previous actions were fulfilled correctly.
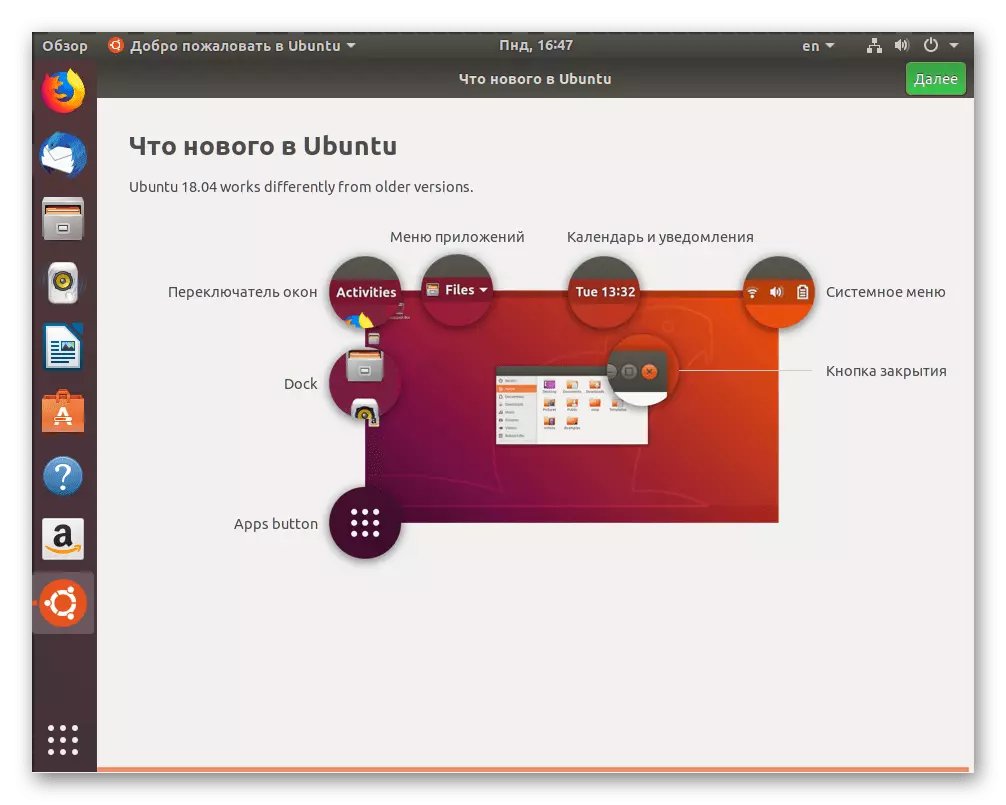
- Now you can proceed to setting up and interacting with the OS.
Additionally, we recommend reading the materials on our website, which are just devoted to the Linux configuration after its installation. Such guides will be the most useful one to those who only go to Windows on this operating system.
See also:
Installing and Configuring a File Server in Linux
Setting up mail server in Linux
Synchronization of time in Linux
Change passwords in Linux
Restart Linux through the console
View Disk List in Linux
User change in Linux
Completion of processes in Linux
Even with the presence of a graphic shell, you have to access the terminal to Linux to perform certain commands or install software. There are a number of standard console utilities and commands to know each Linux user. Most of them have already been considered by other authors, therefore, for beginners, the learning process will be simple.
See also:
Frequently used commands in "Terminal" Linux
LN / FIND / LS / GREP / PWD / PS / ECHO / Touch / DF command in Linux
From today's article you have learned about Linux installations next to Windows 7. As you can see, there is nothing complicated. The main task is to select the correct option of the file system forming and make sure that Windows will not be deleted during installation.