

Step 1: Cleaning disk space
As you know, quite often, users install multiple operating systems to one computer, for example, some Linux distribution next to Windows 7. However, a desire to remove Linux appears, leaving only the second system. In this case, it is not necessary without special manipulations, because when banal formatting partitions breaks down. Start still standing with cleaning disk space, which is carried out like this:
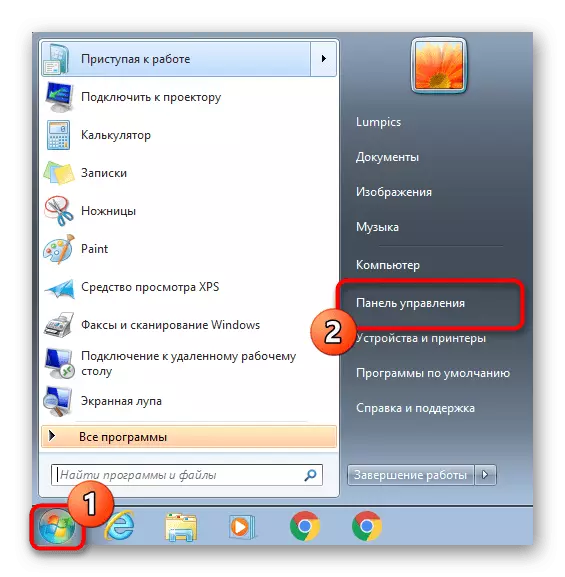
- Upload Windows 7, open the Start menu and go from there to the "Control Panel".
- Here, select "Administration".
- In the list that appears, you are interested in "Computer Management".
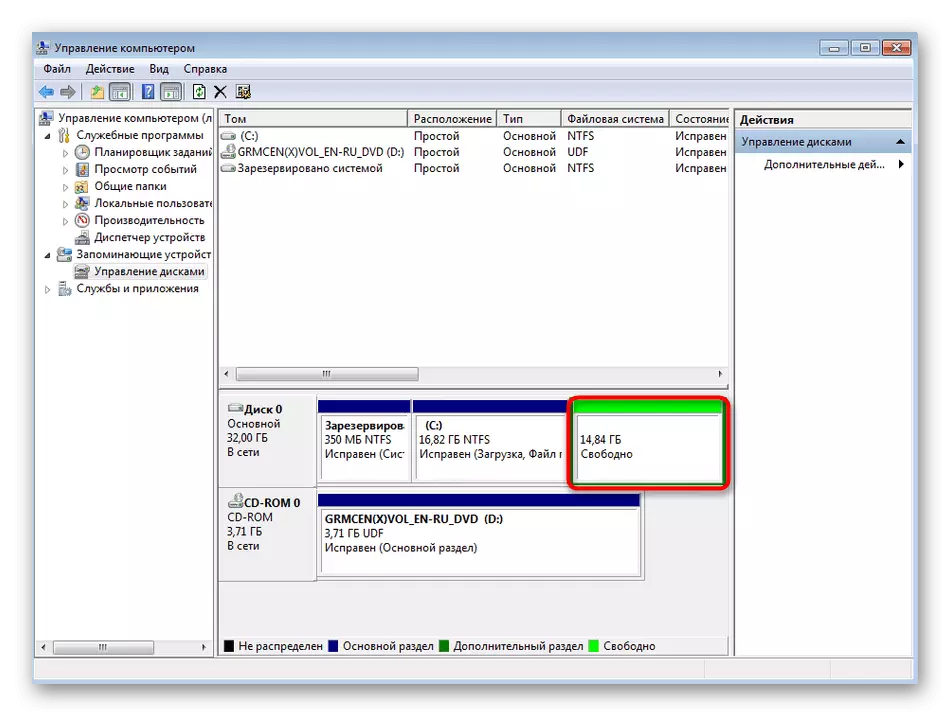
- Take advantage of the left pane to open the category "Disks" category.
- Find logical volumes with Linux files, right-click on them and select "Delete Tom" in the context menu.
- Confirm your intentions by selecting "Yes."
- Now it is clear that a certain amount of space has become free. In the future, it will be possible to create a separate section or expand already existing ones.


Now all Linux files have been deleted from the computer, including custom, so make sure that nothing important in the specified sections remains.
Step 2: Booter Restore
The next step is to restore the bootloader. To do this, you will have to download Windows in recovery mode. It will take for this ISO image with the operating system itself or physical disk. Auxiliary materials on this topic are looking for in articles according to the links below, and we will proceed to direct recovery.
Read more:
Create a bootable USB flash drive with Windows 7
Configure BIOS to download from a flash drive
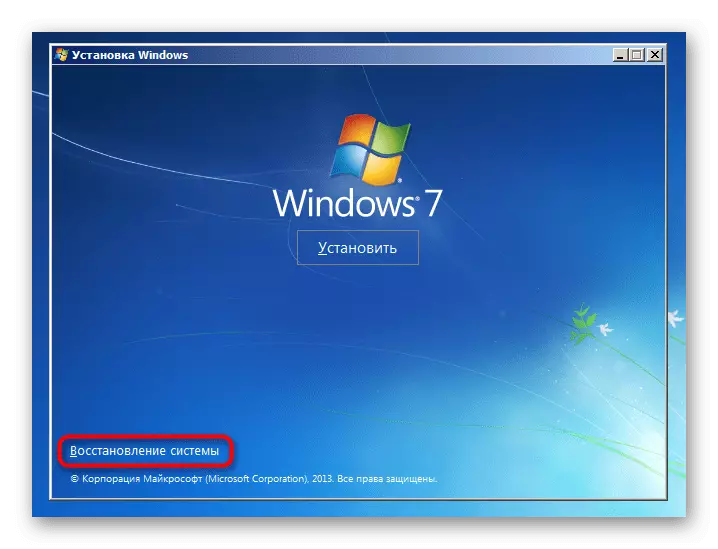
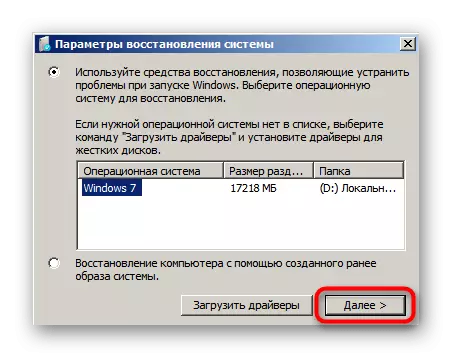
- After downloading the installer, select a convenient language and go further.
- Click the link located on the left below, called "System Restore".
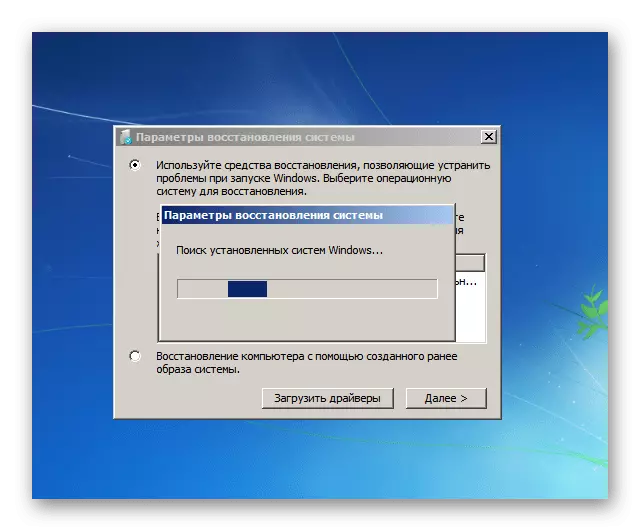
- Wait for the recovery settings.
- A notification of the found system will appear. Here it will be enough to click on "Next".
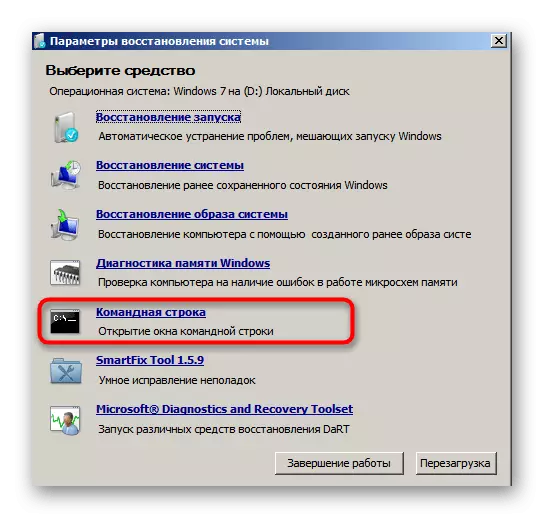
- In the media selection window that appears, find the "Command Line" option.
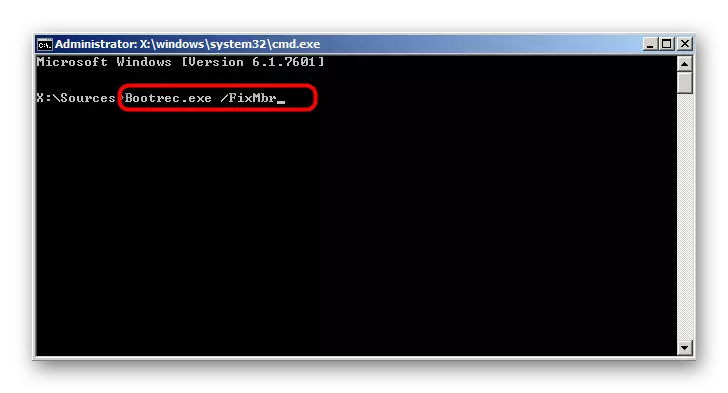
- The appropriate snap will start. Cool the bootrec.exe / fixmbr command to create a basic boot record.
- After that, use the BootRec.exe / FixBoot string to create a new boot sector.
- It is these two commands that are responsible for restoring the bootloader. If they are successful, the "The Operation Completed SuccessFully" notification will be displayed in the "Command Line".
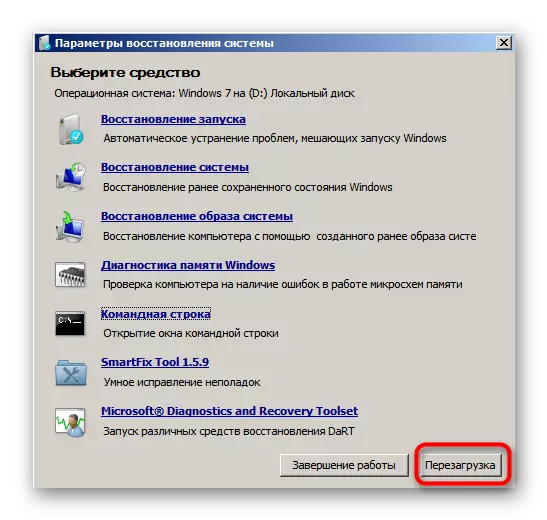
- Close the console and in the tool selection window, click the "Restart" button.
- When the "Recovery After Windows Error" mode appears, select "Normal Windows Load" and click on ENTER.


The last screenshot clearly demonstrates that the loader was successfully restored. It remains only to save the system from unnecessary settings and set the standard startup parameters, which we will talk about in the final step of today's material.
Step 3: Cleaning the residual parameters Ubuntu
Now Windows startup parameters can be configured in such a way that when loading, the menu will still be displayed with the OS selection. Sometimes it interferes, so you should turn off this setting and other unnecessary parameters that could remain from the second operating system.
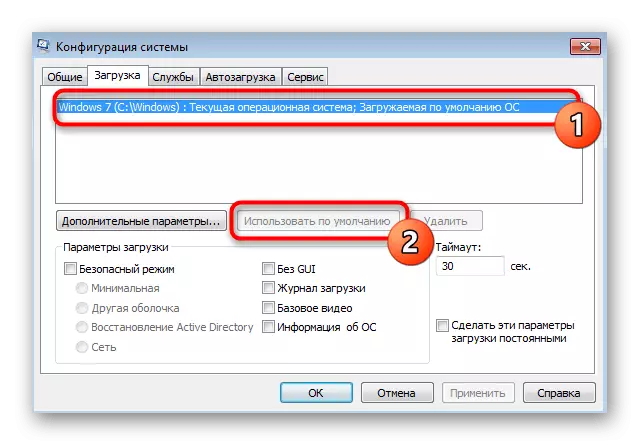
- After launching Windows 7, expand the "Start", enter there with msconfig and open the program displayed in the results.
- In the "Load" section, make sure that there is one OS, and install Windows 7 as default, if it does not automatically happen.
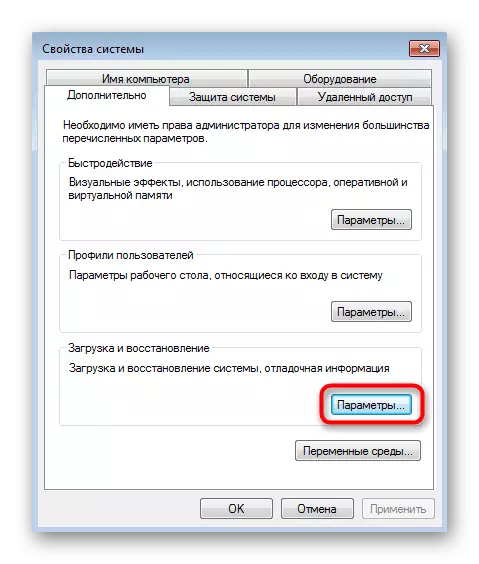
- Now go to the control panel.
- Open the "System" section in it.
- Take advantage of the left pane to go to "Advanced System Parameters".
- In the "Advanced" tab, click on the "Options" button located in the "Download and Restore" block.
- Here you can disable the option to display the list of operating systems when downloading a computer or recovery options if required.


Now you know how easy and quickly delete Linux, while saving the original state of Windows 7. All major actions are focused on restoring the standard bootloader, which happens by entering the literally two console commands.