
Step 1: Creating a check script
First, we propose to create a check script that will run in the future. Of course, you can skip this stage if the command line script is already available. Note that now we will not disassemble the syntax of programming languages, but only we will tell you that everyone can create your own script for each or insert the contents to the file for its further call in circumstances.
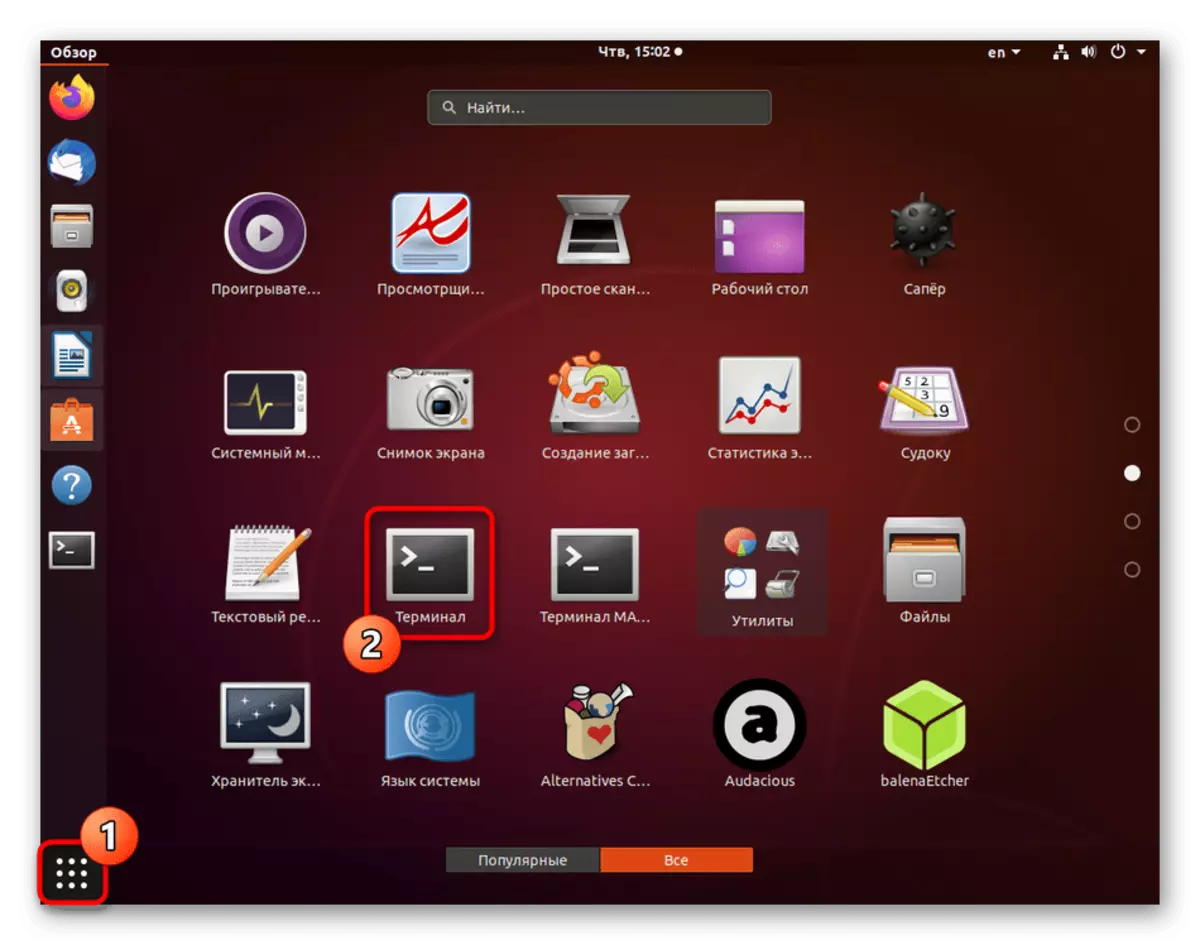
- Run the "Terminal" convenient for you, for example, through the application menu or the hot key Ctrl + Alt + T.
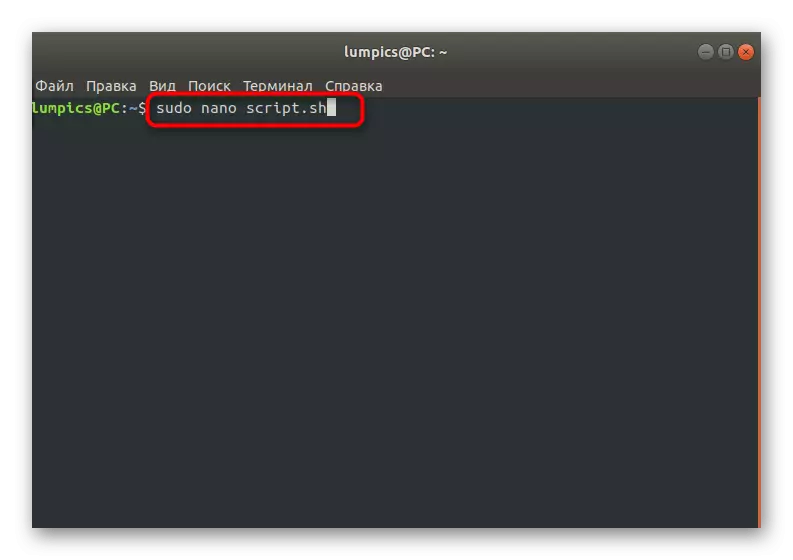
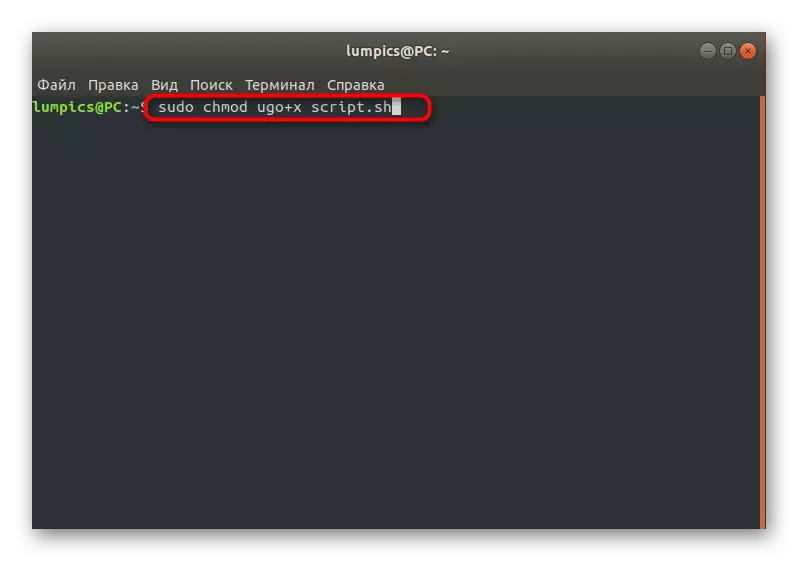
- Here, use the Sudo Nano Script.sh command, where Nano is the text editor used, and script.sh is the name of the created file. You can create a file, for example, through the same VI or GEdit, it will not change the essence, and the name of the element also changes according to personal preferences of the user.
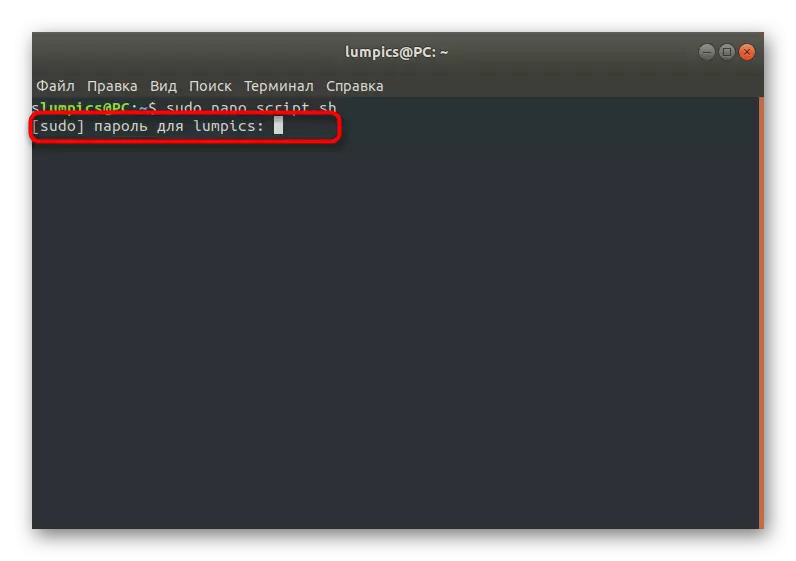
- Confirm this action by entering the password from the superuser account, since it is performed with the Sudo argument.
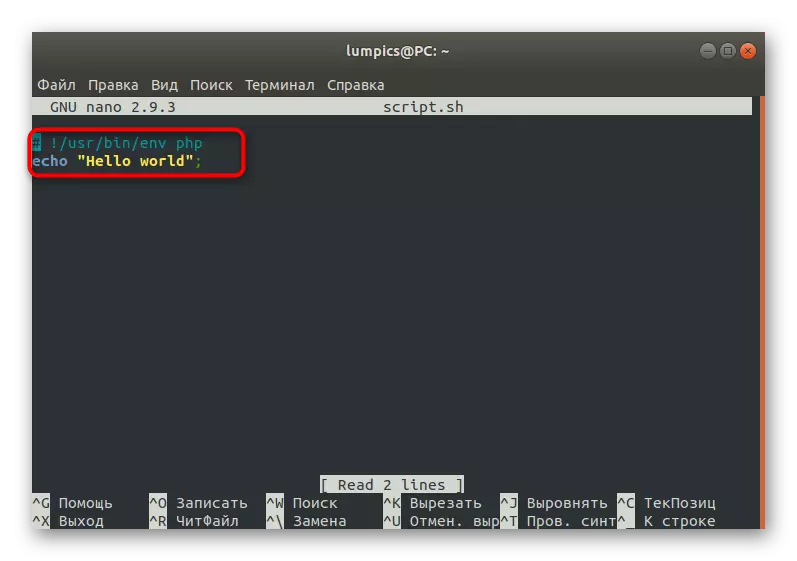
- A new file will open in which you can insert the script strings. Below you see the standard example responsible for displaying the message "Hello World". If there is the contents of another character, simply insert it into the console, making sure that all rows are written correctly.
#! / BIN / BASH
Echo "Hello WORLD"
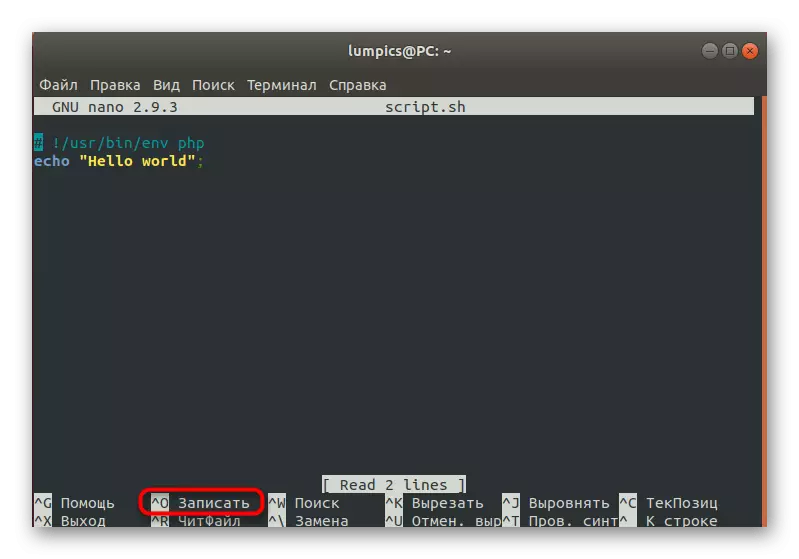
- After that, you can save the settings by holding the Ctrl + O key combination.
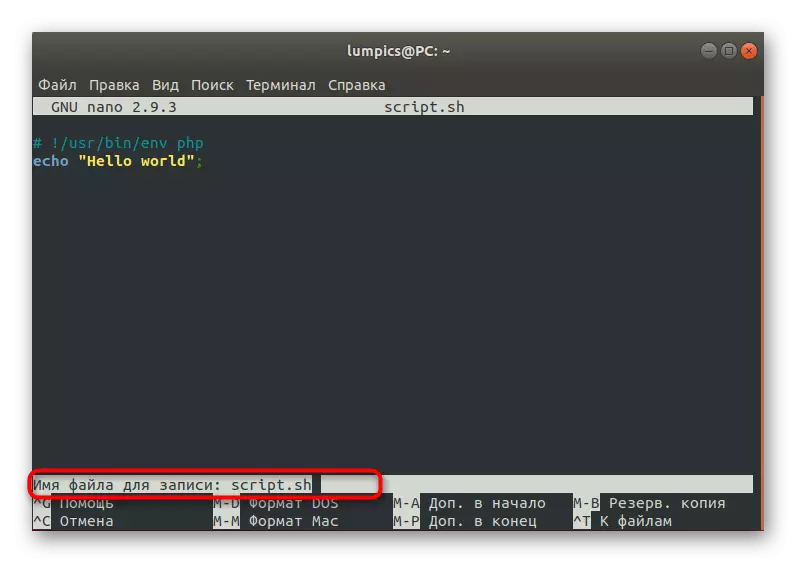
- The file name is not needed, since we are asked when creating. Just click on ENTER to complete the saving.
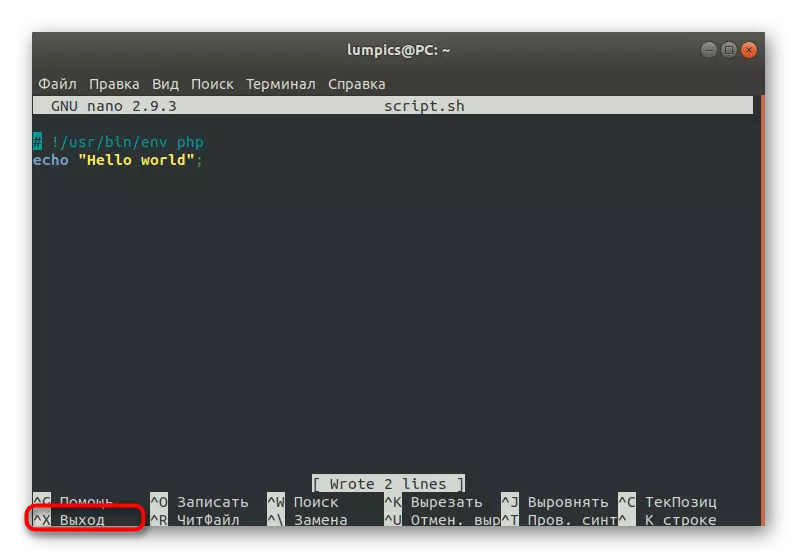
- Leave a text editor via Ctrl + X.
As we see, nothing complicated in creating your own scripts for Bash is not, but the entire feature is to know the code. You will have to either write it from scratch yourself, or copy ready-made solutions from free sources. After the script is successfully implemented in the file, you can safely switch to the next step.
Step 2: Script Setup for EN Utility
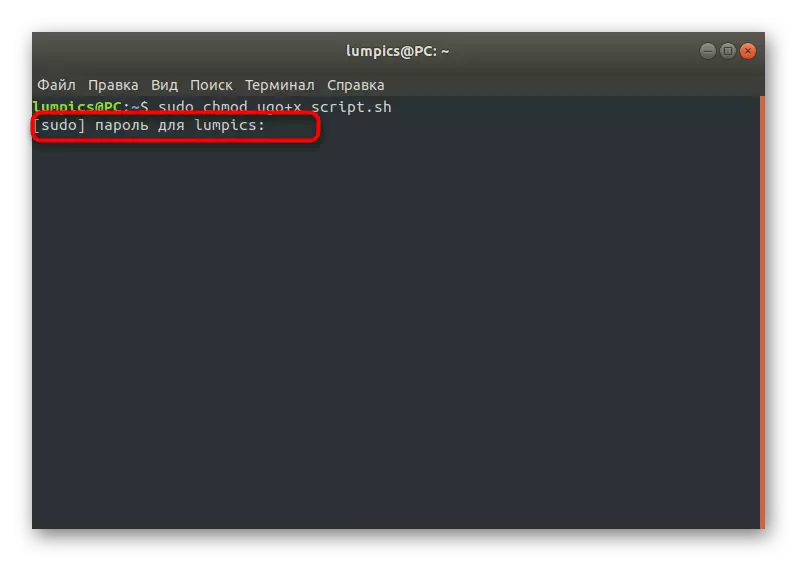
This step is also not mandatory, but without it can not do users who use the ENV utility to start the script. Without prior configuration, it simply does not open, since the corresponding permissions were not originally received. They are added via the sudo chmod ugo + x script.sh command, where script.sh is the name of the required file.
Do not forget that all actions performed through the Sudo argument require confirmation of the authentication of the account through the input of the superuser password. After that, a new string will appear to start commands, which means the successful use of the setting.
Step 3: Starting an existing script
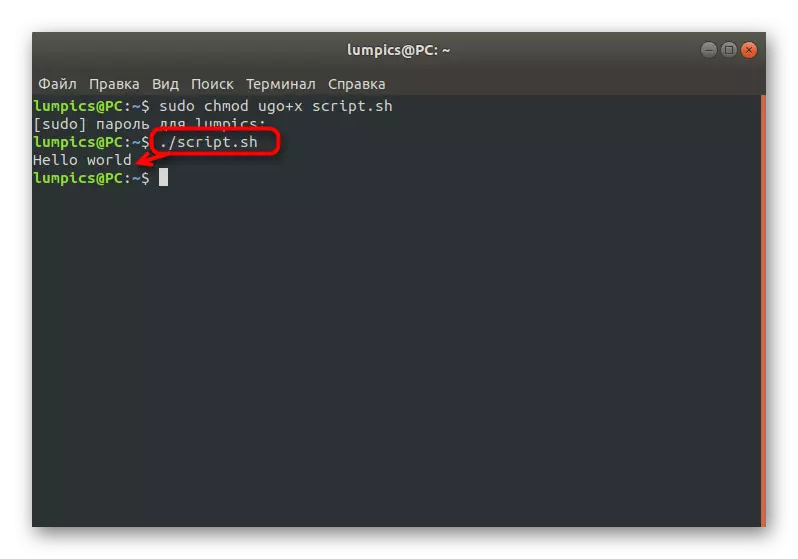
We turn to the main step, which is directly launching the existing script. To begin with, consider a simple command, which has the view ./script.sh and is responsible for launching a file from the current location. The output result you see the screenshot below. For example, we took the previously created script. In the same way, you can also specify the full path to the object so that the string has changed, for example, to /home/user/script.sh.
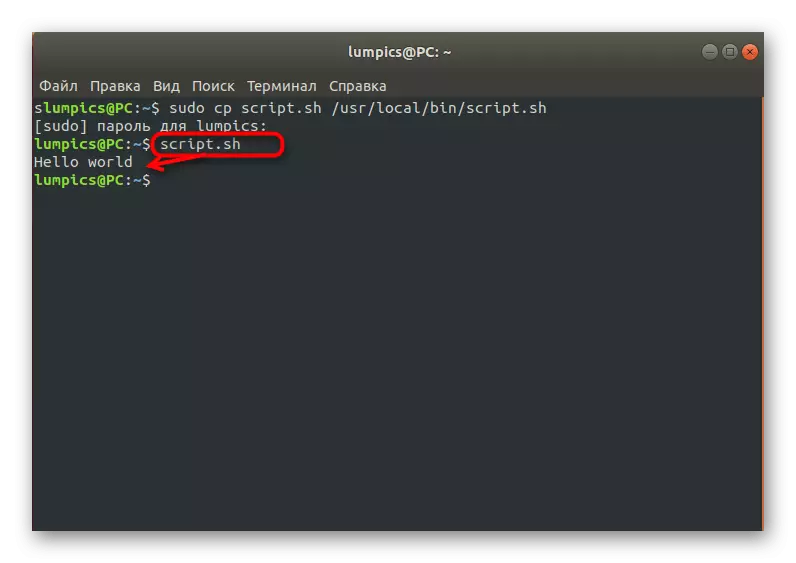
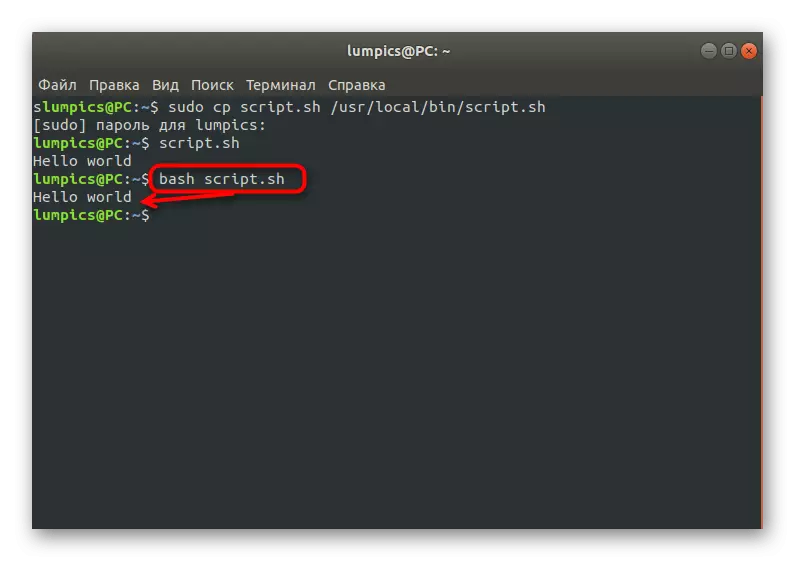
Linux has a PATH system variable. It includes a number of folders responsible for performing a wide variety of actions. One of them is called / usr / local / bin and is used for manual installation of programs. If you do not want to constantly specify the full path to the script to activate it, simply add it to one of the PATH folders. To do this, use the cp script.sh /usr/local/bin/script.sh string.

After that, the launch will be available by simply entering the file name with expansion.
The second opening method consists in simultaneously calling the shell. You should move to the script directory and write Bash Script.sh. This method is good because it allows you to not enter the full path to the object or pre-add it to the corresponding directory of PATH.
That's all we wanted to talk about interaction with scripts in Linux. You only have to create an appropriate file or open existing, using the above recommendations.