

In order for the speakers to start working, it is usually sufficiently connected to them in accordance with the recommendations from the user manual. But if the sound is much worse than, for example, from the speakers of the previous audio equipment or one speaker playing louder than the other, you can try to configure the speakers. Today we will tell you how to do it on a computer with Windows 10.
Stage 1: Preparation
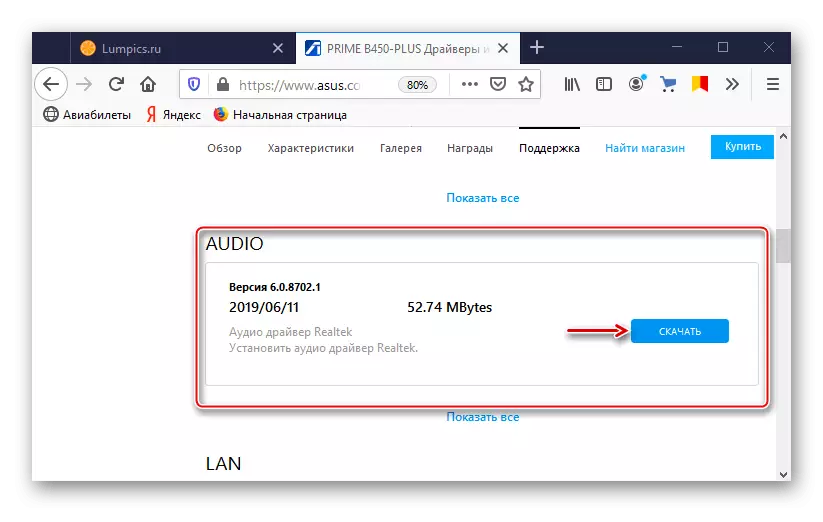
Be sure to install the latest version of audiors to get the maximum set of functions and effects. Download them from the official website of the motherboard manufacturer, sound card, or use special software updates. We wrote about this in detail in individual articles.
Read more:
Search and install audio drivers for Windows 10
Search and download drivers for sound card
Download and install audio drivers for Realtek
Most acoustic systems are equipped with a built-in amplifier and a panel with elements for adjusting the sound located on one of the columns. Try to twist the regulators, it may help to achieve comfortable sound.

Turn on the music, it is desirable that you have already listened to many times, and you know how it sounds correctly. So it will be easier to adjust the columns. If there is no sound at all, it means there is a problem that you have to find and fix. We wrote about the methods of eliminating problems with sound in a separate article.

Read more: Solving sound problems in Windows 10
Stage 2: System Settings
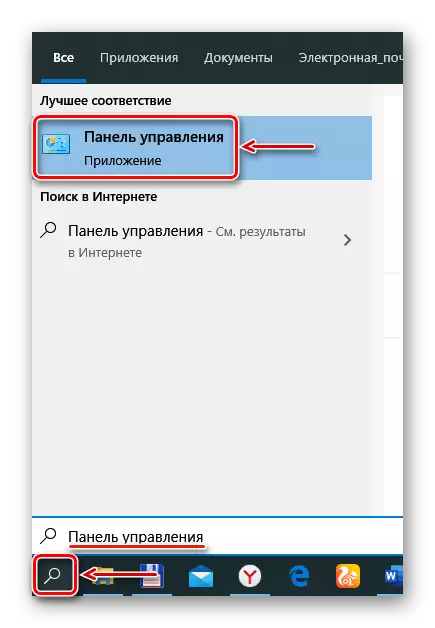
You need to start the speakers to start using the appropriate section of Windows 10, since it is here that the basic parameters of the acoustic system are indicated.
- In the search for Windows, type "Control Panel" and run the application.
Auxiliary
What accompanying software will be installed on a computer depends on the audio codec supplier (REALTEK, VIA, etc.). We will consider setting the columns on the example of the VIA HD Audio Deck utility. Briefly read it with its capabilities, as it duplicates the settings described above, so it will not offer anything fundamentally. But perhaps for someone it will be more convenient.
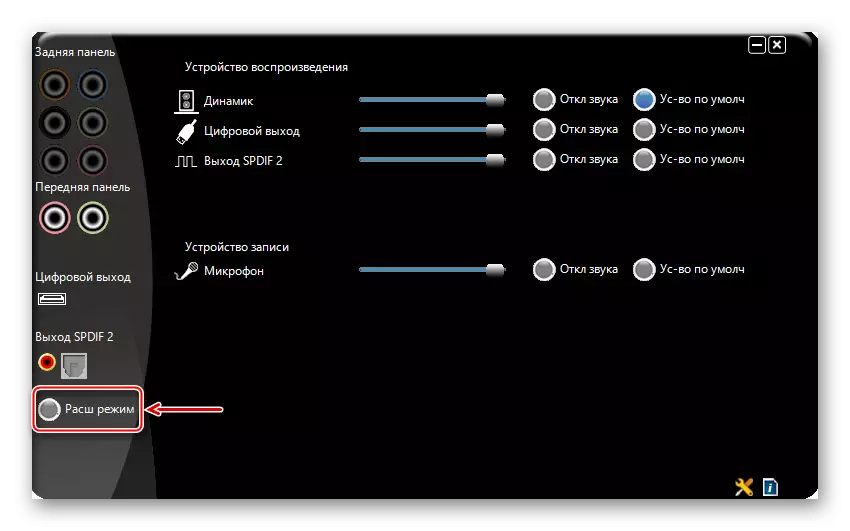
- In the "Control Panel" open the Via HD Audio Deck application.

Go to the advanced mode.
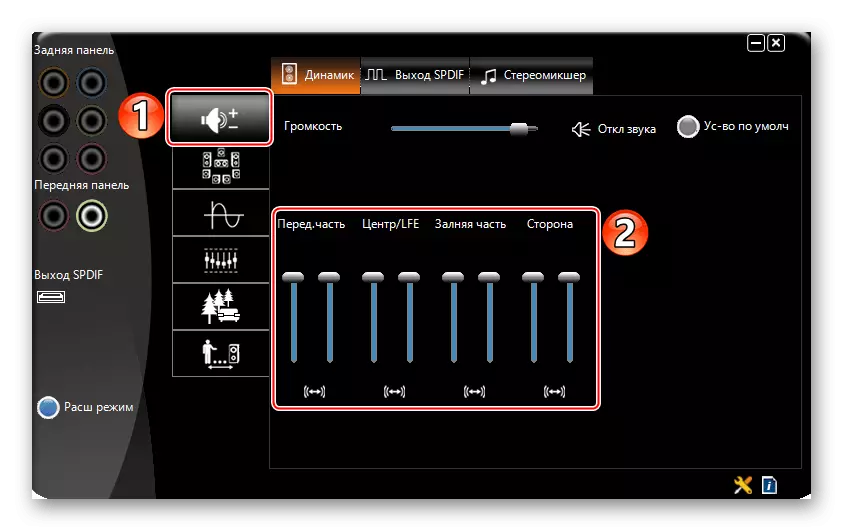
- Open the "Speaker" tab. At the top of the window, you can reduce the volume of the sound or completely disable it.
- In the "Sound Control" tab, adjust the volume of individual speakers.
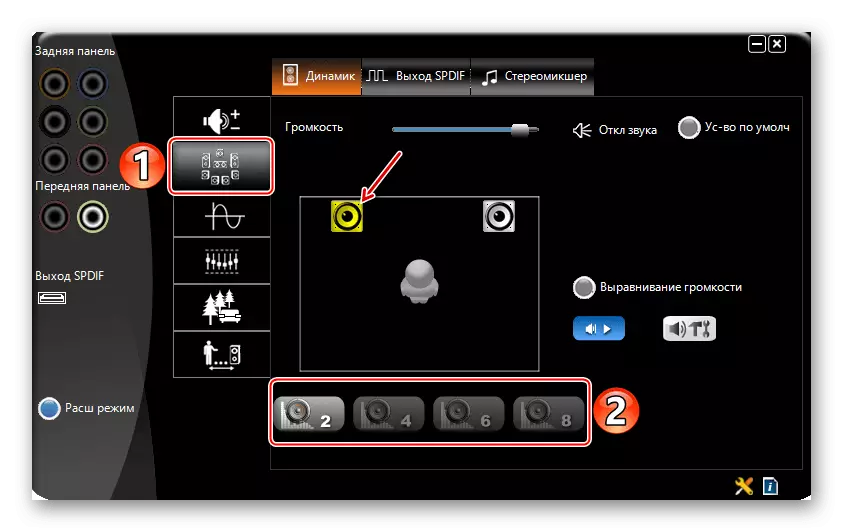
- In the "Dynamics and Test" tab, select the number of columns. To check the sound, click on them with the mouse.
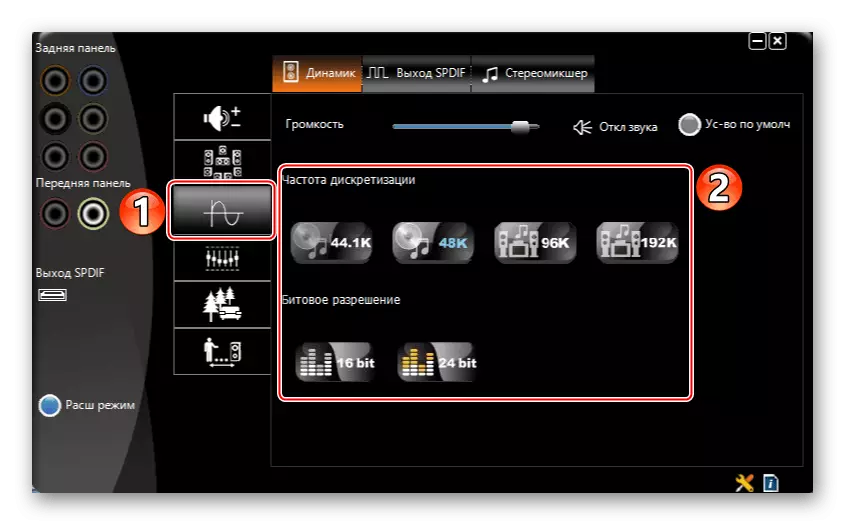
- In the default format, select the sampling frequency and bit resolution.
- In the Equalizer tab, click "Enable" and also tighten the sound manually or choose one of the presets.
- In the "Environmental Audio" section, click "Include" and choose the right environment - "Theater", "Club", "Audience", etc.
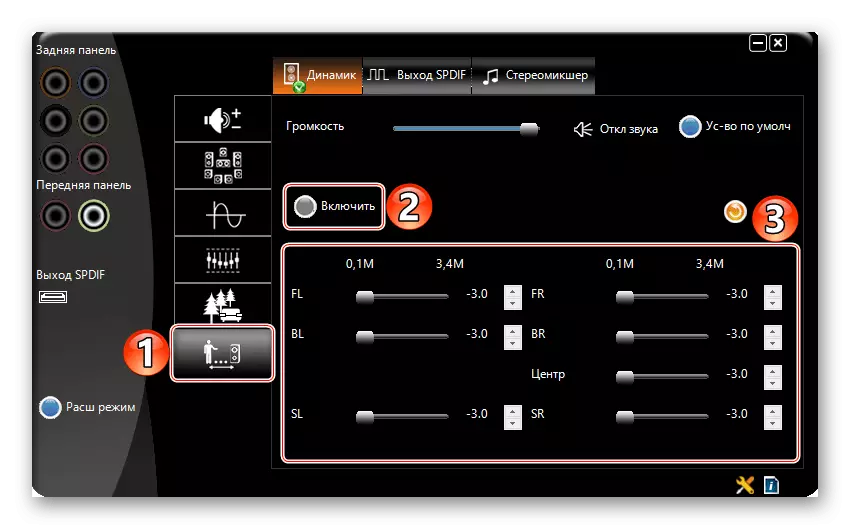
- In the "Room Correction" tab, click "Enable" and set up the columns depending on the features of the room.


Stage 3: Sounder
A more flexible speaker setting can provide special programs to improve sound quality. Consider how to do this, on the example of the Equalizer APO application.
Download Equalizer APO from the official site
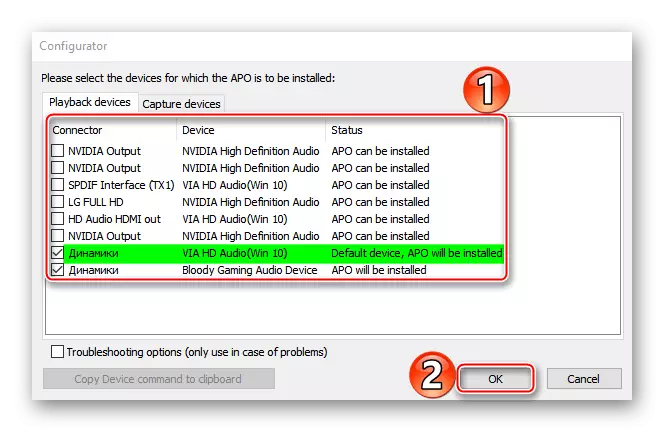
- Run the installation file. At the end of the installation, choose, with what devices the application will work.
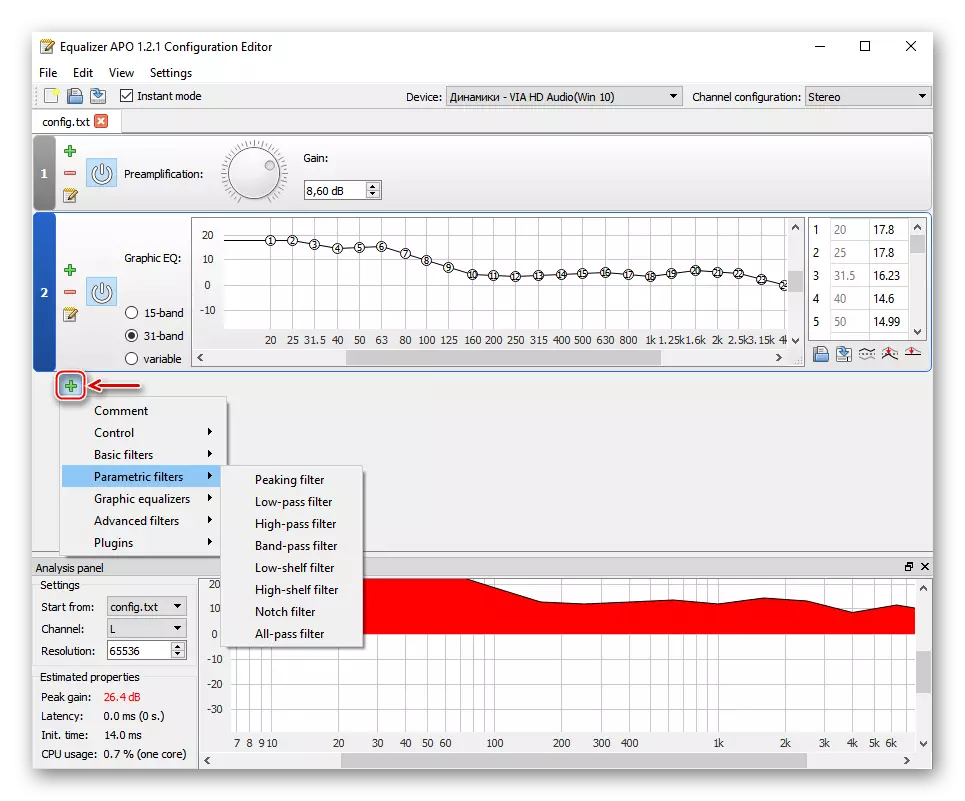
- We open the folder with the installed equalizer and run the file "Editor".
- In the column column, select the speakers, and in the "Channel Configuration" configuration of the system depending on the number of speakers.
- Equalizer APO is a modular interface, i.e. As it needed, its structure can be changed - add or delete improvements, filters and effects. By default, two modules have already been added, which are enough for the initial setting. With the help of the "Preamplification" block, you can make the sound loud and powerful, even if at the system level it is set to maximum. To do this, turn the "GAIN" regulator.
- Equalizer set up using the Graphic EQ module.
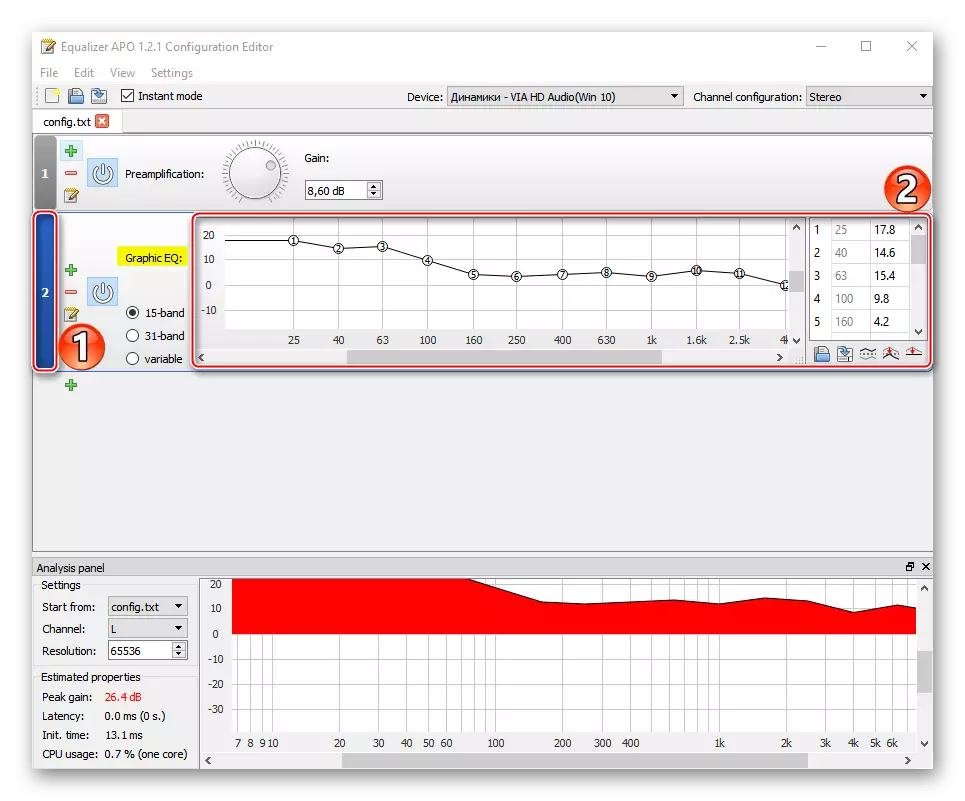
For a more accurate setting, you can increase the number of frequency bands of the equalizer.
- To expand the application settings, press the icon in the form of a plus and select an additional module from the list.


READ ALSO: Sound configuration programs
We hope you figured out the basic settings of sound playback means on a computer with Windows 10. The instruction is written on the example of a simple audio system of two speakers, but the more serious the equipment, the more features will be for its configuration. The main thing is not to stop only on system parameters, experiment with third-party software. So it will be more likely to achieve the most comfortable sound.
- In the "Control Panel" open the Via HD Audio Deck application.