

Under the reset of the router password, it is often implied to the restoration of standard data for authorization in the web interface, but sometimes there is no need to remove the protection against access to Wi-Fi. The actions algorithms for the implementation of these two tasks differ, so we will look at them separately, taking the example of two supported by ASUS router firmware.
Login to the web interface
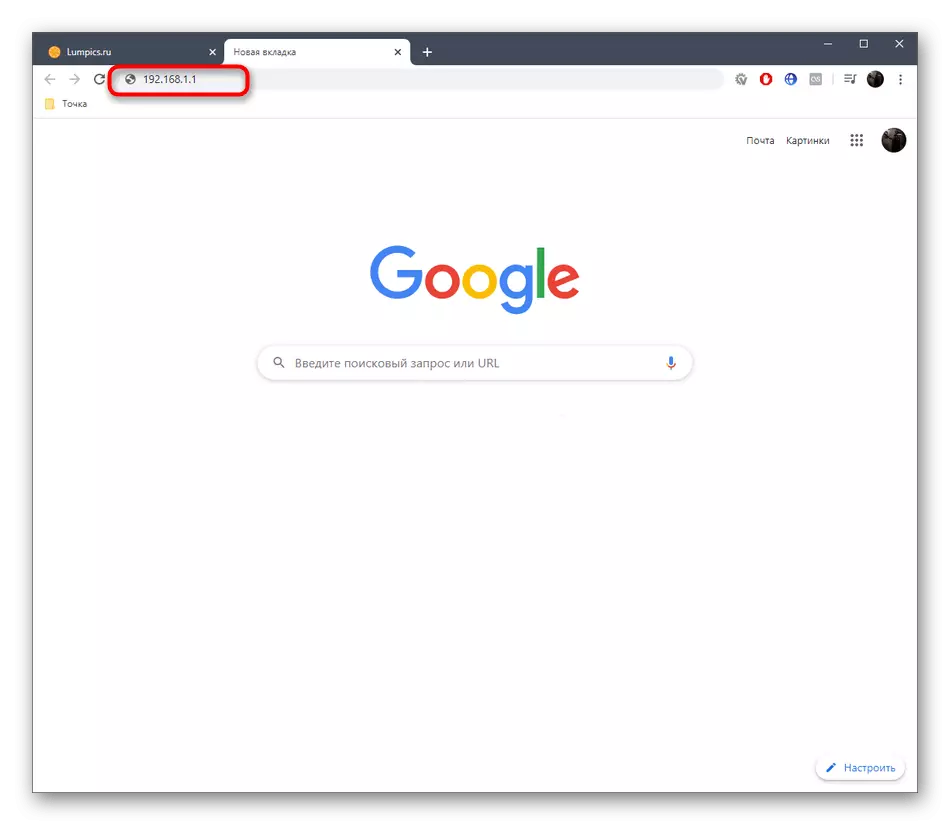
Any action associated with changing the parameters of the router can be performed through the corporate web interface, the entrance to which is carried out through the transition browser at 192.168.1.1 or 192.168.0.1. If you have access to this menu, log in, as some further settings are carried out through the Internet center. More detailed instructions on this topic can be found in another material on our website by reference below.
Read more: Login to ASUS Routers Web Interface
Method 1: Restoring factory settings
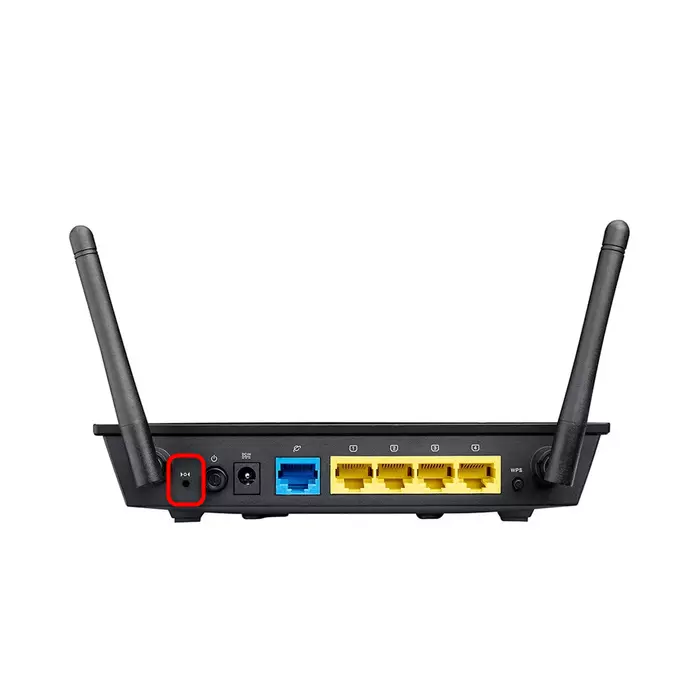
Reset to the factory settings of the ASUS router rolls back all the current parameters, including manually specified passwords. In the Internet center, a special virtual button is assigned to this. However, this can be done without connecting to the web interface, for example, when it fails to recall authorization data. Then you should click on a specially designated button and detain it for a few seconds to recover. More detailed instructions for performing each of these two ways you will find in a separate manual on our site below.
Read more: Reset ROUTERS ASUS
Method 2: Disable Wi-Fi Security
The second situation that implies the password reset is to disconnect protection to access the wireless network. This procedure can be performed only through the settings menu, so it is necessary to enter it. After that, implement the following instructions, pushing out the version of the Internet center.Option 1: Black version
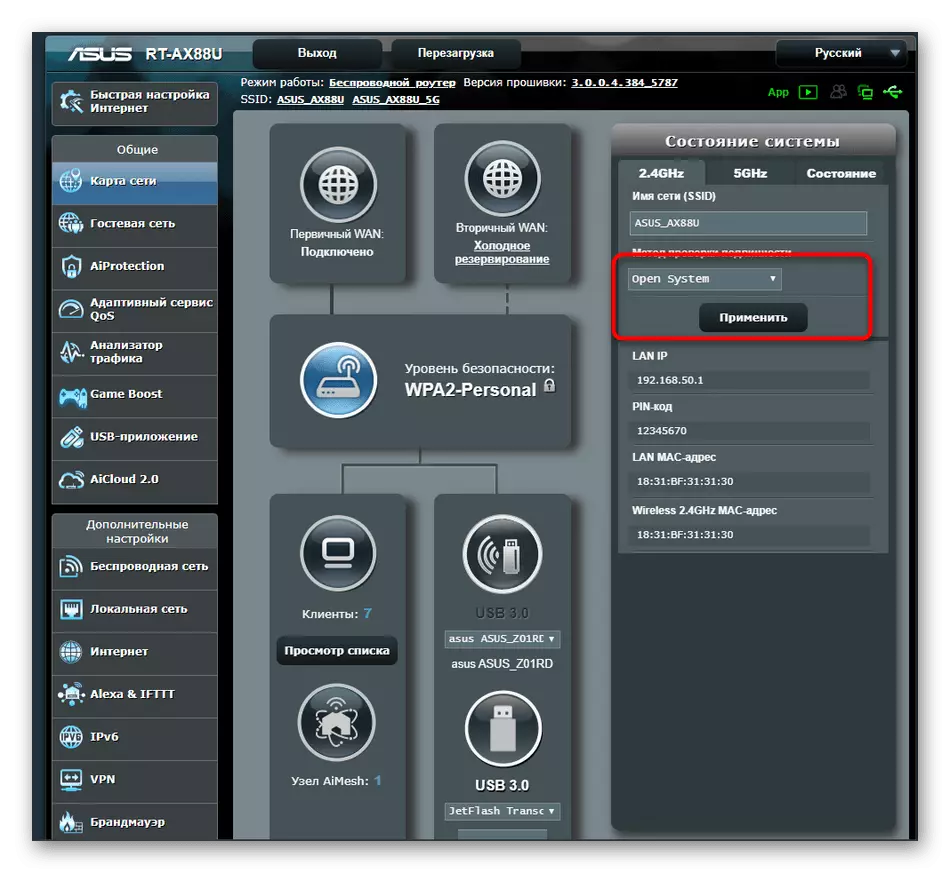
The black version of the web interface is the current presentation of the configuration menu, so we will tell about it first. Disable Wi-Fi protection is literally in a few clicks, and this operation looks like this:
- After authorization, you will find yourself in the "Network Map" section. From here you can move to the category "Wireless Network", but the Wi-Fi settings are available in the current location, and we will take them as an example.
- Specify the necessary access point, and then expand the "authentication method" drop-down menu.
- There, select "Open System" and click on the "Apply" button.
- In the pop-up notification that appears, confirm the performance.
- Expect the end of the use of the setup, after which you can check access to the wireless network to make sure that the new parameters are correct.


Option 2: Blue version
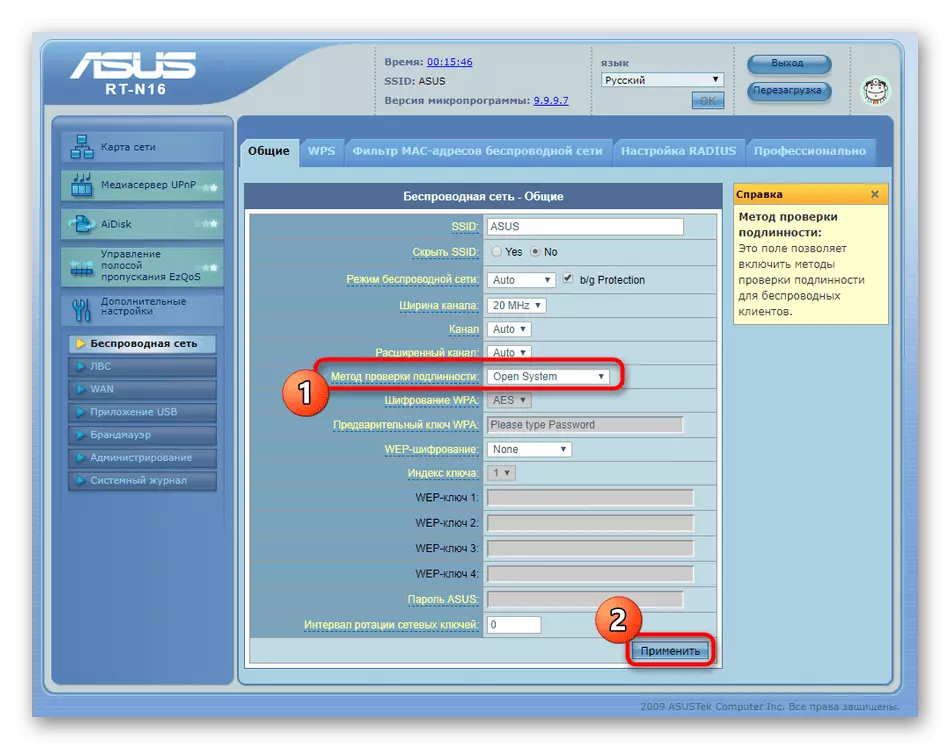
An option with a blue version will suit those users who have not updated the firmware for a long time, and the device itself was also purchased several years ago. The presentation of the interface here is a little different, but has a lot of similar elements with a modern version.
- To begin with, turn on the "Russian" language in order not to get confused in the menu items. Then in the "Advanced Settings" category, select "Wireless Network".
- On the General tab, find the "Authentication method" and expand the drop-down menu.
- Specify "Open System" and apply changes.


Now you know everything about dumping passwords in Asus routers. As you can see, when performing any of the options, this procedure does not take much time. As for the overall configuration of network equipment from this company, you will find detailed thematic guidelines in another article on our website by clicking on the header below.
Read more: How to set up a router asus