
Hosts appointment and methods
Hosts file is present in all modern versions of Windows operating systems, is located in the same place and now everywhere performs the same option. However, before he replaced the DNS server technology, that is, it compared the domain names with their IP addresses. It indicated the address itself, for example, 192.154.12.1, and he was assigned a domain name, for example, Site.com. Now the user could enter a domain name instead of a complete IP address to go to the web resource through the browser. This made it possible to more quickly memorize the location of specific pages, and also added creative and marketing, because now the site address is selected in such a way that it corresponds not only to topics, but also remembered.In the current realities of Hosts, it can be said, it is empty, however, there are several different methods of its application by which the user finds the object needed for editing:
- The basic way is to edit in order to block access to certain resources. This is done by an indication of a false IP address for a specific domain name, which we will talk about more detail later. The system administrator without any problems can close access to any resource only by entering its domain and assigning a non-existent IP to which the redirection will occur, respectively, unsuccessful.
- The same technique is also used to block malicious, as well as advertising sites, which in the future can harm the computer. In the section on editing Hosts himself, we will touch on this topic by presenting one of the most relevant list suitable for imports.
- Less frequent users who have local resources are assigned to him the optimal domain name so that each time manually cannot enter numbers in the browser. However, this topic applies only to knowledgeable users who are so beautifully understood by the purpose of Hosts.
- The last purpose of editing is to accelerate the web page. If an automatically selected DNS server for some reason cannot provide a quick transition to specific resources, you can map their IP and domains in this file to use it when you go to the browser.
It should be noted that sometimes malware developers when infecting a computer make shadow editing of the object, entering the redirection editing there. So, if the computer is infected with a virus or advertisement, when opening a browser, you can automatically fall on some unknown site. If such a situation originated, first check the file itself, deleting unnecessary and suspicious lines, and then go to other methods of solving the problem.
Read more: Fighting advertising viruses
To the future, we also recommend checking the "read only" attribute to block the possibility of re-occurring such cases of sudden changes in the object. This topic will be devoted to one of the following sections of this article.
Hosts location
Above, we have already specified that the object being considered in all versions of Windows is in the same place on the system section of the hard disk. The path to it is as follows:
C: \ Windows \ System32 \ DRIVERS \ ETC

You just have to open a conductor or immediately a text editor to go to its location and start editing.
Creating a backup file
Before starting the editing procedure, we advise you to create a backup copy of Hosts so that in the future it was possible to quickly return the state to the original. This does not apply to those cases when you initially inside it is not stored any line of code, because then the current settings are simply deleted and a clean file is saved without any rules. If you are interested in creating such a backup, follow these steps.
- Go along the path mentioned above, through the conductor, where to find "hosts", click on it with right mouse button and select "Copy".
- Move to any other place where insert this file via Ctrl + V or calling the context menu.
- You can also leave the copy in the original location, but then it will have to be renamed by adding at the end .old.


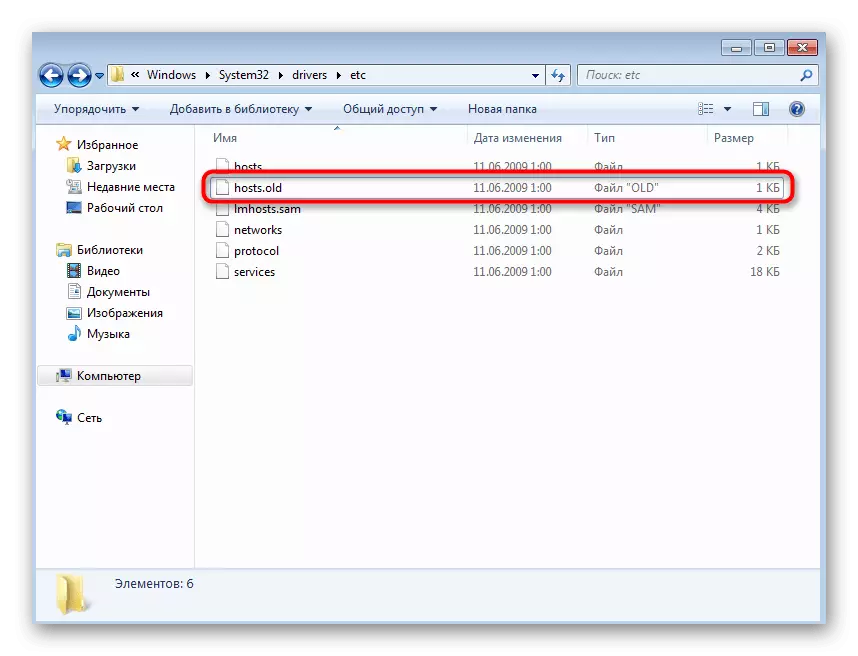
Now you know that in the event of any problems with comparing IP addresses and domain names, you can return the original file status at any time, throwing out all manually settings.
Management attribute "Read only"
The "read only" attribute is used to make restrictions on editing their contents. We have already told about this when analyzing advertising viruses, and now we will show you how to activate this attribute. This information will also be useful to those who will encounter problems while saving the file itself after editing if the attribute is already activated. You can manage this:
- Right-click on the file and in the context menu, select the option "Properties".
- Put or remove the checkbox from the read-only item. There are other attributes here, you can familiarize yourself with them to know about their existence for the future.


In exactly the same method, change the status of the attribute if necessary, for example, to make changes, and then restrict access again.
Opening Hosts for Editing
In Hosts there is no specific syntax or encoding, so even the standard notepad can cope with the opening, and this means this tool to users of any level. However, it is worth noting that there are two options for the discovery that we will analyze below.Editing any system files is possible only under an account with administrator rights. If you have not received such rights or not logged in profile, it should be done right now, which read about the link below.
Read more: How to get admin rights in Windows 7
Option 1: Context Menu Explorer
The first option is to use the context menu of the conductor and allows you to open the object to change literally into several clicks.
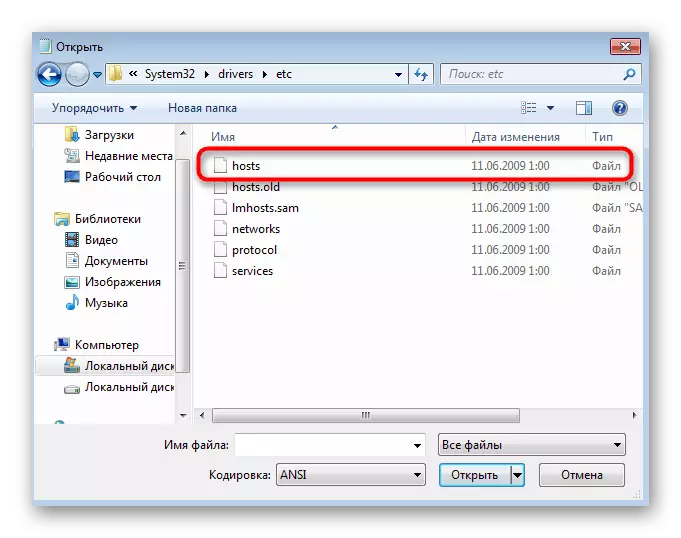
- Scroll to its location and click on the PCM file. At the same time, consider that the original is needed to edit the original, and not previously created a backup.
- In the list, select the first item "Open".
- The "Select Program" window will appear. Here, the default classic notebook will be present, so tick the LKM and click on the "OK" button.
- As can be seen in the screenshot, all standard contents have been successfully loaded.


Option 2: Option "Open" in notepad
This method implies first the launch of the notepad itself, and the file opens it through it. Note that the program is running must be on behalf of the administrator.
- Use the search for "Start" or call the "Run" utility by closing the Win + R keys combination and entering the NotePad string in the appeared.
- In the Notepad window, expand the "File" menu, where to select Open. You can call this option and through the Ctrl + O keyboard shortcut.
- In mandatory in file format, specify "all files" so that all elements of the current directory are displayed in the conductor.
- Follow the path already familiar and find the original HOSTS file there for opening.
- You can proceed to edit.


Amendments to Hosts
Before the main editing process, several rules should be known. Look at the standard contents of the object: all lines that start with # is comments using the description and optionally added after any command. In the current comments, the developers placed a brief description of the file operation, and also showed how to specify the rules by making an IP address and a domain name.

The form of writing the rule itself begins with the IP address, then ideally click on TAB to add an indent, without disturbing the usual stylistic type of content, and already then the comparable domain name is introduced. Below you see a string of 0.0.0.0 www.youtube.com. It is used to specify the false IP address of the known video hosting, that is, when entering this domain in the address bar of any browser, there will be a transition to 0.0.0.0, and the site itself, respectively, will not appear.

Just this method is blocking promotional and potential malicious sites. Usually, the user finds a list of rules for the file and simply inserts it through a notebook. If you need to do this, but there was no appropriate list, we recommend paying attention to the compiled table by reference below. If you wish, use it, copy the contents and insert into hosts.
Example HOSTS file for malicious sites
Do not forget that all changes must be saved. Press CTRL + S combination or select the appropriate item through the File menu in the notepad.
