
With the iOS 10 output, Apple has expanded the iMessage functionality, which differs from traditional messages (SMS) only by the title to the full messenger. Despite the fact that the service began to quickly increase popularity, not all IPhone owners know how to enable it and use it. Today we will tell you about it.
Activation of iMessage
Many applications pre-installed on Apple-devices are deprived of their own parameter menu, if we talk about the usual understanding of this term - the change in their settings is carried out in the IOS section of the same name. The number of objects includes iMessage. In order to activate the built-in messenger, do the following:
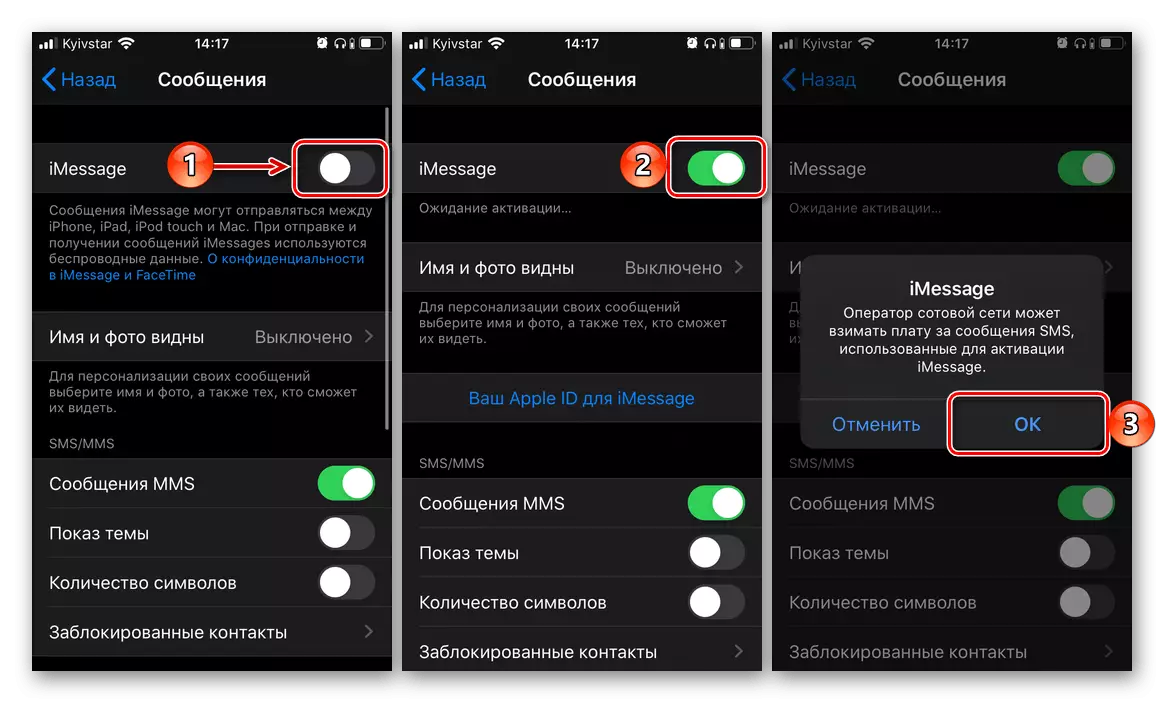
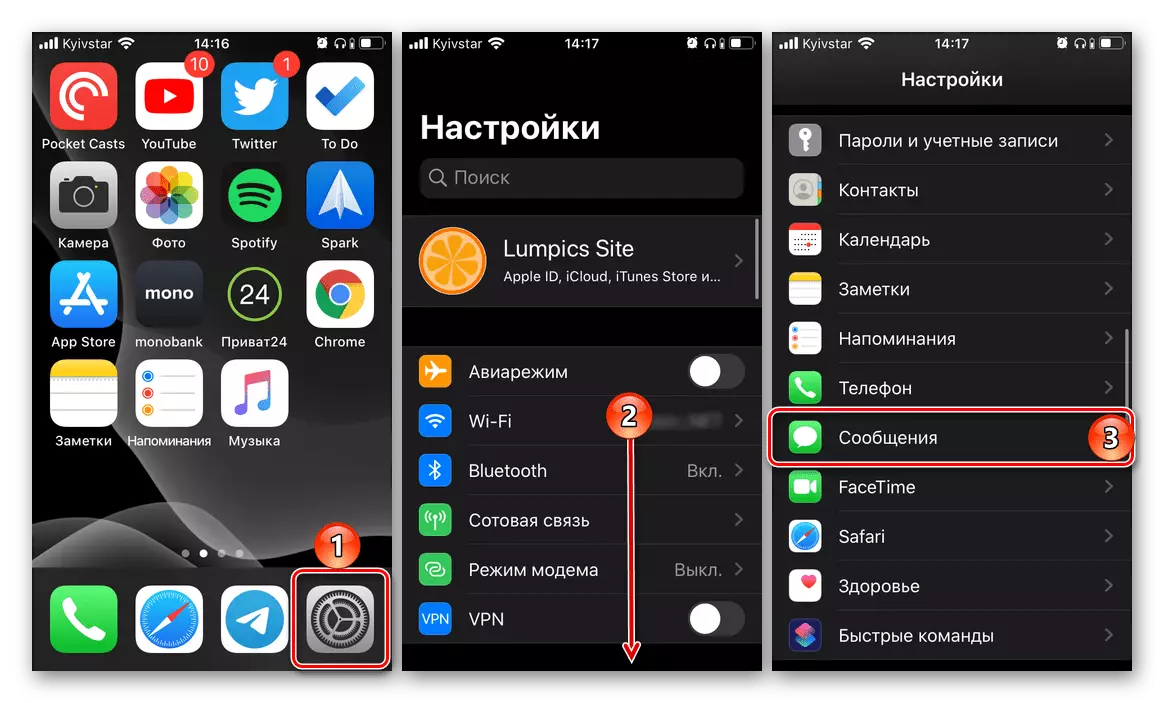
- Open the "Settings" and scroll the list of available options down, up to the list of pre-installed applications. Find "Messages" in it and tap on this item.
- Put the switch to the active position, located opposite the iMessage item. Check out the notification that the cellular operator may charge for the service (solely for the service messages necessary to activate this function), and click "OK" to turn it on.
Important: Paid SMS is sent in one of two cases - the inclusion of the previously disabled iMessage service and / or the SIM card change, and therefore the phone numbers used to communicate in the service. Payment is carried out according to the tariffs of the cellular operator.
- Next, it remains to wait for the completion of the activation of the service, after which you can communicate with friends, familiar and colleagues not only through ordinary text messages, but also with stickers, audio and video files, that is, both in a full messenger and, unlike SMS, completely free. Additionally, you may need to log in to your Apple ID by selecting the appropriate item in the settings, but we will talk about this in more detail in the next part.
There is nothing difficult to enable iMessage on the iPhone, but in order to use the system messenger as possible, you need to configure it.
Setting
At the previous stage, we just activated the messaging function, but without proper configuration, it will not be possible to fully use it.Data for receiving and sending
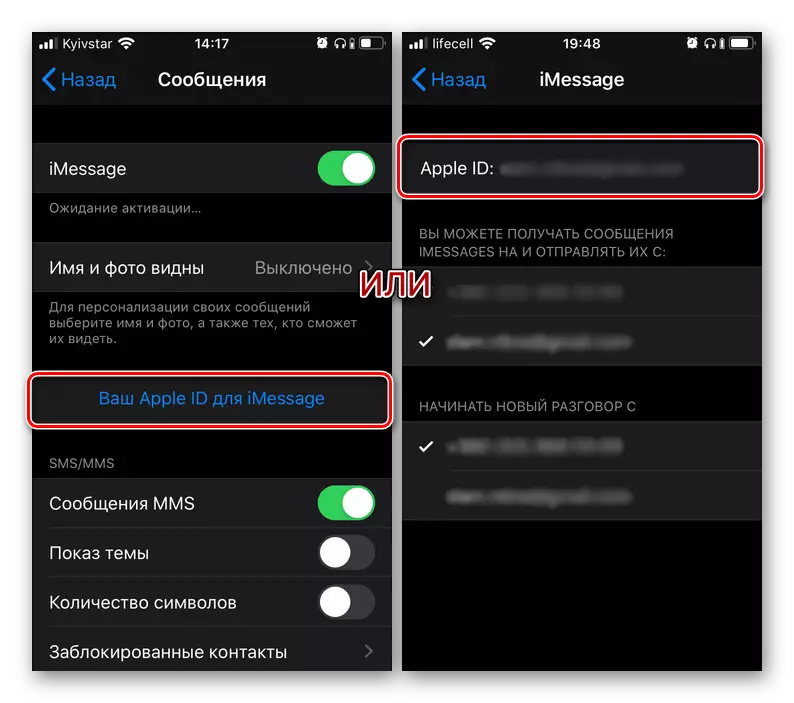
The main user identifier in iMessage is an Apple ID account to which, in turn, not only email can be tied, but also a mobile phone number. Both the first and second can be used to send / receive messages.
- Under the iMessage string, the switch opposite which was activated in step 2 of the previous part of the article, tap "Sending / Reception".

Note: On devices with iOS 12 and below the item required to go to the setup "Sending / Reception" It is not the second, but the fourth in the list available.
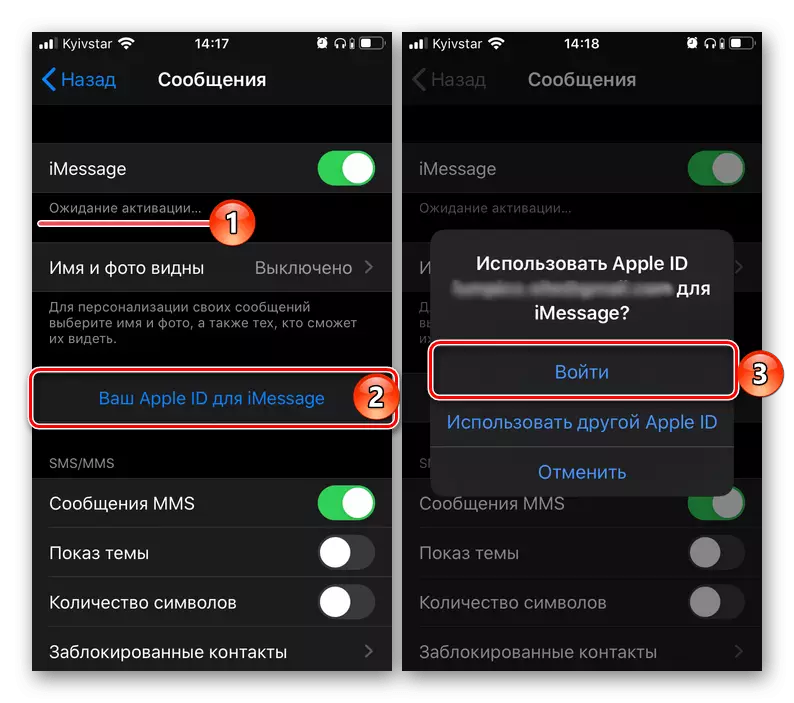
- Make sure that you are logged in in your Apple ID account, and if it is not so, log in by following:
- Tap on the inscription "Your Apple ID for iMessage". If, instead, in the first line you see the white, and not the blue inscription "Apple ID: Email address", it means that you are already authorized in the account, but if necessary, it can be changed to another (about this below).
Note: In some cases, the ability to enter the account appears on the direct configuration page. "Messages" - Where the iMessage activation is performed.
- In the pop-up window that appears, click "Log in" if you want to use to communicate the account specified in the notification, or "Use another Apple ID" if you need to change it.
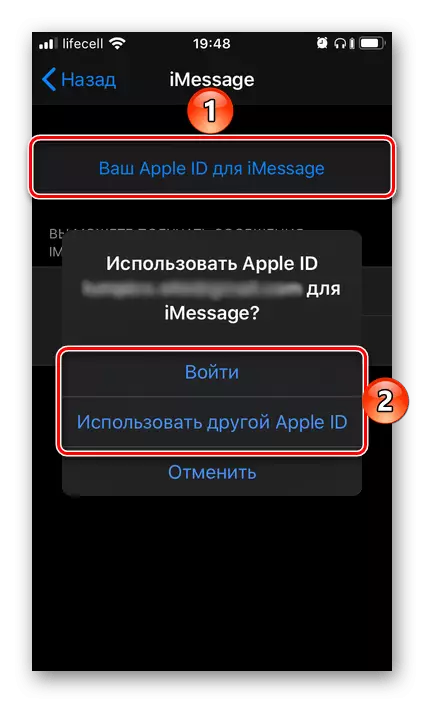
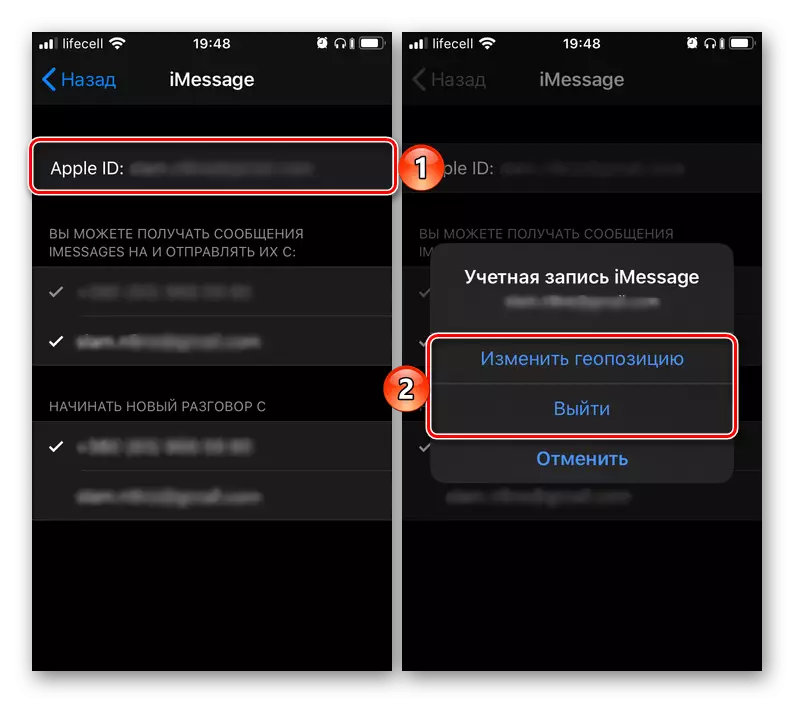
Note: If you are already authorized in the account, but you want to use another, and / or if you want to change the displayed geoction, tap "Apple ID: Email Address" and select the appropriate option in the pop-up window.
- Enter the password from the account (if required) or mail and password, depending on which option was selected in the previous step.
- Tap on the inscription "Your Apple ID for iMessage". If, instead, in the first line you see the white, and not the blue inscription "Apple ID: Email address", it means that you are already authorized in the account, but if necessary, it can be changed to another (about this below).
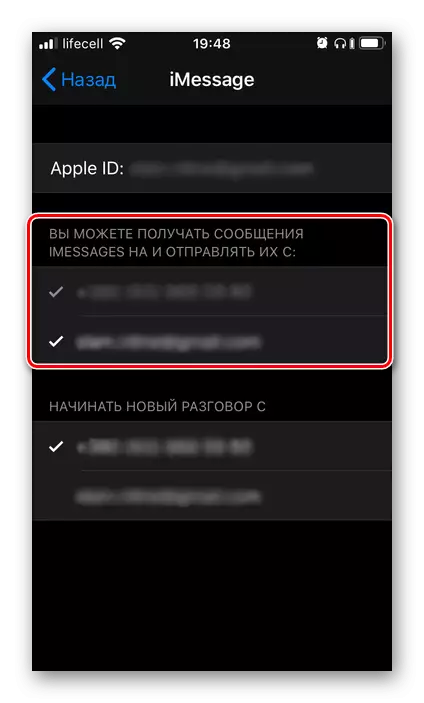
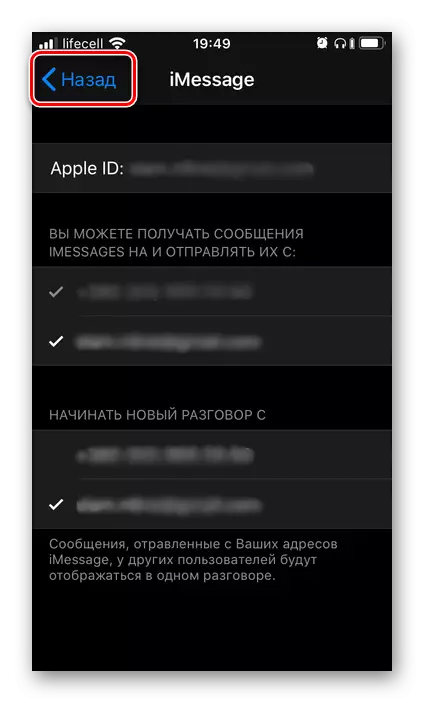
- After authorization in the account, you can choose where the read and sending messages will be available - the mobile phone number, if it is attached to the Apple ID, it is noted initially, you can additionally mark email.
- Below, in the "Start Talking C" block, highlight a telephone number or email address checkbox, depending on which of these identifiers you want to display from recipients of messages.
- After performing the necessary settings, tap "Back" inscription located in the upper left corner of the screen.

Additional settings
On iMessage, there are a number of settings that should be paid.
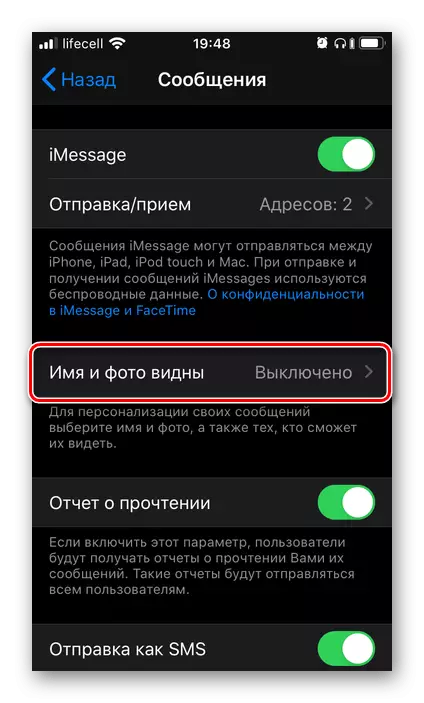
Name and photos are visible
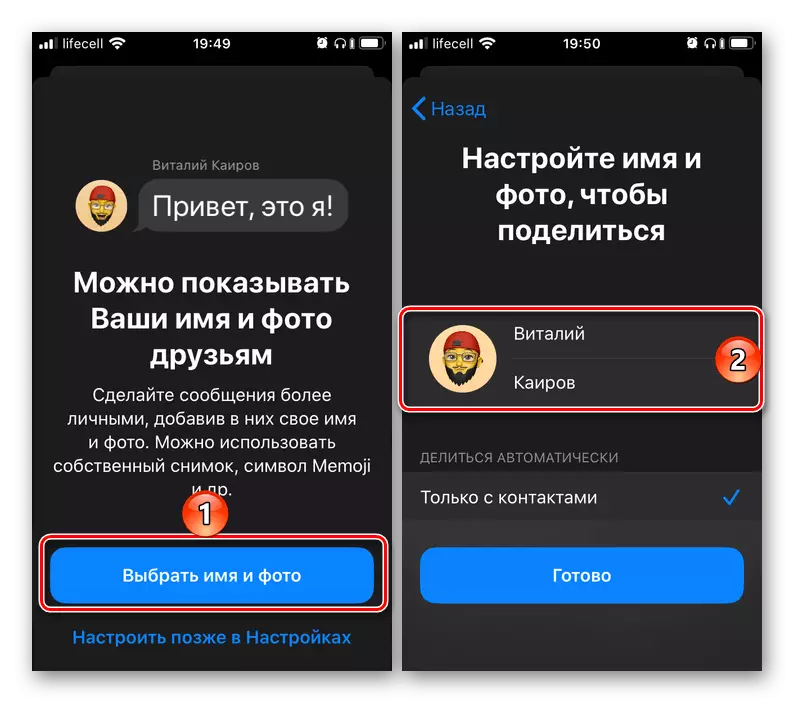
Go to the same section and tap "Select a photo and name" or "name and photo are visible" (depends on the original Apple ID settings) and do the following:
- Specify the name and photos that you want to demonstrate when communicating in the service.
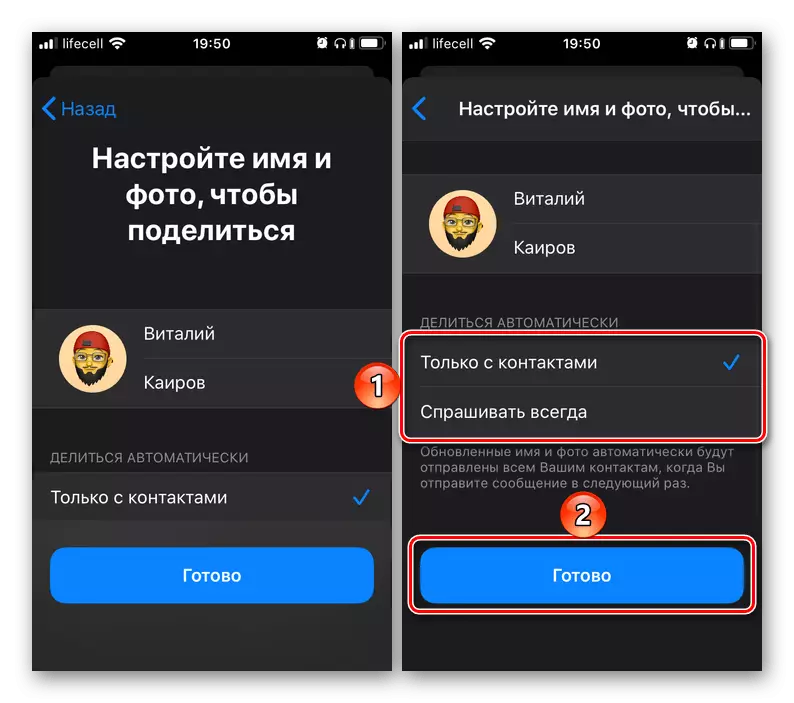
- Then determine with whom you will share these data - only with contacts or each time you choose yourself (on request). Tap "Ready" to confirm.
- After the first setting in this section, it will be possible to generally prohibit or allow the show of your photos and name.

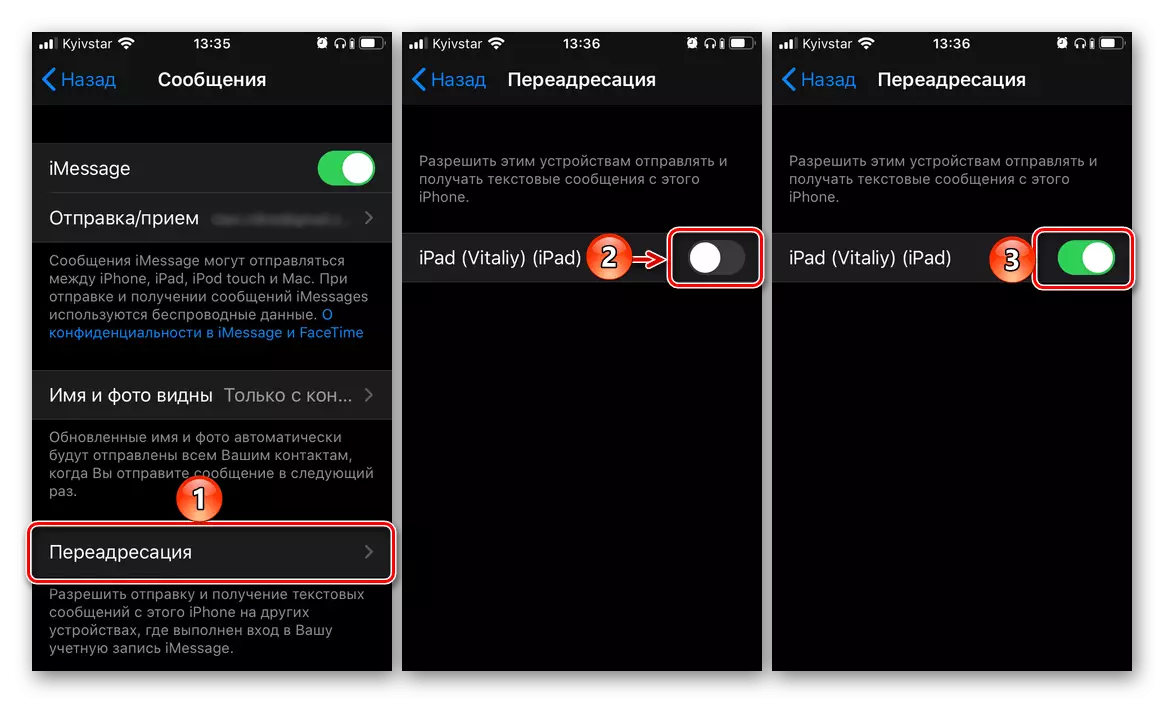
Forwarding
If you have other devices that support the iMessage feature (iPhone, iPad, Mac, MacBook, IMAC), you can activate the possibility of sending / receiving messages to them. The main thing is to log in in the same Apple ID account, after which the iPhone settings section will include redirection for any or all of them.
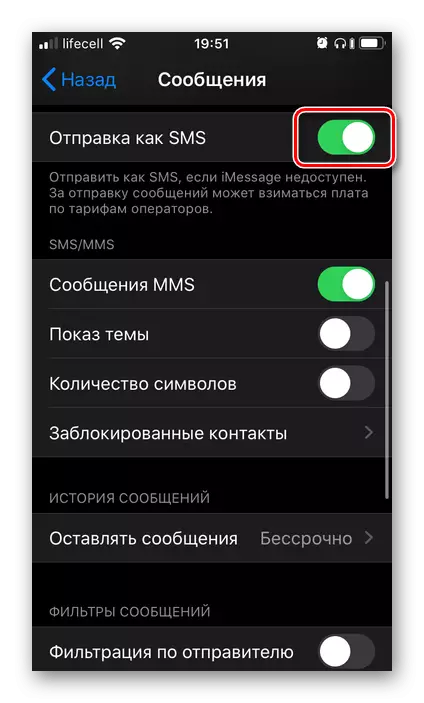
Sending like SMS.
Enabling this option allows you to send conventional SMS in cases where the iMessage cannot work - for example, Wi-Fi and Mobile Internet (3G / 4G) are not available.
Other settings
Most of the options remaining in this section are as simple as possible for understanding and do not need an explanation, especially since a detailed description is presented under the main one. Turning on / off occurs by moving to the corresponding position of the toggler. And yet several points should be deleted.
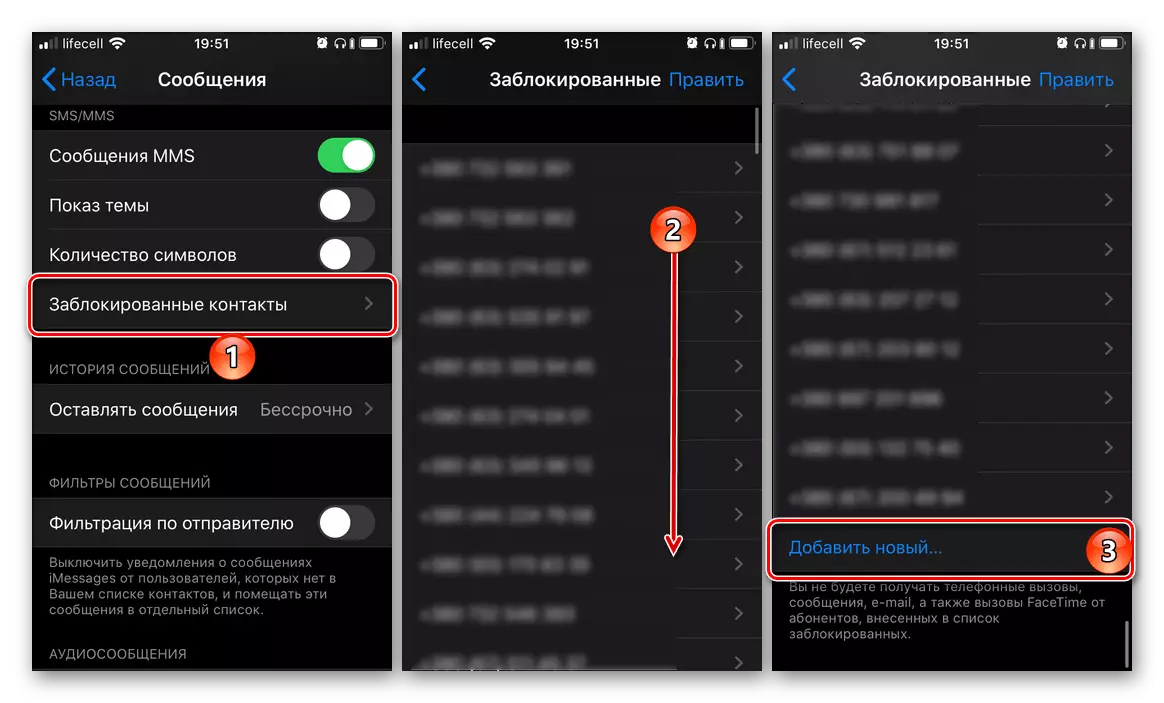
- "Blocked contacts" - allows you to create a "black list" with subscribers from which you will not receive voice and video calls, messages and e-mail. All that you need - "Add user room" to the specified list or block it from the address book (for example, after the admission of an undesirable call and / or text message).
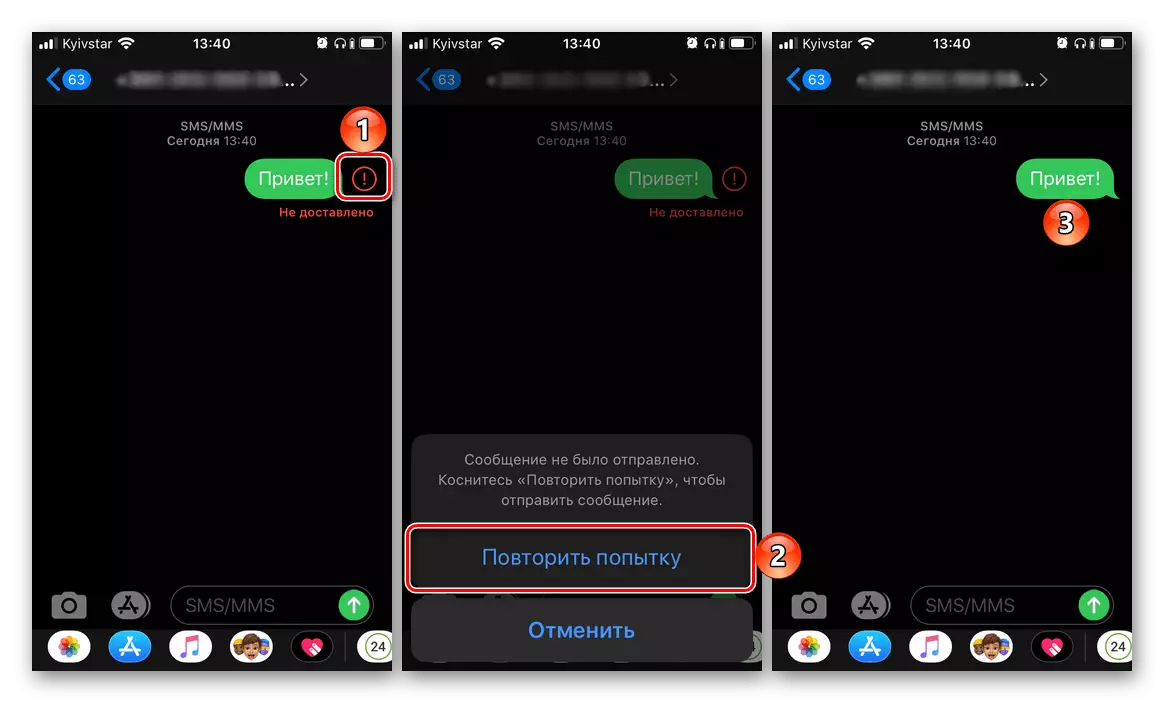
Instead of free posts, paid SMS / MMS
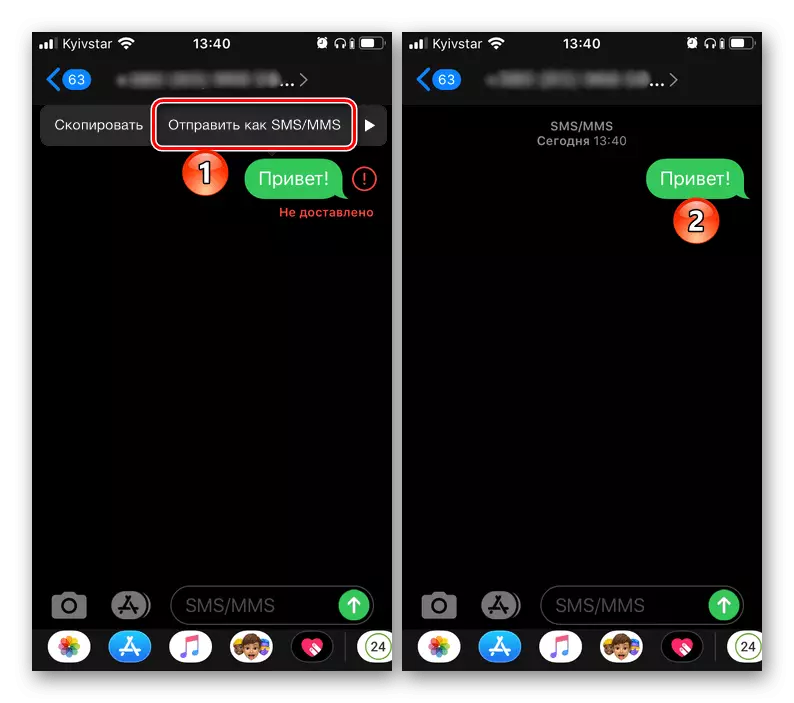
The designated "behavior" of the service is accompanied by the fact that in the input field instead of the emission lettering indicates "SMS / MMS", and the send button and the message window, if it has already been sent, has no blue, but green. The reason for this is that the subscriber with whom you are trying to contact is not enabled, the iMessage function is not included, or it is not the owner of the compatible Apple device. Consequently, or he needs to activate the work of the service, or it will not work out anything here. The same paid SMS is sent because the corresponding item was activated in the settings (see the article of the same name).A red exclamation mark is displayed near the messages.
In addition to the specified sign, such messages are accompanied by the inscription "not delivered".
- Check the Internet connection by using the instruction, the link to which was given above, in the first paragraph of the part "IMessage is not activated".
- Click on the icon with an exclamation mark, and then "repeat the attempt" of sending by selecting the appropriate item in the pop-up window.
- If the recommendations described above do not solve the problem, touch the message itself and select "Send as SMS / MMS" in the menu that appears. Note that in this case the shipment may be charged according to the tariffs of your operator.
Most of the problems with which you can encounter during the inclusion, settings and use of the iSmesty, easy to eliminate.
Include an iPhone to an iPhone, but in order to start using this feature, it must be correctly configured.