

Method 1: Panzoid
Panzoid is the only fully free online service that we consider under this article. In functionality, it is a little inferior to competitors, but the developers do not put restrictions on the quality of the render and do not impose watermarks on the ready-made video with the added picture.
Go to the online service Panzoid
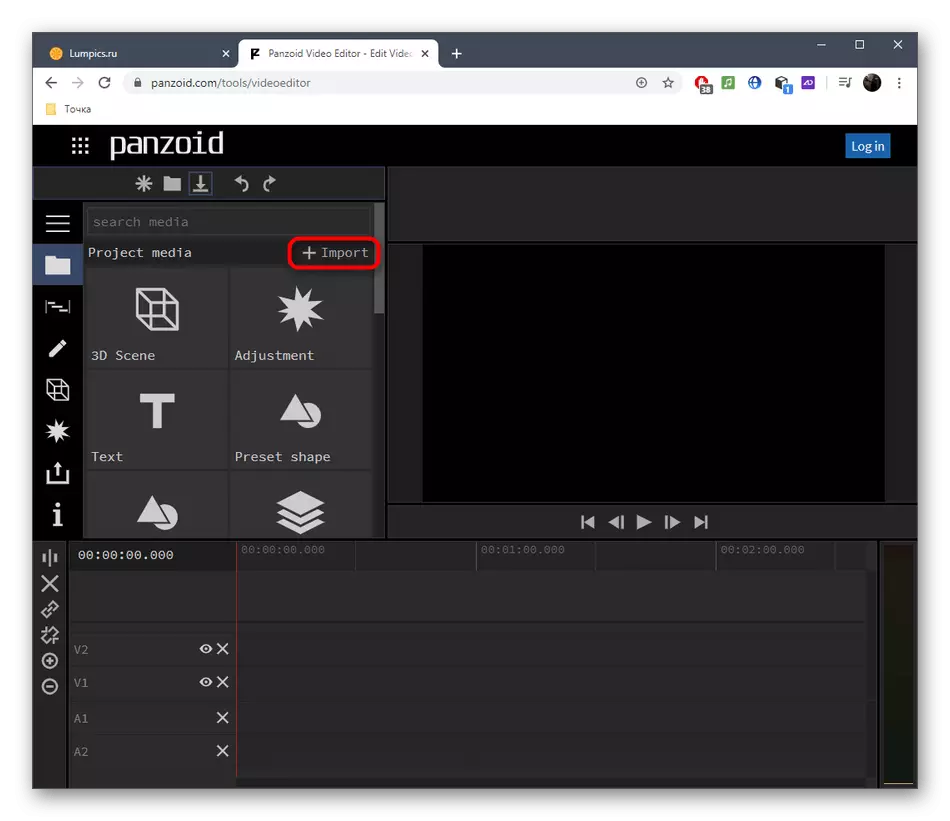
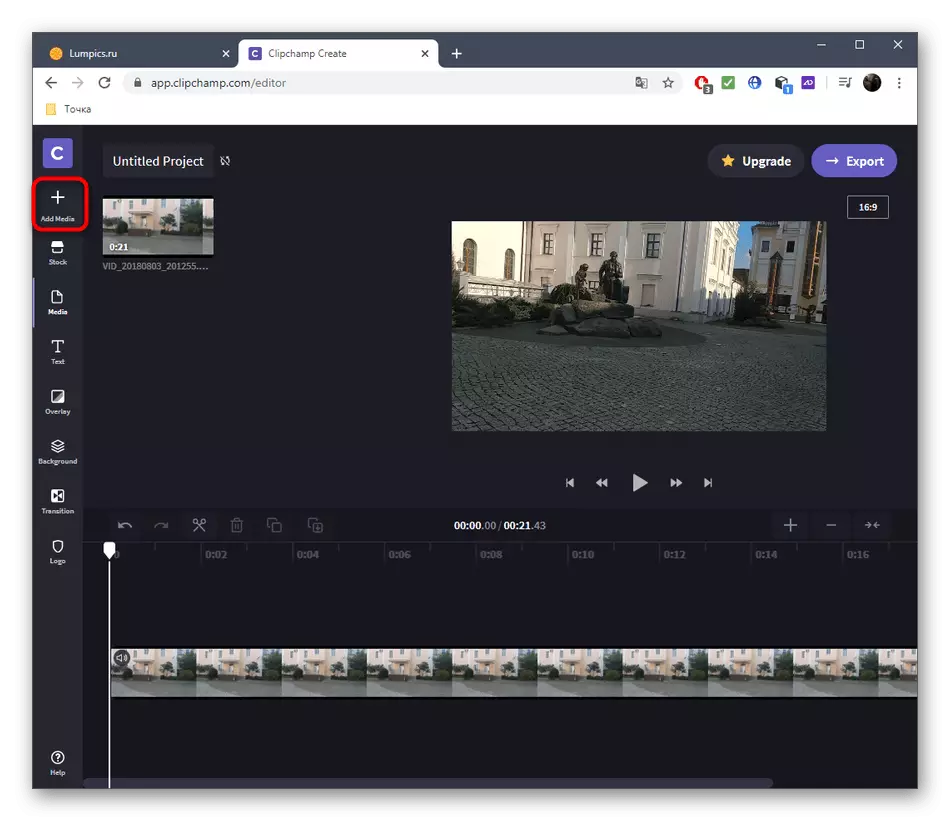
- After starting the Panzoid video editor in the left block, click the "Import" button to go to the addition of content.
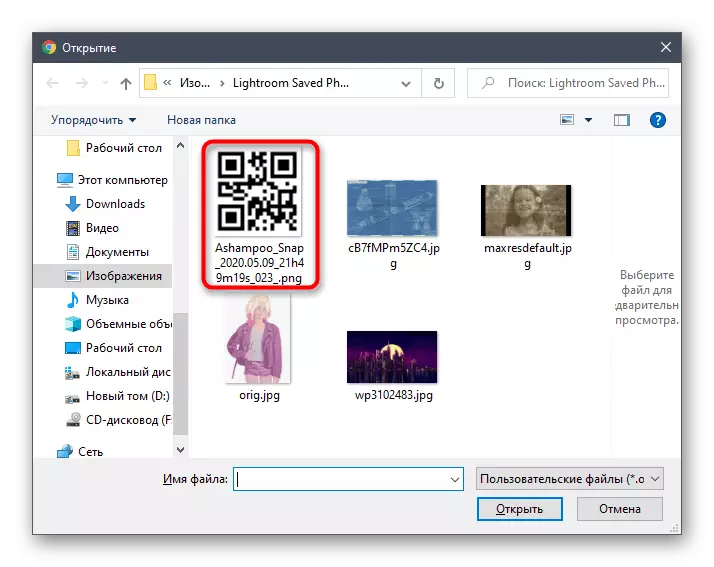
- When the "Explorer" is displayed, you will have to select a video and a picture.
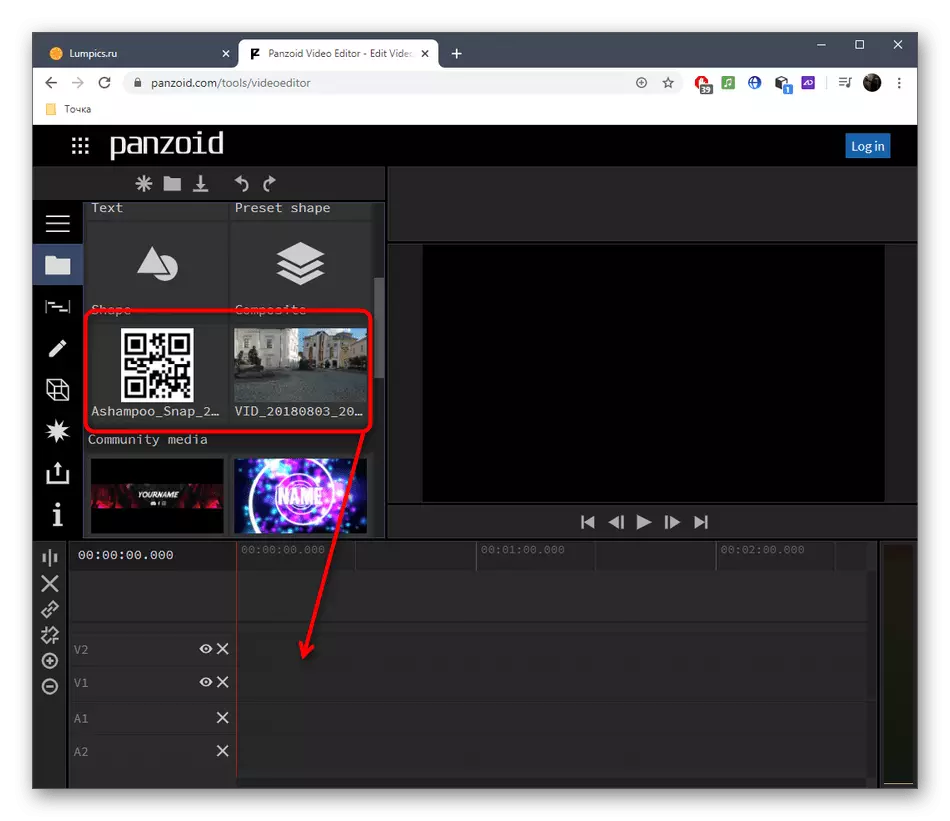
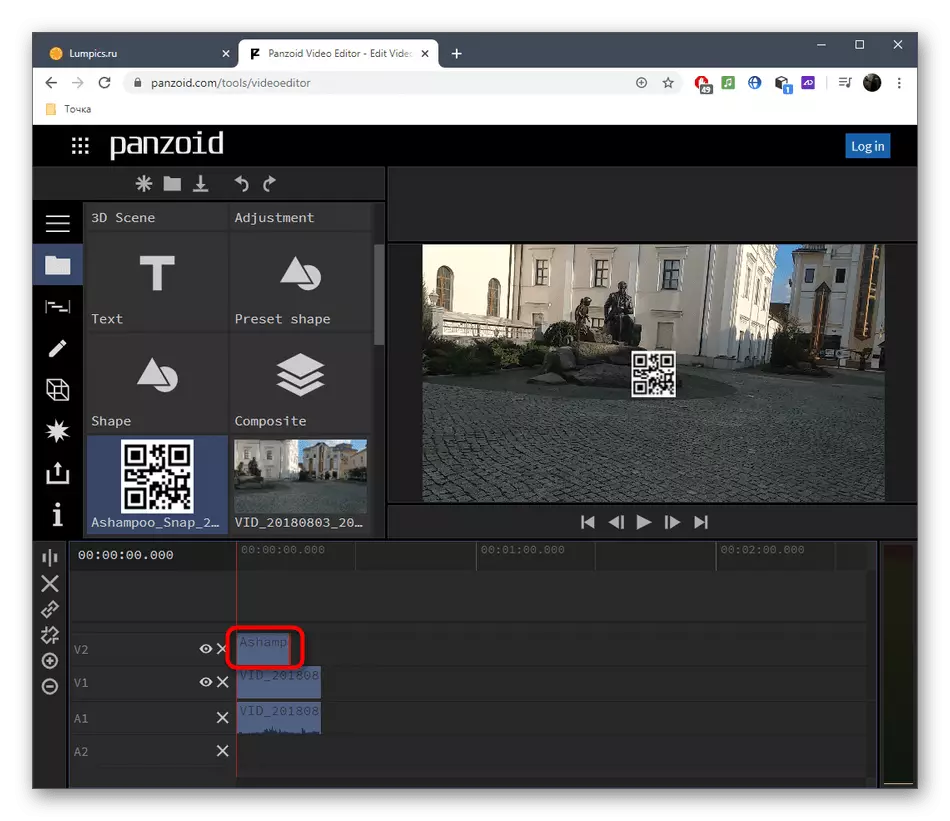
- After dragging them in turns on the timeline, clinging the unit with the left mouse button.
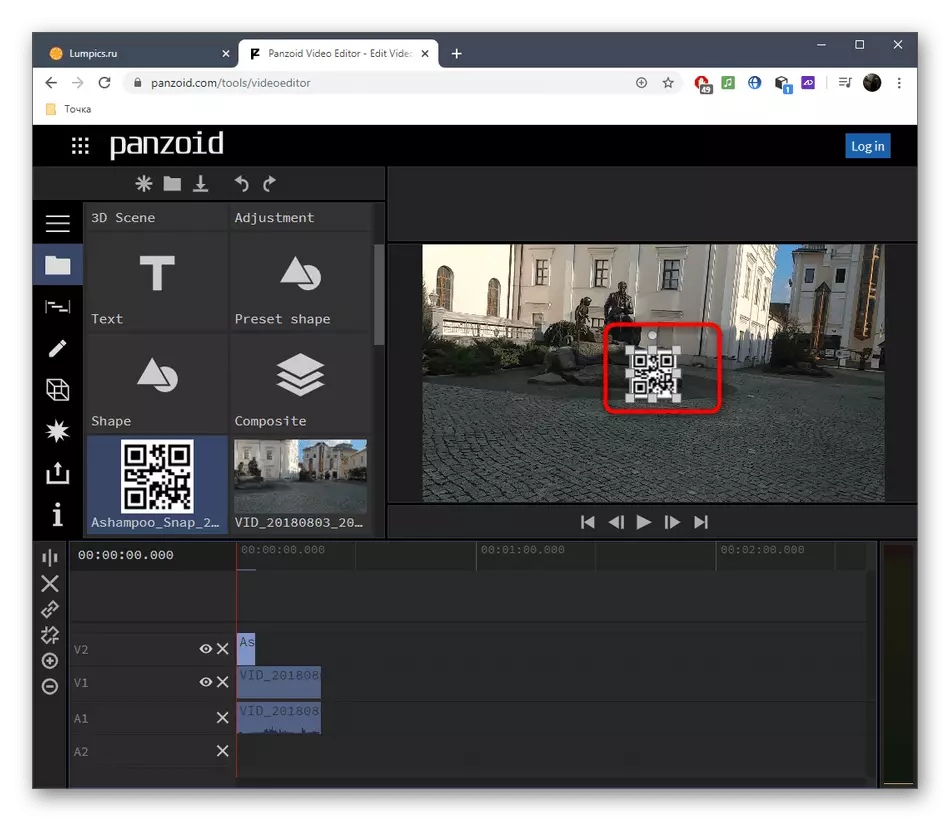
- The image should immediately appear on top of the video, and with simple tools, you can move it, rotate and transform, using the preview window for this.
- Stretch the duration of the pictures on the timeline so that it is only a certain period or over the playback of the entire video.
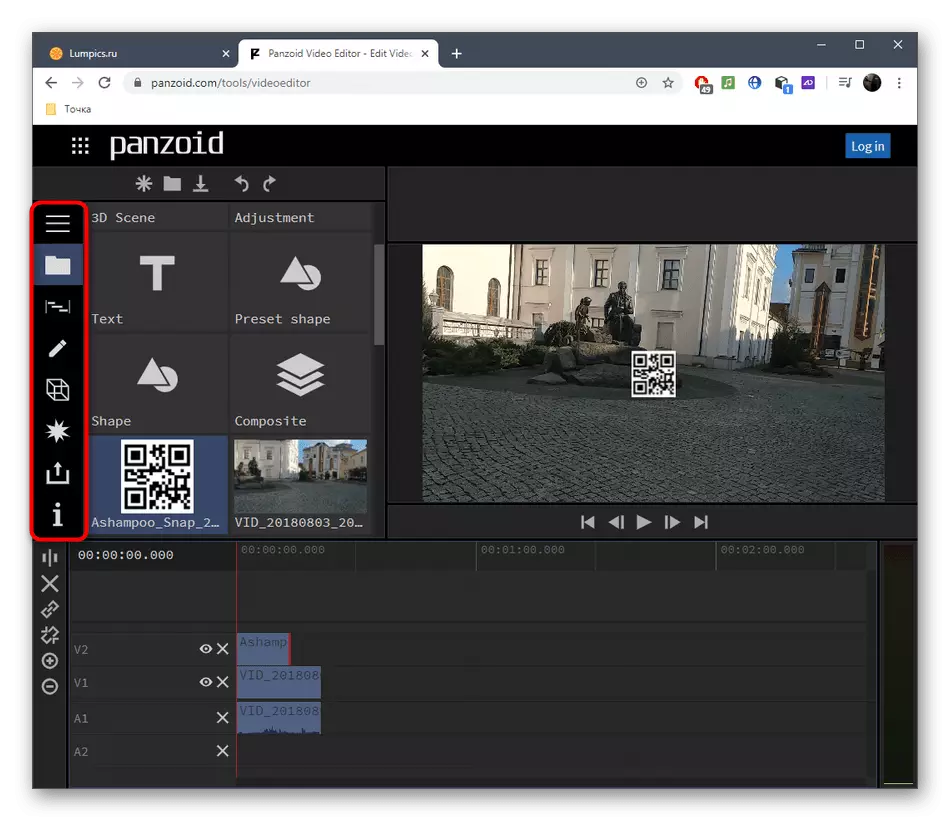
- Use other functions present in Panzoid to perform additional video editing if there is a desire.
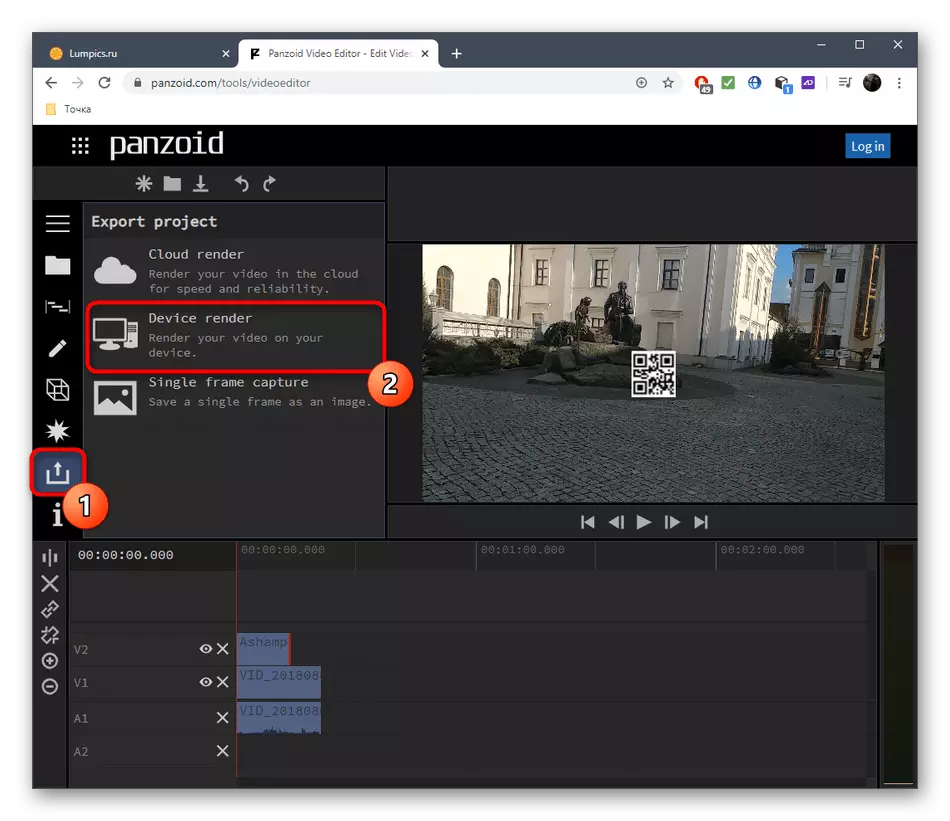
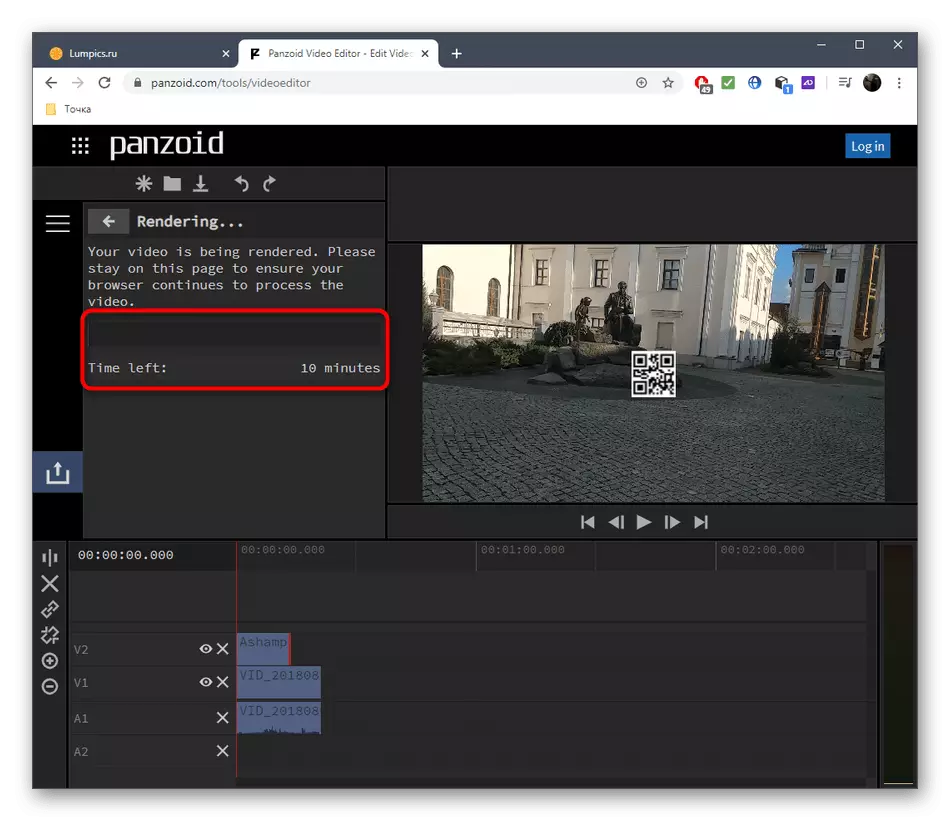
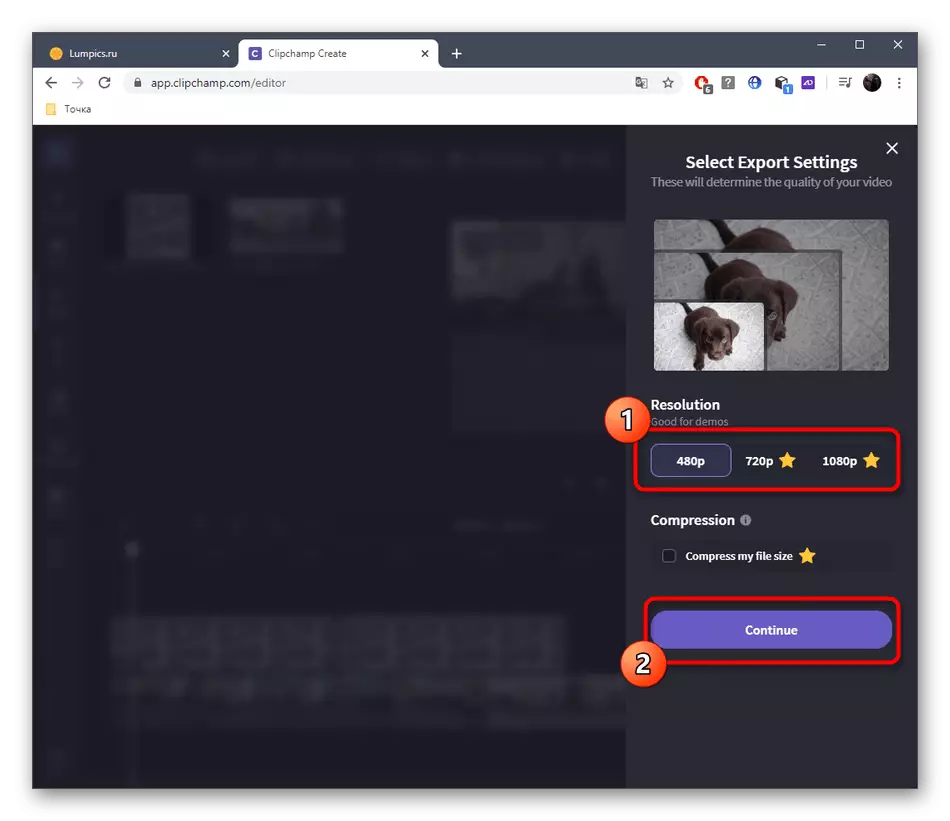
- After switching to the "Export Project" section and click on Device Render.
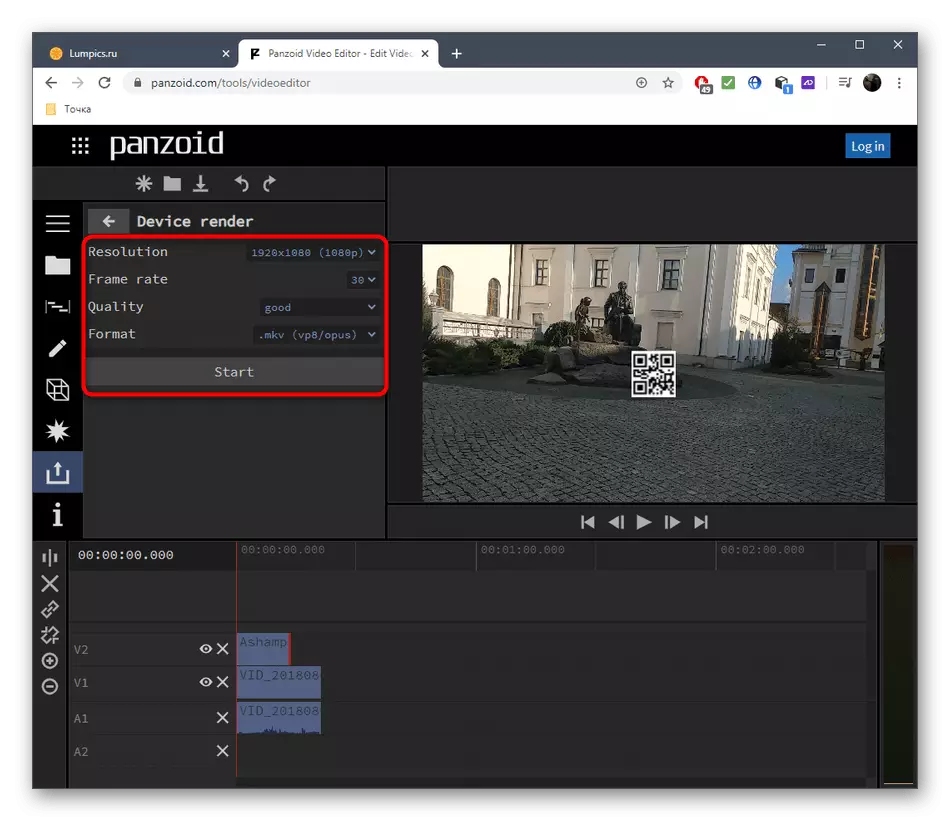
- Specify the processing parameters, including the number of frames per second, resolution and end format, and then click "Start".
- Expect the end of video processing, which will take from a few minutes to an hour, because the duration of the roller is different as the specified rendering parameters.
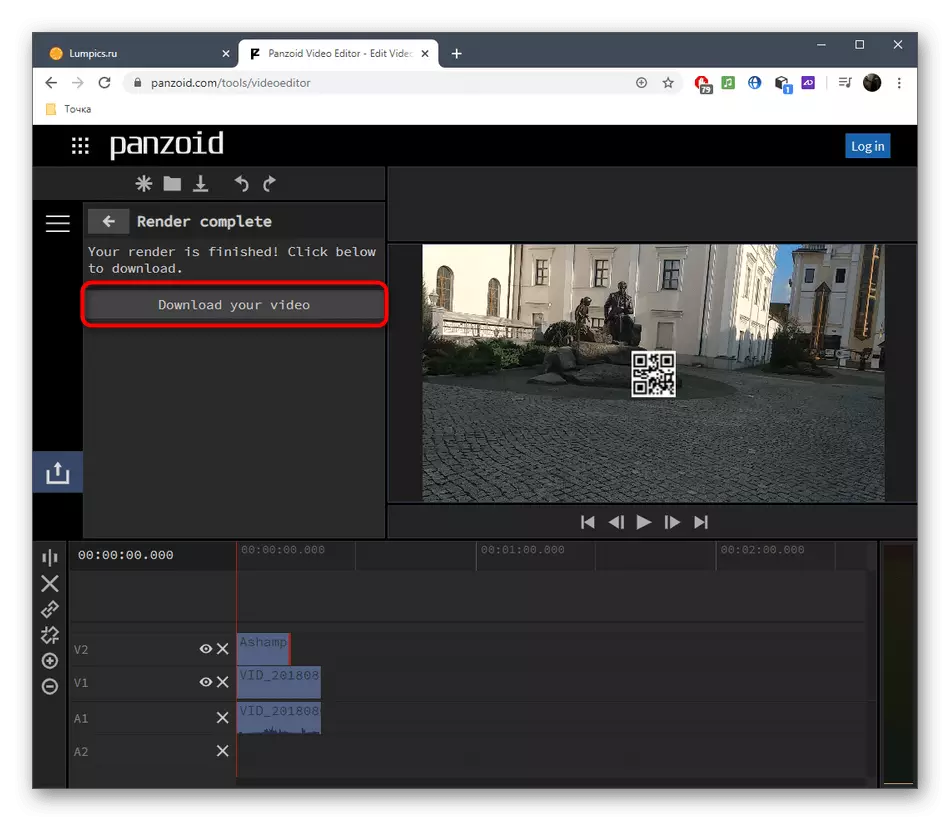
- When you finish, click "Download Your Video" to download the project to the computer.
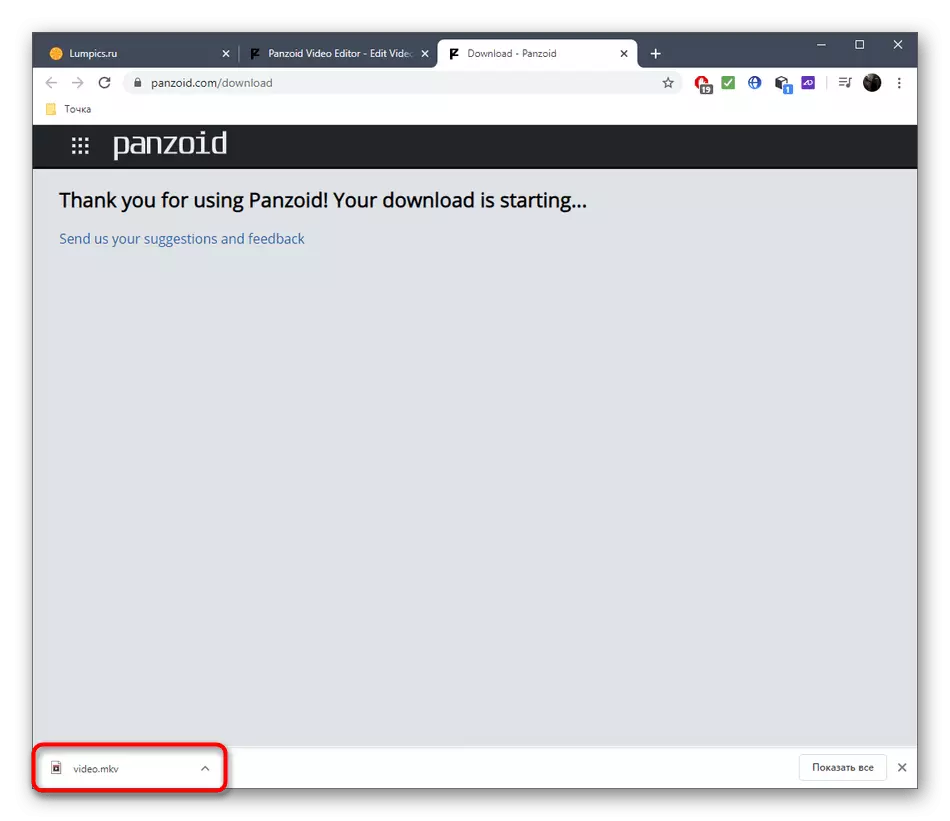
- Wait for the end of downloading and go to further interaction with the video.
Method 2: CLIPCHAMP CREATE
CLIPCHAMP CREATE - advanced video editor working online. It has all the necessary options in order to quickly and correctly impose a picture on video, but without restrictions it does not do. In the free version of the site, you can download the finished project only in 480p and with an extensive watermark.
Go to CLIPCHAMP CREATE online service
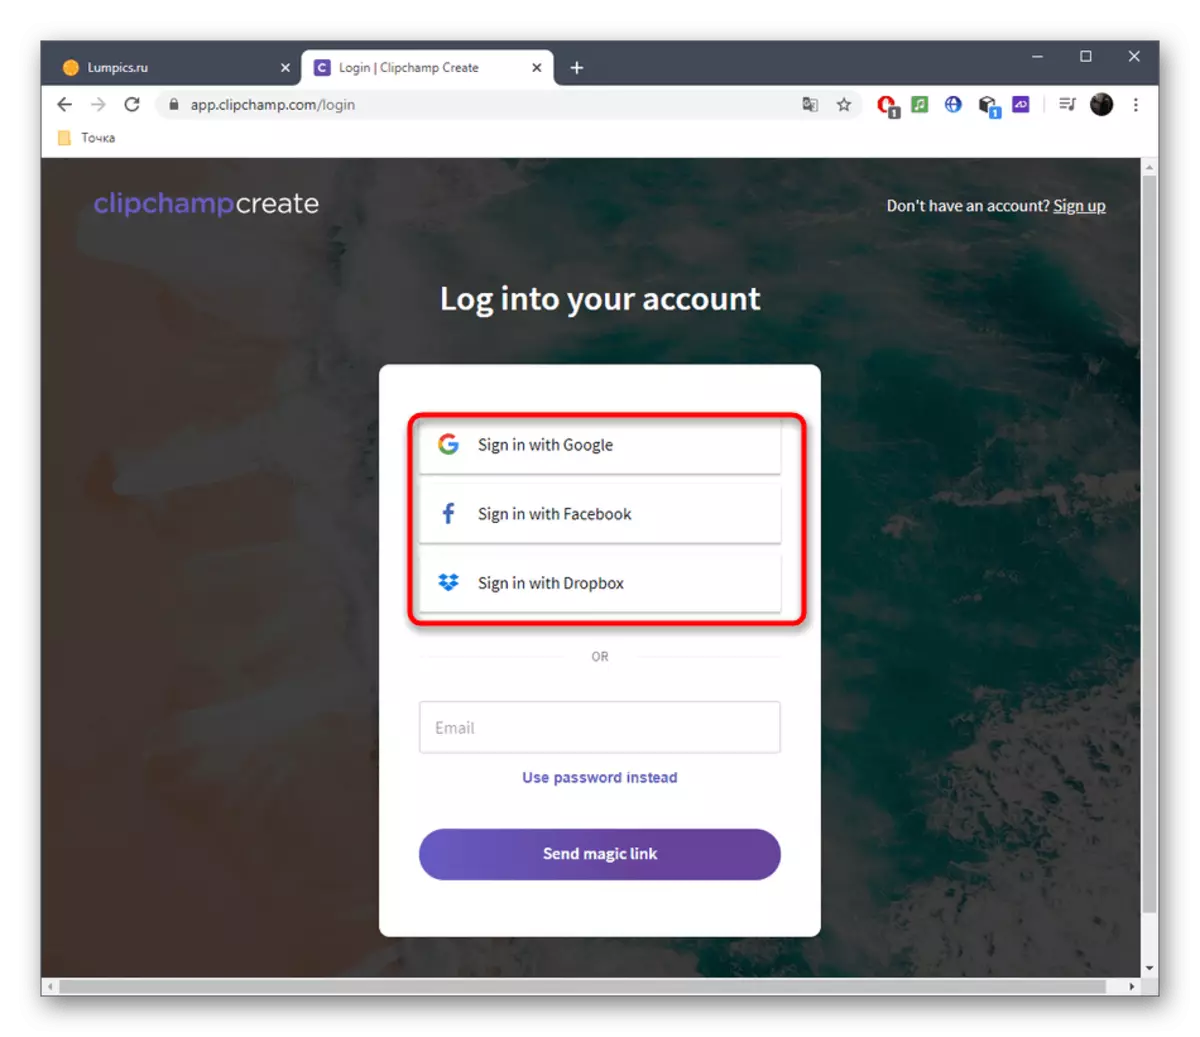
- When you first go to CLIPCHAMP CREATE, you will need to log in with social networks or enter email to register a new profile.
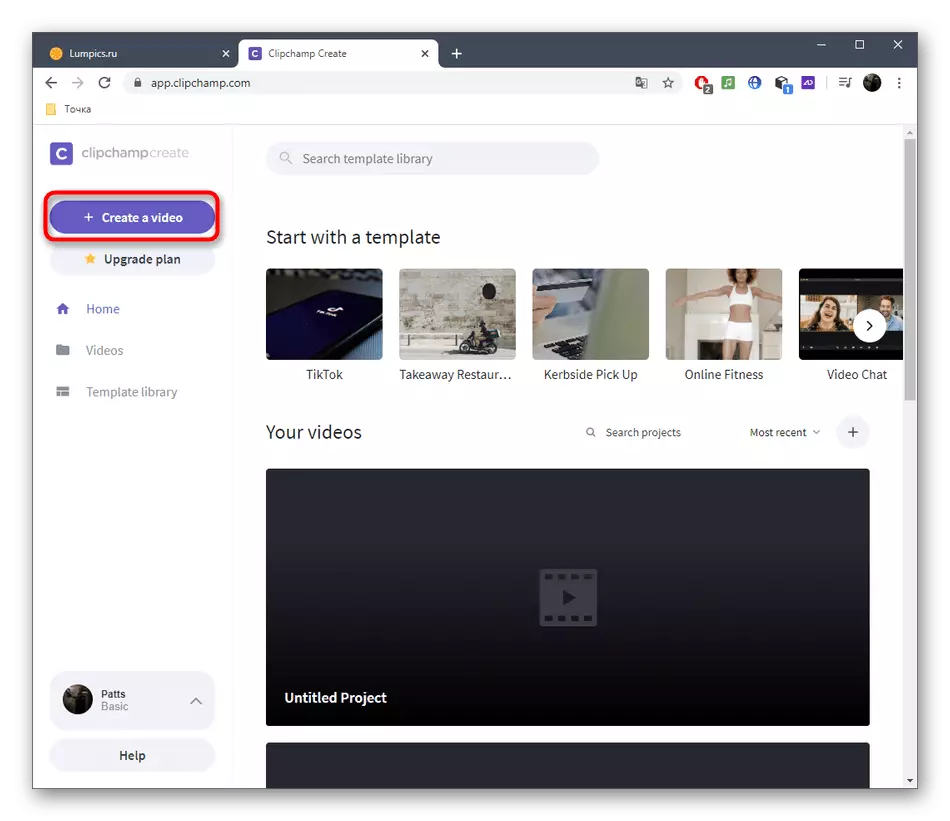
- After successfully logging in on the left pane, click "Create A Video".
- When creating a project, select the aspect ratio that will be optimal in a particular case.
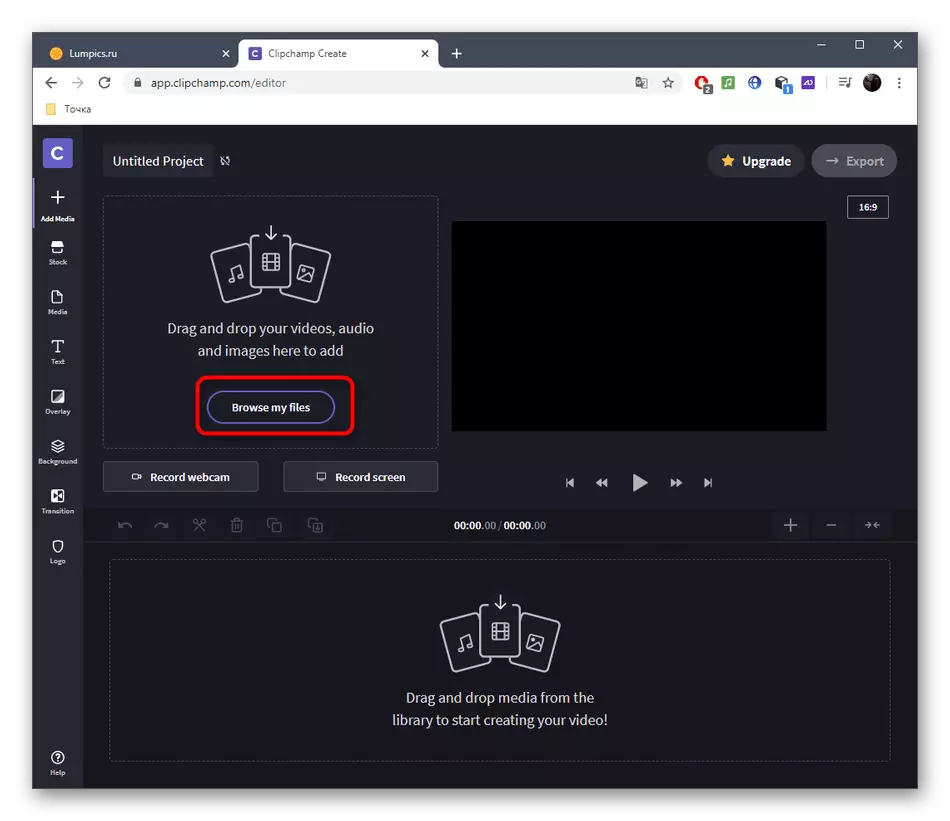
- After opening the editor in the left block on top, click "Browse My Files".
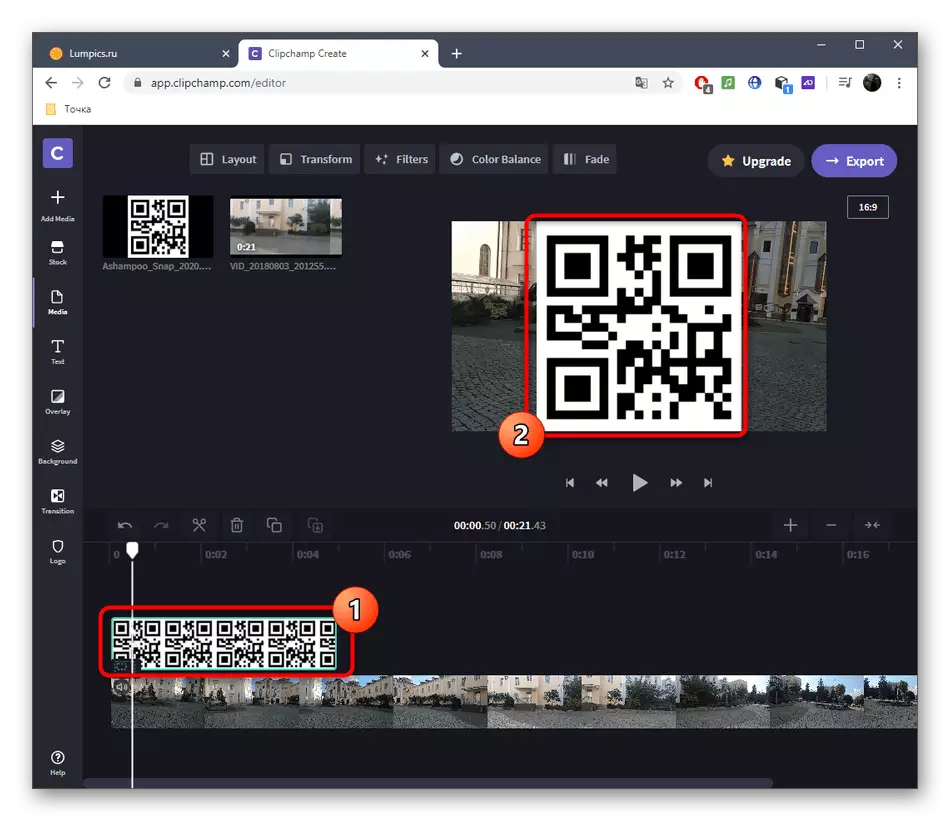
- Add a video or picture first.
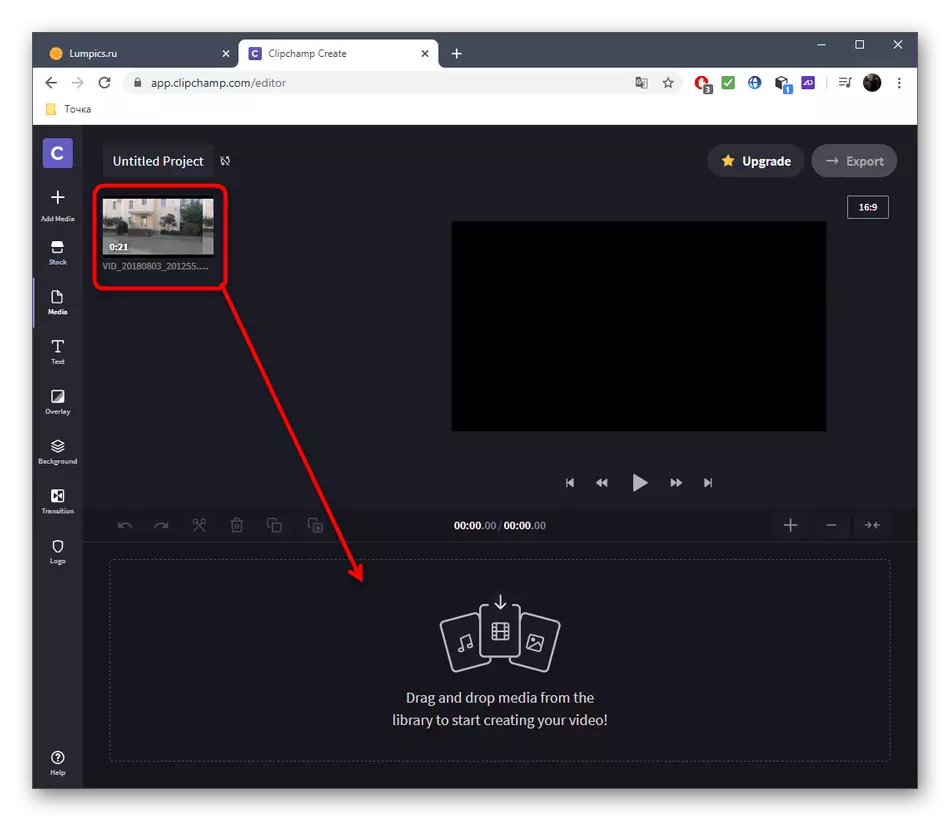
- Drag the material on the timeline.
- Return to "Add Media" again through the left panel.
- Click "Browse My Files" to add a second material.
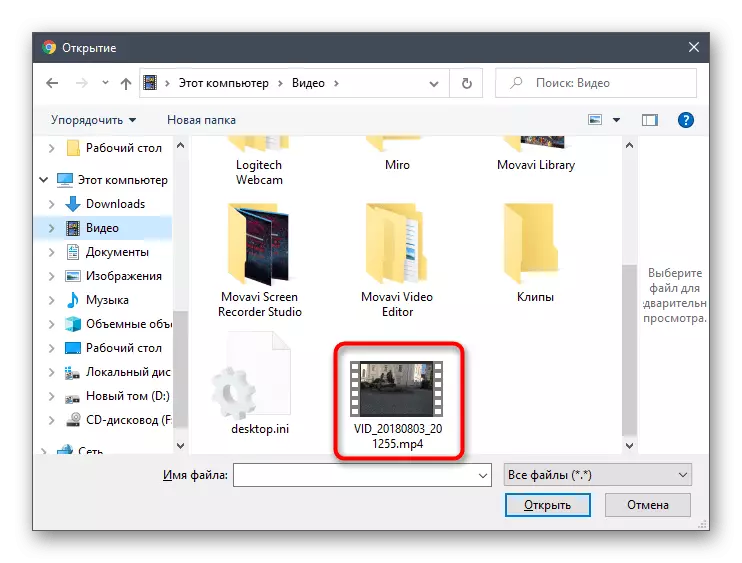
- Now in the "Explorer", find the missing component of the project.
- Drag the picture on the top layer, and the video for it.
- Still the duration of the image playback to the desired length, and then make sure that it is displayed on top of the video. Now the picture can occupy almost the entire preview window, but then we will configure the size and position.
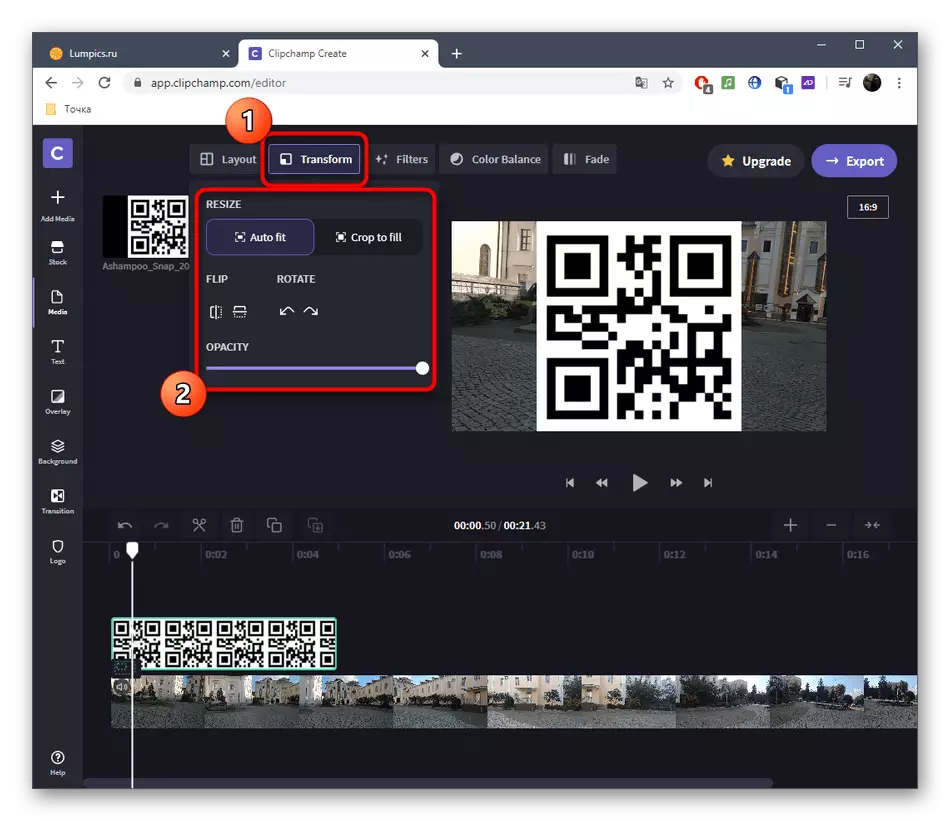
- To do this, after selecting the picture, open the tab "Transform" tab. Here you can reflect the snapshot, turn it and set up transparency.
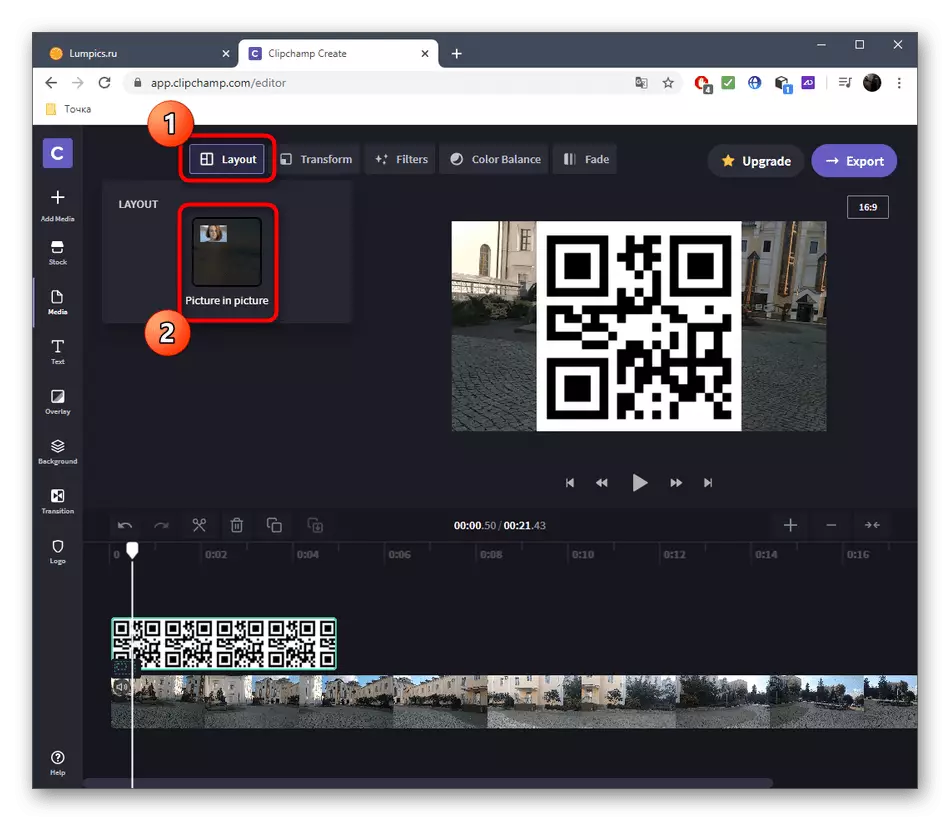
- In "Layout" specify the "Picture In Picture" mode.
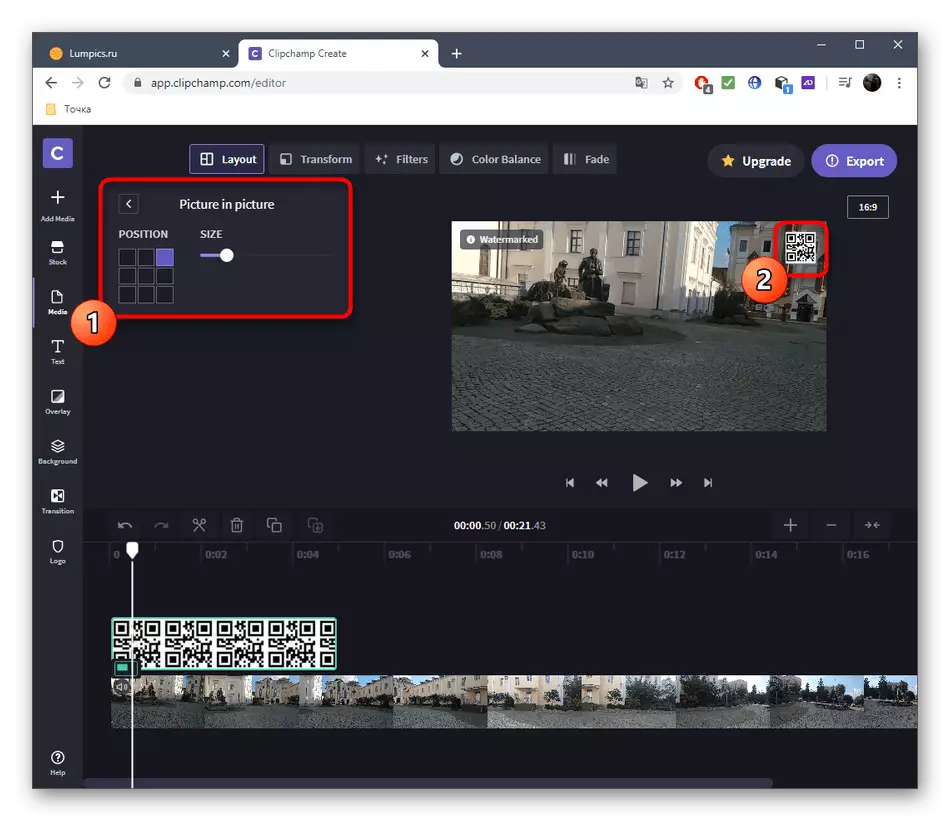
- Specify the position and size of the image, tracking its location through the preview window.
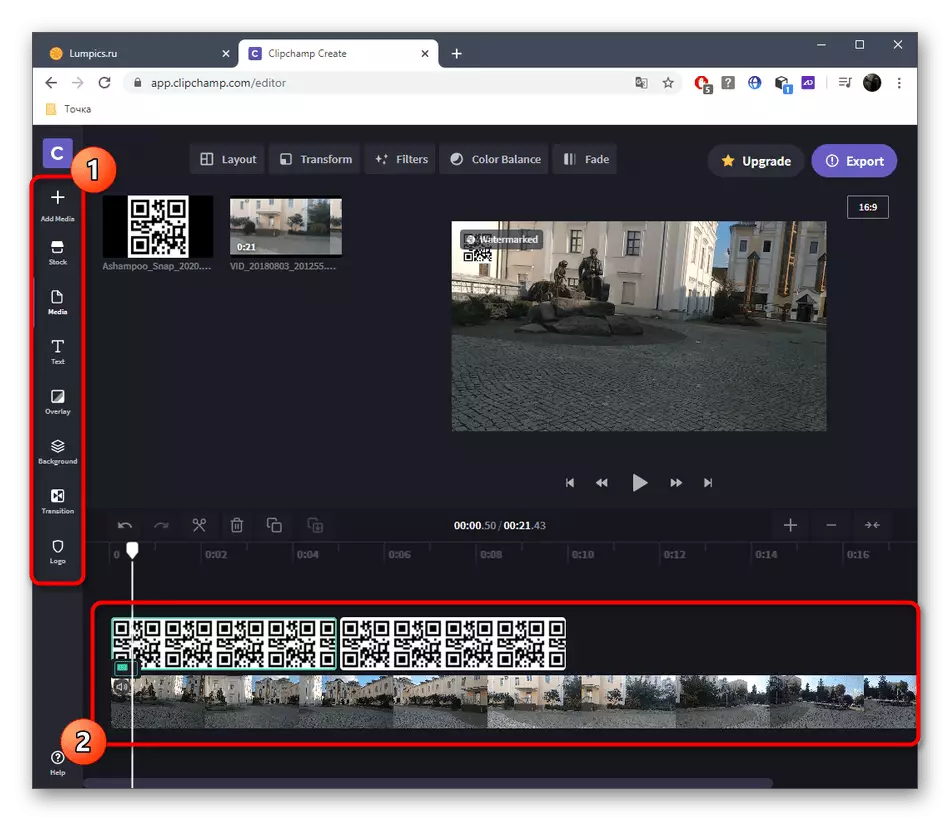
- Use other tools to control the timeline and mount the video if there is a need. For example, you can add other photos, glue a video, configure the transition and arrange the inscriptions.
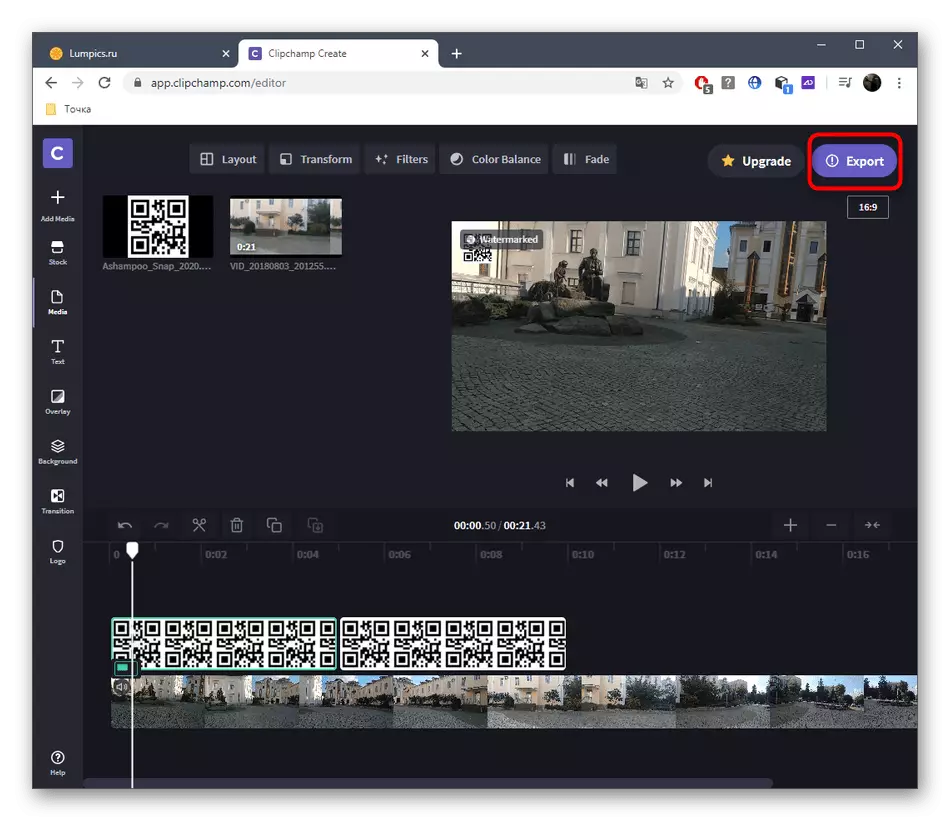
- Quickly, press "Export" to go to save.
- You can save video only in 480p, and if you wish to get a higher resolution, one of the proposed tariff plans should be purchased.
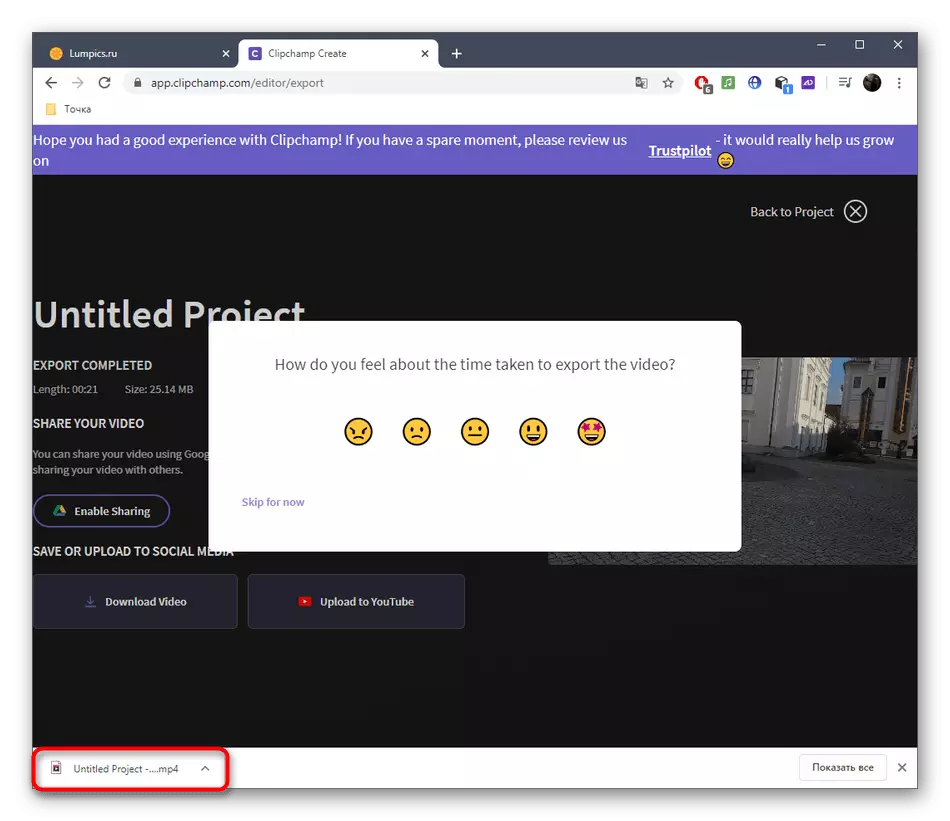
- After go down the down panel and click "Download Watermarked 480p Demo".
- Wait for the end of rendering.
- After that, the video will be downloaded automatically.


3: INVIDEO method
The INVIDEO online service works in about the same principle as the previous one, and similar limitations of the free version also apply for it. Because of this, the user will face the task of choice when exporting a finished project.
Go to the online service invideo
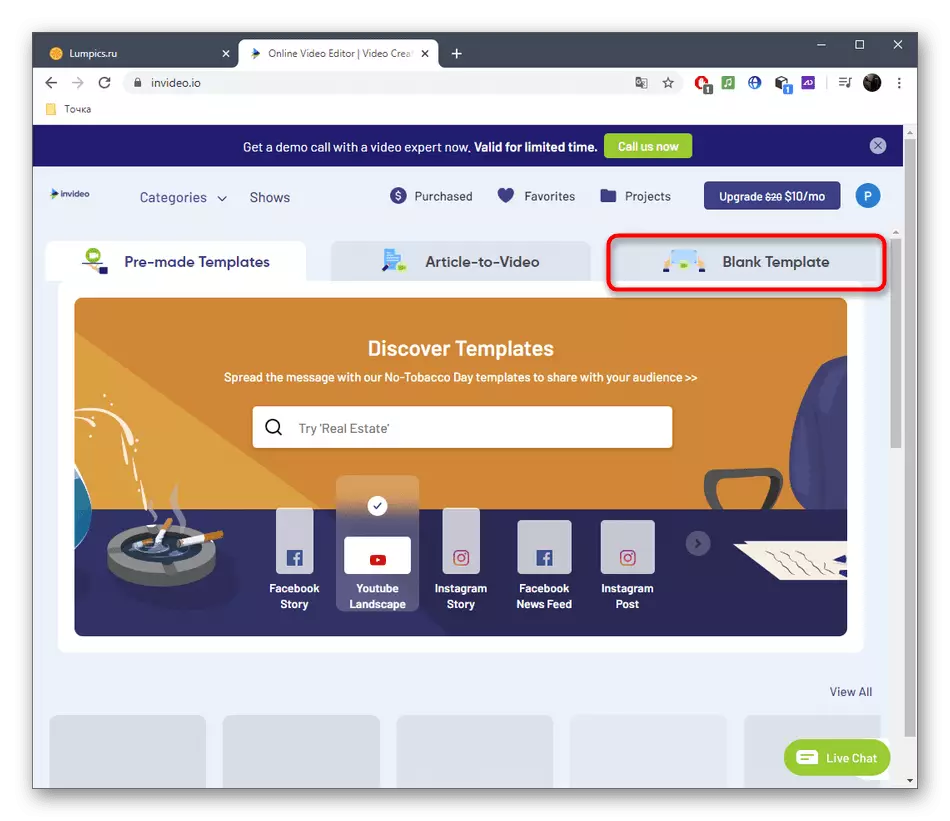
- Open the INVIDEO main page and go to the Blank Template tab.
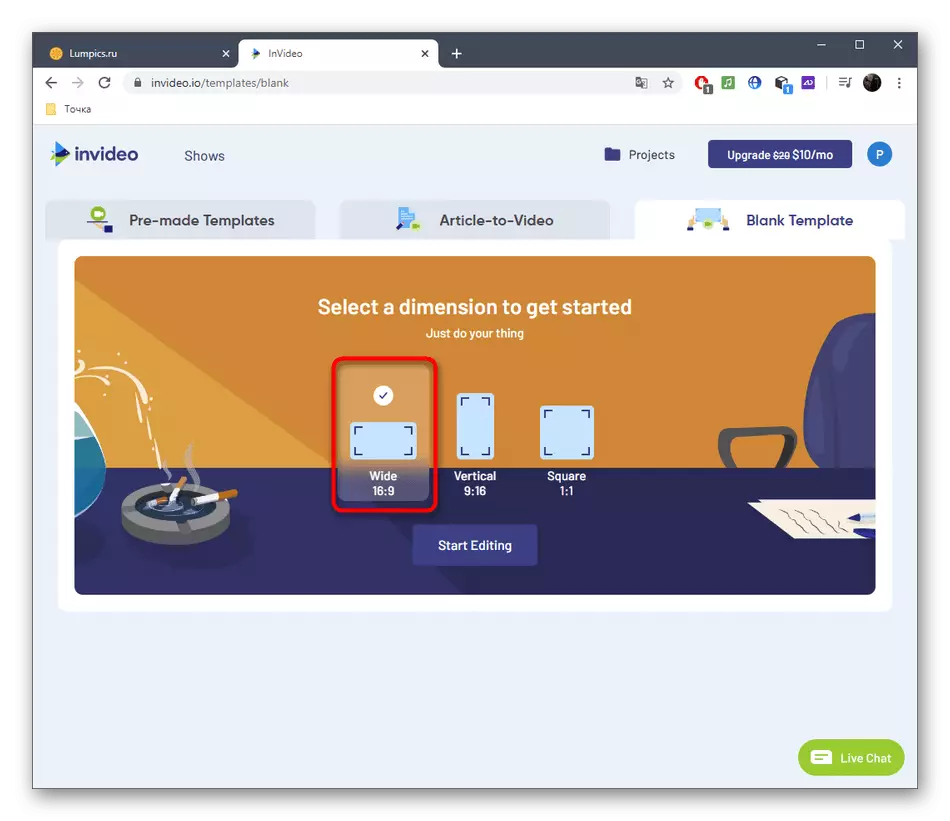
- Choose a suitable project orientation and go to the beginning of interaction with it.
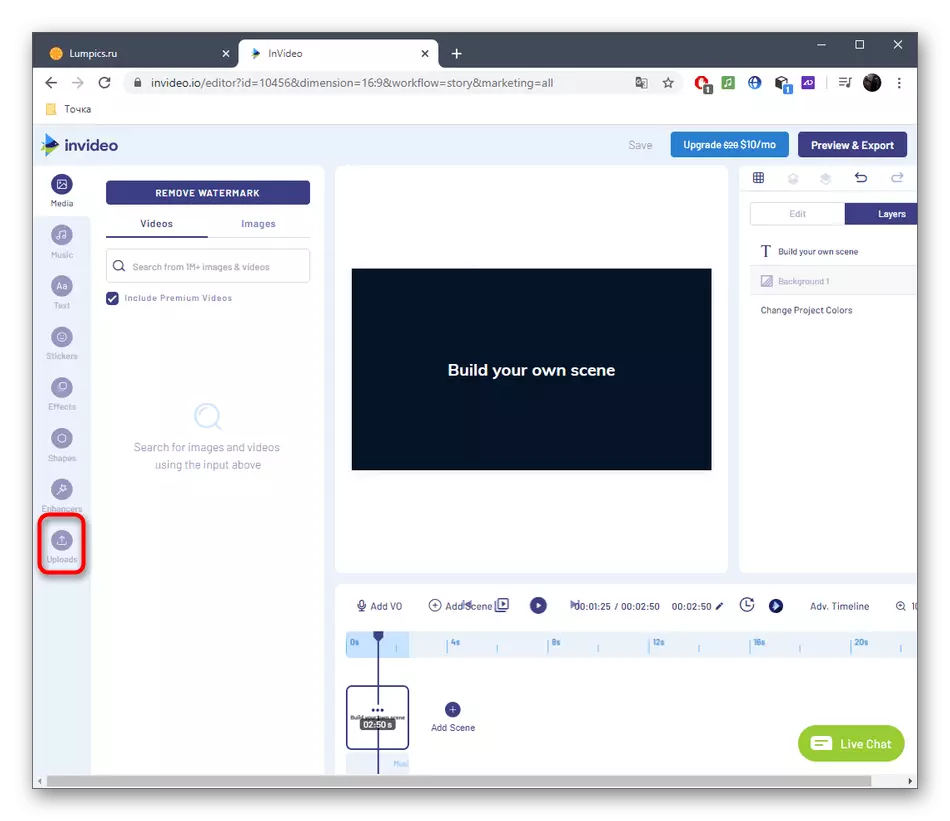
- Through the left panel, move to the "Uploads" section.
- There click the "Upload - Files Up to 200 MB" button. The ability to upload a file weighing up to 200 megabytes - another disadvantage of the free version of Invideo.
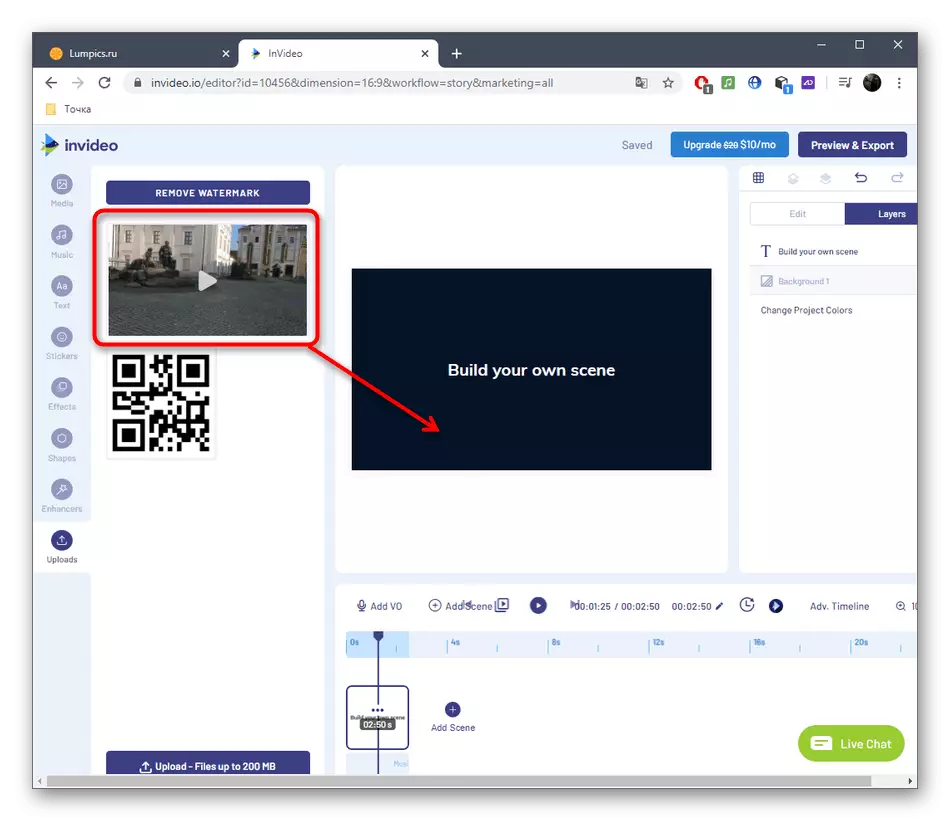
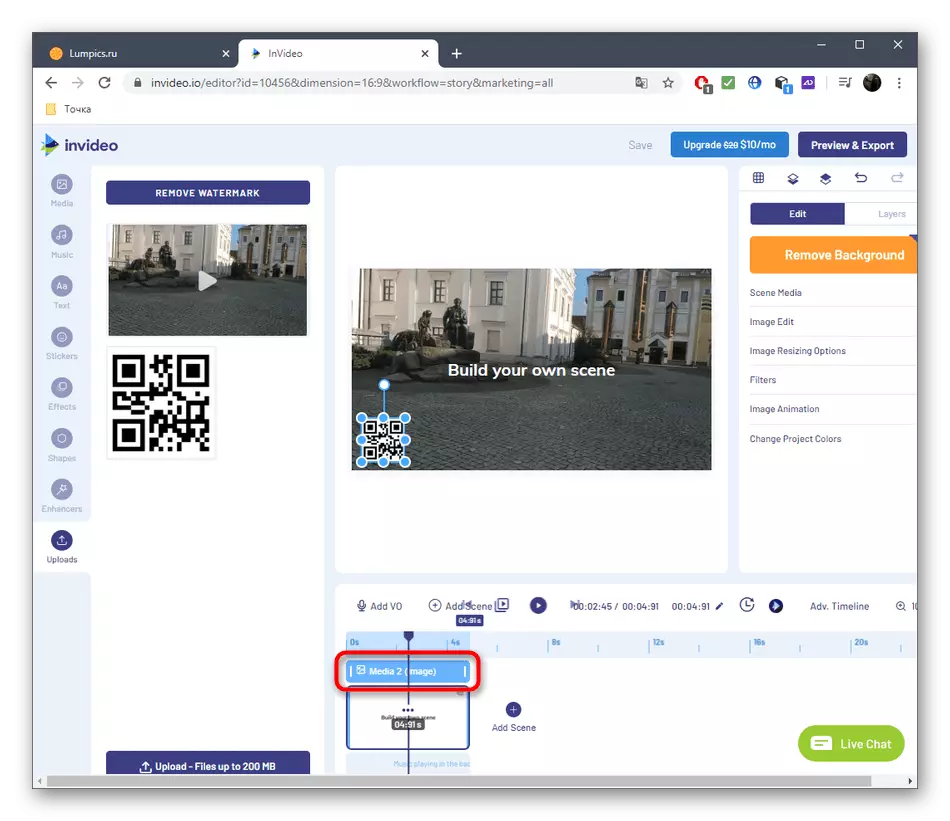
- In the "Explorer", in the same way, select a video and a picture, and first drag the roller itself into the preview window.
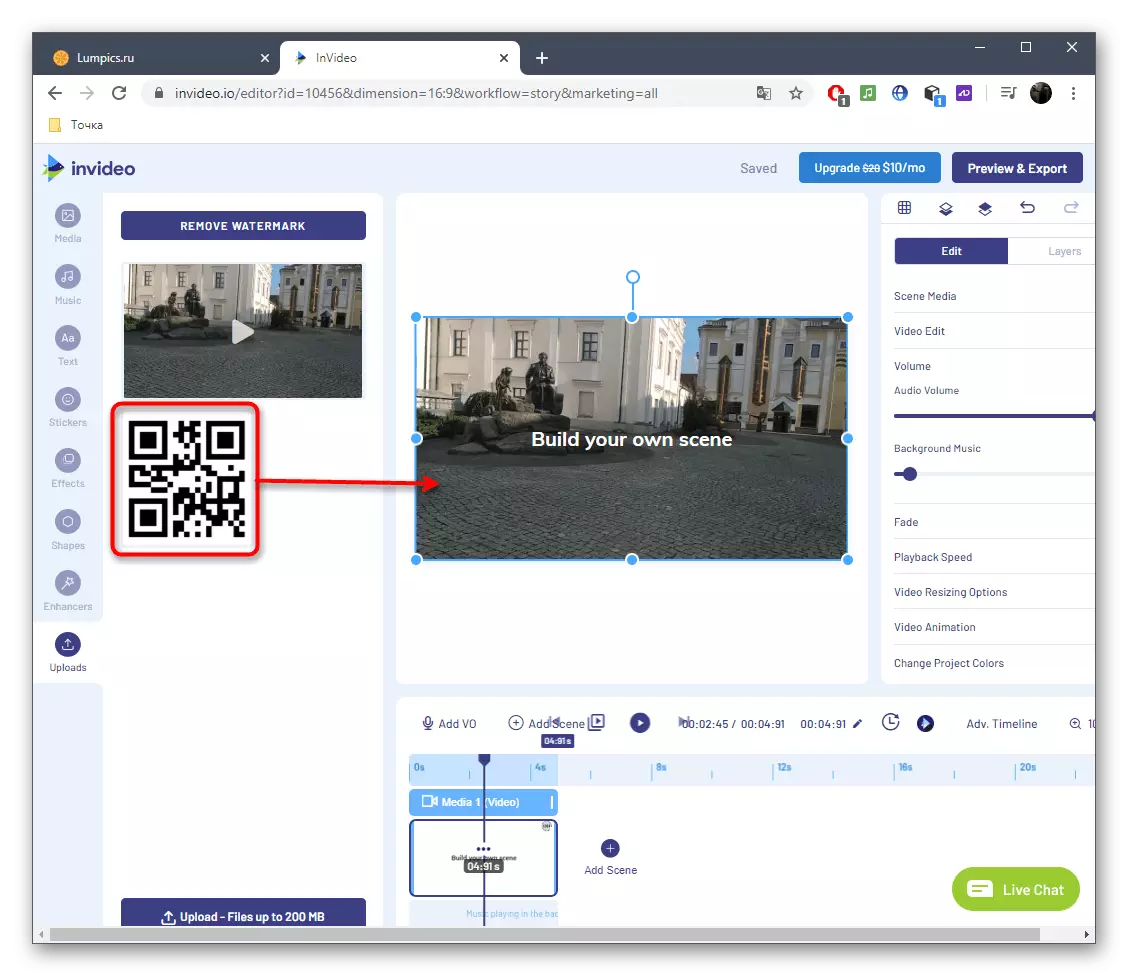
- After that, impose an image on it.
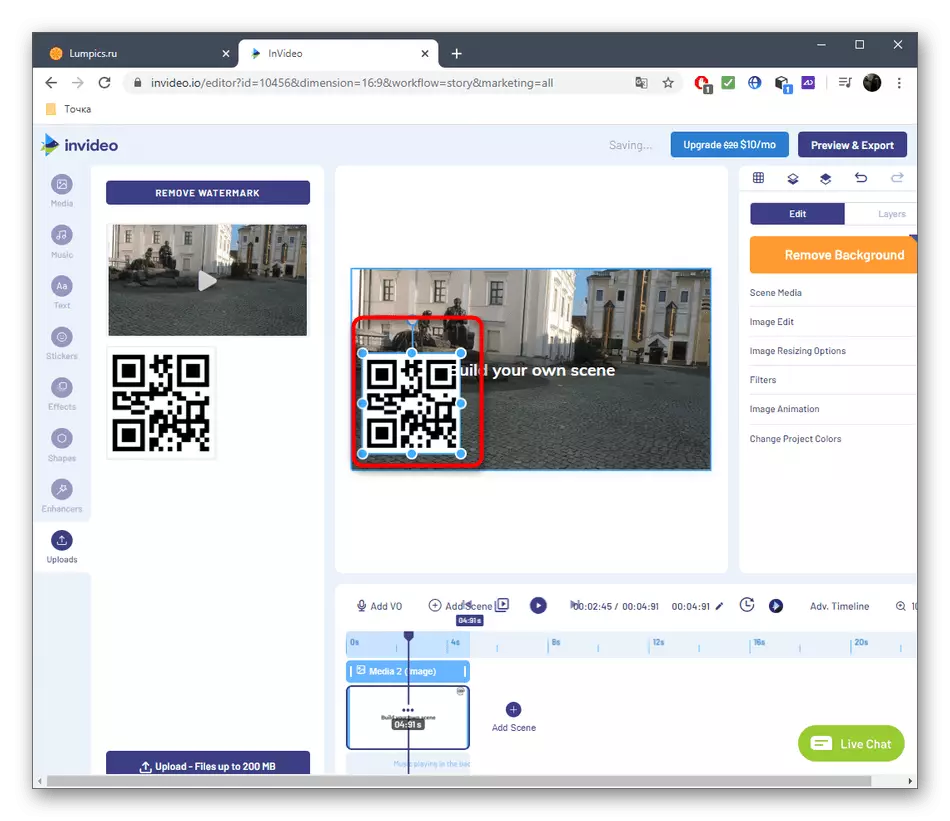
- Using the editing tool that appears, adjust the location and size of the picture.
- On the timeline you can edit the length of the scene to set the period during which the image will be shown.
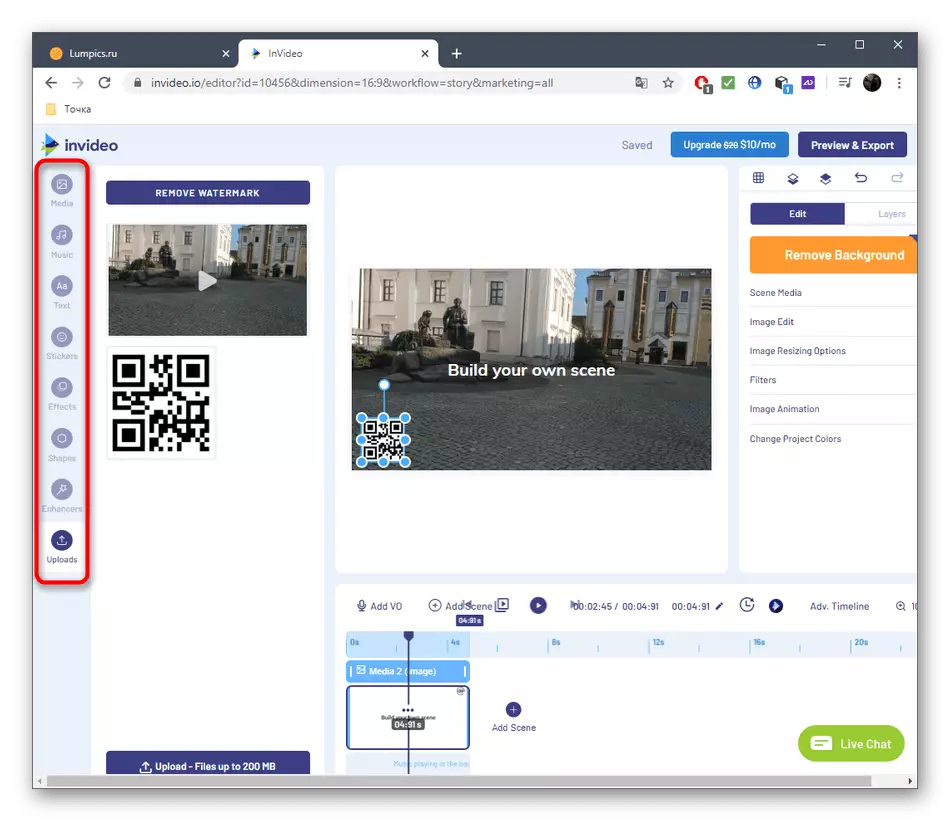
- Use additional editing tools to complete the video.
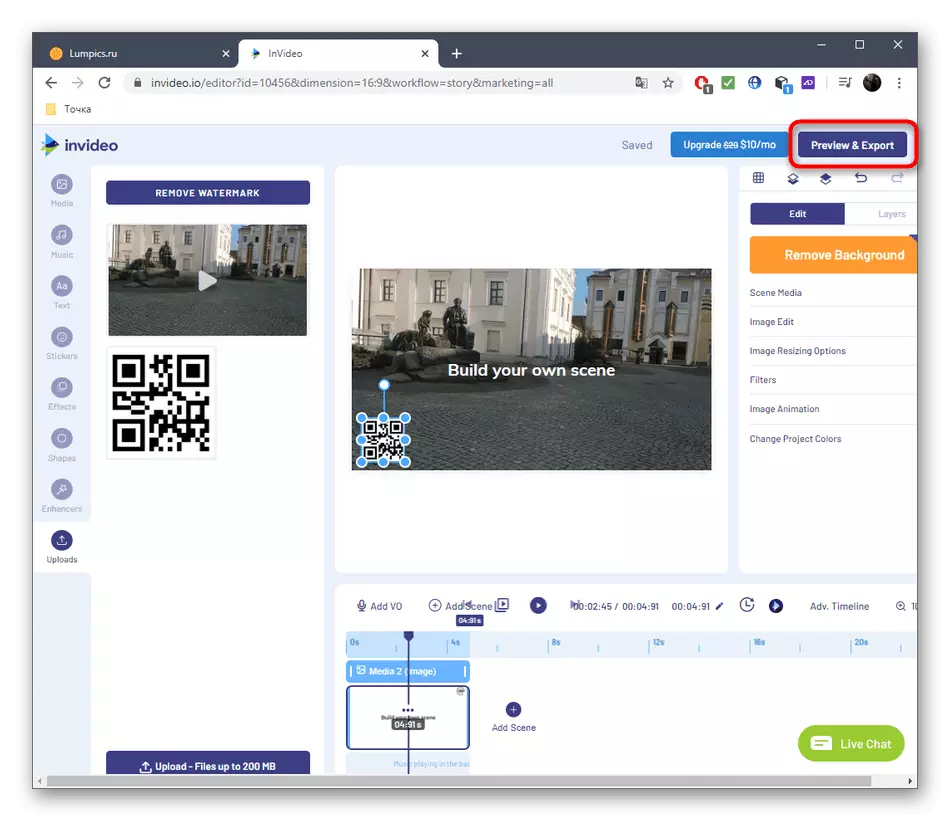
- Use the "Preview & Export" button to save the finished project on your computer.
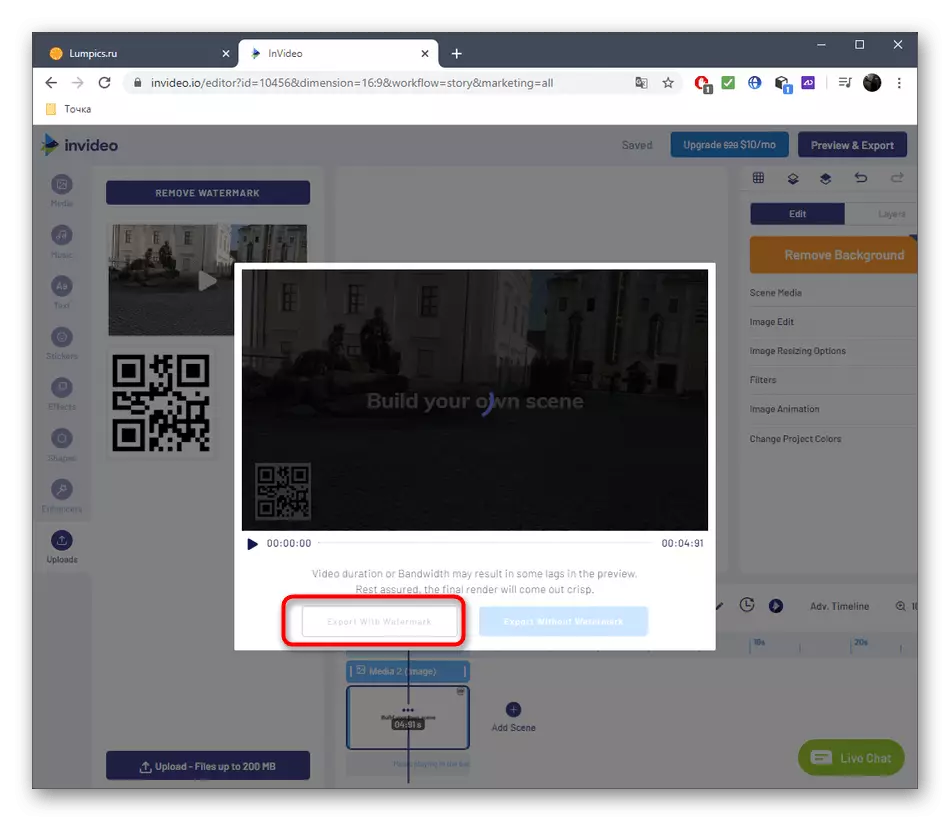
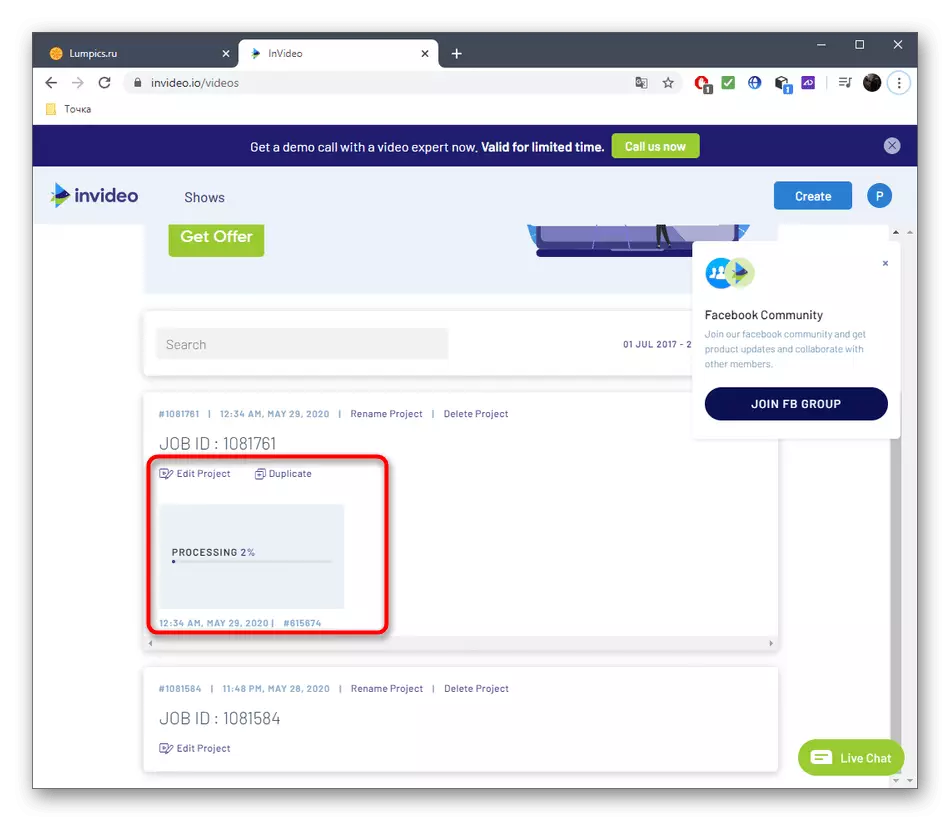
- Expect processing, look at the video itself, and then click "Export With Watermark".
- The rendering process begins, after which the video can be downloaded.

If for some reason you do not fit the online services described above, for example, I don't want to purchase a full version in order to download the video in good quality, we advise you to familiarize yourself with full-fledged software, allowing you to apply rollers and pictures over the existing layer, reading auxiliary The material on the links below.
Read more:
How to apply a video or picture on video
The best apps for overlaying video or pictures on video