

Preparatory work
TP-LINK N300 is a class of network equipment consisting of several models from this manufacturer, so for example in this article we will take only one device with the latest firmware. Before setting, the router needs to be connected to a computer, because without this, the input to the web interface will not be available. Detailed connection instructions are looking for in another thematic article on our website by reference below.
Read more: Connecting a router to a computer

Before moving to interaction with the Internet center, dedicate some time to configure the network parameters of the operating system. You only need to make sure that the IP address and DNS servers are automatically obtained: open the properties of the network adapter and find the corresponding item there. About changing properties Read more.
Read more: Windows network settings

Login to the web interface
Separately affect the topic of login to the web interface. For all TP-LINK routers, this operation is performed equally, therefore, to solve the current task, we suggest reading a separate universal manual on our website by clicking on the following link.
Read more: Login to TP-LINK routers web interface

Fast setting
In a separate section, I will bring a quick configuration operation, since the wizard present in the web interface will like many users. The presence of such a module will allow in minutes to set the basic parameters of the wired network and Wi-Fi, which is carried out like this:
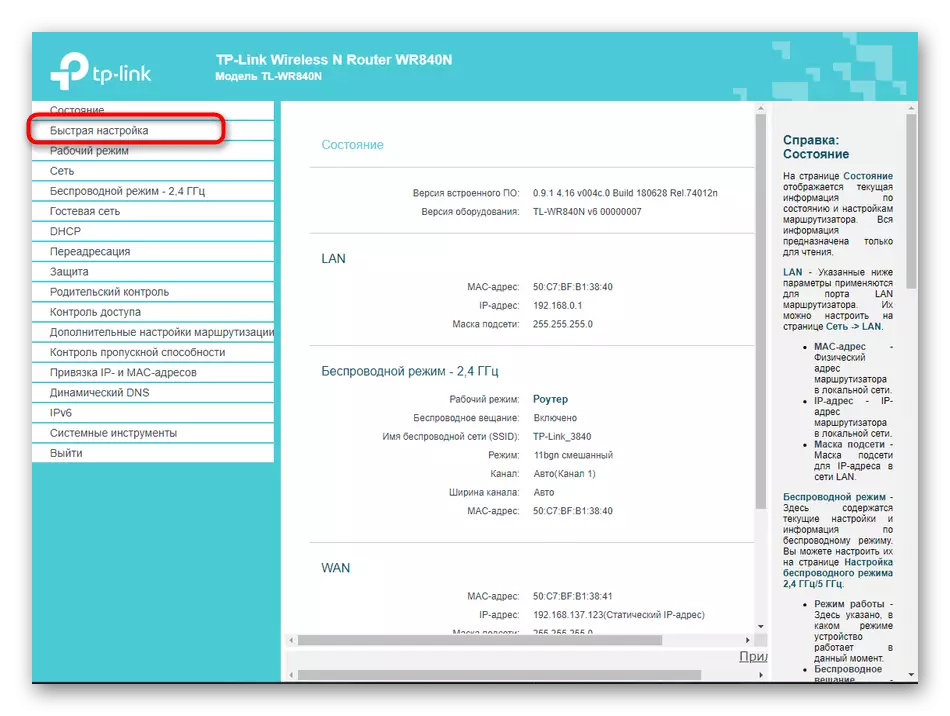
- After successful authorization through the left panel, select "Fast Settings".
- Browse the welcome window and click on "Next".
- When you select the type of mode of the router, stop at the "Wireless Router" version, if you are going to produce a standard configuration procedure.
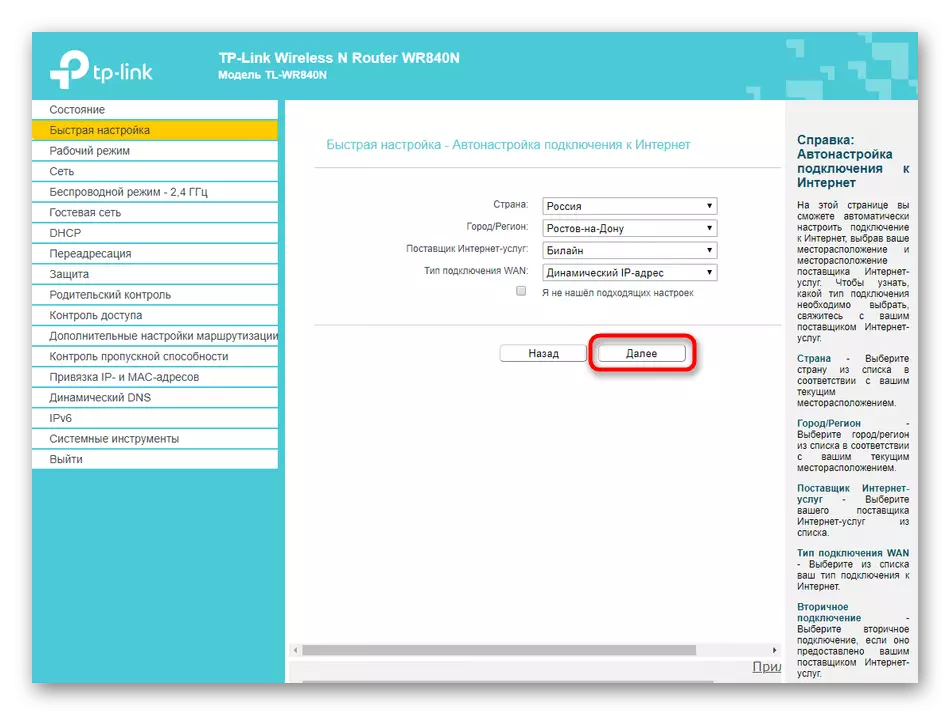
- The WAN connection is configured by filling out the table that appears. In it, select the country, the city and the Internet service provider. Then the most responsible moment begins: selecting a WAN connection. You will have to find instructions from the provider, read the documentation or refer to the technical support to find out what protocol to specify and what parameters to set it.
- If there were no suitable options from the table, check the specifically allotted string in the checkbox and go further to manually set all the settings.
- If you need to clone the MAC address, the MAC of the computer is used instead of the physical ID of the router, be sure to specify this item.
- Next is the configuration of the wireless network. Select the name for it, set the recommended type of protection and come up with a password consisting of a minimum of eight characters. If you leave the network open, consider that then absolutely any user can be connected to it within the Wi-Fi coating radius.
- Check the changes made and apply them if everything suits. A return and a few steps back are available in the case when you need to change the state of any item.


Upon completion, restart the device so that all changes entered into force. Only then proceed to check the performance of the wireless and local network. This can be done even with the "Diagnostics" tool, which is in some implementations of the TP-LINK N300 interfaces.
Hand set TP-LINK N300
The quick setup wizard acting for the TP-LINK N300 class routers, unfortunately, does not provide configuration flexibility, so many parameters simply remain unaffected. There are several reasons for it, the most important of which is that many additional settings simply do not need a certain reservoir of users or edited extremely rarely. We take into account the emergence of the situation when it may be necessary to appeal to other web-interface items of the router, so they broke the manual setting process to steps so that you can find the required.Step 1: Network (WAN Settings)
Primary wired network setting is the most important step of manual configuration, because it depends on whether access to the Internet will appear. If the wizard has not managed to edit certain items or now need a donoyake, follow these actions:
- Open the "Operating Mode" section, where you check the "Wireless Router" paragraph. This is the main destination of the router, therefore, choose this option.
- Next, move to the "Network", where you are interested in the first category "WAN". Expand the Connection Type drop-down menu. Through it, determine the WAN protocol, which provides you with the provider. Depending on the protocol, the displayed form is already filled. In the case of static IP, it will be necessary to enter the address itself, write the subnet mask, gateway and DNS server. After do not forget to click on the "Save" button.
- Separately consider other popular protocols. The only one of the available options that does not need to be additionally configured is a dynamic IP address. All parameters are automatically obtained, and for the current IP and gateway values, you can monitor the "Status" menu in the same web interface.
- In the Russian Federation, many Internet service providers provide PPPoE protocol. For it, set the username and password received when connecting the Internet itself. You can choose how the connection will be made: in automatic mode or each time you have to enter the same authorization data.


Step 2: Local Area Network
The local network is also worth paying a little time, since not always standard values correspond to the required. Usually, checking and changing the settings of this category is performed only by those users who are going to connect Internet television or computers through a network cable to the router.
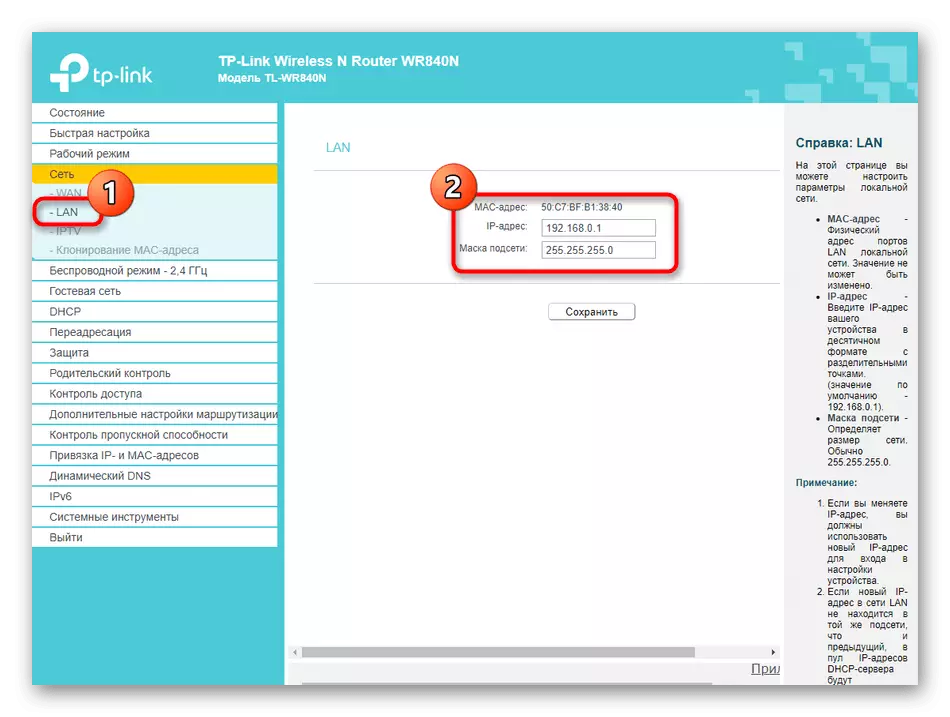
- To begin with, open the "Network" section and select "LAN" category. Make sure the IP address corresponds to 192.168.0.1, and the subnet mask is 255.255.255.0. There are no more parameters in this menu.
- The following submenu is "IPTV". Change the parameters here in accordance with those that were obtained in the instructions from the provider providing access to television. Upon completion, do not forget to apply the changes.
- In the same principle, as it was and in fast setup mode, cloning the MAC address is carried out if it is required.


This change in the local network is over. Be sure to "Save" in the case when any changes were made.
Step 3: Wireless Network
The next step configuration of the TP-LINK N300 series routers is to set the wireless network settings. By default, Wi-Fi will be activated, but sometimes it is simply not needed or has a need to change the name of the network and / or password.
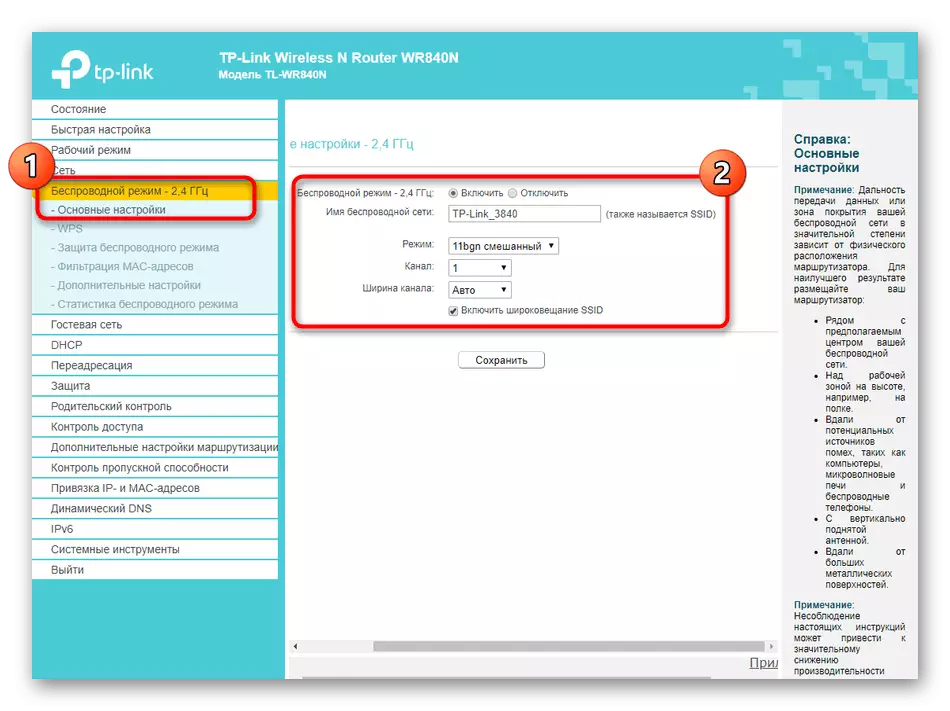
- Through the left menu, go to the "Wireless Mode" section and select "Basic Settings". Here you can disable Wi-Fi at all, marking the relevant item, as well as change its name. You should not change the mode and channels, unless you do configuration under WDS. Then the channel must be fixed, and you can specify one of the available ones.
- Following the "WPS". This is a convenient technology that allows you to quickly connect to the router without using the password. You can add a device directly from this category or set a PIN, which will be involved for the connection. Disable WPS is not necessary if you do not need it, because this technology does not have any load on the overall operation of the network.
- It is important to pay the time and security of Wi-Fi by going to the "Protection of the Wireless Mode" section. Here we advise you to choose the recommended encryption method, noting the marker highlighted item. If necessary, change your password to your, which will consist of at least eight characters. If the network should be open, simply mark the "Disable protection" marker, after which the password will be removed. There is nothing more to change anything else here.
- In the case when Wi-Fi operates in open mode, it may be necessary to set the filtering of physical addresses of devices so that only home equipment has been connected to the wireless network. To do this, in the "Filtering MAC addresses" section, you will need to select "Allow" mode and create a table from trusted devices, that is, those that are actively used in the house. It works in the opposite direction: there is a ban on the connection for the specified MAC addresses, and all other purposes will not be concerned.
- In the "Wireless Statistics" you will see all users who are currently connected to the router, as well as how much traffic they consume. This menu will allow you to learn and physical address that is used to filter according to the rule described above.
- Separate attention deserves the "guest network". This is a separate wireless connection for which its own name is entered and the level of protection is set. Such Wi-Fi is only calculated on certain groups of users, so there is a number of specific parameters for it.
- For example, a network isolation is available or setting the schedule to which the network is open. If you decide to set this time, then be sure to check the clock settings.


After making all changes, apply them and check the performance of Wi-Fi. If the parameters did not change automatically, you will need to restart the router, and after it is repeated, everything must function properly.
Step 4: DHCP Parameters
DHCP is an important technology embedded in the TP-LINK N300 router, as well as in all modern network devices. Its purpose is to provide each connected device of a unique IP address, which is necessary with special network protection rules or for normal optimization with the operating system so that information appears on the screen that IP is already used. DHCP configuration needs to be given only a few minutes:
- Open the "DHCP" section and select the "DHCP Settings" item. Here, make sure that the technology is enabled, and the range of the set IP addresses does not intersect with the main address of the router (192.168.0.1). If necessary, change this range by exposing it, for example, from 192.168.0.10 to 192.168.0.64. Such a list will be enough enough to provide each connected equipment with a unique IP address. No longer need to change any settings in this section.
- Use the "List of DHCP clients" if you need to view all the local connections and the ratio of their IP addresses. This can be useful, for example, to set the following router protection rules.
- The last submenu of the section is "Address Reservation". It is necessary in order to secure a specific address for a specific device that will not change when re-connected. The purpose of this setting also depends on the following rules of protection.


Step 5: Router Protection
Many users neglect the parameters of the router protection, because they do not believe that someone will want to hack or make an unauthorized connection. However, access control implies filtering not only external devices, but also internal, which can be useful, for example, if necessary, the organization of parental control. Therefore, we advise you to familiarize yourself with all the following items and decide that it is worth changing.
- To begin with, open the "Protection" and select the "Custom Protection Settings" item. Make sure that all items present here are activated. Change any of them is only if there is foundations for this. This is usually required only to experienced users, so we will not stop in detail on the section we will not.
- Approximately the same applies to the "Advanced Protection Settings" menu. Here is the control of external connections filtering, setting the number of transmitted packets per second. This should be changed only by experienced users.
- In the "Local Control" category, you can choose which users can connect to the TP-LINK N300 Router Web Interface to change the parameters. Access can be discovered by everyone, and if necessary, just to enter the MAC address of that equipment from which you can connect.
- The last setting item is Yandex.dns. This is a branded system of domain names from Yandex, which allows you to safely use the Internet. By default, it is turned on, but if you disable it, nothing will change for the usual user, therefore it does not make sense to consider the submenu.
- To configure parental control, move to the appropriate section. There is set by the general rule and physical addresses of devices for which access control will be distributed.
- Run down below to create a limit schedule and select a list of sites, which will be prohibited. This setting is carried out at the personal discretion of each user, and it will be easy to understand it, since the principle of forming a table to primitive is simple.
- Restrictions for connecting to a router to specific devices through the "Access Control" menu. Here you first need to set "node", that is, to choose the current router for which the rules will act.
- Then go to "Purpose" and click "Add" to form a list.
- In it, set the lock mode, for example, the IP address, specify the target, add a description and port (optional).
- If blocking should not be permanent, go to the "Schedule" category and arouse the already familiar table by day and hours.


Step 6: System Tools
The final stage of configuration TP-LINK N300 - editing system tools. This is necessary in order to establish the normal functioning of the router, to ensure the performance of the protection rules, and is also recommended simply to familiarize themselves, since in the future, most likely, it will be necessary to apply to this menu to change any parameters.
- First Open the System Tools section and select "Time Setting". Make sure that the system time matches the real one. As we said earlier, it is necessary to ensure the normal performance of the schedule of protection rules.
- If you just bought a router, probably there is no need to update the software, but soon it may be needed. Then go to the "Update Firmware" menu, download the file received from the official site, and click "Update".
- In the "factory settings" should be found in those situations when you want to restore the standard parameters of the router, for example, if the device's performance has been impaired.
- Through the "Backup and Recovery", there is a separate file with all current router settings. Especially urgent such an option will be for those who put a large number of protection rules and is afraid of losing them if the router parameters suddenly occur.
- In the "Restart" category, you can not only send a router to a reboot, but also to set a schedule when this process will be automatically produced. It will be relevant, for example, when a lot of devices are always connected simultaneously to the router and it is necessary that sometimes he reset the cache and cleared the memory for better work, which is just performed when rebooting.
- The last step is to change the password for authorization in the web interface. We recommend doing this to limit access to any users to the settings, because you can disable parental control or remove access control rules.


The main parameters of the TP-LINK N300 router can be set through the mobile application by connecting in advance through Wi-Fi. If you are satisfied with this option, we advise you to go to a separate thematic instruction on the link below.
Read more: TP-LINK routers configure via phone