Method 1: Context Menu
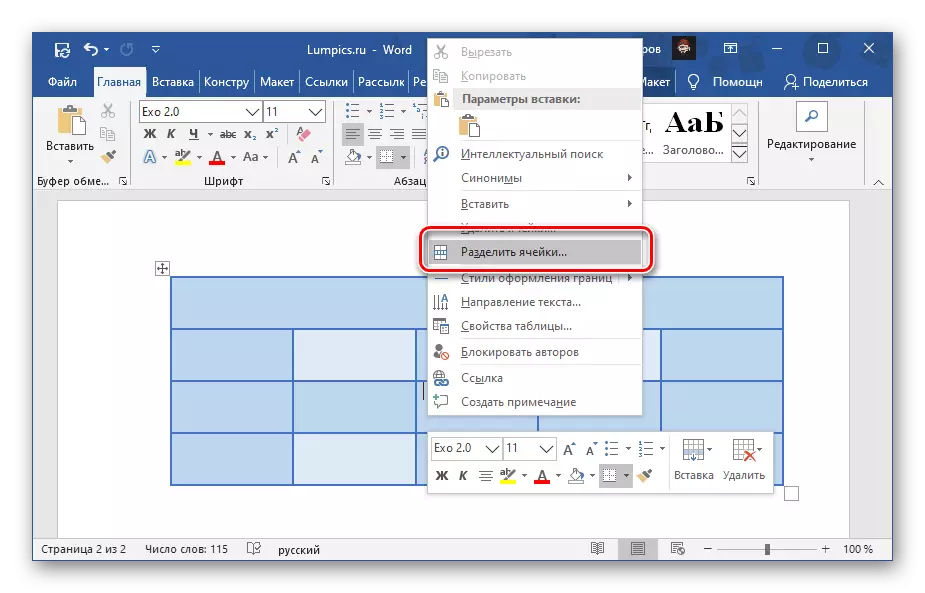
The simplest way to split the cells in the Word Table is to appeal to the context menu, called on the corresponding element.
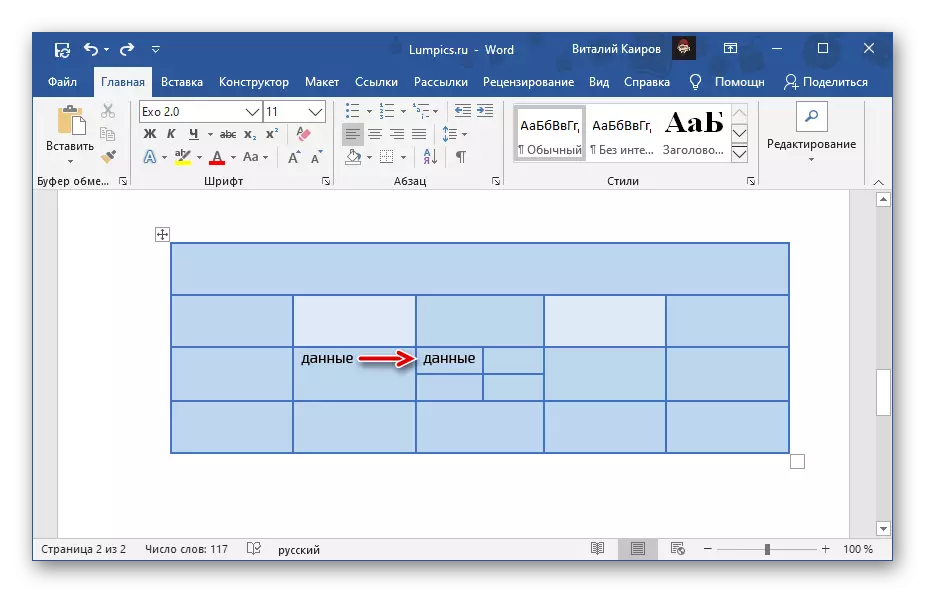
Important! If the cell contains data, as a result they will be placed in the first of them - the left, upper or left top, depending on how and for how many elements is separated.
- Right-click (PCM) on the cell you want to "smash".
- Select "Separate Cells".
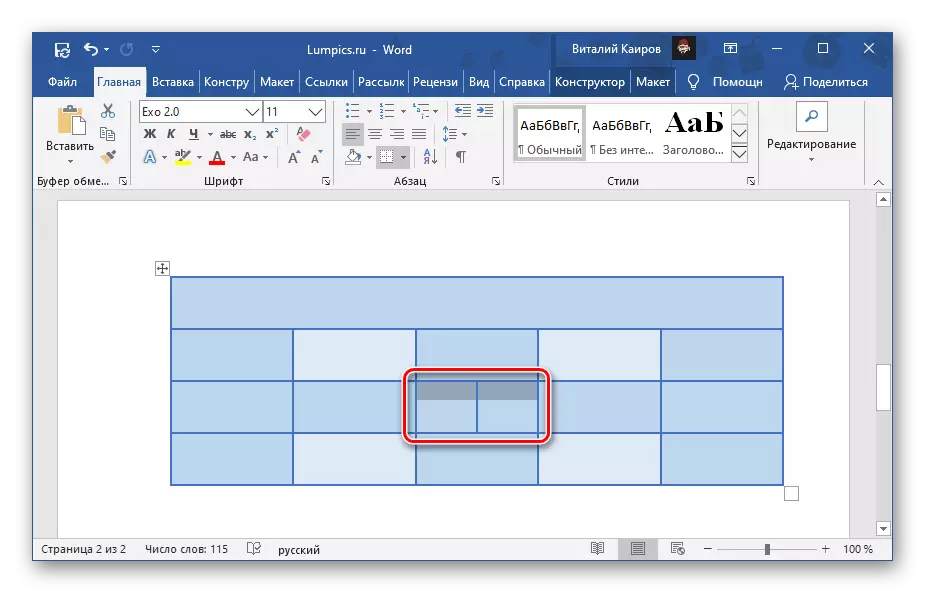
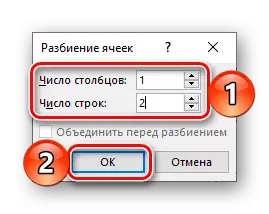
- In the appeared window, specify the "number of columns" and "number of strings" that you want to get in this element of the table. Click "OK" to confirm.

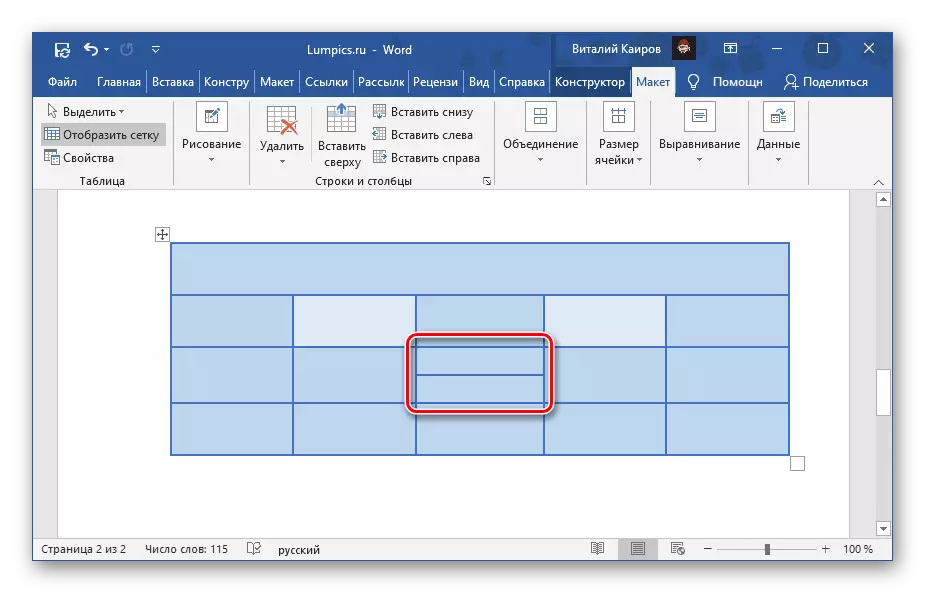
Note: To split vertically, it is necessary to indicate the number of columns, horizontally rows. In the example below, one cell is shown, divided into two vertically, now there are two columns in it. The number of elements obtained as a result of this action is not limited, but it is worth considering their future size and amount of data that will need to be entered.
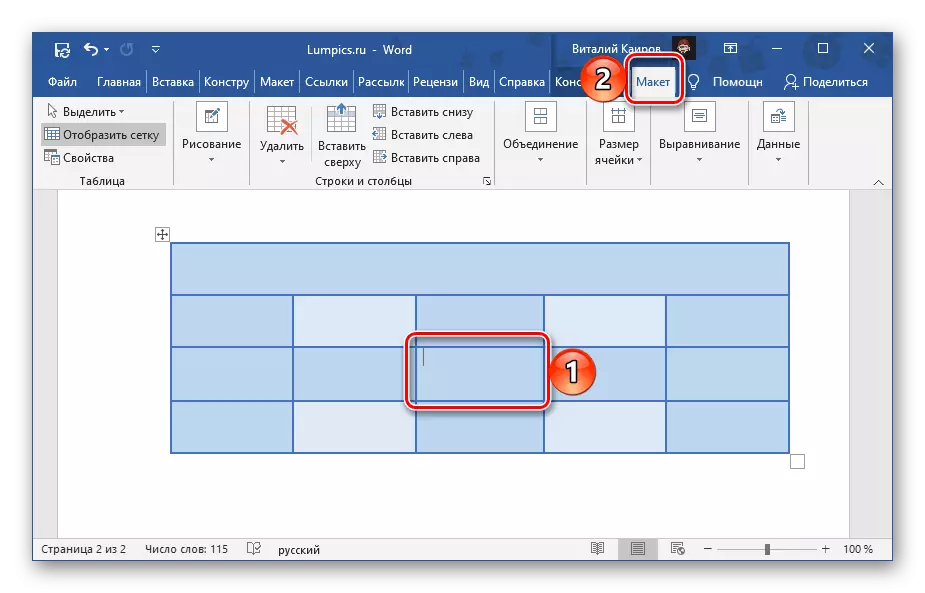
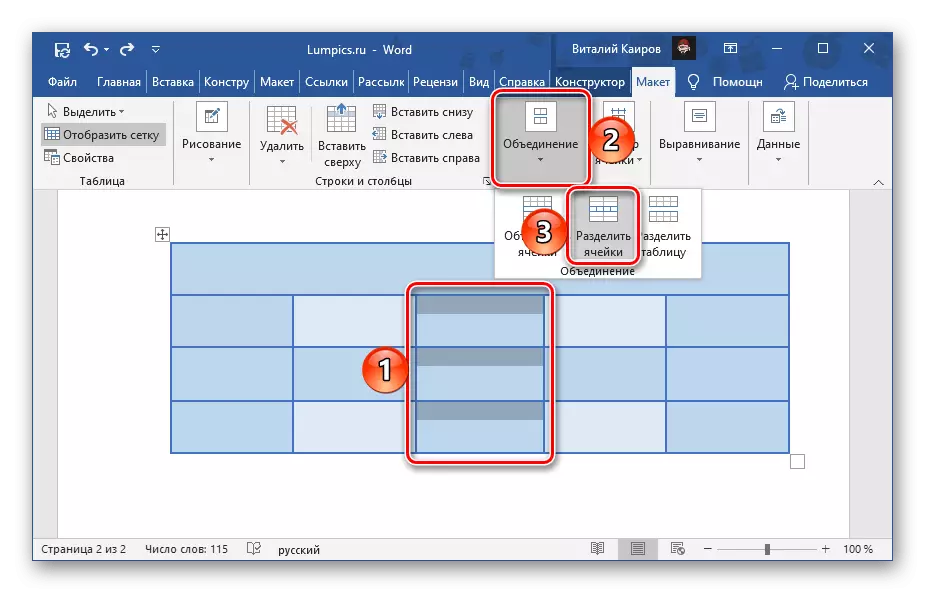
- Click to the left mouse button (LKM) on the cell you want to break, and go to the "Layout" tab shown in the image below.
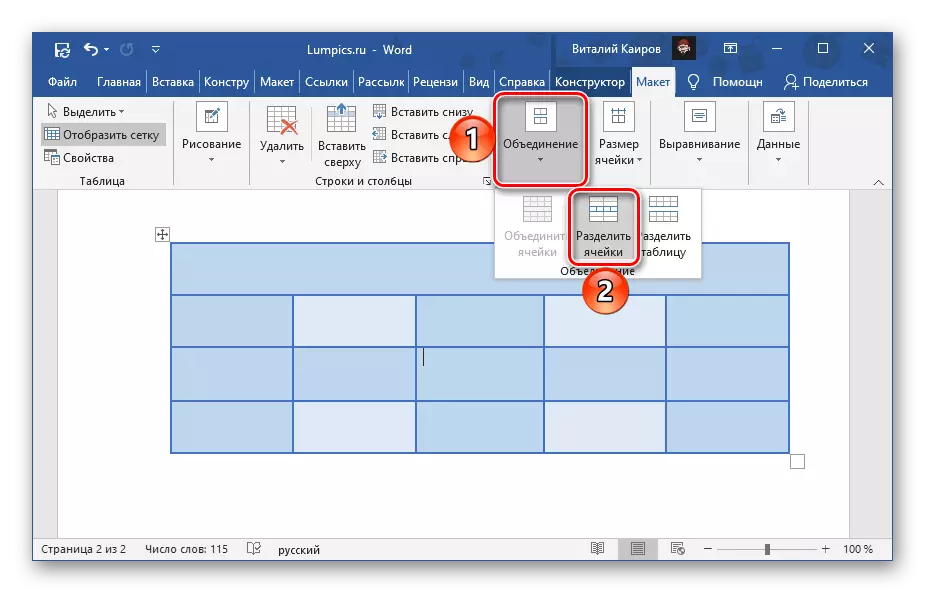
- Click on the "Divide Cell" button located in the "Combination" group.
- Perform the same actions as in the last step of the previous instruction, that is, specify the desired number of columns and / or strings to which you want to divide the selected item, then click "OK".
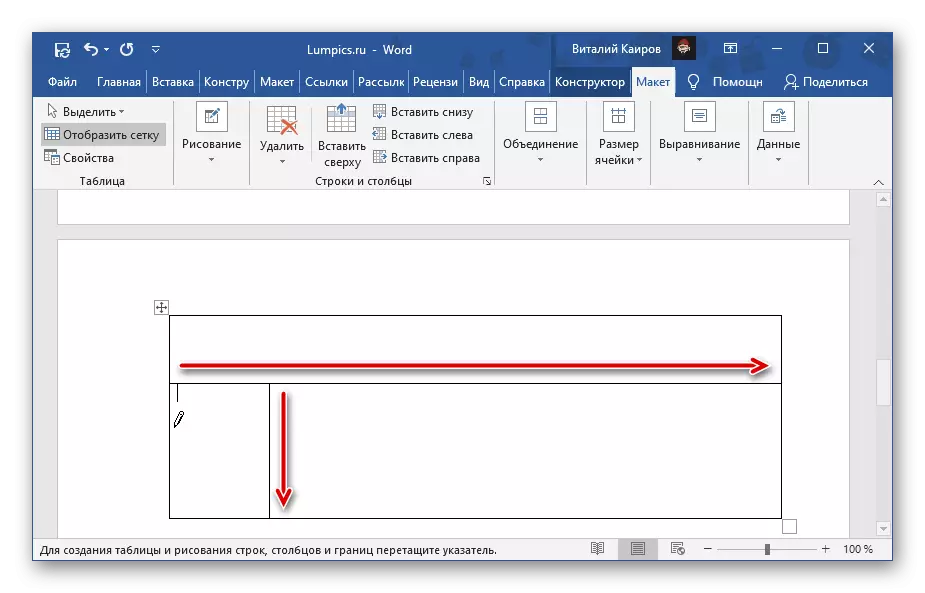
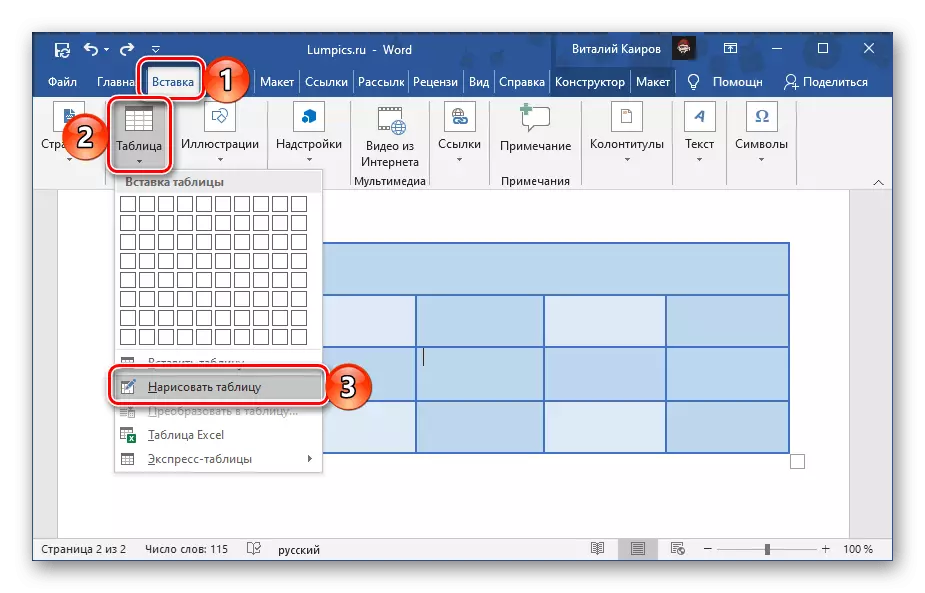
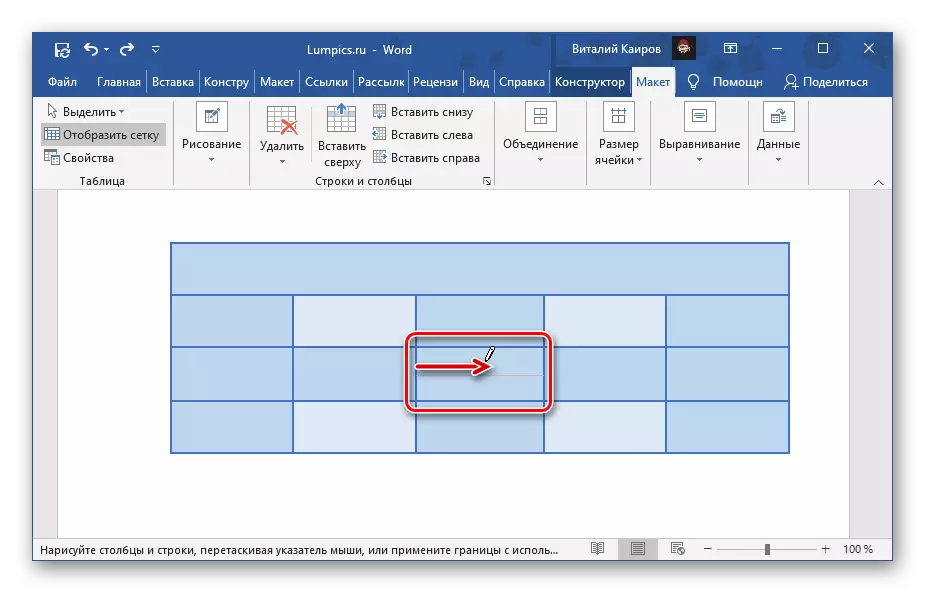
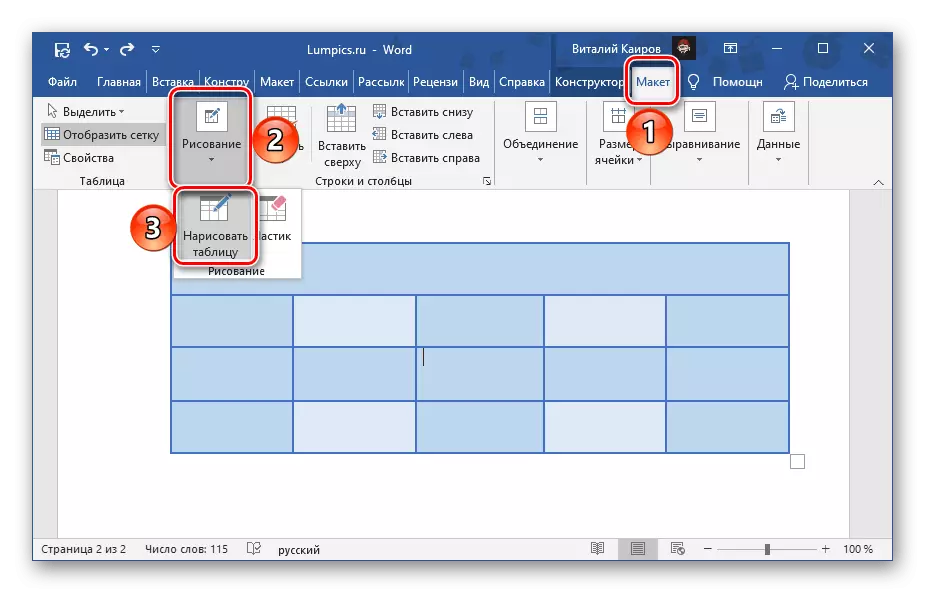
- Go to the "Insert" tab, click on the "Table" button and select "Draw the Table".
Note: You can call the same tool through the tab "Layout", after having highlighted the entire table or clicking on any part of it.
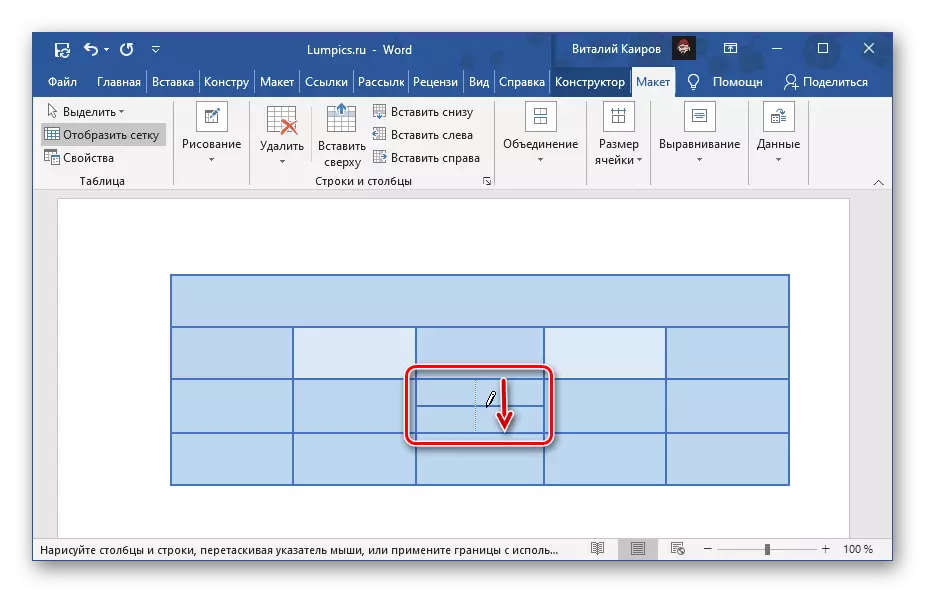
- The cursor pointer will change to the pencil, with which we are with you and break the cell.
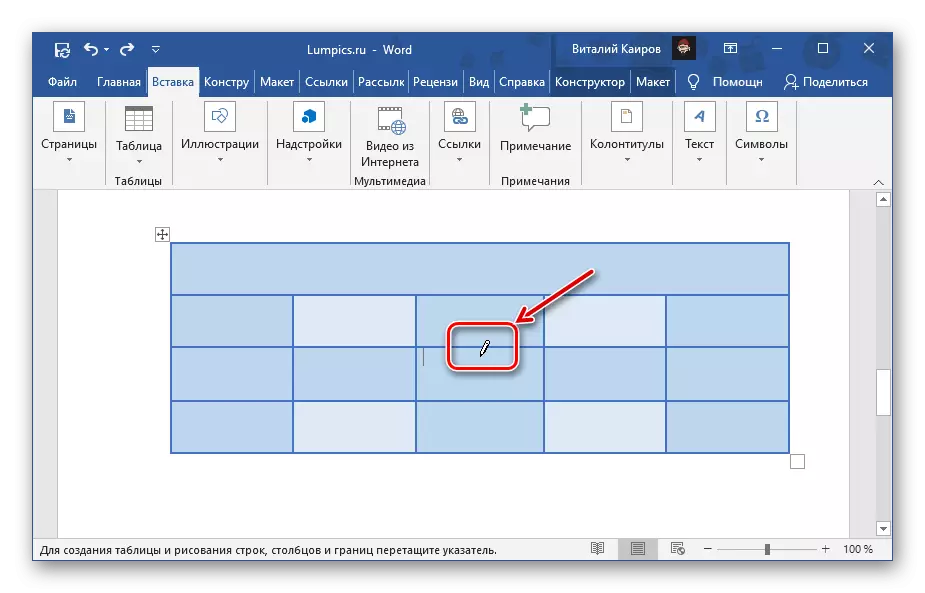
To do this, it is enough to carry out a vertical or horizontal line in it (it must be done strictly from the border to the border and as soon as possible), depending on whether it is required to make rows or columns.
If you wish, you can divide the cell and on the string and the columns.
- It is easy to guess that this tool allows the cell to divide on an unlimited number of items.
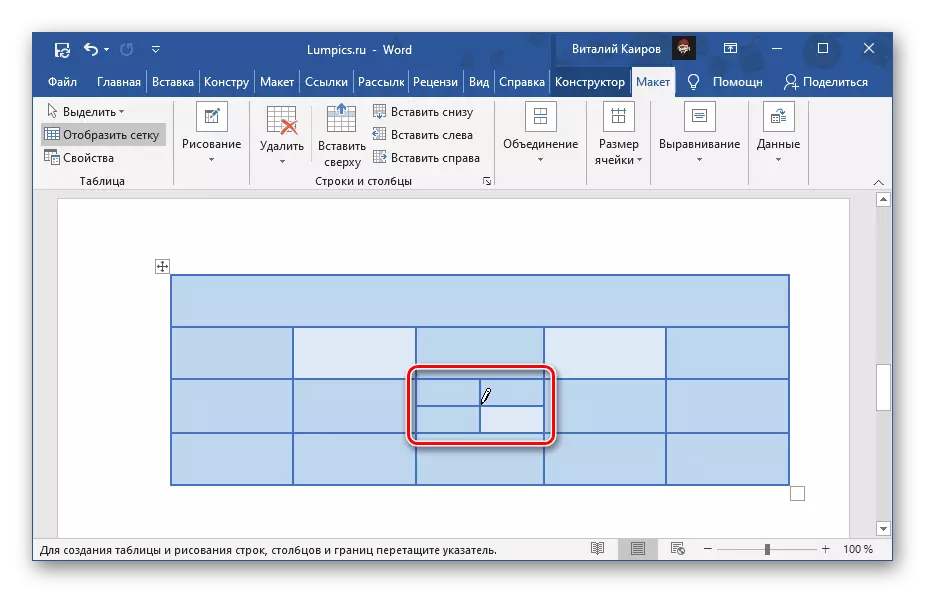
In addition, you can draw the border not only in one of them, but also in several minutes.

If you made an error when separating the cells, or use the "Ctrl + z" keys to cancel the action, or select the table items obtained as a result of the division, call the context menu and select "Combine Cells".

Method 2: Tools tab "Layout"
Immediately after creating a table and / or its highlighting on the Word toolbar, a group "Working with Tables" appears, consisting of two tabs - "Designer" and "Layout". Turning to the latter, you can solve the task voiced in the title title, the main thing is not to confuse it with a tab that is initially represented in the toolbar.
The key distinction between this and the method discussed above is that using the tab, the "Layout" tab can be divided not only one,
But immediately two or more cells. The context menu does not allow this.
Method 3: Independent Drawing
There is another method of separating the cells in the Word Table, which, unlike the previous two, allows you to make it not only strictly symmetrically, and also arbitrarily, manually drawing a line that divides the element to columns and / or lines.

We have previously written in a separate article about all nuances of self-drawing tables.
Read more: How to draw a table in Word