Please note that some parameters of the router cannot be configured to configure without direct access to the web interface, and in this article we will discuss exactly applications for Android or iOS, which distribute router manufacturers. If you do not find the necessary information here, use the search on our site by entering the name of your device model to familiarize yourself with the detailed manual of complete configuration through the Internet center.
Step 1: Search app
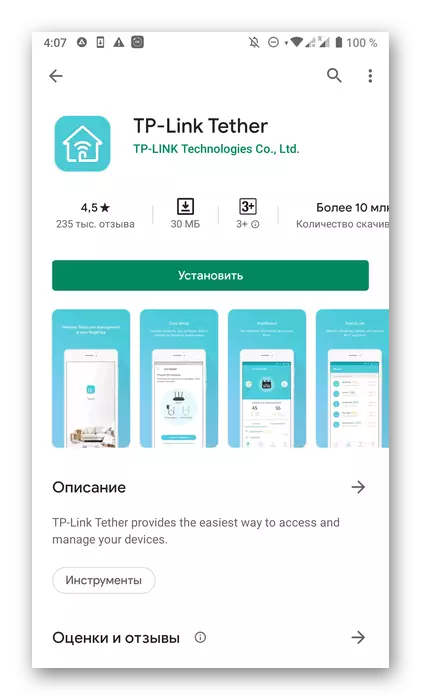
To begin with, it will be necessary to find a suitable application that is considered official. There are not such a large amount, but especially relevant such programs for holders of routers from TP-Link, ASUS or D-LINK. Go to the manufacturer's website to find a direct download link there, or enter the appropriate request in the Mobile Application Store on your smartphone. Installation of such a tool is carried out in a standard way and will not take much time.
Step 2: Getting Started
It will not cost without preparatory work, since from the very beginning will have to be logged in in the application and make it finds the appropriate router and establishes the connection with it. This operation is performed in all programs by approximately the same algorithm and looks like this:
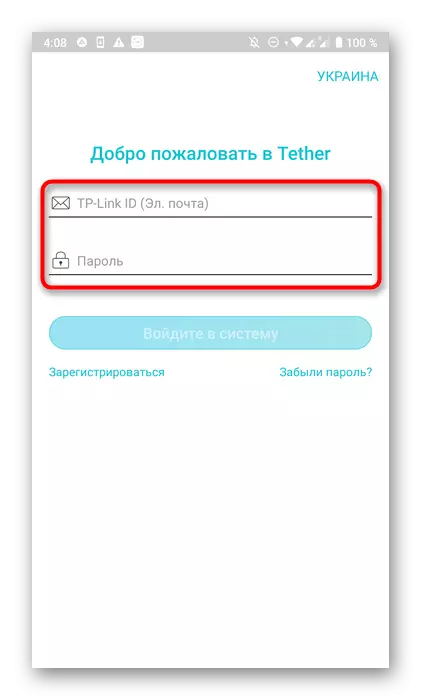
- Run the software received and register a new account that in the future will be used to configure the router. All parameters will be automatically saved in it, which will allow them to restore at any convenient moment even after the router configuration is reset.
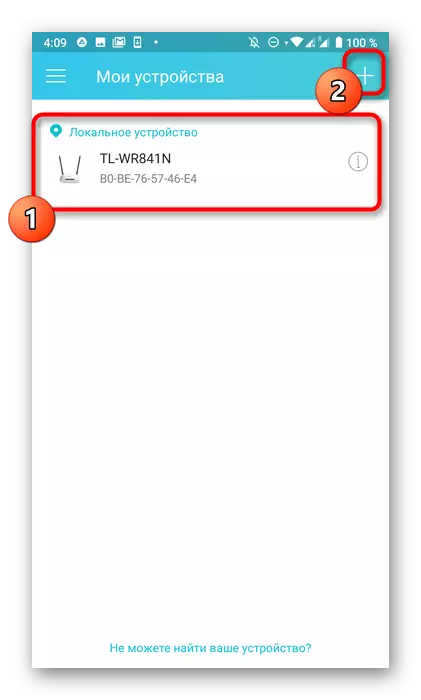
- If the router is turned on and Wi-Fi is properly functioning, it will be displayed in the main menu. In a situation where this did not happen, find the corresponding button that is responsible for the transition to adding a new local device.
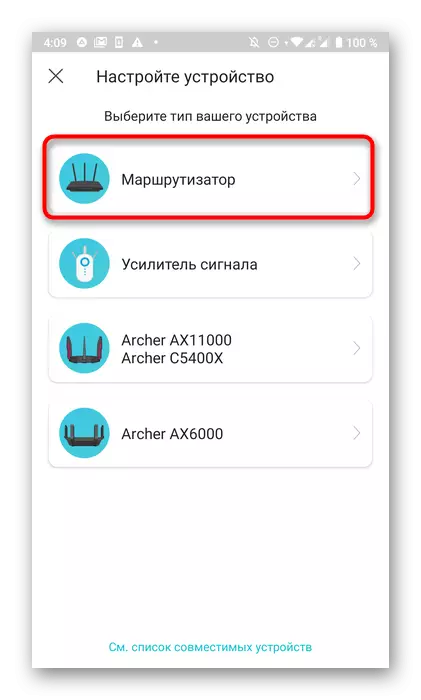
- With the support of the developer of various types of equipment in the menu that appears, you will need to select the Type "Router" or "Router". Otherwise, an instruction for connecting will immediately appear.
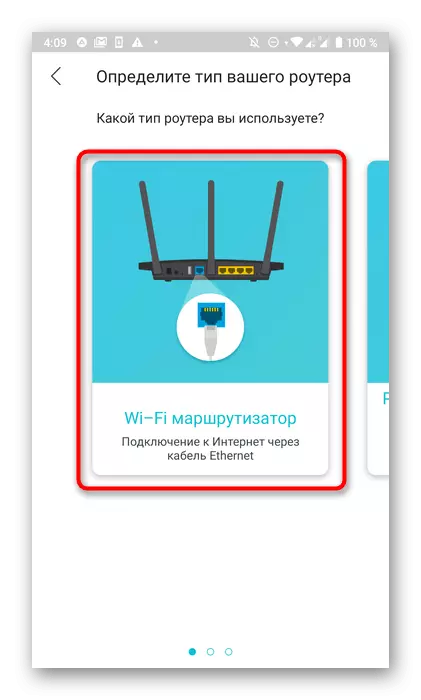
- The first step of the connection will be the definition of the type of the router, since each of has a different connection to the Internet.
- For novice users, first encountered with the configuration of such equipment, a separate guide to the primary device connection will appear. If these actions have already been executed, just skip this step.
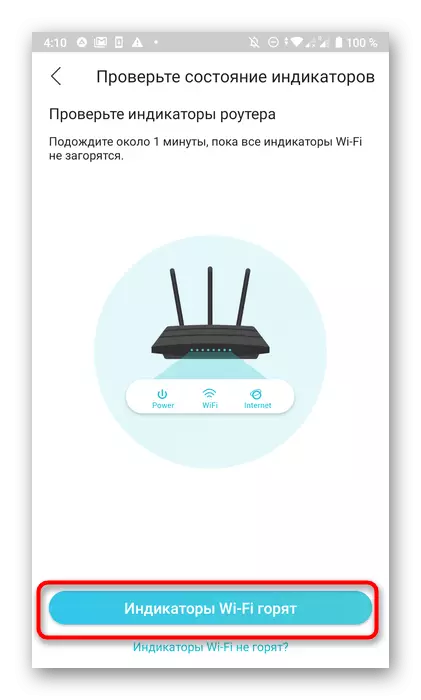
- Sometimes you need to reboot so that the application has already successfully detected the router with a new inclusion. Make it and click "Next" to start scanning.
- Check the status of the router and confirm it in the program itself to go to the next step.
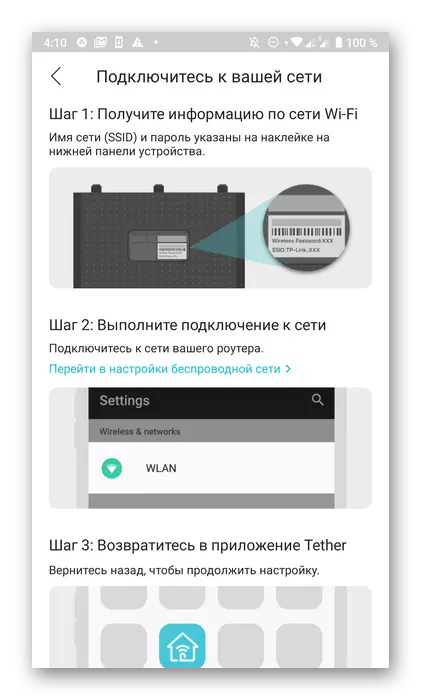
- Now it is necessary to deal with the main process - connecting to a wireless network. To do this, follow the detailed displayed instructions or do it yourself.
- Wait for the expiration to search for local device.
- As soon as the router appears in the list, you can select it to go to the further change of parameters.


Step 3: Wi-Fi
To start, adjust the wireless network, since it is using it with its help with a telephone and other mobile devices.
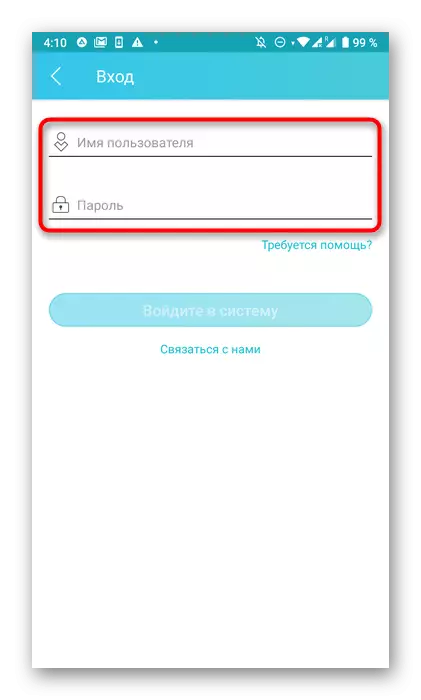
- After selecting a local device, as it was shown in the previous step, a new form for the entrance will appear. It requires not previously created authorization data, but a username and password to access the router settings. Most often in both fields, you will need to enter Admin, but these values may vary depending on the device model. For its search, read the rear sticker located on the router itself.
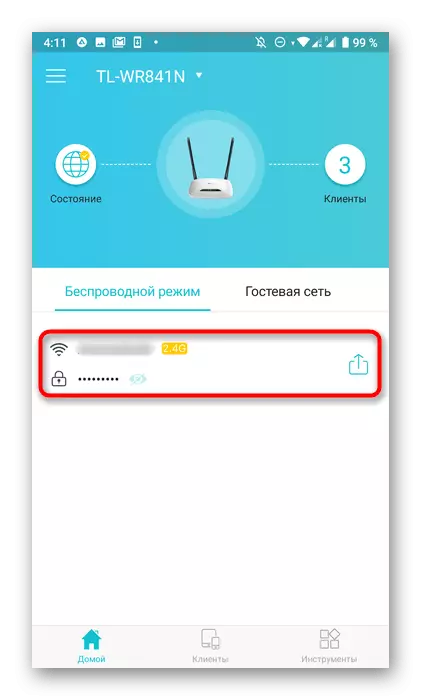
- You will immediately find yourself in the main router management menu, where click on the current wireless network.
- If the equipment functions on two frequencies, specify the one you want to configure for use.
- Set a new wireless network name and set the password. Through the same menu, you can disable Wi-Fi at all if required. Upon completion, do not forget to save changes.


Step 4: Internet connection
The most important step of this material is to configure the connection to the Internet, since it depends on it whether the signal from the provider will be applied. Most applications allow you to set only the basic parameters, and the whole process looks like this:
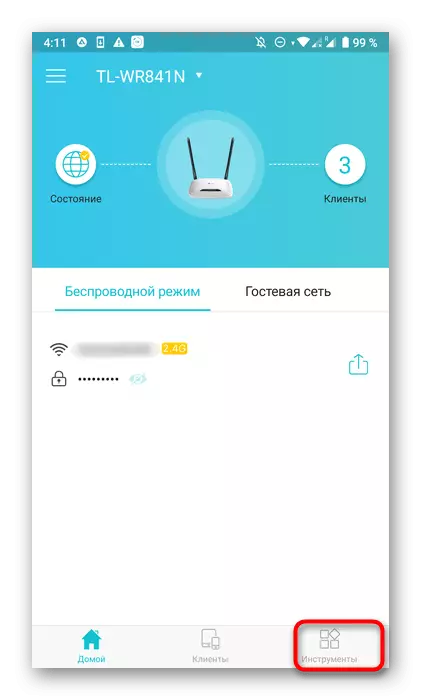
- The execution of this step directly depends on the equipment model used. First you need to open the panel with all sections. Sometimes it is located immediately on the left, and in other cases you will have to go to "Tools".
- Select the option "Connect to the Internet" or "LAN".
- The following actions are also associated with different router manufacturers. Some of them, such as TP-LINK, allow only the parameters installed by default, and for their configuration will have to go to the web interface through the browser. In other cases, all items can be changed independently. To do this, you need to know which connection type provides a provider. Lay this information in the contract or contact directly to technical support.


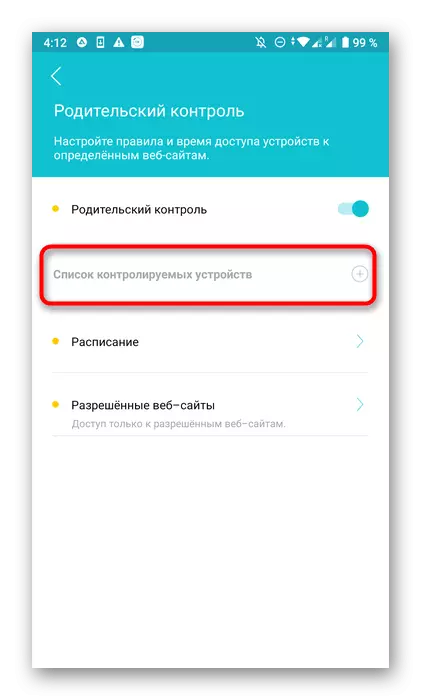
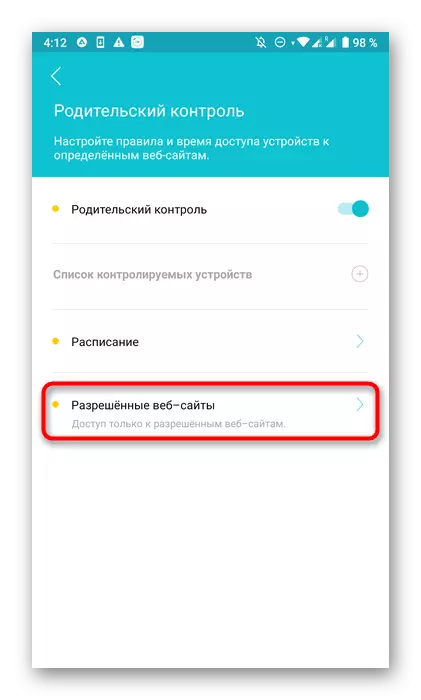
Step 5: Parental Control Configuration
One of the settings present in each mobile application allows you to set parental control parameters, which will be especially useful for those users who want to establish restrictions on the use of the Internet or create a black list with forbidden sites. To manage this mode, you will need to perform only a few simple actions.
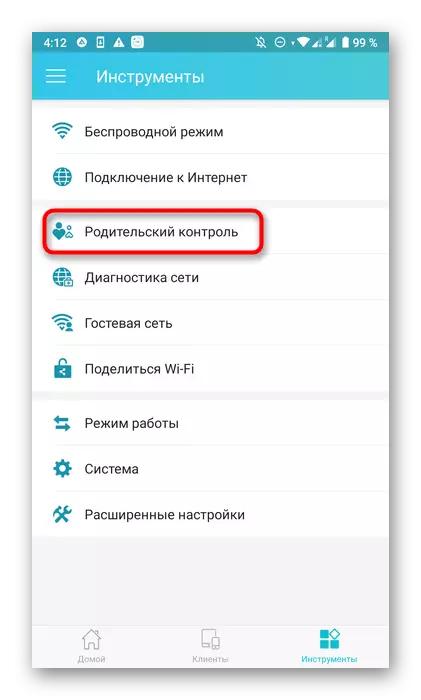
- In the same section "Tools" or through the menu, select "Parental Control". In some programs, it is called "Access Control".
- Activate this setting to deploy a list of additional parameters.
- To begin with, it is recommended to create a list of controlled devices to which the established limitations will relate.
- Check out the list of customers and simply check the checkmarks of those who consider it necessary.
- Next, go to the setup of the time limit rules, creating a schedule.
- In it, just specify the date and time when the target computer or smartphone will have access to the network.
- Additionally, it is possible to configure a list of allowed sites.
- Set all the addresses of sites that the user will be able to visit, and all the others will be blocked automatically.


Do not forget to save changes so that when you leave the application, they did not accidentally dropped. It is important to note that parental control can be disabled through the web interface. If the user can enter it, nothing will prevent him by manually to change the settings you have set up, so it is additionally recommended to change the standard admin to a more sophisticated password.
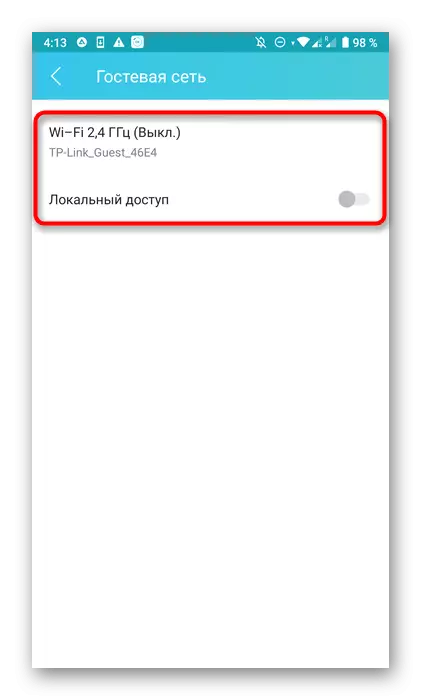
Step 6: Guest Network
Almost all known applications additionally allow you to configure the Wi-Fi guest network, which will be isolated from general and intended for certain purposes, such as distribution with speed limits or access without password.
- To do this, in the menu, tap the section "Guest Network".
- Go to it for further configuration.
- Slide the appropriate slider to enable guest mode. No longer need to make any settings, however, it is sometimes possible to change the encryption key or set a new name.


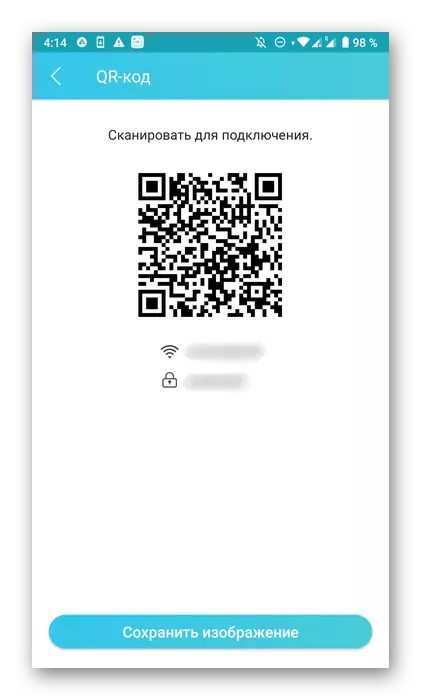
Step 7: Connecting to Wi-Fi without a password
Separately, it is worth noting the "Share Wi-Fi" function, which is present in almost all applications. It allows you to connect to a wireless network without using a password or immediately see the key to enter it.
- If you need to activate this option, move to the specially designated partition on the toolbar.
- Select the network you want to share.
- The QR code appears on the screen, which remains only to scan to connect. It can be saved as an image or use a standard password for connecting.


Step 8: Changing the mode of operation
Even during the preparatory actions, the user required to specify the mode of operation of the router, however, during the interaction with it, it may be changed. Then through the already familiar menu "Tools" you need to go to the "Work Mode" section.

All applications contain three classic options, as well as detailed descriptions to all these functioning modes. You need to mark the marker to suitable and apply the changes. The router will immediately be sent to a reboot, and after switching on earnings in a new mode.

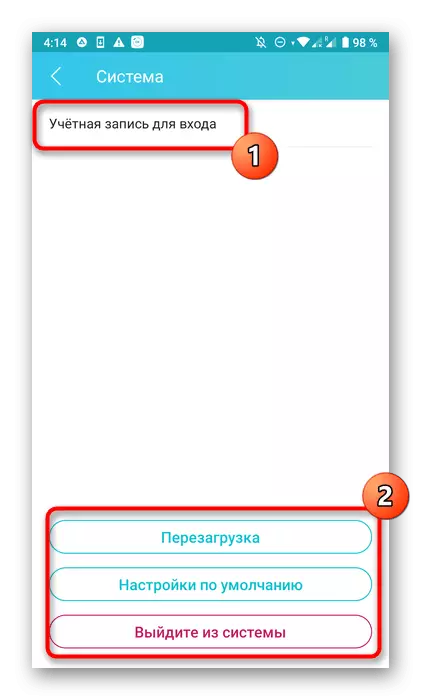
Step 9: Input Parameters
Before completing the configuration, consider the System or System Tools section. Here you can return the default settings if something suddenly did not go according to the plan, or change the account data for the entry, which is recommended to be done to prevent unauthorized access to the router parameters. Then, through the same menu, send a router to a reboot, and the process of its setting with a smartphone can be considered successfully completed.