

Step 1: Function Support Check
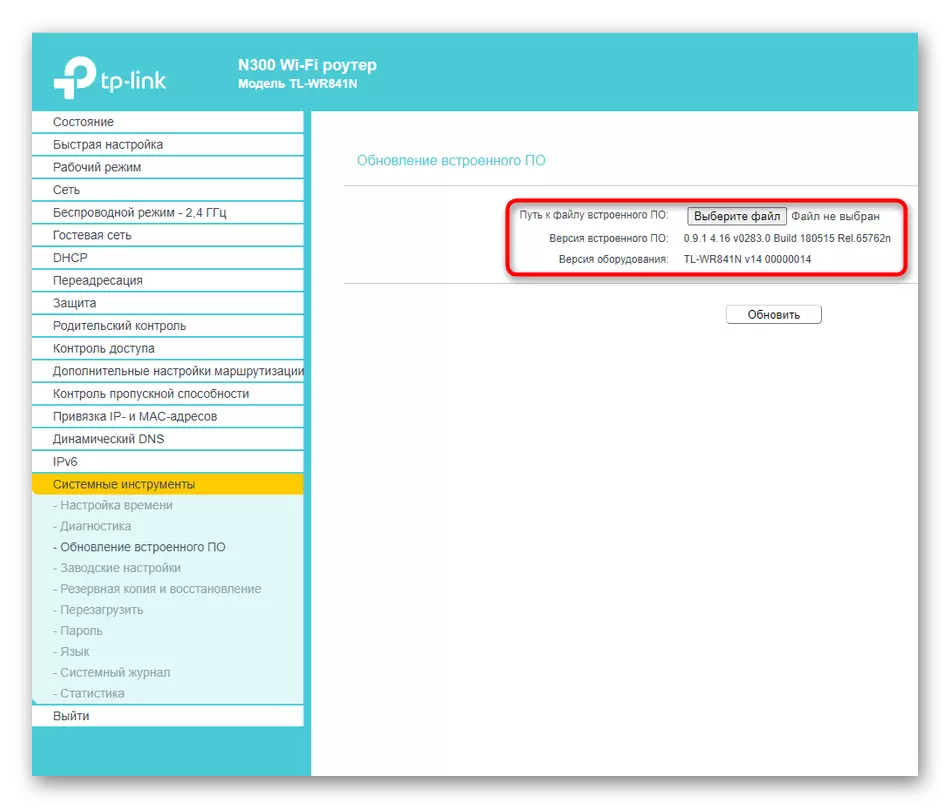
Unfortunately, not all models of routers from different manufacturers support the VPN setting, because in some devices this technology is simply missing. We recommend in advance to familiarize yourself with the technical specifications of the model in the printed manual or on the official website. Additionally, you may need to update the software, because sometimes developers add the necessary innovations, after which the ability to configure VPN. More detailed instructions on this topic can be found in a separate article on our website by reference below.
Read more: Update the firmware of the router
Step 2: Selecting a suitable server
The next step is the selection of a special site providing VPN services. The fact is that the connection is carried out only with the help of an appropriate account, that is, the use of third-party sites is mandatory. Some of them allow you to use VPN for free, however most distribute services for tariff plans. Sometimes there is a trial period for a week or a few days, which we recommend executing that after purchase it does not have any problems with setting up or compatibility. We cannot give specific recommendations, because suitable sites are really a huge amount. Find them through the search engine and register your account.

Step 3: View information for connecting
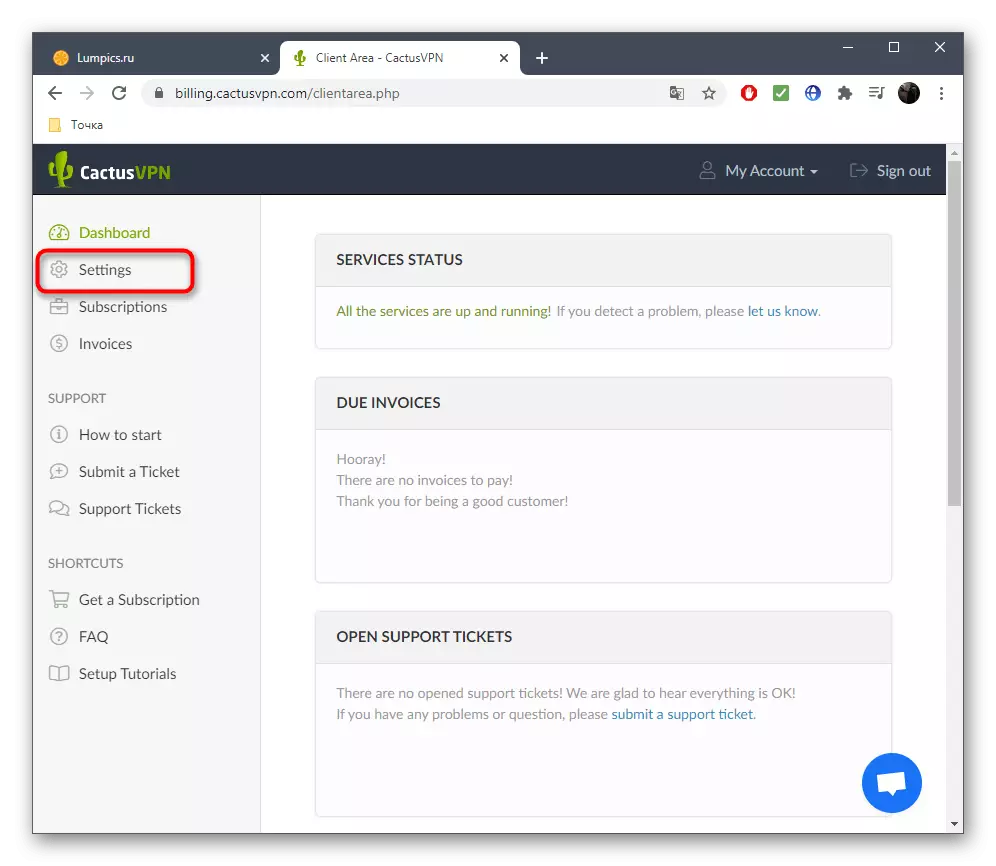
Now, when the account is created and is confident that the router supports VPN, you can go directly to the organization of such a connection, but you need to know the client information in advance, the filling of which is in the router's web interface. Consider this procedure using the example of one popular site with VPN.
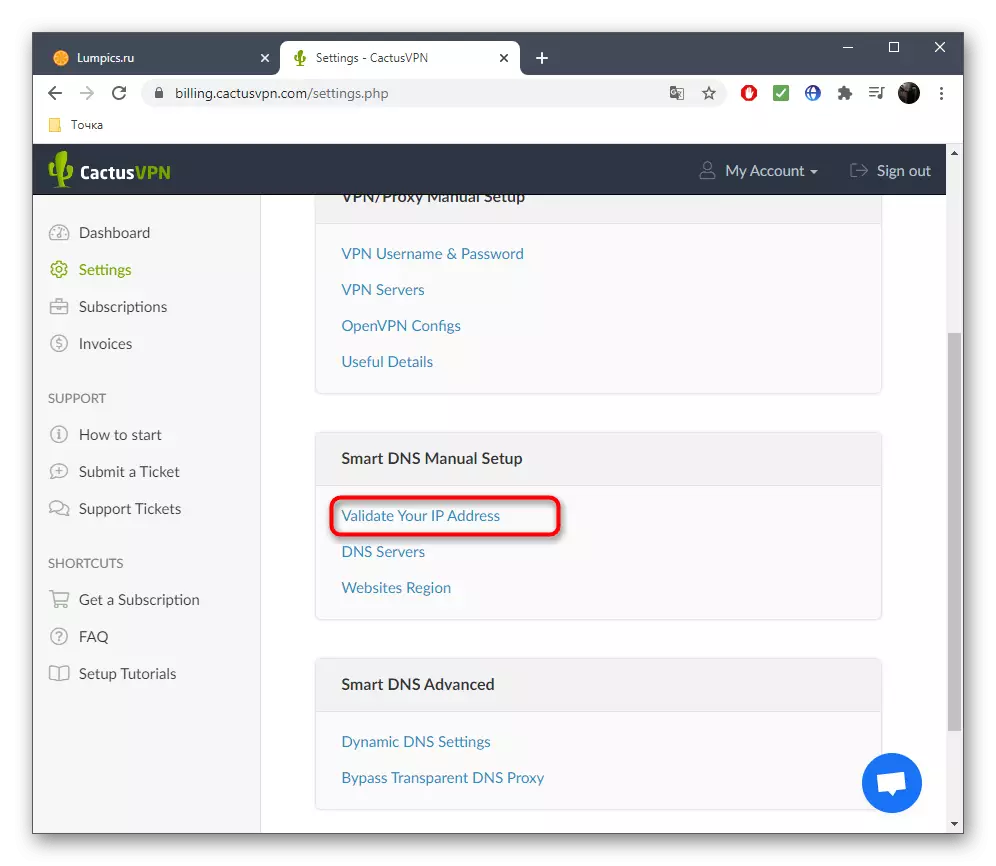
- After authorization in a personal profile, go to the "Settings" section.
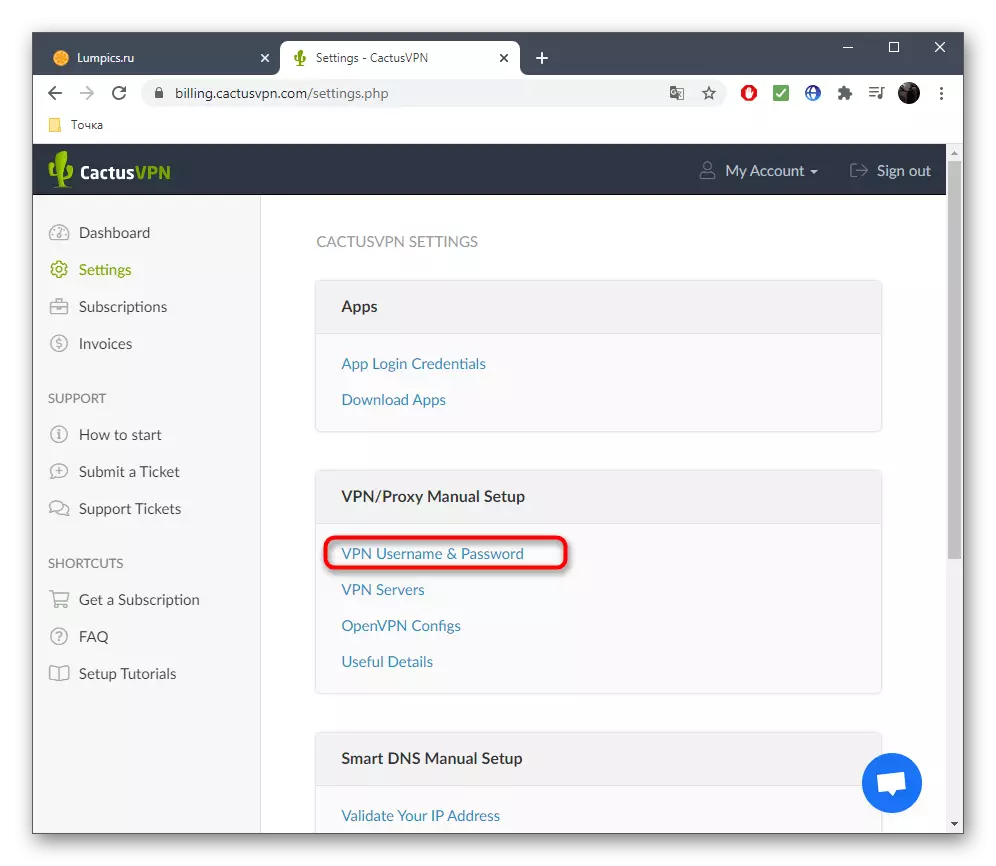
- Here you are interested in the clicable inscription "VPN Username & Password".
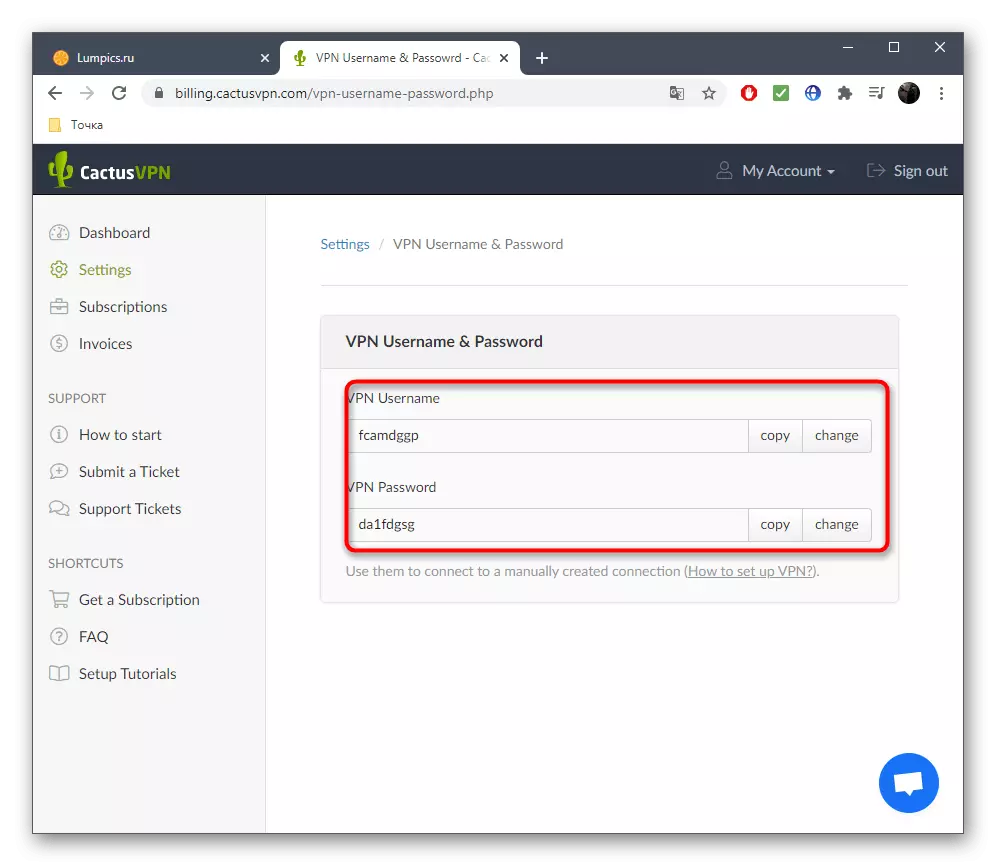
- You can change the username and password or leave them in the same state, remembering or coping for further use.
- Return to the previous menu and open the "Validate Your IP Address" section.
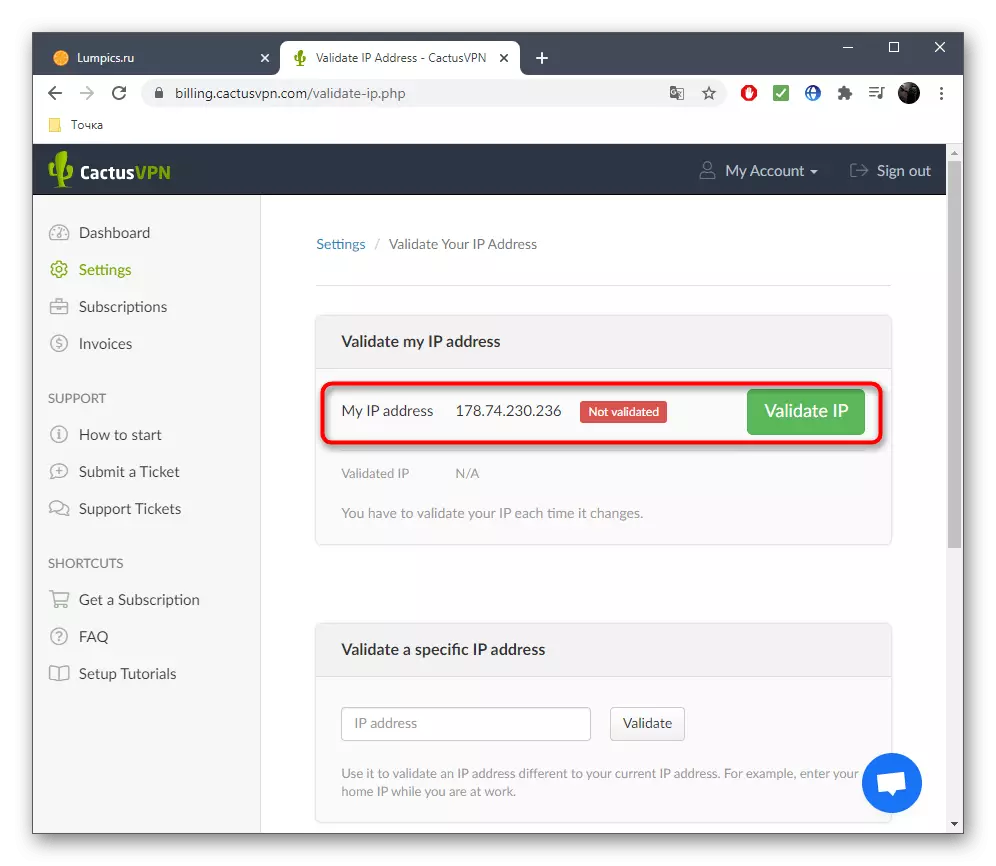
- Copy the assigned IP address or change it to another available. Sometimes in the Internet center of the router, it is necessary to enter it.
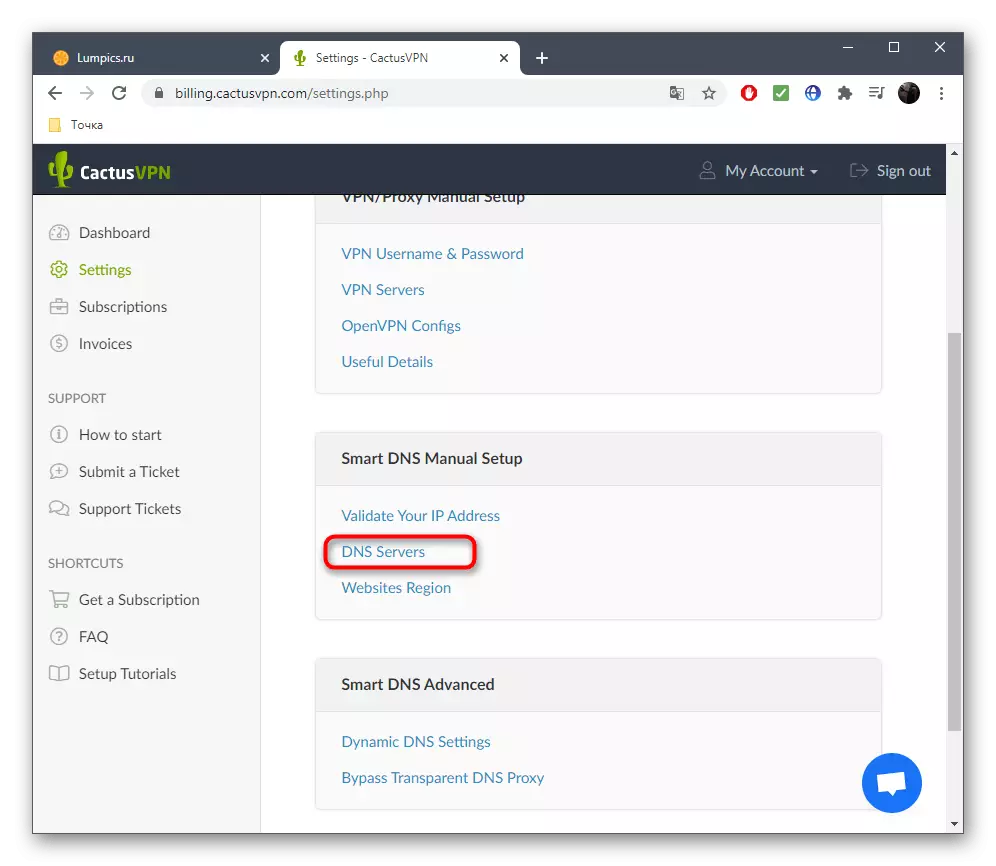
- It remains only to know which DNS servers assign the site used to go to the appropriate settings section.
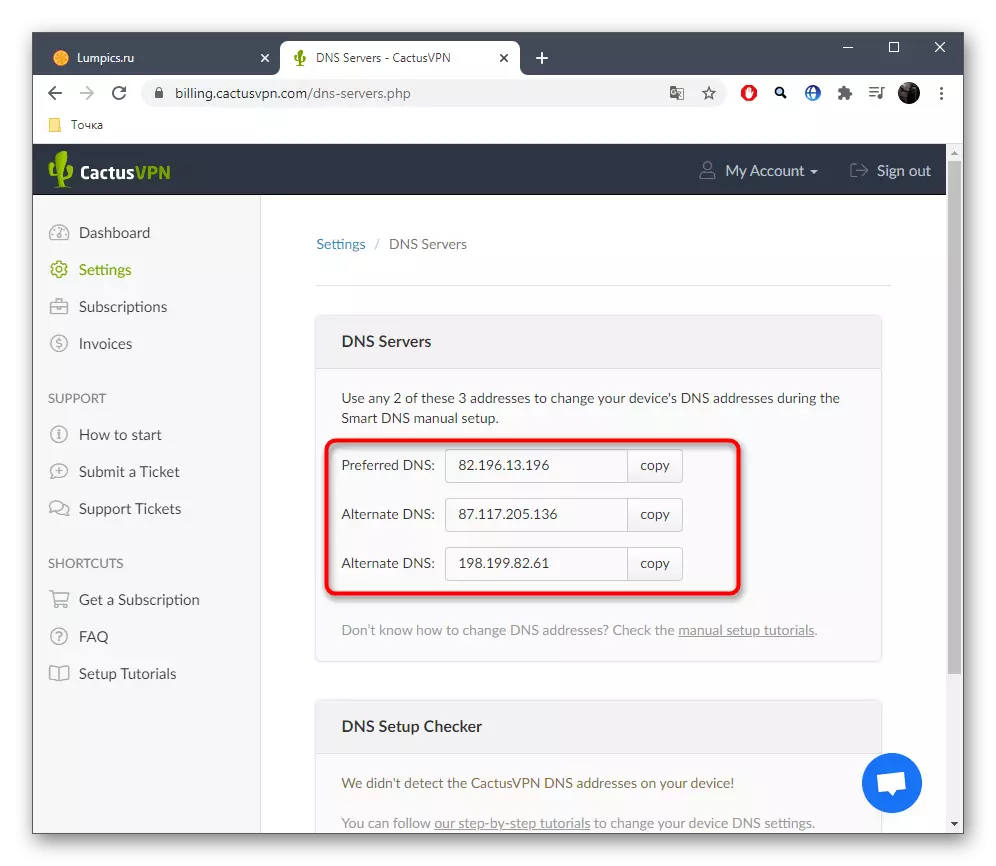
- Most likely, you will need to copy only the first DNS, and alternatives are entered at the request of the user.
Please note that each such web service has a unique interface, but the principle of obtaining the necessary information is almost always the same. Additionally, many where there are detailed instructions for setting up certain routers, so you can always refer to such materials to avoid the occurrence of difficulties.
Step 4: Configuring the web interface of the router
It is time to configure the VPN itself on the router to arrange a connection to the virtual server. As mentioned above, not all routers support such configuration, so we will look at only one example, and you should navigate it to perform similar actions. However, to begin with, you will need to log in to the web interface, which in detail read in the material below.
Read more: Login to the web interface of routers
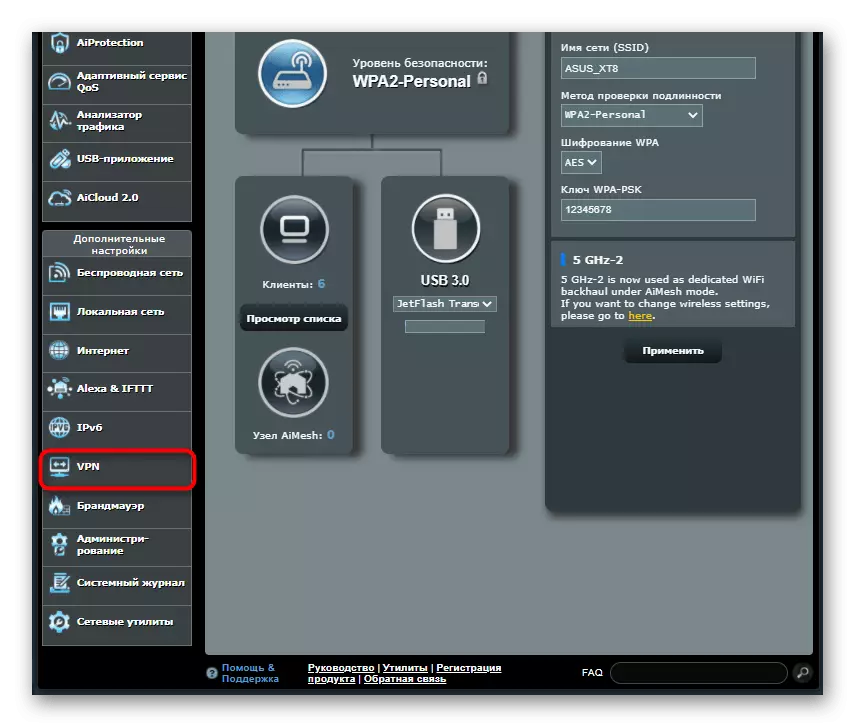
The sample will be a router from ASUS, since its developers provide many different VPN settings suitable for users of different sites with specific protocols. We will analyze the general configuration procedure.
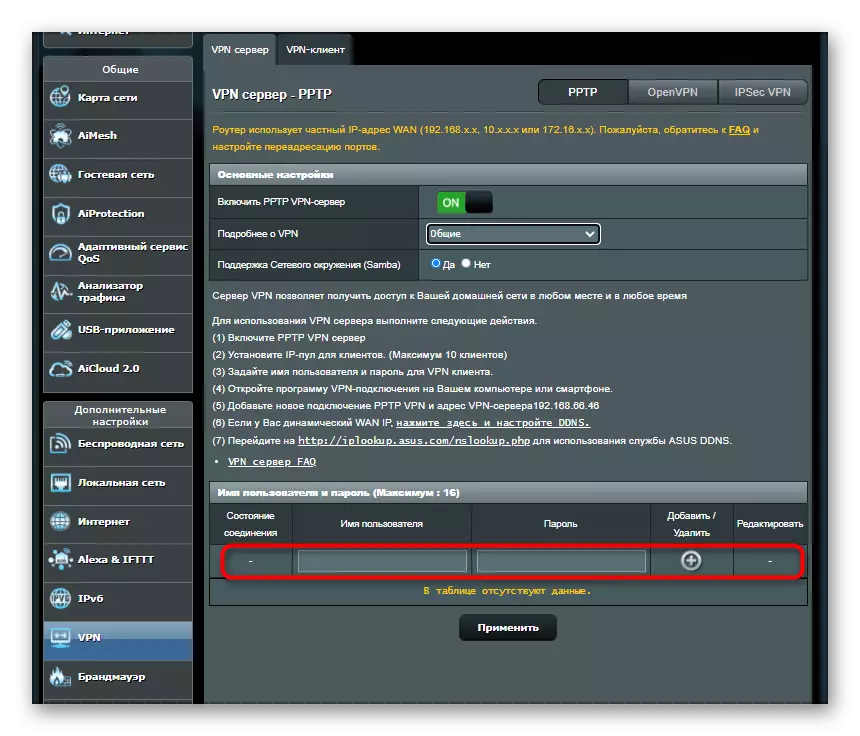
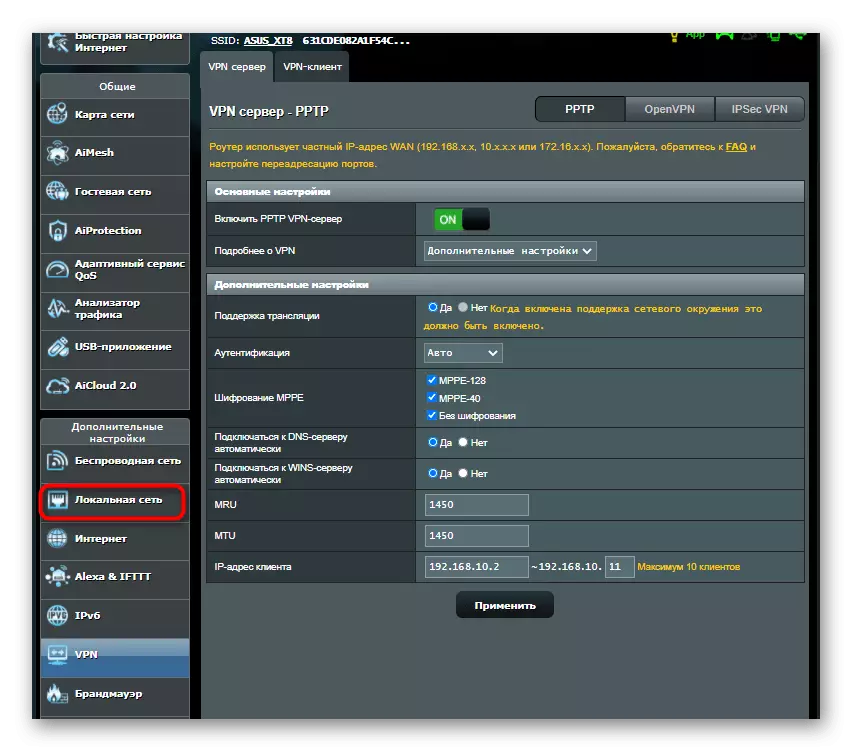
- Through the left panel in the "Advanced Settings" block, find the category "VPN".
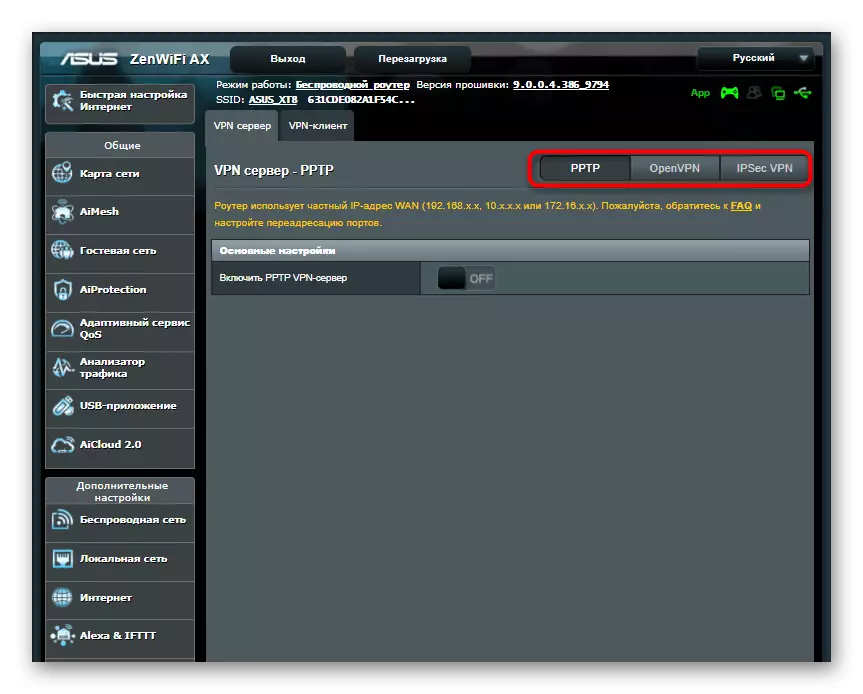
- In it, you can choose one of the three available VPN servers, pushing out the protocol on the site used.
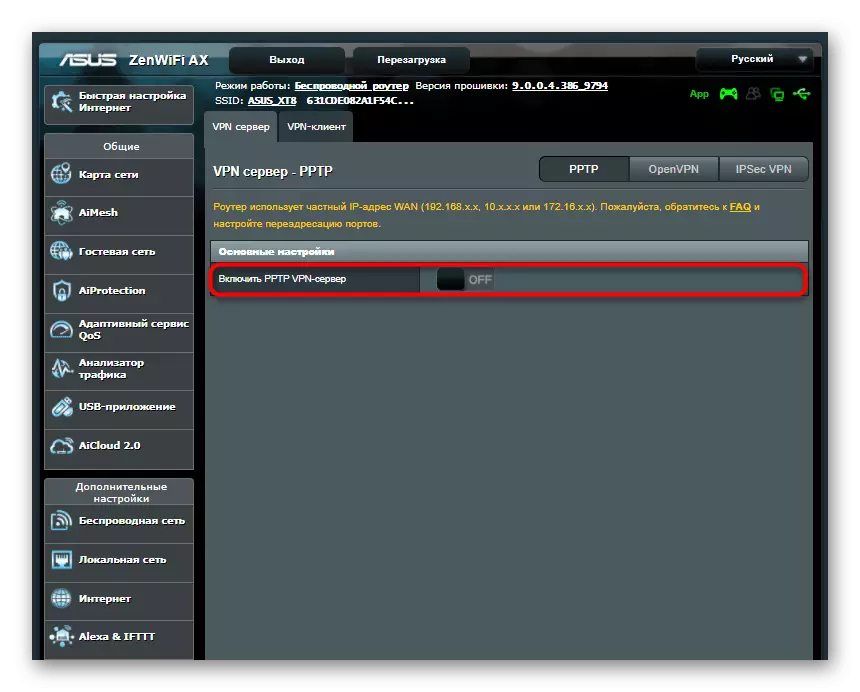
- Next, activate the virtual server by moving the appropriate slider.
- In the table that appears, enter a certain earlier username and password, and if multiple accounts are used, add new lines and apply changes.
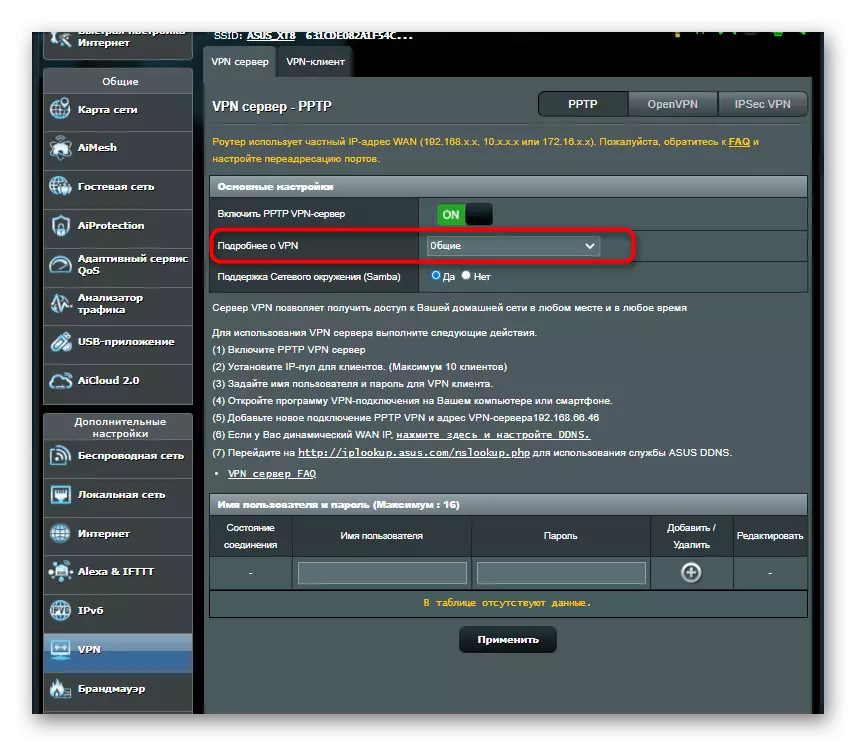
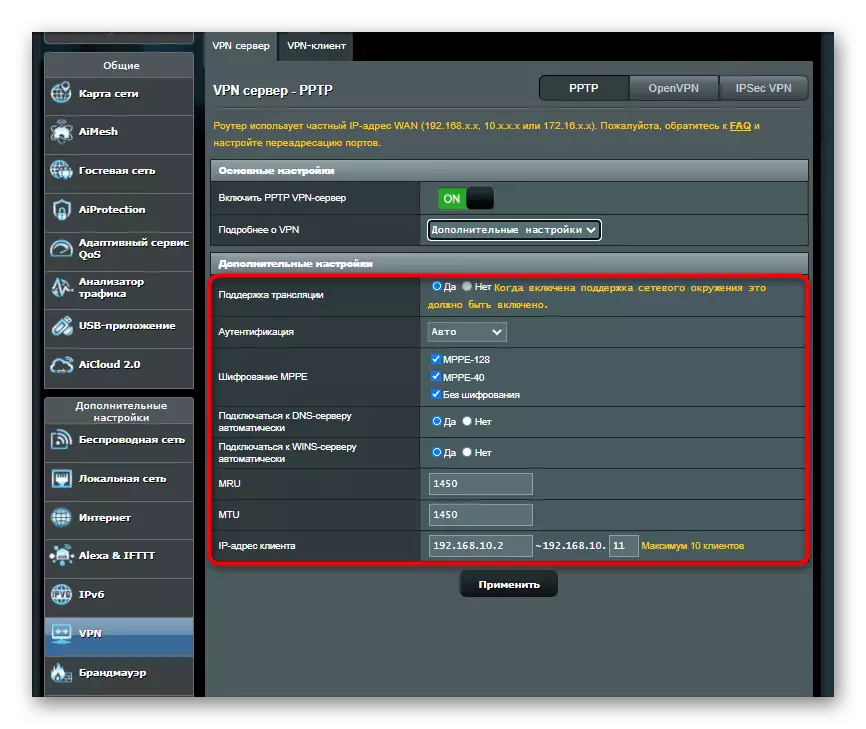
- If you need to specify additional parameters, turn on their display through the "Read more about VPN" drop-down menu.
- Now you can change the client's IP address, configure the connection to DNS servers and change the type of authentication.
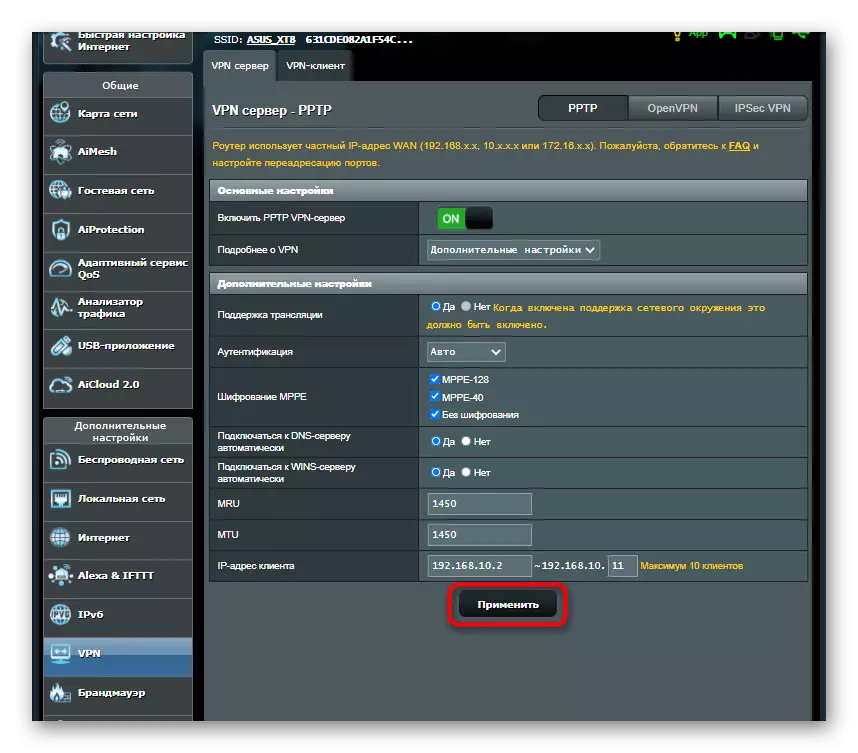
- Check all the settings and click "Apply".
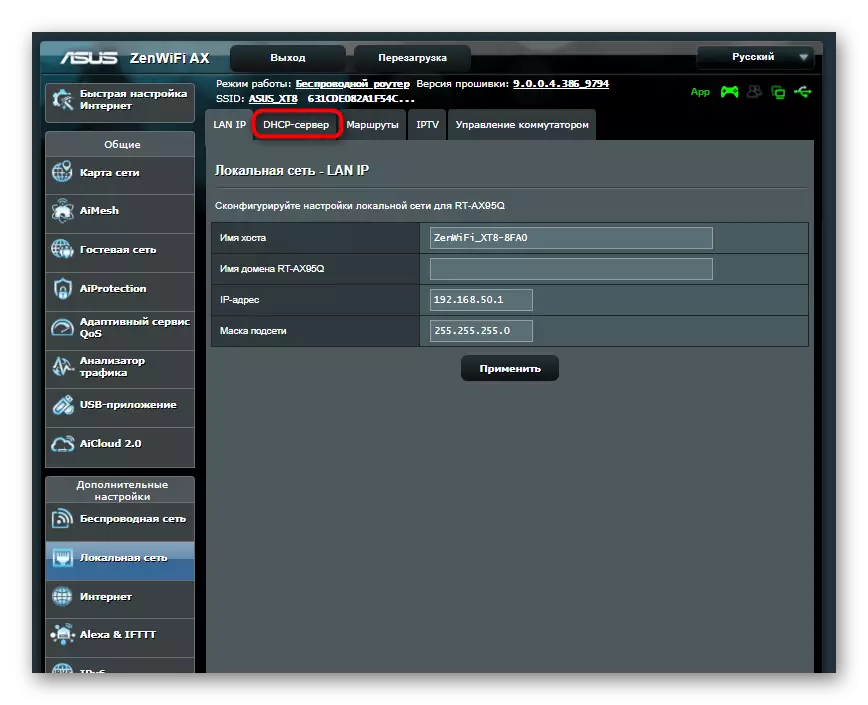
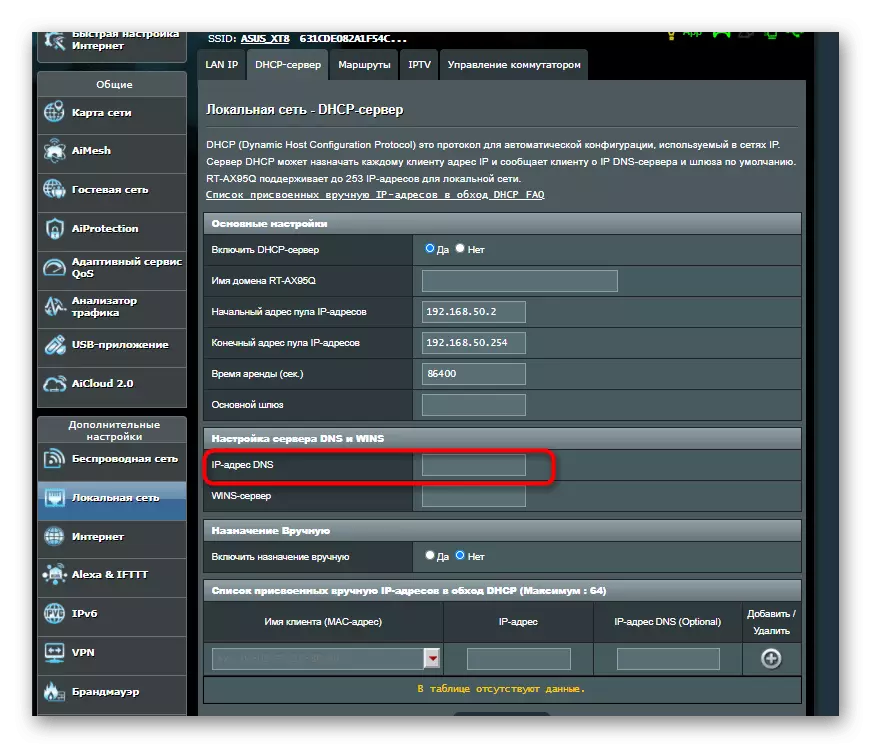
- If you need to change the DNS server, go to the "Local Network" category.
- Open the "DHCP server" tab.
- Lay a specially designated item and enter the DNS address there.
Once again we clarify that the router from ASUS was taken only as an example. For other models, the configuration process may differ slightly, which is associated with differences in the location of the web interface items, however, in the general picture it looks the same for all devices.