Under the "Main Disk Installation" is understood as 2 different tasks: Saving all files to this disk or automatic loading of the second operating system installed on D, when the computer is turned on. Next, we will analyze both options, and you immediately go to the one that reflects your request.
Option 1: Changing the location of the files
Now almost all users have a hard disk smashes into two logical (C and D), or these letters are really called two different drives. In both cases, especially in the SSD + HDD bundle, where the solid-state drive of a small volume, on the system disk C sooner or later ceases to have enough space for downloading any user files. The Windows 10 operating system allows you to change their location to drive D. After that, the critical updates for the OS will continue to download on C, and all the files are not allowed and not affecting the performance of Windows will begin to be stored on D.
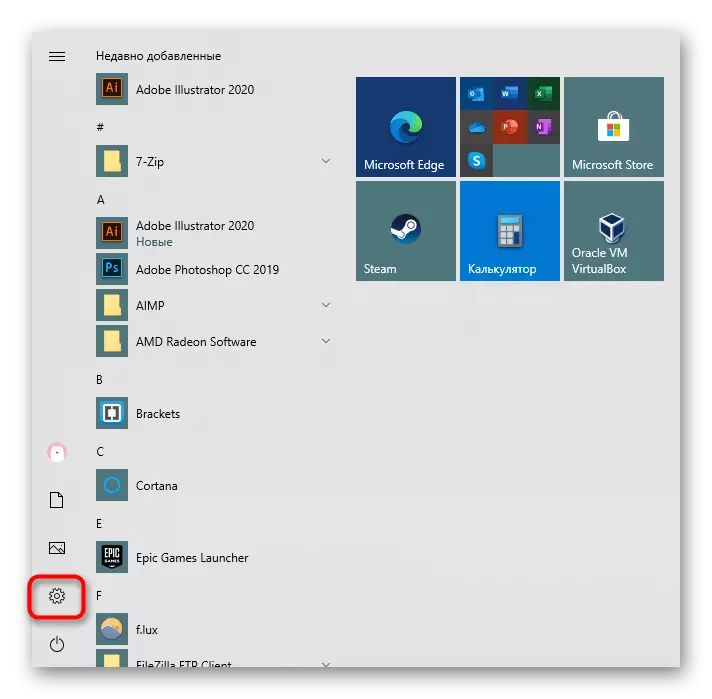
- Open "Start" and go to "Parameters".
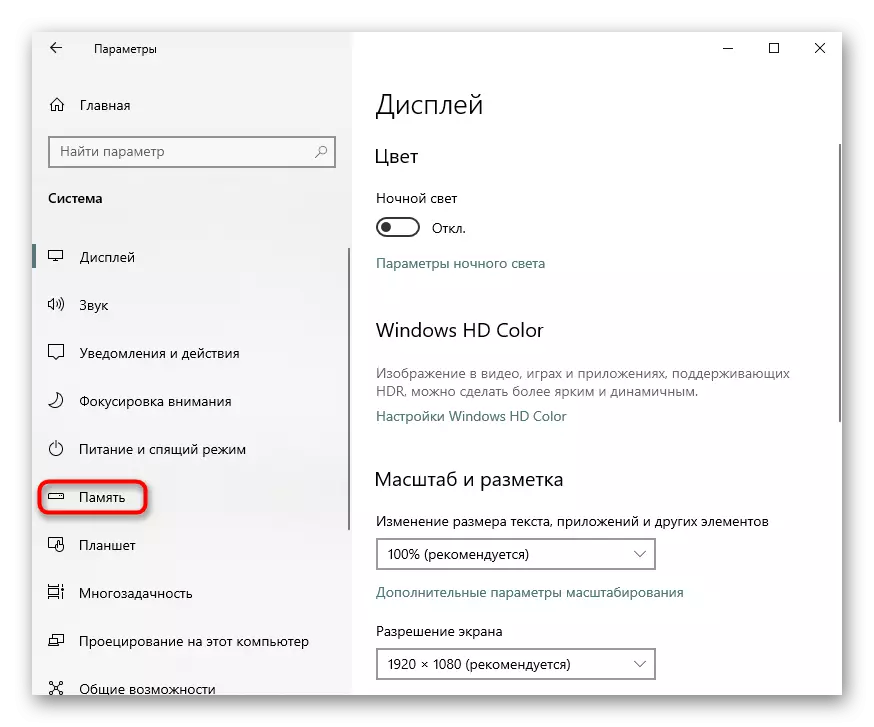
- Go to the first section "System".
- Here you need a subsection "Memory", located on the panel on the left.
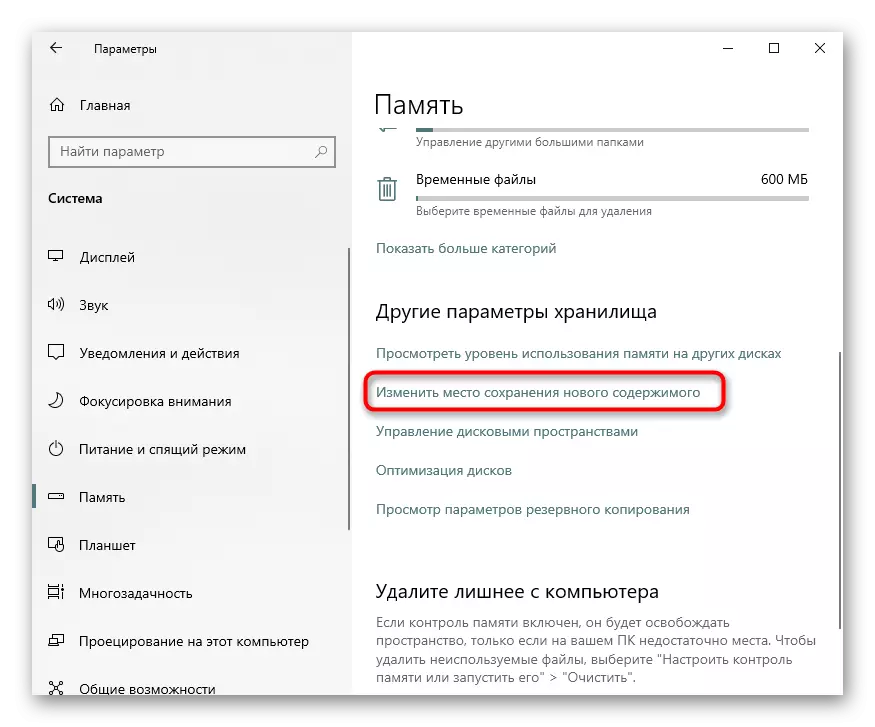
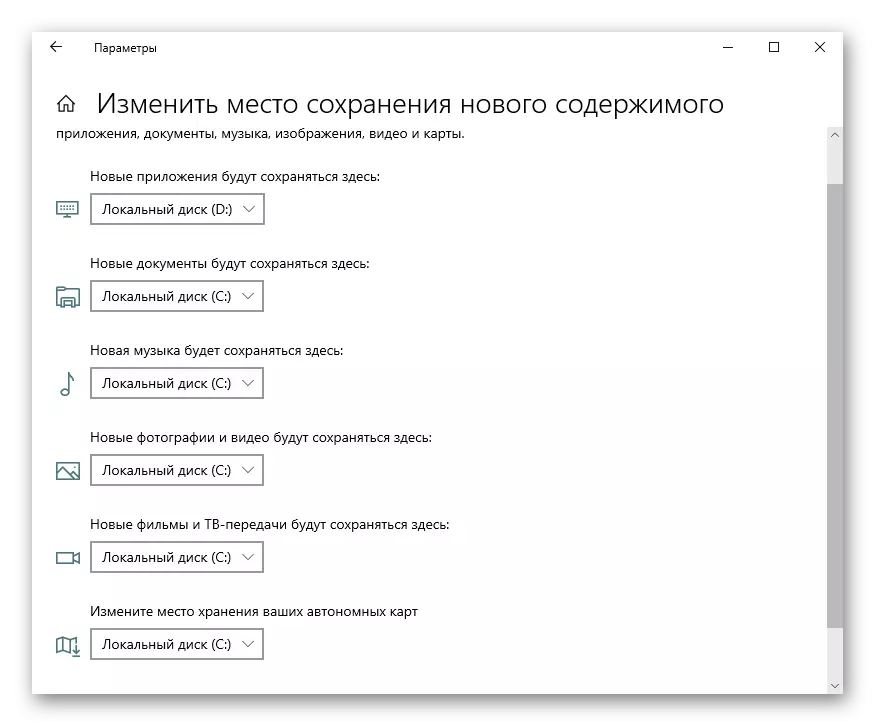
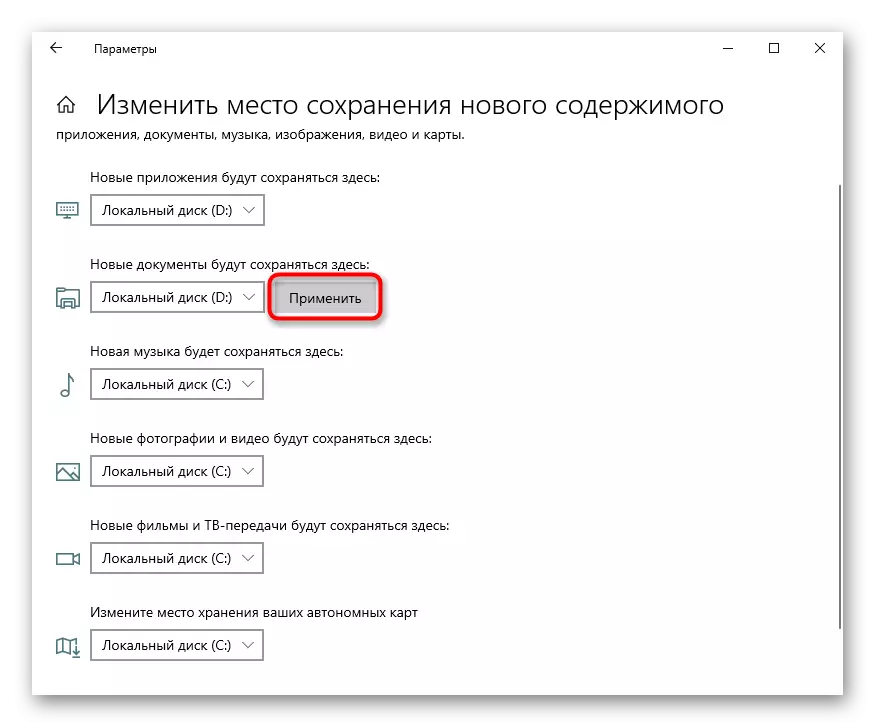
- Find the clicable link "Change the location of the new content".
- Here is a list of everything that can be transferred to Disc D.
- Change all or some items, not forgetting every time you press "Apply". After that, you can simply close the window.

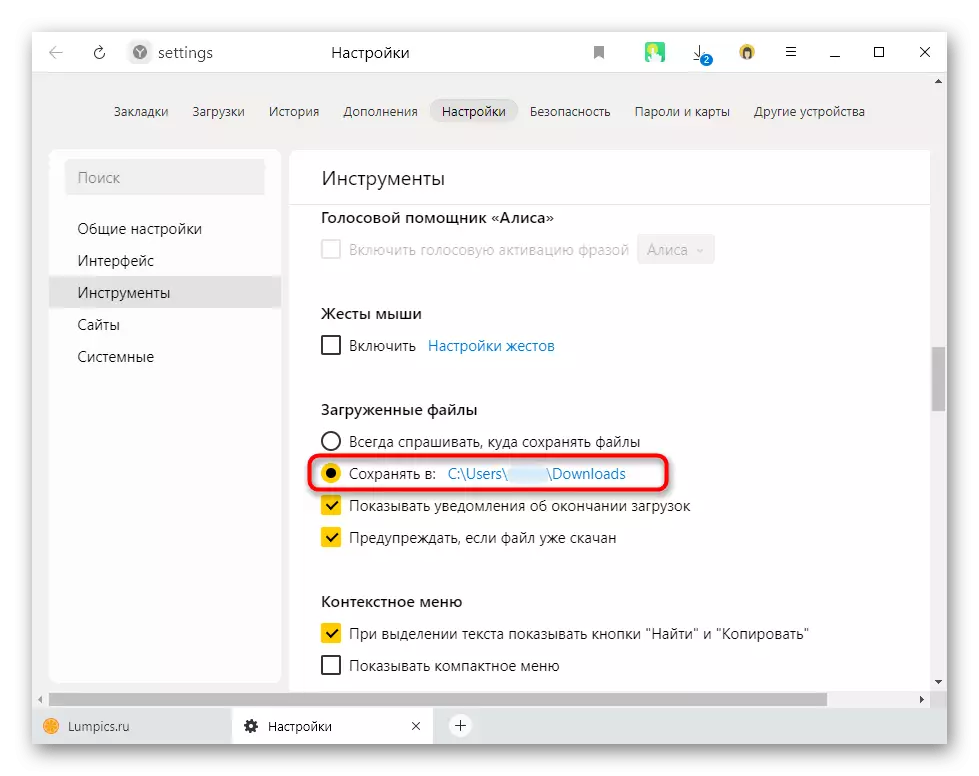
But do not forget that these were only the basic settings: many programs, mainly browsers, will continue to save everything in the previously specified folder. Usually this is a C drive, so do not forget to go to the settings of your web browser and change the path there by downloading to your computer. The same applies to torrent customers, gaming clients and other applications that imply loading.
The instruction will not affect the independent installers of new programs: by default, they will always offer to install the C disk, so you need to manually change the path every time. Change it on the automatic selection of D, unfortunately, it will be only editing the registry.
Attention! We do not recommend further actions to users without experience and without any particular need! Changing the registry parameter can lead to violation of Windows and problems with the launch of some programs!
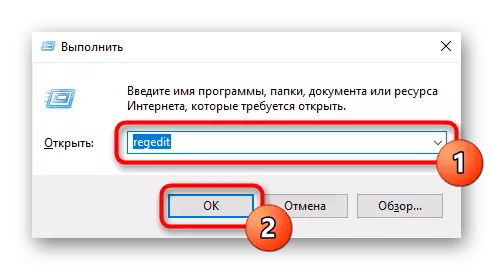
- Combine Win + R keys Call the "Run" window where you enter the REGEDIT. Click OK.
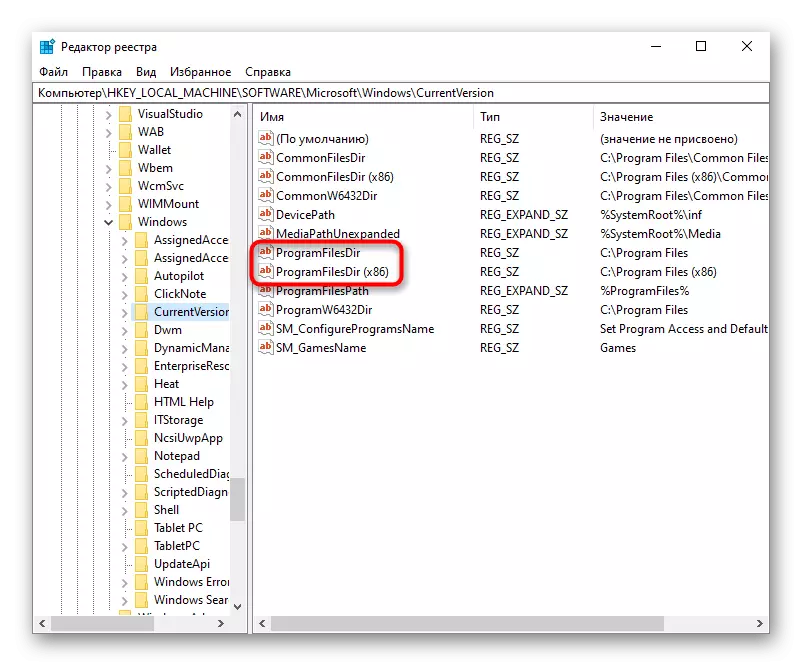
- Copy and paste the following path in the address bar: HKEY_LOCAL_MACHINE \ Software \ Microsoft \ Windows \ CurrentVersion, then press ENTER.
- At first you will need to select the "ProgramFileSdir" parameter, and then - "ProgramFilesdir (x86)". If the 32-bit system, then the last parameter will be edited.
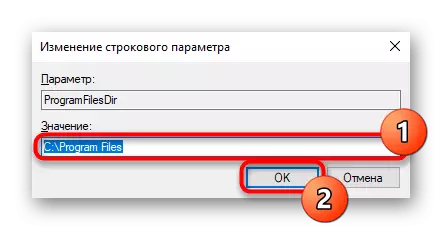
- Open it by clicking twice with LKM, and in the "Value" field, change the letter with C to D. In the 64-bit system, you will need to do the same with the second parameter.
- It will only be left to restart the computer to apply changes.

Option 2: Change the loaded operating system
In some users, on the contrary, two operating systems are installed on two different disk (C and D). And if the default is that that is installed on the disk C, it can be easily changed through the "System Configuration".
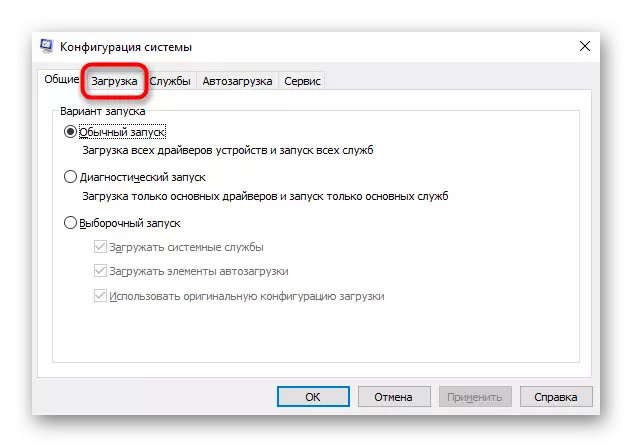
- Click the Win + R key combination and enter the msconfig command, then click "OK".
- Switch to the "Load" tab.
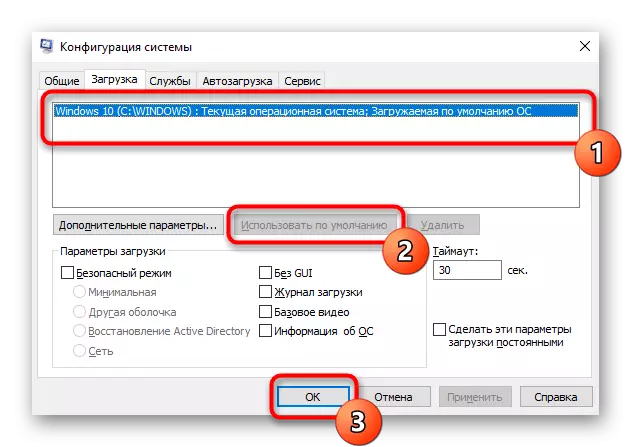
- Highlight the OS that is installed on the D disk, and click the "Use By Default" button. Confirm the changes to the "OK" button.
- Restart PC.

To change the downloadable operating system and disable the OS selection notification when you turn on the computer, you can enter somewhat differently.
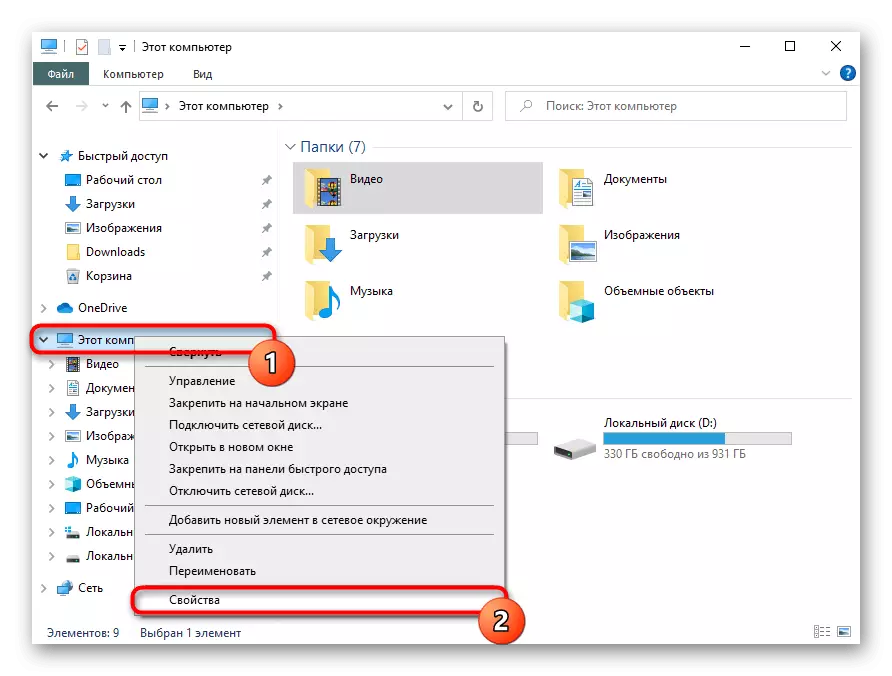
- Click the "This Computer" label with the right mouse button and go to Properties. If it is not on the desktop, open the "Explorer" and do the same by using the left pane.
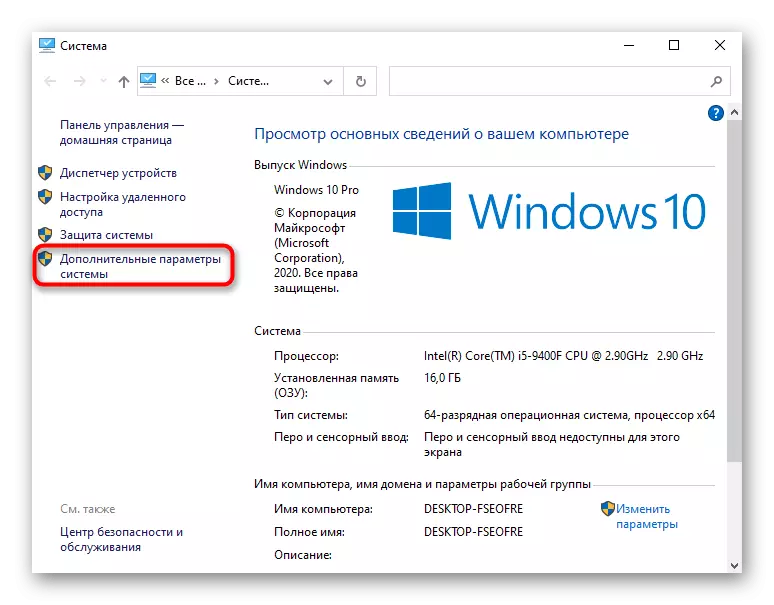
- Again, over the left panel, switch to "Advanced System Parameters".
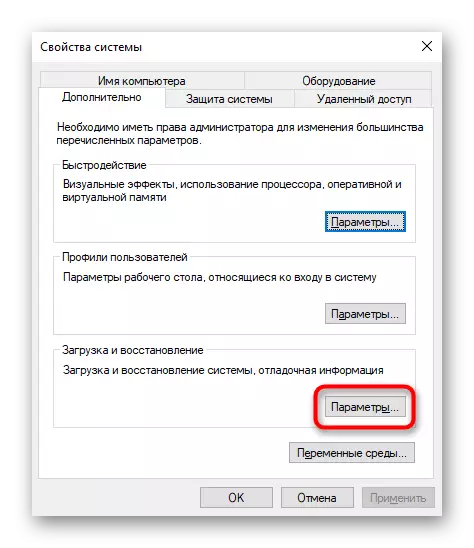
- On the "Advanced" tab, open by default, find the "Download and Recovery" block and go to "Parameters".
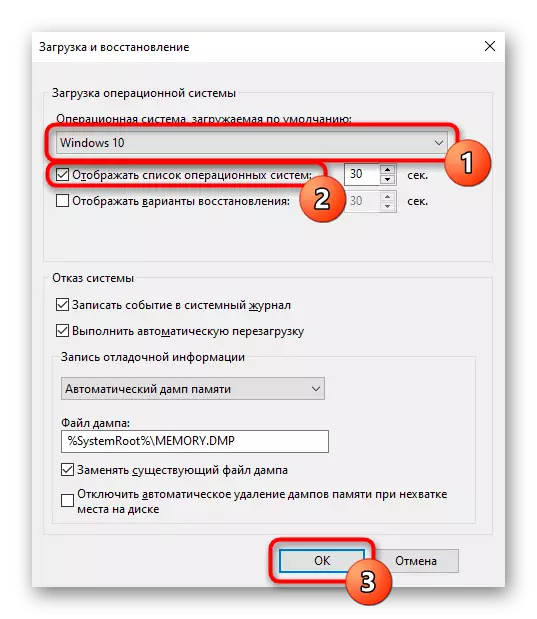
- Here, through the drop-down menu, change the default OS, which is installed on the D disc, and then remove the checkbox from the "Display List of Operating Systems" item. Save the changes to OK. They will take effect after rebooting PCs.