
Step 1: Preparatory actions
First you need to deal with a number of actions, without which it will not be possible to do on the setting. Consider each stage in order:- Log in to both routers that will be used to configure, following the instructions from the link below.
Read more: Login to TP-LINK routers web interface
- Make sure that each router is configured and connected normally to the Internet. If this is not the case, you will need to produce the primary configuration of all devices, for which you can use the search on our site by finding the appropriate instruction models.
- If the WDS function is missing in the router, where it will need to be enabled, try refreshing the firmware, and for detailed instructions, click on the header below.
Read more: Refracting TP-LINK router
Now that everything is done, you can go to the immediate configuration of each device. Routers will be divided into the main (connected to the Internet) and the one on which WDS is turned on. Let's start with the preparation of the main router.
Step 2: Setting the main router
Repeat that the main router is the one that is connected to the Internet from the provider cable. It does not need to include WDS, but other settings should be performed, which will be discussed below.
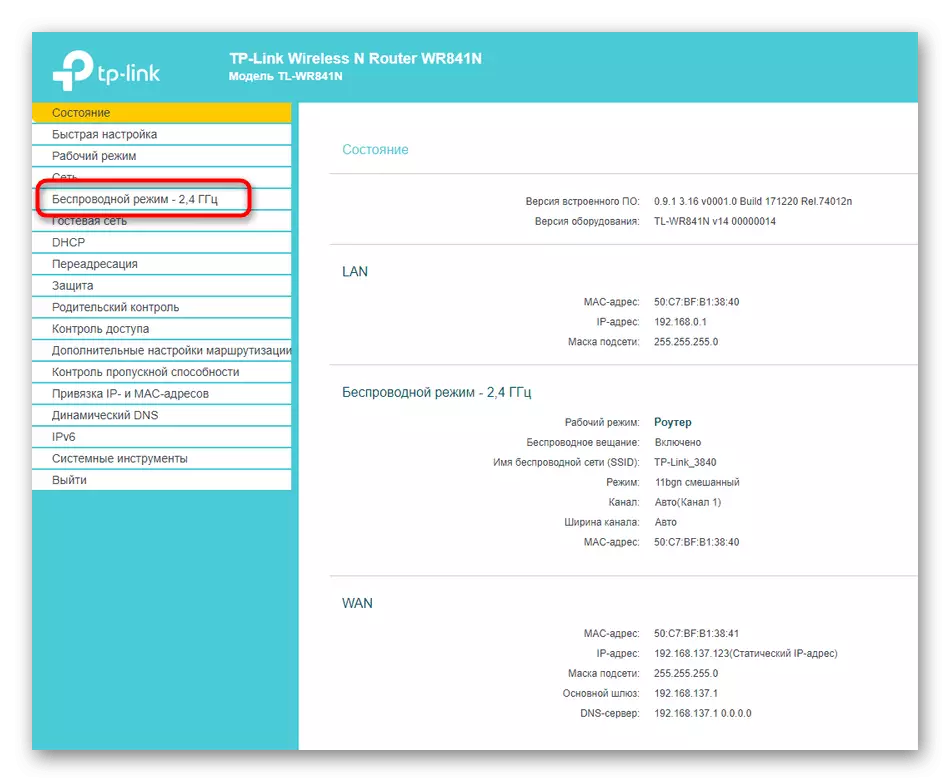
- After successfully logging into the web interface through the menu on the left, go to the "Wireless Mode" section.
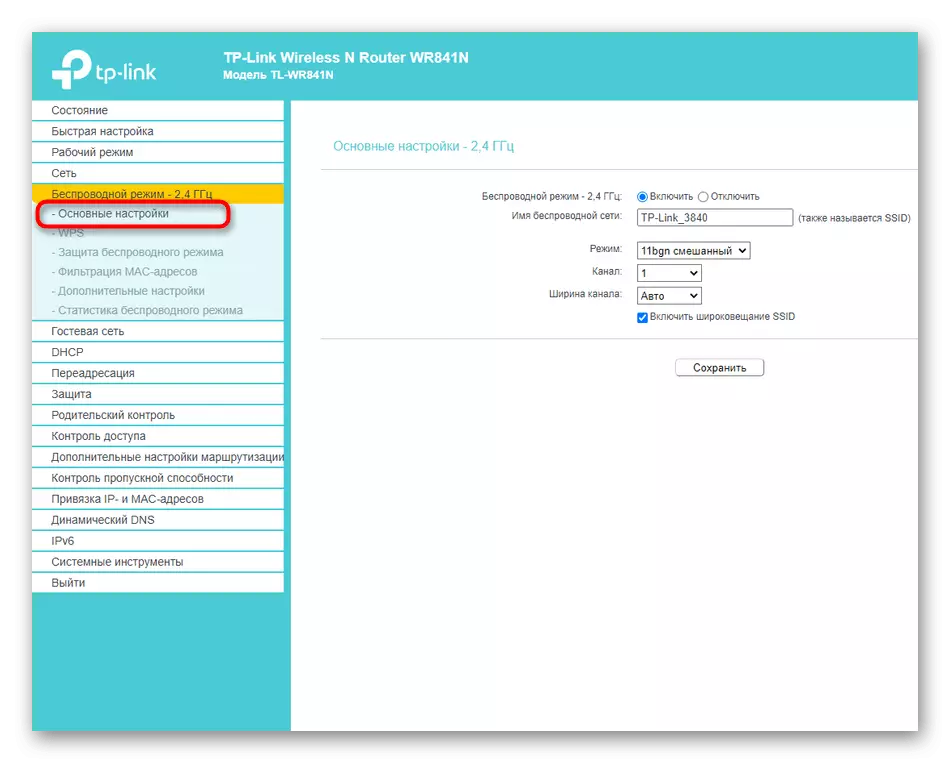
- Select the category "Basic Settings".
- By default, the channel must be selected automatically, however, you should change this parameter to 1 or 6. Most often these channels are free.
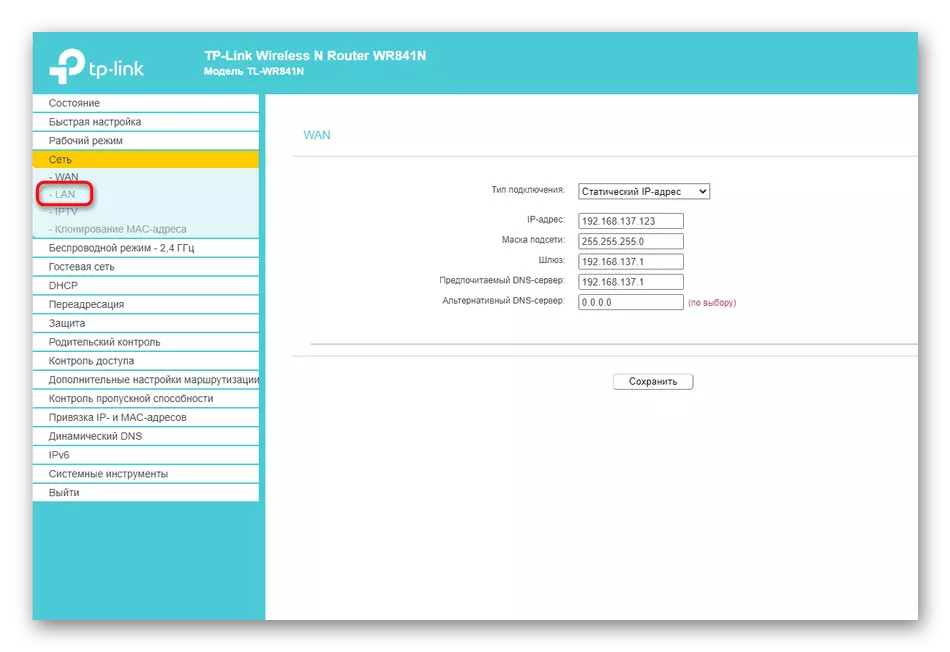
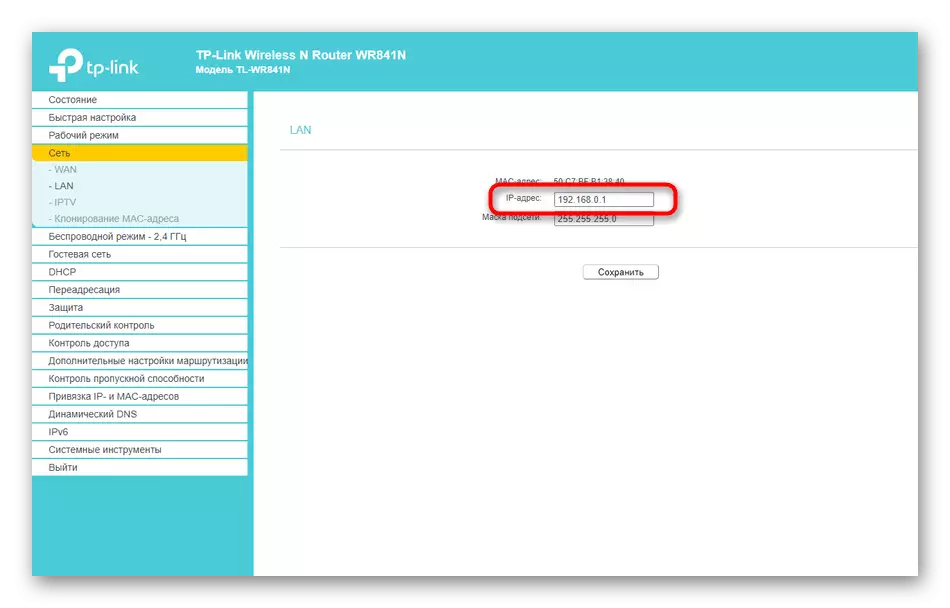
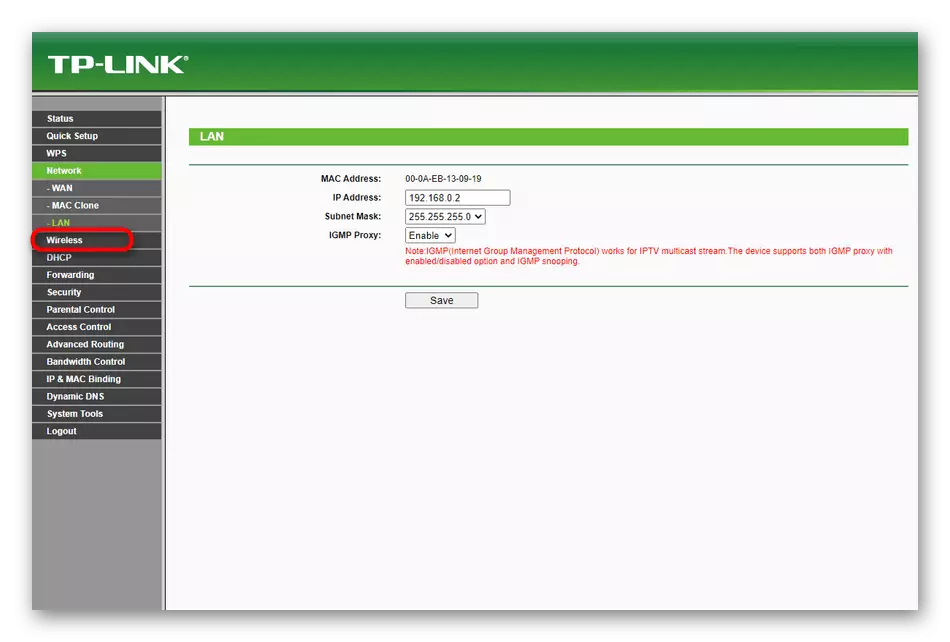
- Then open the "Network" section.
- There you are interested in the category for setting the local network.
- Remember the installed IP address, since it is necessary to apply it to further configuration.


More than this router settings do not need to be performed, provided that the basic parameters have already been exhibited in advance, you know the name of the Wi-Fi network and the password from it, since it is this information that will be used to connect via WDS.
Step 3: Configure the second router
For the router, which must function in WDS mode, will need to set a slightly more parameters, but this will not be difficult. We will analyze the process on the example of another version of the web interface for clarity.
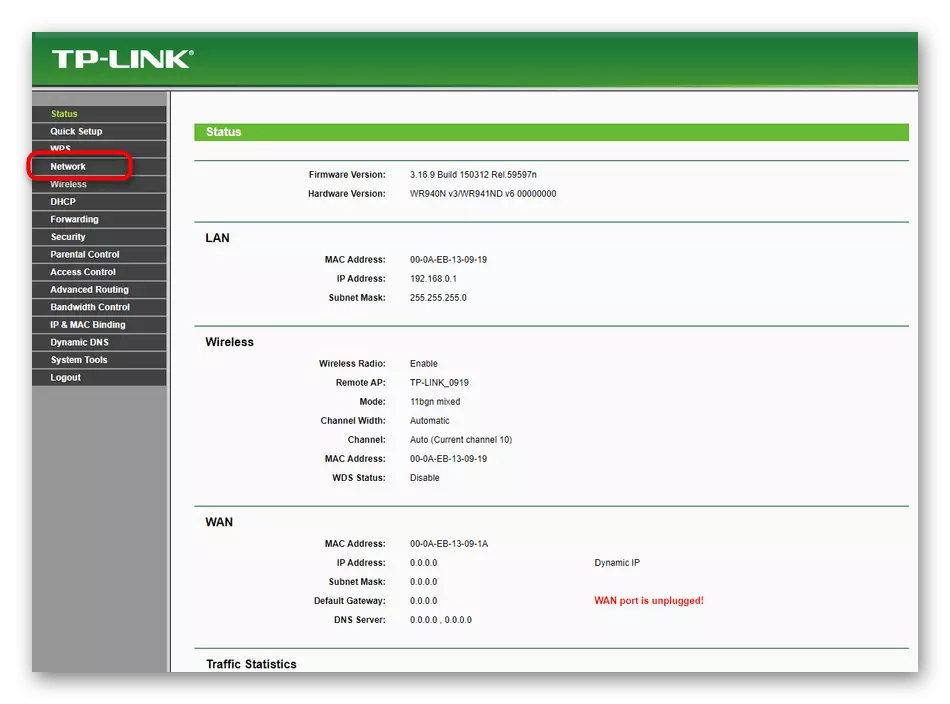
- So far, you can simply connect the router to a computer using a LAN cable or wireless network, and then log in to the web interface where you need to open the "Network" section.
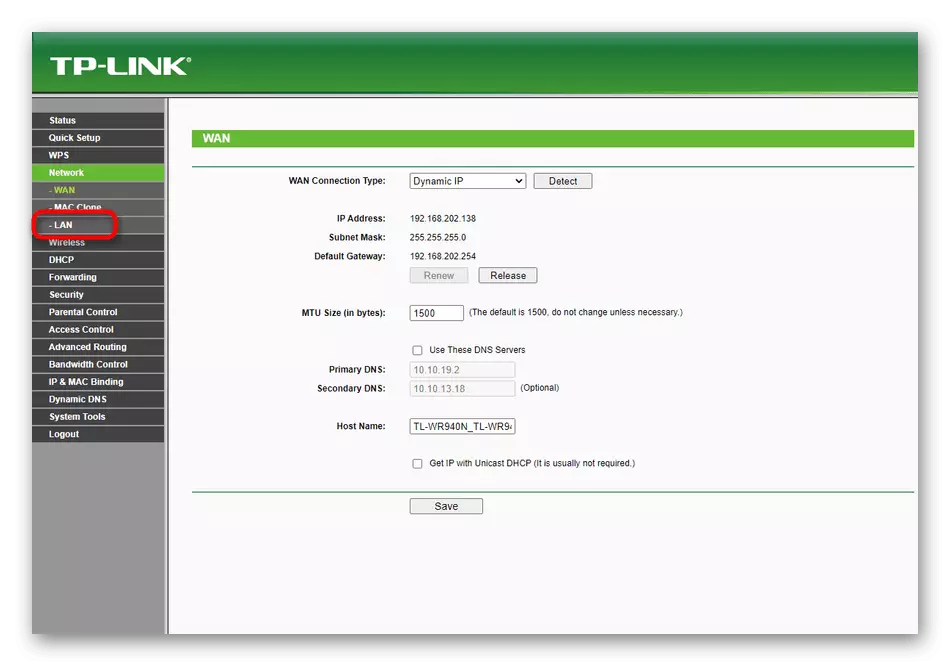
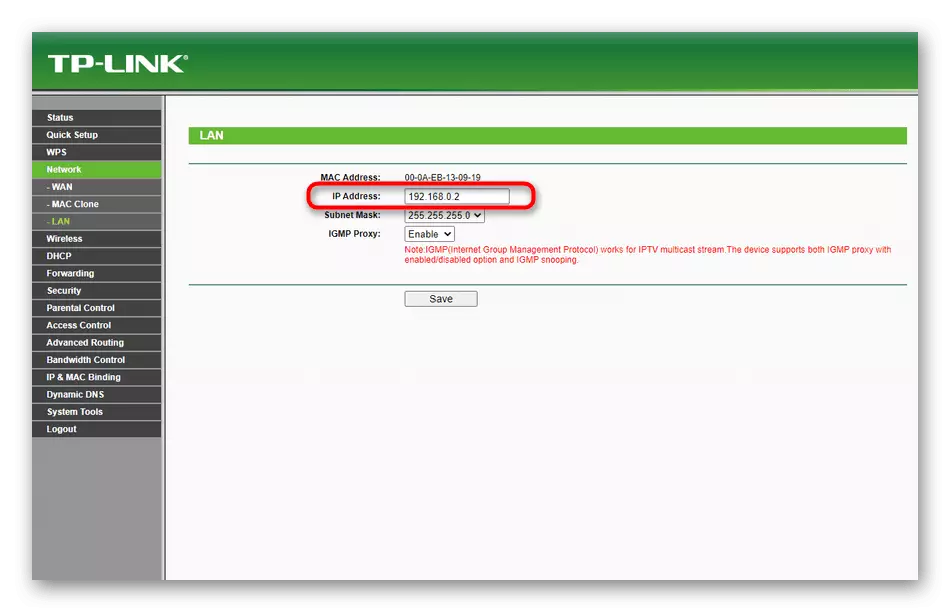
- You need a category "LAN", which is responsible for settings by the local network.
- Change the IP address of the router to such that it does not repeat the address of the main router, which we defined in the previous step. It will be enough to simply change the last digit, and then save the setting.
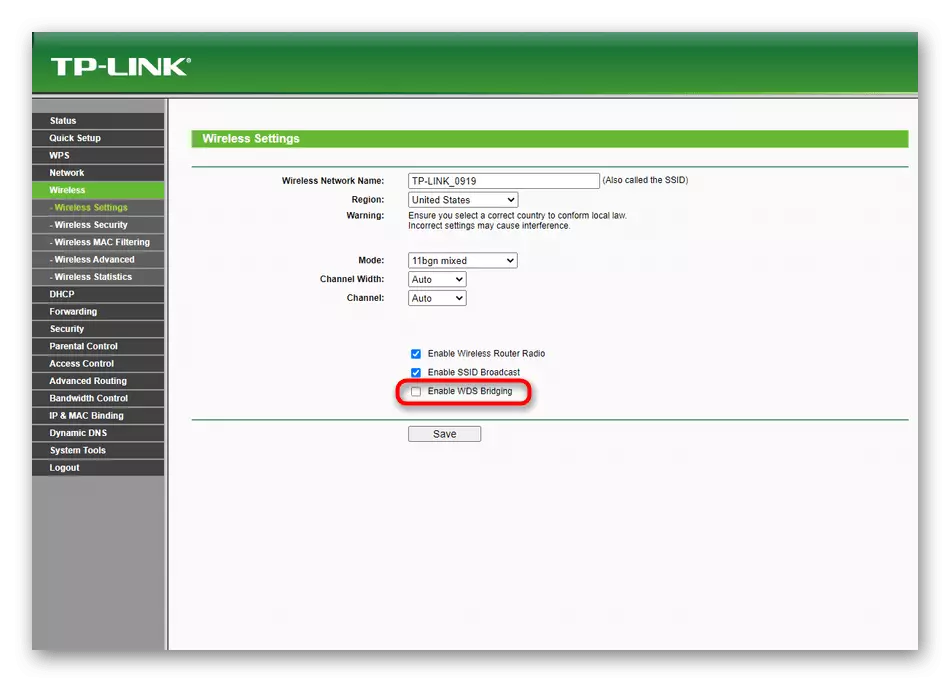
- In the following, open the "Wireless" section, which in the Russian version is called "Wireless Network".
- There are activated the mode in question, checking the "Enable WDS Bridging" items.
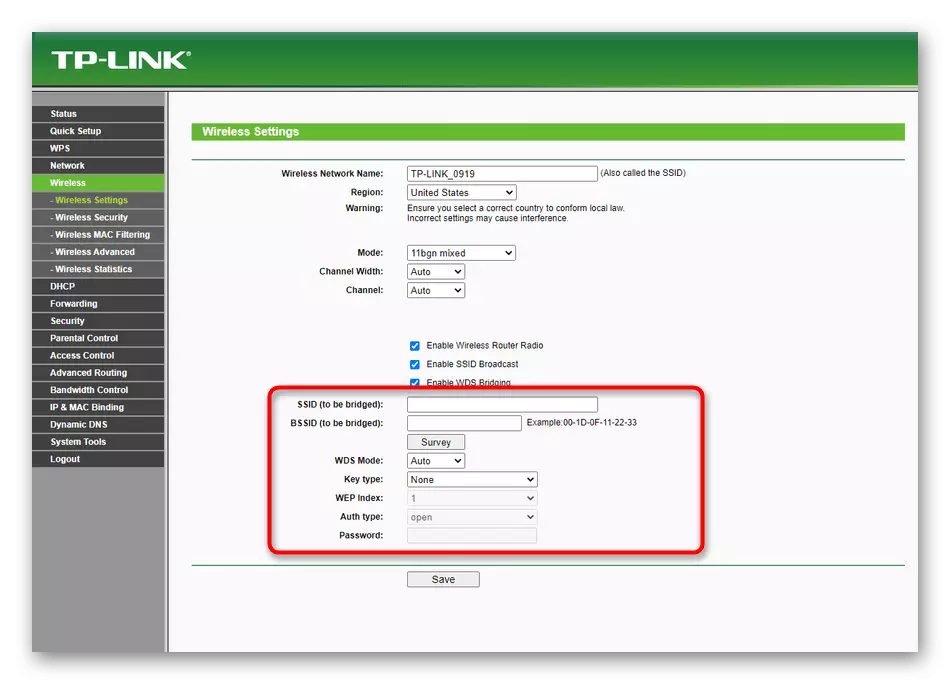
- Immediately after that, a number of different fields will open, which must be filled to connect. Enter the name of the wireless network or the MAC address of the router to which the connection is carried out, and write the password if the network is protected.
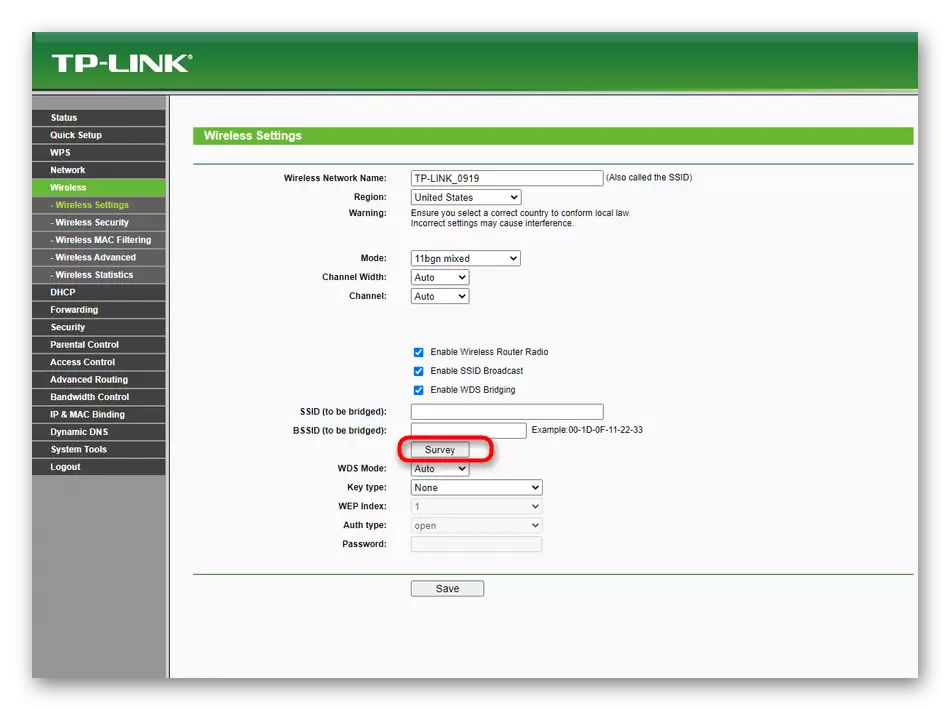
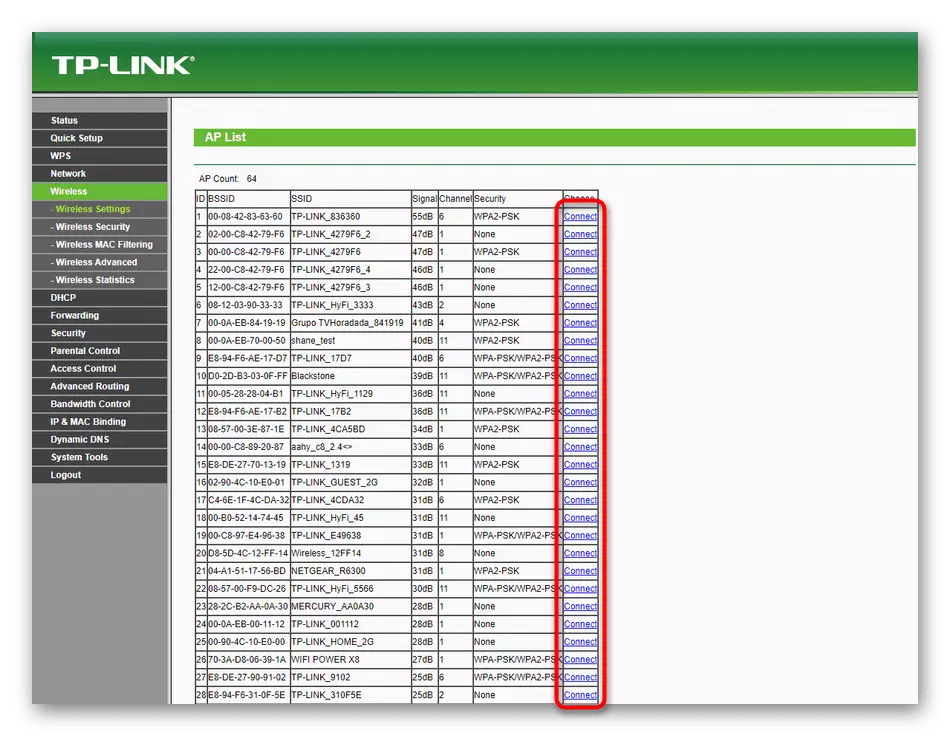
- However, you can go and faster by clicking on Survey. This button is responsible for scanning the nearest access points to which you can connect.
- Lay your Wi-Fi list among the list and click "Connect". If necessary, enter the password and wait until the connection is set.
No more actions will have to perform any actions, so you can proceed to the normal use of this router as a bridge through WDS technology. However, consider that, most likely, the connection speed will be significantly lower than that which could be when using one router.
Step 4: Solving Possible Problems
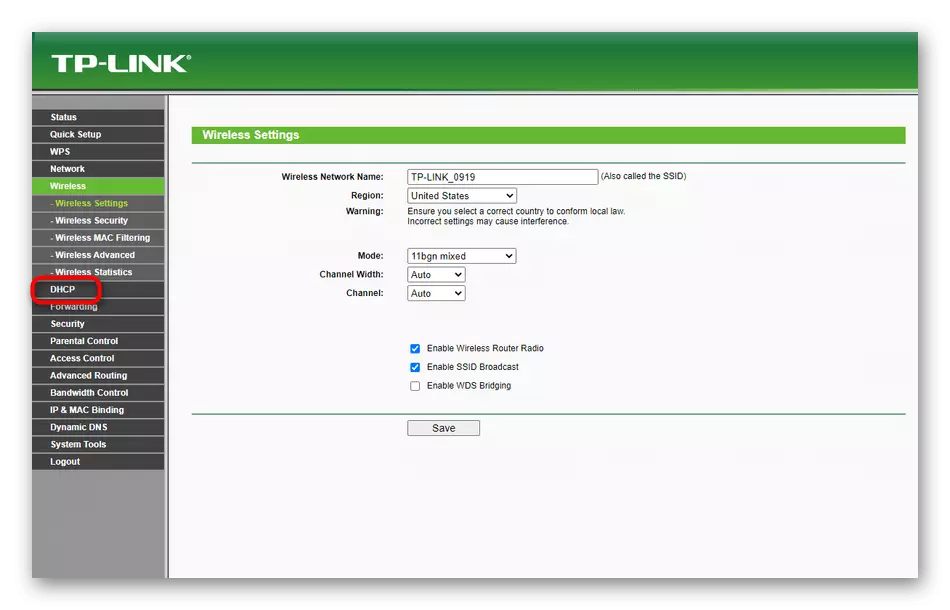
In a separate step, we decided to highlight the solution of possible problems, because it does not always have the user from the first time it turns out to organize a similar connection. There may be other settings for the router using WDS technology, so open its web interface and follow these steps:
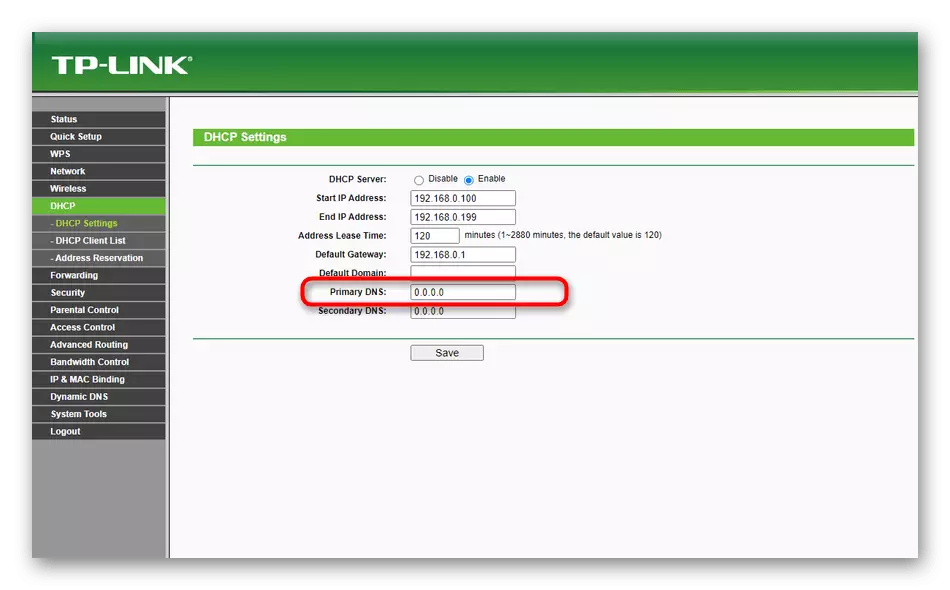
- Go to the "DHCP" section.
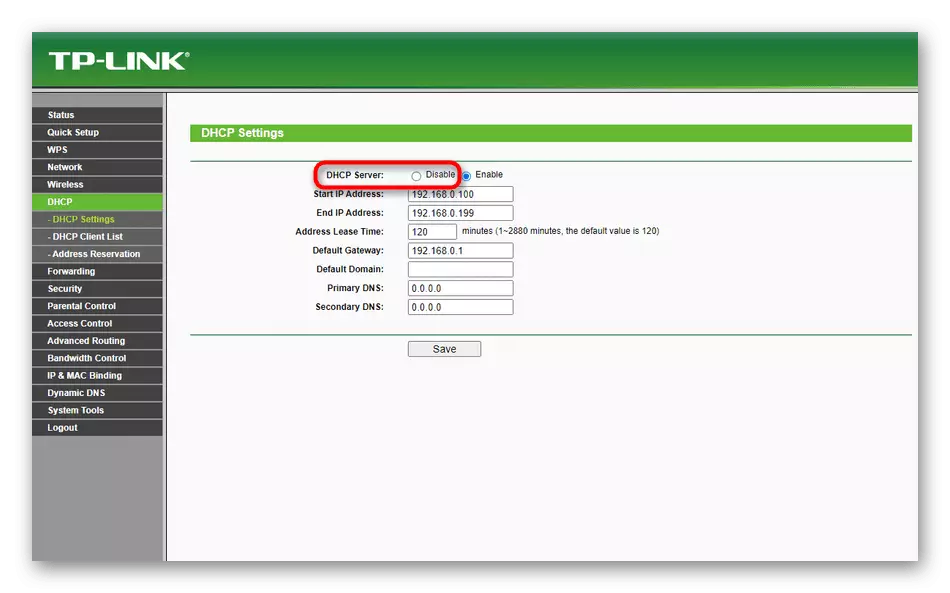
- Disconnect the DHCP server by placing the marker to the appropriate item.
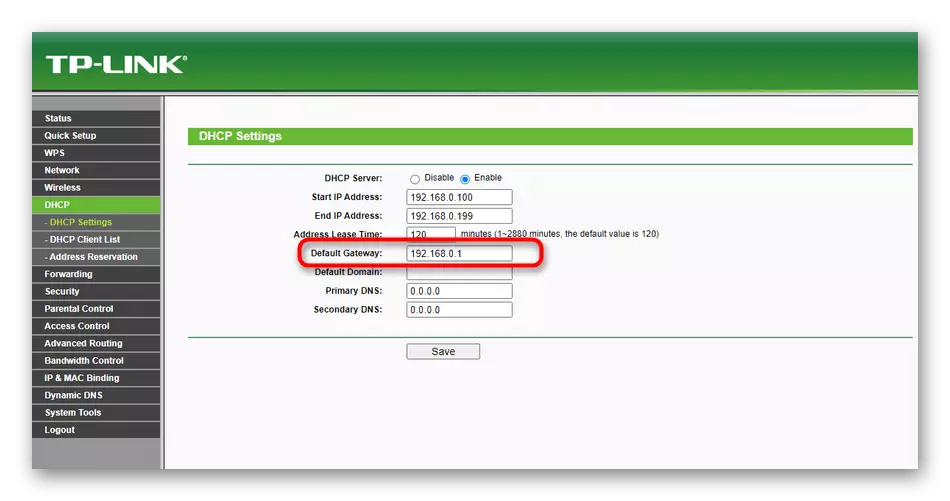
- As the default gateway, set the IP address of the main router.
- This can be done with the main DNS, the parameter of which is called "Primary DNS".
It remains only to save the settings so that the router will automatically go to the reboot, after which you can try to implement the connection again using WDS. Note that if you need to reset all settings, you can roll back them by returning all the modified parameters to the default state or completely dropping the device configuration, read more detailed.
Read more: Reset TP-LINK router settings